Leaderboard
Popular Content
Showing content with the highest reputation on 01/09/2021 in all areas
-
Please join me in welcoming our newest sponsor to the LSP family, Synthetic Ordnance Works. SOW is run by our very own Damian Andrus, and many of you will already be aware of Damian's fantastic replacement landing gear sets. SOW also has a new, dedicated sponsor forum: https://forum.largescaleplanes.com/index.php?/forum/103-synthetic-ordnance-works/ Welcome aboard Damian and Synthetic Ordnance Works! Kev12 points
-
RAF FG.1 XV571 WILD HARE Phantom Conversion
HerculesPA_2 and 11 others reacted to Anthony in NZ for a topic
Thanks Derek Ok so the insides are pretty much done. Part of me wants to dirty up the white, but I think once the engine front is fitted and it is glued to the fuselage the shadowing will be enough. All I have left to do is put a tiny black 'dot' on the probe front to simulate a hole and then glue the vari ramp section in permanently. I glued the intake probe/sensors to a piece of very thin plastic card and blended in with Mr Surfacer and then trimmed the edges to match photos of how it mounts to the intakes. Actually looking at photos I have glued them in a slightly different position as the kit holes didnt seem in quite the right place (a little low comparing to photos). Anyway, I am getting close to gluing to the main fuselage...but I have yet to do the vents on the tops and bottoms. I have had to resist the urge just to glue them on and cross that bridge later on. But I know that would make them really difficult to do properly....so I better do it now. Cheers Anthony12 points -

HH-60G Pavehawk Kitty Hawk 1/35 DONE!!
J.J. and 10 others reacted to Pete Fleischmann for a topic
Hey all- doors are up..got the upper deck/fuselage seam cleaned up cheers P11 points -

My Completed LSP Projects of 2020
Hartmann52 and 8 others reacted to Thunnus for a topic
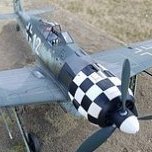
I'm not as voluminous a modeler as some of you and was only able to bring five builds across the finish line in 2020. All of these builds were shared here at LSP. At the beginning of the year, I finished the Tamiya F4U-1a kit, which was a change of direction for me as I usually focus on Luftwaffe subjects. My next completion was the Revell Bf109G-6 kit converted to a G-6/AS using the AMUR Reaver resin conversion. The next one was also another conversion as I backdated the Zoukei Mura Ta152H-1 kit to a Ta152H-0. The Hasegawa Bf109G-14 build was next as I attempted to portray Eric Hartmann's winter mount as a blotch scheme. My most recent completion was the Hasegawa N1K2-J.9 points -

Type XXVII A "Hecht" German midget U-Boat, 1:35
Pastor John and 8 others reacted to Ramm66 for a topic
Hi guys, This is an old resin kit from JF-Models with small modifications. I hope you like it. I painted with few grey shades from Gunze's colours, then weathered with oils, pencils and pigments.9 points -
PZL P.6 1931 from scratch scale 1/32
Chris Wimmer and 8 others reacted to Marcin_Matejko for a topic
The end9 points -

New Sponsor: Synthetic Ordnance Works
Neo and 8 others reacted to D.B. Andrus for a topic
It's late, so take two aftermarket pills and call me in the morning. Peter9 points -
.thumb.jpg.f0920d798d5d8600fb58b1d8a906ddff.jpg)
My 2020 | Not a Good Year |
Starfighter and 7 others reacted to shadowmare for a topic
Only 2 but I think interesting, unusual planes finished. N1K1 and PZL P.11. P-11 was a good kit, suprise for me as it came up. I can't really say that about N1K1 - old model with long list of places needing work. Main issues were empty cockpit and protruding panel lines. I started Vietnam F-4E from Tamiya too, but ended up with only a small progress. Hope you like them! Ready For Inspection: https://forum.largescaleplanes.com/index.php?/topic/85170-ibg-pzl-p11c-dzwonek-132/&tab=comments#comment-1206761 Ready For Inspection: https://forum.largescaleplanes.com/index.php?/topic/87741-takararevell-n1k1-ja-shiden-132/8 points -
1/32 Mig-29C (9.13) Ukrainian "55"
Scale_artisan and 7 others reacted to Marcel111 for a topic
The wash is on! And boy does it make the model look better since it tones down the gaudiness of the paint a little. I really like the way this project is starting to look. At this point it's all coming together exactly as planned, which is quite rare for me, there is usually some flaw here or there. Cheers, Marcel8 points -

Bf 109G-10 Erla, 3.JG300, Prague-Kbely,May 1945
coogrfan and 6 others reacted to Miloslav1956 for a topic
My first finished model in this year. Revell kit 1/32 Aires cockpit, Eduard wheels, HGW riveting set, wet transfers, seat belts, Barracuda exhaust & decals Montex mask, All colours MRP7 points -
hello ! We did a variant of our US navy pilot sitting 5 with a JHMCS helmet instaed of the standard HGU68 helmet Here the RIO carries the standard HGU-68 helmet and in the model : cheers Norbert7 points
-

1/32 Revell Me 262B-1/U1 Nachtjager
Paul in Napier and 6 others reacted to Thunnus for a topic
Thanks guys! I really appreciate the comments and the encouragement! Still futzing around and being gun-shy about starting the painting on this build. I still need to paint the wheels so I did that instead. I'm using the resin replacements from Barracuda Studios, which come with some nice hydraulic line details for the main wheels. I've painted the rubber portions first, with a mix of flat black, grey and brown to simulate worn rubber. The color is progressively lightened as I travel from the wheels to the tread surfaces. I scanned the wheels and made adhesive masks with the Silhouette Portrait. I really LOVE having the Portrait... so useful! The metal hubs are painted in black and then the wheels were given a gloss coat. To highlight the tread, you can either go light and portray dirt/mud in the treads or go dark. I'm going dark since I think this gives a better impression of an aircraft operating off tarmac, which may or may not be true of these jets.7 points -
5 points
-
Hi all, while I'm not very active on the forums at this moment I still keep an eye out on anything LSP related. As some of you might remember a few years ago I finished the AIMS Ju388 L1 conversion. When building it I wasn't to happy with the instrument panel (a few mm to big) so I decided to create one in 3D and print it through Shapeways. Recently one of our forum members asked me about it and one thing let to another; the IP is now available for purchase on Shapeways (see direct link below). If you decide to purchase it, keep in mind that everything will be handed by Shapeways (not me). Prices are also set by Shapeways, I don't make any money from it. Just here to help my fellow modelers. If you have a 3D printer yourself, please PM me and we can probably work something out. https://www.shapeways.com/product/SKL2XSTAG/ju388-instrument-panel-1-32-scale Cheers, Wouter5 points
-
Thanks, Max! The last days were spent with painting many small parts, constantly checking references etc. The engine is painted, I had a nice blue-grey colour in my collection of paints which matched pictures and memory: Xtracolour X157, FS16176 "Grey F-15 Mod Eagle" (!) The kit parts were installed on the engine with the exception of the exhaust pipes: The engine is clicked on its firewall temporarily for handling. Here are other views: Things to add to the engine: exhaust pipes, wiring and additional scratch things like oil filter, oil filler cap and baffle plates. The instrument panel was also given attention. The kit has decals for the instruments: Annoyingly, they were printed on one contiuous film within the surrounding line, so they had to be cut out individually. They settled nice in the instrument recesses with help of DACO Strong (red cap) decal solution. Glass was simulated with drops of Klear. Some additional placards were required on the lefthand side of the panel. Fortunately, I have an old Mike Grant instrument and placard decal set which yielded suitable placards: And here is the instrument panel in all its glory: The kit instrument panel is faithful to an old factory picture which can be found on internet, most probably from the version which the kit portrays. For PH-MBK, some modifications were necessary: Pedestal: - remove propeller pitch control lever, - move throttle handle to the right, - mount it higher than intended by the plastic and by the instructions. The pull levers on the right side of the pedestal got small handles (you can put your fingers behind them). Headset connectors were added on the lower lefthand and righthand corners of the panel. The slot below the pedestal is for a microphone and the small hole on the left of it is for its cable. These items will be added much later in the build. In the sixties and seventies, it was quite normal to fly without a headset. The noise level is very high in a small plane, for the simple reason that sufficient insulation material adds too much weight to the small plane. It's unthinkable now to fly without a headset, and rightly so! A nose cancelling headset has been the best investment I ever made for flying. The control yokes also will be added much later in the build. Remember that I showed a picture of the amount of lead required to let the Fuji stand on its nose wheel? I was able to put a lot of it in the cabin floor part. Below the centre console: And in the recesses below the front seats: This is about half the amount of lead needed. The rest will have to be put behind the instrument panel. I hope the space is sufficient! To be continued. Cheers, Peter5 points
-

DH 82A Tiger Moth S Rhodesia 1943
monthebiff and 4 others reacted to geedubelyer for a topic
Hi Max, I've just caught up with your build. It's a bitter sweet read at present. You were brave to attempt to rectify the dihedral on the nearly finished model and I can see why you had to do it. I had a similar issue with a Camel way back when. Left as it was you'd have never been happy with it. Now that you've taken the plunge more power to your elbow and I hope you're successful. If, for any reason the repair does not completely fix the dihedral might I suggest putting the airframe into a small maintenance diorama? Could you place trestles beneath the wingtips to provide the necessary dihedral and still keep the model looking as if you'd made it that way? A small hangar floor baseboard. A couple of standing mechanic figures, a set of stepladders and a rag draped over the wing here or there. Just a thought. Hope it does n't come to that and all works as you planned. Best of luck. Cheers. (In the mean time, enjoy your oil painting. )5 points -
1/32 HK Models Lancaster B Mk.I Nose Art Kit RF128/ QB-V Victorious Virgin.
Wackyracer and 4 others reacted to monthebiff for a topic
Some more progress and decided to replicate the fairly rudimentary hinge on the rear bulkhead. I decided to use 5thou plastic card and then sanded it down some more before fitting followed by Archer riret decals to finish. Wiring added to the service panel after drilling location holes and then the assembly glued in to position. Also one for Tom as he mentioned to me I should improve the U/C lever which I missed so with some careful drilling I got to this and decided to leave it there before breaking something! Thinking thats the cockpit floor done now so working my way through the side panel details now. Regards.Andy5 points -
Cyberhobby worked out great for me...a little extra work to help get the cowls to close nice and tight.5 points
-
I think it's COVID related, personally. Production levels are down, and some companies are holding off new releases until things improve. Then you have to factor in shipping delays, and the COVID-driven spike in interest in the hobby. It basically comes down to increased demand chasing decreased supply down a clogged supply chain. Kev5 points
-

SBD-5 of the Royal New Zealand Air Force - Trumpeter 1/32
Nikola Topalov and 3 others reacted to Brett M for a topic
Afternoon/evening everyone! Hopefully, everyone enjoyed the New Year. Here is my finished build of Trumpeter's 1/32 SBD-5 Dauntless. I've modeled this after the planes the RZNAF used in World War 2 for a 3 months by 25 Squadron before being returned the US, and switching to F4U Corsairs (thanks Alan!). After starting the 1/32nd world with Tamiya's Corsair, this was a bit of a change! Thankfully, even if it's not super crisp like Tamiya, it still built up quite nicely. Aftermarket includes the following: Archer Fine Transfers complete resin raised rivet set Archer Fine Transfers SBD stencils Synthetic Ordinance Works landing gear Master Casters SBD weighted wheels/tires Montex Masks Master .30 caliber barrels Ventura Publication decals Airscale placards Eduard canopy masks MRP, Tamiya and Alclad paints I think that's all...... A huge thank you to Woody @Archer Fine Transfers for letting me test out his rivet skins, they worked perfectly! For those of you considering them in the future, I HIGHLY recommend them to replace the recessed rivets on this kit. Everyone that provided information on the Dauntless and the RZNAF during the build, a big thanks to you too. Build thread is below. Feel free to critique, offer suggestions, point out anything I may have done wrong. It's just learning to me! Thanks for looking! Click on any picture to view it at Flickr and full resolution4 points -

Zactomodels new website!
Pete Fleischmann and 3 others reacted to Zactoman for a topic
Have a look at my new website!!! https://zactomodels.com A big thank you to the modelers whose pictures you'll see on my homepage. A huge thank you to Marcel and Miro who took multiple pictures of their kits until the lighting and pose of the images worked together so that I could merge them for the hero-pic. Thank you for tolerating my AMS! My old website was cluttered, crowded, not mobile friendly and way beyond obsolete. Not having a clue about building websites made this a real challenge. The site still needs a lot of work. I was mostly focused on making the homepage and store before going live. The "about us" page and "shipping details" are temporary and will be filled in when I get the time. The "privacy policy" and "terms and conditions" are copy/pasted standard legal mumbo-jumbo that nobody reads or cares about. I do plan to eventually add a customer build gallery and probably a few other pages for faqs, news, tutorials, etc. Just need more time... Please let me know what you think, if you find any problems or have any suggestions. Happy New Year!4 points -

Kinetic 1/32 CF-18 Hornet Build
Starfighter and 3 others reacted to DrewH for a topic
So after thinking about it for a half glass of Scotch, I redid the intakes. Overall much better after the second time. Main fuselage is glued together with the intakes. This will take some time to clean up, fill, sand, rinse repeat at nauseam for a while till I get it acceptable. Nose wheel bay is in the forward half so I can start getting the cockpit aligned. The "fat Pylon" is done, this is likely the easiest part of this build. Only took 2 glasses of Scotch to get the courage to scratch build this. and lastly just because I know this exists - had to put the "ashtray" on the IP coaming It's actually an instrument mount which the pilot will install when needed. I think it's still one of those not to be mentioned items but I'm not sure. Anyway - back to toils of this beast. *Edit - sorry for the crapy iPhone pics I didn't rotate*4 points -
Kitty Hawk OS2U Kingfisher - S.O.D. resurrection
spartacus2000 and 3 others reacted to Grunticus for a topic
Just a little while longer for the RFI thread... Edit: RFI thread added.4 points -

USMC AH-1Z ... NOT a shark mouth ;-) FINISHED
Sepp and 3 others reacted to themongoose for a topic
All 1 color now :-) Check out the graphics i did for this latest model...especially for rick & morty fans, I couldn’t have just plain hellfires4 points -
S.O.D. + moving = surprise!
Rick Griewski and 3 others reacted to LSP_Mike for a topic
I did find my Tamiya 1/35 Pz III, and 1/64 Lindberg He-111, both original kits. I had a pristine Hase Me-109E with John Steele artwork, but am still looking4 points -
posted on Jetmads FB page https://www.facebook.com/JETMADS2016/posts/7417750000781214 points
-

DH 82A Tiger Moth S Rhodesia 1943
VW Chris 1969 and 3 others reacted to mozart for a topic
He has a wee bit more hair than me, and a different rather "dabby" style. This is where mine is: Thanks for the words of advice Alain, it could be going back to almost square one is the best way.....more deliberation!4 points -

1/24 F6F-5 Hellcat--In Flight
daHeld and 3 others reacted to easixpedro for a topic
Thanks! The Zero is the Tamiya 1/72 scale kit. It's a gem, but TINY! I thought about cotton, but I think it looks too 'cottony.' This looks okay, but I really like how you can paint it and drybrush the highlights etc. As for in-flight, I'm the opposite. I think airplanes look the best while flying. But that's the beauty of our hobby--we can build what we like and how we like! Managed a few more moments tonight. I'm close to being done. Have to fix an issue with the smoke and paint the rod where it pokes out of the Zero. I'll do brown to match the prop hub and help disguise it. Here's a few teaser pics. Tough to photograph in the basement at night. When we get a nice day I'll take it outside and get some good shots to post in the RFI section. And some wings to finish off the base! Thanks for the encouragement and following along! -Peter4 points -

1/32 Revell Me 262B-1/U1 Nachtjager
Paul in Napier and 3 others reacted to Thunnus for a topic
Thanks guys! I'm still in the procrastination mode and filling the time with some of the final small details. The loop antenna was redone to fine tune its shape and also so that it is oriented vertically when mounted at an angle. The plastic radar array will be replaced with this Master brass Neptun upgrade. Very easy to assemble. Mounting to the narrow stalks on the plastic part was very dicey as it was very difficult to drill the necessary holes. I was barely able to manage it. I'll shoot this with primer. If the joint is too messy, I'll have consider re-doing the connection.4 points -

Current Catalog - Updated
chukw and 2 others reacted to D.B. Andrus for a topic
For S.O.W. Landing Gear Sets Currently Available Please Go To This Site: Synthetic Ordnance Works Thanks, Damian3 points -
Qatar Rafale
Johnny Cloud and 2 others reacted to Finn for a topic
It's real, from here: https://www.afcent.af.mil Photos pg2: Jari3 points -
Scratchbuilt Bushmaster PMV 4x4: now with paint!
Starfighter and 2 others reacted to GMK for a topic
Which didn’t take long. Still need to model the cradles & ammunition holders, the the swing arms themselves are more or less done. These will have MAG58/M240/GPMGs mounted. Mirrored & printed the wire cutter for the RHS.3 points -
3 points
-
Thanks, Jeroen! I'm hoping to return to this build tomorrow, and hopefully make some good progress. Kev3 points
-
3 points
-
My Completed LSP Projects of 2020
Thunnus and 2 others reacted to mywifehatesmodels for a topic
Most of my favorite LSPs for the year are in this thread. Thanks for posting! John3 points -

anyone else notice a shortage of kits
Rockie Yarwood and 2 others reacted to Archimedes for a topic
It’s the Large Scale Kit famine of 2021 I tell you!3 points -
Scratchbuilt Bushmaster PMV 4x4: now with paint!
Starfighter and 2 others reacted to GMK for a topic
Mucking about with minor parts today. Firstly, the wire cutters were CAD’d up. These are located in the upper corners of the windscreen. I’ve modelled them in the folded position. Without the ECM antenna. Then it was time for the front (small) & rear (large) crew steps. On to the machine gun Platt swing mounts.3 points -
And this arrived today. Thanks a bunch, coogrfan, I really appreciate it.3 points
-

USMC AH-1Z ... NOT a shark mouth ;-) FINISHED
Buster99 and 2 others reacted to themongoose for a topic
My new Viper came in yesterday... I broke a window and a new one was the most reliable way to get a clear sprue so i have something perfect for this build. Will have to build another Viper with the cracked screen, OHH DANG I already have a paint scheme picked out. Now for progress on this one Got a stencil for Christmas definitely like these! next up will be the light ghost gray +10% black before the top coat.3 points -
I am a historian by profession. Therefore, for me building a model is an act of researching history as well as a hobby. Hope this makes sense.3 points
-
Thanks guys, I appreciate it! Thanks for the headsup! From what I understand, this was an earlier machine, so hopefully I'll get away with using whats in the kit. I'm sure though, that precisely 1 second after I finish the build, a beautifully clear picture will surface proving me wrong Little bit of progress after a quick trip to Montana! All the kit provided cockpit details were affixed and everything got a coat of MRP Vernice Anticorrosione Also, the Fiat A74 has started going together. I'll finish off the pushrod and intake piping before I begin painting. Plenty of fun ahead!3 points
-
Happy New Year LSP friends. I have managed to put in at least a little time on the Corsair project every day or nearly so. And it's time to post something so that y'all don't think I have just given up. Progress seems slow. But here's the thing. I am scratch building a cockpit in 1/18 scale - the most complicated cockpit I have ever attempted (second toughest was my P-38), mostly due to three things (sorry if I sound like a broken record). One, the Corsair doesn't have a floor, which exposes a ton of detail in the bottom of the fuselage that would otherwise be unseen (and unmodeled). Two, the cockpit walls of this model are on five different parts (left fuselage, right fuselage, lower fuselage, upper wing half LH, upper wing half RH), making attachment of components challenging. And three, the Corsair is chalk full of rube-goldberg gizmo's. And it is those gizmo's that take alot of time and effort. They also leave me wondering just how far I need to go. When I look at some of the cockpit efforts you guys have done (talking to you AirScale), I feel the need to shoot for the moon. Yet other smaller 1/32 efforts leave stuff out yet still look very convincing. First - it is time I selected the aircraft I will model (the Bu number). Why? Because I am constantly having to decide what configuration part to make. Like all warbirds, and especially the Corsair given its teething issues early on, and all the other improvements it received over time, things changed. So here it is: This is VF-17 (the Skull and Crossbones Squadron, or the Jolly Rogers) F4U-1A Bu No 55995, Vought line no 1636, #29. The pilot was Ira Kepford who was a rather famous and successful Navy pilot. I like this aircraft because I can duplicate the paint scheme and make decals relatively easily, plus it represents a fairly famous (or notorious) unit. And it is indeed a -1A with the partially framed canopy which the model came with. Many have modeled this aircraft, so lots of info out there. When the time comes, I will be challenged with the triple colored paint (light gray bottom, light blue middle, darker blue top) that all Corsairs had at that time. Ok, the cockpit. I have had a bit of a decal disaster. Many months ago I purchased yet another set of Model Master decal papers, only to use one sheet leaving several more sheets for the next project. Well - with time for some reason the decal one creates on this paper loses its ability to slide off the backing. Even if I increase the soaking time. Here are the decals I have made so far for the cockpit: I mean, they are very representative of the actual placards in the airplane. But when I cut them out and attempted to apply, they would not free themselves from the backing, and self destructed. GAH!!!! So, I am fed up with the Model Master decal kits. And I am going with another brand "Expert Choice" by BareMetalFoil. Still waiting for them in the mail, and that is holding up some of my progress. In the meant time work progresses on the LH side to include the forward LH auxiliary panel and the side console (shown with the failed decal sheet before failure): Positioned on the LH sidewall: For these parts, I spend hours and hours researching their details, deciding how to build them up and with what materials, and laying them out on paper usually about 4x size. The actual fabricating of the parts takes less time than all that research work! Anyway - not too impressive I know. That side console you see there is going to get ALOT more complicated. I think you will like it. I really have a tiger by the tail with this cockpit. Hope to post more progress soon. Take care, and stay healthy.3 points
-
My 2020 | Not a Good Year |
MikeC and 2 others reacted to Panzerwomble for a topic
Maybe a bad year but some real good modelling ! Love them both . P11- 80+mph slower , well under half the rate of climb of the 109 , open cockpit ..the courage it must have taken to fly them against the Luftwaffe in 1939 , knowing you were most likley at such a disadvantage . You've done it justice in that model !3 points -

Italeri CF-104 Starfighter "Kicked up a Notch": KLP Publishing eBook now Available!
F`s are my favs and 2 others reacted to chuck540z3 for a topic
Good point, but as I mentioned in my post above, nothing is glued yet, "so excuse the gaps and other fit issues that will disappear when that finally happens". Also, the F-104 avionics hatch overlaps the rear of the seat a bit providing a few inches of clearance behind it, as shown in my dry fit of the cockpit a few weeks ago. Since this pic was taken I sanded the bottom of the seat a bit more so that it would fit lower, but on the real deal it barely fits under the glass. Now one thing that's doesn't fit is the avionics door over the bay itself in the closed position. That little black box on the forward side of the door interferes with the boxes underneath. I don't know what Aires was thinking, but since the door is always posed open, few would know or care. Cheers, Chuck3 points -

RAF FG.1 XV571 WILD HARE Phantom Conversion
HerculesPA_2 and 2 others reacted to Derek B for a topic
Hi Antony, That colour does look much better I checked some images, and the intake demarcation does appear to be at the back of the vari-ramp, so I would say that you are correct. Derek3 points -
I agree with Kev. Shortages here and there yes, but still gobs and gobs to choose from that are available; too many, in fact.2 points
-
Thanks for all the nice feedback! Thanks for the suggestions that were messaged or posted here. I haven't had much time since launching to work on the website but have made few small changes thanks to those recommendations. As previously mentioned, it's a work-in-progress and I've still got a lot of work to do on it. This is the first website I've ever built (my old one was started by an old roommate for me and I just updated but never learned) and it was much harder than I'd anticipated. I looked at my options and decided to learn WordPress using online tutorials and lots of searches for answers, just to make a basic site. What is frustrating is that so many seemingly simple things are much more involved or in some cases not possible without actually learning to code (and I don't have time for that). I just now (temporarily) removed that line. When time permits I will add a page that lists all of my products with links to pdf instructions for each product. I had hoped to do that before launch but didn't find the time. Thanks for pointing it out to me. Mark and Tim, PMs sent. Thierry and Tom, thanks for the orders. Both shipped the following day. Notifications of orders received and orders shipped (including tracking info) are now automatically sent. If any of you don't receive those please let me know so I can investigate and fix the problem. Cheers Chris2 points
-
Italeri CF-104 Starfighter "Kicked up a Notch": KLP Publishing eBook now Available!
Anthony in NZ and one other reacted to Winnie for a topic
The proper nomenclature for the avionics bay is "Q-Bay" same as on the U-2... (now the geek will retreat...) Awesome work!2 points




(640x480).thumb.jpg.064421ea444b5e95b34072769cccd203.jpg)

.thumb.jpg.5da8bff9741de420eb2e87addd8f2cf6.jpg)