Leaderboard
Popular Content
Showing content with the highest reputation on 03/11/2019 in all areas
-
just got permission from Aifix to post pictures of the new airscle F6F cockpit se test shot ..more here Peter15 points
-

"Willie the Whale", FINISHED
Jan_G and 9 others reacted to blackbetty for a topic
well, i´ll call this one done... 107 by karl holubar, auf Flickr 105 by karl holubar, auf Flickr 104 by karl holubar, auf Flickr 103 by karl holubar, auf Flickr 102 by karl holubar, auf Flickr 101 by karl holubar, auf Flickr 100 by karl holubar, auf Flickr10 points -

Airfix 1/24 F6F Hellcat Cockpit
Alain Gadbois and 8 others reacted to airscale for a topic
Hi folks I just got permission from Airfix to post images of the new F6F airscale cockpit set test shot ..this is just the PE, decals to follow hope you like it Peter9 points -

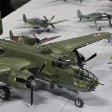
HK B-25H
Kagemusha and 6 others reacted to machine_marty for a topic
A few updates here. Got time to work on the internal details. I'm a bit suprised at how little there is in the kit, with detail levels being on a par with 1:48, and not 1:32. I had the Eduard etch set for the tail/upper gun sections so decided to use what I thought would be an improvement. However, for the cockpit I'm leaving this out of the box (with an exception of fabric seatbelts). All is in primer now so next post will be post painting. Apologies for the poor pics.7 points -

Tamiya Phantom F4j(UK)
Landrotten Highlander and 5 others reacted to TimHepplestone for a topic
1st one for 2019. Tamiya Phantom F4(j), decked out as a 74 squadron aircraft using Yellowhammer decals to depict a F4J(UK). Great kit that builds into an imposing model. All errors were user generated!!6 points -

1/32 Tamiya F4U-1a Corsair - Boyington's 17740
Pastor John and 5 others reacted to Thunnus for a topic
I just got back from a short vacation to Hawaii! Got back on Saturday and managed to do a little work on the Corsair on Sunday. Decided to work on the Vector resin cowling parts. The resin comes with small bulkheads for the nose cowling. So you have to remove the molded bulkheads first. The major surgery was performed using my Tamiya snips like a pair of scissors. I then used a dremel to grind down the raised plastic. The interior of the cowling was then sanded down with sandpaper and sanding sponges. The resin bulkhead pieces were sawed off their casting bases. I used CA glue for attachment. I'm not sure if this will be visible or noticeable once the engine inside the cowling but the additional detail is nice. I moved on to the resin cowl flaps and decided to glue in the little actuator parts. Stretched sprue was used for the cable that is strung along the actuators. I think this detail will be very noticeable and is a nice addition compared to the plain flaps that come with the kit. That's all for now! Thanks for checking in!6 points -

Make the others jealous
Anthony in NZ and 5 others reacted to BloorwestSiR for a topic
Not an LSP, certainly far from it in terms of subject and scale but still fun. With this release I now have all three versions of the Falcon from the series. Well, in 1/350 scale anyways. Carl6 points -

Spotted Ass Ape HobbyBoss B-24 Assembly Ship
Erwin and 5 others reacted to Wackyracer for a topic
Another couple of hours adding more interior bits, but first I had to remove 2 pieces I had decided to glue d'oh After the small hiccup all good. I realised the lights/leds/optics would be here and I needed to drill and mount these before placing internal parts in this area as I maybe able to hide these behind said parts. Finally need to find a rivet plan for the outside. Did pick up the haynes B24 book which has lots of internal pics and info which will be very useful.6 points -
verry little time for the hobby lately...... sprayed the interior and added some structure with styrene strips and added the radios etc. Now trying to understand the instructions of the profimodeller waist gun set And busy with the HGW seatbelts. until next time! Jan5 points
-
Make the others jealous
LSP_K2 and 4 others reacted to BloorwestSiR for a topic
It is Kev. Bandai can really cram the detail into it though. There's also a guy on Shapeways selling upgrade parts if you want to take it further. Carl5 points -

Tamiya A6M2 / A6M5 Zero Tweak List?
Pete Roberts and 4 others reacted to A6M for a topic
Hello Gentlemen, Scott mentioned this thread on the phone this afternoon so I came to check it out. After some attempts to sign up as a new member I discovered I already had done so some time ago. A bit of password recovery and here I am. For what it's worth I sent a copy of my A6M5 tweak list to Rado Marczak a number of years ago when he reviewed the Tamiya kit here. https://www.largescaleplanes.com/reviews/review.php?rid=938 So you did in fact see it on LSP, albeit well hidden away. I also have done a similar list for the A6M2, but it too needs to be revisited and brought up to date. At any rate, several of you mentioned you were considering a build of a large scale Zero so I'll make an offer to help out as best I can if any of you have any questions. Ryan Toews5 points -

"The Star of Africa" - Hans-Joachim Marseille's Do-335 A-2/Trop - Yellow 14 - FINISHED!
Paul in Napier and 4 others reacted to Out2gtcha for a topic
Here is where I'm up to at this point..... I was not satisfied with the spacing of the spots on my test bed spot painting experiment, nor the overall shape of the spots. The test bed came out more like a Japanese "puzzle" looking camo vs the less jagged spots in the leapard spot camo. I was happy however with the overall hand sprayed look of the spots, and the test confirmed to me that hand spraying was the way to go. I figured out a way to rectify the spacing and shape all at once, albeit a bit unconventional. I went to the local Hobby Lobby (US arts and craft store) and picked up these: Round baseball, basketball and general office type stickers. Ok, stick with me on this one......its gets a bit weird. So, I figured that it would be way easier to figure out the spacing I wanted, and move these around VS having to just wing it. I de-tact each sticker on my wrist before application and set about applying them in a random, but evenly spaced pattern. Strangest looking camo EVER! Weird I know........... The next step I took was to use a dark green colored pencil, fairly close to RLM 80 and very lightly traced each circle: The next step was to make randomly shaped camo spots (generally) inside the circles and then use a moistened cotton bud to remove the circle: As you can see, even with a good de-tack on the stickers, some still pulled up a tiny bit of paint here and there. Fortunately, wherever I found a spot like that, with some judicious planning I just formed a spot right over the pulled up paint, after some 6000 grit polishing of the spot. Im much happier with the spacing and general shape of the spots. Should get working on the spots today. Cheers!5 points -

MIG-15 Bis BG Air Force Trumpeter 1/32
Gazzas and 4 others reacted to ShelbyGT500 for a topic
Hi guys continue with painting and weathering of truck and trailer : Aaand tires, a lot of tires Maybe for that part of the build I must open new topic at NON LSP section - question for admins of the forum Cheers guys5 points -
Hello, Here's a built that I struggled to complete but I finally got it done. It is the AMK Fouga Magister with Berna Decals showing and old school scheme of the French Display Team (Patrouille de France) from the 70s. Very nice built. There are a lot of parts, some with both plastic and metal option. No particular issue during the built. Fit is quite nice. With the Fonderie Miniature one I built at a time where there was no other choice to have a 1/48 Fouga. That was another piece of work to build.4 points
-

AMT 1991 Silverado 454 SS-Completed-03/21
Gazzas and 3 others reacted to mustang1989 for a topic
Got the gloss coat on. Here in the photos this is about 6 hours after application so this is already nice n' dry to touch. It'll be another 3-4 days till I bring all of this out of the drying booth. I'm really stoked about how this finish is going to look on the completed build. I was pretty happy to make out the bulb letters in the middle of the light reflection on the body :4 points -
HK B-25J , 18 sqn RNEIAAF
Whitey and 3 others reacted to BloorwestSiR for a topic
Looks really nice Jan! The bomb bay should be silver. It's usually painted on the restored versions as a preservation method. And yes, the instructions for the Profimodeler sets can be quite confusing. For the waist guns, here's what I ended up with: Carl4 points -

RP Models -1/10th Douglas Bader and Spitfire Cockpit
Greg W and 3 others reacted to Brodiebear for a topic
After some advice on the PF forum I decided to revisit the shadows and highlights, so this is where I got to; Then I noticed this piece of resin sticking out on the right side of the life jacket So a quick look on the internet and I found this image on Alamys website showing the correct colours, so will have to paint these details, even though the right arm will probably obsucre the detail.4 points -

Iranian F-4D 3-6712, 71st TFS, '' DONE''.......
daveculp and 3 others reacted to Daniel Leduc for a topic
A very quick update guys, On the first color I noticed that keeping my black fadding was going be a challenge with that product, even when thinned close to 50/50 with their own thinner, couldn't get the fine layers I used to have with Tamiya or Model Master. The result on the 2sd color confirm me that I shouldn't go on with the rest, it was worst..... So decided to stop it right there and thank god, it was acrylic.... very easy to take off with amonia glass cleaner. and the big black spot in the middle is my thumb print I left after I cleaned up my airbrush.... another things to fix.... It took me an hour to clean my mess and restart again, Yippiiiiii, Next time trust me, I'll practice on scrap when switching media. So this time, I decided to go with those Model Master.... Sorry guys for the mishap but it's part of the game more often than I wish for.... Thanks for watching and have fun Dan.4 points -

Hobbyboss B-24: no turret fix in sight
Wackyracer and 3 others reacted to 109ace for a topic
I will have two different turret sets out this week. One providing the Emerson/Consolidated combination, and the others providing two Consolidated turrets. Prices to be announced.4 points -
Because there’s no such thing as too many Phantoms
phantomdriver and 3 others reacted to TimHepplestone for a topic
Thanks for the kind words gents. Got the dangly bits attached and some photos taken today. Calling her done for now. I might add some am burner cans if I can get hold of any. The kit cans are very soft on terma of detail. Fortunatly, being Tamiya the fit is so good they dont need any glus so I can remove them when needed.4 points -
Thanks Rob & Tom I hadn't really meant to start this kit but I’ve been drawn in by its loveliness The cockpit is is really good, I’ve added a little detail to sharpen it up, but it doesn’t need a huge makeover. I’ve added seat cushions from Milliput, the gunners seat would really give you a sore a***. I can’t imagine them not having a cushion there... I’ve fabricated a fairly generic oxygen bottle from odds & ends from the spares box and replaced all the moulded knobs & levers with rod and super glue and a few other bits and pieces. I’m going to add a bit of wiring but I think I’ll leave that until after painting - I’ll use coloured wire to hopefully give it a little more depth rather than just post painting. There are still some more things to do but this is the gist of it: I ended up ordering the Airscale brass instrument panel so I’ll have to wait for that to arrive before I can go too much further on the cockpit. I may dip into the engine next. I also ordered Montex Masks, HGW belts and a Master Barrels MG for the rear gunner. Have a good weekend... Guy4 points
-
My last built , enjoy, url=https://www.casimages.com/i/190302015634538135.jpg.html][/url url=https://www.casimages.com/i/190302015634764639.jpg.html][/url url=https://www.casimages.com/i/19030201563524465.jpg.html][/url url=https://www.casimages.com/i/190302015635298443.jpg.html][/url] url=https://www.casimages.com/i/190302015635775596.jpg.html][/url url=https://www.casimages.com/i/190302015636533857.jpg.html][/url Voilà voilà3 points
-
"The Star of Africa" - Hans-Joachim Marseille's Do-335 A-2/Trop - Yellow 14 - FINISHED!
Kahunaminor and 2 others reacted to Out2gtcha for a topic
Well, As they say, they only thing you really have to fear is sphere itself.3 points -
This just arrived today, and at first glance, it looks magnificent. I'll be popping off a review of it, hopefully sometime in the next week or so.3 points
-
And for our new update! drumroll... First let me say i apologize for the delay as usual. The schedule is just being brutal and i have had this update ready for a while now. I just havent had the time to sit down and get the mac out to post this between flights, or even outstation as i am trying to keep physically busy with walking and going to the gym after long flights. I have managed to finish the cowl which was readied for the Brengun photoetch cowling fasteners and has received the HGW etch part that i bended to look partly open. I scratchbuilt the cowling retainer spring and the hook mechanism on both the fuselage and cowl. on the other side of the fuselage which will not have the cowl on i build the mechanism with the spring in the relaxed state. The prominent lip on the cowl that was there for mechanics not to cut themselves was added using stretched sprue. The cowl was weathered with oils, and chipping was done with pencils. I have also predrilled the fuel tank drain port location and the ejector chute exit ports. For the fuel drain i have tried a couple of techniques to get the panel precisely drilled and have settled on using the punch set as it leaves a clean circle rather than successful use of bigger and bigger drillbit sizes which ended up twisting the thin pe part. The louvers have been sanded along with the hatches which will receive photoetch parts. I have taken a polyester mold of the vents from another one of my kits in order to burnish the pe vents to the correct shape when the time comes for me to install them on the fuselage. The fuselage has been painted white as seen previously and gunze sand yellow was airbrushed very thin. once the coat was dry i micromeshed some areas to give it a patchy look which will come through very nicely with the woodgrain. The rudder was modified with the addition of a brass rod at the bottom as the part from wingnut wings doesnt extend far enough to poke into the fuselage where the rudder pedals are wired to the control rod. I opened up the elevator exit points for the rigging, and modified the top side openings with sprue and then placed pe parts from the HGW set. The openings should be oblong and not square as wnw has depicted them. a bit of parallel sprue glued in the square recess then sanded flush, then some chain drilling and cleaning up and the etch part on top did the trick. Rudder was then painted, preshaded postshaded then covered with Richard's Aviattic lozenge decals. Mr mark setter neo and a hairdryer and the decals behalved FLAWLESSLY, as always! The horizontal stabs were painted and a filter of ochre was brushed on the white areas to tone the pop down. More stuff was done but it's been done over a lapse of time so i might have forgotten some of the smaller details. I had some time off today so i scratched built a flare rack from spare pe and from albion aluminium rod and have added the hinge at the top of the ammunition cans. I have some supplies on the way that i want to add to the albatros in the forms of pe chains in 1/48th scale and some more little dings and bits that will overall further enhance the little details. I have added some sublte chipping on the horizontal stabilizer and sealed those as preweathering before further assembly. I have the day off tomorrow and i am on standby overnight so progress will be done. The inevitable is coming, i will start working on the fuselage woodgraining and i still have not decided wether to plot my own masks and paint all the markings on, or use the decals and weather those which i am not a fan of doing usually, and i avoid... Thanks for checking in. Your comments are greatly appreciated my friends! Karim3 points
-

Any Tamiya 1/32 rumours?
Dave Morrissette and 2 others reacted to ericg for a topic
A 109 to do something innovative and give the market something we haven’t seen before.3 points -
Nice to see that I can make an impact! Photography is one of my other hobbies so taking pictures is not all work but fun, too . In my opinion every review of AM stuff should feature a comparison between the kit part and maybe some competitors. Well the best review would be against the original... All the experts on the different subjects are reasons why I joined LSP in the first place. There's so much information and knowledge here! Back to my 109 - a quick shot from the bench: Thanks for the picture and the kudos! I'll add my mini comparison: Hasegawa (2.9mm wide), Barracuda (2.6mm) and Eduard (2.2mm). The latter has the same width like the ones from Revell's G-6 (measured 2.25mm) and presumably G-10... So Barracuda it is for the F-4. I'll use the Eudard ones for my upcoming G-2/R2 conversion - yeah I'm into those photo recon birds ! Cheers Joachim3 points
-

RF-8G Trumpeter & Fisher Model
HerculesPA_2 and 2 others reacted to EricF for a topic
Some work on the right aileron With a dry fit on the wing with the flap Stay tuned Cheers Eric3 points -

WNW Handley Page 0/400
Rick Griewski and 2 others reacted to ringleheim for a topic
3 points -

Make the others jealous
scvrobeson and 2 others reacted to discus for a topic
The postman brought me this today Definitely not a LSP but that's the only scale available for this beauty.3 points -

Hong Kong Models B-25J bomber 'Peggy Lou'
Wackyracer and 2 others reacted to Thomas Lund for a topic
Hi Guys It's been a while - I have been doing WAY too much company related travel. On the positive side I've gotten my own man-cave so what ever spare time has mostly been spent sorting that out. A little has been done on the Mitchell. Still more PE bent and assembled, ready for paint. However... I was looking for info on some colors on the ammo boxes when I stumbled over Kents Catch 22 Mitchell here on LSP... it made me realize how much was missing inside, and then I just had to add some detail that I fear would be visible if missing... quite a big task... I guess I'm about halfway3 points -
Very nice work! The Barracuda exhausts should be bigger than the kit exhausts, assuming that the Revell G-10 kit has the same exhausts as the G-6 kit.3 points
-
Yep, Carl is right, most of the sweetheart bays I've seen have been aluminum. I went w/bare aluminum on mine as well some gizmology:3 points
-
A couple more images, fixed the missing wheel bay skin.3 points
-
Hi, A last sanding session on the metal body, then: - Primer, - Giallo Modena, - Rosso Corsa. Also started to spray primer on the first 200 metal rivets. 400 left to do... before GM&RC. Few of them will be White. Voilà. La suite bientôt! Pascal3 points
-

HK B-17...C 5/4 sweating the metal
Derek B and 2 others reacted to brahman104 for a topic
Many thanks Brian! Thanks Terry! Yours and everyone else's ceaseless words of encouragement are what keeps a build like this going, especially after all this time! Well now, where did that last month go? Oh yeah that's right, I was in NZ for a week, then two days at home, then down to Avalon with work. Oh how times flies - literally!!!!! I finally had a quietish weekend (notwithstanding getting my house broken into and laptop stolen) and I really wanted to have a crack at covering the waist windows with aluminium. As these are riveted over the top of the existing skin, I can get them all ready to go now, then place them on at a later date (about June, 2035 at my rate!). This like many other aspects of this build, promised to be highly challenging, especially as there is a formed depression in the metal to meet the rear of the window, as well as the openings for the wind deflectors and the forward observation window. Have a look below at how the adventure unfolded...... First up was to cut the piece oversize and anneal if for forming the depression. I did this over the "inside" of the acrylic frame I had already made. The unfortunate by-product being that the metal was now very soft, so removing the three apertures for the windows was quite tricky and very time consuming.... Slowly, I began to make headway, but I really needed a solid support so I didn't unnecessarily distort the shape. I vac formed another piece of the fuselage section and taped the piece inside so as to keep the curvature.... Trying to get a nice shape to the front window was extremely difficult, and took a lot of filing then rechecking against the reference pics... I finally got there though, and with rivets applied (heaps of fun!) it was glued in place on the acrylic window sill.... A close up of the front showing the rivets to good effect. A little more shaping of the wind deflector port there and it's not looking too bad! Yet a bit more whittling and the previously shaped waist window fits nicely! Still got to line the windows with aluminium, but it does fit! Yay! I also redid the top cap on the tail cone to make it look a bit neater..... not entirely how they did it in real life but this piece is small!!!!! I promise I'll start the tail wheel soon! Cheers, Craig3 points -
Hello! i'am Jan and this will be my first build on the forum, Normally I build 1/48 aircraft so this will also be my first 1/32 scale build...... Not sure witch Aircraft I will build, but N5-245 or N5-230 are on my short list I have some Aftermarket sets that I will use for this build, G-factor landing gear and Hgw seatbelts are in the mail. Started with the cockpit, and slowly build from the front to the back of the aircraft. thanks for looking, Jan2 points
-

1/32 Tamiya F-16CJ
RALPHY ROCHA and one other reacted to Breaker for a topic
Finished photos of my TAMIYA,Inc. 1/32 F-16CJ. Built with AMS Resin ECM pod and L/h HARM pod, Eduard Model Accessories SNIPER pod, MASTER Static Dischargers, AIRES HOBBY MODELS wheels, GT Resin R/h targeting pod pylon and VideoaviationGBU-38s. Decals were a mixture of kit and Astra Decals. Painted with MRP & Mr Hobby. Seat belts are scratch built, Bomb rack is robbed from the Academy Hornet. I was planning on using the Quickboost seat and Aires wheel wells but they both were far too small! Massive thank you for Joe at Yellow Cake Models for sending my a new lower fuselage after I butchered mine and Fanch at Fancherello models & photos for cutting me the stencils for the tail.2 points -

1/48 Eduard Fw-190A-4
JerseyChris and one other reacted to cbk57 for a topic
I have been messing with this for a while. I really like this new Eduard kit. I built the original effort with full engine that they released years ago and it was a fight to get it together. This is a really straight foreword build. Landing gear have nice defined slots to lock them into. In my opinion this went together really nicely.2 points -
Yes your right, been working on a DH9, stuck in wood grain land. DH9 by The 3rd Placer, on Flickr Will get back to the Albatros soon. Ryan2 points
-
HK B-25H
machine_marty and one other reacted to BloorwestSiR for a topic
Some nice progress there Martin. You're correct in that once the fuselage is closed up, you won't see much of it interior. Carl2 points -

Fokker pair
BiggTim and one other reacted to sandbagger for a topic
Hi all, The fuselage sides and top decking had a brown glaze applied, but nowhere else on the aircraft. I've added that and now I'll add the personal and national markings, Mike2 points -

1/32 WnW Halberstadt CI.II (Late)
AlbertD and one other reacted to monthebiff for a topic
Now have the fuselage painting complete with engine cowls and underside completed and then decals on followed by adding the tail plane. Also finally finished the wings adding rib tapes etc with Aviattic faded lozenge on white decal paper followed by kit decals to finish. First efforts at adding the individual rib tapes and really happy with the results. Also the white decal paper Aviattic use is exceptional and works so well with no issue's whatsoever! Shame the WnW decals are not so easy to use and pretty thick and need some help settling in to place. Regards. Andy2 points -
MFG-1 is wonderful....especially with a pair of Kormoran under the belly2 points
-
RF-8G Trumpeter & Fisher Model
blackbetty and one other reacted to EricF for a topic
Here is my work on the inboard flap The used Evergreen is the thinnest available (0,13mm)2 points -

1/32 T-38A Thunderbird Completed
johncrow and one other reacted to themongoose for a topic
Good advice Don! The color is matching up perfect. I worked it up slow then did a mist coat over the area of the repair and now you have to look close to find the chip.2 points -

1:18 Hobbyboss AV-8B Harrier
Greg W and one other reacted to patricksparks for a topic
Finishing the turtle deck, have to still make some vent fairings to go over the 2 holes at the rear of the deck.2 points -

HK Models 1/32 Avro Lancaster
jgrease and one other reacted to richardchapman5 for a topic
Got some work done on the merlins. The next engine I'm planning on adding extra plumbing. I have placed the outer nacelle to the wing and added some Nato black to see the fit. I have test fitted the inner nacelle to the wing. L wing with both engine dry fitted. that's all for today and thanks for looking.2 points -
.thumb.jpg.745e9c32fdfafef712dcea77f75e8a27.jpg)
Apollo 16 Trans Earth EVA - Completed
Starfighter and one other reacted to TimW for a topic
2 points -
1/12 MFH Ferrari 312F1. Still progressing on the Chris Amon Ferrari. The fitting holes and the front Ferrari logo area are masked. I had a little « spot » on the Red, so I sanded it and made a touch up. The dampers looked to simple for my taste. I used modified F1 Specialties brass electronic connectors and chemically burnished them, then put a center adjustment screw and finally install the knob on the damper. A Koni decal add a nice looking detail. Aaaaannd, there is a new kid in town! 0.3 flat pattern: tested today and happy with the result Voilà. Pascal :ml:2 points