Leaderboard


Popular Content
Showing content with the highest reputation on 01/19/2020 in all areas
-
Cheers guys. Some more work. I think the model sits a little flat and needs the characteristic tail heavy look. I read on another build somewhere that they took 3mm off the top of the main gear legs. I decided to go with 2mm to begin with, and take it from the middle of each leg so that the geometry of the extension link and gear doors stayed the same. For this mod, I am using the plastic gear legs as they are very sturdy, although my process will actually add a bit more strength to them. I started by drilling a hole all the way down the leg, from the top. i used my vernier calliper to measure 2mm, and pressed the sharp edge at intervals around the circumference of the leg to give me a guide. The brass rod has been inserted after I cut the 2mm section out and has been positioned for reference. By pre drilling the hole before the cut, the alignment has been pre set. I removed the cut section and refitted the leg together after this pic was taken. I made up some masks using my mask cutter for the tail numbers and letters and the National insignias. ‘197 is alive again. The sit of the model is now a little more tail heavy which I may drop a little more once I have all the stuff hanging off the bottom of the aircraft sorted out. Some more weathering effects have been added such as the wing roots and the panel behind the cockpit. This was done with a very thin mix of Tamiya Zinc chromate paint. Further work on the back end. The VZ has been sanded down whilst the 197 has not yet been touched. As can be seen, the back end is really starting to come to life.15 points
-
Finally. An envelope from the Czech Republic was delivered to my doorstep. One set of HGW Wet Transfers for the F4U Corsair. Having never used wet transfers before, I thought it would be prudent to perform a test. The carrier film that holds the markings covers the whole sheet so you have to cut out each marking separately. After cutting the marking out, application begins just like you would a normal decal: after dipping in water, the paper backing slides away allowing you to apply the decal. The directions specifically call for Mr Mark Setter to be applied on the model before the marking. From my understanding, Mr Mark Setter has adhesive properties and that is an important property for these wet transfers to work properly. After the marking is slid into place, a cotton bud is used to blot out the excess fluid. This is what the marking looks like after application. The instructions say to allow 6-8 hours to dry but being a test, I was curious if 3-4 hours was sufficient. Using a toothpick, I carefully rubbed one corner of the clear carrier until it curled up and I used tweezers to pull of the carrier, leaving the marking behind. In this case, 3-4 hours was sufficient for the marking to bond with model surface. The result is a marking with zero clear decal film. With that initial test giving me some confidence, I applied the wet transfers on the top surfaces of both wings of the F4U. Even with the removable carrier film still in place, the markings are still much thinner than the Tamiya decals treated with decal solution. I'll probably leave these overnight before I start removing the carrier film.11 points
-

1/32 ZM Henschel Hs-129 B-2......FINISHED
Victor K2 and 10 others reacted to monthebiff for a topic
So I now have the basic paint scheme on in readiness for any markings I will be spraying on. The colours of the upper surface look a little odd in the pictures but to the eye are much darker. Regards. Andy11 points -

P-26 Peashooter / wife test picture.
Lee White and 9 others reacted to Troy Molitor for a topic
Im trying to load pictures from my new laptop. test test..10 points -

ICM announces Fiat Cr.42 1/32 in three presentations!
Wackyracer and 8 others reacted to kkarlsen for a topic
Speaking of oddball's - This is my favorite oddball... "More than 2,500 Fairey Barracuda aircraft were built during WW2; more than any other type ever ordered by the Royal Navy's Fleet Air Arm, however not a single complete example is known to remain in existence today." Some courageous people are trying to resurrect one: Fairey Barracuda Restoration... Would be great to have it in 1/32 scale too... Cheers: Kent9 points -
The wife is visiting with her sisters, so I had a day of un-interruped modeling. The cammo pattern is my own interpretation as every profile has a different interpretation and no photos of the complete plane seems to be available. Thanks for looking Nick8 points
-
Painting on the 109 underway, again, the Kitsworld decals shows fairly heavy mottling going right down to the bottom of the fuselage sides. While paintings (never trust an artists rendition) show little... or even no mottling on the aircraft sides. There's also paintings of the aircraft with II Gruppe straight line instead of a III Gruppe wavy line, but I have 1or 2 pics. here of the aircraft with the wavy line so, that's what I'll use. I ran out of a key Tamiya color to home mix the RLM 75 so used some recent acquisition paints that were as yet untried, Mission Models, they seem to work ok. My query: does the mottling look to heavy? paint came up with the tape off the resin exhaust pipes, my fault. not the paint. I forgot to clean and prime the resin Thanks for looking7 points
-
Hi Guy's, would it be too much to hope for an updated Westland Lysander by ICM? Seems to fit the early war theme, ICM is now 'filling' Kent7 points
-

Lukgraph De Havilland (DH.88 or DH.89?) soon to be announced?
kalashnikov-47 and 5 others reacted to mozart for a topic
Oh my! A DH89 would make my year and it's only mid-January! This >>>>>>>6 points -
Sorry about that! Let's get back to the matter at hand... For many years this photo has been one of my favorite subjects for a diorama: Fiat CR. 42 on it's nose with crew from the Australian Photographic Unit... (Libya 1940'ish) I have seriously been thinking about doing this with the Silver WIngs kit. But I must admit the price of the kit quickly stopped me. Now there seems to be nothing to stop me from doing this after all... Cheers: Kent6 points
-

1/32 OV-10D Bronco by Kitty Hawk
KAGNEW and 5 others reacted to spyrosjzmichos for a topic
And a few detail shots.6 points -
1/32 OV-10D Bronco by Kitty Hawk
KAGNEW and 5 others reacted to spyrosjzmichos for a topic
Calling this one done! Started back in May and first to be finished for 2020! Despite the usual KH problems the kit proved to be quite an enjoyable one to build and challenged my skills without driving me crazy. I do plan to add a pair of AIM-9 missiles under the wing pylons and have both the model and figure placed on a round base but it's more or less done! A huge thank you to all of you who followed me throughout this journey and provided me with help and advice!6 points -

Yak 3, the Special Hobby Hi-Tech Kit
USMC Herc and 5 others reacted to Dpgsbody55 for a topic
Not a lot of progress over the last week, as I've been filling and smoothing joints, priming and repeating. I've also been waiting for a set of decals to arrive from England. Here's the model today, after final priming. I've also been doing a little bit of work on the undercarriage legs, which caused a little more consternation. The main legs in steps 29 and 30 have two small parts (D7 and D35) to attach which will attach to the upper main u/c doors. Be careful with these for two reasons. Firstly the pins on them need to align with more parts (D8) in steps 31 and 32. The second issue is that part D10 in both steps 29 and 30 need to be attached the same way up on both legs. Check the drawings in the instructions carefully with these two parts as you can mount them upside down. Lastly, the markings I was after arrived yesterday and they look magnificent. They're from Begemot, a Russian company, and your choice of markings is vast as you have 25 choices. Here are some. There are eight more schemes on the back of the first page. And the decals themselves: Decisions, decisions...... Cheers, Michael6 points -
based on Lukasz facebook post it looks that Gipsy-Six engine is ready and they want to include 1 or maybe 2 in upcoming release so twin engine de Havilland plane on horizon? DH.88 or DH.89? https://sk-sk.facebook.com/pg/lukgraph/posts/?ref=page_internal jan5 points
-
1/32 ZM Henschel Hs-129 B-2......FINISHED
tomv87 and 4 others reacted to monthebiff for a topic
A little more done today and added the yellow flashes to the lower wings, nose and tail band followed by the national insignia on the tail. . Time for some decals and a practice on a my test mule (Mk V Spit) to get the white wash technique right!! Regards. Andy5 points -

Caudron C.714, Azur, 1:32 - FINISHED
BradG and 4 others reacted to Landrotten Highlander for a topic
The plane is starting to show off its sleek lines once I put the front and back portions of the canopy on. I intend to have the canopy 'open', so the middle bit has been left off and hidden behind some Tamiya tape. I used the 'inside' masks and painted the inside of the canopy the same colour as the cockpit. No blemished or paint creeping under masks have been found, so I am a happy bunny - at least for this part. The 'outside' masks were put on before gluing the covers to the fuselage. The front part of the canopy did not fit perfect and would have required some pulling out of shape to make it fit. I did not like the sound of that, so I hightened one area with a smell narrow strip of plastic. The centerline on the fuselage, as well as where the grey plastic bordered the clear, needed only a limited amount of putty. Some sanding and rescribing the affected panel lines and screws completed this part of the build. Next are the wings. Dry fitting showed me some problems, so to overcome these I will first fit the bottom of the sings to the fuselage and make sure there are no steps and the lines flow smoothly before fitting the top halves of the wings. That all, folks slainte gu mhath5 points -
HI Everyone, Time to reveal my interpretation of the scheme. I've mixed my colors from tube paints, and there are three layers of each color. Each layer of color was tinted differently and then all of it was covered with a thin layer of Future. After a few days of hardening, I'll begin to paint the Ansbach shield on the cowl and the JG54 heart under the cockpit. Then I'll pull all of the masks and see what needs touching up. Finally, I'll smooth the paint as much as possible which should reveal the multiple shades of paint. Cheers! Gaz5 points
-

Spitfire Mk.XVIe - 1/32 Tamyia
chuck540z3 and 3 others reacted to Mazi for a topic
Hi everybody I´m a new member and I´m from Czech Republic. Thank you for joining the LSP group and here is my first 1/32 scale model. Spitfire Mk.XVIe - WO Murray Lind, No.485 squadron, Fassberg, Germany 1945 HGW WET TRANSFER Wheels: Barracuda Paints: MRP and Gunze Cockpit´s door: Quickboost Mask: homemade Photos my friend Miloslav - thank you.4 points -

A6M2b Model 21, buntaicho Lt(jg) Jun‘ichi Sasai, August 1942
TorbenD and 3 others reacted to Miloslav1956 for a topic
A6M2b Model 21, buntaicho Lt(jg) Jun‘ichi Sasai, August 1942 1/32 Tamiya HGW wet tranfers & seat belts CMK wheels, wheel bay & flaps Aires exhaust All colours MRP - new test IJN set Painting mask homemade4 points -
ICM Gladiator slow build. Finished!
Rick Griewski and 3 others reacted to mozart for a topic
Kind Forumer here Quang!!! I have your address so I'll get what's necessary plus any other bits still on the decal sheet that you need in the post asap, just let me know. Until that little mishap I was thinking what an immaculate job you're making of the painting and decals, once corrected it'll look super!4 points -

Chebourashka at Soviet Air Force
dutik and 3 others reacted to ShelbyGT500 for a topic
And the next update The door is fixed and detailed : Well if the door will be open, we need a ladder: The wheels from the kit are horrible - soft rubber , the "rims" - far from the truth, so I will use the resin wheels: Also scratched antennas, pitot tubes and screen-washers: Well that is for now Cheers guys.4 points -
Masking up the rudder. Painting the fuselage. I went for RLM 75 and 83 for the fuselage. I painted the tail with a brush, RLM 81 brown with 83 green irregular splotches. Gloss is also on, just awaiting things to dry before some decals and I need to apply the painted out 4 on the fuselage.4 points
-
Ahoy! Although moving at what can only be described as a tectonic pace, I have made more progress! Cockpit tub finished - added at least a representation of a throttle cable which, unfortunately, you can't quite see in this pic. Fuselage buttoned up. Started work on the wings, and couldn't resist a trial fit to the fuselage. Putty manufacturers aren't going to make a fortune out of this kit - the fit is, so far, excellent. Just a trace along the spine so far. Gun blisters are by Barracuda and only required a tiny bit of sanding to reduce the thickness of the leading edges to get a pretty much spot-on fit. I'm going to finish assembling the wings, then take a break from this to make more progress on project no. 1. That's all for now but I'm looking forward to getting back here; I'm really enjoying this build. Sepp4 points
-
I masked up the wings and tail surfaces first for paint. Gunze RLM 74 and 75 used and airbrushed freehand.4 points
-
Thanks for the comment guys. Nice! Would be great to see a picture or two of you and an F-100. Some more work. I had a bit of a play with the tan colour as I felt it looked a bit too pink. I shaded it with a very thin mix of Model Master enamel Tan to brown it up a little. I have started post shading some lighter areas of each base colour. The scorched areas are still a work in progress.4 points
-
Chebourashka at Soviet Air Force
Starfighter and 2 others reacted to ShelbyGT500 for a topic
Hello my friends This is AN-72P at 1/72 scale of TOKO. I started this birdy many years ago and it is the only one abandoned project Why? Horrible plastic material, raised panel lines and no rivets . .. no details, horrible manual , etc etc So now it is time to put on the helmet and the body-armor and finish the Chebourashka: And this is one of the examples at this $%^t - the window clear part of the left-side door: But we will fix it Ok guys, thanks for watching as always and Cheers3 points -
3 points
-

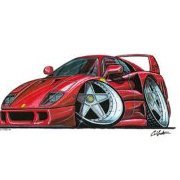
Tamiya LaFerrari repaint
mustang1989 and 2 others reacted to The Madhatter for a topic
Hi guys and girls So recently, my son has become obsessed with cars - in particular the LaFerrari and the Aventador. He got a 1/18 LaFerrari for Xmas, but I remembered that I had the Tamiya one built from a few years ago that was more than a little under whelming in regards to finish. So, after scouring countless pictures with my son, I came across a really nice FXX in blue which I thought would translate nicely to a standard LaFerrari. It looks way better than when I first did it now. The wheels are from the NSX kit which I had left iver and thought would look pretty cool on this - painted in gold titanium. I lost an exhaust nozzle, so I took one off and cast a replacement in resin. You can't tell the cast one apart except for the chrome is slightly different shade. Not worried about it. Well, that's the first one off the blocks for 2020. Now my son wants me to repaint the old Aventador kit I gave him in the same colours - which I shall dutifully do for him Anyway, that's it but thanks for looking Si3 points -

ICM announces Fiat Cr.42 1/32 in three presentations!
Rick Griewski and 2 others reacted to quang for a topic
Rick, this Dutch Decal sheet is included with the ICM Gladiator kit destined to the Belgian market. As a matter of fact, the sheet was originally released in 2012 to be used with the Silver Wings 1/32 resin kits. HTH Quang3 points -

Ju-87B, 1:32, Trumpeter
dodgem37 and 2 others reacted to Hartmann52 for a topic
Slowly, but surely - the work is progressing to the finish "Ost-Front Alter zoldat!"(c)3 points -

P-26 Peashooter / wife test picture.
Troy Molitor and 2 others reacted to Trak-Tor for a topic
My system says it needs more test pictures. Details from different angles would be fine. Juraj3 points -
1/32 ZM Henschel Hs-129 B-2......FINISHED
Victor K2 and 2 others reacted to monthebiff for a topic
Been having a bit of a dilemma over the scheme I am going for, initially it was this one. But after a bit of deliberation I've finally settled on this one today. Thought I'd push myself and try a hand painted winter scheme and lots of heavy wear and tear. Regards. Andy3 points -
Caudron C.714, Azur, 1:32 - FINISHED
LSP_Kevin and 2 others reacted to Landrotten Highlander for a topic
Thanks all for the comments and the likes. I have some more iffy pictures. As discribed in my latest post, I enclosed the cockpit. sorry they are a bit out of focus (seemed OK when I looked at the tiny screen on my camera However, you can clearly discern the structure of the framework, which would otherwise be a bit too bland. I am happy with the way the 'engine' turned out. The flash has drowned out the shine of the metallic paint (Mr Metal Colour drybrushed onto Hallfords black primer)3 points -

ICM announces Fiat Cr.42 1/32 in three presentations!
RLWP and 2 others reacted to thierry laurent for a topic
Should I mention once again the lack of any existing large scale BP Defiant...?3 points -

Tamiya P-51D discussion of extra parts and block differences
Pete Roberts and 2 others reacted to Juggernut for a topic
I found it. It's on ARC : Aircraft Resource Center - 1/32 P-51 Review (of sorts) by Tourist.3 points -
Thanks very much for the comments guys, appreciated. The area where the fuselage meets the tail was a bit too sharp for my liking, comparing it to photos showed a more gradual bend. i squared off the area concerned Glued a lump of resin in its place The new shape. Much better. The prop was next on the radar to be fixed. Whilst resin is a great material to model in, I find that some areas will warp over time so I avoid that by stiffening them up. The prop was a bit curly, whether that was the way the master has been made or whether it is slightly warped. I bent each blade out of the way and drilled through its root, into the spinner, I then cut a trench into the back of each blade, meeting up with the hole that I had just drilled. I cut brass rod that fit into the hole and the trench, which was then superglued into place. The blades were then straightened before I filled the holes. Straight as a die. Sprayed with SMS primer filler and sanded.3 points
-
Oh boy, some hobby goodies arrived today, specifically some items to help with a 1:32 A6M2 that I’m currently working on.3 points
-
Thank you, thank you, thank you., and thank you! I really appreciate your good words. Details from yesteryear: Thank you for looking and liking. Sincerely, Mark3 points
-
The Hs.129B-2 Finally arrived at one of my local (Australian) hobby stores ... So ... having it sent, along with a couple of other ZM kits they held back for me - It arrived at the post office a day or two ago. I'd like to say that I'm now up to date with the entire 1/32 ZM collection ... except they sneakily tucked another couple of Skyraider kits in before the first of the Hs.129 kits. Never mind ... as soon as those rock up to one of my other suppliers ... I'll be sorted ... Rog3 points
-
.thumb.png.84c5d3a464f2dd83f0ac37a5aac81ec8.png)
1/32 Tamiya P-51D-5 NA Mustang "Ferocious Frankie"
Greg W and one other reacted to Antonio Argudo for a topic
thanks Peter, glad that you like it and are follow it, cheers Thanks Mark, glad to hear that you had fun in my country, I'm sure you enjoyed tapas and the sun of the south cheers Thanks Bevan So, the other sidewall is done now, hoping to close that fuselage halves pretty soon and move to the wheel bays which will be the next big task, thanks for looking, cheers2 points -
I've continued a little on the kit - it's fun adding detail. This jet isn't really big and with the engine bay open, you have a compact kit loaded with detail, from the nose to the cockpit, engine and avionics bay and ground power connection. Really cool. Here's where I am with the engine bay: So the two round things to the aft of the bay are where the air intakes on top of the fuselage connect. More in the middle and diagonally placed, are the air exhausts. Of these air exhausts, only one is in the kit and it is way too small, so it had to be scratched. You can't see it in the photo, but I've also built some detail in the interior of them. On the starboard side, next to the round intake connection, an electrical wire box is located. That part alone holds about 40 tiny parts. You can't see it very well in the photo, but it's there. I have to build another one of these on the port side too, but I haven't started it yet. It took me about 4 hours to build just one... I think I'm almost halfway through detailing the engine bay. Painting it will be a big challenge, there are so many different colours in this area! Looking at some good close-ups of the area behind the seat, I noticed quite a bit of tubes, so out came some super glue and more metal wires. It looks very much like in the photos of the real EAV-8B, I'm happy about that. I also added some detail to the instrument cover and the leg straps on the seat. I'll show it when the seat is painted. I also wanted to add another point of interest by showing the extended in-flight refuelling probe. The kit provides just two parts for the closed probe. I cut the front part and extended the probe, so now I have to detail the middle section and the support strut. For this, I have to wait until the air intake is done, though... Another part that I cut open and detailed, is the large pylon, located nearest the fuselage. In the middle of it, an access panel is located. It holds 4 connection points, 2 tubes and some instruction plates. I spent a night building the interior and although you probably won't see it if you don't get really close to the kit, it's just one of those little extras that I like to add. So, here's another dry-fit photo of where I am at the moment: I've continued detailing the radar, started detailing the interior of the radome - I'd like a few more photos of that part, but not so easy to get - added detail to the cockpit, seat, area behind the seat and the canopy framing. Loads of almost invisible details there, not sure if it was worth the time, but I guess we'll see later. Then the engine bay, in-flight refuelling probe, the small hydraulic system's ground test panel, the hydraulic panel in between the nozzles, the avionics bay and the ground power panel. Ow, and I started detailing the nose landing gear. I hope to have the kit done by November. Not sure if I'll make it, but that's fine. Thanks for taking the time to follow, if you have any suggestions or photos of other parts that can be opened, please do! Nic2 points
-
ICM announces Fiat Cr.42 1/32 in three presentations!
monthebiff and one other reacted to quang for a topic
My ‘Belgian Edition’ ICM Gladiator kit includes a Dutch Decal sheet for a Belgian Gladiator AND a Fiat CR42. Is it coincidence or is it time travel?2 points -
I knew I could count on the ‘kind forumers’ but I didn’t know they would respond so quickly. Thank you all for your concern. Now back to the Bristol engine2 points
-
Apologies for the delay in replying Brian - 8000 worked AOK, thanks for the advice And now, a small update. With my second project (which has a 'due by' date attached to it, and so currently has priority) coming along nicely now and nearing being ready for paint, I've dipped back into this one to move it along a notch: Bagged up for the white portions of the markings to go on. Possibly OTT but as I'm new at this spraying game, better safe than sorry. and out from under the covers I'm pleased with how it came out - only one tiiiiny touch of bleeding/leakage on one of the roundels which will easily disappear when the black portions go on. I'll let the white harden for 24h then re-bag the thing for the red wingtips and diamonds on the fin. More later! Sepp2 points
-
(Mostly) Great results! Too bad on the decals, but sounds like you've got it sorted.2 points
-
 The whole thing looks like this at the end ... one drawn and one finished. Since the infield access and the reinforcement at the wing root are raised, some Tamiya tape had to be used, which I carefully carved into the rough shape. Here, for example, some phot etch would be highly appreciated!:2 points
 -
I've got a Matchbox Lysander setting next to my Matchbox Tigermoth........one of them is about to have a modern new kit of it.........I'm hoping ICM can fill the other2 points
-
Quick update - I've been adding some weathering and various conduits to the MLG bays. These bays are incredibly "busy" and Tamiya didn't replicate any of the hydraulic / electrical lines. This is one area that really could use an aftermarket insert. Still a work in progress, I'm going to add a few more lines and some fastening brackets, at that point, I'm calling these done. Also added (what I assume to be) the flight markings that were present on the MLG door. These weren't included with the decal sheet. Thanks again to Antonio for finding the pictures of the real thing that illustrated this. I forgot to bring the second door with me when I took the pics, you'll have to trust me that I painted on that marking as well. Thanks for looking!2 points
-
Update : After months and months of headscratching, I've finally found a way to attach the kidney shaped parts to the gearbox. They need to be fixed to the gearbox at exactly the spot where there's a hole for the screw that attaches the gearbox to the chassis. I've trimmed a plastic part of an old aircraft kit so that it fits in the hole, the copper tube will hold that part in place while I drill the holes : Here I've drilled the first hole and inserted a piece of brass tubing that will hold the kidney shaped part in place : Dryfit : Not a lot of clearance between the diagonal torsion bar and the suspension arms, but the real car looks exactly the same : I'm really happy that I've finally found a solution, now I can move on with this project. Sincerely Pascal2 points
-
ICM Gladiator slow build. Finished!
Paul in Napier and one other reacted to quang for a topic
So down to the paint shop we went. In the past I've had many mishaps with primers and stripping paint coats. After some soul-searching, I found out that the Tamiya Silver lacquer paint in spray can works best for me. Used as an undercoat, it acts as a fine primer, tough, reliable and forgiving. So I decanted the faithful TS-30 Silver Leaf from the can into my airbrush and started spraying. It went on smoothly. Too smoothly in fact. Because I went on to discover that the kit looks absolutely gorgeous under a silver paint coat. So much that it would be a crime to cover all these fantastic details with the drab green of the Belgian version. So presto, CHANGE OF DIRECTION. My Gladiator will be finished in RAF interwar livery. Hi-ho Silver! Here are the results of the first painting session. Notice the subtle difference between the metal paneling and the canvas texture Under-Wing/fuselage join Wing root Stab join Now it's time to choose a nice livery for the silver bird. All comments and questions are welcome as usual. Cheerio, Quang2 points