Leaderboard
Popular Content
Showing content with the highest reputation on 03/10/2020 in all areas
-
Thanks Dana, I sprayed them earlier, so making progress. Thanks Petr! Just wanted to share.....windscreen masking is off and no issues with paint leaking. I'm always worried about that occurring! Lost a bit of blue on the rear windows where the canopy will sit, but easy to fix. Nice to see the cockpit stayed together with all the handling these past months.9 points
-
.thumb.png.84c5d3a464f2dd83f0ac37a5aac81ec8.png)
Hasegawa 1/32 Bf 109G-2/R6 (JG 5) "Yellow 3"
daHeld and 6 others reacted to Antonio Argudo for a topic
Thanks gents for your words! cheers wings are glued, also I increased the dihedral angle which is a bit flat on the Hasegawa 109s, with plasticard and sanding the wing inner reinforcement, cheers7 points -
Finished ! A big thank you to my French friends for their help. And another big thank you to you, for your friendly comments!7 points
-
more pics posted over on https://www.ipmsnymburk.com/forum/viewtema.php?ID_tema=39718 jan6 points
-

1/32 ERA-3B Skywarrior - 3D printed / scratchbuilt
S.Pelletier and 5 others reacted to Dandiego for a topic
Well Ben, it was an experience of a lifetime for me. Made possible by......modeling. Our local IPMS chapter was asked to make models for a display at NAS North Island. All of us who participated were given an opportunity to fly out to a carrier. I jumped at the chance. Kind of sobering when you are filling out the next of kin form. Safety briefing...."we will only open the rear cargo doors if we are inverted in the water". Gulp! The trap was actually no big deal. Spent the night on board the Enterprise. Was on the LSO platform at night. "Don't worry, if an aircraft buzzes the platform just jump into that net down there". Gulp! Stood in the starboard catwalk while F-14s and EA-6B's were launched. Noise so loud that the 2 bones in my arm were vibrating. When the Tomcat spread its wings for launch they were over my head. Life moves on, the aircraft, the ship, and I.....all retired. Dan6 points -
Thanks mate. I let go some nice musical equipment to make use of the sale. And I was happy to do it. I have a new ambition. I want to make models. Good models. A childhood dream?.....perhaps. I love modelling. I feel it like I do when playing with good musicians. There is so much that is the same. Transcribing a performance is the same as studying a photo for details.... I find modelling utterly mesmerising and astounding.6 points
-

Building the Kitty Hawk T-6/Harvard in 1/32 Scale Now Available!
Greg W and 5 others reacted to chuck540z3 for a topic
March 8/20 Well I'm back from a bit of a break cruising the Caribbean in the Caribbean Princess, sister ship to the Grand Princess (California) and Diamond Princess (Japan) that have had the so-called COVID-19 virus outbreaks. My wife and I had a great time, but the thought of being stuck in quarantine makes me shudder, because it could just as easily been us. No more cruising for me until the world gets this bug under control. Scary times and yes I know the mortality rate is "only" about 3%. I just as soon not take the chance, especially at my ripe age of 65! A tiny update. I've also be procrastinating on just how to do this, now that the wings are assembled. Before assembly, this would have been super easy, so I had to think of a different approach. Here is what the fuel caps look like on each wing, which are perfectly flush. While some Texan/Harvards have them that way, they have been modified and most are as shown by Max above. First step is to cut a nice and smooth hole in the wing. To do this, I used progressively larger drill bits, then finished off the last third with circular files to keep the hole symetrical and smooth. I then cut some sprue rod to fit, drilling a hole in the top so that I had something to grab onto when inserted the rod in place. The rod was carefully measured, then glued into place at the bottom and top of the rod, leaving a significant depression in the wing, just like the real deal. I then fashioned a fuel cap out of a few bits of spare PE brass. These are only dry fit, because I will paint them red and glue them later at the end of painting. The other side, to show the depression in the wing. Pretty good- and much better than before. That's it for now, but I really must get going on this build before the weather starts to turn nice. Once it does, my modeling Mojo goes into almost complete hibernation, which will drag this build over the summer. Cheers, Chuck6 points -
I just needed to finish something after a bit of a break from 1/32 so this is out of the box. The kit is okay, but detail is lacking in some areas and the gear are super flimsy. Not my best work to be honest, but nice to have it done.5 points
-

B-51 Back at it
Starfighter and 4 others reacted to Dandiego for a topic
More scribing. Dont know what these are but....here they are. Have worked on the transparencies. Round starboard window, overhead window and nose camera window. Dan5 points -
Small update. Went ahead with wiring up the 2800. I used some brown craft wire I found in a dollar store. Looking at some other online builds I noticed a lot of people drilled out the connection points for the ignition ring. I'm not that much of a masochist so I just fixed them behind hoping that staring at the engine through a closed cowl will hide that fact. Used some Ammo "Starship filth" for the weathering and some small chips and scratches. Hoping to finish up the cockpit tonight and make some progress on this build. Cheers Jeff5 points
-

Standing Down
Trak-Tor and 4 others reacted to chuck540z3 for a topic
While this news is surprising, I'm glad it isn't truly sad, like you were leaving the site for good. Your fingerprints will remain all over this terrific site for many years to come and from what I've seen of the other Mod's, it will remain in good hands. Thank you Kevin for all your dedication and hard work here at LSP. Now get modeling again and show us what you're building! Cheers, Chuck5 points -
Some more goodies for the Gladiator (and others) on the ICM's way: www.facebook.com/ICM.Models - March 2020 Releases Juraj5 points
-
First time modeler? Revell 1/32 F 16. Right scale, affordable, looks like an F 16.5 points
-

Zvezda Star Destroyer - a new detailing project
Greif8 and 4 others reacted to The Madhatter for a topic
I had the camera out today for other things and decided today is a good a day as any to take a couple of update shots. I'm not as far along as I would have liked but I had the spare time. I'm almost finished the top. I just have to finish the edging and then the top will be considered done. I test fitted the bridge to the body to make sure I could. There are definitely going to be fitting issues but nothing some super glue won't take care of. Looks like I'll also have to add some more details once the body has been glued together to help tie in the areas better. This adds to the ever compounding issue of painting first or not (first world problems....) Anyways, that's all the pics I took but thanks for looking in. Si5 points -
Hasegawa 1/32 N1K2 Shiden Kai (George)
Jeff T and 3 others reacted to bdthoresen for a topic
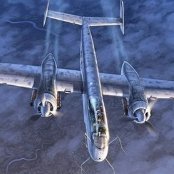
Howdy, all! Thought I would show one of my latest projects on the bench, Hasegawa’s 1/32 N1K2 Shiden Kai “Late Version”.......I started this some weeks back as a bit of a “pallette-cleanse” due to some heavy projects on the go. I have been “project-locked“ for some time, and decided that this kit might get me out of my own head! As always, I have started with the cockpit.... The cockpit was sprayed with a black base coat, followed by a coat of Model Master RLM82 Dunkelgrun, as I find it to be a very close match to some pictures I came across of the George that was restored by the Team at Champlin Fighter Museum. I experimented with some different painting techniques to add highlights and shadows, as I found that the cockpit, when assembled, is really dark inside the fuselage. Black components were edge-highlighted in black grey, and the natural wood knobs were painted in Model Master Radome Tan, followed by a coat of Tamiya Clear Orange. Chipping was done by hand with a fine brush, as was some of the generic placarding. I also took a page out of some armor modelers’ playbook, and also forced highlights and shadows with oils. (Martin Kovac is excellent at this.....check out his channel “Night Shift” on the ol’ YouTube!) And another. I still have to put some clear over a few instruments lenses on the radio and side consoles. I will also add some rudder pedal straps from leftovers of an HGW seatbelt set..... Seat assembly was painted as before, HGW seat harness set was installed, and draped in a bit of a haphazard manner. Still need to weather them slightly further. Another. I like the chipping on this one. Still need to add a few scratches with a silver Prismacolor pencil. I will complete this just before I install the cockpit. Right sidewall. Raised details were highlighted with a mix of the base color, and white. I then applied oils for weathering, including a washes and filters. Left Sidewall...... And lastly, the instrument panel. All dials were individually punched from the Hasegawa decal sheet, and applied. The power wire for the reflector gunsight was added from .015” lead wire. I will add the reflector glass from tinted acetate, just before installation of the canopy. I also have the fuselage halves glued together, as well as the wings. I plan to take more photos when there is something more interesting to look at. Thanks for checking in. As always, comments, critiques, and advice always welcome....Take care, until next time..... THOR4 points -

MiG-9 "Fargo" LEMkits 1:32
mywifehatesmodels and 3 others reacted to kalashnikov-47 for a topic
One you won't see every day. Here is my 1:32 scale LEMKITS MiG-9. These kits are very well engineered.4 points -
more pics posted on https://www.ipmsnymburk.com/forum/viewtema.php?ID_tema=39718 jan4 points
-
‘New’ special edition kits with no decals and separate decals .http://www.wingnutwings.com/ww/ A cheaper option if you have spare decals and don’t want lozenge decals. Good move. Bring on the Fokker D7’s - and everything else!4 points
-

Resin Switches and Knobs
ColinR and 3 others reacted to Pete Fleischmann for a topic
Here’s how they look on photo etch- cheers Pete4 points -

F-100D Thunderbirds SIX
Durangokid and 3 others reacted to themongoose for a topic
My latest Thunderbird in the series comes to you loaded down with aftermarket goodies. I had picked up quite a bit over time for it so decided I would have to do it wheels down. yes I know, an oddity for me. Then as I was building it and looking at reference pictures I only saw 2 with drop tanks on it. Hey there's an idea, if I am going to break up the Thunderbird graphic on the bottom let's load it up. The perfect theme came to mind, HEADING HOME. Trumpeter shows this smoke system on the box art but there's nothing in the box haha. So I made it up with piano wire and shrink tubing...just suttle heat affects on the exhaust. Most pics of the Thunderbirds show this area very shiny. The museum birds have been polished to death, I avoided doing those :-) Super fun build with lots of help from the forum. Check out my WIP for details. Thanks so much everyone!4 points -
Thanks for all the generous comments and support, guys. I'll be around for a while longer yet, as I have a few long-standing plans for the website that I need to bring to fruition, and with my load here already becoming lighter, I hope to start working on those things soon. I've also still got a few reviews to do, so look out for those, too! As for modelling, a big part of my decision to step down is the realisation that I haven't finished an aircraft model in over 2 years now, and with my bench time having dwindled to zero, I've been reduced to being a bystander in a hobby I've worked so hard to support. Having found some time to build a Deadpool figure over the January holidays, I was struck by how emotionally satisfying it was to be building something again, and I certainly need that outlet in my life these days. So, once the dust settles, I do indeed hope to be seeing you all again in the WiP forum, but as an ordinary LSP citizen once again. Kev4 points
-
The antenna mast - part 2 Well it's done and glued onto the canopy but its predecessor hasn't submerged. Here it is: The wire is made from elastic thread (Uschi's fine rigging thread). The insulators were done with a drop of superglue followed by a blob of white glue, which didn't adhere to the thread on its own. The cone was made from 0.2mm sheet smash moulded over a sharpened tooth pick. That's it from me - the next post will (finally) be in the RFI section. Cheers Joachim4 points
-
So I'm thinking this one is finally done. I added a few bits to the interior of the canopy frame and then used some plastic polish to give it a decent shine. Next on went the dorsal antenna (these later versions didn't have a wire coming off it). Lastly, I added safety wires to to the napalm tank ingniters and the rocket fuzes. They are present in the picture below and were a feature on all underwing ordinance, WW2 to present. If you zoom in on this picture, you can see how the rocket safety wires are secured to that slot in the leading edge of the forward stub launcher. You can also make out the safety wire for the pylon mounted 500 lb bomb/napalm tank hanging down. : These are present on all underwing ordinance, WW2 to present. Whilst on the subject, I'm a big fan of realistic ordinance. It's surprising how many super-detailed, realistically weathered builds out there have immaculate, glossy bombs, with no safety cables, dirt, stencils, etc. Call me weird but I actually enjoy superdetailing ordinance. It's almost like a mini-model. Here is a 500 lb bomb I did for my last build, the Tamiya F4U-1D, Dark Blue Killer. Here's a shot that shows the final outcome. I'll be back to post some final shots and will do the obligatory RFI.4 points
-
.thumb.png.84c5d3a464f2dd83f0ac37a5aac81ec8.png)
Hasegawa 1/32 Bf 109G-2/R6 (JG 5) "Yellow 3"
daHeld and 3 others reacted to Antonio Argudo for a topic
I shouldn't get distracted from my Mustang build but I couldn't resist to start this one.... So, using the Hasegawa Bf 109 F2 kit as base to upgrade to the G2 version, it will be a "in flight" display so cockpit will closed with the pilot figure and not much of the details visible, this is the progress so far, cheers4 points -
Hmmmm, Cat shot in a C-2. Did that once. Strapped in, with a 5 point harness, told to keep my hands away from the release button. Feet off the floor and braced against the seat in front of me. They said that the cat shot would throw your feet up and possibly break your ankles. Full power to the engines, the entire craft is just straining and pulsing with power. And then ....whoosh. Tremendous acceleration and then .......a sense of floating as the cat stroke ends. Never forget the experience, it was over 30 years ago. Dan3 points
-

Waterslide decals without a gloss varnish basecoat
Modeller 01 and 2 others reacted to Out2gtcha for a topic
Ive used Future on decals (mainly just stencil type decals that have lots of clear carrier on them + text) that need to be applied to foil. In that case polishing is not possible as it destroys the grain of the foil, which is what generally gives the foil its realistic appearance. In that case I just put a drop of Future down where the decal should go, then press out with a warm damp cloth from there.3 points -
The licence is needed when a trade mark is used. A model manufacturer can recreate a scale "representation" of a real thing without any restrictions. That is pretty much the same as making a sculpture, painting, photo, etc of a "real thing". Any such design is an original artwork, just like making a model of, let's say, the Eiffel Tower from scratch is the property of the artist who created it, not the Gustave Eiffel company. However, if the model manufacturer wants to use a trade mark such as Jeep, Boeing, Lockheed, they need permission. That explains why sometimes models do not have the name or type on the box. Tamiya has a "2 1/2 ton 6x6 Truck" that is in reality a GMC "Jimmy". Italeri has a "1/4 ton 4x4 Utility Truck" that anyone will instantly recognise as a Jeep. So, there can be ways around the licencing, but sometimes it is inpossible. How do you describe a "North American P-51 D-5NA Mustang" in other words? In any case, sometimes the licence may not cost that much. I know of cases where the permission to use a trade mark was granted for free. I also know of one case where the licence fee was a payment of 1 dollar. Radu3 points
-

1/32 ERA-3B Skywarrior - 3D printed / scratchbuilt
Out2gtcha and 2 others reacted to blackbetty for a topic
...my portugese is a little bit rusty....3 points -
Some more photos, or it didn't happen - right? Interior 'blanking' on auxiliary doors: Some additional weight - probably overkill... Fuselage has now been drying overnight in a warm place - and has now had all the joints sanded back - remarkably straightforward as the kit fits together so well: Intake ring and tail pipe fairing test fitted: Jet pipe fairing has had superglue applied to the visible internal joints (it's constructed from two halves) - this will be sanded back later and fitted to the fuselage. However - an earlier post on this thread and a few reviews of this kit when it was released have pointed out the internal shape of the intake ring can be improved: You can see the step in the above image that needs blending with the rear end of the intake ring. My plan (if I could find my Milliput) is to blend in some epoxy putty on either side of the ring - cover the intake section already on the fuselage with cling film - and push the intake ring into position - with the epoxy putty still soft. This should mean the main intake section acts as a mould so that the sculpted epoxy putty on the ring matches the top and bottom flats in the main intake section perfectly - at least that's the idea - *if* I could find my *@!&*+!! Milliput! Will remove the intake ring again after a few hours - as soon as the Epoxy Putty starts going off - but not hard. I'm confided I'll then need to do some more sanding and shaping - before fitting the intake ring to the fuselage. More soon - if I can find my Milliput... #frustration Iain3 points
-
Some nice pictures here, but when based at RAF Leuchars, good for seeing how worn they got. http://axis-and-allies-paintworks.com/e107_plugins/forum/forum_viewtopic.php?13611 Will follow your build with interest as i was planning on doing the same with my Mossie but an early FII (maybe no Gee fitted) or 3E or 3H. Darren3 points
-

PR.XI & Mk.Vc - Revell Mk.IXc & Mk.IIa kits
VW Chris 1969 and 2 others reacted to Wackyracer for a topic
Primed and test fit Scratch built the storage rack for the extra oxygen bottles and stratched 2 more from sprue and plasticard. Beige one is from a hasegawa kit. Revell ones are only 75% round and hollow. Will add the tubes once installed and painted.3 points -
Small update. Haven't had as much bench time this weekend, and didn't get much done. Part of the problem is that I keep finding things that I don't like about the kit parts, and I want to fix them, like the cowl flaps and the landing flaps. I ordered a set of PE flaps, and decided to have a go at scratching the cowl flaps. I showed them next to the kit parts for comparison. I'm still working on the nose. The resin got more bubbles in it than I would like, and it has taken a while to fix them, so I'll post that later. Tim3 points
-

NLLSP- No Longer a Large Scary Project- finished
Alain Gadbois and 2 others reacted to chrish for a topic
I think most of the painting and chipping is done on the fuselage, now I can continue gluing parts together again for a while. Home made masks and painted on markings, It seems I go through a lot of masking tape on my builds. Thanks for looking3 points -

1/32 ERA-3B Skywarrior - 3D printed / scratchbuilt
BiggTim and 2 others reacted to Starfighter for a topic
Yes, all of them were printed on my Anycubic Photon. I have bought a new resin and I am experimenting with the settings; in addition, curved parts like the seats always have tendency to show "steps" as the printer is limited by the resolution of it's LCD screen. I could try to angle the parts on the build platform but this would cause other inconveniences. In this case, it is easier to use a little bit of putty to get them smooth. All parts need post-processing anyway.3 points -

1/32 ERA-3B Skywarrior - 3D printed / scratchbuilt
HerculesPA_2 and 2 others reacted to Starfighter for a topic
It's probably getting a bit boring but it's all I can show at the moment... I have finished the basic structure of the A_LORAN console behind the Plane Captain's seat. New side consoles for Pilot and Navigator are ready as well. Next, I will draw and print the fron IP before I can get back to some 'real modelling. And the one with a ruler requested by Mark.3 points -
Salt weathering done......and hard to see in pictures, of course. But, at least in person, it helped tone things down. The insignia's definitely look better (first picture, super dark for some reason on it, much lighter in person???). Definitely looking for opinions here. The main panel lines on the fuselage, I shaded them with smoke and I'm not sure if I went too nuts/dark. Thoughts on how they look? Should I back them down a few steps so they don't stand out as much? Let me know what you think! Overall progress.....3 points
-
Final wheatering stage I had one day completely dedicated to modelling yesterday and I can show you some progress (beaware: many pictures incoming). I started with the wheels. They recieved some MIG pigments which were blended with mineral spirit. And the outcome was....meh Those pigments worked fine as long as there was a tread but the smooth tyre looks weird. Tamiya buff to the rescue! Not 100% satisfied but a lot better than before. Onto the fuselage and wings. I wanted to do some subtle chipping (it's not a Spitfire afterall) where the crew would regularily stress the paint. That would be the handholds, the wingroot and the port rear canopy opening: And of course some panels on the wing especially around the oil and fuel ports. I used silver oil paint from Ammo and I'm quite happy with the result. Definitely more control than with acrylic paint and a sponge! The picture above brings me to the next part: fuel and oil stans/leaks. I added a dark filter using oils (umber and van-dyck-brown) to add a filthy shade followed by small hand painted streaks. The drop tanks saw some heavy wheatering - maybe not a 100% accurate but an eyecatcher nonetheless. Speaking of fuel and combustion - the Messerschmitt's DB engines aren't known for a clean exhaust gas (comparable to nowadays Volkswagen ) Therefore I went quite heavy and added more paint then usually. Using MRPs premixed paint for the first time, I have to say that I'm impressed. Nice flat apperance and for my taste a good ratio of thinner/clear/pigments and the colour comes close to my usual self mixed paint. The area close to the exhausts and their tips recieved some soot pigments for the extra dirty appearence! Afterwards I started pulling the masks and adding the small stuff and here we are: I'll start adding the antenna wires after the dreaded antenna mast is rebuilt. Maybe I can shoot the RFI pictures next weekend - stay tuned!3 points
-
Hi Guys, This is my Revell/Monogram F-102. Engraved, Aires cockpit and wheel bays (fit is terrible), Reskit wheels, Master pitot, Fündekals. A lot of work to make it look decent. This plane was based in Langley during the late 50'. Cheers Tristan [/url] [/url] [/url] [/url] [/url]2 points
-
Remove the nozzle every time you're ready to clean the airbrush for bedtime. The nozzles are very tiny so remove them over a box (I use the Iwata box) so they wont fly away. Practice putting on the micro nozzles with your hands, then just a micro turn with the wrench. I say micro because I have ruined two nozzles threads on a HBC Iwata nozzle and a Mr Hobby Creos Iwata micron clone. But lesson learned. Removing the nozzle and cleaning after every paint session will eliminate almost all problems. Every once in a while I drop my nozzles into a jar of lacquer thinner for a few minutes to get any gunk out that may have accumulated there. Hope that helps.2 points
-
2 points
-
I have the same airbrush and use mostly Mr. Color lacquer thinned with their leveling thinner or Tamiya thinned with the same. I also clean with hardware store lacquer thinner. I don't seem to have to take it down to clean it often as long as I flush it well after use but when I do I remove the tiny nozzle. I have one of those sets of airbrush cleaning brushes and scrub and flush the area between the nozzle and cup until it's clean. I don't use any lube and the needle never really sticks. Sometimes if it's been sitting a couple of days I'll do a quick spray with thinner to get it going.2 points
-

New Landing Gear Products
AlanG and one other reacted to D.B. Andrus for a topic
Hi Alan I have plans for the He 219(R), because I have the kit. However, I sold my Ju 88 and will have to look around for donor parts. Thanks for your suggestions. Cheers, D.B.2 points -
My new airbrush arrived yesterday and I promptly put it to work marbling the wings: While letting the marbling on the wings dry, I masked the fuselage markings: I then marbled the rest of the model, waited a few hours then laid down the aluminum dope layer. There is some edge cleaning to do, and the port side white cross is a little uneven relative to the black cross. My plan is to carefully sand down the metallic layer to correct these issues.2 points
-

RAF Akrotiri
Eagle Driver and one other reacted to Iain for a topic
This popped up on my Facebook feed earlier today - Lightnings and Akrotiri: Iain2 points -
1/32 is the way to go.2 points
-
Small update here: I received a set of new landing gear legs from Damian last week, and I just completed them, and the barracuda wheels. These things are very nicely done, and are very stout, and that metal oleo is awesome!! Can't wait to get them mounted on the bird, but I have a lot to do yet!! Tim2 points
-
OK, some cockpit work completed. It's straight-up Mig21UM, but the dual pairs of identical instruments on the IP suggest a twin engine bird. That's my story and I'm sticking to it.2 points
-
evening folks thanks for that pic Antonio, I haven't seen it before - interesting it doesn't show the black tail - I assume that came later. Also very little exhaust staining so that will save me trying to do that badly thanks again - great find! Hey Juraj - no the canopy stays as is - i would need to start again and well I just don't want to (plus I only have one set of PE parts which would be destroyed trying to disasseble it.. And as for seeing it, yes if you are at Telford again, it will be there ..so, as I said before it's the bitty stage in trying to get around the airframe in a logical order and get it finished, ..I covered the whole model and sub assemblies in flory wash and wiped down to give some definition to the rivet & panel detail (especially on the painted wings).. I removed the decal stencils and replaced them with rub down ones I had custom made - £60 for an A5 sheet so not cheap, but then a great improvement over the unavoidable decal film on natural aluminium.. ..these gun panels will be weathered & chipped when it's on it's wheels.. ..this vent door was added, the larger rear one will follow when I have finished the landing gear & doors.. ..the cockpit sill was added and the canopy panel that hangs here finished.. ..massive moment - the landing gear legs were fixed with JB Weld - funny story, about an hour after fitting them when the model was in a jig, I walked past it and thought 'I will just check a photo to make sure it's right' - well I looked and I had mounted them the wrong way around with the torque links facing forwards! A mad panic ensued, but as JB Weld takes 5 hours to cure I could just re-do them correctly (Thank God..).. ..the inner gear door hinges were fabricated and added - they are the two black structures on the centre rib at the top of each end.. ..the corresponding lugs were added to the doors.. ..and the doors were hung... I know there is a debate about having these up or down on the ground, but I made them and everything under them so I want to be able to see it - so these are down ..you can also see the retracting link assembly on the right connected to the door and piston, and a cable with fixings on the left which I assume stops them opening too far (?) although they are loose like this in refs I have so maybe not.. ..outer doors next, and as I found I have a load of leave to take from my day job before April 1st, I hope to have it finshed by the end of the month TTFN Peter2 points
-
.thumb.png.84c5d3a464f2dd83f0ac37a5aac81ec8.png)
Hasegawa 1/32 Bf 109G-2/R6 (JG 5) "Yellow 3"
109 and one other reacted to Antonio Argudo for a topic
2 points -
.thumb.png.84c5d3a464f2dd83f0ac37a5aac81ec8.png)
Hasegawa 1/32 Bf 109G-2/R6 (JG 5) "Yellow 3"
daHeld and one other reacted to Antonio Argudo for a topic
2 points


