Leaderboard
Popular Content
Showing content with the highest reputation on 06/27/2020 in all areas
-
Back to work on the G-14! In preparation for painting, I've treated the wing root fairing in a sandy color as they were commonly made of wood. I've sprayed the wing root area with hairspray to do some chipping after the base camo colors are established. I've had some difficulty using this technique on AK Real Colors paints so we'll just have to see how it goes. If I don't get any chipping at this stage, that's fine as the white will cover much of this anyway. While the hairspray dries, I'm going to preshade the other external components. All of the preshading is black. First, the panel lines. Next is the mottle to establish some tonal variation. I've decided not to mottle the upper surfaces as the white wash is going to cover it anyway. There are other ways I can establish some tonal variation in post painting. The first color to applied is RLM 76 Light Blue. I am using the AK Real Color Version 2 of this shade, thinned with Tamiya Acrylic Thinner thinned with 2 parts thinner for 1 part paint. Thin mixes are key using this preshading technique. The color is built up slowly, layer by layer, dialing in the amount of preshading that is desired. The light blue is extended up onto the fuselage sides. After the light blue is finished, the upper camo is painted. Again, I'm using AK Real Colors versions of RLM 74 and RLM 75 for the upper camo. Like the RLM 76, the RLM 75 is thinned 2:1. For whatever reason, the RLM 74 worked better with an even thinner 3:1 mix. During painting, I've discovered that some of the wing joints and vertical tail joint have cracked. So I've re-glued them and will perform some clean-up before proceeding. Next will be mottling on the fuselage.11 points
-
More test fitting trying to get everything to line up properly. The cockpit tub must fit correctly or the body shows major gaps requiring massive work. But before I can close the tub, I have to wait for a set of 1/24th scale placards and data plates to see if they will work. Not sure what I can do if they don't.10 points
-
8 points
-

1/32 Hasegawa N1K2-J Shiden Kai 343-45
Paul in Napier and 6 others reacted to Thunnus for a topic
You're welcome, Troy! I always appreciate a good tool or two! The wing part is from a 1/48 G.55 build that I completed years ago. It came with extra wings and fuselage halves for some reason. The insert panel joints were further refined using the D400 sander. I changed the sanding paper to 600 grit. I'm not going to apply another primer coat at this stage since there is still riveting to do and I don't want to build up too many paint layers. I decided to take a look at the engine to decide what kind of work I'll be doing here. It's a fairly complete representation except the cylinder banks are hollow on the rearward facing side. The exhaust ends are not exactly "hollow" but recessed as dimples. I used the D300 router to deepen the recesses a little bit. I spied a cutting head that came with the D300 and thought it might be useful to deepen the exhaust openings. I tested it out on a piece of plastic and decided not to risk damaging the exhausts. This tool isn't really made for the side-to-side motion necessary to hollow out elliptical openings. Doesn't look much better but the exhaust openings ARE deeper. Tipped with black paint, they should look the part. Here are the unmodified engine components stuck together using Blue Tack. The stubs on the wiring harness are very small but I think I can use a micro drill bit to hollow out them out to accept wires.7 points -
1/32 TRUMPETER P-40F WARHAWK “EL TIGRE”
mywifehatesmodels and 5 others reacted to Tolga ULGUR for a topic
This is 1/32 Trumpeter P-40F Warhawk “El Tigre” (41-14245) tactical code “87” from 66th FS / 57th FG Sicily 1943. The kit's top curve of the nose is off, it is not as it needs to be, it has a distinct hump. Thanks God the plastic is thick enough to sand it flatter. So I sanded this area a little. I have used Eduard instrument panel and CMK seat in the cockpit. Exhaust : Eduard resin parts for Hasegawa. Wheels : Hasegawa s P-40 parts. Rear view mirror & pitot tube are from Hasegawa spare box. Paints: Gunze Sangyo acrylics Decals : Nose art and "El Tigre" decals are from Custom Hobby Decals. Happy modelling ,6 points -

HH-60G Pavehawk Kitty Hawk 1/35 DONE!!
A-10LOADER and 4 others reacted to Pete Fleischmann for a topic
Hey all I won’t torture you with every rivet picture- but this part took me so long I felt like I had to photograph it! cheers Pete5 points -
One more view of the completed model with canopy in place. I just left it loose so it can be taken off to peer into the cockpit. And paired with its adversary, the Flying Tigers P-40B. The AVG and the 77th Sentai tangled repeatedly in the skies over Burma in the early months of 1942. And yes, just to close an earlier loop, I did fill in the ammo magazine inspection windows with Krystal Klear ;-) Thus the first pair in my overly-ambitious plan to build all of the principal fighters of the Pacific War in 1:32 scale and in this kind of historically apt pairing. That's the end of this one, so thanks for following along and for all the encouraging words and advice. After a bit of a nap, it's on to the Tamiya A6M2 Zero. That will get built as a plane from the carrier Akagi that took part in the Pearl Harbor raid. Once it's done I'm destined to return to the world of limited-run Special Hobby kits, since it will need to be paired with a P-36 - one of the few American planes that actually managed to get off the ground and fight back on Dec 7, 1941.5 points
-
OK, last bit. I got the optical gunsight installed through its little hole in the windscreen, added the tailwheel, and rigged the antenna. Here's some blow-by-blow on that last... First, here's the gunsight. I painted the back of the propellor in "Japanese Propellor Brown". The Nates used this (as anti-glare) only on the back of the prop blades. Later in the war many IJAAF aircraft had the whole prop and spinner painted in this color. I tried out a new brand of paint "Vic Hobby" that HLJ now carries. Figure the Japanese are by far the most likely to do the research and get these colors right. I also got some Nakajima IJAAF Dark Green from them (these are acrylics) that may figure prominently in a war-weary Ki-43 that I'm cogitating on. On to antenna rigging, I figured it was essential to reinforce the antenna mast or it would snap off, so I carefully drilled into it lengthwise and inserted a garden-variety sewing pin. Of course I drilled a hole in the fuselage to match. I drilled a hole in the top of the vertical stabilizer in which I would insert a tiny eye fitting made out of fine wire. It's a bit hard to see but I also drilled through the flange at the top of the antenna mast so it could accept a wire fitting. The wire I am using was sold for the purpose of detailing model car engines, but it works great here - very easy to form, and has a rugged black coating that does not come off. I made a couple of these little fittings to represent the tensioners / insulators on the antenna wire. That's actually the "tensioner" already hooked through the "eyebolt" that will get glued into the vertical tail. Even with the optivisor I am pushing the limits of what my eyes will resolve, much less my manual dexterity... And then that thingy plus the "tensioner" attached to the antenna mast. I closed the loops with tiny drops of CA, which will get painted black later. Now to rig the thing... I used this stuff, which is what Wingnut Wings recommends for biplane rigging. It is very elastic, so easy to get taut AND won't break or come loose if you bump it accidentally. Et voila - this went down in one pass, nothing broken, nothing smeared with glue, nothing needed to get re-done. The modeling gods smiled on me today for sure. Another view. I'm declaring victory on this one now and putting it on the shelf. Given how well today went, any attempts at further detailing are sure to only make things worse...5 points
-
I bought this monster right after it first became available and shelved it for some time. Too many things on the work bench ahead of it. Now it's time to get busy. First, a short history. 2106 is an SBD-2 Dauntless that joined the Navy prior to Pearl Harbor assigned to the "Lex" as part of the Atlantic Fleet. 2106 participated in war games conducted in the US gulf coast area and flew mostly from hasty dirt airfields. During this time, 2106 ingested a lot of dirt and dust through the intake of the radial engine, destroying the rings on several cylinders. Shortly after the war games, the "Lex" was reassigned to the Pacific Fleet and 2106 was dropped off at Ford Island for engine replacement. The "Lex" left for a delivery cruise taking aircraft to other islands and 2106 stayed at Pearl. 2106 survived the attack on Dec 7th and, upon the return of the "Lex", rejoined her on-board squadron. 2106 was then a part, six months later, of the Midway campaign. During it's second attack run, 2106 was heavily damaged, but made a one-wheeled crash landing on Midway and was later recovered. She then went back to the factory and was repaired, but instead of rejoining the fleet (newer SBD-3/4s were coming out by then), 2106 was sent to Michigan to join the training of new Navy pilots learning to land and take off from small aircraft carriers in Lake Michigan. 2106 was spun into the water and sank to the bottom of the lake. There she laid until discovered in the '90's and raised for salvage and preservation. 2106 is now on display at the Naval Aviation Museum in Pensacola, FL. This thing is going beyond extra large! The cockpit tub is a large sub-assembly with a lot of detail hidden from view most of the time. There is a section behind the firewall and ahead of the dash bulkhead where the oil tank, engine mounts, and intake are hidden. To make an access door or panel will, in my opinion, weaken the forward fuselage joints and make them took fragile. So I'm going to cover them and leave the details inside. I've added so more details the are easy to see, but were omitted from the kit. Seat belts, switches, and plumbing have been put the best that I can. The engine has received a wiring harness and some other enhancements...not many though. The decals are crap. I nearly destroyed one small decal in a test and discovered they are paper thin and don't adhere to much. So I'll paint most all the markings instead. This is the rudder with red/white strips added. I still have to thinly coat it with light sea grey leaving the strips to show through some. Such was the hasty attempt to change camouflage. I have added metal landing gear from Scale Conversions for their strength.4 points
-
1/32 Nakajima A6M2-N RUFE
CZPetrP and 3 others reacted to corsairlada for a topic
Very old 1974 TOMY kit plus MDC conversion color AK Real color , Gunze C, Yahu Instrument panel homemade mask - drawn in corel draw, mask which was edited and carved on plotter by my friend Pavel Shortland floatplane base, Solomons Islands, February 1943, flown by Lt. Keizo Yamazaki4 points -
what is the best F/A-18E 1/32
Michael931080 and 3 others reacted to Dave Williams for a topic
A can of worms with this one. The Revell kit has better detail (except maybe the cockpit, which is weak and seems unfinished on the Revell kit) and is generally more accurate, but is a real bear to put together. A few people have pushed through, but for a lot of people, the Revell kit isn’t worth the effort. The plastic is also soft with the Revell kit, and I have concerns whether the gear will hold up in the long term. Having both kits, my reluctant vote is for the Trumpeter kit.4 points -
Moving swiftly on here are the latest photos of the complete airframe, the wing to fuselage joints are really good maybe a smear of Mr Surface at the front but the rest are great, also requiring the same treatment is the starboard stabiliser to fuselage joint. Before I joined up the wing and fuselage I fitted the cockpit tub, as you cannot see the attachment points I did not know how well it was affixed so I added two supports to the bottom of the tub. The stabilizer joint And the wing to fuselage joins. Cheers Dennis4 points
-
Hands down Tamiya P-51. Great fit, great detail. The ZM kit has more detail that will be invisible after you complete the plane unless you build it skin off. But otherwise all that extra detail is wasted. The Tamiya kit fits together really well and is typical Tamiya as far as quality goes.4 points
-
1/32 Magister Test Shots by MikroMir
RadBaron and 3 others reacted to Anthony in NZ for a topic
Just ordered one off ebay, there are a few up on there now with free shipping from Ukraine https://www.ebay.com/itm/Mikro-Mir-32-002-Miles-Magister-British-training-aircraft-1-32-scale-model-kit/224040715995?ssPageName=STRK%3AMEBIDX%3AIT&_trksid=p2060353.m2749.l2649 Just if anyone else is interested Cheers Anthony4 points -
US Navy pilot hands out of cockpit adapted to F-14 wider fuselage by Reedoak
A-10LOADER and 2 others reacted to norbert for a topic
Hello ! We adapted the US Navy pilot hands out of cockpit to the Tomcat wider fuselage , BTW, we changed also the MBU-23 by a MBU-14 mask. the open face version is designed to change the face without too much work (by us, it's still a CAD work). For late Tomcat : Cheers Norbert3 points -
All, While I have been a member of LSP for a couple years now, I have not completed a 1/32 build until now. Here's is my first submission - a 19 month build version of the HK B-25J glass nose, made up to resemble the original "The Ink Squirts" as based on Okinawa in the summer of 1945. This took somewhere around 500 hours of time to complete. For the most part, this is an OOB build. I did get the correct props, added metal landing gear, Brassin wheels, used Finemolds ABS plastic seat belts (they are very nice!) and used the Profimodeler brass gun barrels. The paints were a mix of things. Most of the interior was done using Vallejo Air paints. This is the first time I've ever used these paints and I have to say they are excellent. The only ones I did not care for were the metallic ones. They were too grainy for my tastes. The exterior of the plane I first coated in Model Air Grey Primer then applied an overall coat of Floquil Old Silver. I then masked off areas and used a couple different Alclad metals over this for panel variations. Aside from the Grey Primer. None of these were applied to cover 100% as I wanted slight variations in the aluminum skin tones (which can be seen in photos of the original aircraft). Glass lights were painted with Tamiya clears (green, red and orange) on the back side of the clear plastic parts that were then glued into place. Some the engine parts were painted with Model Master Metalizers. Weathering was applied by hand (literally, with my fingers) using a mix of Mig Old Aluminum, Black Smoke and Volcanic Ash pigments mixed in with some of Doc O'Briens Grimy Black weathering powder (these powders can be found in railroad modeling catalogs). For the liquid weatherings I used Mig and Model Master washes. My father was stationed on Okinawa at the end of the war (when this plane was there, too). He often commented that the planes were dusty/sandy from the island sand. So my intent on weathering was based on this and what I could see in photos. Not real dirty/grimy but somewhat dusty-dirty. I have not installed the U antenna on the front glass yet. This did not come with the kit and was purchased from Profimodeler also. Decals were from Kits-World and are very nice! They were applied directly over the Old Silver/Alclad paints and sealed with a 50/50 mix of Polly S Clear Satin and Flat Clear (this seemed to approximate the sheen of the aluminum best to my eye). For the rivet counters out there - Yes, there are some errors. But it's a model. I enjoy building them and don't worry too much about, well, the rivets. The kit cockpit glass is wrong for this particular aircraft. If you search for images of this plane, you will note that the left front of the cockpit has metal framing around the image painted on the glass (the pilot?). These frames are not molded into the kit glass. If anyone has any questions about how I did something on this build, please feel free to contact me. Apologies about the fancy backgrounds in the images. My photo studio was set up to photograph a model (as in woman) and I didn't have time to change it over to a light table (which this model, being as big as it is, probably would not fit on anyway! LOL!). Hope you all enjoy and thanks for taking a look! -Ro3 points
-
Thanks guys! Here is the mottling applied to the fuselage sides. I did get a little bit of hairspray chipping on the wing roots to materialize. The underwing markings were sprayed using custom-cut masks. In order to increase the contrast between the underlying camo and the white overspray, I decided to increase the mottling. Now I need to figure out which markings would go over the white overspray and which ones were retained from the original scheme.3 points
-
So small progress. I have had airbrush issues and was waiting for parts. Anyway............... I have finished the main canopy. It is not as clean as I would have liked but it will have to do. Flaps have been installed. And the forward wheel well doors are on. I snapped off the nose gear, it is back on but needs some more work. All in all a decent effort but not as good as I had hoped. Still.... it will be the only Pirate on any table I put it on. Dan3 points
-
Best 1/32 Mustang in your opinion?
LSP_K2 and 2 others reacted to Dave Williams for a topic
I don’t think I’ve ever heard that the Z-M P-51 kit is easier to build than the Tamiya kit. It’s usually the other way around. One thing the Z-M kit has going for it is the price, but at the moment, the $99 shipped price on the Tamiya D/K kit moots that advantage. It’s hard to say no to the Tamiya kit at that price.3 points -
A bit more work. The colours in this pic seem much too bright, probably because of the camera setting or light. It is better under natural light.3 points
-
It was a strange feeling to see him. He was in the USMC and the video must of been from around 1966 or 67. I was only 7 years old at the time but remember how he was when he came home. Watching this series was a real eye opener for me. He's gone now. He would have been 72 now but the agent orange finally got him with cancer. Like many vets he didn't want to talk about it so I don't know much about his service. I understand he did 4 tours and I know he earned 3 Purple Hearts.3 points
-
75 Sqn RNZAF Mosquito Detailed Build
Chris Wimmer and 2 others reacted to Anthony in NZ for a topic
Ok the nose gun bay is pretty much finished. I re-did the screw attachments for the screws around the edge of the allu cap (these screw the cap to the wooden structure and frame inside the edge of the nose) as I felt they were too big the first time I did them, si I filled them with CA and redid them a better size and the correct number. In reality there are more flush head rivets....but lets be honest, they are barely seen looking even in real life so I decided not to add them all for fear it will start looking like it had once been used as a pin cushion. Balance is the key me thinks. All of Roberts gun bay is now in and I just have one or 2 tiny additions to add once Air freight is opened up to NZ again. HGW are kindly sending me the numbers 1 & 4 which I messed up and I am waiting on suitable tiny chains to arrive to complete the suite. But its pretty much finished until I can sort these items. All the wiring for the lamp, terminal blocks and suppresser box were scratchbuilt and wired in G45 camera fitted along with ammo feed chutes etc. A couple of pneumatic lines for the firing solenoids need adding, but waiting for suitable chain until I pop these last couple in. Wolf, notice the 2 wing heads are lock wired together. Looking at photo's though they were done on some airframes and not others...so take your pick. Anyway, hope this is interesting to those interested in the Mosquito Cheers Anthony3 points -
Wow, time has flown! That was 15 years ago! Thanks again for your kind words. At that time I was fascinated with the 1/32 models by Rodney Williams and I was trying to imitate him. I was not even thinking about turning this kind of work into "kits", but because of this model Vasko Barbic of Warbirds Models contacted me and asked me to make some masters for resin conversion/detail sets. At his request I made a few Hurricane sets that were later sold under Warbirds Models label, then under the MDC label and finally under the Grey Matter Figures label. This was really the "start" of my professional model design career. It led to all kinds of designs for complete models, conversion sets, detail sets, tools, decals, and lately CAD design for injection-moulded kits. I met a lot of great people along the way and I found myself in great situations where I had to pinch myself. So, even though that particular model was not turned into a kit, it led to a lot more other exciting stuff. Radu3 points
-
Unmasking the canopy is always a nervous moment for me, but this one turned out nicely - no leaks, none of the paint peeled off the canopy framing. This is also the first post using images hosted on my new ImageShack account (thanks for the tip, Kevin). So hopefully these are now permanent, will not expire, and perhaps will be easier for some folks' browsers to load. Closer-up image: I may actually finish this thing today if I can wrap work up in a timely manner. Which would be nice on a Friday regardless...3 points
-
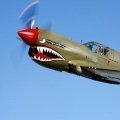
Finished! HPH Mig-15 Korean War
Daniel Leduc and 2 others reacted to Padubon for a topic
Primer time.3 points -
www.facebook.com/mikro.mir.dnepr/ - 1/32 Miles Magister Mk.1 Test Build And more pictures here: www.greenmats.club - Miles Magister Mk.1, MikroMir 1/32 Juraj3 points
-
For sale in the UK , with bust £81.00 or standard £63.00 https://www.scalemodelshop.co.uk/products/new-products Bob2 points
-
1/32 Trumpeter F-100F
LSP_K2 and one other reacted to Mark Jackson for a topic
I always find it odd that no amazing decals came out when the single seat version was launched. There's a whole D&S book that covers some of these great markings yet all that appeared were boring SEA camo markings.2 points -

1/32 Trumpeter F-14A Tomcat
Greg W and one other reacted to Mark Jackson for a topic
I've been busy and can now say that the two intakes are attached to the lower fuselage! The fit of the Trumpy parts is poor but with some pre-planed plastic strip supports and re-enforcing points you can obtain a fairly convincing aerodynamic line. Of course you will need copious amount of filler and lots of sandpaper. One area which was bothering me was the underside of each pylon; no AIM-7's meant that the connection point details would need to be created. Good old Trumpy just give you an open area which would be covered by an AIM-7 missile. I actually managed to airbrush without tears, tantrums or blood spillage! Vallejo white primer then model color white with thinner and airbrush flow improver. I adjusted the pressure so that when spraying it was about 20psi and it was an enjoyable experience. All the control surfaces have been filled and sanded, at least Trumpy had the sense to place the seam on the undersides.2 points -
.thumb.png.84c5d3a464f2dd83f0ac37a5aac81ec8.png)
1/32 Tamiya P-51D-5 NA Mustang "Ferocious Frankie"
Greg W and one other reacted to Antonio Argudo for a topic
thanks for the interest mate, but no update on her, maybe soon if I get the Mustang Mojo back, been doing 1/48 109 G10 on the other hand, cheers2 points -

My first double build - Calling them DONE - Pic’s in RFI
lrmf777 and one other reacted to Stokey Pete for a topic
This project was supposed to be the start of me building a little quicker, being used to working on multiple kits, and from my very patients wife’s perspective.....thinning the stash. I’m beginning to wonder if there’s some model kit after hours reproduction going on, I’ve built two and gained 3 more kits to the pile. With a Viggen to come towards the end of the year too, I’ve gained double over what I’ve built The ‘Flanker’, F-15E, and Harrier are the magically appearing kits.2 points -
1/32 Fokker Dr.I from Meng
thierry laurent and one other reacted to Dave Williams for a topic
Those high prices only exist because they are believed to be OOP.2 points -
I’ve just spent an interesting couple of hours listening to personal accounts from people who trained as w/ops at Yatesbury (No. 2 Wireless and Radio School) in Dominies. Accounts varied in some respects but it’s largely due to when they trained and the radio equipment they used. The earlier gear, up to the end of 1943ish, was the 1082 and 1083 receiver transmitters. They were big, bulky, and quite difficult to use in some respects such as tuning. They needed coils changed if the frequency was altered and the students had to carry a large bag with them containing an array of coils. Conditions in the planes were described as cramped (they were also of course in flying gear with parachutes) and numbers of pupils (when mentioned) was 3 or 4. Then the Marconi T1154/R1155 sets were introduced, frequencies were changed by simply turning colour-coded dials, so easier to use, no need for bags of coils etc. There were 5 seats but 6 pupils were often carried, somebody sitting uncomfortably on a “shelf” at the back of the aircraft. There was only one transmit (morse) key available which was on the desk in front of the transmitter, so they took it in turns to operate it over the length of the flight. The instructor (sitting alongside) gave each student a station to call up and a message to pass on, or a signal would be sent from a ground station which the pupil had to answer. One Australian chap said his initial w/op training at home was using WW1 equipment so the Marconi gear was a revelation. No real clue about layout apart from the mention of the number of seats, and what can be deduced from that.2 points
-
2nd. Just found the silly "extra features" such as retractable landing gear, movable control surfaces, etc a bit annoying.2 points
-

Old Revell Hurricane build thread
Troy Molitor and one other reacted to Wackyracer for a topic
Oh WOW. Radu's build was one of the reasons I came back to the hobby! I remember going to a local airshow and photographing the planes and found a model kit vendor. I'm pretty sure I bought a 72nd spitfire and a fw190d-9 (arch enemies ) to build). I then spend the next few days trawling the internet (via dial-up) to find how these things went together (last builds I was probably 10 or 12). It was during these trawls I came across LSP and this build and was captivated by the extras and scratch building. With my naive eyes I thought the kits hadn't improved and it was the builders adding all the details! I also tracked down Model Airplane International 051 October 2009 (so now I realise I've been back for over 10 years) and a nice build of a SH P-39 in RAF markings again with scratch building and extras. Both these lead me to where I am now. Thank you for tracking down this build thread, i've been searching for this many times. Its now saved in fav's forever. Oh I got a Revell Classic 32nd Hurricane sortly after. Made a right old mess of it 10 years back and it's now a paint mule!2 points -
Make the others jealous
BloorwestSiR and one other reacted to LSP_Mike for a topic
How does the RFM kit compare to the AFV Club kit? BTW, the old italeri kit had a partial interior, and link tracks.2 points -

Lukgraph DH 89 Rapide
mozart and one other reacted to thierry laurent for a topic
Thanks Max. I will try to scan the pictures as well. Barracuda has fortunately released this late radio system.2 points -
Old Revell Hurricane build thread
Troy Molitor and one other reacted to monthebiff for a topic
Your Hurricane is a masterpiece Radu and it certainly helped me and inspired me to take my PCM kit to the next level including the raised wing rivets, cost me an absolute fortune in resin rivet decals at the time!! Regards. Andy2 points -

Make the others jealous
Dany Boy and one other reacted to BloorwestSiR for a topic
I forgot to post pics of the finished display case. With the doors on: This is the first time I've had all my finished Tamiya Spitfires in one spot. I swung by my LHS today and picked up some new armour kits.2 points -
Fw190 D-9 with Ta152 tail Brown 4 - info from Crandall vol 1 needed
Troy Molitor and one other reacted to Jerry Crandall for a topic
Hello Nick, The color recommendations in EagleCals 126 and page 284 of our Dora vol. 1, match, describing "Brown 4" W.Nr. 500647 of JG 26. The colors are based on the computer analysis of "Blue 12" W.Nr. 500570. One of the problems in identifying colors on D-9s is some of the factories used recycled wings. Cheers, Jerry2 points -
Main colours on. Next up, decals. Sorry for the cruddy pics.2 points
-

1/48th Boeing B-52H Stratofortress
Greg W and one other reacted to tomprobert for a topic
I fancied doing a bit of work on the BUFF last night... IMG_0179[1] by Thomas Probert, on Flickr The wife took this unbeknown to me as apparently she wanted to show her girly pals how big my... model is2 points -

FW190D-13 Yellow 10 conversion
Hartmann52 and one other reacted to BiggTim for a topic
Wrapped this one up this evening - my second for the year!! That's some kind of record for me, and it's only May. The world must truly have gone crazy! A couple quick teaser shots with my phone for now. I will take some more in the daylight tomorrow with the DSLR and post them in the RFI section with details in the next few days. Thanks!2 points -
.thumb.png.84c5d3a464f2dd83f0ac37a5aac81ec8.png)
1/32 Tamiya P-51D-5 NA Mustang "Ferocious Frankie"
Greg W and one other reacted to Antonio Argudo for a topic
Thanks Chuck, very appreciated from a superb modeler like you, we are working both for NAA aircraft at the moment cheers thanks John for the info, there is a new Alclad decals in the market, coincidence? https://www.hannants.co.uk/product/PF32412P?result-token=mBaQK&fbclid=IwAR0v6EtqXi2X4XmsWFtM9X8zJLffqbX-ZTdVfoXWJy-4LYraxRZMGCsWD84 I have not update since it's been boring stuff and not much visual, lots of sanding and filling rivets/panel lines... still more to sand and prime ahead but getting closer to the paint phase, most of the "silver" paint has been striped using superglue cleanner, I find out by accident, it works fine and does not damage the plastic, the wheel bay will be closed since is the position depicted in the image I'm rendering, so that excuse me from losing my mind with those pipes and wires detailing also a big shout to my friend Mathieu who kindly sent me stencils made in the silhouette for "Ferocious Frankie" markings, cheers2 points -
Messerschmitt Bf-109E-3, 1:32, Cyber Hobby
turbo and one other reacted to Hartmann52 for a topic
Good afternoon friends. I beat him. Not everything turned out as planned, but ... I already forgot it and now in work a new model I apologize for the quality of the photo - I plan a high-quality photo session, and then give it2 points -
1/32 Tamiya P-51D-5 NA Mustang "Ferocious Frankie"
Antonio Argudo reacted to hworth18 for a topic
Any updates on this?1 point -

75 Sqn RNZAF Mosquito Detailed Build
Anthony in NZ reacted to LSP_Kevin for a topic
Superb, Anthony! Kev1 point -
Old Revell Hurricane build thread
Troy Molitor reacted to dennismcc for a topic
That was a most impressive build of a kit that I often opened the box then put the lid back on and put it back in the stash. Cheer Dennis1 point -
So after having the kit smudged by Tibetan Monks and getting my attitude straightened out a bit with the CF 188...I have decided to try revisiting the cursed Kinetic Kit. I first dealt with the splitting seams which (knock on wood) have, as yet not re-appeared. Then since I had a dozen sheets of foil that I had originally planned on using on a HK B-17 (which ultimately received Alclad and was the better for it) or building an aluminum canoe...I figure I'll stick it all over this kit and kill two birds with one stone. The saga continues; Thanks for looking1 point
-

1/32 Hurricane
Landrotten Highlander reacted to Radub for a topic
I know I said that the next pictures would be of painted parts, but some other stuff got in the way and I never got around to even stirring a pot of paint. (No, it is not an open gunbay, just in case you were wondering). I never posted any pictures of the finished landing gear. Here are a couple of photos. Radu Brinzan1 point

