Leaderboard


Popular Content
Showing content with the highest reputation on 11/11/2022 in all areas
-

1/32nd A-20G coming from HK Models
blackbetty and 13 others reacted to barkhorn for a topic
OK guys, you can start looking for errors now: Source: HKM FB14 points -

SPECIAL ANNOUNCEMENT - Wingnut Wings
Pup7309 and 11 others reacted to spruebrothers for a topic
SPECIAL ANNOUNCEMENT Sprue Brothers Models LLC is ecstatic announce the pending arrival of a special purchase of Wingnut Wings inventory. 43 different items (all are kits except for 2 items) are expected on this pending shipment which we are hoping to arrive within the next few weeks. This full container arrived in the US last week, and it is currently in the rail shipment queue to get it to our warehouse in Liberty, MO from the port. Due to the shortage of carriages (what containers are transported on), we are patiently waiting its turn to transit on the rails. We have “turned on” all the items (https://spruebrothers.com/wingnut-wings/) that are expected to be on this container so allow you to put in for Notify When Available requests. We are not planning on accepting pre-orders. It will be first come, first serve once they arrive. Just watch our new arrivals page for the announcement of their arrival, or you can request to be notified by email using the Notify When Available feature of our webstore. Approximately 14 months ago, we were contacted by Wingnut Wings inquiring about whether we were interested in helping sell their remaining inventory from when Wingnut Wings closed. The process was not fast. WNW finally accepted an order from us in late June, which finally shipped in September. Now we are anxiously awaiting its arrival. Please note that we do not know if there is any more remaining inventory nor do we know if we can obtain any more inventory after this shipment. Please refrain from calling or emailing us for any additional information. All the available information is listed here. We are very short staffed due to the current labor situation so we want our staff members to focus on getting orders shipped out rather than trying to answer questions that they do not have any further information.12 points -

MQ-8B Fire Scout - Brengun, 1/32
KiwiZac and 11 others reacted to Starfighter for a topic
Thanks a lot Maru and Pete! Well, building the frames was already super annoying, but it's easily topped by webbing the nets onto the frames. It's super tedious, boring and takes way longer than it look. I have spent the whole evening doing it while watching a replay of this year's Le Mans 24 hour race (which I was not able to finish either :D) and I only manage to finish five of them. That's less than half of the nets I have to build. And I am not even taking into account the nets I need for my two elevators and the diorama for the AH-1Z... anyway. The nets are actually bags containing onions my good friend Fred aka @stusbke has discovered and was kind enough to provide me with. Thanks a lot, mate!12 points -
More........11 points
-
Mike, I'm not so sure: more than shadows they should be highlights, but I don't see how they could be! well, the long summer break made me lose the usual feeling with the work table, and I see that it takes me a while to get my hand back, I feel rather awkward, and objectively the work is progressing slowly and messy. for example, the propeller. the HD resin set is something simply gorgeous: perfect lines, micron tolerances, clear and comprehensive instructions. a high quality product, in short. sold to anyone who decides to do so, even to a clumsy as I am. let's see: as for the Bf109 G10, the idea of closing the hub details under the spinner did not appeal to me, so here too the magnet trick, with the bonus of not having the gun through the hub and spinner, therefore much simpler. hole to size, magnet, PE bolt, easy easy. then light layer of Alclad after protecting the contact areas with Maskol. all very nice, except that the tolerances are such that even a layer of Alclad creates sufficient thickness to produce difficulties in inserting and then turning the ring nuts in the hub. it will end, we will see later, with after assembling retouching. but above all, in the instructions it was well specified to leave 0.2mm below the spinner's base ring. did I take it into account? obviously not. and those two tenths were used to make the spinner sit well on its base plate, damn me. furthermorer, it was also indicated to reduce the internal thickness of the spinner, since the counterweights fit there very tight, and I first painted and then checked the hub-spinner fit. alright. after a lot of scraping with various drills risking damage, I solved it by gluing a 0.2 mm copper wire along the circumference. getting the right height of the countermagnet in the spinner required a million tests and different thicknesses, but in the end... then assembled everything with a certain attention and fibrillation with respect to the correct angles and the intrinsic fragility of the rear plate (there is a clear warning about that in the instructions) I gave a coat of hairspray and salt, and a layer of RLM 70. fast brutal scratching, and here we are. here at home after a round of black oil. the finesse of the Hasegawa mold is best appreciated in the annular radiator, simply painted with a coat of Alclad and an oil wash. while waiting for the various drying phases of hub's glue and colors, I alternated starting the cockpit, deciding to use the tin tub by adding only a few details of the Brengun PE set and counting on the painting (and on the poor visibility of the whole once closed in the fuselage). ditto for the semi-fuselages, in which few details will go. and that's all for today, next the propeller blades and the end of the cockpit. cheers, Paolo11 points
-
This was supposed to be a quick little side project to give me an excuse to print something on my Elegoo Saturn 3D printer, but like most of my projects, dragged on and got more complicated. I decided to try to recreate the metallic effects and overall weathering as close to what we see on screen as possible, and late in the piece, I decided it needed a base for stability purposes. So what was supposed to take a few days has ended up taking a few months, but here it is. Thanks for looking! Now I need to get back to one of my many unfinished aircraft projects! Kev10 points
-

1/32 Special Hobby Hawker Tempest Mk.II
Christa and 8 others reacted to Tolga ULGUR for a topic
This is 1/32 Special Hobby Hawker Tempest Mk.II with the markings of EG-X /PR733 flown by R.E.Mooney Co of No 16 Sqn RAF in Fassberg West Germany. This Tempest was built OOB except for CMK seat and Eduard instrument panel. Paints are Gunze Sangyo acrylics. Happy modelling9 points -
Cheers guys, much appreciated! It's all simple stuff, and 99.9% of people will never notice, but it's a fun little exercise in old fashioned MODELLING, and for me, that problem solving is the fun stuff A day off work means some solid time at the bench The saga of the wheel wells continues. The openings are pretty much finalized, just some fine tweaking to do. The leading edges started to get a bit thin, so plasticard was used to give a bit of rigidity. It's looking a bit better now, when offered up to the top half Notice how the shape of the opening changes depending on how it's viewed. No wonder Infinity had trouble getting it right! You may be wondering the purpose of the filled in section of the forward/outboard wheel well opening. The corner as supplied by the kit is a nice sharp 90°, where as it should be a radiused hole, just big enough to clear the gear leg. See the above reference pics. That hole will be shaped when I've got the gear to use as a guide. Other odd jobs are just filling and sanding and fitting parts in the rear cockpit. Exciting things. Im calling the engine it finished. The R2600 is a big piece of gear! I love a round motor, but they sure are a bunch of work to build in miniature! Back to the bench!9 points
-
I've been 'tinkering' with this build for the last couple of days! Really enjoying it. I also started cutting out every removable hatch on the aircraft and started backing off the holes with the right flanges, etc. I also bought a new 'Toy' to work alongside my H&S Infinity CRPlus airbrush, I've used it a few times so far and WOW!! What a game changer it is! So, i'll let the pictures speak for themselves. (Please bare in mind this aircraft will be modelled weathered, filthy and pretty beat up, just like they were with the constant daily use they got)9 points
-

RAF FG.1 XV571 WILD HARE Phantom Conversion
TankBuster and 8 others reacted to Anthony in NZ for a topic
Thanks! Few more details added to the rear bulkhead to match Brit FG.1 layout in late mod state. And sidewalls have also been changed quite a lot, sorry I dont have a pic of what the Avionics parts looked like before I started removing stuff and adding extras. But this is pretty much what an FG.1 front sidewalls should look like, locking mechanism connecting rods to be added and then hopefully this weekend I can epoxy the front tub in Righty....off to bed Cheers Anthony9 points -

1/32 Revell Messerschmitt Bf109 G-2 converted to an F-4 Trop
Kagemusha and 7 others reacted to monthebiff for a topic
With the fuselage buttoned up it was time to start adding the nose panels In general pretty happy with how that's turned out, now time for a bit of elbow grease to sort those panels out and some quite long sink marks in the upper nose section. Regards. Andy8 points -
LG doors tonight. They have a shape to conform to the wing that had to be bent into place. I thought metal would be good for this but ended doing them in Sheet styrene for some reason. I guess it’s just my mode now. Nothing fancy here. We are driving hard to the finish line!7 points
-

Kitty Hawk 1/32 HAF Mirage 2000 EGM
themongoose and 6 others reacted to spyrosjzmichos for a topic
Hi everyone! I spent the last couple of days weathering the model based on reference pics I found both of the subject aircraft as well as from other Mirages. I did go for some heavy weathering, something that was actually quite usual for the EGM versions (not sure much for the newer marks). All weathering was done using a combination of black and dark brown oils from Abteilung 502. As always, all feedback is most welcome!7 points -

Exhausting!
Rick Griewski and 4 others reacted to Bruce_Crosby for a topic
Hi Guys, Here is a short treatise on recent developments at Casa Crosby. I've got a number of 1/32 Hasegawa Fw190-A models and three PCM Early A series. A couple of years ago I bought aftermarket hollowed out resin exhausts for the Hasegawa kits, plus some Ki-84 exhausts. I painted them, along with two of the PCM sets (third one arrived later) and, like you do, put them in a bag or a container and put them away somewhere safe. Forgot to say, there were two PCM Ta152C-1 exhaust sets as well, but I've used them. MEANWHILE!!! Back to the plot - I've lost them somewhere. I still had one set of PCM A exhausts, but they are clearly taken from the Hasegawa kit and reworked, and they are marginally smaller, which could only get worse if I copied them. So, here's what I ended up doing: I drilled out three complete Ki-84 sets, wasn't worth the time and effort of making a mould. Then I modified two sets of Hasegawa exhausts, made a mould box, let it set then cast a pile of bits. Pilot holes drilled in the Ki-84 exhausts with my ancient Archimedes drill. Yes, one is off but that actually doesn't matter as there's a lot of cutting and filing to take place still. First manifold already looking better. First set of Ki-84 exhausts drilled and filed. Obviously, I have cleaned up the seams and refined the lips from this attempt. And that's three sets. Starting on the Fw set. A short while later......... Comparison of the PCM resin and reworked Hasegawa by Yours Truly. Two sets of Hasegawa parts were modified so I could speed up the casting. Here's the mould and the mould box sans walls. A pile of castings in need of some TLC. Final result: Ten sets of Fw190-A series exhausts ready to go. No, not PhotoShop! How long did it take? I started looking for useable bits about 8pm on Tuesday and worked until gone 10pm. On the Wednesday I carried on drilling and cleaning up, having decided to not cast the Ki-84 parts but drill three sets instead, also double up on the Fw parts. I made the mould box in the afternoon, gave it a couple of hours for the cements to gas off and added the RTV in the evening. I had the mould box cracked open by 8am on the Thursday and spent the whole day casting and cleaning up the results. All done by about 3pm. Was it worth the effort? Yes, as now I'll find the originals inside the week. If I hadn't made them, the old ones would be lost to the mists of time. That's pretty much a hard and fast rule in modelling! Regards, Bruce Crosby5 points -
.thumb.jpg.f0920d798d5d8600fb58b1d8a906ddff.jpg)
ICM AH-1G "Mo-Ther-Lover" Vietnam 1:32
Daniel Leduc and 4 others reacted to shadowmare for a topic
Painting in process, weathering effect - grey, another darker OD by sponge. Base color plus whites/yellows - paintbrush modulation. Few dirty streaks by brush.5 points -

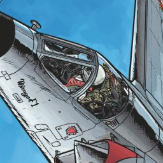
The ‘Viper’ pit - A short break to build other stuff.
Rockie Yarwood and 4 others reacted to Stokey Pete for a topic
Times are tough at home in recent weeks. But, there are things that lift the mood when it’s at its darkest. This is one of those. I’m sat painting what seems like the 100th F-16 pilot figure, when my daughter comes to me and asks “Daddy! Can I paint a pilot?” in that cute way only a 4year old can. I dig through the spares box and let her have at it. A unique take on the apparel of the Viper driver and his ACESII mount. Now she announces that she wants the “16” to put it in.5 points -

1/32nd A-20G coming from HK Models
Paul in Napier and 4 others reacted to dennismcc for a topic
I tend to stick to single engined aircraft but one of these would change my mind. Cheers Dennis5 points -
Finished !! 1/32 Spitfire Mk.XII ( Hasegawa + Paragon + Warbird + Grey Matter )
Greg W and 4 others reacted to Tolga ULGUR for a topic
Some more progress. Decalling mostly finished except for minor addings. Roundels are from spare parts of DK decals. Customized Fuselage codes ( EB-B) are from Customhobbydecals Australia. Serial numbers and letters (MB882) are from Xtradecal.5 points -
RAF FG.1 XV571 WILD HARE Phantom Conversion
Rockie Yarwood and 4 others reacted to Anthony in NZ for a topic
Front office getting closer Finishing up modified sidewalls now5 points -

RAF Museum Visit & Avro Lancaster R5868
thierry laurent and 3 others reacted to Archimedes for a topic
Hi All, While I was in the UK I took the opportunity to go to the RAF Museum and do some research on their Lancaster R5868 (P-OS). Among other aircraft my Grandfather flew Lancasters during the war and, having bought the Border kit, I wanted to see one ‘up close and personal’. It was strangely uplifting experience finally seeing one in the metal: a bit like meeting a childhood hero only this one didn’t let me down at all; it has all of the presence one would expect and S-Sugar oozes serious purpose from every rivet. I spent enough time just standing and staring at it that one of the museum curators came over and asked me if I was alright! I took a huge number of reference photos of course and then got my wife to snap the shot above. The exhibits in the rest of the museum are no less impressive and some are simply charming. As a return favour I snapped a picture of my wife Alex in front of this (I am sure you can guess why ). The standard and range of exhibits of all eras are of exceptionally high quality . In the WWII section I had to get a few shots of their Beaufighter RD253 as my grandfather’s brother worked at Bristol as a machinist making parts for Bristol Hercules engines. @mozart I even found the museum’s Anson (which is a lot sleeker in the metal than any photo manages to convey). The World War One section is worth the price of admission alone however: In addition they have some truly exquisite LSP wind tunnel models like this one: Finally I found just one aircraft in the exhibition that I have actually flown… (which my wife reminded me is now in a museum…owww) If you find yourself in London with some time to spare just go. You won’t be disappointed. Best regards, Paul4 points -
Hi Guy's, Well after the disappointment with the FW 190D9 that I am stalled on, I thought I'd drag this project off the shelf and get started on it. Now, I am no FW 190 expert, so I may need some help throughout this build, but as far as I am concerned, I have everything that I need to get going. Don't worry about the 'Sturmbock' boxing of the kit, it's actually just a standard A version kit in there, but it was loose so I had to use this box to keep it in as it was the only spare box I had that I could find! So, I have all of these bits and pieces to add in with the build, and a lovely wooden base to put it on as well. I am going to try and open up a few extra panels as well as the engine and forward gun bay, things like Fuel Filler Caps, Main Fuselage Access, Tail Wheel Access Panel, Etc. And the schemes that I have to decide on are: Yellow 8 of JG 301. There are plenty of pictures showing this towards the end of the war with patched up paintwork, patched up and Mismatched panels, etc. (I actually really like the Black/White Chequer Cowl version from 1943. I was also asked by a few people what my work bench looks like: So, with mojo still on a high, on we go................. Cheers!4 points
-
I spotted the huge mistakeit's not a Boston III4 points
-

About those new tooled 1/32 Phantoms....
Kagemusha and 3 others reacted to Dave Williams for a topic
If everyone held off on building a kit that they have because something better may come along, nothing would ever get built.4 points -

Silver Wings Gauntlet II
R Palimaka and 3 others reacted to mozart for a topic
I can breathe a small sigh of relief because the "X" bracing wires are finished without too much hassle, one or two tested my patience but that is all that's required really with rigging: I've yet to address the gap at the top of the rear strut! I'm quietly hopeful that the rest of the rigging will be straightforward, but time will tell.4 points -

1/35 Boeing AH-64D/E Apache from Takom
CRAZY IVAN5 and 3 others reacted to Zola25 for a topic
MBK in germany just put the Takom AH-64D kit up for presale @ EUR 75.00 - Retail 85.00 - Launch date in January - Which means it could likely come earlier online. Shipping times these days are not exactly reliable https://www.modellbau-koenig.de/Flugzeuge/Flugzeuge-1-32/Hubschrauber-1-24-1-32/AH-64D-Appache-Longbow-Attack-Helicopter /Niels4 points -

HGW Models News
D.B. Andrus and 3 others reacted to Jan Bobek - HGW for a topic
NEW Basic Line | MESSERSCHMITT BF109G-2/4 1/32 https://hgwmodels.cz/en/textilni-pasy/1242-messerschmitt-bf109g-24-basic-line-132-132839.html4 points -
I've had retinopathy in both eyes at different times. Long story short, my left eye was corrected by laser surgery, (yeah, like somebody tapping their finger on the back of my eye) but my right eye was really messed up, burst capillaries and hours of laser surgery , they knocked me out for that one. So now my left eye is relatively OK and my right eye has some macral damage (that's the part of your eye that does the fine focussing) so I need corrective lenses for that. Also had some floaters but they break up and disappear over time (still have one). Maybe you could ask about lasering your retina back (like Richard) and maybe corrective lenses (glasses) after that. Good luck4 points
-

Any one eyed modelers?
trgt and 3 others reacted to R Palimaka for a topic
I had a torn and detached retina in my left eye about 12 years ago. Following several laser surgeries that basically spot-welded the retinal wall back in place, the back of my eye apparently looks like a quilt. I have fairly good clear vision (despite being near-sighted to begin with) but because of the way it healed there is distortion too…straight lines are very slightly wonky, like looking through water. Your mind does adjust, although I find I can’t work as long, and magnifying visors help. Close up work takes effort but taking occasional breaks works well. Your permanently dilated pupil is unfortunate, that must be tiring. I’ve recently had cataract surgery in that eye to replace the lens which also corrected my distance vision. It’s now much more clear and bright. Still wonky straight lines though, but remarkable difference. All that to say it gets better with some adjustments, and patience. And yes, bigger scales are way easier!! Richard4 points -
Final update for today. I have finished the IP and painting of the seat area. For the IP I painted it very stark as it sits way back when everything is assembled and I decided to go heavy to add a bit of pop at normal viewing distance. Still dry fitting shows most everything will be shallowed by shadows when it all comes together. I cut off the molded on Radiator handles and installed two I made. Later, I will install a couple of throttle lines behind those handles. I combined acrylics and oils for the leather cushions of the seat. Once the oil has dried I will give it a slight sheen. Ernest4 points
-

Nellis AFB Aviation Nation Air Show '22
Ol' Scrapiron and 2 others reacted to chuck540z3 for a topic
I was fortunate enough to attend the Nellis AFB Air show near Vegas for the 10th time this past weekend, which was one of the best shows I’ve ever seen, especially since I love fighter jets. Since just about every American fighter jet model lives there, you’re sure to get the sweet smell of burned kerosene and loud noise all day long. One small disappointment is that there were almost no WWII Warbirds like there usually is, other than a P-51D Mustang. As a result, 90% of my pics are of jets and hardly any props. I took about 2,000 pics, deleted most of them as usual and wound up with about 325 which were good enough to keep. Here are a few of them. One of the reasons I attended this show was to see if I could get some reference pics for my next build, of a Block 32 F-16 Aggressor in the new “Ghost” scheme. Not only was this jet there, but there were two of them, one on the tarmac (86-299)… And my subject (84-220) in the air! This should be a great reference for painting the bottom. It even had an F-22 chasing its tail during a mock war game sequence The Navy usually sends an F-18 Super Hornet, but this year there were 3 of them, with 2 F-18G Growlers And an F-18F CAG bird There were several F-35A’s that flew, including this demo jet flown by Major Kristin “BEO” Wolfe, of Hill AFB, Utah. Not her jet, but I include this pic because there is no mistaking that Nellis is a working AFB, with about a dozen F-16’s parked in the background. Back to Kristin, who put on a terrific show Pretty good water vapor on a tight turn, considering the dry desert air Shortly after the F-35A demo, came the always super popular “Heritage Flight” of the F-35A, F-22 and P-51D Mustang The F-22 demo pilot was Major Joshua “CABO” Gunderson of Langley AFB, Virginia. It turned out that this was his last airshow as the F-22 pilot, so he was looking maybe a little sad as he taxied down the runway. As always, the F-22 demo was awesome. Since it was his last demo, Major Gunderson was soaked with lots of water from water bottles and a few fire extinguishers as he left the cockpit. After about 5 minutes of fun, the F-22 team posed for an official AF pic, which I took as well There were lots of other acts of course, including this jet powered fire truck called “Shock Wave”. Sadly, the other Shock Wave truck crashed and killed the driver only last July, so this act can be quite dangerous. Although a bit gimmicky, I thought the fire truck was absolutely awesome, especially when it drove next to the spectators and let the Rolls Royce jet engines fly. T-33’s are usually there, which are so beautiful in the air. As always, the last act at Nellis was the Thunderbirds, where they are based. Here’s a few random shots, although I’ve got about 75 more! For you photography buffs that might want to know, I used a Nikon Z-7 II camera and a Z 100-400 4.5/5.6 VR lens, which is a bit short for airshows and not as good as a 500mm+ prime lens. However, I have trouble finding the aircraft in my viewfinder at 200mm as it is, so this lens works for me and with 46 MP, most of these pics were cropped a bit, but still showed decent resolution. Unfortunately, the airstrip is almost North/South and you stand on the West side, facing East and the bright sun for most of the day. To compensate for this high contrast situation, I usually boost the exposure by about 1.7 stops so that the aircraft stand out from the sky a bit more. For focus, I used Dynamic Area Autofocus and AF-C, which with this camera combination, seemed to grab the jets out of the sky fairly easily. Shutter speeds were a bit high at 1/1,600- 2,000/sec for obvious reasons, but with the bright sky, this kept the aperture close to f5 while ISO was usually less than 200 and sometimes as low as 64. Hope that helps- and I'm still learning! Cheers, Chuck3 points -
my last built :3 points
-
.thumb.jpg.745e9c32fdfafef712dcea77f75e8a27.jpg)
Trumpeter T-72B1
TankBuster and 2 others reacted to TimW for a topic
More pics...3 points -

Is Airfix about to spring a New 24th scale Hurricane on us?
Smokeyforgothispassword and 2 others reacted to notanotherrainydaykit for a topic
24th Scale Sea Fury........ Monstrous Bristol Centaurus Check! Monstrous Five Bladed Prop Check! Folding Wings Check! Lots of underwing stores Check! The requirement to order Gallons of EDSG and Sky Paint Check! Shut up and just take my money.............3 points -

1/35 Boeing AH-64D/E Apache from Takom
Landrotten Highlander and 2 others reacted to Smokeyforgothispassword for a topic
I'm hanging out for the E model, it's going to look great in AAAvn colours3 points -

MQ-8B Fire Scout - Brengun, 1/32
Anthony in NZ and 2 others reacted to thierry laurent for a topic
I love that. I simply hope that they do not smell yet... Such a diorama could smell iodine but not onion!3 points -
My left eye was damaged at age seven by a thrown stone. My optician, John Earnshaw, intervened to stop the injured eye being removed at Casualty (sop). John told me that forty one years later. My left eye healed and it works, albeit my binocular vision is impaired, so tracking on-coming, fast moving objects is unreliable. My depth perception is poor. I had difficulty seeing bowled cricket balls and I am wary of approaching traffic if my driving speed exceeds fifty miles per hour. I have been a relatively sedate biker for more than fifty years. LSP is an antidote for my frustrations building small scale ship models and 1/72 aircraft models, but getting parts into the right place is still a challenge. I use lots of light, an illuminated magnifying lens and long, long tea breaks when things aren't going well. Good luck with your future model building Target.3 points
-

1/32 Special Hobby Hawker Tempest Mk.II
Tolga ULGUR and 2 others reacted to MikeMaben for a topic
Excellent Tolga ! ! ! Makes me want one 'in' my stash.3 points -
Just got an email that my Hs129B-3 has been shipped. Sooner than I thought!3 points
-
The doc said in my case it was a gene pool thing, luckily it affected my non-shooting eye and they were able to correct the situation in my other eye with laser surgery before it went south. Laser surgery is like staring into the sun while having a brain freeze. The doctor said the other eye and the brain will, or should, make up for the injury caused by surgery at some point. Puberty has nothing on growing old. Funny thing is, as i was going through the procedures I was buying models not even considering I'd have any sort of handicap. I don't like to ask doctors questions, or know what they're about to do to me. Just get on with it, besides what can I contribute to the conversation anyway, never went to medical school. So I'm happily buying these kits woefully ignorant of what the outcome will be. Now the kits, and the tools I also bought, have been gathering dust. I've been making caps for my percussion revolver, but you need not have a pretty outcome with that as what you want with a model. So, as you say, I keep that up and I should be all set to handle the tiny bits after awhile. Always good to talk to, or hear about, others who have been down a stretch of unfamiliar road.3 points
-

About those new tooled 1/32 Phantoms....
Stefano and 2 others reacted to CRAZY IVAN5 for a topic
I would however pay for an RF-8 or an F-11F Long nose there are limits to my hypocrisy3 points -

IPMS Nationals Telford 2022
scvrobeson and 2 others reacted to Phartycr0c for a topic
Also, I can confirm, My Viggen will be making the journey!3 points -
IPMS Nationals Telford 2022
Stevepd and 2 others reacted to Phartycr0c for a topic
Folks Mike, Roy and myself will be tending to the stand throughout the weekend so please do feel free to come over and say hello. within reason if we can accommodate, bags and purchases can be left at the stand rather than carry them around. If you are lucky you may even get some of the purchases back! Seriously, do come and say hello after all its YOUR stand too. Kev, iv'e printed a few extra flyers out to act as handouts on the stand.3 points -
Gulf War Viper
Rockie Yarwood and 2 others reacted to Cheetah11 for a topic
And suddenly all comes together. I will wait for some better weather and take more photos with the Nikon. Cheers Nick3 points -
Simply GORGEOUS! Makes me want to go down and start the one in my stash.....3 points
-
My dad lost an eye some 40 years ago in an industrial accident. He was an avid woodworker, bowhunter, fisherman, and mechanic, and kept doing all of those things. The only thing it really affected was depth perception, which he re-learned pretty quickly. He just had to take it slow and careful for a while until he got used to it. Why do you ask?3 points
-
I think a combination of all will end up being the answer. I'm not after measurable perfection, rather what looks right. Looking at reference pics, I think I've got my head around some of the things that are throwing off the shape of the kit well. This panel line, where the leading edge kinks, is where there would be a change of direction of the wheel well opening. The kit represents it outboard of that. I wondered if that meant that the location of the wheel wells was incorrectly moved outboard on the kit, but the distance between the outboard edge of the wheel well and the wing fold line seems about right, so I'm not looking into it any further Either way, a bit of plasticard, welded in place with Sprue-Goo and I'll break out the Dremell! Otherwise, lots of visually boring jobs, gap filling the fuselage halves etc. The engine is together and ready for a wash. Plug wires and the prop governor pushrod is enough visual interest. More soon!3 points
-

About those new tooled 1/32 Phantoms....
Violator1991 and 2 others reacted to ColinR for a topic
We all know that feeling - but your sacrafice has not been in vain - Now could I ask you to start on the Tigger 1/32 F-111 Vac - coz damm I need an injection moulded 1/32 F-111F in my life and I'm not getting any younger3 points -

WNW SE5a
R Palimaka and 2 others reacted to Greif8 for a topic
Made some progress on the cockpit/engine area. I sprayed everything a canvas color and then painted the wood in two tones; the framing is a bit darker in color than the seat area for example. I have also added the bracing wire to the sides. This turned out to be a rather tense process, but the end result is decent. As you can see I still have a great deal of work to do. Painting the leather area of the seat is the next challenge. I also have to figure out how to make the starter magneto that sits to the immediate right of the pilot at about shoulder level. A photo of the actual reproduction aircraft shows it in the instructions, but there is no part for it, so I will have to make one; always a daunting bit of work for me as my scratch building skills are not that advanced.3 points -
I would hope for a Boston III3 points
-
thank you, glad you like it so far... for the rest I do not guarantee, however! full-bodied update today, ready? to begin, I closed the engine module. I replaced the kit's tubes and added more, as well as electrical wiring and a few bolts here and there. I also cut the ejection ducts of the MG cases, which will be redone with Eduard PE up to the belly of the fuselage. but nothing, it does not convince me very much. however, it is and remains, apart from a few other rounds of filth once in place. I opened the holes corresponding to the expulsion of the shells on the part of the kit, here is a test in place of the whole. it is true that we will not see anything of this area, just as it is true that they have tried too hard to provide this otherwise desolately empty space, but I do not know why, I am not satisfied with it. oh well, I'll like it, I don't have many alternatives! in reality this and other jobs were done as an interval in the riveting work, a via crucis that required frequent pauses. as well as several corrections to putty and sandpaper... but the bulk is done. so now I can install the fixed part of the flaps to the upper surfaces of the wing halves. on these there is, in correspondence with the flaps, a hole that made me waste a lot of time trying to understand its meaning, not being present on the photoetched parts: either I had to plug the hole on the wings, or open it on the photoetched parts. in the end I got there: it was a mechanical indicator of the extension of the flaps, the pilot could read the value in degrees through a strip that ran under it coherently with the flaps themselves. ergo, I drill holes in the PE. a couple (dozens of) dry tests to check dimensions and position, and away with epoxy and hairpins for curlers! other anti-fatigue things during the riveting were for example the welds to the fork of the wheel, using the black cyan, denser and more visible than the transparent one. and the main landing gear legs here we are almost there, only lining and weathering are missing. the placards come from an HGW sheet dedicated to the Dora. in parallel I began to think about the cockpit. I have several options for the instrument panel. since the one in the kit has a nice three-dimensionality, I tried to use it, drilling the main instruments. and then insert plasticard discs on which to place some Airscale decals. unfortunately I am not satisfied with the result. not that the idea is wrong, it's my realization that doesn't compete with the cleanliness of the Yahu set. which however is decidedly flat. and what if I place on it some PE bezels? we are always far from a 100% satisfactory result, but I would say that I give up. having to insert the tube for the flare gun into the panel, and in any case pierce the fuselage, I took the trouble to try to relate them. so in the end what remains of the rich Brengun set? well, actually several little things, one of which is the nice seat, in six comfortable pieces! well, that's almost everything for today... soon propeller HD, a spectacular set. speaking of propeller, studying the spinner, you can see quite well how there was, before the tip was painted yellow, a white spiral on a black background. somehow the spiral can also be seen in the anterior area (points 2 and 3). evidently the yellow, given without a common background, had a different rendering depending on the underlying colors. also, there is an ideal continuity with the part in the black zone (1) even if it is interrupted, perhaps for a later retouch. and so far... what I do not explain is that the spiral is reversed with respect to the direction of rotation of the prop. in all the other photos of spinner with spiral, this follows the direction of the motor: if the propeller rotates clockwise, as in the case of the Dora, the spiral starts from the base and rises to the right until it reaches the top of the spinner. here it is the other way around. ideas? thanks for any idea or suggestion you have about it, I don't explain this oddity. cheers, P.3 points

.thumb.jpg.5da8bff9741de420eb2e87addd8f2cf6.jpg)