Leaderboard
Popular Content
Showing content with the highest reputation on 09/11/2020 in all areas
-
Thank you very kindly! Every time I think I've got clear skies ahead it throws me another curve. But I think I may finally be over the hump...maybe. Gloss clear and Decals next I think I need to tone down the spots (looks much worse in the dammed pictures) Thanks for looking10 points
-
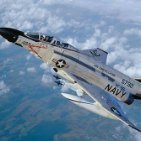
Progress..... I have been working on the wing-top pod fairings. This is the second go round with putty. Wingtip lights, there is a red one on the other wingtip. More sanding and polishing is needed. Genie missile fin bases, fresh off of the printer. Each base will get a sheet plastic insert, bottom of the pic. Genies that were carried on the Scorpion had the fins extended since they are not carried in an internal bay. Dan9 points
-
Let's let this one die. It's clearly not a Tamiya rendering, they are like Fort Knox when it comes to releasing CAD renderings. The "what will Tamiya release in 1/32" topic is getting really really old. We are 99% sure it's nothing.......... and we will eat that crow if it comes, but only if it comes with biscuits and gravy8 points
-

ICM Wish List
Dpgsbody55 and 5 others reacted to Out2gtcha for a topic
I guess if were talking more likely subjects in the ICM wheelhouse, I'd love to see ICM put out a PE-2 as their first 2 engined LSP. Not that I think it's likely ICM would put out a large 2 engined LSP, but its plausible6 points -
Revell P51D Mustang, Col Don Blakeslee , 335th
Cicciuzzo and 4 others reacted to Panzerwomble for a topic
Greetings. This is my Revell 1/32 Mustang in colours of the Colonel Blakeslee c/o 335th Fighter Squadron , 4th Fighter Group , October 1944. If you don’t know, Don Blakeslee was the American ace credited with having the highest number of missions (over 500 sorties / 1000 hours) in the ETO as well as leading the first unit of Mustangs over Berlin. Training with the RCAF in 1941, flying Spitfires, Thunderbolts and eventually Mustangs, one obituary described him as “the most decorated second world war US Army Air Force fighter pilot “ . A fascinating and inspiring character. The P51D BuNo 4413779 was delivered to the unit on the 30th June 1944, and carrying the personal letter C, became Blakeslee’s mount till he was grounded for being “too valuable to loose” on 1st Nov 1944. The 27 year old Colonel Blakeslee didn’t go in for nose art or victory markings, but always flew C for Charlie as he reckoned it stood for “chief cook and bottlewasher”. Service records show this aircraft belly landed on 1st Nov 1944 at RAF Harrowbeer near Plymouth in Devon (quite some distance from “home” at RAF Debden in Essex) and this may be part of the reason Blakeslee’s flying days were considered done . Growing up a Plymouth boy, I spent a lot of my teenage years wandering around that old RAF base imagining the wartime exploits 40 years earlier, it was also popular as a place to learn to drive Dad's car. The aircraft was repaired and went on to serve with other pilots of the 335th until the end of the war, being scrapped in September 1945. There is now a replica on the UK airshow circuit G-SHWN. I found a picture of 4413779 dated between 10th and 27th October, just a couple of weeks before the landing at Plymouth. Shows the recently applied red canopy framing, white tail and an OD wing fillet taken from a 336th aircraft. 2020 has been a busy year for me in my usual armour arena: 4 Battle of the Bulge, 4 Normandy , 5 other dioramas, two 1/48 jets plus other odds and sods, and so I decided I wanted to try something different and new . So… let’s have a go at Alclad NMF ….. Mustang seems a good subject (never made one in any scale before - i'membarrassed how is that possible ??) Bought the Revell kit as it was all going to be a bit experimental, and if it goes wrong then, er ,no great loss, and ………sheez.......... it’s only got Olive Drab as the kit offerings …no …no …..NO more olive drab !!! So looked around for a more suitable NMF Mustang and decided to do this particular aircraft instead. Mostly out of box, made a dinghy (?) for the seat and some homemade belts, and also the specific aircraft markings as couldn’t find a set in 1/32. Also had a go with using Flory wash instead of the usual oils, so as ever, a few firsts with every model. Hope you enjoy. Guy PS Hope you don’t mind a sneaky last pic of the previous model I completed before starting this one, and perhaps the nemeses of the 8th Air Force…., a Dragon 88mm Flak 36 .5 points -
Image trial run
Out2gtcha and 4 others reacted to Sabre F-86 for a topic
If this works, you will see a 72nd scale Grumman Tracker, hosted on my own web page. I know I tried this before but I can't find the post.5 points -
This is going well so far. I applied a few of these last night and then removed the transfer film this morning. Especially on the cowl, it makes a huge difference. There's just no way you could get this painted-on look over semi-matte black with a traditional decal: The one thing I'm not happy with is the red color that the HGW transfers use. It's too primary and luminous for my taste (unlike the red of the Tamiya decal sheet, which matches my home-mixed "hinomaru red" very closely). For the small markings like the fuel fillers and wing no-step outlines that's probably fine, but for the tail codes I think the HGW and my hinomaru color will just clash too much. So, I could risk using the Tamiya decals for the tail codes, or I can finally get off my ass and set up the cameo cutter I ordered and figure out how to make that precise paint mask. I think I'm going to try to achieve the activation energy to do the latter on Sunday. It's not easy to get excited about fooling with a computer program on the weekend after spending all of the work week staring at a computer screen, but I know I'll be happy with having the thing up and running once it is.5 points
-
Hello guys. Time to build something..... Nice and good old hasegawa kit (again). I will add some goodies and hopes it will be good.4 points
-
Question re wartime B/W photos ...
D.B. Andrus and 3 others reacted to Padubon for a topic
Hello, I would choose 02. My reasoning behind it is that Messerschmitt may not Have manufactured the struts, they were possibly under contract. Even though early in the war the RLM colors were pretty dead on, many factors can be accounted for different shades of each particular color, for example primer, thinner, how thinned or thick, humidity, air or heat drying, etc. Back in my Army flying days, I curiously counted the tones of green on one of my beloved CH-47D. I noticed 7 olive draw and 9 interior green. It was a 15 year old bird. Again, to me RLM 02 is the most logical option.4 points -

The antique BoB Revell Spitfire Mk.I
Greg W and 3 others reacted to thierry laurent for a topic
Hi again, As I already mentioned, I'm currently ending the last internal details. This picture is showing the oxygen hose with the supports added. I initially considered putting them on the fuselage wall but they were so tiny that this would have been more complicated in the end as I would have to add the hose within the supports after painting. And here it is dryfitted on the cockpit side: I added the small photoetched panel and the lever. By the way that one needed to be shortened to be correctly positioned: Here I added the lever managing the landing gear. The knob was built out of two microtube sections, thin rods and CA glue. And finally the throttle handle (in sand color): The gunsight still needs to be done. This will be a combination of the shortened Barracuda part with the photoetched and film elements from the Aires set. Unfortunately, I did not have the time to do it. Moreover, I must still do a final check of the internal components to be sure I did not forget anything before painting. Cheers Thierry4 points -

Tamiya 1/32 Bf-109G rumours and anything else
Rick Griewski and 3 others reacted to Kagemusha for a topic
ZM are developing a Bf 109G-6, which should prove definitive.4 points -

Question re wartime B/W photos ...
Pete Roberts and 3 others reacted to Radub for a topic
The film difference that you are talking about is “orthochromatic” vs “panchromatic”. There is a lot of stuff about it on the internet. Orthochromatic film makes yellow look dark and blue look light. This is immediately evident in photos of Romanian aircraft, for example, which feature plenty of yellow and blue in the insignia and markings. In my book on the I.A.R.80/81 I have a section dedicated to this issue, with examples of how film affects colour. Having said that, the colour of those undercarriage parts is dark, and that would be dark on any kind of film. I suspect it may be RLM 66. Radu4 points -

ICM Wish List
mozart and 3 others reacted to Alain Gadbois for a topic
Interesting to note the ICM wish list has replaced the Tamiya thread. Seems to hold more promise for any new kit. My wish, why not: Hawker Fury, and also Hind family: lots of variants and interesting schemes! MiG-15 and 17: we need new kits of these for sure. Alain4 points -
I bought this kit quite a long time ago, I think it was one of the first LSP's I bought. I did so because it was 69 bucks, at the time I thought it was a bargain for a large scale Macchi 202. The I tried building it and found out why there weren't many builds of this kit around. What I remember from doing the interior is it required sanding down the inside of the fuselage a lot to make the resin fit. I got finished doing this, turned towards the wheel wells and that's where I stopped. Years past with this kit sitting in the shelf of doom. The pile of dust on it was quite impressive. It almost hit he bin a few times, the only reason it didn't was because I'd hate to have wasted 69 bucks. I picked it up last month and decided come hell or high water I would finish it. The wheel wells that proved difficult to fit were thrown in the bin, I then progressively glued together the bottom wing to fuselage, then gear doors were put into place followed by the upper wing sections. Those did not fit well and all of the wing to fuselage joint area has been sanded and shaved heavily then rescribed to get a decent fit. The resin oil cooler was too small to fit the hole in the resin lower cowling, itself being slightly under size. Some sanding of the plastic helped with fit here. Radiator was fine and the tail was average but some basic filling and sanding here fixed that. I did get stuck for a while with the canopy, windscreen and spinner. The spinner is too small for the back plate, this was just sanded to fit, which makes it slightly under size, but oh well. I had to take a lot of plastic off the fuselage to get the windscreen and canopy anywhere close to fitting. I decided for the colours, I liked the profile of one of the around 20 Croatian machines used on the Russian Front. The pictures of these machines are not the best, so I just guessed at what the markings might be, figuring German insignia was most likely with the Croat shield in place of the swastika to make things a little different (but this kind of thing was done with at least 1 POA machine). Markings came form the spares box along with the pilot.3 points
-

Mitsubishi A6M5a Zero, Sadaaki Akamatsu , Atsugi 1945
Brett M and 2 others reacted to Miloslav1956 for a topic
Another Zero finished. 1/32 Hasegawa kit, Eduard color cockpit & wheels, Yahu instrument panel, HGW wet transfers & seat belts, Aber gun barrels, All colours MRP test sample IJN3 points -
I dream of Genies...................or A pair of Ding Dongs............. Lots of fine work to do here, but a start. Dan3 points
-
I've been getting some paint sprayed. I decided to try black basing again even though I'm not sure I was happy with the last try. There is definitely a fine line between looking like squiggles under the paint and worn, faded paint. It doesn't take much to loose the effect or make it look totally fake. I still need to let it dry well before I give it a close look but it seems to look ok to me. It's hard to see the effect in the pictures. I think it will be a good base for weathering down the road. Please feel free to be honest if it looks off to you. I'm still learning. Oh, and I love these MRP paints.3 points
-
I never did get the ww1 thing, far too niche in my opinion, I was always tripping over unsold stacks of them in model shops, despite the opposite opinion on forums. Graham3 points
-
Tamiya 1/32 Bf-109G rumours and anything else
MikeMaben and 2 others reacted to timvkampen for a topic
Very true, just a shame it was the wrong scale re the P-383 points -
hi first , sorry if I spoil your thread John you are right ( I know that you know the subject like the back of your hand ) ... too small in height , ! yes , we can see it lacks a little bit of the " step" beneath the nose . too long ? I don't know .... but once we have all the infos I think things can be done ...............we count on you here is a rough test , I removed the " lip " at the fuselage tip to get the best join ....... Alain from the top3 points
-
Completed today and hung up in the back of my display case. Overall, a lot of fun to build. I really didn't run into many issues along the way. I did take some shortcuts on the interior as I knew it wouldn't be visible in the end. I added some waist/belly windows and also eliminated the ball turret and instead added a tunnel gun. Hope you enjoy!3 points
-
St, I think there is room for a Tamiya level 109G. I'd like for them to do an Emil and Gustav...or a Friedrich. ...or all three, along with a Mustang B, an A36, Spitty MkVb and a Spitty MkIa. Very reasonable if you ask me.3 points
-
So I did my wet transfer experiment, and learned some things. 1. For anyone who is thinking about using these: They come as a stack of four layers. The bottom layer is the familiar thick blue decal backing paper that you are used to. The next layer up is the decal ink itself that you will transfer. The layer above that is a very thin clear film. The top layer is a much thicker translucent protective paper. It is very easy to remove the top 2 layers when you are trying to remove only the topmost protective paper! How do I know this? I think you can guess. Fortunately, it is not too hard to get the clear carrier film layer to lay back down smoothly on top of the ink layer and decal paper. 2. Having navigated that crisis, I tested out 4 conditions. 2 substrates: smooth flat Gunze lacquer wet-sanded to 3000 grit and that surface covered with Gunze clear gloss lacquer. By 2 solutions: Mr Mark Setter and Micro Sol. I left the transfers in place overnight before removing the clear film. 3. The results: All 4 conditions resulted in the decal ink transferring solidly to the test surface. Once on it resisted being rubbed off very strongly. The gloss surface made it easier to remove the clear transfer film, but it was not too hard to do without the gloss. This appears to be the only benefit of the gloss surface. The Mr Mark Setter (which is a milky colored liquid) left much more visible residue on the test surface relative to the Micro Sol (which is a clear liquid). This residue was hard to clean off, and curiously harder to remove from the gloss surface than the matte. So my final conclusion/process. I am going to soak the transfers in water for several minutes before trying to place them, not the 20 seconds that HGW recommends. It is critical that they be fully soaked off of the decal paper before you try to lift them with the clear transfer film. I am not going to bother with a gloss coat. I will re-check the smoothness of areas where transfers will land, and may go ahead and wet-sand with 4000 and 6000 grit in a targeted way to make those spots ultra-smooth beforehand. I am going to use Micro Sol I am going to remember to fold a corner of each plastic film piece over (someone, maybe Brett, recommended that) when placing the transfer, as this made it easy to tweeze the thing back up the next morning. I am going to do this very slowly and carefully, in several rounds, because it is way more delicate than using regular decals (but the result looks awesome, so it is worth it). The last decision I have to make is whether I'm going to try and cut masks to paint the large tail code numbers on the vertical stabilizer, or use the transfers for them. I'm leaning towards the transfers because I think the result will look every bit as good as paint (unlike a traditional decal), but I may wait until I have some experience with smaller transfers before deciding on using these large ones (the biggest of the set).3 points
-

EA-6B Prowler (02 April: Done!)
Derek B and 2 others reacted to easixpedro for a topic
Thanks folks! Always nice to know someone is following along in the ether. Managed to make the HF antenna that was kicking my rear end. Looks a little rough, but should be acceptable under primer. Still have to go back and cover the eleventeen billion rivets, so it'll get shot once that task is done. You'll note that I also added the antennas on the vertical stab. Part of the ALQ-99 receivers. They'll get blended in a bit too. I also added a square panel out of litho for the horizontal stab. Note how I cut off the attachment points Trumpy provides in order to replicate it with tubing like the real deal. Here's the stabs themselves I filled the rivets with perfect plastic putty. For the panel lines, I used Tamiya putty laid down between masking tape to replicate the caulk that's used in those panel lines on the real deal. Point to remember here, is that seam sealant is usually applied by young airmen ...imagine your best caulking job at age 19-20! Now do it hanging 15 feet off the ground! And this 8022 sealant is horrible. It smears and doesn't clean up with a darn in real life. It's usually applied in excess above the panel line, so I'm not too worried about the unevenness of it. That's it for now. Hope to get some more bench time soon so I can something to share. Hoping to start working on the foreward sections to block out the basic airframe shape before I start on the wings etc. Thanks for following! -Peter3 points -
Well that was easy enough. King Tiger, yes. Jagdtiger, no. Both photos from this magnificent Ryton volume.3 points
-

Colombia Kfir C10 Revell+Isracast
HerculesPA_2 and 2 others reacted to red Dog for a topic
And that is exactly what I have done I learned about that technique initially in Chuck's kicked up a notch series - episode T-6 harvard Chuck moved the gear attachment points outboard in the wheel wells and since seeing that and how clever that was I knew one day I would need this product as well. So I immediately went on Amazon and bought a small set of Oyumaru. First occasion to use it is with this KFIR model. I need to add two RWR sensors from the Isracast C2 nose to the Cheetah nose Nick kindly provided. So out goes the Oyumaru. A small piece was cut and immerged into 80°C water for 3 minutes. I malaxed the oyumaru and then pressed it on the Isracast C7 nose on top of the bit needed duplicating. Let it cool down until it became hard again and removed gently the oyumaru from the resin nose. All good this far. Best candidate to pour material in there was the ZAP epoxy resin I usually use for strong bonds for my in fight builds. Poured equal part of the two and filled the mould. No particular care was taken except to ensure the liquid went to the bottom of the mold. I wasn't too cautious about air bubbles or anything treating this more like an experiment and honestly I didn't expect the first try to be successful. I let it dry for about 18 hours and to my surprise the part came out easily from the mould with a more than decent shape for a first try. The base of the part is messy and sanding will be required, to flatten the part. I must say I am very surprised at how easy this was to do... I did another pour for the other's side sensor and result was as good as the first one, ruling out the luck of the newbee. Both sensors where then attached to the resin long nose. Some final adjustments needed, but another step closer to the painting ... So Chuck if you read this: thank you for a great tip and thanks Alain for suggesting the same. This is why I feel this place is so great. Thank you3 points -
I managed to finish the engine. I was forced to modify the shaft that secures the propeller because the kit’s one is on a cone shape and it does not secure the prop well. I used plastic tubing and I think is going to work well.3 points
-
Thanks for the encouragement! I really do appreciate the positive re-enforcement! Keeps the mojo moving. And with that, the He 111 is ready to go drop...onto the display shelf...if I can find some room. The last few details have been stuck on as of 17:00 CST and my contribution to the BoB group build is done. I hope it meets approval. (I'll try to get better pics soon) Thanks for keeping me company along the way, to all who liked and commented, it's appreciated.3 points
-

Matchbox Tiger Moth
KiwiZac and one other reacted to Alain Gadbois for a topic
Hi all! Here is my entry for this group build! I bought this kit when I was around 20 years old, and had decided to improve it quite a bit at the time. Looking at the parts today, I had too much ambition for my abilities, trying to thin the engine cowls and wing trailing edges. I didn't have the tools or experience and had mixed results when using the materials I had on hand. I finally gave up after thinning all the trailing edges except the ailerons... Now with much more reference material, on line references and other builds here on LSP, I'd like to continue where I left off, and hopefully finish it! Alain2 points -
Hello gents, My name is Olivier from Belgium. I'm a long time lurker on LSP as I do mainly 1/32 models but never actually posted a model. I decided to post my first after completing my first Fisher model: the Sea Fury. I read a lot of topics on this very forum while building this so many thanks to all previous LSP Sea fury builders, it was very helpful. The model is mostly OOB save for minor modifications around the Hook bump and scrath of the engine innards as some cover behind the exhaust plates were omitted and I wanted to detail the inside. Paints used were acrylic gunze H71&H72 for the top surfaces and Vallejo azure blue for the undersurfaces. I traded the fisher decals for some hobbycraft's desert fighter. Thanks for looking, any critic more than welcome.2 points
-
So we all know how in some b/w photos, the color yellow can look quite dark due to the film used (I think that's it). Are there any other colors that shift like that ? I'm asking because I'm trying to figure out what color the landing gear and inner doors are in this pic. It looks like black but that doesn't follow anything I've ever read regarding LW painting practices. I have a theory, what do you think ?2 points
-
They opened it just couple of days ago.2 points
-
Wingnut Wings... We Really Did Lose Something Special
Pup7309 and one other reacted to adameliclem for a topic
I’ve read that Kubrick did the same after completing “2001: A Space Odyssey” for the same reason, but with a snooty twist: he didn’t want the models re-used for “inferior” films. A few items survived, fortunately. No matter how badly Jackson might wish to be like Kubrick (he’s got the hairy and rumpled look down pat), I tend to think he’s not so controlling that he’d put the molds to the torch, and might not have that authority anymore. Who knows? Decades from now, LSPers might be hotly debating a rumor that the WNW molds went down with a sinking cargo ship. Adam2 points -
I disagree. However it is stylistic and a matter of taste. If ZM and Tamiya do the same kit I will go for Tamiya. Take the Mustang. ZM has a lot of detail that is forever buried inside the kit. However the Tamiya kit engineered in removable panels so that the plane could be buttoned up gear down or panels open. It could even be posed gear up. The gear up I found the least useful. But I like their style of giving options and not locking you in to open panels or buried useless detail. I like ZM and plan to oneway build their Skyraider. If they did a G-6 and Tamiya did not I will get their G-6. But given a choice of identical subjects chances are 90% I am going Tamiya. I do not claim that Tamiya is better than Zm but I personally like Tamiya better.2 points
-
2 points
-

1:32 scale Ansaldo 'Baby'
Trak-Tor and one other reacted to sandbagger for a topic
Hi all, The main and tail floats had wood panels nailed to the internal structure. Inside each float were canvass ’bulk heads to separate the float compartments. Each of the three compartments in the main floats were accessed through a circular cover on the top surface of the floats. At the front and rear edges of the main floats were reinforced with Spruce end caps. Across each main float were recesses to locate the float cross beams and these recesses were covered with panels. These details are not reproduced on the kit supplied floats. The floats panel and nailing lines were created with a scriber and a 'Rosie the Riveter'. Base coated with 'Tamiya Dark Yellow (XF60) then overcoated with 'DecoArt' Burnt Umber. The edge beading was created by lightly sanding through the Burnt Umber to reveal the base colour. Sealed with 'Alclad' Light Sheen (ALC311) mixed with 'Tamiya' Clear Yellow (X24). Photo-etch access panels and strut plates black based then oversprayed woth 'Alclad' Steel. Weathered using 'Flory Models' Dark Dirt wash then final seal with ALC311. Mike.2 points -

Matchbox Tiger Moth
KiwiZac and one other reacted to Alain Gadbois for a topic
Thanks Max. Indeed, this is the GB for a Tiger Moth. Isn't it the iconic trainer for most of us (some might say the Stearman...)! I will concentrate on the cockpit and the obvious problems like the wing dihedral, plus a few details (yeah right!). Never rigged a biplane so this will be a start for that. I'm following your lead, and thinking on how I will address this now. Funny thing, one part is missing in the kit and it is one of the seats, so I can't sneak out of this problem! Thanks Mike! When looking through a project set aside for so long, you are making a sort of investigation in what you were thinking of doing with the kit at the time. I had attempted to redo the cowl parts with tooth paste tubing, which was METAL then so you can see it was a long time ago. Also I considered making the Canadian version, which has many more differences than the few alternative parts the kit gives you. Pencil marks on the wings suggest cuts to replace sections and so remove leading edge slats. Frankly, that version looks clumsy with the large canopy and distracts from the elegance of the design so I will stick to the basic version. May I add that this is the very first 1/32 scale kit I ever purchased (around 1980 or so). Kangaroo Hobbies in Montreal, which was one of the great hobby stores around then. Finally, here is the exact spot where I stopped. One small section scraped in the middle of the aileron! I think I will start right there to make this right after all that time! Thanks for watching!2 points -
Jo-Han Maverick-Dyno Don's Ride-One Yr Project-Complete!!
Gazzas and one other reacted to mustang1989 for a topic
Still haven't given up on this one Chris. Just had to take a short break away from it again. I'll be back on it soon though and thanks for askin' dude.2 points -
Quinta Studio - 3D printed interior for NEW P-51D, Su-25, F-16C
LSP_K2 and one other reacted to ade rowlands for a topic
Was that impressed with the set I got for the 1/48 Tamiya P-38 I went ahead and ordered a set for the 1/48 GWH Su-27UB I’ve got on order.2 points -
And now looks much better, at least to me. Still a teeny bit to do in this area, then I can move on to other "stuff". I just now realized that the hole is in the wrong position, so I'll rip that off and redo it. Thank goodness for Evergreen strip plastic.2 points
-
Beat me to it. Might be time to crack down on intentionally discourteous content.2 points
-
LaGG-3, La-5, La-5FN Macchi C205, C202. Fiat G-552 points
-
First of all, that is not the "Tamiya Model Magazine" FB page. Secondly, what you see in those pictures shares a suspicious amount of errors and shape inaccuracies with the Trumpeter kits. Just look at the engine bearer. I am quite familiar with the Tamiya 1/72 and 1/48 kits and I can tell you that what you see here has little in common with those Tamiya kits. Radu2 points
-
Work has continued on the decal phase, with mainly the general warnings and cautions being done now as I wait for my replacement markings to come in. I also had a lucky day where I was able to focus on the GBU-12, so the decals and "remove before flight" streamer were added. The burner cans were also left to be done, mainly due to how to do the ceramic plates on the flame ring. I finally decided to spray the rings in white, give a generous helping of grime, and hand re-paint the support struts Chrome Silver before sealing them away in the exhaust tubes. The airframe itself is going smoothly, with lessons learned from my previous "incident" fresh in mind, I am definitely slowing down, making sure each marking is right well before adding my Solvaset. As you can see, the wheel and tire assemblies have also been added at this point, mainly to have the jet stop resting on it's struts. The next bit I worked on was the boarding ladder, adding the anti-slip coating to the steps Finally came the canopy and windscreen. I started off by masking for the B-1/2 sealant strip that would be present on most US military aircraft. I luckily had a pot of the color I was going to use for the dark gray on an F-16 if/when I build that one, and before I moved over to acrylics. I gave the B-1/2 two days to cure, as it's enamel, then re-masked and sprayed the upper surface color. Those pieces are just down to a second dip in Future to seal everything in, then attach the framework. As always, thanks for stopping by the hangar!2 points
-
Work begins on the front cockpit. The reference pics on the website linked on my first post shows differences between the structure of the kit's cockpit sidewalls and cockpit divider, and the real thing. Out with razor saws. Before After Moulds were taken of parts of the front cockpit panel to make copies of switches and knobs and things. I figured I'd just build this kit OOB, and focus on the paint scheme, but as the build plods forwards, i'm finding more and more things to tidy up. Great fun! Denzil2 points
-
KH T-6 Texan - SNJ
jgrease and one other reacted to Len Turner for a topic
More cockpit with some Eduard bits... Regards, Len2 points -
With COVID-19 lockdowns going on in Melbourne, I've been physically separated from this build (which lives on my yacht in Geelong) for several months! I'm currently doing CAD modelling of the fuselage sides, to check if it will be easier to 3D-print new sides rather than sculpting the fabric panels into the Texan kit fuselage side moldings, although that might still be a possibility. I'm also playing with a 1/72 Wirraway build... might post that on "Non-LSP Works" at some point in the near future...2 points
-
After some deep internet research I determined that Northrup used blue tape and big ass rubber bands to hold the pod in place while workers riveted the pod into place. Although it was not a common construction technique it was effective and cheap. Dan2 points
-

F-89F Advanced Scorpion
scvrobeson and one other reacted to Dandiego for a topic
Incremental progress. Pylons have been scribed and riveted. Sprayed one with black lacquer from a rattle can. Panel lines and revits on the top of the wing. First pod epoxied to the wing. Dan2 points -

Colombia Kfir C10 Revell+Isracast
HerculesPA_2 and one other reacted to red Dog for a topic
The air to air refuelling probe has been in the back of my head since planning this build. I have been looking at the stash and being a fan of the scooter, I initially thought I scored with the bent probe of the Skyhawk. Since the Colombian KFIR have been updated with the help of IAI i figured that reusing old proven modification would surely be SOP with these guys. So why not re-use the skyhawk parts? Getting my last skyhawk box (for the future AF-1) I found both the straight and bent probe. Upon checking on the Kfir I realised it was not matching. So the itch was wrong… but then I found this: and that seem pretty close to the Kfir 2000 probe. The tip of the probe will be donated by the skyhawk straight probe which I won't need for my AF-1 (using the bent probe) The rest is scratched with pasticards and metal tubing, based on pictures. The most difficult part to shape is the one connecting into the back of the aircraft. It's made with plasticard 2mm laminated with an extra 1.5mm plasticard, cut and sanded to shape. The tube attached to the fuselage is a hollow round section flattened at its base and clued on a 1mm thicj plasticard section shaped. The fact that it is hollow allows to insert the metal tube which has been cut to length and shaped accordingly. the tip is glued atthe end with a rod inserted into both end to provide better strenght. It sags a bit but that's because it's not glued yet and thus not perfectly aligned. nevertheless happy with the result. What else can I do to delay that anhedral wing issue …2 points





.thumb.jpg.5da8bff9741de420eb2e87addd8f2cf6.jpg)