Leaderboard
Popular Content
Showing content with the highest reputation on 04/08/2019 in all areas
-
How nice it would be......
wunwinglow and 8 others reacted to Starfighter Jock for a topic
To have a newly tooled P-51B in 1/32.9 points -

A new Proper Plane Decal has released
Daniel Leduc and 7 others reacted to Proper Plane for a topic
Dear friends! Let we have the honor to join to the major league of companies which offers best decal - Aviattik, Uschi van der Rosten, HGW and introduce you a set of wood grain decal. We do hope you like them! This decal has a transparent background and was developed in co-operation with Dave Douglass - a famous artist which widely known as Albatros and other planes researcher. Set of decals containing 4 sheets with 4 wood textures. Fits the 32th scale but also can be used in the 48nd. To make an order visit to online store www.ProperPlane.com8 points -
If you have ANY intrest in the F-4 , or it you just like beautiful videos .. spend 8 mins watchign this one , The JSDF 302 Sq is retiring its F-4Es soon and they made this video , and frankly it contains some of the best camera work I've ever seen , freeze frame in places and you have the a masterclass in detailign a Japanese F-4 enjoy https://www.youtube.com/watch?time_continue=480&v=wfc7qBVplxQ colinR7 points
-

1/32 MH-53E Sea Dragon - 3D printed / scratchbuilt
Dadeo911 and 6 others reacted to Starfighter for a topic
More CAD work. There are still more detail to add but I hope to finish it within this week. Resin for my printer should arrive today as well, so I hope to hold the sponsons in my hands within the next two weeks. I will have to split them in order to print them on my Photon - these things are huge!7 points -
F-100D Trumpeter.July 4th - 100% complete
Marcel111 and 6 others reacted to crobinsonh for a topic
Ok. Having had NO response from Trumpeter at all (just as I expected) I have resurrected this build from the shelf of doom. I will work out what I am going to do with the windscreen later. I have focussed on weathering and adding some more details. The weathering is not just colour but also paint finish - matt for new touchups, slight sheen on older paintwork etc. Not sure how please I am or not so just pushing forward. Here is the latest state - the windscreen I should add I took off in preparation for the replacement part - now I know I am not getting it I have glued in back on. I also had to sand the surface of the model down to get rid of the horrible pebbling texture that the Vallejo Matt left all over the more - what a chore! More to come later this week.7 points -
Messerschmitt Bf109G-8, 1/32, Finnish Air Force (G-6 HASEGAWA)
F-4Phanwell and 6 others reacted to Hartmann52 for a topic
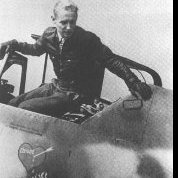
So: "Sergey aka Suomi says - finish! The prototype is the Messerschmitt-109, my favorite! Option: Suomen Ilmavoimat, 3 / HLeLv24, 06/30/1944, Lappeenranta. Pilot: MSgt Nils Katajainen, total victories 35.5, Messerschmitts - 18, on this machine - 7 (06/29/44 - Il-2; 06/30/44 - Pe-2; 07/01/04 - Air Cobra; 03/07/04 - 2xYak -9, 2хИл-2), Mannegreim 2nd Class Cross - 12/21/1944. About aftermarket in this model: Aires cockpit, main gear - RB, used about 20% of BigEd on 109G-6 from Eduard, exaust pipes - REXX (pilot version), the others - out of the box"(c).7 points -
.thumb.jpg.f0920d798d5d8600fb58b1d8a906ddff.jpg)
Revell PBY-5A Catalina 1:48
chukw and 5 others reacted to shadowmare for a topic
Hi guys, my new project is Catalina in 1:48 scale. I made some changes in interior, deleting some kind of form leftovers. I added radiooperator chair and devices, beds, and other stuff, which will maybe be visible throught small windows on center of fuselage. Overall, very nice kit with outstanding surface, full of rivets. I'm planning usual camo, Blue Gray, and Light Gray on bottom. Maybe 44-P-4 japanese fleet spotter from Midway. I don't know how to paint interior, yellowish Zinc Chromate or Interior Green?6 points -

"The Star of Africa" - Hans-Joachim Marseille's Do-335 A-2/Trop - Yellow 14 - FINISHED!
Paul in Napier and 5 others reacted to Out2gtcha for a topic
Lastly for the weekend, I got the Ruhrstahl Ru 344 X-4 missiles about 80% completed. The paint and weathering is done, fins are completed (but crappy cell phone pics dont make them look quite as cool as they are IRL) and really all that remains for them now is the making and painting the anti-sway braces and have the stainless steel tubing on the fins opposite of the wire guided fairing fins: All for now gents. Ill be back on the big fräulein later today/this week, as I need to start back up on the missing pieces of the puzzle, which are the tubes for four out of the eight X-4 missile fins, the X-4 anti-sway brackets, landing gear, landing gear door interiors, and the MLG bays which still need to be completed as well. Then it comes down to installing the landing gear, gear doors, X-4 missiles, wire guides and then pitot tube, underbelly Fug 25a antenna, and the upper full radio antenna. Thanks for looking in on me!6 points -
How nice it would be......
Kagemusha and 4 others reacted to Dave Williams for a topic
This. So I’m not sure why people are still asking for one. Tamiya can’t, and certainly won’t, make every kit people want them to make no matter how hard people wish. I’m glad two companies known for good quality models have announced the kit, and I’m sure at lest one will follow through. Time to wish for something else, I think.5 points -
Revell F/A-18E Super Hornet build.
F`s are my favs and 3 others reacted to dmthamade for a topic
Well, my Phantom build is currently on the stalled shelf. Nothing wrong with the build, i've just lost interest...A lot has been written and shown what a disaster the new Revell Bug kit is, I've been waiting for the release, so against all recommendations i did buy the kit. I have done the Trumpeter kit, and like the Revell kit it has many ways for things to go wrong. Reading through the instructions and looking at the parts, i can see where thought and planning will be needed to complete the build without having things go bad. Mouldings look good, details look crisp. Cockpit is pretty sparse, seats look funny, can't vouch for accuracy. I see the parts where bulkheads have to be trimmed, may have a workaround for that. Weapons look OK....so far so good!! I have to say, these are some of the biggest sprues i've seen, and there is a lot of plastic in the box. Very large/colorful decal sheet, printed in Italy(cartograf?) Kinda a toss up who did it better, Revell or Trumpeter.... Everything on the wall. Don4 points -
Hi all, My latest completion, the WNW Albatros B.II. very nice kit, like all other WNW kits I build. This one is maybe a bit more delicate, but the fit and engineering is perfect. Many hours of enjoyment. Making pictures is not my forte, so only a couple worth showing. I really need to figure out how to do that better..4 points
-

How nice it would be......
Thunderbolt and 3 others reacted to Kagemusha for a topic
Both HK and ZM have one in the pipeline, either of which will hopefully satisfy.4 points -
I really think that absolutely ANY new LSP that Tamiya-san comes up with will sell like hot-cakes. A new Tamiya LSP is about the only model Id plan (and DO plan) on buying site unseen. A new tool Tamiya B/C P-51 LSP would be a licence to print money IMHO. Same for a Tamiya P-38. Any LSP they come up with could arguable considered the preeminent version of whatever it is, and will sell well. I have no clue what Tamiya-sans actual next new LSP will be; but I know Ill be buying one!4 points
-
I've painted some of the cowling parts, including the Vector resin cowling flaps. This will add some detail although it will be tucked away from most perspectives. The nose cowling has also been painted. Vector provided detailed ribbing for the inside of the cowling. As I move towards the exterior elements, I've been moving away from my Mr Hobby and Tamiya paints and using the AK Real Colors for the first time. The cowling interiors were painted the same as the exterior bottom, which is Insignia White. Results with the AK paint have been good so far and they have not only sprayed well, they've shown no adverse effects with the normal weathering techniques... pastel and enamel washes over an Alclad Aqua Gloss clear coat.4 points
-
Thanks, fellas! Great questions. Elevator joint: the joint is still in design. There are different ways to do it and still meet printing requirements but I'd like to make it as prototypical as possible. In most wartime tailplanes photos, I've noticed that the elevator tabs are often set differentially (inner tabs slightly down, outer tabs slightly up). I may replicate this for added realism. Early dihedral tailplanes: yes, an early dihedral set will be made available too. :-)4 points
-
She now has legs. The brass landing gear is absolutely fantastic. The hydraulic actuators for the main landing gear need a little work as to their attachment to the main wing. Now that I have proper reference books and new found confidence, I would like to rip out the landing gear bays and start over. The next model of choice will surely get the full treatment. Upon putting on a good even primer coat (Mr Surfacer 1200 diluted 50/50 with lacquer thinner) I realized that I had to pay more attention to some body work. I will spend the remainder of tonight touching her up. Its the first time I have ever used a primer for the whole of the airplane. I am hoping to make it easier for the white under fuselage coat to adhere using less paint. And to spot body work imperfections, so far on target for this one. The primer eased some of the sharp panels lines I had scribed prior. And made them look better than what I had originally produced. She will have the SEA camouflage scheme when done. I am thinking of black basing the tan and lighter green camouflage areas. And then use a wash to pull the panel lines out, ever so. What and how much weathering is being looked at in detail. I have some thinking to do on how this is going to happen.4 points
-
The Modern Viper Guide, 2nd Edition
Darren Howie and 3 others reacted to jmel for a topic
NOW SHIPPING!!!!!! www.reidairpublishing.com4 points -

Spotted Ass Ape HobbyBoss B-24 Assembly Ship
kkarlsen and 3 others reacted to Wackyracer for a topic
Instrument panel done. Still need to add more details to centre console and add all the switches to both panel and console plus controls etc.4 points -

Spotted Ass Ape HobbyBoss B-24 Assembly Ship
TorbenD and 3 others reacted to Wackyracer for a topic
Mr Surfacer 1500 black. Mr Paint white aluminium again Then dull interior green over ak scratch effects4 points -

1/32 MH-53E Sea Dragon - 3D printed / scratchbuilt
sandokan and 3 others reacted to Starfighter for a topic
Nothing spectacular, but the first surface details are being added to the sponsons. This is the time when CAD parts come to life.4 points -
"Dark Blue Killer" Tamiya F4U-1D
Loach Driver and 2 others reacted to John1 for a topic
Finally completed this model, after starting it back the summer of 2018. My first large scale Tamiya kit and I'm absolutely blown away by how good this was. For those who have never built one of these kits, you have to treat yourself! My subject is "My Nel III", a late war Corsair assigned to VMF-511, flying off the USS Block Island. Decals courtesy of the truly awesome Fundekals set. Here's a full list of all the corrections and updates I incorporated into my build. Not saying it's the complete list of every modification the kit needs or that all of these are even necessary. Some are just to update the kit to the late -1D variant I was building. Just posting in case it helps anyone else. cockpit flare gun deleted entirely Delete upper wing ID light Delete lower wing landing light Add left side armor plate (installed to protect the pilots throttle arm) Add under seat armor plate (installed when the Corsair gradually started performing air to ground missions). Add left side windshield hand grip Add a thin metal bracket on top of seat for seatbelts Fill in cockpit vent in fuselage (this mod was only seen on post-war Corsairs, with maybe a few limited exceptions). Fill in wing fuel tank fill ports (these tanks were deemed an explosion hazard and were gradually eliminated from later production runs). Drill out cockpit frame lightening holes Add rudder pedal adjustment levers Added multiple hydraulic lines on forward cockpit bulkhead Added pins and retaining cables for pilot's back armor plate Drilled out top tubes on pilot's seat mounting frame Removed moulded on seat adjustment lever and replaced with scratchbuilt part. Drilled out lightening holes on footrest support frames. Added multiple electrical lines underneath instrument panel and side consoles Used awesome Barracudacals cockpit decals Used thin acetate between kit instrument panel and decal, instead of thick kit clear part Added hydraulic line to cockpit accumulator Added large heating duct to right side of cockpit Added stubs of pencils sticking out of map case Used pilots oxygen hose, to run from regulator Thinned levers on throttle assembly Drilled out opening of pilot's relief tube and added drain hose Added HGW harness instead of kit PE Added bomb emergency release lever on left side of console Added very basic 2D radio behind cockpit seat Added multiple electrical cables to radio and IFF control boxes on right sideway of cockpit Added rocket control panel (kit part R-44 but not shown in instructions) Added rocket firing handle on upper left side of cockpit Added electrical lines for MG switches on glareshield Sand down the fabric stitching on wings and control surfaces Added Vector cowling set. Fiddely but in my opinion, well worth it if you are leaving the cowl flaps open Added cowl flap actuator rods and linkages Added engine ignition lines, with clips to hold the lines together Added oil drain line on bottom of crankcase Added curved oil lines at top of cylinders (see my comments above) Added larger diameter lines that connect cylinder tops to each other Added electrical and hydraulic lines to main landing gear bays Carved out openings at bottom of main landing gear retraction struts Drill out lightening holes in main landing gear bays Thinned kit exhaust openings Opened lightening holes in sides of flap panels Open up lightening holes in LG oleo scissor links Added Barracuda resin wheels Added ignition "pigtail" leads to HVARs Added Brassin resin 500 lb bomb in lieu of kit 1,000 lb bomb (thanks Jennings!!) Added arming wires to front and rear bomb fuzes Added scratchbuilt wingtip navigation lights Added multiple hydraulic and electrical lines to wing-fold area Added emergency release handles and linkages to interior of canopy frame. Used those awesome Fundekals decals. If anyone's interested, the full build is here:3 points -
more pics regarding Corsairs3 points
-

How nice it would be......
Rick Griewski and 2 others reacted to R Palimaka for a topic
Yup, Mustang III would be nice...so many I would like to do. I agree with Dave though, there are two promised in the pipelines from a couple of companies with good reputations. I don't see Tamiya doing it. I guess I could start on my Rutman P-51B kit, one of the above will show up just before I finish. Richard3 points -
How nice it would be......
Thunderbolt and 2 others reacted to Rick Griewski for a topic
Noooo not until I finish my Rutman P-51B! A new Tamiya kit would be way too much distraction. Rick3 points -
3 points
-

Revell Bug
D.B. Andrus and 2 others reacted to Mark M for a topic
not done much as ive been concentrating on the harriers but the base is finished3 points -

How nice it would be......
JerseyChris and 2 others reacted to Starfighter Jock for a topic
The P-38 would also be very welcomed!3 points -

Spotted Ass Ape HobbyBoss B-24 Assembly Ship
Rick Griewski and 2 others reacted to Wackyracer for a topic
Turrets arrived from USA3 points -
And it starts!! Before. After. The bulkheads that seem to be causing so much angst don't really seem to do much, may add a little support to the upper fuselage, but i may have a workaround for that. There is moulded on detail on the upper part of R6 that is seen through the early ECS(?) parts, i'm using the late parts so i can lose the part i cut out. Cutting apart the intakes allows me to work on the seam all the length of the tube, and after trimming the locators at the end i will be able to easily add the engine faces. All the locators are on the bottom of the tubes, so positioning these parts is no problem....i hope. Don3 points
-

A Tale of two Cobras: FINISHED
Model_Monkey and 2 others reacted to Dukie99 for a topic
I finally painted the MFDs with transparent blue, I think it looks OK. I have now masked and glued the canopy of the Viper. The fit of the fixed parts is absolutely stupendous. The central portion was glued with 2 minutes epoxy for stength and the side walls with bondic. I glued the doors which you can pose open in the closed position and the fit is great with minimal sanding. I also glued the vac form canopy on the Whiskey with epoxy and bondic. The fit is a lot more approximative than for the Viper but that was to be expected. The clarity of the vac is great and I am pretty happy with the result. Now I need to mask it. Cheers, David3 points -
Finished..... 1/32 Tamiya P-51D Mustang "Old Crow"
Starfighter Jock and 2 others reacted to Tolga ULGUR for a topic
Some progress I have used Alclad lacquers.3 points -
The missing part did'n show up during my extensive crawling around session, so I decided to scratch a replacement. It's not perfect and still needs trimming and sanding but I think in the end it'll be good enough! The AIMS camera is only dry fitted and is of course tiltable like the original. The good side of the frame will be mor visible. And here it is in the cockpit: Now I have to do the cleanup, prime the frame, clean up again, dry fit the auxilary units and the electical connectors and then the cockpit is good to (finally) go to painting stage. Thanks for watching and commenting!3 points
-
Here the panel with the switches. Now I will paint the radio-equipment and make them ready for installment. The Interior needs a little dirtying up also. Thanks for watching. Ferry3 points
-

F-84G Thunderbird - Complete!
sandokan and one other reacted to themongoose for a topic
Well I'm waiting on parts for the corsair and they're coming from Belgium so...time to start what I'll call a slow roller. heading into summer and the family has lots planned so I'll work a little at a time on this one. It's going to be out of the box. Although you know I'm already struggling with that decision :-) The major work here will be foiling. I've gone over all Foiler and Out2gtcha post on this technique, I've done some practice work, I've collected all the tools (even have my mason jar for bleach). I chose this one , probably obviously, because it has the straight wing and I'm hoping that makes things easier this first time with foil. I started on the cockpit last night. Here's a quick shot of the model and the work so far...2 points -
Me 117 E "Adler". bomber/fighter Various types of bombs in the bay. Various types of torpedo's 2x 20 mm cannons Mounts: *drop tanks *regular bombs *cluster bombs RADAR: Location and identification of air,sea or ground target. Goes to auto-pilot for the attack. Computer chooses the best weapon to destroy the target. Markings: Radio call sign Unit emblem Pilot's personal insignia:skull Kills under canopy.2 points
-
FANTASTIC news. That just made my day. Question: Any suggestions for what decals on the Airscale instrument decal sheet might go here? TIA, D2 points
-
1/48 Hasegawa Arado 234 "Blitz"-After 3 Years...Completed
Gazzas and one other reacted to mustang1989 for a topic
Ok gang I've got some pics I think are worth sharing so you guys know I'm still building an aircraft. lol . I decided to do before and after photos because just looking at it the cockpit at first doesn't really look like I've mad a lot of progress. There are a few items more however and yes....................it's been tedious. This is where I left off: and this is where I'm at now:2 points -

How nice it would be......
Starfighter Jock and one other reacted to BiggTim for a topic
You see there, Brian? I've said it so many times, that it's beginning to spread!! My plan is working perfectly..... Keep beating that P-38 drum, Chris!2 points -
How nice it would be......
BiggTim and one other reacted to JerseyChris for a topic
Calling Mr Tamiya....2 points -

Spotted Ass Ape HobbyBoss B-24 Assembly Ship
Wackyracer and one other reacted to Out2gtcha for a topic
Very cool...............please do let us know how the install and prep goes on the turrets. I dont have the kit yet, but am very interested in any AM turret options when I do get it.2 points -
Wow, very nice!2 points
-
pretty certain they are inspection doors for the control lines that connect to the ailerons.2 points
-

AMS Resin CBU-87 and CBU-89
Harold and one other reacted to Pete Fleischmann for a topic
CBU-87 was my favorite bomb. Selectable spin rate..4 dispensers per jet each with 202 sub munitions.. I miss those days.. Cheers Pete2 points -
I found another image in my files that provides a much more detailed view of the CO2 tank mounts. This is from the A6M3 22 c/n 3685 in the Duxford collection. Rob Thwaites was kind enough to photograph this plane for me back in 2008. In the photo you can see the two mounts were not identical in configuration. Ryan2 points
-

1/48 Hasegawa Arado 234 "Blitz"-After 3 Years...Completed
D.B. Andrus and one other reacted to mustang1989 for a topic
Pilots seat is done and installed. I'll be working on the back wall where the battery and other details are and working my way forward after I take care of the nose gear bay on the bottom side of this whole assembly. Here's the progress as of this morning though: ( The seat belts are actually dirtier than they look in the picture-here they look practically brand new....wow)2 points -
Hi fellows, The fighter versions of the Crusader are back. I have been mainly working on the Recce version so far to have the same level of progress as the fighter versions. Today I show how to easily attach the engine assembly in the fuselage and how to avoid an issue. If we strictly follow how the Aires kit had been design, it appears that the engine exhaust is out of the fuselage by around 2 mm. To correct it, this is here below how to proceed: 1- Reduce the diameter of the shoulder as show 2- Next, make a chamfer of the engine kit and on the resin too. It permits to move forward the after burner canal and to position the shoulder right inside the kit bulkhead. The result is that it is automatically centered in the fuselage. The final result here below Bye Eric2 points
-

Fokker pair 2
Greg W and one other reacted to sandbagger for a topic
Hi all, Yes the 3D printed parts are close tolerance and fit well, although there are no location pegs/holes as you'd get on standard kit parts. However the parts can be printed hollow and include parts the original kit has as separate pieces. You can still see the 'layer lines' created by the vertical printing process, but even at this 1:32 scale, you have to look specifically to notice them. The engine has progressed a bit more now with the addition: The conical valve springs Crankcase breather pipe Magneto drive assembly with two 3D printed magnetos Two air pump to crankcase pipes Decompression valve. Still have to add ignition leads, intake manifold with locking rings, water pump, coolant pipes, oil filler pipes, sump oil sight glass. There's also a couple of other pipes plus engine controls. Mike2 points -
Thanks as always fellows for the kind remarks. Bench time is precious lately but, and I’m sure I’m not the only one here susceptible to it, a new tool has pushed me to take some time to do a little work. In this case I purchased a UMM-USA PropMaster prop jig. Wow, do I love this tool! My thanks to Mr. Vojtech for ridiculously fast turnaround and for a great product. I have mentioned previously that that I thought I’d use the spare blades from my HK Lancaster kit to replace the somewhat misshapen B-25 blades. Since these blades had a different mounting lug than the B-25 blades, and were a bit long, I first removed about 2.5 mm or .100 inch of material from the hub end with my trusty razor saw: This effectively removed the squared-off mounting lug: Thereby, with a little cleanup with a sanding stick, the blades were ready to glue directly to the hubs: All that remains is is to fill a few voids on the back side at the joins and the props are ready for paint. Onward! Jimbo2 points
-

1/32 MH-53E Sea Dragon - 3D printed / scratchbuilt
Dadeo911 and one other reacted to Starfighter for a topic
Thank you all for your kind comments! Peter, compared with what you are doing, I am just playing around... but it's still fun! I am currently still working on the fuselage surface but I also looked for reference photos and took the final decision to go for a MH-53E instead of the CH-53E. The CH might be better documented, but the MH looks even more special and the mine sweeping equipment offers some very interesting options. I will probably go for a HM-14 'Vanguards' aircraft. I have started the CAD drawings for the bigger sponsons and I will also have to modify the IP, but that should not be a big issue. This is of course just the rough shape of the sponsons, details will be added later.2 points


