Leaderboard
Popular Content
Showing content with the highest reputation on 10/18/2022 in all areas
-
F-104G "KLU" - Italeri 1/32
F`s are my favs and 14 others reacted to Warbird for a topic
Hi All, This is Italeri's 104 with Reskit exhaust, Master pitot, Eduard wheels and seat. A few additions here and there but otherwise a straightforward build. The kit has its pros and cons and I think others have already given enough feedback about it. This plane was based in Leeuwarden (Netherlands) during the late 70' - early 80'. "D-8115" markings are paint otherwise I used the (top-notch) decals from the box. Paint is AK Real. Photos taken outside so light varies a little bit... Cheers Tristan15 points -
1/32 ZM Messerschmitt Bf109 G-14 7/JG.3 "Yellow 18"
daHeld and 12 others reacted to monthebiff for a topic
Not had a lot of time for building of late but have managed to get the cockpit decalled Needs a set of belts and some final weathering but back on track. Regards. Andy13 points -

1/32 Short Stirling
R Palimaka and 11 others reacted to tomprobert for a topic
Good evening guys and gals! Time for an update on the big Stirling. Over the last couple of weeks I have been continuing to devote my attention to the wings. The kit parts are not the most accurate in terms of aerofoil shape and the top surfaces are too flat and don't capture the real thing particularly well. Therefore, with cunning use of spars I have made an attempt to correct this and replicate the real wing shape more accurately. The spars were previously cut to the correct depth following plans, and then I added a large diameter Evergreen tube to the leading edges as this was the correct shape/diameter to capture the curvature of the leading edge. The leading edge was glued first, given 24 hours to dry, and then I glued the forward spar to the upper surface. Again, this was allowed to dry thoroughly before the rear-most spar was glued. This has allowed me to bend the plastic along the full length of the wing and capture the aerofoil shape much better. It's probably easier to see what I mean with a picture: The next problem I encountered was the fact that the nacelles were not deep enough and when the top and bottom halves were joined they were an oval shape rather than circular. This would cause major problems when it comes to adding the engines (plus it's totally inaccurate!) so I measured the diameter of the Beaufighter cooling gills and made four plastic card plates to be glued to the nacelle fronts. The area behind was then built up with P-38 and blended to shape, meaning I now have corrected and perfectly circular mounting points for the engines when the time comes: The Revell 1/32nd Hercules engines from the Beaufighter will now fit perfectly: Lots of blemishes still to be sorted in the above photos, but you get the idea. With the wing halves joined I thought I'd tackle the ailerons next - Cees had removed these previously as the molding is very soft and the shapes poorly defined. First it was case or prepping them by sanding and thinning the trailing edges: For some reason the upper surface of the port aileron was 4mm too short, so I lengthened this with some plastic card bent to the correct shape and blended in (red arrow). I next added some plastic strip to the rear of the wings (blue arrow) to ensure a nice and strong join: Finally, they were glued in position - the fit was almost perfect which was probably more luck than carefully planning on my part! The Stirling has very distinctive fuel cell covers in the upper wing surface - the Sunderland has the same and I made these from thin plastic card on that model and was very pleased with the effect. Although not strictly accurate, I liked the effect as it made the very large wing surface more three-dimensional and therefore I decided to do the same with the Stirling. First of all I made some card templates - these can then be drawn around and flipped over to do the reverse on the opposite wing, saving errors on expensive plastic card in the process: These were then transferred on to plastic card before being glued to the wing surfaces: A top tip for making wingtip lights - cut out the shape with a saw and line with plastic card: File and sand to shape and they're ready for some clear sprue: I've also added various other raised areas to keep things interesting and have tried to capture my scribing etc. in the light in this shot. It also shows off the effective aerofoil modification: The undersides still have a lot of work to do on them, but I need access to the spars when it comes to joining the wings to the fuselage so these will remain as is for the time being. The wheel bays and flap area will also be finished off when the fuselage and wings are joined to avoid damage to these areas: The uppers have really come to life with the tank covers, life raft hatch as well as various access panels: Having corrected the aerofoil shape highlights just how out the original kit's wing position is - Cees was already on the case with this as removed the raised section on his fuselage for good reason! And that brings you up to speed for now. Until next time, all the best, Tom12 points -

MQ-8B Fire Scout - Brengun, 1/32
johncrow and 10 others reacted to Starfighter for a topic
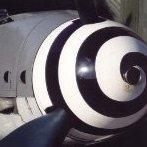
After some additional sanding, it doesn't look too bad I'd say. A tiny bit more of sanding and I'll be ready to fit the nets and start painting.11 points -
Well with all due respect: NOT a OV-10A Bronco, but a OV-1 Grumman MOHAWK.............in 1/32nd scale..........10 points
-
1/32 Revell Messerschmitt Bf109 G-2 converted to an F-4 Trop
Greg W and 7 others reacted to monthebiff for a topic
Still plugging away at this one and now have the cockpit decalled using a mix of Barracuda and Airscale Just need to add some belts and final weathering but about there. Also managed to make a start on the wheel well adjacent as the F-4 usually had round wells Will need to get the fuselage closed up before I can modify the side walls. Regards. Andy8 points -
Thankya - its a start at least! Day 2 Pretty wiped out from work etc. but got a little time in this evening. All of the filler on the wing sink marks was sanded and smoothed out, made up the pylons and made the modifications to the wing so they can be fitted (drill holes, remove a raised ridge from the wing surface.) Also sawed the moulded in wingtip lights out so I can use the optional clear bits. Digging through the aftermarket looks like I have some Bazooka tubes from Eduard - deciding if I will mount these or not - they look pretty good aside from the fact that the front end is not hollow - there is a concave depression instead which seems odd. Maybe I can drill them out...8 points
-
New boxing of Italeri Tornado
Tomcatfreak and 6 others reacted to Zola25 for a topic
True - I used the Aires cockpit for the GR.1 in my conversion. It fits quite well if anyone wants to have a go at it /Niels7 points -
Revell new tool Bf-109G 2/4
LSP_Kevin and 6 others reacted to monthebiff for a topic
One thing to note on the Revell G-2/4 boxing that the new sprue they has supplied has a later wooden foot rest and the metal foot rest is no longer in the boxing as that sprue has been removed. I used a spare from my ZM kit on my build Regards. Andy7 points -

1/32 Trumpeter EE Lightning F.Mk.6 XS904
scvrobeson and 6 others reacted to Derek B for a topic
Original kit ventral fuel tank arrester hook fairing (left) and modified one (right). Modified fairing in place. Derek7 points -
.thumb.jpg.5da8bff9741de420eb2e87addd8f2cf6.jpg)
Infinity 1/32 Son-of-a B!tch 2nd Class
R Palimaka and 5 others reacted to RadBaron for a topic
Quick update, nothing exciting, just more of those much derided "Basic Modelling Skills" being put to use. I know I could have bought the separated control surfaces add-on for the kit, but where's the fun in that? Elevators and horizontal stabs Also thinning the area around the wheel well. I made a cut line the thickness of the wing spar, then ground away everything forward of that. The plastic is nice and soft and VERY easy to carve and shape. Denzil6 points -

1/24 scale Trumpeter spitfire " So this is a Spitfire, she sure is a a pretty lady"
Greif8 and 4 others reacted to miketippingmodels for a topic
1/24 scale Trumpeter spitfire " So this is a Spitfire, she sure is a a pretty lady" This is my first venture in to 1/24 scale and I wasn’t disappointed, seeing even more detail as an upscale form 1/32 its pretty amazing, I had heard a lot of bad things about this kit, fit issues, etc but I over came the problems and I hope made a decent job. All of the paint used was MRP and 95% masking instead of decals. The figures are 1/24 from Reedoak there are only a few figures that I could find in this scle, so its not as popular as say 1/32, and the Jeep is from Italeri Enjoy5 points -
aeroscale.net/news - Italeri will be releasing in November the IDS version of the Panavia Tornado in 1:32 scale5 points
-
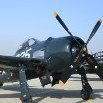
Scratchbuilt 1/24 Grumman F8F-1 Bearcat
Paul in Napier and 4 others reacted to Jim Barry for a topic
I spent a great part of the day with decals on the prop. I like it, but it’s still coming along. Morning should be ready to seal everything in floor shine and even out the disruptions.5 points -
Revell new tool Bf-109G 2/4
RBrown and 4 others reacted to Dave Williams for a topic
I’m not sure that the Hasegawa kits are the “gold standard”. They are obviously a big step above the ancient Revell F/G kits from the late 60’s, and have good detail and easy construction, but they have some accuracy issues. The current “gold standard” is probably the ZM kit.5 points -
To be honest I don't even know if it was ever available. I'm always pushing luck and sending emails The Cutting edge Cockpit kit inserts pretty well into the fuselage halves. No real hassle safe for cutting a few plastic locating lugs. The resin piece is rather large and heavy and I removed as much as casting block as possible to save weight for the in-flight display The seat even slides into its rails The kit's glareshield was cut off and replaced with the A-10C glareshield and Instrument panel Some minor adjustments are needed for fitting the IP and it needs to be sanded thinner but this will be a pleasure to paint.5 points
-
Completed the 1/32 Infity Vampire FB. Mk5 in the markings of SAAF no.1 squadron coded AX-A flown in the fifties and sixties. Model nose was corrected a bit, rockets added and the SAAF decals were home designed and printed. PLEASE SEE UPDATE ABOUT THE SAAF roundels below... Full modelling details can be found at my website here.....4 points
-

Directed Energy Weapons
thierry laurent and 3 others reacted to LSP_Matt for a topic
Thought people might be interested in this topic and some recent speculation about developments. Protecting high value vulnerable assets (AWACS, Tankers, Ships) an increasing priority in an ever increasingly hostile operating environment. Hope you find it interesting Directed Energy Weapons Cheers Matty4 points -
The addition of some of the fungi has begun...........and the Moon Oak and crystals are added. I have yet to put any of the groundwork down yet, so lots and lots of work to come. In this world a Moon Oak has the shape of an Oak tree, the coloration of a large Aspen or Birch, and the budding/blooms of a Japanese cherry blossom tree. Not totally sure where I came up with some of the strange fungi I put in. I've seen some very interesting ones on our hikes and some nature specials. These are not all by any means, but a start. Way back, I made 3 SUPER dinky owls, about 1 or 1.5mm tall. Not a lot of detail, but enough to know what they are when seen. I took the opportunity to give all 3 a different cool roosting spot: #1 is high up above the cottage #2 is overlooking what will be the water fall and "sea" below. #3 is roosting on one of the cottage beams All for now, as its back to the grind! Next up will be adding some soil, then varying grasses, mosses, tall grass, flowers and finally pulling the lighting through the cottage and getting it glued down on the base. That should be fun! Thanks for looking in on me.4 points
-

1:32nd scale Lloyd C.V
Paulpk and 3 others reacted to sandbagger for a topic
Hi all, I've represented the cover plates that were fitted over the flying wire turnbuckles at the lower wing roots. These were made from 0.2 mm thick plastic card. The raised centres were pressed out using the small 'ball' end of a paper embossing tool. Holes were punched through the plates to represent the securing bolts. Painted with 'Alclad' Duraluminium (ALC102) and weathered with 'Flory Models' Dark Dirt clay wash. That's it for the model itself. Just the figures to finish, Mike4 points -
My ex-wife had a second cousin who flew them after flying Dauntlesses. He hated them. They were sluggish, had very high stick forces and were difficult to bring aboard. He always said if the Japs didn't kill him, that aircraft would. He managed to cheat both fortunately.4 points
-

1/32 Trumpeter EE Lightning F.Mk.6 XS904
D.B. Andrus and 3 others reacted to Derek B for a topic
More work on the ventral fuel tank... Derek4 points -
Mirage 2000-5F & Mirage 2000D - 1/32 Kittyhawk
Quinta Studio and 2 others reacted to ROM for a topic
Hello The last 2 years, I was busy with this quite demanding project. And now I am pretty happy to finally share the result . I built side by side two Kittyhawk boxings, both in French Markings: a Mirage 2000-5F during Operation Harmattan (Lybia) in 2011, and a 2000D from Operation Chammal (Iraq/Syria) in 2015. The builds were far from "From the box" so to say... Kittyhawk... well is Kittyhawk you know. Interesting subject, quite nice details, but mistakes, lacks, or incomplete intructions. So I had to provide a lot of work to bring the models to a higher standard they deserve. It was maily done with the help of 3D printing. Non exhaustive list of addons: - Exhaust: Reskit - Cockpit -5: Renaissance - Cockpit 2000D: 3D+Quinta - Seats: Grandmodels - Wing Tanks RPL541 542: FFSMC - PE parts: Eduard - Wheels: 3D - RPL522 ventral tank: 3D - Missiles & Pylones: 3D - GUB24: 3D - Decals: Uprise et FFSMC - Figures: Reedoak The Mirage 2000-5F: And the Mirage 2000D: The full WIP is detailed in 80 pages of french Cocardes magazine, with English captions. With Mike's authorization, I share the link if you want to get a copy: Cocardes 24 Special Mirage 2000 Hope you like them! Regards Romain3 points -
.thumb.jpg.f0920d798d5d8600fb58b1d8a906ddff.jpg)
ICM AH-1G "Mo-Ther-Lover" Vietnam 1:32
BiggTim and 2 others reacted to shadowmare for a topic
Hello guys! I started ICM Cobra in september. Goes together nicely as every their new release I had. I found a way to manage Achilles heel of this kit - undercarriage. I simply made groove for paperclip wire and poured thick layer of CA glue. Then I will put small metal tubes into fuselage to make strong joint. Does anybody have "Du-Me-Mi" AH-1G Photos? I'm looking but without success. I don't like to rely on profiles as they are often superficial. After this modification I started cockpit and transmission. Added Eduard PE, lead wires and made first aid kit from alluminium foil. There is small gap in beetween bottom fuselage panel and fuselage halfs and small problem with transmission side panel - slightly protruded. Nothing to worry about. Kit itself is "weekend edition" for every thorough modeller.3 points -
So trying to do a "get my mojo back" build here. Simple Goal; get something done on it daily - doesn't have to be much but at least some progress. By all accounts I have heard this is a decent kit with a few challenges but nothing crazy. I will be using some aftermarket, definitely the BarracudaCals decal set for Sleepy Jean III (they look brilliant) and master brass barrels. Probably some of the Eduard color etch set for the pit and last but certainly not least the fantastic landing gear by SOW. Maybe something for the engine - the front could use some work to make it more accurate and detailed IMHO... Day 1 Progress Started with the wings and tail surfaces as I am lacking paint for the cockpit - hopefully that will deliver mid week. As other builds here have noted there are noticeable long sink marks on the wings - I have filled with Mr Surfacer 1200 (more like Mr Surfacer 100 now as that pot is OLD but makes it more useful to fill small issues...) The Master Barrels are "full length" so you must make some modifications to accommodate for that. I Dremel-ed off the lip on each brass barrel at the back end so that these can be inserted through the ports after paint. Engine bits. Left is from this kit, the right borrowed from a Trumpeter kit. The Trumpeter at least has more correct distributers option parts. I know not a lot will be seen after the engine cowlings are on but I would like to at least have the front of it right. Might see if I have some aftermarket engine bits in the stash or order something.... So not a ton done day one but a start!3 points
-
3 points
-
New boxing of Italeri Tornado
Tomcatfreak and 2 others reacted to Zola25 for a topic
Just give Reskit 5 minutes.. you will have Kormorans I am sure /Niels3 points -

New boxing of Italeri Tornado
LSP_K2 and 2 others reacted to thierry laurent for a topic
This is actually the kit with the 2520 reference. As you can see the ECR is the kit 2517. It was announced in an Italeri newsletter I saw this morning. https://www.google.com/search?q=italeri+tornado+2520&oq=italeri+tornado+2520&aqs=chrome..69i57j33i160l2.16066j1j7&client=ms-android-oneplus-rvo3&sourceid=chrome-mobile&ie=UTF-83 points -
I just received an email from Yellow-wings. THEY ARE ALIVE AND WELL AND VERY MUCH IN BUSINESS!!!3 points
-
Yeah I wish Revell here in the US would get the molds for the Ju 88 and the G-103 points
-
Yes: and no: Jari3 points
-

1:32nd scale Lloyd C.V
Rockie Yarwood and 2 others reacted to sandbagger for a topic
Hi all, Final bits added. Observers machine and ring mounting. Windscreen, which was modified from the kit supplied as it was too large. Airspeed Anemometer added to forward, left interplane strut ('Gaspatch' with scratched photo-etch mounting). Crew steps added - made from photo-etch and 0.5 mm diameter wire. The only thing left, if it can be done satisfactorily, is to add the metal cover plates over the flying wire turnbuckles at the lower wing roots. Then it's onto the figures, Mike3 points -

New figure attempt
Rockie Yarwood and 2 others reacted to Pete Fleischmann for a topic
manufacturer is Lerchik. It came from a shop in Germany. Can’t recall which one.3 points -
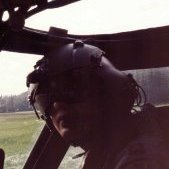
1/35 Scale MH-60G Pave Hawk II
Rockie Yarwood and 2 others reacted to Zorro for a topic
Amazing how a little bit of color makes things come to life. Next, micro brush to the cabin floor and some Zinc Chromate Primer to the Pilot and Co-Pilot's seat wells before installing the electronics... most of the time we would hide our helmet bags in these seat wells. Not a good idea to place anything in there that will prevent the seats from stroking below the floor level during a hard landing, i.e. crash sequence!3 points -
ICM considering OV-10A in 1/32, vote on their FB page
Rick Griewski and 2 others reacted to petrov27 for a topic
lordy for some reason I first read this as "ICM considering an A-10A in 1/32...." I need glasses (better glasses.)3 points -
Finished up the GBU-38's and the LAU-7 rails and, got them installed. These items make a big difference in the overall look of the jet compared to what she came with. I still need to do the CATM-9 and I'm waiting on the center line pylon, Litening pod and, ACMI pod to be printed and I can finish this project up finally. Steve3 points
-

New Release Update Request
scvrobeson and 2 others reacted to alaninaustria for a topic
Thanks everybody, I really hope Infinity continues with the Me-410 and Wyvern. Both very iconic aircraft! Cheers Alan3 points -

Andy's Hobby HQs 1/16th M4A3 76W HVSS Sherman is up for Pre-Order!
TankBuster and 2 others reacted to JeepsGunsTanks for a topic
Started the build. First impressions are, this is a very, very nice kit. There has only been one fitment issue. The exhaust tube for the little Joe Aux Generator little tab does not line up with the hole in the lower hull. Easy fix, just trim it away. Only very minor complaint is, I wish it had come with T-84 or T-80 tracks, both more common in Korea, but saw action late in WWII as well. The kit builds into a very late M4A3 76 wet tank, so any of the tracks would work. T-66 tracks were rarely seen in Korea though. I'd love to do it up in the Korea war Tiger Face. I love this kit so much so far, I want another one! It is all building up a lot like the RFM 1/35 kit of the same subject. Just bigger. Though this one has a single mold lower hull, were the RFMs all have a lower hull you build up, bar none the worst part of their kits. Kit started with the lower hull. It also wants you to do the tracks and suspension, before the fun stuff, but I'll be doing those things last. The nice sprue cutters are paying off. The fit on everything is very good so far. This part was trickier than I thought it was going to be, the outers have a shallower hole they fit in, and should have been done first. You can see there rear hull plate and the finished powertrain. Rear hull together. Need to hit that corner with some glue and clamp it. Cat is shedding like crazy. Lower hull and powertrain attached. This was very easy to do. Perfect fit, popped right into place. started on the upper hull. with everything so big, I was able to use the periscope to hold the periscope mount in place, and glue the flap, and guard in place, without gluing in the periscope, so I can paint those separately, and reinstall them. Test fit at the end of the night. I didn't get all that far. Spent most of the day moving the model making stuff to the area around my computer desk. The old area will not be available through the holidays. This way though, I can use my Computer Monitor to display a PDF of the instructions, in a much larger easier to see way!3 points -
Still progressing, overhead bins added; and painting underway I'll find a better place to re-fit the counter balance weights and should be ready to close this up soon Thanks for looking3 points
-

DigiHell & the F/A-18F Super Hornet - 3rd Wire & On The Deck
Greg W and 2 others reacted to themongoose for a topic
A few updates for today. Definitely a LONG build I've been 5 or 6 days working in the evenings on the camo for the fuselage sides and the underside of the wings. Finally finished that up this week. Printed out the light ghost grey masks late last night. Won't be able to apply them tho till later this week as I'm traveling today thru Tuesday. Working on some FOD covers based on a youtube video by FlyingS Models. It's tough o find 1" wide teflon tape finally broke down and ordered it off Amazon. This blue color helped with the paint coverage and may look like creases in the cover if any ends up showing through. And then finally I went ahead and clear coated the tails after finishing up the custom decals. I ran the Eagle and Anchor off on the laser printer. Boy are these brittle. Definitely don't scuff them against anything till you get clear coat over them. Printed on white decal film, then went around the printing very softly with a #11 blade to score the film. I touched up all the white edges with a brush I have that has 3 bristles left lol3 points -
Okay, it's done! Although while preparing the photos I realized that I don't have any exhaust staining or engine oil, etc. I'll add it. I also ended up using the overall canopy part because the individual pieces just weren't overlapping and sitting correctly to have the open cockpits. The paints are MRP and I mixed some of the Light Grey with the Grey-Blue to make a more faded color. I did go back over some areas of the fuselage sides with Grey-Blue to darken the fuselage sides where they may not have had as much sun exposure. The markings are painted using masks cut on a Cameo 4 cutter. The number 2s are from decals and the painted over rudder stripes are the kit decals. Some of the interior colors are brushed Vallejo paints. The antenna post doesn't have a positive location despite what was shown on the instruction sheets. I attempted using the sponge technique on the walkways to add paint wear in those locations. First time for that.3 points
-

1:32nd scale Lloyd C.V
Rockie Yarwood and one other reacted to sandbagger for a topic
Hi all, Figures done. Both are the 'Yellow House' German aviators (YH32005) set. Brush painted with 'Tamiya' acrylics, Mike2 points -

Revell new tool Bf-109G 2/4
Uncarina and one other reacted to thierry laurent for a topic
Bummer! That is plain stupid! This means that for that kit it is probably better to get the full Eduard Brassin pit rather than the Barracuda bulkhead/seat if you do not have a spare part.2 points -
Revell new tool Bf-109G 2/4
LSP_K2 and one other reacted to CRAZY IVAN5 for a topic
The more i look at this the more I've decided to get one of these , I built Revell's G-10 and bought resin up grades , I'll do the same for this one too2 points -
I didn't get much bench time this weekend, but I was able to inspect the cockpit goodies Aftermarket is sometime a trend rather than a necessity but in this case I can tell you it is not. The kit's cockpit really needs to be replaced. Luckily the A-10A Cutting edge is gorgeous. The IP and Glareshield are not correct for an A-10C and although it is quite easy to convert them, I called AMS to the rescue and Harold was very kind to answer my request. Not only did Harold send what I ordered he was very kind to add extra pieces like the gun muzzle and more importantly (for me) that big T antenna which I was wondering how to scratch (especially since I need an extra 2 for my OV-10G+ project - at least know I have an example to base by scratching on) So many thanks Harold, it is very much appreciated. if you don't have the AMS parts, converting the Cutting Edge A-10A cockpit to A-10C is not overly complicated: - On the Instrument panel, you need to remove the analogue instruments above the 3x4 engine gauges on the right side. This is easily done with plasticard. Top is AMS A-10C, Bottom is CE A-10A As you can see the A-10C needs another square screen on the left side. The A-10A wasn't a MFD so you might also need to add the buttons row The armament panel (below left MFD) has been revised and therefore should be changed on the A-10A IP. The rest is pretty much the same - The stick needs to be replaced with a F-16 stick. That's probably easy enough to steal from somewhere - The glareshield needs to be cut on the side, just outboard of the 3 fire extinguisher handles. Remove the red identified on both sides. The overall angles of the glareshield had to be changed during A-10C conversion and although it's pretty obvious from the comparison picture above, I would leave it as it is on the CE part and omit that detail. - On top of the glareshield centred on the APU fire extinguisher, you need to add a rectangle button box. It is the equivalent of the F-16 UFC. AMS has this part moulded on its glareshield although it seems not wide enough. It seems it's only the left part of the full UFC as depicted below It's a part flight sim fans cherish as it's the main keypad to control inputs into the A-10C system, we have many replicas in the sim builder community: - There are not many differences between the A-10A and A-10C side consoles. The throttle has more switches but that's impossible to see and the UHF panel (not too far from the throttle if I remember right) has been updated. These details are hardly visible so I wouldn't bother changing them. - What is missing is the new DTU unit behind the seat. It's a large box where the pilot inserts its DTC (Data cartridge) that contains all of the data needed for the flight prepared at flight planning. I'll have to add it as well. (image from The Drive) - After A-10C conversion, the avionics of the warthog still have been upgraded. The A-10C can now use APKWS guided rockets and deliver JDAM and Laser JDAMs and loads targeting pod. Except the stores under the wings these changes are mostly invisible as these are avionic black boxes changes mostly. Yet one visible cockpit change is the New Helmet A-10C pilots wear. It's called the HOBIT and is an improved HMCS. It also features a monocle like the Apache helmet. (image from The Drive) This system also features a series of visible dots disposed in a square on the canopy, just over the pilot helmet. (image from Key Military) I am not sure if I can model the HOBIT, I haven't made any research about eventual availability in 1/32 scale for a HMCS looking close enough to that one, but If I do find one, I'll sure investigate a way to add the canopy dots as well.2 points
-
Some cockpit detail shots of Bf-109 G-6, W.Nr 165277
tucohoward and one other reacted to ProfessionalAmateur for a topic
Unfortunately no better than these ones (from MT-507). I'll take some when i visit her next time (less than hour away from where i live).2 points -
Converting the 1/16 Tamiya RC Full Option Tiger I early to a Tiger I mid - production
Greg W and one other reacted to ironman1945 for a topic
Its been a grind, adding zimmerit to the hull, been slowly doing sections at a time. Tedious, yet results are worth it. Here are some shots of the hull after completion of the zim. Having done that, on with the turret! Cheers, hope everyone is well, and more as it progresses. Dave/Ironman19452 points -

Italeri Mc-202
Azor and one other reacted to alaninaustria for a topic
Got an update from Italeri today: they said it will be released before the year end and to watch for the update on their website! So, it could come anytime from now! Sure am looking forward to it! Cheers Alan2 points -
1/32 Revell Messerschmitt Bf109 G-2 converted to an F-4 Trop
Paulpk and one other reacted to monthebiff for a topic
While working on my ZM G-14 I realised I had the earlier G-6 footrest available to me to use so after much trimming I managed to squeeze it in the the floor space of the Revell kit which definitely improves the look. Annoyed with myself after Antonio kindly posted the picture of the early starboard side wall I swapped the completed part with one from my unstarted G-6 and modified it accordingly. Much happier with that and time for painting now. Regards. Andy2 points


