Leaderboard
Popular Content
Showing content with the highest reputation on 06/20/2019 in all areas
-

1/32 Kitty Hawk F-5E Kicked Up A Notch. Oct 3/19. Finished!
CarstenB and 9 others reacted to chuck540z3 for a topic
Right to the plastic, because after I've added so much fine rivet and panel line detail, I don't want anything filling it like a primer. With enamels and lacquers I can do that, but it requires extensive surface prep and sanding, which sometimes is not enough as shown below. July 20/19 When I’m in the modeling zone, I am possessed, so another quick update on painting 3 days in a row. After finishing the bottom of the jet and getting a procedure and rhythm of what I should do, I got after the upper part of the model and low and behold, that bloody fuselage seam was worse up top! Back to the drawing board all over again. And this is why. Nothing really fits front to back… So after a few hours of careful sanding this evening and re-painting, it turned out pretty good if I do say so myself. I took a little heat earlier for painting a “plain black jet”, but I think this baby will look awesome with big red Soviet stars and bright red placards and other markings. I’ll just let the pics do the talking now…. With poor fitting gun doors, this area turned out great as well…. I still have a few small flaws, but I’ll let this dry for a few days before I try to repair them and get my sticky fingerprints on the nice shiny surface. Cheers, Chuck10 points -

1/32 Kitty Hawk F-5E Kicked Up A Notch. Oct 3/19. Finished!
blackbetty and 6 others reacted to chuck540z3 for a topic
July 19/19 Well that didn’t take long. That seam flaw, among other small items was driving me crazy all day at work so as soon as I came home, I got right on it and had them fixed in about 1 ½ hours. First, here is the offending seam and why it’s such a pain to fill and create a smooth finish. This is probably the worst fit on the entire kit, and there are many! And after paint. Still there and since I’m doing surgery anyway, I may as well fix that sink mark in the LEX that I was going to leave alone since it’s on the bottom anyway. Fixing it after paint is not so easy, but after too much experience with this situation, here is what I did. First, I masked off the small detailed areas so that I could sand the seam without eroding them off. Note that the paint is attracting dust already! Since the CA glue is tough, especially after drying so long, I used fairly coarse 400# sandpaper until I had the black lines of the seam and sink hole revealed. I then added CA glue to these black marks, let it dry, then sanded it down again. I then used 1,000# sandpaper and smoothed out the sanded area and the paint on the fringe to eliminate any sharp edges. Once that was done, I masked off another area near the intakes for further repairs. This area was just sanded, along with other small flaws that I found later. Finally, everything was smoothed out with Mr. Laplos polishing cloths in 4,000# and I used compressed air to remove most of the dust. I am happy to report that the seam is now gone, along with the sink marks and other small flaws. There is still a small step at the junction of the intakes and the old seam, but that would take a huge effort that just isn’t worth it underneath a model that will never be seen. The funny thing is, almost all of this will be covered with the big fuel tank anyway, but I’m glad this annoyance is behind me. Next up when this dries, the top paint! Cheers, Chuck7 points -
.thumb.jpg.f0920d798d5d8600fb58b1d8a906ddff.jpg)
Trumpeter P-47D RazorBack Pacific 1:32
AlbertD and 4 others reacted to shadowmare for a topic
Hi, i decided to show my new project which is older version of Thunderbolt. I will add Eduard etch for cockpit and cut out a panel on side to show guts behind engine. Trumpeter provided many interior goods so it's really a shame not to present them. Painting will be Pied Paper or Passionate Patsy, unfortunately Kagero done decals only for Bubbletop Patsy, so i have artwork only, without serial number on tail (problem) or code on side (smaller problem). Does anybody have photo of Razorback Patsy with 3 downed planes? I have seen model with that but have only photos where plane is without them. Seat is for P-400 Special Hobby but seems legit for P-47. I will need to repait it.5 points -
Modifications and additions: Jet pipe and exhaust turbine face scratch built. Seat cushions and belts scratch built Height of tail increased by approx 2mm Rocket rails scratch built Rivet detail added to circumference of belly tank Added brake lines and actuator rods to undercarriage All antenna replaced with wire Cockpit access step scratch built Scratch built Pitot tube Scratch built Nav lights. Airscale decals used for cockpit instruments. Markings and finish: MRP Extra dark Sea Grey and Sky. Kit stencil data decals Small squadron crest decal custom made All other markings masked and sprayed5 points
-

1/32 Kitty Hawk F-5E Kicked Up A Notch. Oct 3/19. Finished!
daveculp and 4 others reacted to chuck540z3 for a topic
I hope so. For those who might have missed it, this is the template, although nobody makes decals for this VFC-13 jet, so I'll have to compromise with a bit of a "what if" and use VFC-111 decals instead. Note how clean and shiny it is- and I don't care that it's likely that way just for the air show. If it looked that way for even 5 minutes, that's what I'm going to try and replicate. Cheers, Chuck5 points -
My child hood memories are of programmes like "Thunder Birds" "UFO" & "Captain Scarlet" These shows were full of fantastic designs, such as Thunder Bird 2, SHADO Mobiles & Interceptors, and of course, The SPV, or Spectrum Pursuit Vehicle. I have had the Dinky SPV for years and recently I cam across "Studio 2 Models". They make limited run garage kits of a number of models from these Gerry Anderson series, all to "Studio Scale". This is the SPV. Its resin & fibreglass. It is no "shake & bake " kit, and requires a lot of work to get it together. The interior is scratch built, having to cut the door out first. It is painted in the same car paint as used on the original studio kit. Thanks for looking, Angelo4 points
-
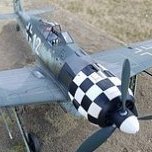
First Armor In 15...er..16 Years! Cyber-Hobby's 1/35 T-34 Mod. 1940: FINISHED!
Fooesboy and 3 others reacted to mywifehatesmodels for a topic
OK, I'm calling this one done. I was almost afraid to look at the date of the last post in this thread, but.....life happens. The tracks were very difficult for me. It's been far too long and I think I could have spaced the drive/idler wheels differently and it would have helped to get the track spacing right. Next time I'll pay closer attention to that and hopefully not work myself into a corner. Aside from that, everything else went fairly well. For the remaining equipment, I decided to leave the large tool/equipment boxes off the sides of the hull. Many of the photos I was able to find show these boxes to be missing and other items are often attached. I used the kit's tow cable ends, but replaced the middles with cables I made from wire. The log was the result of digging through my brush/burn pile for some candidate sticks. I also used extremely small twigs to make a bundling of kindling wood. The rolled tarp was from my spares and I made it years ago from facial tissue and painted it. I added the straps from the PE set. All along the build process, I was adding oils and pastels here and there and worked some silver pencil chips into a few spots, as well. Everything was sealed with a final coat of flat lacquer. Even with it's many warts (pretty much all my own fault), it's still probably the best looking tank model I"ve ever built, finish-wise and it was refreshing to get back to some armor after all these years! Thanks for all of your encouragement! John4 points -
The extra exhaust's are now done and I have started working on the Liberty Engines... The plastic between the cylinders, was removed before assembly. Kent4 points
-
thanks for the comments guys, i just finished a big contract, i'm back to being retired again, so i get on the bench for few hours a day not just few hours a week, really speeds builds up I started on the stowage and remote gun pod, everything is still glossy, i'll give it all a dull coat the sand treatment when I'm finished I'm having trouble with my camo painting its a lot harder than i expected, i'll finish one complete backpack before i start the other, i need to try and perfect a good technique. Youtube here i come I got my SMS camo paint, they are an Australia paint company with good reviews so will be interesting to see how they spray, first i need to get a face mask, nasty stinky paint4 points
-
The official overall dimensions of these aircraft had been the subject of some controversy decades ago, but is established to certainty ... Length 9020 mm Wingspan 9920 mm Various measurements of surviving airframes have given a length range of 29' 7' to 8' ( 9017 to 9042 mm). All of Hasegawa's 1/32 scale F, G,and K kits are too short in length. The F kit introduced a lengthened fuselage, but it was still marginally too short, about 2 mm. The G and K version are something like 4 mm short. The discrepancy is small and very subtle. Unfortunately the error is not spread out over the length of the fuselage but confined to the area to the rear of the cowling and forward of the windscreen. As a result the buele appear too close to the cockpit on the G-6. On the F kit the error is really not noticeable, at least to my eye.4 points
-
F4U-1A Corsair Tamiya 1:32
RALPHY ROCHA and 2 others reacted to Koralik for a topic
This time model from WW II times, I generally avoid model aircraft with a propeller. I definitely prefer modern aviation. However, from time to time I make a model for someone to order. I present to you such a model F4U-1A Corsair model from the Tamiya skal scale 1:32 This is one of the best models I've built, all the elements fit together without a problem. Model made straight from the box with one addition from yahoo. I invite you to watch, I hope that the model looks good.3 points -
3 points
-
1/32 F-4J Phantom (Complete)
Mel and 2 others reacted to gmctaggart for a topic
Thanks Out2ghtcha. Another quick update. After more time sanding and filling I am starting to get somewhere. I also did a pass of primer to see the areas that still need some work. A little bit more work and I think these will be done. Let me know what you think. At the same time I have also continued cleaning up the AC paneling. Removing the raised panels and also adding in some panels and screws that were not part of the molding. I filled in one of the access panels which didn't seem to exist on the photos I have. I am hoping this is correct. Its also interesting that in doing these photos how much clearer things are such as the errant holes in some of the panels. Will need to correct that. As always feel free to comment or correct my assumptions. Gord3 points -
...or you could wait for Tamiya to release one.3 points
-

I/32nd I.D Vacform RAAF Canberra B.20
D.B. Andrus and 2 others reacted to Piprm for a topic
Cockpit continued : Just a sideline observation on the Quilted side-wall of the cockpit... You will notice by the photo - reference below , that the stitching on the quilted fabric isn't as even or uniform as you would expect... ( the stitching - diamond shapes) So in keeping with detail and observation and also a dedication to those rivet-counters here - I have followed the same practice here with my master internal parts.3 points -
Started receiving some aftermarket parts... I've decided to try out the new soft resin wheels from Halberd of Ukraine. I'm pretty impressed with these beauties... Live Resin .50 Cal Ammo and flexible feed chutes.... Kent3 points
-
Thanks for tagging along guys, the fork has been stuck and the test flight passed. It's off to the shelf with the rest of my finished work. What fun it was! I've added a registration to the tail, not completely fictitious but still not accurate to this airplane. I stole the markings from my Airspray A 26 (remember the one I put turbine engines on? yup that one's decals) I've also painted the nav. lights and added boarding steps to the landing gear legs, I also reasoned that being as how the gear legs were spring steel, polished aluminum is probably not an accurate color for them so I repainted them Vallejo silver. Some final pictures and off to the next project... The same kit, different version...possibly more accurate?3 points
-
How I extended the nose...3 points
-

1/32 Kitty Hawk F-5E Kicked Up A Notch. Oct 3/19. Finished!
Whitey and 2 others reacted to chuck540z3 for a topic
Tell me about it! Just trying to paint it dust free is impossible, so I am always doing touch-ups. When I'm done, I plan on creating a home for it just like my A-10C Warthog, which keeps the crap off of it. Now a small painting tip. After I sand and create dust, I clean it off the usual way, then use compressed air to get it all off. At my paint booth in my garage, I give it another blast of compressed air to get rid of new dust picked up en route, just prior to painting. When I paint, I start near myself and move my airbrush away from me, trying to keep the air flow moving at all times in one direction. This lacquer paint dries very quickly and within 1 minute, any new dust that settles on the surface won't stick, although I leave everything alone for about 24 hours before touching it. Cheers, Chuck3 points -

Tamiya P-51 with upgrades
scvrobeson and one other reacted to WasatchAviator for a topic
Here is my first build here on the site. Let me know what you think before I put the 2 halves together! HDW Seat Belts and Baracudacals placards2 points -
Hi All, ive wanted to build one of these fun kits for a while and as I’ve just finished the ju88 in the multi engines group build I thought it was the perfect time. There isn’t a lot to it and it’s designed as a snap together kit, but it captures the look of a Corsair very well. Normal service will be resumed soon but in the meantime I hope you all enjoy following this build. cheers Matt2 points
-
my last built , enjoy :2 points
-
I reckon WNW will regret kitting the Lanc. From now on all they'll get is bombarded by people telling them that they're utter, utter idiots and total amateurs because the diameter of the screws on the compass housing is out by a millionth of an inch, and therefore the kit is completely unbuildable (all whilst conveniently ignoring the various issues that crop up in, say, a Tamiya kit). Should've stuck with WWI. As we all know, the only surviving record of any WWI aircraft is Snoopy's Dog House so they could have carried on flogging kits of fictional aircraft like the Gotha UWD, and no-one would be any the wiser.2 points
-
No problem. I am happy they are with you. Looking forward to your build. I plan to build this bird soon too. (using masks) Cheers2 points
-
Hi Kevin I sent you the decals. I am happy they finally showed up. I was worried they got lost in transit. Happy modelling Cheers Mikkel2 points
-
IP given a very dark base coat of grey. Once dry brushed and detail painted, it should look adequate.2 points
-

Migflug
Michael931080 and one other reacted to Pete Fleischmann for a topic
Hello All- I've done a bunch of L-39 flying for MiGFlug. Philip is a good friend of mine; and the story of how this company got its start is funny and fascinating..but I'm not sure if I'm able to share the details! If you call or email MiGflug, you will likely talk to my wife Kristi, who is the North American rep; as well as several other titles. Great company. Cheers Pete2 points -

1/32 Kitty Hawk F-5E Kicked Up A Notch. Oct 3/19. Finished!
Rocat and one other reacted to chuck540z3 for a topic
Thanks Guys! Hi Michael. I was initially going to build the Hasegawa kit I have in my stash, but after checking the sprues with raised panel lines and almost no detail, I was very happy to hear about this new KItty Hawk kit, so I bought it. It's a real mixed bag of some nice detail and horrible fit issues, but overall, it's way better than the Hasegawa kit. Using my last Tamiya Spitfire kit as a 10/10 for kit quality, I would place the KH kit at a 6 and the Hasegawa one at a 4 at best. No, mostly because many of the stencils and placards on a real jet are stickers and not painted due to their fine features. Large "NAVY" signs could be painted, but there are many small placards that will have to be decals, so I may as well do them all the same way to ensure a good color match. Although I'm a bit apprehensive about how this will turn out on this gloss black finish, I do have experience with decals on a BMF as shown below. If you have good decals to begin with, you can spray a local sealing coat of X-22 to make the decal margins blend in and disappear. eg. The serial number on this P-38L is a decal. Cheers, Chuck2 points -
Anyone built the new WNW Gotha G1 or UWD?
scvrobeson and one other reacted to Dave Williams for a topic
I think the kit was only released a few days ago. Few people in the world probably have it in their hands yet, and unless one of them can build the kit in a day or two, I’m guessing no one has finished it yet.2 points -
Trumpeter P-47D RazorBack Pacific 1:32
AlbertD and one other reacted to Dpgsbody55 for a topic
Great project. Mine is presently on my shelf of doom, but I'm fairly certain I will finish it. Incidentally, I had the same idea as you, to open up the sides to see all the supercharger workings inside. Here's the intercoolers under construction. And the assembled trunking: I'll be following this one. Cheers, Michael2 points -

Migflug
scvrobeson and one other reacted to MikeMaben for a topic
Wonder how many rubles that would set me back ??2 points -
It's a ZSK 244A Bomb Arming Panel mounted under the center of the IP.2 points
-

Spitfire (late) exhausts 1:24?
Menelaos and one other reacted to Model_Monkey for a topic
Hi Menelaos, the very same 3D-printed Mustang exhausts are also available in gray resin directly from Model Monkey (click here). Grey resin is smoother. I am the designer. Cheers! - Steve Larsen2 points -
1/32 Griffon Spitfires
nmayhew and one other reacted to SimonCornes for a topic
Hangs head in shame!!2 points -
Further to my last, an abbreviated narrative of my build can be found here in LSP. See https://www.largescaleplanes.com/articles/article.php?aid=6672 points
-
It's already done but I'm going to release it with the Engine as well. Graham2 points
-
hm, strange this, most of the photobucket pics are gone. Did some more work. Its a bit less productive but i try to do some minor stuff each day. Now at the hobby room its 32°c. First, exhausts done, did it in 2 tries, but, resin and thinner, works great t get rid of the feiled paint attempt. I softened the details in the burner cans. As most know, there is a little detail on the real feathers, and i find the aires details to hard. Now i'm sure that the sanding gives a good grip for the paint. Sprayed with Mr Surfacer Black, Let dry overnight, and then did some Alclad gloss black over it. Made my own maskings for the black part of the exhaust petals, after one night i maksed them all . Pale burnt metal went over it. I let it dry for a couple of hours, and the Gloss clear over it. The tube, inserts and fan sprayed with mr surfacer black, overnight drying and then gloss clear, i drybrushed with white, and silver. Some white wash, here the results. The shrouds are painted with my own blend, some claer gloss, and they look great The rest of the engine covers are fitted, some sanding, removing the support on the inside helped alot.All is flush now. For the fuselage, and boddy, next is filling and sanding. Did the horizontal stabilizers, glued them, filled the panel lines, and then masking. Like on some aircraft, there are panel lines, and later moddels have all the lines filled. So, i wanted to get that look. There is the result, after the masking, some layers surfacer, removed the tape, and then the black primer on.2 points
-

1/32 Kitty Hawk F-5E Kicked Up A Notch. Oct 3/19. Finished!
jgrease and one other reacted to chuck540z3 for a topic
June 18/19 Finally, I’m really painting. A first coat of paint reveals flaws and with gloss black, they are amplified at least 3 times over a flat finish. I always start painting on the bottom, just in case I have airbrush or paint issues, but in this case, Tamiya Gloss Black lacquer (TS-14) sprayed beautifully. This paint was decanted from the rattle can then thinned with about 40% of Tamiya lacquer thinner. I expected a few flaws underneath, because this is where the kit parts do not fit very well, but I did not expect to still see so many seam lines and other flaws. The rear, however, came out looking great. With that shiny coat of X-22 over the Archer rivets, it almost looks like metal already with the smooth reflection. Back to the drawing board….. And another coat of paint. Much better now. A close up to show that those seams lines are now filled and other flaws repaired. There are so many surfaces that from this angle, it almost looks wrinkled. In the background, I’ve been busy cleaning up, assembling and painting other parts that will be attached later for ease of handling. The landing gear, doors and hardware are ready for final assembly. And here’s my first shot at painting the exhausts, which have gone from this: To this, using Alclad Stainless Steel. For the inside, I used Alclad Steel, followed by a dusting of rust to replicate reference pics. Although I’m getting near the end of this build, I still have a lot to do. Missiles, the main fuel tank and dozens of tiny bits still need to be attended to. I’m a bit nervous about decaling, because I normally shoot a good sealing coat of X-22 over the decals to seal them in and reduce decal film edges. On this nice gloss black finish, X-22 might make the finish look too artificial. I guess time will tell! Cheers, Chuck2 points -
My June is still heavily booked with family obligations. My youngest just graduated from high school and we'll be taking a family trip to the Eastern Sierras this weekend. And then driving up to NoCal next weekend. So not much modeling until next month probably. I had some time to glue the wings to the fuselage. As typical on this kit, the fit is amazingly good. Since I'm planning on leaving the wings removable, I'm very close to the painting stage. So I'm playing around with some pre/post-shading techniques using a Scotch Brite pad and splatter painting templates.2 points
-

WINGNUT WINGS LANCASTER!!!!!!!!!
Bill Cross and one other reacted to Radub for a topic
I don't think the "oil canning" is exaggerated. I saw the plastic parts at two different shows and the effect is actually quite subtle. Maybe it is just the lighting that makes it look too pronounced. Radu A quick Google reveals plenty of that effect, anyway. https://pin.it/yucshwapn4hgjz https://pin.it/ufprh6ejnqm3x42 points -

Migflug
D.B. Andrus reacted to Martinnfb for a topic
Or you want to go even faster and higher ? ....... with Mig-25 :) http://rusadventures.com/tour6.shtml1 point -
Migflug
Martinnfb reacted to Michael931080 for a topic
I think if you look at Josh’s eyes at the end of the video one was a little wonky like it was stuck from all the G’s they pulled!1 point -
Wow, cool that's one you just dont see built that often. Well done!1 point
-
interesting project kent not an easy one1 point
-
The weathering looks overdone, but seeing photos of the real thing, you nailed it, fantastic model of such a stunning aircraft.1 point
-
I've finally got a roof on the Cessna. I made a roof from .040" sheet and super glued it to the side walls (after making some covers to hide the wing attachments) as well, the instrument panel is finally in as well. and plunge formed a new windshield to replace the kit windshield as the new roof and old window weren't going to work together. the kit windshield plunge formed windshield1 point
-
I'm getting slammed at work so not much time in the evenings except to eat and sleep. No major work on the Corsair. I did start hammering out a replacement for this lost piece. Luckily, it's one of a pair so I have physical part to base my copy on. I used a thick section of plastic card (actually two glued together) to start carving out the basic shape. The flange around the base will be a separate piece of thinner card stock. Since the part is so small and would be difficult to hold, I tried to do the majority of the shaping while the part is attached to the bigger piece of plastic. Bottom flange is added. I'm now confident that I can make a pretty good copy of this part. At least good enough so that it won't be noticed. I made the mistake of hollowing the end out to mimic the original part but this wasn't necessary since the opening will be blocked by the flap. The opening on the original part is there to accommodate the locating tab on the wing. The replacement part is almost finished. It is a tad oversized but I should be able to whittle it down. Because of the hollowing out, the walls around the opening are really thin and may prevent me from reducing the part to the correct size so I may have to fill the hole that I made. When I was trying to verify that the opening of the replacement part would be blocked by the flap, I had a mishap with the Tamiya Extra Thin cement... another repair!1 point
-
I decided to paint the windscreen. I have a couple of masking options to choose from... the Montex mask set which has a full set of inside and outside canopy masks. And then the Tamiya kit comes with tape masks but you have to cut them out manually. I used a mixture... the Montex masks for the inside and the Tamiya masks for the outside. The interior of the windscreen was painted first: satin black (actually very dark grey). After the interior masks were removed, there was one cockpit part to be added. This was painted black and finished off with a decal from the Barracuda decal set. Before the windscreen was glued into place, I attached the armor glass. The windscreen is clicked into place and secured with Tamiya Extra Thin glue. I ran into a hiccup while working on the center wing assembly. I lost one of the small exterior parts to the carpet monster. One of a pair of small fairings that go over the attachment point to the flaps. I've made two extensive searches for the missing part and even recruited my wife but the part remains missing. I'll have to scratch up a replacement but I find it really hard to sculpt such small pieces of plastic. <Sigh>1 point
-
Nothing interesting to comment on? I've attached the inner wheel hubs to the main landing gear legs. The legs are far from being done though. The parts in grey need to be painted. It's a testament to Tamiya that the bits and pieces, which include the hydraulic brake lines, can hold together like this without glue.1 point


