Leaderboard
Popular Content
Showing content with the highest reputation on 12/31/2023 in all areas
-
Aaannd got the landing gear glued on. this was a bit of a fight. I kinda expected it to be the nose gear isn't glued up yet as I haven't decided whether or not to have the long oleo or short one attached Thanks for looking16 points
-
Valuable knowledge, and the kind of input that makes other people's models better, thank you Derek! It's not an exact replica, but closer to the mark. In the meantime the pulley got some paint and the unit it is connected to has made an appearance on the back of the fixed rail. Time to look at the wheel wells, but I think I'll leave that for next year...10 points
-
Thanks for the views and the comments! I've gotten round to adding some weapons and dirt to the model This shot shows the additions to the rear of the fuselage/ beaver tail and phoenix pylons and phoenixes in place. paint touch up needed here and there It was pointed out to me earlier that I had too much white in the intakes, although I can no longer fix them properly, I've added more gray...lighter than the lower gray but still...it's gray and the fun continues... Thanks for stopping by9 points
-

New Sikorsky Seaking coming in 1/32 and 1/35 scales
Sage the Owl and 7 others reacted to Maxim61 for a topic
Hope it's not old news but just found this on a Facebook page. JSProducts out of Melbourne Australia are working on what looks to be a 3D printed Seaking in multiple scale. Looks like we may get a Seaking in 1/32 scale at last. The printed stuff looks good on their page. https://www.facebook.com/profile.php?id=615549000217008 points -
1/32 Kotare Spitfire Mk.I (Early) K9795 19 Squadron October 1938
KiwiZac and 7 others reacted to monthebiff for a topic
Had a very nice quiet couple of days and got plenty done on the Spit, wing assembly completed and I really like the way Kotare have gone about this I'm not going to fix the radiator cowl until after paint as far easier and the fit is perfect so no problems there. Also managed to get all of the cockpit assembly completed and ready for paint. A bit tedious but worth it is drill out the lightening holes in the various frames And dry fit of the seat and all of the cocpit parts together And call me sad but this is something that has really impressed me on this kit which is the fit of the fuselage access panels which can be usually problematic in many ways but Kotare have absolutely nailed it Apart from a set of HGW belts I'm building this out of the box which I've not done for a very long time as I usually like to push myself and build difficult kits/ conversions as anyone knows who follow my builds. This is just a breath of fresh air and such an amazing kit to build and thoroughly enjoying.! Regards. Andy8 points -
I did some tidbits in the last days. I've learned what to expect from Eduard sets, usually I find them so-so, but they sure do add some nice things, like the foor pedals they always have. Tricky to fold, but when done they look the part 100%. I could even pull the boot strap through the eye. The rear seat is finished. Not accurate, but a whole lot better than OOB. I abandoned my original intention to make the tubing true to the original. I got tired of it, and will leave it as in the photo. Again, not accurate, but better that OOB. I still have the inside of the greenhouse to do. I wis all here and their loved ones a wonderful, happy, and above all healthy 2024! Cheers.8 points
-
1/32 Kotare Spitfire DWK
John1 and 6 others reacted to David Mooney for a topic
Hello all, This is the final build of the year, and i've just got it over the line. Not much to add on this one as i said it all in my last build two weeks ago of the same kit 1/32 Kotare Spitfire Mk 1a - Ready for Inspection - Large Scale Planes So, i dont think i've done a bad job getting this done in under two weeks. Happy new year to you all All comments welcome7 points -
I love these days between festivities when nobody knows if you're actually working, or building models. The ejection seat just happened to get finished in this time vacuum.. Here are some general views that show the effect of having the parachute back-pad and light tan parachute harness separate from the seat. The blue straps form the safety harness which secure the pilot to the seat. In a change from previous seats, I decided to include the thin blue leg-restraint straps. In retrospect, I should have left myself some longer straps for the blue shoulder harnesses, but it is what it is now. Can we blame the armourer Derek? In the next views, you get a feel for how the straps and the back-pad interact, as well as the components on each side of the seat. The decals are from Peter's excellent Airscale 'Modern Cockpit Dataplate and Warning Decals'. You'll notice that I haven't fussed with detail on the seat-pan sides, since they can't be seen except for the height adjusting lever. And finally a view from the top, showing the busy drogue-chute compartment. That's it for now. Let's see how many days I can still milk out of the confusion in the start of the new year. Cheers! Sean7 points
-
My 2023 builds
alain11 and 5 others reacted to Tolga ULGUR for a topic
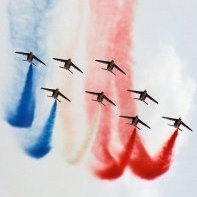
Hi guys Last two days and my 2023 balance sheet is ready. I'm not very productive this year considering the length of my to-do list. Here it is in chronological order 1- 1/32 Hasegawa P-40M (Kittyhavk Mk.III) 2- 1/32 PCM Hawker Hurricane Mk.1 (Very early) 3- 1/32 Revell- AIMS Messerschmitt Bf 110C-6 4- 1/32 Hasegawa P-47D 28 "Eileen" 5- 1/32 Revell Junkers Ju-88A-11 6- 1/32 Revell Hawker Hurricane Mk.IIb 7- 1/32 Trumpeter P-47D 5 8- 1/32 PCM Ta 152C 9- 1/32 Kotare Spitfire Mk.1a6 points -
Hurricane IIb, Revell 1/32 - finished
Starfighter Jock and 5 others reacted to Sepp for a topic
Me again. Recalling this minor hiccup: If it helps anyone, I first very lightly sanded round the edge with 6000grit cloth, then gave it a soak in warm water followed by a good dose of MicroSol. The offending item then lifted off good as gold. Replacement went on nicely - better than the first go, thankfully. After a satin coat, I gave it my first go at battering-up a subject - bear in mind I'm still in "learn as you go" mode; some things worked, some didn't. Wear and tear was Uschi silver metallizer, aplied as dry as I could get it with a cocktail stick. Not-quite-worn-through paint was metallizer applied very dry with a micro cotton bud. You can tell I started on the left wing - much too heavy-handed; by the time I reached the right wing-tip, I was very much more comfortable with the process. After that, and faaaar too much oil/dirt streaking on the underside, I added more filth and exhaust staining with pastels. Pictures suggest that muzzle staining didn't extend much beyond the tape patches, so I didn't add any (btw, inner patches are Tamiya tape, outer ones are papier maché made from newspaper and white glue, formed over the parts from my other Hurricane). I should've left the cartridge chutes alone, too, but by that stage I was... enthusiastic. Lesson learned: less is more. I've seen people write that when you get to the stage of thinking "just one more...", stop, walk away, and revisit later. This is good advice. I originally intended the kit to have the HF aerial, but the kit depicts the stub seen on VHF-equipped aircraft. I made the taller spring retainer/mast from flattened Albion tube pinned into the top of the rudder, once the stub was cut off. I then changed my mind, so no wire, but she retains the "old" HF mast. After that, it was just a case of adding the various flying surfaces, gear and fwd mast. Funny how one moment you have a pile of disparate bits, and the next - done. The three handles on the canopy (one ext, two int) were made from Albion brass rod. Exhausts were coloured using pastels with the stub ends highlighted with HB pencil. I'm glad to be finished with this one. Not my best work, but a valuable learing experience. The kit and I fought each other from day one - it's a perfectly reasonable product, but it has its foibles and I need to exercise more patience. Anyway - at least I finished it in the same year I started Proper RFI pix to follow, once the merriment has subsided. Thanks for all the encouragement and for stopping by; I hope all have a very happy New Year, and a productive and satisfying 2024. Sepp, out.6 points -
Cheers Andy, I’m loving the PCM Hurricane plus add ons, this is my kind of modelling! I’m really looking forward to the Revell Hurribomber but I’m a bit concerned that it might be a bit too “straightforward”, being the perverse bloke that I am! Which reminds me, I must finish this straightforward Spitfire: then decide which of these is next: (one of the Hart’s will be a Hind) and the Border Models Lanc is too big to be in shot! Happy New Year and good health to you all!6 points
-
Howdy folks, I've just published the last What's New update for 2023. Happy New Year and all the best for 2024! Kev6 points
-
5 points
-
RAF FG.1 XV571 WILD HARE Phantom Conversion
Michael931080 and 4 others reacted to Anthony in NZ for a topic
OK fuel tanks and dents.... Hmmm I didnt realize doing dents would be more difficult than I imagined, well at least for me either. Thankfully I have some great photos of the tanks XV571 worre mostly in the late 80's (so much stuff seemed to chop and change, it makes me wonder if ordinance etc might have been shared between 43 and 111 sqn's as one of the fuel tanks often worn on 43 Sqn XV571 even appears on XV574 if 111 Sqn at one stage. If anyone has an answer I would be interested to hear it??) Anyway, my first advice is NOT to try and match every single dint and scratch on the tank you're looking at, it just looks plain wrong. Just do the main ones, the final result will be much better. Prime the surface with Mr Surfacer and then you can see what size and shape and angle your dents, flat spots and scrapes are and you are happy with the position of them. I used a couple of different shaped curves scalpel blades to make the initial dent. Then using emery paper rounded, I blended it in to smooth it out. Some dents are soft (meaning there isnt really a defined edge, yet some are and sometimes have an almost creased edge. Experiment is pest, but it is actually a lot of fun and I think (hopefully will make a nice natural appearance to the final look) you will enjoy it. I am particularly looking forward to denting my Paragon 100Gal underwing tanks on my 1/24 Mossie when I eventually get back to it. Carry on sanding and priming untill you are happy. Oh by the way these are the @Jet Passion tanks so the wall thickness may be more than the kit ones. One final thing to be mindful of is that if your Phantom has the strengthening belly strap then your pylons are going to sit slightly off the surface (this is normal even on the real airframe), so you will have to add the rubber sealing strip between the two You can even see here there is fresh air above the inboard one, note the rubber seal on the outboard one? And my version Off to the paintshop..... Now I have had real issues trying to find the correct greys for this model. I have brought all sorts of paint brands and nothing has satisfied me very much at all. Of course I have never seen a Phantom in my life so I have to go off photo's and take into account lighting etc etc. Anyway this is where I am at. I know some will possibly balk at what I am doing, but this is the best I can come up with, I am as always open to advice. My main 'Base color'is Mr Color 73 Äircraft Gray" which is just a tad too dark on its own for Camouflage Grey BS626 (the main overall uppersurface colour) and all the other greys for the undersurface look a little 'çold' for the Light Aircraft Grey. So what I did here as an experiment was spray the overall tank '73' (this was my base) then I lightly randomly sprayed white over the top for the underside and pore so for the pylon as these are actually white. Then I added a dash of 73 into my white and softened the white and full tone blotchy finish underneath. This evened things out and oddly enough the dents took on their own shadows! Then I masked the demarcation lines and sprayed 73, but lightened with a touch of white, blotching it in areas with the base colour. The lower tank in the pic above had a slightly newer rear end section added and was lighter and the grey demarcation was feathered not hard edged. The upper tank has a Green white rear end apparently taken from their spares inventory which is in a US green and white. This is what I ended up with Then I used oil paints and added some filters and then Burnt Umber and black mix was used to simulate the centre main tank section which often got quite dirty underneath Hard to see I know, sorry Desperately trying to go with the 'less is more' theory which is hard I hope you guys approve, as this is all a bit new for me this type of weathering. As always your ideas, tips and input is appreciated for those of you who know how to do this properly Again my mix of Greys is home made to how. I feel looks right and maybe it looks wrong to those who have actually seen a Phantom, I appreciate any feedback as I am flying blind here. Thanks again chaps, and I super appreciate all of your help and encouragement along the way this year as its been a tough one. Lets hope we can get this sucker finished in 24!!! Cheers Anthony5 points -

1/32 Tamiya Thunderbird F-16C
JayBee and 4 others reacted to Pete Fleischmann for a topic
Hey Tamiya- here’s an awesome idea: release an “all in one” F-16 kit with sprues from the Thunderbirds kit and the CJ, so I can build virtually any C model F-16. Include decals for whatever you think will sell- Then: create a stand-alone injection molded D model conversion that you could sell separately. The parts break down of the C kits would make this super easy. your welcome. P5 points -

Northrop P-61A „Black Widow” 1:48 GWH
Dennis7423 and 3 others reacted to Kriss for a topic
I managed to finish the P-61 A "Black Widow" from GWH, the model depicts the machine with its own name "Lady Gen", Florennes, Belgium, december 1944. The rest of the pictures will be in the gallery.4 points -

PCM Hurricane (late) 56 Squadron….finished!
R Palimaka and 3 others reacted to mozart for a topic
Thanks Andy for the prompt and Mike for the info from “the Bible”, ie the wonderful Finnish Hurricane walkaround on BM. Drainage holes drilled in the aft floor pan, the forward one is next. I’ve also drilled out the entrance holes in the fuselage for the rudder cables:4 points -
Spitfire Mk1. Differences between Mid and Late
Fanes and 3 others reacted to 19squadron for a topic
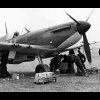
The Kotare is too heavy at the shank relative to the Chord. the widest part of the curve on the trailing edge is much too high, and the long straight trailing edge from the tip to the widest part of the chord on the trailing edge [which contrasts with the much more symmetrical curve of the leading edge] is missing. the edge of the leading edge follows the sweep of the leading edge curve and crosses the blade at the shank end before the shank end becomes round to fit into the hub, which is not represented at all on the Kotare kit part. The kit prop is crude and has none of the quality of a real blade.4 points -

P 51 B war weary trumpeter 1/32
Reuben L. Hernandez and 3 others reacted to red baron for a topic
my lastest built :4 points -
PCM Hurricane (late) 56 Squadron….finished!
R Palimaka and 3 others reacted to monthebiff for a topic
Max, you won't regret buying these, I have a few sets from ANYZ and they are extremely easy to work with as long as you do the prep correctly. Take a look at the switches on the port side pilots panel on my Devastator (silver switches on a black triangular base) They look daunting but work really well. Super build so far Max. Don't forget to open up all those drain holes in the rear fuselage as well which is often overlooked. Regards. Andy4 points -
Last update of the year! First up - I completed the troop seats that are going against the aft bulkhead. They are the kit parts with a few additions. I used the new Quinta seatbelt set. Instead of applying the belts like decals, I let them dry a bit once off the backing paper and then twisted them to have them better replicate the real thing, supergluing them in place. Much more realistic approach than just having them rigidly attached to each seat. Most of the time when not in use, the seatbelts were tucked into a velcro flap on the seatback. Kept them from getting tangled up or blown around by rotor wash. For the two seats I opted to build like this, I replicated the open flap by cutting out a section of lead foil from a wine bottle and adding small portions of seat belts. I also added the thin wires that support the legs of the seats and the triangles that attach to those wires (also made from lead foil). Here's the real thing: Here's my humble replication: Note that you can't see the seat legs from this angle but rest assured, they are present. They angle back and secure against the rear of the floor. Also adding more details to the cabin area. Added a radar warning display to the instrument panel (carved off a gauge from the kit IP), the countermeasure safeing box mounted on the side of the CE’s storage bins, various wires, a coiled-up intercom lead on the battery box and a Grimes light on the side of the co-pilot’s seat. Have to admit, I’m nervous about how well the cabin is going to install into the fuselage. Anyway, this is probably going to be my last update for a bit. I’m waiting on some parts to arrive in the mail (Reedoke helmets / helmet bags) and a set from Meng that has some rucksacks and Pelican cases. Need to clutter up the cabin a bit before moving forward with the final assembly. Thanks for all the feedback lads, hope every has a safe and happy New Years!4 points
-

*** 1/32 Kotare Spitfire Mk.Ia "Brian Lane" COMPLETE ***
J.J. and 3 others reacted to 19squadron for a topic
Compare Propeller tip yellow with spinner........4 points -
I’m doing mine yellow - because I have a number of Spitfires with black spinners and a number with sky/white, but no yellow ones!4 points
-
For all it's worth:4 points
-
Make the others jealous
Rick Griewski and 3 others reacted to Tolga ULGUR for a topic
Another arrival before the end of the year. I think my Junkers Ju-88 squadron is complete. From one collection to another. Thanks Martin4 points -
With 2023 now drawing to its inevitable close, I thought I’d take a moment to look forward to the year ahead and see what we have in store for 2024. We do have several very interesting projects that are not far enough along to make any public statements about just yet, but as soon as it’s appropriate to do so, I’ll make those announcements separately. But of our confirmed, scheduled projects, first cab off the rank is John Kim‘s Building the Trumpeter P-47D Razorback in 1/32 Scale: This is currently undergoing proofing and revision, and should be available by the middle of January. Next up will be Geoff Coughlin‘s build of the new Airfix 1/48 Sea King for Build Guide Series No. 21: Work will be getting under way on this one shortly! There’s a strong possibility that one of our unnamed projects will come next, and it will be closer in style to our Phantom series than a straight modelling guide. Failing that, it will most likely be a book that was actually planned for 2023, but failed to make the release schedule: The recent news that Zimi Model plans to re-release the Kitty Hawk range should see the Texan/Harvard kits available once again (if not already), and Chuck Sawyer‘s build guide will be the perfect companion. (Note that the cover is subject to change prior to publication.) The release schedule for the rest of 2024 is less certain, and largely dependent on when various projects come to fruition. But look out for a Build Guide on the Wingnut Wings Fokker D.VII series by Gary Boxall, a second volume of sci-fi & fantasy builds by Jason Gares, at least one more Build Guide from John Kim, and others covering the ICM 1/32 Yak-9 and Zoukei-Mura 1/32 Skyraider. We also have other projects under negotiation or development, that—again—aren’t quite ready for a public unveiling. But stay tuned for all our usual announcements and updates as they come to hand! Many thanks to all our customers for a great year in 2023, and I wish you all a Happy New Year for 2024! Kev3 points
-

Spitfire Mk1. Differences between Mid and Late
Mekon and 2 others reacted to Archimedes for a topic
@19squadron Thank you for the images Simon. Yes, my post was intended to elicit further information so I appreciate the response. Despite the many highly useful images I am still looking at ‘apples and pears’ if you will because I am seeing real propellers which are painted, shown at various angles of incidence in varying lighting conditions versus a frontal view and one angle of incidence of a kit propeller. That being said I now do see the offset between the leading and trailing edges of the blade relative to their distance from the hub. As someone who spent a whole year designing propellers for drones in 3D CAD I do appreciate just how challenging these shapes can be to replicate at any scale. Whilst I would hesitate to use the word ‘crude’ when it comes to Kotare’s 32001 DH propeller attempt, I can now see that it is not quite the blade shape of a real DeHavilland airscrew. There are many factors that have to be borne in mind when producing a model of any subject. The propeller is probably the single most difficult shape to get right. As one moves from the hub to the tip and looks at the cross-sections, one generally moves from a circle at the hub through to aerofoil sections that are twisting all the while as one moves outward. One can burn hundreds of hours in designing this whether lofting it (as the draftsmen at Jablo, Hordern Richmond, Weybridge Blades, Rotol and presumably DeHavilland had to do) or doing it in 3D CAD (which is subject to the limitations of the CAD package). Kotare will have had deadlines to meet, a price point to hit and a profitability target they were aiming for. At some point someone in Kotare may have said: ‘OK that is good enough - stop work on the propeller blade and move on’. That is not to make any excuses for anyone but it does now make me wonder what the Revell MkII and Tamiya MkIX propellers look like in comparison. Thank you for providing this insight. It is one more of many that demonstrates just how hard the Spitfire is to get right for the model making community. Though the fascinating RAeS paper referenced below does not mention the propeller specifically, what it does do it demonstrate just how diligent Supermarine were in attending to fine detail of almost every facet of their design. RAeS Spitfire Paper What this resulted in was in the Mk1 aircraft that could fly 40 mph faster in level flight, using the same power than its compatriot, the Hurricane. Thanks once again Simon. Kind regards, Paul3 points -
I don't want to say something stupid, but the impression I have is that the camo was given on the field. what if the light part under the swastika was the same color as the lower surfaces? the profile interprets the light spot behind the cockpit as aluminium-coloured, it seems to me... all this suggests a machine that is not fresh from the factory, but put together/repaired at flight group level. my usual zwei pfennings, obviously. cheers, Paolo3 points
-
I just wanted to express my appreciation to Peter of Airscale, and Ali of Aerocraft for their superb service. On Boxing Day afternoon I placed orders with both of these fine gentlemen and received emails yesterday to say that both had been despatched! The Airscale order arrived this morning (3 sets of Sutton harnesses) and the Aerocraft one arrives tomorrow (undercarriage and struts for my next Tiger Moth). Thank you both…in the sometimes “aimless grey” days following Christmas, such prompt service is a breath of fresh air.3 points
-

Spitfire Mk1. Differences between Mid and Late
Fanes and 2 others reacted to geedubelyer for a topic
I can't unsee that now.3 points -
Spitfire Mk1. Differences between Mid and Late
Pete Roberts and 2 others reacted to Tolga ULGUR for a topic
Thanks for this @19squadron Yes, after examining it very carefully, I agreed with what you said. But I must admit that I didn't realize it until you explained it. Maybe my eyes are not good enough. Age also advanced. Again, those who are not very meticulous about accuracy and whose eyesight is poor (like me) could not may notice this. In fact, it should not be very difficult to produce an aftermarket product with today's technological possibilities. Maybe one man business producers can take action on this issue, of course, with your technical knowledge and support. (Forgive me if I forget any other manufacturers, but the first one that comes to mind is (Alistair from Aerocraft) Ali623 points -
3D Printed Space: 1999 Eagle Transporter in 1/32 WIP
BiggTim and 2 others reacted to Panzerwomble for a topic
Absolutely wow . What a great project of an outstanding subject . When I lived near RAF Benson we occasionally used to be surprised by what they had in there .3 points -
So I was working on the outer wings, sanding off the existing surface detail ready for re-scribing and getting ready to cut and modify the tips. But all this work was too much for the glue seams at the leading and trailing edges, and they eventually split open. The outer wings were just too flexible to take all this work. So to strengthen them, I decided to add two spars, which I measured and cut from some 1.0mm styrene sheet. They're black because that's what I had. You can see two sets of outer wings in the photo below... the dark grey set are for this Wirraway conversion. The light grey set are for my "Hot Rod Harvard" project (these will be clipped and modified to represent CAC Boomerang outer wings). A third set (not shown) will be made for my "Gee Bee's Wirraway" project (standard Texan wings clipped by 24 inches at each tip).3 points
-
Beautiful build. when you glue the nosegear make sure it's in the wright position. At the last picture it's positioned backwards.3 points
-
*** 1/32 Kotare Spitfire Mk.Ia "Brian Lane" COMPLETE ***
Hoss FL and 2 others reacted to monthebiff for a topic
OK, so shall we start sampling the colours of the fuselage roundel with the lower wing roundel and compare with the white spinner or shall we let Hoss get back on track with his beautiful build. Regards. Andy3 points -
Well the wheels and wheel well doors are on. The detail is not the same as AM resin and the door attachments are a little over scale and does not have a lot of detail, but they are sturdy, strong and provide positive location. This is a compromise I can live with on a model of this weight and size. Only the tailhook and the small light under the nose remain then the bottom is done. In the mean time the windshield was painted. Not the most logical demarcation of colours but that is what it shows on the photos. Cheers Nick.3 points
-
Thanks, Thierry. It looks like the most of the Airfix and Verlinden stuff is out of production. Not rare necessarily, but catch-as-catch-can on ebay and the sorts. Thank you to you and @mc65 for the lead. Regarding the academic figure and posable mannequins, in David Parker's book "Crew School," which is all about sculpting figures in our scales, he has exactly the thing I'm looking for. (Great book, by the way. Highly recommend.) However, it's a custom creation of his and I believe is/was 3D printed. I haven't pulled the trigger on a 3D printer yet (yet another skill for my brain to try to build and keep sharp), but stuff like this pushes me ever closer. Ugh. I can't find any references on Preiser's site regarding the multipose figures (google is coming up short too). Do you have any links? Anyway, today was a productive day at the bench, and I'm more or less done with the sculpting, I think. First, an unexpected detour back to the pilot as I decided to address what, to my eyes, was the most glaring inaccuracy... his boots. As mentioned above, the figure was intended for the ETO and would be considered a bit overdressed for the PTO. So, I started by shaving off most of the lower legs. This was to allow room to sculpt straight pant legs over the remaining material. Without removing that material, I suspect he would've looked like a man who never skipped leg day. The general process for me is pretty straight forward. Wet down some Green Stuff and roll it fairly flat, then stick in position. \ Then, using silicone brushes, spatulas, toothpicks, and just about anything else, start shaping folds and creases into the material. Lastly, I use a sharpened toothpick to add a gap between the cuff and the figure. I had to pop the figure off the wine cork that I'd attached it to for painting and a bit got left over. So, that's not in-scale dog poo on his foot. There will be a little bit of filling and sanding required at the meeting of the putty and the figure, but I think it'll turn out well. In the end, I'm pretty pleased with these results. The rest of the inaccuracies of this figure will have to be addressed via squinting. And I finished up the crew chief as well. I added pockets to the front of his jacket, as in the source material, he's got something big and heavy in his right front pocket. I also added collar and the patch for his rank insignia. It's out of scale, sure, but I feel it gives it some visual interest. Once these cure overnight, I'll prime them and clean up any rough spots, then get them with a coat of paint. I cleaned up the collar near the neck well a bit after this shot, so it's a lot cleaner now.3 points
-
Right, on with the Motley, as they say...but for the hell of me I don't know why they say it! I cut a piece of 0.5mm card to fit into the hole I created. I let it into the piece instead of gluing it to the back. More work but I don't know how tight a fit it's going to be when the two fuselage halves come together and an extra 1mm ( the same will happen on the other side to accommodate the switch panel) might be disastrous. Initial coat of paint and a quick fit of the pieces shows there's some clean up to do and a bit of card filling at the bottom but I'm happy with it at this stage. I popped the Airscale parts on to see what they looked like and, with a bit of filling at the base of the flap assembly, they're looking nice I also tried the two seats to see what needed to come out and, as you can see, the pilot's seat needs a little protrusion taking off and the gap card filling. This should be great once painted tomorrow. The rear seat, I think I dodged a bullet TBH. The kit part looks like this and the kit seat sits into the hole in the middle of the raised assembly Taking the raised section down to floor level would've left a huge hole to fill and sand and the rest so I measured up the dimensions if I just took the raised sloped top part of the assembly away. Exactly the same size as the base of the gunner's seat so it can sit on that nicely. Looking better than the kit parts already hopefully Also sprayed some of the protrusions a grey colour for contrast. Hard to say which shade they should be as pictures are scarse. I'm working from 1939 handbooks and manuals mostly. If anyone has any links to good pictures I'd be most grateful As ever, thanks for looking.3 points
-

*** 1/32 Kotare Spitfire Mk.Ia "Brian Lane" COMPLETE ***
Hoss FL and 2 others reacted to 19squadron for a topic
Radu I'm not as good on the computer as you are so my sample has a border, but taking a screen grab from the rear of the spinner where it is in the same plane as the roundel white relative to the light source, I'd say the spinner and white were pretty close in tone.3 points -
1/18 Supermarine S6B - S1595
airscale and 2 others reacted to europapete for a topic
The S series of racing seaplanes really were engineering marvels for their day. On the S6's the floats housed fuel and coolant, the right hand float containing more fuel to help counter the engine torque on takeoff. The left float less fuel but also coolant. The fuel was pumped up to a pressurised header tank behind the engine. This was neccessary because under the high forces encountered during near vertical banks in turns the pumps were unable to move the fuel and this tank kept the engine supplied until the 'plane levelled out again. The wings were double skinned, their surface acting as radiators and oil coolers were along the fuselage sides. The oil tanks were in the tailfin and spine. The engine was so highly tuned it only lasted just over an hour at full power.3 points -
I have added two clamps from scrap PE to the back seat which will rest on the tube in front it. I made the cushioning for the back seats. They need to dry twelve hours and will then, after some sanding, recieve the same color as the front seat. The painted seats in place. I have also started work on the internal tubing. I will try to stay as faithful to the 1:1 as much as possible (within reason), but some artistic license will be applied as well. Checkin regularly if nothing in the way of anything. I want less surprises than with the Phantom. Cheers!3 points
-
1/32 Kotare Spitfire Mk.I (Early) K9795 19 Squadron October 1938
chaos07 and 2 others reacted to monthebiff for a topic
With Boxing Day and family things stopping play with work on the Spit which was most frustrating normal service is again resumed! The filling of the holes left from the hot air ducting removal was made good and the lost rivet detail was reinstated with Archer resin decals Hot air outlets also made good with the plugs supplied by Kotare working very well The added the wing spar and wheel well assemblies Followed by the eight Browning gun mounts Not a huge fan of the way Kotare has done those but I would suggest if you are drilling the ends of the inner two barrels out do them once installed in to the lower wing. I'm going to add the outer two barrels at final assembly to hopefully avoid damage. Regards. Andy3 points -
Tamiya 1/32 F4U-1 Corsair
denders and 2 others reacted to Nikola Topalov for a topic
Hi gents, Some progress with the office and the engine. Not much and there is still a lot of work to be done, but this is it for now until I get back from vacation. I intentionally slightly overdid the seat hoping that when the seatbelts come it will all be visually balanced. I also decided not to scratch build the inside of the cowl flaps due to lack of enough free time. Thus I am going AM with this:3 points -
Hello Here my last built : a mosquito PRXVI from the HK BIX/XVI. The kit is not really an easy one. Lack of détail in the cockpit, fit is not always good and landing gear are not really strong. This plane was in th BG in England from june to april 1945 when it was destroyed on landing Hope you like it.2 points
-
I think the White of spinner IS White off, the round raf White IS white for "high visibility", for recognition2 points
-
If we could between us find a clear image of the nose art I'd offer to have a go myself, but as I'm the other side of "the Pond" from you, I fear the postage would be prohibitive. You could try asking on the paint masks forum, perhaps there may be someone in the US willing to have a go https://www.scalemodelpaintmasks.com/2 points
-

Spitfire Mk1. Differences between Mid and Late
Christa and one other reacted to Archimedes for a topic
Hi @19squadron. Whilst I do take note of the potential discrepancies you mention, I have a different view on the DeHavilland propeller shape: having compared the kit part at the same angle as the photograph on pages 15, 20 and 21 on 32001 kit’s instructions, I find that the blade shape looks about right to these eyes. Thank you however for your input to the discussion. Kind regards, Paul2 points -
So...it's done 1/32 Ju-87 from Revell (Hasegawa) finished as what-if in polish markings. Cannon pods were scratchbuild aloing with wingfold mechanism. Gun and cannon barrels are from Master, seatbelts from Eduard. Four-bladed propeller is a kitbash of P-51 spinner and Ju-87 blades. Torpedoes are from some Dust 1947 game aircraft. Figures are from ICM WASP set. Hope you'll like my approach to this legendary aircraft because it's not my last word in what-if style2 points
-
Blimey, a couple of weeks of inactivity and this thread is down on page seven! Anyway, some solid progress made - though, sadly, I don't think I'll squeak a completion in before the end of 2023 - so my record builds in a year (four) won't be beaten.. I've primed the beastie in AS12 in anticipation of laying down a couple of coats of Humbrol Metal Cote. Probably due to the negative feedback their 'early' version got with regards to the transparent parts, this one came with 2 'spares', so I was able to use one as a 'mask', which saved me some time. As ever, the priming process revealed things I wasn't happy with, so I'm engaged in a round of resanding and touching up. Most of the 'fiddly bits' are done and just awaiting being fixed in place once all the painty stuff is done. Here it is alongside it's mule baby sister! I picked up a Tamiya 1/48 P-51D just to test the paintwork etc. on, as I've never used Metal Cote before. The smaller version is now fully finished - I just need to give it a good 'polish' to bring out the metallic nature of the paint. I'm definitely not happy with the underside yet - a fair bit of work still to do here. We're getting there, but still a few good sessions to go!2 points
-
Acid etch marks are like everything in this earthly life. Now that you know about them, you’ll see ‘em Cheers, Q2 points


