
ChuckD
-
Posts
1,023 -
Joined
-
Last visited
-
Days Won
10


-
 Martinnfb reacted to a post in a topic:
(Not) Building the Infinity Model D3A1 Val - I expected nothing and I was still let down. Into the bin she goes.
Martinnfb reacted to a post in a topic:
(Not) Building the Infinity Model D3A1 Val - I expected nothing and I was still let down. Into the bin she goes.
-
Martinnfb reacted to a post in a topic:
(Not) Building the Infinity Model D3A1 Val - I expected nothing and I was still let down. Into the bin she goes.
-
D.B. Andrus reacted to a post in a topic:
On the Topic of 3D additions, sets and kits…
-
ChuckD reacted to a post in a topic:
Infinity Models Curtiss Helldiver
-
dutik reacted to a post in a topic:
How to Paint 1 to 1 Scale
-
Sole Survivor - Ens George Gay's TBD-1 Devastator of Torpedo 8
ChuckD replied to ChuckD's topic in Ready for Inspection
Absolutely, Ray! -
Castor reacted to a post in a topic:
Sole Survivor - Ens George Gay's TBD-1 Devastator of Torpedo 8
-
Breaker reacted to a post in a topic:
On the Topic of 3D additions, sets and kits…
-
 nmayhew reacted to a post in a topic:
On the Topic of 3D additions, sets and kits…
nmayhew reacted to a post in a topic:
On the Topic of 3D additions, sets and kits…
-
Anthony in NZ reacted to a post in a topic:
On the Topic of 3D additions, sets and kits…
-
CRAZY IVAN5 reacted to a post in a topic:
On the Topic of 3D additions, sets and kits…
-
mozart reacted to a post in a topic:
On the Topic of 3D additions, sets and kits…
-
On the Topic of 3D additions, sets and kits…
ChuckD replied to alaninaustria's topic in LSP Discussion
Ah, a 3D printing wishlist thread. This is a new twist. Modern problems require modern solutions. -
 ChuckD reacted to a post in a topic:
Sole Survivor - Ens George Gay's TBD-1 Devastator of Torpedo 8
ChuckD reacted to a post in a topic:
Sole Survivor - Ens George Gay's TBD-1 Devastator of Torpedo 8
-
@Uncarina, ah man, just an incredible finish. Beautiful end product with super crisp detail and wonderful paint work. A+ all the way around. Congrats on a stellar build, my friend!
-
It looks like I'll be picking the 1/350 Kongo battleship (1944) from Fujimi back up. I have a vision in my head of a seascape diorama of the night she ate a couple torpedoes courtesy of one Eli T. Reich in the ye olde Sealion. A few years ago, I bought the kit and a Pontos PE super detail set, got as far as getting the hull built & painted, the wooden deck pieces affixed, then I shelved it. I took one look at the roughly six thousand anti-aircraft guns I was supposed to build out of microscopic PE and noped right the F out of it. Not too long ago, I realized Black Cat Models is 3D printing all the AA guns I need, so I bought their sets and will get things moving forward again. Between the base kit, the Pontos set, and the 3D printed AA guns, I'm almost ashamed to admit how much I've spent on this kit... and I still need to buy 1/350 crew members. (ugh) Anyway, since ditching the Val, I've made some decent headway on the pagoda tower and am really enjoying the fit of a well engineered kit and its associated detail set. I don't mind complicated kits, but I do mind poorly engineered ones. On that note, I'm still struggling a little bit internally to figure out why I could make it through my P-38 backdate project a couple years ago, but couldn't muster up the effort to tackle the Val. I don't have any more love for the Lightning than I do for the Val, so what gives? Who knows? Maybe it's because the base Trumpeter kit is a decently passable product and all the heavy fitting was my own doing vs. the Val being just crummy out of the box. It will remain a mystery. 😆 100% Infinity Models: Infinitely Craptastic May your efforts on the Helldiver be more fruitful than my short fling with the Val. Oh, believe me... If I'd had more time the other day, my son and I would have made a trip to the range with the Val and M1 Garands in tow. Still, there was something very satisfying about smacking it with the 8lb maul. One can only hope we'll get something someday. It's a fascinating subject for sure. I think you hit the nail on the head though. There's just no pushing through it if there's no joy. I have a family, a full time job, a kiddo that's in a couple different extracurriculars, and butt ton of my own hobbies, so I just don't get as much time at the bench as I'd really like. So, what time I do spend there, I want it to be enjoyable. The Val was just so poorly engineered that it was not enjoyable. I really wonder if Infinity test built any of these before they sent them for final production. Bleh. Couldn't agree more. And yeah, I have enough modern, well-engineered kits in my stash to outlast me, so I'm in no danger of running out of subject material. ❤️ Thanks, Peter. I hope the tongue-in-cheek nature of most of it came through in my wall of text. I've been told my sense of humor can be an "acquired taste" so there's that. I've also been told I have a face for radio. So, there's that too. <shrug> Agreed! On to bigger and better things! Absolutely. We (myself included) tend to get wrapped up in the nuances sometimes... the perfect paint color, correcting a knob that's a half a mm from where it would be in the real thing, and so on and so on... I sometimes forget that this is a hobby - a hobby. Hobbies should be fun and enjoyable or, if challenging, at least rewarding at the end. I'm just not sure I would have had enough of a reward at the end of this project to offset my frustration, and thus, here we are. Maybe in some ways though, I should be grateful for the experience because it helped remind me that this is, as previously stated, a hobby, and it's absolutely okay to toss a trash kit and move on to something that is enjoyable. So, for that, thanks, Val. I guess. Building you was like repeatedly hitting myself on the head with a tack hammer... it felt really good when I stopped. Anyhoo, thanks for your support and understanding, everyone. I hate ending a build thread unfinished and without an RFI. I debated (and giggled to myself for a bit) about posting an RFI of the single photo of the kit in the bottom of the trash bin, but I thought that might be pushing my sense of humor just a bit too far. In any case, yes, it's on to bigger and better things. As always, you have all been great and I appreciate your support and encouragement as much - if not more so - in failure as I do in success. ❤️
-
If you want the helldiver @easixpedro, it's yours for the cost of shipping. Shoot me a PM with your zip.
-
***CAUTION*** SARCASM AND MODEL ABUSE AHEAD SENSE OF HUMOR REQUIRED BEYOND THIS POINT ***CAUTION*** You have been warned. Life is too short to build crappy kits, my friends, and let me tell you, this one defines crappy. If I weren't so annoyed right now, I'd take the time to photoshop an image of it into a dictionary page for the word crappy. I knew what I was getting into... I expected nothing and I'm still let down. Anyhoo, join me on this next and final chapter of this Infinity Val journey. The interior finish went pretty well. I started with an aluminum undercoat, hair spray, some preshading, then the interior green. Detail painting and weathering went pretty well, all told. The decals for the IP went pretty well too. I cut them into 5 different sections to help them settle better and, in the end, I was pleased and naively optimistic. Putting it all together yields pretty pleasant results. But that's where the optimism ended. Absolutely nothing else fits well on this kit. Nothing. Everything has been a fight. Even after careful sanding to smooth out the mating halves and clamping it heavily, the vertical stab's spine still has 1mm gap along most of its length. The cockpit to fuse fit required more superglue than I care to mention and it still wasn't enough to give a clean fit. The curves of the fuselage halves fit neither the contour of the cockpit tub or the firewall itself. This mess is what is left after copious amounts of cement, superglue, and tape were used to try to get the front of the fuse around the firewall. If left to its own devices, the fuselage halves wanted to spread out 3-4mm further than what you see here which would have left a huge step between the fuse halves and the bottom of the wing's center piece. Despite filing all the interior bulkheads down to try to avoid this issue, the fuse halves had large gaps forward of the cockpit. I bolstered the wing joins with extra tabs because they are just simple butt joints. I ended up having to shave down the top of the main spar quite a bit because it was too thick to fit between the wing halves. I attached the lower wing assembly to the fuselage first, then worked to try to contour the wing root mating surface on the upper wing parts to get everything to line up. Here is the result of about a half hour of careful sanding, testing, and repeating. Looks good, right? Erm... Here's the left side before any sanding or fitment work. That's probably a full 3mm offset there. This took about 45 mins of work to get it here. Notice the lip of plastic on the lower outboard leading edge. That's a running theme throughout every single piece of this dumb kit. The whole mess glued together. Why not include 5 elevator halves in a single kit? Seems reasonable. Also, be sure not to number any of them; gotta keep that builder guessing. You want the h-stab to fit inside that little fairing? Right. Sand the bejeezus out of it and scrape it till it halfway fits. On to the ailerons. Guess what! They don't fit! "I'm shocked!" - No one - ca. Ever Even after sanding the mating surfaces smooth (again), there's still a significant gap at the trailing edge and a lip at the leading edge. For crying out loud. At least I got to make a cute little horsey figurine with the clamps. After much fiddling and fussing, I got them installed only to find that there's a significant gap between the elevator and the flap. The air intake below the cowl took some pretty significant shaping to fit the gap in the lower wing piece. The wheel pants required some persuasion... however, what's not pictured here is the fact that the top surface that's supposed to mate to the flat section of the bottom of the wing has a significant step. Meaning it will ever fit straight without careful cleaning and sanding and fitting, none of which I have any interest in doing at this point. I didn't even take pictures of the unmitigated disasters that are (yes ARE) the engines. I believe the instructions call out the wrong part numbers so that by the time you try to fit the two banks of cylinders together, you end up with two parts that with male to male connection surfaces. Plus, none of the alignment keys actually align anything and not one part - case, push rod tubes, cylinder banks, intakes, or exhausts - want to align properly. In the end, I just cut off the intakes and exhaust and just stuck the engine on the firewall, resigning myself to the fact that no one would see the back of the engine anyway. Ridiculous. The resin engine requires you to sand off a huge pouring block in a recessed area that is nigh impossible to reach, least of all without destroying detail on the part. To add insult to that injury, the detail on the resin engine isn't that much better than the plastic offering, so it's not even worth the time. I think the breaking point this morning was the damn wheel pants. They are engineered (engineered!) to have angled surfaces where they need flat surfaces to mate up to the wings. This is just dumb. I get that this is a "short run" kit and such a moniker carries certain connotations with it. However, the deeper I got into this, the more I felt like the "short run" excuse was probably used as a crutch during the design process to say "oh well, close enough. It's a short run kit after all." I would be absolutely embarrassed to put out such a lousy product. I'm glad that others have had success with it, but I just don't have enough time in my life to deal with dumb designs and craptacular engineering like this. In short: This kit sucks. And, as I have mentioned, life is too short to build crappy kits. So, here we are... as close as this pile of hot garbage will ever get to an RFI in my world. Before: https://imgur.com/5NRDXab After: Val will likely be getting a Helldiver wingman in the bin here shortly. No way I'm bothering with that PoS kit either. Thanks for joining me on this short trip, folks! Sorry to disappoint. Hobbies should be fun and this piece of trash just wasn't.
- 31 replies
-
- 21
-
-

-
ChuckD reacted to a post in a topic:
(Not) Building the Infinity Model D3A1 Val - I expected nothing and I was still let down. Into the bin she goes.
-
ChuckD reacted to a post in a topic:
(Not) Building the Infinity Model D3A1 Val - I expected nothing and I was still let down. Into the bin she goes.
-
ChuckD reacted to a post in a topic:
Sole Survivor - Ens George Gay's TBD-1 Devastator of Torpedo 8
-
ChuckD reacted to a post in a topic:
(Not) Building the Infinity Model D3A1 Val - I expected nothing and I was still let down. Into the bin she goes.
-
ChuckD reacted to a post in a topic:
(Not) Building the Infinity Model D3A1 Val - I expected nothing and I was still let down. Into the bin she goes.
-
ChuckD reacted to a post in a topic:
(Not) Building the Infinity Model D3A1 Val - I expected nothing and I was still let down. Into the bin she goes.
-
ChuckD reacted to a post in a topic:
Going to the deep side : U-552 DKM 1/48
-
Hello, everyone and welcome to the arena as I step into the ring with the ultra-short-run Infinity Model D3A1 Val dive bomber kit. I think some of my frustration with the Devastator I recently posted was that I came into it with the expectations that, being a modern model from a generally decent manufacturer, it would be a decent quality build. Perhaps I brought that on myself as I've done enough Trumpeter kits to know what to expect from them. Anyway, I'm hoping that by setting my expectations ultra low with this short run offering from Infinity Model, that I'll get a bit more enjoyment out of this build. As I've mentioned a number of times, I'm a bit of a junkie for the early to mid-war campaigns in the Pacific. Maybe it has something to do with my grandfather having fought with the 32nd Infantry Division in the Buna campaigns, maybe it's because picking up a book about the Battle of the Coral Sea in kindergarten (yes, seriously) was what sparked my now lifelong passion for WWII. Whatever the case, my hands-down favorite aircraft subjects are birds from the SW Pacific theater. With that in mind, I stashed the Infinity Val and some of their indigenous add-on stuff a few years ago and, despite my devastation over the last kit (get it?) I decided to test my patience even further with my next build. So, join me as I try to beat a short run kit into submission and turn out something of a halfway decent result. So, what shall we be building? I'm not super thrilled about the kit's offerings as they're all Pearl Harbor aircraft and that's not a huge interest to me. So, I started poking around the web and, as has so often been the case, landed at pacificwrecks.com where I came across this story. What a crazy tale - check out the link for the full thing, but essentially 3 Vals got lost, ran out of gas, and landed on a beach on the south side of New Guinea. The crew then went on the lam, fought off search parties with MGs pilfered from their aircraft, and were finally wiped out in a running gunfight. With a story like that, I couldn't not build it. Happily, pacificwrecks also includes a profile that gives an idea of paint scheme (though they used a D3A2 for the template despite it being a D3A1). So, off we go. Grab your towel, put on your boxing gloves, and let's fight. The workbench, all neat, organized and ready to go. Not pictured: mouth guard, spit bucket, and referee. Here are the add-on parts I bought back when the kit first came out. All except the mask set are from Infinity directly. It kinda chaps me that they'd put out a kit with a high price tag, then charge more for these add-on items, but they're not the first and they won't be the last. And hey... it didn't stop me from buying them. Anyhoo, we have the engine set, bomb set, instrument panel "set" (one tiny fret of PE), and exhaust set. The PE frets in the top left are included with the kit and have things like seatbelts, gunsights, and arming propellers for bombs. These all look pretty nice, so here's to hoping they're worth the investment. The first step has you build the IP. Miraculously, I was able to shave off the raised plastic detail without winging my thumb in the process (an altogether too common occurrence). Later, I'll punch out the individual decals for the gauges and install them that way. Should be a hoot. At least the IP went together well, though there's really not that much to it. Just a few knobs and such get added to give the final piece some 3D relief. The PE seatbelts went together remarkably well and actually look pretty good. They'll be a challenge to paint in their current positions, but I actually prefer painting them in situ, so I'm used to that method. Generally speaking, the detail on plastic parts is soft, locator pins are more an idea than reality, and in many cases you're left scratching your head about how things are supposed to fit together. Then, when you do figure it out, it turns out the mating surfaces of the two parts are roughly the size of a pin head. In short, there is currently equal parts superglue and plastic cement holding this thing together. Here the pilot's seat is installed and the bulkhead in place. Nothing is dry fit. If you see two parts together throughout this build, they'll either have tape, my fingers, or glue holding them together. Dry fitting isn't a thing here due to the aforementioned lack of locator pins. I spent a good chunk of the morning getting the interior around. You have to place each of the ribs individually and none of them fit all that well, so that was a bit tedious, but not overly challenging. Oddly, the curve of the rib doesn't match the curve of the fuselage. So, I had to tack one end down with superglue, set it with accelerator, then run more superglue under the other end of the rib so that it would conform to the fuselage. I realized later that the vertical brace (horizontal in this pic) roughly amidships is glued on too high. Its base should sit flush with the raised detail just forward of it. I ended up having to nip off the part that sticks out the top. In retrospect, my placement idea was dumb, but in my defense the instructions are... less than clear here. 😕 Either way, test fitting proves that my gaffe isn't visible with the fuse halves together. I was actually pleasantly surprised with how well things went together. Make no mistake about it, I had to shave off things here and there to get stuff to fit or to sit flush, and there was judicious amounts of superglue and accelerator applied, but it was more or less straight forward so far. Not "kit for beginners" straight forward, but if you've got some modeling moxy, you should be able to tackle this. Test fitting the cockpit to the sidewalls shows a fairly decent fit. That gap between the floor tub and the sidewall will be impossible to completely hide, but it likely won't be very visible with the thing buttoned up. I did have to shave the sides of the rear tub piece a lot to get them to fit against the fuselage side cleanly. Same pieces, but from forward. I finished out the night by installing the gunner's seat and test fitting the fuse halves together. Like some others who have built this model, I added a small support to the underside of the gunner's seat because otherwise, it is only held in place by the single vertical strut that connects to the two arms that project from the seat frame. If that's the way it was in the real airplane, that strut must've been made of titanium or there was a really low weight requirement on gunners because that was just ridiculous. Anyway, you can see it fits fairly well and there's a decent amount of (admittedly soft) detail here. Sorry these are vertical. I'll adjust them before I upload them next time. In any case, they give you a feel for how things go together. Before I get too much further, I'll likely add some small tabs below the cockpit floor to help stabilize it, then add some tabs to the fuse halves so they'll line up somewhat cleanly. That's where we're at today. I did test fit the fuse halves and was, again, pleasantly surprised with how well they fit together. That's (emphatically) not to say that they fit well, they just fit better than I expected. It looks like the spine for the vertical stabilizer will require a ton of filling and I'm only partly convinced that the firewall will go in with anything resembling accuracy, but that's future me problem. Tomorrow, I hope to prime, shade, and paint the interior. I doubt I'll get it done tomorrow, but I'll try to post a decent update in the next day or two. That said, I have a couple days off next week, so maybe I'll manage to get the fuse closed up by next weekend. Then it'll be on to the wings, which promise to be an adventure. And there's the bell. Off to my corner.
- 31 replies
-
- 32
-
-
-
ChuckD reacted to a post in a topic:
Sole Survivor - Ens George Gay's TBD-1 Devastator of Torpedo 8
-
Sole Survivor - Ens George Gay's TBD-1 Devastator of Torpedo 8
ChuckD replied to ChuckD's topic in Ready for Inspection
Thanks for the compliments, everyone. As this sits on my shelf now, it’s kinda growing on me.- 16 replies
-
- 1
-
-
- trumpeter
- devastator
- (and 2 more)
-
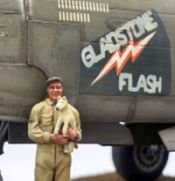
Hello, everyone! Long time, no post. After completing the "panzer of the river" dio back in February, I've started a few things but struggled to get anything across the finish line. Happy (very) to report that this one is done. It fought me most of the way, but by the time I'd gotten really frustrated with it, I was too far along to pitch it. That said, I'm more or less happy with the result. The decals have me fits and you'll see quite a bit of silvering which is just super frustrating. I opted for decals as I wasn't confident that I would be able to get masks to lay down in the wing corrugations. Turns out the decals didn't feel like doing it either. Oh well. I was really geeked about the Devastator kit when it came out, but in my opinion, Trumpeter managed to put out an aggressively mediocre kit. In that regard, I guess Trumpeter managed to capture not only the form of the real airplane, but it's whole vibe too. So, kudos to them on that front, I guess. (?) Anyway, the fit was okay in general, but I had it in my head to really detail up the interior, only to find that it's really really spartan. The whole bomb aimer's area is just pure fantasy and doesn't line up with any of the reference photos in @Dana Bell's recent book. So, it made it a real challenge to want to try to do any extra detail work on the interior. I suppose in the end absolutely none of it would be seen anyway, especially with the wings folded, but I would have known. That said, I did use @airscale's PE and 3D printed products to add detail where I could. I can't recommend these highly enough and they're almost a requirement in my opinion. Off the top of my head, I used the interior set, the prop, wheels, gunsight, wing fold, and twin .30 mount. All fit pretty well without having to do much fiddling with adjacent parts and the added detail was/is lovely. Thanks @airscale! I ordered the ASK stencil set as the kit-provided stencils are ridiculous. However, I would also suggest that the ASK set is only slightly less ridiculous as they are rife with spelling errors and their instructions seemingly have you placing them randomly around the airplane. Weird. I used the Gold Medal decals for the aircraft markings and, fortunately, they came with stencils and much more plausible placement instructions. Any issues with them laying down on the model are mine, not theirs. Highly recommend the Gold Medal set. Also, if you don't have Dana's recent TBD reference book, just buy it. It's a fascinating walk through a really weird, esoteric, and utterly mid aircraft. I digress. This is my rendition of T-14, George Gay's aircraft from VT-8 on the day he became the sole survivor of his group's attack on the Japanese carrier fleet at Midway. If anyone's not familiar with it, here's a short primer on the whole thing. https://en.wikipedia.org/wiki/VT-8 Enjoy!
- 16 replies
-
- 37
-
-
-
- trumpeter
- devastator
- (and 2 more)
-
Try turning the airplane upside down. I mean, I can’t really fault you. Logic would dictate that the engine would be mounted right side up. But logic and wartime German designs rarely go together.
-
Back in the day (late 90s) I used to watch a guy shoot Imron paint on aircraft without a single piece of PPE. Regularly. No respirator, no mask, no gloves, no safety glasses. Just a tank top, jean shorts, and sneakers. He would build a big makeshift paint booth by hanging plastic sheeting from the rafters and be in there for hours blasting away in a haze of chemicals I couldn’t even begin to describe. Even the dumb teenager I was at the time knew that was bad, bad news. Dude was nuts and is probably dead by now. Another guy I knew used to wash his hands with straight MEK after his shift on the shop floor. He is dead now. And here I am religiously wearing gloves, respirators, and safety glasses when exposing myself to minuscule amounts of chemicals at the hobby bench.
-
Man, I would really love to get one of these. Less for the subject, but more to support the effort of one of our own, to see what 3D printing can really achieve, and to build what looks like an absolutely stunning kit. Though the price is absolutely justified, I just can’t justify it myself. (at least not this month ) @airscale, this looks like absolutely magnificent work and I can’t wait to see you cook up in the future. Congratulations on seeing this through to such a beautiful end result!
-
Ah man, that’s the good stuff. Keep it coming, Tom. It’s looking great!
-
Just payin’ you back for all your good will on our “joint” A-20 project a few months ago. ❤️
-
Confirmed. Very Fire is working on a 1/35 scale SB2C Helldiver.
ChuckD replied to Jan_G's topic in LSP Discussion
I’m of mixed emotions on this. Fundamentally, I don’t mind the idea of 1/35 aircraft. However, I’ve built such a collection of 1/32 planes that it would probably irk me to no end seeing one or two of them just sliiiiightly off scale. That said, there are some neat subjects that are only being represented in 35th scale, so I may have to give in.