Leaderboard
Popular Content
Showing content with the highest reputation on 10/10/2022 in all areas
-

Z-M Messerschmitt Bf109G-14
CShanne and 12 others reacted to tucohoward for a topic
As a 109 guy I have been waiting excitedly for this kit. I really should be working on other things but couldn't resist getting started. I've been following Gaz and Andy with their builds, which both look great, but not having built a Z-M kit before, I want to use everything in the box so have started with the engine and will probably follow the directions as they have laid it out. I have read through all the threads dealing with the tail issue/non-issue and will sort that out when I get there. The engine is very nicely detailed and the fit is very Tamiya-like so nothing to report on that. Haven't done a WIP here in a while so well see how it goes. Haven't decided on a scheme yet as it wasn't needed for this part of the build. I do plan on riveting it with a beading tool as I normally do and will use Radu's seatbelts as they are my favorite AM belts and thankfully have a number of sets on hand since they are OOP. Doesn't seem to be a need for much else that isn't in the box. Cheers, Jay13 points -

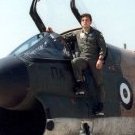
RAF FG.1 XV571 WILD HARE Phantom Conversion
KiwiZac and 7 others reacted to Anthony in NZ for a topic
OK so after trying to remember what I needed to do and in what order I thought I should update before I get too far ahead. Especially for those of you out there contemplating this conversion. I realized there are foot tray's/rests for the back seater so I got a little lazy and hacked them out of my Aires pit I wasnt using and modified them to be slightly thinner, taking a section from the outer edge Now this pic is to advise you Toom builders not to use the kit supplied part for the 'J' as it is different to the FG.1 and I suspect FGR.2 as well. I clipped off F23 which I suspect is for the C/D version. This will need a little modification but not too much. Also test fitting the centre canopy section (Tape on to protect the clear panel as the left is a solid panel with the periscope fitted. I also needed to sort out heights etc for the big panels in front of the back seater's instruments and navigation computer etc. This is very prominent and important to get all my sizes and angles right or the centre canopy section wont fit Here is the rear panel coming together. Still a fair bit to sort but I have the main structure and positioning/sizes are now done. I just have to add rivets, detailing and the gap in the middle is where the radar scope will go. This will be drop in fit after the tubs are glued in. Speaking of which....the rear tub is now epoxied in! Big milestone for me Adios Amigo's, that's it till next time...thanks for tuning in Cheers Anthony8 points -
.thumb.jpg.5da8bff9741de420eb2e87addd8f2cf6.jpg)
Infinity 1/32 Son-of-a B!tch 2nd Class
R Palimaka and 6 others reacted to RadBaron for a topic
On to the wings, then! The kit provides a one piece main spar, that also makes up the rear wall of the gear well, to which the wing ribs are attached. Given the complete lack of fit of literally every part, I didn't want to to leave such a visible area to chance, so I decided to deviate from the instructions, chopping the spar in half, gluing each to the respective upper wing half. From there I'll make up the structure, and most likely put in some of the more prominent wiring and plumbing. Every single part needed shaping and trimming and fine tuning. The spar needed notching to fit around molded in structure on mating surfaces. The ribs needed notching and trimming One issue I did find was, (and I'll put my hand up and take some blame if I installed the spar incorrectly) the angle of the rear face of the ribs as provided in the kit are a 90° angle, which didn't come anywhere close to the angle of the spar. More chopping and creative wrangling. Eventually we get to this stage Here's a completed wheel well. Now to do the other side and add some plumbing! There is still an inboard "rib" to be added, but this part is representing the fuselage skin of the real aircraft, so I'm going to glue the piece to the fuselage, to keep correct angles and what not. The horizontal stabilizers have gone together too, and I've separated the elevators from the stabilizers. Curtiss used some fairly chunky hinges on their controll surfaces, so I'll make those up before reattached everything. Sofar, the kit is living up to being a bit of a slog, but certainly not unbuildable. How badly do you want a Beast in your cabinet?7 points -
 Little progress on Ju-88. Now I put together the rudder pedals supports. I decided that the model deserves new brake pressure cilynders (I think). For them I used soldered brass tube again. For the pedals I used spare PE parts from HGW, again soldered, (The foot rest at the base). Tonight I hope to more pictures of the tailwheel bay. I´m almost there!!!!7 points
 -
Infinity 1/32 Son-of-a B!tch 2nd Class
R Palimaka and 5 others reacted to RadBaron for a topic
Playing with plastic. The cowl halves go together fine. The cowl flap hinge-line is wonky as can be. I chopped off the flaps, hit thr line with filler and sanded the rear of the cowl straight. The forward upper intake insert was offered up to look at fit. Not bad, except that that's nothing what the real thing looks like. Sorting that out will wait until the cowl halves have completely dried.6 points -

Miss Jolly Roger
Starfighter and 5 others reacted to blackbetty for a topic
i decided that mine will have the reinforcing. that seems to be a structural measure and i think that planes later in their service life would have had them so i vacformed two strenghts of styrene over the cut-off original tail. we will see how that works...6 points -
Infinity 1/32 Son-of-a B!tch 2nd Class
R Palimaka and 4 others reacted to RadBaron for a topic
Never having laid claim to a mind of sense or reason, reading the reports of how terrible Infinity Models' first venture into injection molded territory was, awoke something in my few remaining brain-cells. With every word of admonishment that adorned build review, just like that red flag to a bull, I wondered what sort of a Worst-Kit-Ever was hiding within the quite large box. Looking over the sprues revealed a interesting combination of raised and engraved details, miles of flash and plenty of mould release lines. One curious detail was that whilst some parts were (randomly) numbered on the sprues, others had no numbering at all. A check of thr sprue layout in the instructions cleared up which part was supposedly which, but more on that later. Whilst infinity offers all manner of add-on detail kits, I like my models closed up, preserving the shape of the aircraft, so luckily those won't be a further hindrance of dragging this kit across the finish line. One addition I do think needs be made, is the PE dive flaps. They're a fairly costly necessity, but given the fragile, multi-layered nature of these flaps in real life, compared to the somewhat representative blobs of plastic provided in the kit, I think they're a must for anyone contemplating this build. Other than these and a set of Master perforated gun barrels for the rear guns, I'm aiming to go OOTB with this. The plan is to build the 3 tone paint scheme (or something similar) as provided in the kit. On to the plastic! Denzil5 points -

1/35 ch-47 chinook’s (yes two) :)
Rockie Yarwood and 4 others reacted to matt_1185 for a topic
Forgot to post the base I built for the Rotak chinook this model will be sent to Alaska to be displayed at Rotaks headquarters as a gift to honor the two pilots who past away in the crash..5 points -
OK - so it appears an 'enthusiasm injection' is booked in... Ladislav Hančar of LACI has been busy working in the background on a set of Andover engines - I suspect with input/encouragement from our very own Anthony Galbraith (Anthony in NZ). These images popped up on Facebook the other day - and I'm ordering a set!! More news when there's more news... Iain5 points
-

Silver Wings Gauntlet II
R Palimaka and 4 others reacted to mozart for a topic
Thanks Paul! No words......just pictures: See you all in just over a week's time, Spain's golf courses beckon.....5 points -

F-16D block 52+ Royal Moroccan Air Force - Done!
Serkan Sen and 3 others reacted to Zola25 for a topic
Hi All I have started work on my next project and thought I might - for a change - share a few pictures as I go - I am going to build an F-16D block 52+ from the Royal Moroccan Air Force. I will use the Academy F-16I Sufa kit and a number of additional goodies; Wolfpack Cockpit Grand Models F-16 block 50/52+ conversion (tail parapack, larger nose gear and nose gear door a.o) - it is listed only as a CFT conversion but it contains a lot of essential goodies Aires Wheelbays Eduard Sniper pod KASL Exhaust Resin Wheels Kopecky LAU-129 rails Resin Weapons - not sure what the loadout will be yet.. One of the challenges is the spine on the block 52+ - its quite different from the Sufa so a few changes are needed. Anyone who has build the Sufa will know that the spine construction is a bit flimsy in the Academy kit. But other than that I am expecting an enjoyable build. The Wheelbays and cockpit are drop-in fits - my kind of aftermarket parts /Niels4 points -

Infinity 1/32 Son-of-a B!tch 2nd Class
zerosystem and 3 others reacted to D.B. Andrus for a topic
Well, at least you guys can look for an aftermarket L/G set from us in the near future. Cheers, Damian4 points -
In anticipation of the Trumpeter TBD release, I just pulled out my copy of the Schiffer TBD Devastator Book by Doyle. I hadn’t looked at it in the longest time. I have to agree with others here, this is a great book and reference on the TBD— probably the best out there. And I have gathered up all the references on the TBD over the years. Just saying— for those that may be looking at building a Trumpeter 1/32 Devastator! Bill M.4 points
-
Only concern is that these are, presumably, directly scaled up from the 1:144 versions - which are for the Mark 1 Models HS-748/Andover CC Mk.2? Need to check if the cowlings are identical to the HS-780 Andover - with the more powerful engines and the nacelle position further out? And they may/will take some fettling to fit the One Man Model 1:32 wings. But I am getting a set - and they'll be a brilliant step forward - and I'm feeling motivated on this one again. You keep costing me money Anthony - but all in an excellent cause! Iain4 points
-

F11F vacuform Blue Angels
GROWLER 96 and 3 others reacted to daveculp for a topic
Moving the F-11F project back to the front burner. I've got the masks cut for the yellow markings, but before I apply them I need to do some repair work on the right wing. I have this bad habit of moving the airbrush from side to side quickly, and sometimes I'll shake some paint out of the cup. This lacquer thinner eats into the paint and primer - all the way down to the resin. Here I'm re-primering the wing and filling up the depressions caused by the thinner. When it comes to painting I'm such a noob.4 points -
More pics...4 points
-
my last built , enjoy :3 points
-
First completion in a while. Tamiya's superlative Phantom kit with FineMolds' Nano-Aviation seatbelts. Painted with Mr Hobby lacquers, panel wash with AK Interactive and Ammo by Mig enamels, and weathering with oils. Hope you enjoy the photos. Feedback is most welcome! Mark3 points
-

Make the others jealous
Rick Griewski and 2 others reacted to Dave Williams for a topic
Arrived from Volks Japan today. Got the shipping notice on Friday and it said expected delivery 10/17, but it showed up a week early.3 points -

Infinity 1/32 Son-of-a B!tch 2nd Class
Paul in Napier and 2 others reacted to Panzerwomble for a topic
Odd coincidence that the original aircraft was a bit of a dog as well .3 points -

Infinity 1/32 Son-of-a B!tch 2nd Class
Paul in Napier and 2 others reacted to Gazzas for a topic
There are other builds on other forums that have gotten further. Here is one that is ongoing: https://forum.largescalemodeller.com/topic/17094-infinity-models-sb2c-4-helldiver-update-092322-rear-canopy-fix/page/8/3 points -
And it's done. Actually, it was finished a while ago, but I haven't had the spare capacity to sort out posting the pics until now. I usually say at this point that I'll do the RFI shots shortly. What actually happens is that I write the model on a list headed "'Beauty shot' photos to do" which sits on a notice-board near my modelling bench. This will be number 6 (I think) on that list. Anyway, here you go. In the first pic, eagle-eyed readers may be able to tell what my next project will be. Any feedback, including constructive criticism, welcome. Thanks for looking.3 points
-
It seems like a while since my last update. I want to thank everyone for their kind support and helpful comments. Anyway... masked and painted the canopy parts. The vinyl masks shrank a little, so I had to tape a few edges with masking tape. Then I installed everything except the Galland hood. I also detail painted the Revi 16/B gunsight and glued it in place... then weathered it as well as the radio hatch area. The tiny little black tab atop the sight is a tiny piece of PE fret bent at a right angle. Can barely see it in a regular sized photo. The Revi 16/B doesn't have a face crash pad. The top view of the canopy. The seam at the front is ugly. But it's the best I can manage. What I need is a self-levelling filler. Anybody know of one that moves slowly enough to dry before exiting the lower ends? I weathered the radio hatch area and gunsight with Tamiya enamels with a little aluminum chipping done with Citadel acrylics. Scratch Builders... You'll need to make some parts. There are no upper braces for the head armor and no canopy opening lever. I actually had to drag out my Revell G-10 Erla to get an idea of the size of the lever. Thanks for looking! Comments appreciated.3 points
-

Tamiya 1/100 BAC Lightning F6
Rockie Yarwood and one other reacted to Porsche for a topic
A 1970's kit built out of the box with cobbled together decals. Finished with Vallejo metallics...not such a large scale plane!2 points -
Hi all Here my lst built : the Tamiya 1/32 F4U-1D built as a salvadorian FG-1D. Hope you lie it.2 points
-
This is my recently completed build of the Trumpeter 1/32 Me262 A-1a kit. The subject is Yellow 3 of KG(J)54. I added a few things including the Aires Me 262 Resin Cockpit and Wheel Bay set, the Barracuda 262 Resin Main Wheels and Nose Wheel, HGW Seat Belts and Montex Masks. The kit was backdated to an early A-1a including removal of the small bulges on the nose cannon covers and a different type of tail light. The entire build can be found at... https://forum.largescaleplanes.com/index.php?/topic/72974-132-trumpeter-me-262a-1a-yellow-3/2 points
-

1/72 FAS Corsair (1957)
Uncarina and one other reacted to Warbird Kid for a topic
Hey Guys! This was a quick(ish) one that I was able to finish up in a a day. It helped that I started this model 2-3 years ago, and had gotten to the point with completing the cockpit, assembled the model, painted the exterior Gloss Sea Blue, and then started adding the white and blue onto the model. But that's where I was discouraged at how it was coming out, and shelfed it. Finally getting up the "Moxie" to complete it recently (as I was home for a few days last week) I decided to finish it. I had already the FAS Decals and needed to complete the white and blue on the model. Took a little while but it started to come together. Then it was just a matter of adding the decals. They went on super easy and were very easy to work with! I modified the FAS "213" decal to: "217" in honor of our own Corsair BuNo: 92460 which was "217" while serving with the El Salvadorian Air Force. This model will go on display in the case in front of the actual Corsair (along with a few other models I've already built for this display). The goal will be eventually to have a 3D model timeline of our aircraft's history. From factory to museum! I will hopefully have the motivation to complete a few other Corsairs in this project that I've had lingering in limbo for awhile now. Thanks for looking!2 points -
"Many messages and queries about the 1:18 A-4 Skyhawk. Just to let you know that it is progressing fine. And so are the Neptune, the Draken and the Raptor... Release date yet to be decided, but we know by now that 2023 is going to be a very busy year."2 points
-
Just thought I'd let you know what I have been up to on this project (besides loafing). All work has been solid modeling in Rhino 7: It isn't complete, but I have accomplished alot. And similar to my other big layouts, the thick gages have introduced problems that I have to design my way out of, in such a way as to eliminate the issues (almost always a clash of some sort) without completely ruining accuracy. The secret to this digital layout is to accurately model the fuselage especially its contour. A whole lot of stuff is going to be attached to the inside of it, and quarters are cramped. This is what I have had to approximate to the best of my abilities: Some of what you see there is going to be dremmeled away. Some other things will get covered up. Anyway, lots of frames and bulkheads and other fixed structure will show up in there, as well as the tail gear mechanism (which I have finished modeling and can be seen in the first picture above). Also, not Rhino modelled yet are the arresting hook mechanism, the tail gear doors (very difficult to model), and the tail gear door operating mechanism. It has, among other various cranks and links, a pair of bicycle chains with length adjusting turnbarrels, and sprockets: Next post I hope to have that all Rhino modelled. A good many 3D printed parts are going to come from this Rhino modelling, including the doors. But also alot of good old fashioned scratch building. You perhaps recall that I have already had some of those parts 3D printed: So that chain. I don't know if I can pull that off, it's so tiny. I'll try. Tamiya didn't even bother! Any ideas? OK next post I suppose I will show more Rhino modeling. By then I will have eliminated any clashes and assured that everything will integrate. At that point I will select the parts I want to 3D print and send off the order. And while I wait for the parts, I will begin scratch building stuff.2 points
-

A couple of things I've "inherited"
phasephantomphixer and one other reacted to europapete for a topic
Sorry to hear about your loss, Kev. Chris, have you thought about getting a Classic Airframes 1/48 Hudson to give you an idea of what goes where?2 points -
Gunsight in place, engine in place (motor power is not going to work, gave up trying ), built armored headrest parts, cowling flaps on and made the decal patterns for printing. Mojo high!2 points
-
Infinity 1/32 Son-of-a B!tch 2nd Class
Paul in Napier and one other reacted to simmerit for a topic
I have to say that is very poor. The build that was posted on here by the manufacturer ground to a halt after about 4 posts. Either they were just posting to drive purchases, or the builder realised what a complete crock the kit is. Both are plausible and neither reflect well on the manufacturer. Like many, I bought it plus all the add ons which racked up a bill that meant the resin version was more attractive as a purchase and every time I look on eBay, I see other hapless fools flogging their ill-gotten purchase. Good luck with it - I will await the result with baited breath. Cheers Si2 points -

Happy Thanksgiving!
europapete and one other reacted to Troy Molitor for a topic
Enjoy my Northern Americans friends! One of my favorite Holidays. Family and friend times. We are all Americans from the North Pole all the way down to South Pole. Many people fail to ever realize this.2 points -

Hasegawa F-4EJ Eggplane
Anthony in NZ and one other reacted to Greg W for a topic
Ok, I have blown the dust off of this project and tried out some MRP paints that I have wanted to compare with the AK Real Colors I picked up a long time ago. My airbrush Kung Fu is seriously rusty. I struggled to freehand the MRP FS 35109 on a spare eegplane paint mule. Base coat is MRP FS 35526. A lot more practice is needed to level up my airbrushing, before I'm confident enough to shoot the model. Next up, blast the other side with AK Real Colors.2 points -

1:32nd scale Lloyd C.V
scvrobeson and one other reacted to sandbagger for a topic
Hi all, It's been a while since I updated this build. The fuselage, wings, gun cannister and landing gear axle fairing were airbrushed with 'Tamiya' Dark Yellow (XF60). The flight control surfaces were primed white. These were pre-shaded with 'Tamiya' Smoke (X19). The flight control surfaces are covered with ‘Aviattic’ Clear Doped Linen (ATT32097) decal. The wood effects were brush painted using a mix of Windsor & Newton’ Griffin (Alkyd) Vandyke Brown and Burnt Sienna. Grey areas are ‘Tamiya’ Neutral Grey (XF53) or Dark Sea Grey (XF54). Metallic surfaces are ‘Alclad’ Steel (ALC112) or 'Mr. Colour' Stainless Steel (213). Decal areas were airbrushed with 'Alclad' Aqua Gloss 600. All parts were then airbrushed with 'Alclad' Light Sheen (ALC311) in preparation for applying weathering effects, Mike2 points -
Not everyone prefers print. I love reading on my iPad. I can set it up anywhere, I don’t need a light on at night. I don’t need a bookshelf to stack my books. If the text or image is too small I can enlarge it. I don’t have to worry about dog ears. I do get it why people like print. They don’t want change. Many of the printed books are high quality.2 points
-

1/32 Douglas TBD-1 Devastator by Trumpeter - TBD-1A in October 2023!
CRAZY IVAN5 and one other reacted to npb748r for a topic
I think this is likely to be an issue for relatively few modellers. Scale effect, paint and poor eyesight all add up to not really noticing any difference on a scale model of 1/8" in real life. Add to that a gentle buff before top coat and any realistic moulded rivet will have disappeared. I'd much rather have a slight divot, at least if you choose, you can deceive the eye and visually bring out the rivet with some wash.2 points -
Howdy folks, Just a small What's New update this week. Enjoy! Kev2 points
-
Their website isn't working for me, either. No idea what's going on, though. Hopefully just a temporary glitch. Kev2 points
-
After a long time, a big and very loved (after all it was the aircraft that gave me the most loving and excited experiences of my life) build came to an end!! I think the only 1/32nd scale A-7H ever made! (that means a lot of minor but distinguished differences from both A-7E and -D) My ''ride'' for almost 14 years, 2000 hours in her cockpit!! Dedicated to 345BSqn, my second ''family'' I want to thank Harold (aka AMS resin), Barry, John Wolstenholme (who, IMHO, has built the best A-7E in 1/32 scale) for their help and advice and of course all of you who took the trouble to comment on my topic!! In progress here: Hope you like it!! John2 points
-
Looking for a Star Trek Enterprise NC-01 scale 1/350 Polar Lights
GreyGhost and one other reacted to Dave Williams for a topic
NC-01? Do you mean the NX-01 from the prequel series Enterprise?2 points -
 Lets drag this one closer to the finish line. I git the super fiddly upper gear doors and their uncooperative swivel arms in place, 5 minute epoxy please dont fail me. Then i could not resist hanging the flaps. here are the gear doors in all their glory the flaps are just…flaps, so how about some overall shots, shes not finished but i feel really close. the punch list is getting short. guns, pitot, a red handle on the canopy, prop emblems, mast antenna. i think thats it. comments welcome, as always.2 points
 -
What I wound up doing was a compromise. I added a 0.20" plug to one of the kit M2's. It is still short scalewise but it looks better than the straight kit part. I also enlarged the feed tray and removed the top of the receiver and scratch built another feed tray cover. Now my 1/32 M2 ammunition belts will fit the feed tray. I will not worry about the barrel because they were inserted in blast tubes which ran from the end of the receiver to the wing leading edge. I will just insert the barrel into a piece of hypo tube. I will now cast 3 of these guns. It is not perfect but it is the best compromise I could come up with without having to relocate a lot of other things to accommodate guns of the proper dimensions. I will add the buffer spring tube after they are cast. I will also carve out the forward part of the receiver and add a scratch built bolt.2 points
-

Fw-190 A-8/ R-2 "Sturmbock" Revell 1:32
Nikola Topalov and one other reacted to Sasha As for a topic
Continued the work. Imitated the cab visor washer tubes. Made tubular rails at the base of the sliding cab lantern bindings, guide rollers. Guns blacked out, glued pneumatics . The antenna will be taut in any lantern position.2 points -

The ‘Viper’ pit - A short break to build other stuff.
johncrow and one other reacted to Stokey Pete for a topic
And just to prove to myself that one side wasn’t a fluke, here’s the other side of the tail, completed. Several hours of stressful mask positioning and careful touching up. I’ll leave it to breathe a while now. So I can get my head around the underside masking.2 points -
Thank you all for your comments, I'm glad you like the model. I hope that in the near future I will be able to do a few forum workshops on working on the F-100. I will show you how to paint overheated elements.2 points
-
RAF FG.1 XV571 WILD HARE Phantom Conversion
Brett M and one other reacted to Anthony in NZ for a topic
Thanks Derek! Means a lot coming from a guy who knows so much about these airframes! As always....thank you sir! Printed! This is the unit in the 'stowed' position Cheers Anthony2 points -

Make the others jealous
Rick Griewski and one other reacted to LSP_K2 for a topic
And three more for the already stupidly large pile. The Do 24 was as much a nostalgia purchase as anything, though I would really like to eventually build it.2 points -
Guys... Thank you for the kind words and super support. It's time to consider the canopy. To check it for fit and to begin clean up. There are a lot of sprue gates and ejector pin tabs. But that just makes for higher quality parts. I was so afraid of chipping or cracking, that I snipped them from the sprue as far away as was practical, and then sanded them down with my electric-toothbrush sander. (the best tool tip I ever got) Fit on the left: Not bad. Fit on the right: Better... Fit in the middle: Meh. What's you favorite filler around the canopy? This is the first time that any 109 model I have built has a back wall to the canopy glass as well as the cockpit lights. You may notice that I accidentally broke and then repaired this part. And... and... the armored windscreen is a separate part. This is the fit of the early hood. The antenna mast will be attached to your fuselage if you use this one. The parts are thin with some flex. Good thing I added them seat belts... the view is nice. A second shot for your viewing pleasure... OK... one more.... I... and all of you Hartmann builders will be using this later canopy. The antenna mast will be attached to it. ... oh... and you have to drill a hole for the mast. There are generous tabs representing the canopy hinges. The armored head protection fits firmly into significant recesses. I can't tell you how many 109's and 190's I've built where getting the head armor into the correct position was a chore. Yes, I did wash my hands after work today. There is some distortion in the armored glass. But I ain't gonna worry about it. The Revi reflector sight. I think those two pieces with the arrows by them are for the canopy lights... I can't seem to find them in the directions. More research is required. Finally... a super-sized gun sight. Get our your Novus kit to polish those teenie-weenie little panes. That is all for now. There are canopy masks in the kit.2 points
-

MQ-8B Fire Scout - Brengun, 1/32
Paul in Napier and one other reacted to Starfighter for a topic
Thanks for your positive feedback! Building a slightly canted deck has been on my mind since I have started the (still unfinished and not canted) base for my AH-1Z. I thought this was the right opportunity to give it a go. The difficulty is to make it lok intentional without overdoing it. I'll let you judge whether I was successful or not. Whilst my family is on holiday, I had a very productive weekend at the bench. Probably the only time of the year I could watch TV (and having a beer) Uin the living room whilst guesstimating the padeye pattern and the dimensions of the deck details - and even drilling the holes for the padeyes... but don't tell anyone! I managed to design and print several parts for the LCS-3 flight deck, to design and cut several masks and to apply the nonskid surface and welding lines. Several areas were masked before the nonskid surface was applied. As usual, the masks were cut on my Silhouette Portrait using Oramask. Welding lines were simluated with stretched sprue. The hole will be filled with a (non-functional) flight deck light. And here's the setup with the printed details in situ. I am rather pleased with the result so far I have to admit. I now have to draw the nets; I also have an idea how to replicate the heavily stressed skin of the hull. Once that’s done, painting can start. I will leave the MQ-8 as it is right now - I’ll add the remaining parts once it has been fitted to the base.2 points