Leaderboard
Popular Content
Showing content with the highest reputation on 10/30/2020 in all areas
-

TAM SEAC Mosquito
Landrotten Highlander and 12 others reacted to Rick K for a topic
Picked this up from HLJ, via group order, when Tamiya first released this kit in 2015. Saw plenty of beautiful builds of this kit on LSP. The bar clearly has been raised. This will be an out of box build with exception of instrument panel and gun barrels. Cowlings, .303 and 20mm gun bays will be buttoned up. I'm leaning towards a SEAC scheme. hard to believe there are almost 2 dozen parts here. Primer applied to the future "hard to reach areas". Primer complete. MRP 111 Grey Green, MRP 77 NATO Black on IP and bulkhead components. Seats get Gunze 18 Black Green. Will pick out details with brush and toothpick using Vallejo Color. YAHU IP in lieu of kit IP and ... HGW Basic Line set on deck for some seat belt love.13 points -

Malvinas Pucará FINISHED
Uncarina and 9 others reacted to blackbetty for a topic
the main parts are now epoxied together10 points -

SH Tempest Mk V "Kicked Up A Notch". January 14/21 New eBook!
Elftone and 7 others reacted to chuck540z3 for a topic
Thanks for the feedback guys and the chipping and weathering tips. Having said that, I just started! You haven't seen anything yet! As you all know, good weathering is made up of many thin stages and I'm only on Stage 1. Three things come to mind: 1. No chipping will look good or realistic with a glossy finish. I need a flat coat and I'm a long way away from that right now. 2. No chipping will look good or realistic without further weathering. Chipped up birds are almost always dirty. 3. Chipping and weathering is an art and like all art, what I do won't always appeal to everyone. I don't like the plaid look of heavily pre-shaded panel lines and although I do like the look of a dark wash in panel lines and rivets (like my in-progress shots), they don't look realistic to me in all cases, like this Tempest. For some aircraft like my F-4E I built 8 years ago, a bit of a dark wash worked and this is a good indication of where this Tempest is headed with salt weathering. More salt weathering, but this time on a dull metallic finish. Cheers, Chuck8 points -
OK guys, I'm artistically challenged and need your help with honest criticism. You won't hurt my feelings. I just want to learn and get it as close to right as I can. This is done in oils and any of it can be removed, modified or added too. I want to get some opinions and let it set overnight and look at it with fresh eyes tomorrow.8 points
-
Thank you again guys. Had some time to let the whole thing sit for a bit so I un-masked the fuselage stripe, home defense bands/Hinomaru, the 53rd Sentai on the tail/rudder and the yellow leading edge area. This is one COLORFUL scheme! It will all be toned down with weathering including chipping, mud, washes and some Tamiya weathering pallets. Im not going as hard on the chipping as I did on my Rufe, but this one looked like it flew a LOT of missions, so it will be weathered fairly thoroughly. Not going to miss this one setting on a table............ So far so good! On to the weathering...... Cheers!8 points
-
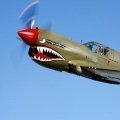
VF-126 A-4E Top Gun completed.
Chris Wimmer and 5 others reacted to Padubon for a topic
Here we go again. I will try to enhance this kit with the Aires detail set that would be perfect, if only it fit properly! I want to build A-4E Bu151059 on its later time. Based on what I have found about it, the plane was repainted, from its first Adversary camo, between 1989-1990, in which the Sand FS 33531 and Brown FS 30219 were inverted. I have no clue why. The fuselage and wings stars, went from grey to brown on the inside part. Photographs suggest that, at least initially, the Adversary red star on the vertical plane, changed to a North Korea star representation, while the left side kept the red star. By late 1991, both sides had the N. Korea star. If anyone knows something about Red 32, please let me know. This is how it looked in May of 1989. Note the camo pattern, not hollow grey stars and the vertical plane adversary red star. Freshly repainted between 1989-1990 with inverted camo pattern, hollow grey stars and N Korea marking on the right vertical. This picture from June 1991, indicates weather wear and a replacement LH wing slat. Note that it still have the Adversary red star on the left vertical. This December of 1991 picture shows the N Korean star representation on the left vertical. This picture of December 1992 shows what it appears to be the beginning of the sad ending for A-4E Bu 151059, my favorite looking Scooter. So far this is what I have done: I read a review about the terrible fitting of the Aires resin wheel wells, I’ll let you know tomorrow. Now, the wings have the “step” that the 1/48 Hasegawa A-4 have at the wing slat area, I fixed by cutting it and with patched it with plastic strips. I’ll finish them tonight. so far so good.6 points -
Yesterday I was finally able to present the completed model to the man that flew the real one, Graham Neil. I had lunch with him and his wife Ronni at their house in Noosa, Queensland, just up the road from me. Here are some pics of the special moment.6 points
-
After 15 years of tryingto have a model in FSM the MH60s will be published in Fine Scale Modeler for December 2020 issue.6 points
-
6 points
-

Duo Fw 190D-9 Hasegawa/Revell
CODY and 4 others reacted to Miloslav1956 for a topic
Hi all, here are my last finished models. 1/32 Hasgawa kits Aires cockpit HGW seat belts, Wet transfers & rivets Eagle wheels Eagle cals All colours MRP5 points -
... with a bit of emotion, despite his age (class '66). The first step in a group already started is always exciting. My name is Fabio and I live and work in Rome. I spend my free time between flying and modeling. The latter made me land here and I hope you want to welcome me among you. I started this wonderful hobby in 1972, with a 1/72 Airfix Komet, painted with my mother's enamel, a cherry red! Personal and work issues have kept me away from modeling for many years, but now, fortunately, I have resumed our wonderful hobby. Like someone who has been deprived of something for a long time, in a compulsive rush, I filled the cellar with planes and wagons. I think I'll start with the latter, to pick up on techniques and materials that are new to me, such as acrylics and all these powders and liquids for aging. it will be interesting. I hope to be able to share pleasant moments of exchange with all of you and learn new things. Cheers. Fabio5 points
-

HH-60G Pavehawk Kitty Hawk 1/35 DONE!!
Derek B and 4 others reacted to Pete Fleischmann for a topic
spent today working on the gear sponsons. Not done, but solid progress. I figured it’d be easier just to make my own telescoping oleo struts for the unweighted gear- cheers Pete5 points -

SH Tempest Mk V "Kicked Up A Notch". January 14/21 New eBook!
Elftone and 4 others reacted to chuck540z3 for a topic
Thanks and sure. As mentioned above, photographing this model is hard to do due to the shine which is very reflective, especially on curved surfaces like the fuselage. Here are two of the right wing from different angles that show the chipping, metallic wash and the residual brown staining of that wash, which is a good starting point for further weathering. Cheers, Chuck5 points -

Gloster Gladiator Mk.II 247 Sqn, RAF.
geedubelyer and 4 others reacted to Padubon for a topic
Finally done!!!!! This was an awesome kit! So easy to build if OOB. I made it a little complicated by adding goodies. Enjoy!5 points -
Mikro Mir 1/32 Fokker E.V/D.VIII
Bobs Buckles and 3 others reacted to olgerd83 for a topic
- model was painted black - masks are removed not bad, very small amount of over-spray that can be easily fixed to be continued...4 points -

SH Tempest Mk V "Kicked Up A Notch". January 14/21 New eBook!
Elftone and 3 others reacted to chuck540z3 for a topic
Yeah, I really shouldn't.... Cheers, Chuck4 points -

A Separate Little War - Strike Wing Mosquito FB.VI
Rockie Yarwood and 3 others reacted to chuck540z3 for a topic
Very nice progress John. You're nearing the finish line! So THAT is what this stuff is! I've been wondered for years what was on the elevator of this Mk I Spitfire. I bet it looks similar on a Mosquito. Cheers, Chuck4 points -
started a long, boring process. based on model size (a fuselage height near engine is 21 mm) on the nose should be 3 black rhombuses, spent whole weekend on it, I tried to make them 7*7mm - too big, 5*5 too small, made them 6*6mm - looks good to me to be continued...4 points
-
The Hurricane has been dull coated and I am about 85% finished with the weathering. I have also added most of the cleat parts. I am trying for a somewhat worn look without making the plane look ready for the boneyard. I highlighted some of the panel lines and then airbrushed an acrylic fading medium onto the horizontal surfaces in a random manner to give them a uneven faded look. Underneath I added a fair amount of oil, soot and other types of fluid stains to the center part of the fuselage as a lot of photos show this area as pretty grungy on many operational aircraft. I still need to add some chipping and wear to the areas that had a lot of foot traffic/maintenance/loading work. I also need to look at adding some exhaust staining, which I plan to keep light as the photos I looked at don't show heavy, or even moderate, staining in the vast majority of the aircraft I looked at. Ernest4 points
-

SH Tempest Mk V "Kicked Up A Notch". January 14/21 New eBook!
Elftone and 3 others reacted to chuck540z3 for a topic
October 29/20 Aren't we all so very lucky to have our hobby during this gawd awful pandemic? With winter almost here and the second wave hitting the world causing new restrictions, I would go nuts without it. BIG Update! The surgery on my right hand was as successful and quick healing as my left hand, so although I still can’t glue tiny parts together, I can do broad strokes like painting- a LOT of painting! The following has a lot of new first for me as follows: 1. Finally using MRP paints for the first time. More on that below. 2. Paint “chipping” with liquid mask on a sponge. I’ve brushed the stuff on before, but never used a sponge. 3. Paint “scratching” with hairspray. Finally, I try what everyone else has been doing for years. 4. Using True Earth Metal Liner washes. Also, more on that below. First the MRP paints. My local modeling buddy Justin (Funkyzeit around LSP) gave me 11 bottles of MRP paint he used on his British Corsair to compare to my favorite paints, which are Model Master enamels and Tamiya lacquers. I’ve been reading raving reviews from you guys about these Slovakian acrylic lacquers for a few years now, so it was time to give them a try. After using them for 3-4 days, I now know what all the fuss is about, because they are so damn easy to use. The paint on my F-15C Eagle (MM Enamels) is really good and the MRP paints are not creating a better finish than on my Spitfire (Tamiya lacquers), but to achieve those finishes, I spent at least twice the amount of time to create them as I likely would have with MRP paints. The enamels needed sanding between coats and the Tamiya lacquers needed to be decanted and thinned, while the MRP paints need nothing and can be used straight from the bottle, which is the exact viscosity that I like to spray. While the Tamiya lacquers dry pretty fast, MRP paints dry faster and make touch-ups super easy. They are less “stinky” too, which is always a good thing in our hobby, so I’m sold. Only problem now is what the heck do I do with about $400 of other paint in my stash!? Before I sprayed any camo paint, I sprayed the bottom with MRP-112, Medium Sea Grey. It sprayed beautifully, with no sputters at all in 10 minutes of continuous painting. I let it dry for a day, then masked everything off to avoid overspray and “dusting” underneath. I sprayed the model with Alclad Aluminum so that I could chip the paint using liquid mask and maybe hairspray, which is a big risk if you don’t know what you’re doing, so I experimented with a couple of kit cowling parts I did not use. On the bottom of the pic below, I used liquid mask on a sponge lightly on the left and heavy on the right, while I did the same thing with hairspray above the central line. I did this because I didn’t know how the MRP paint would react and I’m happy to report that even light amounts of liquid mask come off easily after the paint has dried, while scrubbing the hairspray under paint with water and a toothbrush removes some of the paint, but it’s harder to control the amount and the exact pattern. I found that it was much harder to remove the liquid mask using Tamiya lacquers on my Spitfire, which dry much harder, so the MRP paint is a great for this method of chipping. Undecided as to which method was best, I used both on my model. I like to use poster putty when painting camo, partly because I hate sharp camo edges and my subject appears to have fuzzy demarcation lines in the few pics I have. These putty worms were aligned according to the kit instructions, which appear to be fairly accurate. These are general patterns, with more detailed patterns to come later. While there are no surviving Tempests with original paint on the wings, I used some pics I took of an unrestored Spitfire Mk I that is in a museum in London as a guide. While the Tempest wings will weather differently, especially with actual walkways painted on, it probably didn’t look a whole lot different during WWII. I also used this as a guide for my Spitfire Mk IX build with some success, but I think I can do better this time. Before painting anything, I used hairspray on the wing roots, followed by liquid mask on the tip of a sponge in areas that I thought would show a lot of wear, like the wing roots. The lighter MRP-115 Ocean Grey was sprayed on first, followed by MRP-110 Dark Green, which is the “correct” browny-green for the Tempest. FYI, all these paints say “WWII RAF” on the labels, so they are made specifically for these fighters. The Ocean Grey was roughly masked off to prevent overspray from the Darker Green. Not very pretty, but effective enough. After free-handing paint touch-ups and more curves to the camo, I painted on the black walkways. This was a dilemma, because I normally use a rough and tough paint for walkways, but in order for the liquid mask to be removed for chipping, I elected to go with super thin MRP-5 Black instead. I can make this paint rough later after chipping. Liquid mask removed by just rubbing it off with my finger, while the walkways were scrubbed a bit with a wet toothbrush. Yes, it’s too intense and unrealistic looking for anything but a WWII Japanese fighter, but I planned it that way. It’s easy to tone down or remove chipping, but you can’t create the same type of chipping later if you want more or in a different position. Yes, the chipping is way overdone- if left as is Extra chipping on the starboard side, where pilots enter the aircraft on Typhoons and Tempests. I don’t recall ever seeing this side of entry before. While you cringe at the 4 pics above (Chuck overdid it!), let’s look at a few more pics of that Mk I Spitfire for weathering patterns and colors. Too often we see our models with a dark wash, filling in all the panel lines and rivet detail to make them jump out. Personally, I think it looks beautiful and I’m very happy to press the “Like” symbol here almost every time I see it. While there are plenty of aircraft examples where this method of “weathering” is fairly accurate, I also think it’s unrealistic for a Spitfire and therefore a Tempest. In the pics below I see a few things and I don’t see many dark panel lines and no dark rivets. There is a very metallic overall look to the aircraft and panel lines and rivets are light metal colored instead. I also see metal being exposed a bit without actually being completely bare metal. This is the overall look I’m hoping to replicate. Reviewing Pete Fleischmann’s awesome HH-60G Pavehawk build, I noticed that he was using a new product called True Earth “Waterfiller Putty” to fill in all the rivet depressions before the application of Archer raised decal rivets. This putty looks really easy to use and in the right application like Pete’s, I might need some, so I decided to buy a few bottles for my myself. Going to the True Earth website, I found another product that was new to me called “Metaliner” which is a metallic wash that comes in 5 colors. Bingo!, I thought, that’s what I need for this Tempest build, so I bought a set. The website is below: True Earth Metaliners There are instructions on how to use the stuff at this website, which calls for nothing but a wet rag to rub it off after application, so it is obviously somewhat water-based. The instructions also tell you to do very small areas at a time, so DON’T do an area as big as this! Since the area is so big, it took me a long time to apply and the metallic wash had a chance to dry too much, making it nearly impossible to remove. After scrubbing for at least 10 minutes, I did get most of it off, which is also a testament to the durability of the MRP paint underneath. From that point onward, I did areas about one third of this size at a time, always removing the wash within 2-3 minutes with no further removal issues. For this model, I selected “Warm”, which is not too bright and has a brownish hue to it, which is perfect for the beginning of my weathering. The chipping was then toned down with paint according to what pleased my eye and what I see on the Spitfire above. This is where MRP paints really shine, since modulating coverage is so easy with this super thin paint. And speaking of shine, this model is really hard to photograph due to the smooth nature of the paint and the metallic wash, which will also make decal application without a clear coat super easy. Having said that, the model must be super smooth to begin with, or you can’t get this shine. Remember, this is only Step 1 in the weathering process. Chipping is knocked down a lot, but it’s still there where I want it. No need for a Prismacolor silver pencil to pick up Dzus and other fasteners, because the wash has picked them out already. After salt weathering and a dull coat, this wing will really look the part. A bit of a walkaround. I can’t wait to weather this after painting insignias and applying HGW wet transfer decals. I think the chipping looks much more realistic now. Normally I wouldn’t be applying a wash until the decals were applied, but without the need for a clear coat, I didn’t want to scrub the HGW wet transfer decals after applying the wash, just in case they came off. The good news is that I can still apply more wash after insignia painting and decals as required later. I’m pretty happy with the 4 new things (to me) that I tried on this model and I think it will look killer when finished. Here is my weathering goal in the weeks ahead. Thanks for checking in. Cheers, Chuck4 points -
The builder is slow but the model is very patient. Here is the "finished" payload. I hope to start weathering the main fuselage in the next day or two depending on other responsibilities.4 points
-
Hi all, I was going to keep this untill the next GB. But with a new COVID lock-down in Belgium,I might as well start now. Plenty of other kits to go into the GB's.3 points
-

MI-24 V BG Air Force Trumpeter 1/35
John1 and 2 others reacted to ShelbyGT500 for a topic
Thanks Tim and Chris Now continue with adding more details to fuselage: Cheers friends3 points -
Hong Kong Models - 1/32 Do335 A-10 Trainer announced
scvrobeson and 2 others reacted to pvanroy for a topic
I'm afraid that's just a tall story. As Radu already pointed out: anyone's grip strength will fail long before enough force is reached to dismember a joint. While with the right technique or through sheer brute force it's fairly easy to dislocate joints and fracture even major bones, dismembering a joint through brute force is very difficult - medieval drawn-and-quarterings would often take hours. Also consider that, if memory serves me right, the world-record for a single handed deadlift is something like 360 kg, the record for a raw double handed lift is something like 460 kg, and with straps its somewhere around 500 kg - and none of these guys lost their arms in the process As far as the Do 335 goes, the most up-to-date and comprehensive book about the aircraft is Smith et al. (2017), and all the information below is summarised from that reference. The story about people losing their arms in ejections from the Do 335 is possibly influenced by the death of Werner Altrogge during a test flight of the Do 335 V2 on 16 April 1944. The rear engine of the aircraft caught fire, and after the fire extinguishing system failed, Altrogge decided to eject. However, due to a design error, when Altrogge released the canopy, it hit him in the head, fracturing his skull and rendering him unconscious (if not killing him outright). The burning aircraft subsequently crashed out of control near Buxheim. Following this accident, the canopy was redesigned. Two other, equally unsuccessful attempts at ejection were made from the Do 335. In April 1945, a Uffz. Bahlmann suffered a rear engine fire near Prague, and decided to bail out. On releasing the canopy, is also hit him in the head, although without any severe consequences. However, when he attempted to activate the ejector seat, nothing happened. At that point, the engine fire had subsided, and Bahlmann decided to make an emergency landing. However, upon touching down, the bump from hitting the runway belatedly activated the seat, causing Bahlmann to be ejected from the speeding aircraft onto the runway. He survived with serious injuries, and the aircraft was wrecked. The final unsuccesful attempt at ejection was made by Heinz Fischer on 26 April 1945, when he tried to defect to Switzerland in the Do 335 V9. Having made a navigational error, he ran out of fuel over France and decided to eject. This time, the canopy separation was trouble free, but neither the explosive charges intended to blow away the vertical tailplanes and rear prop, nor the ejector seat functioned, so he abandoned the aircraft in the regular way and survived. The V9 crashed in the Vosges area. Three other lethal in-flight emergencies with the Do 335 are documented: - Alfred Wollank of EKdo 335, who crashed with the Do 335 V4 near Bonefeld, possibly shot down by U.S. fighters on 24 December 1944; - Robert Mossbacher, who was killed in the crash of Do 335 A-0 W.Nr. 240106 due to a front engine fire on 20 February 1945; - Alan Hards, who died at the controls of Do 335 A-10 W.Nr 240112 on 18 January 1946 following a catastrophic rear engine fire. In none of these cases, the emergency ejection mechanism was involved. Post-war French tests of the ejection mechanism with the Do 335 M17 also showed it to be unsatisfactory. Apart from the issue with the canopy potentially hitting the pilot on release, the ejection procedure was also very complicated: the pilot first had to push three buttons in sequence to activate the explosive charges for top fin, prop, and lower fin; then pull both canopy handles to unlock and release the canopy; disconnect the microphone; arm the seat; assume the ejection posture with feet placed on the seat supports; and pull the ejection handle. As an aside: probably at least 11 Do 335 A-10 two-seat trainer production aircraft were completed by converting A-0 airframes, in addition to the one dual-control prototype that was built (V 11). At the very least the V11 and first two production A-10 machines did take to the air, and probably more. Four machines may have been delivered to 4.(F)/Aufklärungsgruppe Nacht. Reference: Smith, J.R., Creek, E.J. & Roletschek, G. 2017. Dornier Do 335 Pfeil/Arrow. Manchester: Crecy Publishing. 288 pp. [This is a revised and updated edition of the earlier Classic Publications book by the same authors, and bearing the same title]3 points -

F-80
Ben Brown and 2 others reacted to thierry laurent for a topic
Hi Ben, This is indeed a camera pod. Out of my memory, they appeared when the retractable rocket launchers were added under the wings. Hth Thierry3 points -

F-80
Michael931080 and 2 others reacted to Ben Brown for a topic
@Michael931080, The big difference was the P-80A and B didn't have an ejection seat. The C version added one and they had to move the windscreen and instrument panel forward 9 inches so the pilot wouldn't lose his legs during an ejection. There were some minor differences in the canopy fairing between the versions, too. The A and B didn't have that little lobe coming out of the aft tip of the canopy frame you see in the above photo. The "F" and "P" were just a change in naming conventions when the USAF was formed in 1948. The P was originally used to designate "pursuit" for fighters, but was changed to F to designate fighters. Everything that was originally a P got changed to F. F was originally used to designate a reconnaissance aircraft, but they changed it to R. The RF-80C was a modified A or B and was never fitted with an ejection seat. Jennings, no idea what that pod on the leading edge is for. Maybe a field mod gun camera pod? It's visible in several photos of F-80s in Korea in the Schiffer book, including the painting on the cover. The author doesn't mention what it is, though. It's sometimes on the port leading edge, sometimes on the starboard side. Ben3 points -

F-80
RBrown and 2 others reacted to Rockie Yarwood for a topic
Hope this is legible! This from the F-80 parts catalog: The legend for it here: Cheers, Rockie3 points -
Buy one, just do it. You know you want too.3 points
-

SH Tempest Mk V "Kicked Up A Notch". January 14/21 New eBook!
Anthony in NZ and 2 others reacted to Brett M for a topic
Stop showing that F-4E.....I’m going to end up buying one.3 points -
Well that was easy. Its on the Spitfire site http://spitfiresite.com/2010/04/supermarine-spitfire-variants-the-initial-merlin-powered-line.html/4 The initial aim with the “C” wing was increasing the armament to four 20-mm Hispano cannon and indeed, initial production Spitfires Mk. Vc were delivered with this type of armament. Combat experience in the Mediterranean had shown that such heavy armament was impractical, and in time the production standard shifted towards two cannon and four machine guns. The structure was re-stressed and strengthened. Also, the Spitfire Mk. Vc was the first Spitfire able to carry a range of specially designed “slipper” drop tanks which were fitted underneath the wing centre-section. Small hooks were fitted just forward of the inboard flaps; when the tank was released these hooks caught the trailing edge of the tank, swinging it clear of the fuselage. A deeper radiator fairing was fitted under the starboard wing, and a larger oil cooler, with a deeper, kinked air outlet, to port. The Mk. Vc introduced the new windscreen design first seen on the Mk III. Later, a number of Mk. Vbs were also fitted with this type of windscreen. Late in the Mk. Vc production the elevator horn balances were increased in area. This modification followed the identical one carried on the Spitfire Mk. IX then in production to increase the lateral stability of the aircraft. The bulk of the Mark Vc were sent overseas with and were used either in North Africa and the Mediterranean or in the Far East. In total, Mk. V production was 6,487, consisting of 94 Mk Va, built by Supermarine, 3,911 Mk Vb, (776 by Supermarine, 2,995 Castle Bromwich and 140 Westland) and 2,467 Mk Vc, (478 Supermarine, 1,494 Castle Bromwich, 495 Westland) plus 15 PR Type Fs by Castle Bromwich. With the advent of the superb Focke Wulf Fw 190 in August 1941 the Spitfire was, for the first time, truly outclassed hastening the development of the “interim” Mk. IX.3 points
-

1:32 scale Ansaldo 'Baby'
Grant_T and 2 others reacted to sandbagger for a topic
Hi all, Here's the shots of the completed Italian Sopwith ‘Baby’ (Serial No. So.5005), built under license by the SA Aeronautica Gio Ansaldo of Turin. The resin model is from 'Lukgraph. A fully detailed build log, in PDF format, will be available to view or download from gallery 2 on my site (just click on the PDF icon) from the site link below. The forum build log for this model can be found here: Mike3 points -
Coming along magnificently Chuck! Those metallic washes look the biz, I've tried to achieve the same effect with aluminium enamels but it just leaves sparkly residue all over the surface like the model's on its way to a 70's disco. If you want to try and achieve that chipping pattern along structural and rivet lines shown in your picture of the museum Spitfire, I've found this can be most effectively done using a silver pencil (first image) or hairspray if there is sufficient surface detail for your brush to grab onto (second image). Keep up the good work, loving it!3 points
-

Malvinas Pucará FINISHED
daveculp and 2 others reacted to blackbetty for a topic
since i have some oramask left, i will try. i have constructed some axels for the props and made them removable the small air intakes at the lower front of the nacelles have been scratched3 points -
You can make it easier on yourself and not use vast majority of the airframe data/panel numbers. By that period in the mid 70s they were much more reduced in usage, here's examples online from that period with 451 where they're pretty clean as far as data markings go:3 points
-
Thanks for the welcome back! It feels good to be back building again. The mojo is not full-bore yet though but I can feel my interest coming back more each day. I've yet to finish the scribing and riveting on the bottom so I thought it would be a good time to test some ideas for the metal finish on the stabilizers. These parts are large enough where I'll be able to lay down some pre-shading texture but small enough to be easily wiped if the paint test goes awry. First, I applied my customary black pre-shading onto the stabilizer bottoms using a mix of freehand and scrubbing pad masks. I'm not aiming for high shine finish so I'm not too concerned with a perfect glossy finish for the preshading. Using Alclad White Aluminum for the base metallic shade and found that, shot straight from the bottle, the color is translucent enough to allow the preshading to peek through. Carefully modulating the application, I want to get rid of any hint of black color of the preshading underneath but leave behind some depth within the metal shade. It's hard to capture with a photograph but this effect is very interesting and promising. I'm going to let this cure and then see how stable this coat is. I want to try and buff/Micromesh the surface and see how it reacts to a clear coat.3 points
-

Tamiya F-4J Phantom VMFA-232 Red Devils *Finished*
Anthony in NZ and one other reacted to vvwse4 for a topic
Hi Albert, I shouldn't worry to much about this. It looks pritty good to me. Like Finn said you cannot go wrong with this. The one thing I would do is to fade the streaks behind the front Sparrow stations a bit more and maybe add a bit more brown tones? The payload looks great, especially the MK82's. How did you do that? Mines are still brand new OD. Keep it coming!! Rick.2 points -
@chuck540z3 Wow i love the result of that true earth wash!! love following your builds, so as my standard luck goes, ive been wanting Flory wash for years now and yesterday i pulled the trigger and got a bunch, and today i discover this new product! there goes more modeling budget!@!!2 points
-
Aren't we all..... And to add insult to injury to Roland Whites's new book, Sea Harrier 809 is now out... !st Gen Harriers in 1/32 NOW please!!!2 points
-

Tamiya F-4J Phantom VMFA-232 Red Devils *Finished*
AlbertD and one other reacted to Squizzy 78 for a topic
I think it looks awesome! With phantoms anyone could find a photo to support the level of weathering that matches their idea of what it should be, due to the fact they ranged from fresh paint to the extreme heavily weathered examples in the Vietnam war. I think yours is a really nice mid range level of weathering that it helps show off the detailing and shows good effect, but not too much or over done.2 points -
This is about what I was after except maybe a bit more subtle.2 points
-
Relevance, historical significance, nationality, combat performance, just a few of the things that play 'no' role in my preference. It's strictly coolness factor, nothing more, nothing less.2 points
-
Whilst on the subject of "red dope", here's another great picture that was posted on BM. Apparently even brand new aircraft could't escape a few patches here and there. I've added a few patches on KK-Q, I'll post an update soon.2 points
-

SH Tempest Mk V "Kicked Up A Notch". January 14/21 New eBook!
Marcel111 and one other reacted to chuck540z3 for a topic
While not as pronounced, I think it would still add something to raised rivets, giving them a bit of a metallic sheen, as shown again on the sides of the Spitfire. On my Spitfire I used Tamiya Silver pastels to try and get this look. And it worked OK, but this Metaliner wash is much better. Cheers, Chuck2 points -
Agree with all above, it works very good in small seams (smooth it with a wet paintbrush or finger) but, for a perfect fit and finish I’d recommend Tamiya fine white filler, I don’t know what’s in it but it dries fast, doesn’t seem to shrink in large seams sands as smooth as glass (quite easily) sticks to anything (resin & plastic) and takes paint very well. my $ 0.2c2 points
-
Thanks guys! We still have a lot of fun making the books - it's fun to make the photos (photo selection is a little less fun, going back from 2,000 photos to 350 is hard), doing the lay-out and doing the research, which sometimes brings surprises. Like those Skyhawk slats! Once my Trumpeter Harrier II is done, I hope to continue my work on an A-4AR that I started some time ago. I hope to build it in maintenance, with the nose folded open (twice) and the engine out. At the moment, we're especially happy that we made additional trips before the crisis started; all our trips and base visits of the last 8 months got cancelled... We've got material for about 5 more books, hopefully things will get better by the summer. Ow, and Jack; now that would be awesome, but I think getting a backseat ride in a MiG-31 would be next to impossible. And although I would jump on it, it would probably scare me to death too. I would love to post photos of models with our book on that aircraft, so if anyone has this combination, please post them here! Unfortunately, not all subjects are available in 1/32... imagine a Jaguar, Viggen, C-130, Mirage F1 or MiG-31 in 1/32! Again, thank you to all who got one of our bookstand thank you for the feedback! Nic2 points
-

Kitty Hawk Mirage 2000C
Paul in Napier and one other reacted to Cheetah11 for a topic
A little more fixing to do before painting. As I said earlier I want all the fixes out of the way before painting and assembly. I fixed the length of the drop tank tanks to the info Romain provided. I will post it tomorrow after the filler has dried. The gun bays are also designed to be open and the doors will not fit flush with the bays installed. I simply removed them to get the doors flush and added a piece of tubing to later fit the gun barrel. The engine mount and engine are secured with super thin location pegs. I was afraid with my clumsiness I will battle to get them to fit. I replaced them with a piece of brass rod through the engine and 3mm plastic card on the fuselage sides. Now for the biggest fix. The resin AB nozzle is undersized. I think KH realized this and instead of printing a new master, they added a ring to the nozzle to get it flush with the fuselage. This leads to a step which is not present on the real aircraft. Because of the nature of the resin nozzle, it will be almost impossible to enlarge it. There are a few options. 1. Best one to get the Resikit nozzle if the fit is better. 2. Ignore the problem. 3. Size the fuselage to fit the nozzle. Option 3 is the only viable one for me, so here goes. The step if no adjustment is made. Bottom cut by sanding a wedge out of both sides Two small cuts on the side of the fuselage completed the cutting. And the corrected nozzle. Now almost ready for a normal build and painting Cheers Nick2 points -
Thanx Max , I just bot some on Amazon. https://www.amazon.com/gp/product/B00DOX7A9O/ref=ppx_yo_dt_b_asin_title_o00_s00?ie=UTF8&psc=12 points
-
I added some decals last night and this kit’s decals are the best I have ever used! So thin and strong, I’m impressed.2 points
-
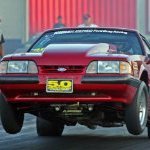
1/35 Ryefield Type 82e Staff Car-Completed
Kagemusha and one other reacted to mustang1989 for a topic
Thanks Kagemusha!! Even though I've been working like a dog at work I have NOT given up my benchtime. I managed to build the engine and install and start work on the interior. The engine originally had 11 parts to it but in typical fashion I added the spark plug wires, fuel line from the pump to the carburetor and installed the circuits leading to the generator. I would've posted progress sooner but I took Macro shots and spotted more boo-boo's than I could count so I made all the corrections and now have a presentable bit of progress. If anyone is thinking about getting this kit...I HIGHLY recommend it. Plenty of detail and goes together very well.2 points

