Leaderboard
Popular Content
Showing content with the highest reputation on 07/25/2018 in all areas
-
my last kit, enjoy :12 points
-
Sales time a my LHS. An average 25€ less on the normal price for each kit.5 points
-
This is looking good - sounds like they are gonna have some French pilot figures available too:4 points
-

Arado Ar 196 A3 BG Air Force 2 Revell 1/32
Mal_Belford and 3 others reacted to ShelbyGT500 for a topic
Thanks Rick It is time for the next update: decals and masks are ready: Well, the aviation base "Chaika" logo is also done: Some weathering over engine's cowlings : And the two rotors: 1.Plastic one: 2. The resin one: Cheers friends4 points -
A bit premature perhaps, but I felt like playing with decals, so added the bottom meatballs. I'll be using masks topside though.4 points
-
4 points
-
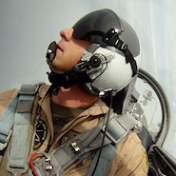
T-45C Conversion from Revell Kit
Tomcatfreak and 3 others reacted to Timmy! for a topic
Lately I had down time at work, sitting as a stand by airline pilot waiting to get a call to go fly, to fill the hours I was fooling around with my 12” iPad Pro, an Apple Pencil and a painting program called Procreate. As usual the complete write up is HERE. I was going for a cell shaded look and not a highly detailed paining. I was fiddling around wth Procreate not trying to create a master piece. Thought the result was worth sharing tho… Bonus video of the time lapse feature in Procreate…4 points -
Fellas, Started back up on this. Had to scratch build the operators stations in the back as you can see quite a bit. Still have a little bit more to do. Andy3 points
-
3 points
-
While I haven't built the Special Hobby kit, I have built (and reviewed) the Kitty Hawk kit, and it's a tough build. The nose panels especially are a challenge, but I have to say I'm pleased with how it turned out: You can check out my build thread for all the gory details: Note that the Revell kit is a re-boxing of the Special Hobby kit. Kev3 points
-

Make the others jealous
Rick Griewski and 2 others reacted to LSP_K2 for a topic
This arrived today, and is a kit that I've wanted for a very long time, but never seemed to get around to purchasing. Through a deal with a fellow LSP guy (thanks a ton, Mike), I've now finally got one. The kit also included some nice Eduard stuff, so I'm already ahead of the curve there.3 points -
Thanks from a fellow B-ri! Ok this one is down to crunch time boys. Ive got exactly 1 week and NO days to finish this thing off. I have a semi-accurate "left to-do" list going on the Extra, but I know for sure I probably left some things off, and there is not a whole lot crossed off the list: - Sand gouge in starboard wing smooth - Blue touchups for starboard gauge? - Mask off and shoot aluminum paint on forward edge wing-tip - Build wing tip attitude indicators - Finish sand and paint wing tip indicators - Fix red forward stripes - Red touchups - Assemble/finish prop - White touchups - Color sand finished scheme prior to gloss coat - Gloss clear - Decals - Final gloss clear coat - paint inner cockpit opening liner black - Fix/re - paint exhaust w/foil area - finish wheels - attach rudder - Paint tail wheel - make custom tail wheel assembly - paint tail wheel assembly - make custom rudder push rods w/tie rod ends - polish canopy inside and out - add handle to inside of canopy - make and attach canopy restraint strap - mount wheels and wheel pants - Glue on aileron counter balancers - Glue on ailerons - Glue on wing tip attitude indicators. - Spine antenna? - Belly antenna? I know I keep posting updates w/no pics in them, but every time I get down to the bench to hit this thing hard, I get into work mode and dont seem to have time to take pics. I did manage to snap a pic of the almost assembled (at the time, its now fully glued together) prop using my PropMaster prop jig: I know its not much, but Im in full flank speed ahead mode! Im back on the little Extra today, and have now finished the blue touch-ups (for as much as they will ever be finished) and have nearly finished the red, only needing to finish fixing the red stripes on the fuselage. Then its onto the white touch-ups, then gloss. Once the gloss/decals/gloss is down, I can concentrate on assembly. Cheers!3 points
-
Wait... Milton Bradley makes parts for the SL500?? Gaz3 points
-
So all the main components are together and I'm almost ready to start the paintwork. I had to change my plan for this kit though. I had always envisaged keeping the engine cowling panels removable as you can with this kit, but after a very frustrating afternoon trying to make them fit i had to admit defeat and glue them in place and so loose all of that fab engine detail. Its not that the fit of the panels was bad it was that they weren't quite good enough and to make them fit precisely you had to maintain some pressure on the panels. I would probably always display this kit with the panels on so in the end the decision wasn't hard and lets face it we all have loads of models we lavished time and hard work on intricate internal detail which are very important to get right at the time but when the kit is finished you can hardly see the fruits of your labours if at all.....HK B17 for example! As you can see the nose is now yellow and I'm preparing to mask the chequers...should be fun! Cheers Matt3 points
-
Now onto the yellow. I masked up and painted the number 7, maybe a touch too thick but it'll do. I also thought while at it, why not try to paint the national insignia. Not too shabby, still need to do the other side of the fuselage and put the black in the middle. These will look better than decals when painted over with thin black I think.3 points
-
3 points
-
3 points
-

1/32 ZM Ta-152 H-O
D.B. Andrus and one other reacted to Ryan for a topic
OK I have a very poor showing with completed WIP's, but this kit is very good, I wanted to share some info and pics as I build it. Here are some shots of the engine mid stream in construction. TA-152 Engine by The 3rd Placer, on Flickr TA-152 Engine by The 3rd Placer, on Flickr TA-152 Engine by The 3rd Placer, on Flickr2 points -
This time the model about which I can not write that it is made straight from the box. This is the F-16CG model from academy with the IsraCast set full of conversion kit for the F-16A. Israeli Air Force. The model has armament probably unheard of in real conditions, but that was the wish of the person for whom I made this model. The IsraCast set is very demanding and forces many model revisions around the vertical stabilizer.2 points
-
This has been bugging me..have to point it out(if it hasn't) There is an AM resin spinner cap for this kit to correct the WNW's part.not mentioning who makes it. For those who have purchased it,or are thinking about picking one up..you don't need it..WNW got the diameter and shape right the first time. Now I feel better. Cheers,Bill. kit matches the photo well2 points
-
Got it - thanks! Ok, Kevin read your article on your excellent build - looks like if you left out the internals (engine, etc.) the kit would be an ok build? But then, why pay for them I would build it closed up anyway....2 points
-
#71, April/May 2017: http://shop.afvmodeller.com/customer/product.php?productid=18720 Kev2 points
-
Indeed, same as the previous P-47 rebox from Ed. Usually priced around 85/90€ over here, and got it for +/- 60€, which is fine to me. The boxart print is nice, as well as the metal plate, but this last item could have been left aside to lower the price. Or at least Ed could have made two version of the package, with or without.2 points
-

TA-152 use of Wood Panels
alaninaustria and one other reacted to Ryan for a topic
Nothing to do with wood panels but the engine in the ZM kit is fantastic, shown here mid production and unpainted. TA-152 Engine by The 3rd Placer, on Flickr TA-152 Engine by The 3rd Placer, on Flickr TA-152 Engine by The 3rd Placer, on Flickr2 points -
Back with some decal work and finishing progress. Article HERE! On to the goodies the photos…. Thanks as always for checking in!2 points
-
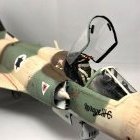
P 51 B war weary trumpeter
Jack and one other reacted to Bill Cross for a topic
For an "unbuildable" kit (from what I have heard), it looks pretty all right to me.2 points -

Icaerodesign Extra 330-SC
BloorwestSiR and one other reacted to Out2gtcha for a topic
Crap, looking at the very first pic in this thread, I just noticed that I forgot to add the pitot tube to that list too....................2 points -
2 points
-
As I just can't find anything else more to do on Spatz and reached a point of diminishing returns should I try, it's done - PHEW! First model finished in two years. This was supposed to be a simple mojo enhancer as Tamiya builds usually are, but it ended up being a epic super-detailing build, particularly in regard to the engine. I added over 70+ individual pieces to the engine - just lost count in the end. So, at least I have something for Model Expo next year finished! 20180725_133654[4017] by Adam Dormer, on Flickr 20180725_133531[4018] by Adam Dormer, on Flickr 20180725_133438[4019] by Adam Dormer, on Flickr 20180725_133232[4021] by Adam Dormer, on Flickr 20180725_133156[4022] by Adam Dormer, on Flickr 20180725_133132[4023] by Adam Dormer, on Flickr2 points
-
Looking real good. If I keep looking at stuff like this, I'm going to end up dragging out one of my own WWI kits.2 points
-
MRP #99 for the US navy white and MRP#98 for the Light gull Grey Spent a few hours this week-end to paint some touch ups like painting the DECM antennas white and make the walkways [img=] As usual I painted them with a texture rust oleum paint, then sprayed MRP#100 for dark gull grey and made some touch up with smoke and lighter gull grey (MRP-98) The trick with this textured product is to refrain to cover the surface completely, just a bit of texture is enough even if the paint from the can remains transparent. Otherwise the coat is way too thick. The second trick is to make sure you cover the model completely, this is going everywhere. Summer break now and I'll be back in Septembre with the finishing touches on the model Have a great time gents2 points
-
Not mine Bill , but I did build a couple of those back in my childhood tho. Don't worry , Tamiya's gonna drop a P-51B on us next year2 points
-
Messerschmitt Bf 109G-6 JG 300 Wilde Sau...*Completed*
Alain Gadbois and one other reacted to BradG for a topic
Alright, camo is on. I basically spent all evening painting. Still a couple of bits to put on, but next up is yellow for the rudder, cowl and number 7, which I think I will have to mask up.2 points -
F-14B UPGRADE 1/32 Tomcat
Shaka HI and one other reacted to Fancherello for a topic
hello Time for an update. I haven't been able to bring much consistent update due to some time lost sorting out landing gear size issues. I'll tell more about this later on, i now need replacement wheels to move forward on this. As I'm waiting for my wheels, I've been working on the GBU-12's and exhausts. These are Eduard Brassin GBU's with navy coating added, made of MrSurfacer 500. My trusty crapy Ikea flat brush was perfect to work the texturing with lacquer thinner. I've been adding some wiring and RBF tags, thanks to one of our kind members advice ( still need one more RBF and pin, though ) And work on the exhaust. Daco shows an excellent picture of a VF-103 Tomcat in the end of its service, perfect match with my topic. No Black and White look but rather some sort of grimey grey green with a few petals having some sort of sandy hue. A good opportunity to have a bit of unusual. and after a fine brush work with oil paint and AK washes: best regards ! Fanch2 points -
Started this on Friday. Fun kit. I enjoyed the build. Love all the engraved detail. Yes, some have issues with out. I build in loose tolerances. print screen windows1 point
-
That's to add small wedges to give more strenght.1 point
-
The paintwork does look great, mottling is always difficult for me. What paint did you use that stripped off? As for "adventures" building character, don't know about you, but I've had my fill of "character" while building. Don1 point
-
Hi there I finished this some 4 weeks ago and have not had the opportunity to photograph it. Now I can ruin a decent model in one click and as you can tell it's not my thing!. I bought this at Telford SMW 2017 and it was one of those I had to have it as I normally buy 2nd hand kits. It goes together quite well and I'm pleased although it's tiny in scale and I had doubts at the beginning but I have vowed to leave 1/48 to the experts, I simply find it too small to make it an enjoyable build. Anyway some crappy photos to humour you with. Ignore the base as it's 1/32 and the only one I've got. IMG_0612 by Stephen Priestley-Dean, on Flickr IMG_0611 by Stephen Priestley-Dean, on Flickr IMG_0610 by Stephen Priestley-Dean, on Flickr IMG_0609 by Stephen Priestley-Dean, on Flickr IMG_0608 by Stephen Priestley-Dean, on Flickr Thanks for looking Steve.1 point
-
I feel your pain with decals1 point
-
WNW's Sopwith Snipe (early) also sold out today
Gazzas reacted to Rick Griewski for a topic
The OOP that impresse me was the 3-Albatros set. I really like that plane and I was indeed poised to buy another box. The whoosh sound is very applicable. Rick1 point -
Revell 41 Willy's -"Demon II"-Completed 09/07
Gazzas reacted to mustang1989 for a topic
Thanks guys!! I finally managed to start on the interior. Here's the progress on the door panels. I mixed up some dark grey and thinner and outlined all the recessed areas so when I shot the white over the door panels it would make those areas stand out a little more. A pre-shading of sorts. I found a piece of adhesive backed blue metallic sheet that I applied and cut out around the edges for a neat and clean door insert panel. Then I masked off and painted the door speaker grilles black. I'm still planning out the rest of the interior scheme. I did the same thing with the seats as I did with the door panels on pre-shading all the cracks and crevices with a dark gray, then a medium coat of white followed by a coat of semi-gloss clear. I'm trying to accent the blue lightly throughout the interior without overdoing it. Keep in mind that the seat belts and dash will be blue as well. I had some soda bottles so I drilled two holes to simulate cup holders and slipped a couple of sodas in the center console. Window switch and shifter bezels were picked out with Chrome BMF. Radio face with CD halfway out of the slot will be going on the blue panel at the front of the console. Weird how Revell didn't have a decal slide or radio face molded on it. Here's phase one of the color balance. There'll be a light blue flocking applied to the floor by tomorrow and some extra details added.Then the floor mats will also be thrown on both sides of the floor. I removed the soda bottle from the passengers cup holder and glued a piece of black sheet styrene on the bottom of the interior tub at that location to simulate that little black foam pad that's usually at the bottom of cup holders. I may put a bottle cap opener in there as well.1 point -

Best NMF kits?
Gazzas reacted to Ivan Ivanovich for a topic
Dead-right! It's a Vinten Vicon recce pod.1 point -
Does anyone make custom paint masks?
Eagle Driver reacted to Tolga ULGUR for a topic
I recommend you DN models. https://dnmodels.com/1 point -
Don, Sorry to hear you've had some difficulties. Rigging seems hard, but once you settle the problem of keeping the model in place and not having to touch the wings with your hands, it gets a bit easier. For me, the most essential tools for rigging are: 1. A biplane jig 2. A lot of very bright light, some from the backside of the model 3. Good magnification. The greatest bonus of rigging a biplane model is some added strength which is usually needed just to keep the upper wing from detaching during casual handling. Gaz1 point
-
Not another P-51, why?? There so many out there now.1 point
-
Hong Kong Models apparently have a P-51B/C in development...1 point
-
Someone here said...there "IS" a P-51B-C in the works as we speak... can't remember who though. Oh! nice job on that FW Mike.like the oil staining on the spinner,nice touch that.1 point
-
Because they still can't top the original ...1 point
-

List of large scale Golden Era aircraft
Leaning_Dog reacted to Hubert Boillot for a topic
Since you asked ... As of this morning. I counted 52 boxes, some of them doubles or trebles of the same kit ... And of course, a lot of resin kits, with rather bland boxes (Luckily, I have framed my pic so that the other members of the stash don't show up. I am smart, am I not ? ) Hubert PS : + two Gee-Bee R1-R2 currently on the workbench ... ... and two finished ones, Fisher's ST-M and the Nieuport Sesquiplan ...1 point -
nice! I copied this scheme onto an 'F' model I had, its quite cool.1 point


