Leaderboard


Popular Content
Showing content with the highest reputation on 10/12/2020 in all areas
-

HH-60G Pavehawk Kitty Hawk 1/35 DONE!!
KiwiZac and 13 others reacted to Pete Fleischmann for a topic
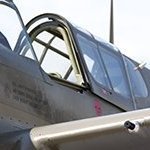
Hey all, the rivets are all down on the fuselage. finally. you are gonna lose some rivets to shop rash. when I repair those spots which are typically one to three rivets, I mark their location by leaving the decal paper next to the repaired rivet(s) so I know where to come back to and smother with solvaset- Might lose some more as I handle the model adding some parts before paint. I’ll inspect it for lost rivets again before I black prime it- cheers Pete14 points -
Then it was time for the main rear gunners glass, the main canopy, and the windscreen (in the ZM kit are one part). I must say, the Ki-45 certainly isn't in the history books with any of the legendary twins of WWII, but it has some surprisingly attractive lines......especially all cleaned up: The fit at the back of the main gunners hatch glass I assume is very good, but I pooched mine a tad and it will need some adjusting: The next step was masking all this glass. With the help of some Tamiya tape, and some of the best OOB glass masks I've yet used the task was accomplished: The blue OOB ZM masks are truly wonderful. Very flexible, stick very well without leaving any marks, and are stretchy enough to be compliant without breaking or tearing. I did shoot the interior khaki gray color on of course next, but I have a slight bit of dread that there is some secret leak somewhere that let a bit of over-spray on the clear. That will have to wait until near the end to see how much if any repair work I have to do. The only glaring issue I found was a couple of gaps, one one each side of the wind screen. Possibly caused by over sanding, possibly a manufacturer defect. With the fit of the rest of the kit, I suspect the former. Nothing that some Mr Surfacer 500 wont fill: That it for this round boys. Next up is adjusting/fixing that rear canopy part, re-spraying any interior color needed, then its onto a layer of Mr Surfacer 1500 black. Cheers!11 points
-
Finally some paint... Obviously there is no decal for this model and everything will be homemade. I started by doing decals artwork for this one but knew that the light coloured decals on the darker colour skin wouldn't work. Luckily I had access temporarily to a cameo 4 and cut some masks. I tried to cut stencils but it seems these were either too small or my experience with the hardware is too limited Anyway, In the end I will try with a mix of masks and decals. All this to explain this weird looking first colour patchwork It's always easier to mask a red line with a single strip before base coat rather than paint it after base coat with a double strip which is most of the time in difficult places. The white basecoat is mostly for future decal or masks location Same patchwork on the bottom and with a very crude pre-shade with black Masking was done with Tamiya tape strips and silhouette masks. These red lines really colour the KFIR wings The reason I masked the tail squadron patch is that my only chance to make this work is with a decal but I need a white background. Can't print homemade decal in white and yellow and expect it to stand out on dark grey. So 2 steps: 1 mask for background, then decal on top. Top surfaces were sprayed with Gunze H305 and post shaded with a darker IJN Tamiya grey. Very subtle colour variation, but it's there. Bottom surfaces were painted with a 50/50 mix of Gunze H311 and H308. few spots needing corrections due to me not being careful enough. The border line between the top and bottom colours were masked with white Tamiya curve tape so have a straight curved edge between the 2 colours10 points
-
I decided to start this one with the engine. The detail on the P&W R-1830 Twin Wasp is pretty soft, and there are mold seams running down the sides of the cylinders which are very hard to remove without wrecking the cooling fins. Fortunately, since this engine will only be visible from the front through the cowling, I can focus on just tying to make that one angle look decent (like the false-front buildings on a Western stage set). The main parts, sort of cleaned up: Rather than trying to do any drilling, I went with the quick/dirty solution of gluing plug wires (0.3 mm lead) to the backs of the ignition distribution ring stubs. Started with some semigloss black Then Mr Color Super Iron II for the steel cylinder sleeves Then Alclad II White Aluminum for the cylinder heads Some contemporary photos showed noticeable rust on the cylinder sleeves, so after a black acrylic wash I added some rusty pastel (I'm now using Vallejo acrylic washes over metallic lacquers because the Tamiya enamel washes tend to re-wet the lacquer, which interestingly does not happen with non-metallic lacquers). Then painted the crankcase light gray-blue I decided at that point that the rust was too pronounced and hit it with another dose of black wash to tone it down The pushrod tubes don't line up at all perfectly, so it's going to be a bit of a chore getting them all solidly in place. But overall for a pretty lackluster kit engine (at least by 1/32 standards) it is coming together OK. From here I need to get plug wires in place, find a stencil decal for the reduction gear housing, add some oil paint grime, flat coat it, and that should be OK.10 points
-
new company to me from Hungary they have opening weekend with Buy 1 Get 1 free offer 3D instrument panels https://www.rfstudio.hu/# https://www.facebook.com/pg/Red-Fox-Studio-112301346967714/posts/?ref=page_internal F-117 F/A-18E Mirage III E/RD/O A-10 P-38 Bf-109G Fw-190A-8 Me-262 P-519 points
-

Fisher F9F-8T/TF-9J Twogar
Chris Wimmer and 7 others reacted to Landrotten Highlander for a topic
Once that was done the PE was rolled until it fitted the curve of the resin I also choose to hollow out the inward facing side so that some of the holes in the PE would not be blocked. Marking the holes with pencil. Create an hollow with scalpel #11. Forgot to take intermediate pictures of the process, but once the resin was glued in the correct position, the remaining missing frames were fabricated from plastic sheet. I will put these aside until I am ready to fabricate the operating mechanism. But fo that I will need the cockpit and wing section glued to the hull. That's all for now. Thanks for looking.8 points -
Doing some cleaning and sorting of things amassed on my bench the last few months. Sorted out decals, start to file them. No room. File drawer is packed tight. Dig through file headers. Armor instructions and aircraft instructions. Dig them out, go through them. Instruction sheets back to the 70s in both piles. Talk about a trip down memory lane....7 points
-
 Today's goal.......7 points
 -
Tight fit for the interior parts in the cargo area.7 points
-
This is me ... I have a big bag of extremey fine powder that I have no idea where I got it or why I have it.7 points
-
So "camouflage" or not, this isn't a low-observability paint scheme ;-) That photo is too cool in tone, BTW - the actual colors are yellower. Overall I'm pretty happy with how this is going. But more work to do. There's one tiny area where the masks lifted the base coat of paint (in a highly visible spot, of course) so I'm going to have to fix that. Plus I need to mask and paint a lighter-yellow ID band around the rear fuselage (if I had been thinking carefully I probably would have done that MUCH earlier and then masked it off). I'm going to give this latest round of paint a day or two though before I try to do anything more on top of it.6 points
-
Fisher F9F-8T/TF-9J Twogar
Chris Wimmer and 5 others reacted to Landrotten Highlander for a topic
Right, here goes update # 1. thinking I want the speed brakes down I first tackled the forward speed brakes to see what is what. First observation: the holes in the speed brake do not line up with the framework of the resin body. Fisher would have you glue them in the centre of the PE, but that will cause the framework to obstruct the holes - and I cannot imagine that would be a desired aspect of the speedbrake. So here is my solution - not a perfect copy of the real item, but good enough for my purpose. On the left is my first try, on the right the other speed brake.as seen from both sides. First step was to sand the outward facing side such that the framework opened up.6 points -

Hobby Boss 1/32 B-24D
wunwinglow and 4 others reacted to Keith Cox for a topic
QUICKBOOST 1/32 B24J Liberator Propellers for HBO QUB322585 points -
I've built the Revell kit last year and did not encounter any problems, at least none that a little elbowgrease wouldn't solve. And howling with the wolves, I've sold my 2 Tamiya kits and bought me another Revell kit. And btw, the kit decals are excellent (maybe Cartograf?). But we all have our preferences, don't we! Lothar5 points
-
Hello, a new update on this model. The IP cover was panted and weathered. I replaced the HUD's glasses with thin clear plasticard sheet. Then I removed the molding line from the front canopy section. After a good polishing session the part was glued into the fuselage. A thin stripe was applied in front of the windshield to simulate the defog vent. Here some details added to the speed-bake vane. Now my Legacy Hornet is ready for the painting stage... CIAO! Piero5 points
-
2nd prototype5 points
-
.thumb.jpg.5da8bff9741de420eb2e87addd8f2cf6.jpg)
MikroMir 1/48 Percival Provost
scvrobeson and 4 others reacted to RadBaron for a topic
OK, calling this one done for now. One of these days I'll get a pretty backdrop and use a real camera, but for now, heres a quick look at her in all her flourescent glory!5 points -
Ok, lots to see................... I have finished with the major re-spray of the metal areas. In addition to re-spraying all of the very shiny Airframe Aluminum with Stainless Steel I have also given the entire model a light dust coat of Aluminum to try and blend in everything so that the panel contrast is toned down a little. I have also un-masked all of the previously painted white areas. These areas will contain squadron markings. I will be adding yellow stripes. Lots of cleanup and fine touchups to go but here is the basic scheme. Dan5 points
-
Tamiya - F4u1a
Loach Driver and 3 others reacted to simon417 for a topic
Finally got this one finished and also tried my hand at building a base. AK Real Colours Eagle Cals Barracuda Wheels Barracuda Cockpit stencils Ultracast Pappy Boyington AK Terrains Palm Tree - from Ebay seller in Thailand It's a great kit. I have another in the pile for a later date. Thanks for looking. Simon4 points -

Something for our Aussie friends...
mpk and 3 others reacted to D.B. Andrus for a topic
4 points -
Hi All, small update. So, after seeing the pictures of the fire extinguisher control box mounting arrangement, I was doomed to having a crack at representing it! I decided to try and fashion the lower mounting frame simply by drilling and carving out the platform on the kit part which had been sawn off from its previous location on the side wall frame. The upper mounting bracket is a spare PE part. The bungee bearers on the side of the box were made from sections of 0.5 mm rod and the bungee cord represented with 0.2 mm copper wire. The kit control box is slightly oversize so I couldn't easily fit the same arrangement on the other side so I just left it off as it won't be easily visible anway - a convenient excuse as doing just this side nearly sent me barmy! Should make some progress with assembly of the rest of the cockpit parts next time. Thanks for stopping by!4 points
-

Fuji FA-200, 1/20 Nichimo
Paul in Napier and 3 others reacted to mgbooyv8 for a topic
Still IMC most of the time I'm afraid, Jack! Well, more time at the bench, then. Anyway, I'm filling and sanding now, not worth a picture. To show the thought that went into the making of this kit, here is a picture of the partly build-up interior as it would be OOB: Floor, carpets, skid plates, seats and parcel shelf are all moulded in different colours to enable finishing without paint. The same holds for the controls and instrument panel (not shown). The result is convincing enough for sombody who is not very experienced and would have trouble with painting. Ofcourse, painting the parts gives much better results, and here the parts are just dry-fitted for the picture. To be continued. Cheers, Peter4 points -

HH-60G Pavehawk Kitty Hawk 1/35 DONE!!
Michael931080 and 3 others reacted to Woody V for a topic
Pete, Actually you shouldn't lose any and a primer coat will have a negligible, if any affect on adhesion. The way you are doing it now is fine and you should not lose any rivets by handling the model. When I did my Wildcat build I glued a part in the wrong place and in the process of fixing it I had to do some sanding around the rivets. As you can see in this photo, the rivets took sanding without coming off. Try it yourself on a scrap part. There's only two ways to remove the rivets once they're on and dy; pop them off with your hobby knife or sand them off.4 points -

Cleaning the bench
Rick Griewski and 3 others reacted to BloorwestSiR for a topic
I was going through some boxes and found a complete RC car that wasn't assembled. It was still in the box. Couldn't remember buying it or where it came from. I finally got around to working on it recently and it's almost done.4 points -

Cleaning the bench
mpk and 3 others reacted to Rick Griewski for a topic
I clean up often. So there is not much nostalgia involved. Not much history build up you mentioned. I used to leave myself post-it notes when I was working so after 3 weeks I could start back up with least amount of delay. Boring I will admit.4 points -
How about instructions for the Aurora MBT- 70? I also found a bunch of Shep Paine diorama tip sheets.4 points
-

Revell 1/32 Late model P-51D, when?
Paramedic and 3 others reacted to Dave Williams for a topic
I think the number of people who buy and build multiple kits of the same subject is greater than you think. That said, if I could buy only one, I’d choose the Tamiya.4 points -
I started off this past week by breaking out my A6M paint mule, and spraying a fairly opaque (much more so than I will be on the model) layer of the MRP 177: Next I applied some camo masks I pulled from my Silhouette cutter. Here I have to say I used a 1/2 sheet on the cutter and it spat out the mask sheet before the whole wing was done, so I had to just randomly put together some camo bits. That did NOT work out well. I ended up hating the arranged look of the ones I chose: It didnt look bad when I just had the masks on, but after I shot the gray I could tell the arrangement of the camo was really bad. However, the look of the colors themselves and the process itself did prove good. I then moved onto my nemesis....................clear parts! And the Toryu has a lot of them. I started by gluing on the center section of the airframe, which has 5 smaller individual windows in it. I also glued in the far rear gunners glass along with some pre-made masking: Finished up the OOB gun sight as well, and installed that: It was at that point that for clarity sake, ease of finishing (have other Tigers tails soon to tame) and ease of masking I decided to use the fully buttoned up glass configuration. This will lend itself to ease of masking and some much cleaner lines.4 points
-
With the yellow base coat completed (dang that took a lot of paint, even over a white undercoat - I guess that's yellow for you): And masked up for the camo. Even with the masks pre-made on the Silhouette it was a few hours' work to get this all sorted out. It did not help that I apparently screwed up re-sizing one of the images I traced so that the masks for the top of the upper wing were too short and had to be amended with tape. And with the light green color sprayed. Even though the lacquer is dry to the touch in a few minutes, because I have to mask over some of the light green to shoot the dark green, I'm going to leave it set up until tomorrow before attempting that.4 points
-
Bit of sunshine on the patio this afternoon - so am opportunity to cut and sand the various castings I'd made for the Navigator's panel, without getting the house full of resin dust! These are very rough shapes just now - but shout give me a head start on making an F3 looking rear cockpit: Everything still needs properly squaring up - including the currently tapered screen casings - and the panel below needs a re.do to F3 pattern - but it's a start! Iain4 points
-
 I do not know why but I do not like lit displays. When a plane is parked the probability to see them up is very low. Typically, you need to add some ground crew, electrical connections and so on. Another option is to put the plane rolling or even in flight with a pilot figure. However, these two scenarios are rarely chosen by modellers. So, why doing such a choice whereas this also increases the risk to get a toyish look? Eduard regularly made the same choice. I'm always puzzled by that...3 points
 -

Red Fox Studio - 3D instrument panels - P-38, A-10, F-117, F/A-18E, Bf-109G, Ju-87 etc
coogrfan and 2 others reacted to alaninaustria for a topic
This is just amazing, the fidelity of these products takes our hobby to an entirely different level. Thanks for sharing these photos. I am really impressed at the fidelity and the possibilities that 3d printing brings to the hobby. And it is still in its infancy. Just amazing! Cheers Alan3 points -
Tempted with the Spitfire, Mustang and 262. But for elegance for me it's the Me163B Matty3 points
-
The Whirlwind was designed with leading edge slats but I believe these were wired shut early on in it's career. TRF3 points
-

Cleaning the bench
mpk and 2 others reacted to Michael931080 for a topic
I think we all feel "nostalgic" when we clean up our work areas Mike! I sometimes find things I had completely forgot about!3 points -
they have it on their FB page as a new release which should be available soon Dave3 points
-

A6M5c Model 52 Hei Takeo Tanimizu 1/32 Hasegawa
AlbertD and 2 others reacted to Miloslav1956 for a topic
Today update. Now Landing gear and Engine.3 points -

DH 82A Tiger Moth S Rhodesia 1943
VW Chris 1969 and 2 others reacted to mozart for a topic
Talking of geometry, after a very busy day in the garden I started to look at the interplane struts, which scrub up quite nicely and have the usual SW wire core to act as location points. I did a trial fit to see if the wire needed trimming (it does move within the resin sheath too) - just a tiny amount to come off perhaps. The unknown however is what the forward lean angle is - sometimes given in SW's instructions but not this time. I reckon it's about 70 deg: but of course with biplanes there is always a knock-on effect with accurate location of upper wings, of cabane struts etc. The fuel tank casting has some guides either side which I thought might key with the wings for ease of fit, but no: It's a guide to show the upper and lower edges of the port/starboard wing but like the lower wings some better means of beefing up the joints are needed. Reference pics:3 points -

Minicraft 1:144 MD-80 (SAS)
Rockie Yarwood and one other reacted to LSP_K2 for a topic
I've been asked, and have agreed, to build this kit for the brother of a friend, a guy that I like very much, so I'll be slipping this in with my other two projects, to hopefully be completed sometime this winter. Decals are already here for an SAS machine, and I'll probably need to ask Jennings some questions regarding the wings, as he did the artwork for the decals. Kit had already been started, but the work is pretty clean, so I'll just be finishing it up.2 points -

Red Fox Studio - 3D instrument panels - P-38, A-10, F-117, F/A-18E, Bf-109G, Ju-87 etc
Darren Howie and one other reacted to Uncarina for a topic
Nice! It would be awesome to see an F-4EJ-Kai set released to help convert the Tamiya kit. Cheers, Tom2 points -
Ah, ghosts of builds past. I try not to save too much. The only instructions I have ever kept are WnW because they are just too nice to toss. I always have old parts laying around that haven't made it to the spare parts box yet. I do keep all the spare decals though. As big a work surface as I have I end up with so much clutter I just have enough room to fit the model.2 points
-
HH-60G Pavehawk Kitty Hawk 1/35 DONE!!
Pete Fleischmann and one other reacted to Timmy! for a topic
Taaa Daaa! Schweet! Prime ASAP. Scrape the primer then add parts. Methinks less headaches!2 points -
And base now painted up, with a simulated concrete pad to follow.2 points
-
Witchcraft.....Hungarian Witchcraft.2 points
-
I've spent most of the day looking at the those pics, and it just looks right to me , Example A On the ground the Tornado looks like a heavy beast , squatting down even when not under load, and that pic seems to replicate that sit perfectly , , So bring it on ..2 points
-
Still working on the stencil decals. So far the bottom and left side are done. I'm still looking for the stencil that says "You can call me Ishmael".2 points
-
Hopefully there'll be a GR1/GR1a at some point: these birds just look odd to me in anything other than grey/green wraparound and unit markings from an RAF Germany squadron, preferably 2 Sqn given my predilection for recce. The German examples look good too. Must stop, or I'll talk myself int buying more than one ....2 points
-
I love the Silhouette machine. This was the first try at making these masks - all applied with no issues. I'm going to need to be careful with the 4s on the cowl that cross the raised lip between panels - they need to be firmly pressed down right before painting as they don't stick for long...2 points
-
The kit is packaged with the Pearl Harbor venue in mind, although it contains alternate cowl and windscreen parts to construct an export version Hawk 75, as operated principally by France in WWII, but in small numbers by a host of other air arms during and after the war. This is the plastic you get: With a pretty-decent clear parts sprue: Note the three windscreen versions. You also get a few resin parts for the landing gear: And decals, which I will use as templates to make painting masks when I get to that stage... And they provide a small PE fret: The only aftermarket thing I have is these canopy masks, which I will scan and copy with my Silhouette to make a second set for the inside: The molding is if anything a bit rougher than the last SH kit I built (the Ki-27 Nate). It's going to take some significant work to get the fuselage joined up in a way I'm happy with. Check out the XL sprue gate on this cowl part (guaranteed to avoid short shots, I guess): Yep, it's a but rough. (the other half was actually worse). So I started in by joining the correct forward fuselage/cowl pieces to the main fuselage halves, and then began poking at the engine. I don't want to start the cockpit yet because I need to do some research (i.e. waste hours grazing the internet for photos) to see what enhancements I can make to it, and make a plan for building those, before I start. The challenge of getting the SH plastic all nice and pretty on the outside will of course be enhanced on this kit because I need a smooth enough surface to do a credible NMF (which I am barely qualified to do on the best of days). But I want a 1:32 P-36A, so, since this is the only game in town, here we go.2 points
-
2 points