Leaderboard


Popular Content
Showing content with the highest reputation on 05/27/2019 in all areas
-
The first of 10 Academy Zulus is on the bench. This one will be shipped to the Commanding Officer of HMLA-267 when it's finished. Nothing fancy, just a straight build with a nice clean paint job.10 points
-

Su-25 Frogfoot A Trumpeter 1:32
Alain Gadbois and 9 others reacted to Koralik for a topic
.10 points -
Hi, i just finished this kit by MRC which i bought 20 years ago. had some major issues, as the decals have deteriorated and somehow the canopy had warped and a slight crack. other than than, it was an interesting learning experience building this kit without a conventional build guide. the mrc kit's instruction were more of an instruction with words rather than the normal pictorial guide. after some reading, there is a black and white photograph of how the part should look like after assembly. sure was interesting to me. I used the 2 bobs decals "whiskey in the mix" and Eduards BIG ED photo etch parts which were a real delight as the added quite a bit of detail to the kit. anyway, hope you enjoy the pics. sorry for the poor photography.9 points
-
Color study before i decide the final paint job.6 points
-
hello again folks Hi Craig - I only do this when using annealed litho, or the soft ali I use for compound curves - a good example of this comes in a minute when doing the stabiliser fillets - it's a really good way of getting a virtually invisible seam rather than trying to butt two complex edges together.. So, fillets.... they are all curved as you woulkd expect, some in multiple directions - I was hoping the dorsal fin was the last panel as the very tip of it overlaps the fuselage skin I can't add until the cockpit is in.. but no, it's the first panel down - I guess as it's the least removed in service.. ..to get an idea of the area, this is for a P51C without a dorsal fin - I couldn't find too much on one with a fin and all the resto pics I have of Lopes Hope do not yet have all the fillets fitted so some assumptions were made from what I could see that they are pretty similar to a 'D' model.. ..you can see curvature & shapes and the fittings that fasten them too ..I did the dorsal fin but forgot to take pics, so this is the upper forward fillet first.. ..a sheet is bent & taped down to start the forming process.. ..a ball pein hammer is used to gently beat it into shape, and helped with balsa rubbing blocks and hard wood coffee stirrers.. ..here I am trying to get it to conform to the leading edge and the curved part that runs out onto the fuselage.. ..after shaping a number of scaled templates were used to derive the shapes - these are side views so I have to allow for the shape as it curves away from the eye.. ..and soon all the fillets were in place ready for final shaping & smoothing - at the leading edge you can see where the panels overlap - by sanding away the overlap a perfect seam results - in fact on the full size one this is a butt weld which is finished on the outside.. ..after final finishing and finessing some of the edges, the fasteners were added - this was a vet labourious process as each one must be punched, then marked with an awl for the fastner, then flattened, then added - there are about 60 each side.. ..once the other side has it's fasteners (I can only do so many at a time without getting bored..), I will move along the underside to the air scoop & exit under the fuselage.. TTFN Peter6 points
-

1/32 MH-53E Sea Dragon - 3D printed / scratchbuilt
sandokan and 4 others reacted to Starfighter for a topic
Thanks for asking, Olivier! My little resin printer sadly cannot handle the sponsons properly, the parts are always slightly deformed - probably because they are too big. Tim aka Wunwinglow is so kind to print them for me on his Form 2, so (near) perfect parts will be available soon. In the meantime, I have made a little test with failed parts to see how it looks. Pretty massive, I'd say... The part is very dusty and the defects are obvious, but you get an idea of the surface detail. I am currently printing the engines; these are simple low res parts which will require a lot of work to obtain a perfect surface, but they should be a good base to work with. I will post a photo with the RH engine in place soon.5 points -

A bit of 1/35 on the way
Pfuf and 3 others reacted to Thomas Lund for a topic
Amusing Hobby's Rheintochter - fun kit and surprisingly good And some figure from a figure painting couse this weekend4 points -

RF-8G Trumpeter & Fisher Model
Coneheadff and 3 others reacted to EricF for a topic
Thanks Squizzy!!! A little update for today. I worked on the forward bulkhead of the wing box. I happy with the result obtained in a 0,13 mm steerene sheet even if it is not well centered on the fuselage. Anyway, we will not see the default once the wing in place. Eric4 points -
Almost finished4 points
-
Some more... Finish looks very flat when photographed in the light tent - but does have a sheen - here she is on the kitchen table with ambient light: Need to sort the lights, paint radio aerial, weather the exhaust stubs a little and a few other bits and bobs. And, yes, cowl panels are removable - just a bit of a faff. Will include when I do final RFI shots. A HUGE thank you to everyone that's chipped in along the way and kept the encouragement going. Taking a break now! Iain4 points
-
Thanks guys - wine was good! Not delivering next weekend now - so gives me a little extra time for some details! Here's where we're at - please be gentle! Back with a few more in a mo... Iain4 points
-

The Academy AH-1Z decals are fine.....choose your paint wisely
D.B. Andrus and 3 others reacted to Dave Roof for a topic
After reading a handful of complaints from a few modelers regarding the decals in the Academy AH-1Z, I decided to do a quick test. First, not only is one of the colors called for incorrect (36320), one of the paints they recommend are Vallejo. I would strongly suggest you DON'T use Vallejo's air colors as they are way off. The correct colors for the AH-1Z are 36375 for the bottom and 35237 for the top. In this test, the paints used are Ammo acrylics 36375 and 36320. This was used to check for color contrast as the decals "should" be printed to match 35237 as that is the color used for the markings on the real aircraft. The gloss used was Mr. Hobby Super Clear out of the can. Now, I have used 36375, 36320 and 35237 from Ammo, Hataka (lacquer) and AK real air colors. While all three brands respective colors are slightly different shades, they are close enough for me to conclude that any one of these three paints will provide the same result. I will be doing a test on a chip painted with 35237 to see if the decals 'disappear'.........they should. Hope this helps. Dave4 points -
I have had a real mixed bag of luck with transparencies since migrating from 1:48th to larger scale models. This canopy seemed to be cracked on both flat windscreens. Fortunately the rear one was a scratch that I could polish out, but the front one was cracked and I resorted to drilling it out and replacing with a piece of clear PETG. Needless to say I nearly destroyed the now flimsy forward frame and decided to glue the front "hatch" closed to increase the strength of the canopy as a whole unit. Here you can see the added framework inside the opening part, as well as a locking handle and a piece of air-conditioning piping. Each crew member has a little fan to blow air as desired in the cockpit, but the kit only provides one, so I had a little fun manufacturing another. The punch was really useful for the blades. For those who are hesitant about scratch building, here is an example of how a complex looking object is really just a collection of basic shapes. Another example is the jettison handle. The doors area bit basic OOB, so some PE and styrene to refine the look. Trumpy simplify the hinge mechanism by using two "elbows" on top of the door structure, but the Mi-24 only has one on the forward side, and a restraining cable on the aft side. The MONTEX mask for this canopy is quite a feat in measurement, and fits the inside perfectly. I added these fairly distinctive handles to the framework, completing the detailing. A fire extinguisher was added to the area just behind the left side of the cockpit, and finally the fuel line that everyone must trip over when trying to access the central compartment. I was in two minds about using the PE instrument panel for the pilot, but in macro it sure looks a lot neater than the kit part. you will notice that I plan to ditch the nav display provided, and rather use a blank display with a warning from my MiG-23 decals (doesn't look legible to me). And to answer Marcel's question... The most potent weapon against the Mi-24 in Angola turned out to be this little fighter - the AerMacchi MB-326K. It was licence-built by the Atlas Aircraft Corporation of South Africa, and known to us as the Impala Mk II. Armed with two DEFA 30mm canons and a well trained pilot, it was a formidable low level adversary. I will tell more of the story in due course. Cheers! Sean3 points
-
thank you chaps - I do really appreciate your kind words after a day of looking at the fasteners - I have to accept they are over scale... I could not find a drawing that had the fastener size, just the hole size, but then I saw the hatches below the stabilister have the same size fasteners and I have that drawing, and it has that dimension.. basically they should scale to 0.85mm and the smallest puch I have is 1mm, it doesn't sound much, and maybe it's not the diameter that is troubling me so much as the thickness - they look like big bolts and they should be shallow and streamlined.. I need to buy a smaller scale punch set, and I need to think about a thinner material to use.. they are all coming off... TTFN Peter3 points
-

Su-35 Air Brake
LSP_K2 and 2 others reacted to ringleheim for a topic
"notable changes include the removal of the dorsal speed brake". http://www.ausairpower.net/APA-Su-35S-Flanker.html3 points -

Cold War Studio
chukw and 2 others reacted to Michael931080 for a topic
It’s to bad you can’t use this beautiful Photoetch on the older Revell kits! It sure would dress them up immensely!3 points -

Revell 1/32 F4U Corsair - DONE!
sandokan and 2 others reacted to themongoose for a topic
I finished setting up the wing to fuselage attachment today. Here you can see how I configured the magnets and the tab that keeps the wing from shifting forward. The magnets are neodyneum with a 0.3lb pull strength. It worked with 2 but I could shake it and get the wing to pop off so to be safe (I don't expect it to get shaken but you know how that goes...) I doubled the magnets up. In the back I've made a tab that slips up inside the fuselage. This holds the left/right alignment and presses the two parts together to minimize the joint. Overall this will allow me to make changes to the lighting over time or make repairs if needed. The wing gap is nice. You can see a little gap up near the nose. Most will be covered by the cowl. Regardless, without glue there will always be a join there. I may work to see if I can get it to close up some more as in the detail picture above under magnification I can see one of the magnets looks crooked. Tomorrow I start painting!3 points -

P-47D-25 & P-47D-30 1/32 Hasegawa
Starfighter Jock and 2 others reacted to Miloslav1956 for a topic
Today update!3 points -

Attitude Aviation Buchon Conversion
Starfighter Jock and one other reacted to LSP_Kevin for a topic
It seems like the longest time since I've been able to work on a model, and this is my attempt to claw my way back to bench and at least try to get something built. Having lost my mojo due to the extended break, none of my started projects have much appeal to me at the moment, and having promised Espen I'd build this one after reviewing it, I decided it would be a great project to get back in to the swing of things. So, what's the project, then? I'll be using Hasegawa's Bf 109G-6 kit, and combining it with the Attitude Aviation As Hispano HA-1112-M1L (Buchcon) conversion, to build "Red 3" from the movie Battle of Britain: For more details about the conversion set, check out my review from back in January this year: https://www.largescaleplanes.com/reviews/review.php?rid=2177 I haven't cut any plastic yet, but am hoping do so tomorrow. Before we start I want to thank both Kent Strickland and William Lawlor for their efforts in supplying me with a Hasegawa Bf 109G-6 kit, and also Espen Tjetland of Attitude Aviation As for the conversion set. Hopefully some actual modelling in the next update! Kev2 points -
"Ironclaw 500" - Grumman EA-6B Prowler, Trumpeter/scratch, 1/32
RandyB and one other reacted to Starfighter for a topic
Cheers everybody, it's bee a while since I finished my big Prowler - buying a new background for my photo booth was a good opportunity to finally take some photos of the finished model. For those who haven't followed the build, here's the link to the WIP thread: https://forum.largescaleplanes.com/index.php?/topic/57040-how-to-destroy-an-expensive-kit-with-just-a-few-cuts-or-prowler33/ Photo quality is not ideal, I've been playing around with the photo settings but I am obviously not a good photographer... Anyway, comments, questions and critique are welcome as usual. "Beaker" waiting for the rest of the crew to board the aircraft.2 points -

Italeri TF-104G
Loach Driver and one other reacted to MikeC for a topic
Coming sometime in the future to a magazine (hence only one photo - sorry, no more or I'll be in trouble with the Editor), here's my rendition of the Italeri two-seat Starfighter. The subject was an aircraft of 31 (Tiger) Sqn, Belgian AF, 1983. The tip tanks were used for the 1983 NATO Tiger meet, just before Belgium finally retired the F-104. Decals by DACO, intake covers & chocks by Video Aviation, pitot by Master, and RBF tags by HGW. Thanks for looking.2 points -
Just a few odds and ends to re-orient myself with the build. The access panel on the bottom of the fuselage is molded too softly so I am going to fill it with CA glue and re-scribe it. Added some bits of plastic and brass to make a bracket for the drop tank strap. The horizontal stabilizers have been given a coat of Mr Surfacer 1200 and marked with a pencil for riveting. And I've received the MDC cockpit decals from Vincent K! Thanks so much for your generous contribution to this build! Can you tell me where the blue SAUERSSTOFF decal (7) and the red bolt markings (8) go? I think I know where the other markings belong.2 points
-

1/35 KH MH-60L "Super 63"
Anthony in NZ and one other reacted to Hawkwrench for a topic
I taped up the stripes for the floor last night (it took me an hour) and when I went to turn on my CO2 tank, it was empty. What a wasted night!!! So I just went to bed! Tim2 points -
Hi Chrish, thanks for your support. Speaking of support I put the aircraft on a temporary stand to see what it looks like, what I have in mind. that is what I am looking for! still need to do more work on the nos wheels as they are standing too far apart. Also the main landing wheels are too square in profile. All in all the landing gear is not bad, but a bit too skinny. You wonder if Revell had the nerve to deliver the parts for the gear in plastic, they might want to have made the parts at least as thick as in real life. I am not so worried for this one, being up in the air. with some final touches on the cockpit, it's almost time to start painting!2 points
-
DONE - Hasegawa Fw190A-5 Walter Nowotny
daveculp and one other reacted to Thomas Lund for a topic
Not really any good at keeping up the updates, am I ? The 190 is pretty far along now, been painting markings on it. Starboard fuselage cross still have the mask on because I need to correct it2 points -
Thanks Thomas I am always a little mortified when folks say they are discouraged by what I post - I understand the emotion if you see something you think is better than you could do, but ultimately I think it's like a ladder - i was on a rung somewhere at the bottom when I started, and after lots of trial and error I ascend a step at a time - now maybe somewhere in the upper middle... before you say anything, I too see builds that take my breath away, or make me feel inadequate for a moment, and then I realise that they are actually my inspiration -I wanty to be as good at every discipline as they are... I got one this week - an email from Model Motorcars where I once bought some bits and in it was a link to a guy who built a Lincoln Continental - now I am not a car guy when it comes to models, but when I looked at what he does, and how he does it all in metal, I was staggered - this is a car in 1/25 - smaller scale than my P51, yet what he does I could not do in 1:1 scale.. I see this, I wince, and then I get fired up to be like that here's the link.. it leaves me feeling huge surges of inadequacy... Peter2 points
-

Fokker pair 2
blackbetty and one other reacted to sandbagger for a topic
Hi all, The basic undercarriage assembly is done now. I still have the undercarriage struts to make and attach before I can fit the assembly to the fuselage frames, Mike2 points -
Sprue Bros Weekend Special
Rick Griewski and one other reacted to falcon1974 for a topic
I'm going to get a very large box soon with a Lancaster, B-17E/F, Do 335B, and a Ju 87G. Funny thing was that I was going to get the first 2 earlier last week but something told me to wait and see what the weekend deal was going to be. I think it cost me more in the long run but lots more fun I reckon. I hate Paypal credit!!!!2 points -
P-47D-25 & P-47D-30 1/32 Hasegawa
AlexM and one other reacted to Miloslav1956 for a topic
Today update.2 points -
1/32 Hasegawa/MDC Bf 109G-14 Hartmann - Built in 2007
daHeld and one other reacted to Thunderbolt for a topic
finished:2 points -

MWP Project: Mirage IIIC "Ça va sans dire!"
Out2gtcha and one other reacted to aquatarkus10 for a topic
Hi Craig, Thank you for appreciation. At the moment I used only a light pass with steel wool "00 00" to get the details highlited. For weathering with this technique(MWP) I usually use the procedure that I show you below only for illustrative purposes: B-25 J Kit HK 1/32 scale model "Lady Lil" and weathering + stress effect: Nakajima Ki 44 Type II "Tojo" Hasegawa kit 1/48 scale model George2 points -
I promised an update with modelling content within 24 hours, and here I am 22 hours later with exactly that! I have to confess that I haven't really achieve all that much, however, but it is at least something. The major element of this conversion is of course the new nose, which requires removing the corresponding sections from the kit fuselage halves. Below is a photo of the terrific one-piece resin replacement nose, which I borrowed from the review: My first task was to remove the substantial casting block, and happily the cut locations are quite well defined, which makes the process easier. It's a tedious process, but it's important to proceed slowly. I used my JLC razor saw in a stroking fashion to initiate and then deepen the cuts, with any tricky bits being handled by a #11 blade. Here's the result: Still a little bit of refining to do, but it's basically ready for business. The next task, and probably the most important one of the project, is to remove the corresponding sections from the kit fuselage halves. I used the same technique outlined above for removing the casting block from the nose piece, but the instructions here a slightly vague, and I managed to misread the supplied photo, and remove too much material from the forward wing root section: In the photo you can see that I've glued a section of styrene strip into place to compensate for the material I removed in error. Once this has set strong, I'll set about shaping it to fit the corresponding cut-out in the resin nose. I'll also be more careful doing the other fuselage half! So, that's as far as I got before running out of time. I'm slowly starting to feel like I'm shaking off the rust! For the next update I aim to have the other fuselage half cut down, and the mating surfaces on all parts fitting nicely together. It's really important to go slow here and get this part right, as the success of the project rests on it. Kev2 points
-
Here you go2 points
-

1/32 HPH Models AC-47 'Spooky' Gunship
F-4Phanwell and one other reacted to Finn for a topic
Here is one in action giving a look at the inside: Jari2 points -

"Ironclaw 500" - Grumman EA-6B Prowler, Trumpeter/scratch, 1/32
Martinnfb reacted to Durangokid for a topic
Masterful work! You build thread was great to follow too. Man I wish I had you skills! This is going to be part of a ship diorama right? Bryan1 point -
Wow what a monster!! Brilliant work1 point
-
1/32 Hasegawa/MDC Bf 109G-14 Hartmann - Built in 2007
Thunderbolt reacted to LSP_Kevin for a topic
Excellent result! Kev1 point -
1/32 Hasegawa/MDC Bf 109G-14 Hartmann - Built in 2007
Martinnfb reacted to Thunderbolt for a topic
1 point -

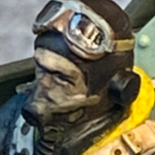
1/24 US Navy/Marine Pilot Airfix Hellcat by Elan13 Miniatures
coogrfan reacted to elanlane13 for a topic
Here is the first of two pilots we are producing for the new 1/24 Hellcat release by Airfix. US Navy/Marine pilot in flying gear. Resin kit Sculpted by Robert Lane Box Art Edward Sage Available from the Elan13 Miniatures website Price: £20.001 point -
1/32 Hasegawa/MDC Bf 109G-14 Hartmann - Built in 2007
Martinnfb reacted to Thunderbolt for a topic
Preshading.1 point -
1/32 Hasegawa/MDC Bf 109G-14 Hartmann - Built in 2007
Martinnfb reacted to Thunderbolt for a topic
Airframe assembled. The Eagleparts supercharger intake is evident. The MDC spinner fitted temporarily. I later placed this with the Eagleparts example. Airframe canopy masked off and airframe painted alclad aluminum as a primer1 point -
1/32 Hasegawa/MDC Bf 109G-14 Hartmann - Built in 2007
Gazzas reacted to Thunderbolt for a topic
Further cockpit details:1 point -
1/32 Hasegawa/MDC Bf 109G-14 Hartmann - Built in 2007
XOPCT reacted to Thunderbolt for a topic
the cockpit with the instrument panels swapped.1 point -
1/32 Hasegawa/MDC Bf 109G-14 Hartmann - Built in 2007
XOPCT reacted to Thunderbolt for a topic
The cockpit assembled and painted. I eventually decided not to use the MDC instrument panel, as I will show later. I thought the Eduard IP was more realistic in appearance. These were the colored PE panels where each gauge ring was etched and colored separately - the panel alone took hours to assemble.1 point -
1/32 Hasegawa/MDC Bf 109G-14 Hartmann - Built in 2007
coogrfan reacted to Thunderbolt for a topic
Moving on to the rest of the cockpit. The cockpit floor was impressively detailed. It is a shame that MDC does not make these cockpits anymore. The port sidewall The MDC instrument panel. The KG13 control stick. One of the best examples of this I've seen.1 point -
1/32 Hasegawa/MDC Bf 109G-14 Hartmann - Built in 2007
coogrfan reacted to Thunderbolt for a topic
I painted the starboard sidewall based on what I thought was accurate, though I question some of my decisions now. Tamiya German gray base coat and model master enamels for colors1 point -

Make the others jealous
thierry laurent reacted to Out2gtcha for a topic
At least those are the better "anti-static" peanuts VS the older style that built up static electricity and stuck to every bloody surface in your house.1 point -

1/48th Boeing B-52H Stratofortress
Starfighter reacted to tomprobert for a topic
Evening all, Time for a BUFF update.... With the school term being in full swing time at the bench has been a little limited, but the wings are now on the model is really starting to take shape. The spars I'd spent hours making previously meant the winds simply slid over them and resulted in a very solid union with the fuselage. The fit wasn't too bad, but in true vacform style the wing roots on the fuselage were shorter in length than the wings themselves, so there was a lot of building up and shaping with Milliput to level things out: IMG_1036 by Thomas Probert, on Flickr Once under a quick lick of paint, the joins look pretty good and capture the shape of the real aircraft quite nicely: IMG_1053 by Thomas Probert, on Flickr IMG_1051 by Thomas Probert, on Flickr We've now got something starting to resemble Boeing's finest: IMG_1047 by Thomas Probert, on Flickr IMG_1049 by Thomas Probert, on Flickr As a size-reality check... that's a 1/24th Harrier in the final stages: IMG_1055 by Thomas Probert, on Flickr Until next time, Tom1 point -
Revell 1/32 F4U Corsair - DONE!
sandokan reacted to themongoose for a topic
Thanks Gaz! Work continues on this cold and rainy May weekend. At least I haven’t had to waste time watering the grass I planted a few weeks ago. It’s modeling time. I got my way upthrough primer today. Wing lights are in. Velcro’d the circuit board in. The wing is done. It looks good under primer so ready for paint here. the fuselage is great except on top between the windscreen and cowl. Dang Revell has 4 big divots here. Thought i got then but obviously that’s not the case as you can see then from 18” away haha This shot shows how nice the rest is1 point -
1/48th Boeing B-52H Stratofortress
daveculp reacted to tomprobert for a topic
It's been a while since I've done any work on the big BUFF but thought it deserved a stint back on the bench... Since the last update and completion of the internal bulkheads, the next logical step has been to have a play with the landing gear bays. It took a lot of head-scratching to get the legs themselves correctly positioned and therefore the internal bay roof structure, and as is often the case with these types of builds, you sometimes have to sacrifice accuracy for structural integrity. Therefore the bays I've made are an approximation of the real thing but close enough for a cursory glance when it's placed on the model show table - especially when the big doors and legs are in place to hide the majority of my work! I had a good delve into the bays of the B-52 at Duxford for some much-needed reference as well as a few books, and armed with plenty of plastic card and Evergreen strip, I set about building up the basic interior structure. The front bay: IMG_0865 by Thomas Probert, on Flickr IMG_0862 by Thomas Probert, on Flickr IMG_0855 by Thomas Probert, on Flickr And the rear bay: IMG_0863 by Thomas Probert, on Flickr IMG_0859 by Thomas Probert, on Flickr IMG_0856 by Thomas Probert, on Flickr And both bays together: IMG_0861 by Thomas Probert, on Flickr Still lots of further detailing to be done, but the basic structure is now there... Until next time, Tom1 point


.thumb.jpg.5da8bff9741de420eb2e87addd8f2cf6.jpg)