Leaderboard
Popular Content
Showing content with the highest reputation on 11/09/2022 in all areas
-

Backdating ZM Gustav. Choosing a variant.
Bruce_Crosby and 17 others reacted to quang for a topic
And sooo… I crossed the Rubicon and joined the fray. Come to think of it, three months ago, I knew nothing about the Bf 109 and couldn’t even spell Messerschmitt. Then came the arrival of the ZM kit in our regions and the ensuing flurry of activity in the interweb. My curiosity was piqued especially when controversy aroused about some apparent pitfalls of the kit. I knew ZM since I built their Skyraider a few years back. I knew they were serious about their products so when I read about the early critiques, I knew I had to try it out myself and make my own opinion. So during two full months, I read all I could about the subject and when finally I found the ZM kit at a discounted price , I was ready. This thread is not intended as a WIP per se since there are already several ones en cours but rather to share with you my impressions as a ‘consumer’ of plastic. Hopefully you’d find it helpful or at least entertaining. Each one of us has his own opinions about instruction sheets. As a hardened old-timer, I tend to pass on them most of the time. Except in this case… As I knew next to nothing about the 109, I forced myself to READ (really read) the 50-page instruction booklet included in the kit. What a revelation! It’s obvious that ZM put a great deal of effort in this booklet. So instructive about the subject and plenty of useful tips and pitfalls to avoid. A sample The next thing I wanted to check out is that infamous tail join which caused so much ruckus on the internet. It was indeed curious why ZM contrary to the other manufacturers (Revell, Hasegawa, …) decided to provide the horizontal stabs in one piece and the vertical tail in 2 parts. The reason is simple: the real thing was built that way: So I decided to make a dry test. The fuselage halves are taped together. Only the tail top halves and the horizontal slab halves are glued. NO cement between the horizontal slab, the lower tail and the upper tail. Dry fit indeed! The result speaks for itself. No shim and no glue. Just some extra care in cleaning the stubs when the parts are detached from the sprues. Compare with the real thing. Note the thickness of the flange. One thing to consider. Like on the real thing, the vertical tail is asymmetric. Starboard=flat. Port=curved Viewed from the rear. Note same thickness between upper and lower tail. Also perfect 0° dihedral. Again no glue. Note that RH flange is purposely larger than LH. Also peculiarities on the horizontal stab. This kit is so meticulously researched and moulded that any attempt to ‘correct’ it under some wrong assumption would only lead to tragedy. My advice: read the plan and clean the stubs. Happy modeling! Cheers, Quang18 points -

Border Models Lancaster B.1 "Victorious Virgin"
R Palimaka and 12 others reacted to Winnie for a topic
Thanks for the comments folks, I have done a stint of dayshifts, so not much work time, but got my hands on it this weekend! More paint, and assembling sub-assemblies. progress is happening but s l o w. As I think the end is near on this part, I get slapped back to reality! Anyway, cockpit is about to be put together, next is the bomb-aimer/ nose gun turret area. there were some punch mark on the forward facing bulkheads, which was strange, but I filled with some Surfacer 500, so the hope is that it will be subdued enough! Cheers H13 points -
There are SO many detail in the cockpit. I keep going back and forth on the second page and keep finding stuff to add. I'm not a Lanc expert, actually know very little about it, so most of the colors are fantasy, but hey, it looks like a Lanc to me! I've spent probably 4 hours today and there seems to be not much progress. Cheers Harald12 points
-
Border Models Lancaster B.1 "Victorious Virgin"
R Palimaka and 10 others reacted to Winnie for a topic
I painted the "Dunny"... I thought I saw somewhere there were decals for the flare chutes, but I have no idea... Can't see that in the instructions anyway, also I think I'm building an early Lancaster, so maybe this flare chute is wrong, but it brings visual interest for inside the door, so I'm sticking with it! Also curious if the control runs would be a different color, such as zinc-chromate, I may do them in that color just for breaking up the colors. Also may do the hydraulic lines on the floor black. very miniscule weathering, just a little dry brushed aluminum on the floor boards, but I like it for what'll be visible through the massive (sarcasm) door.11 points -
Border Models Lancaster B.1 "Victorious Virgin"
R Palimaka and 10 others reacted to Winnie for a topic
A dab of paint. For you who have the kit, be careful, the tolerances are super tight!11 points -
Border Models Lancaster B.1 "Victorious Virgin"
TankBuster and 9 others reacted to Winnie for a topic
Since @MARU5137 prompted it: As I have recently received this amazing kit, I shall have to start it! First little bits attached to the seat, found a broken part, the armrest on the bulkhead side is broken, I'll attempt to repair, but may just leave off. There WILL be paint and chipping before I attach the seat yes! Cheers H.10 points -
Border Models Lancaster B.1 "Victorious Virgin"
R Palimaka and 8 others reacted to Winnie for a topic
OK, some more work completed, the nose section is getting closer, some more decals coming shortly, but work is in the way... I'm trying to get an hoiur in here and there but 12 hour night shifts are a pain at times... Anyway, here we go: It looks busy, and when the last pieces and gun turret goes on, it will be very busy indeed! This is going to be awesome!9 points -

Silver Wings Gauntlet II
R Palimaka and 7 others reacted to mozart for a topic
The top wing is on! Not without its trials and tribulations; first off (as Joachim predicted) putting the top centre section on first didn't work well, the margin of error for getting that square and central was too small and the chances of the wings being skewed and out of alignment too great, so that idea was abandoned, though there was a consequence which I've only just discovered. So once the wing had been assembled and the struts glued in place on the lower wings, it was then "just" a question of lining everything up and gluing the wing in place. Except of course it's never "just" a question! Even with the plane mounted on the jig I still needed the capabilities of an octopus to hold everything in place and steady for gluing and setting. For some reason I have a gap at the top of both port and starboard outer aft strut.....nothing that can't be easily overcome but odd nonetheless. So the cabane struts, well one actually, that I "tweaked", now a little too short so I need to make a new one, again nothing too major. Thankfully though everything is square and stable. My next task is the "X" rigging between front and rear struts (x4) then main rigging completion. Starting to look like a proper Gauntlet now!!8 points -
Just to be clear - the "pre-order" is to register your interest only, as clearly explained on the Aviattic website page. I now have a mailing list of just 300 interested parties, who are kept up to date with the trials and tribulations of getting this kit to the pre-order stage, when those on the list will be invited to place their orders before the kits general release. These are very difficult times to be attempting anything like this project and it will be years before I see any kind of financial return - and only if it sells over a thousand units, which is a long way off yet. So, if anyone thinks such a multi-media, highly detailed WW1 aircraft kit is over-priced, I suggest you try it yourself! Full injection-moulded WW1 kits are just not an option - even with millionaire backers, there simply is not the market, sadly. Multi-media kits allow a level of finesse in the detailing which should be welcomed not feared. I sold just 320 of the Aviattic Ansaldo Balilla's. A kit many consider the finest WW1 aircraft kit yet produced. Their disappointing sales meant that going to a costly second run was just not financially viable. They currently change hands on EBay for hundreds of pounds, yet it took me three years to achieve that sales figure.. If you want to support such endeavours with no prior financial commitment - I just need to have a rough idea of the potential customer numbers - then please sign up for the newsletter. This kit will not be produced unless I can guarantee around 600 sales. Not "interested parties"..sales. So that is my priority at the moment. Honing the various elements for fit and accuracy and deciding on production methods for each part. I will not know the final production price and hoped-for delivery date until I am satisfied that the Pfalz will be the finest kit that I can produce. We are living in very difficult times, costs are escalating weekly, there are few casting and printing companies left wishing to deal with such small numbers. Most are too busy casting goblins or busty princesses for Kickstarters. Best wishes, Richard (director and head tea-maker, Aviattic Ltd)7 points
-
Border Models Lancaster B.1 "Victorious Virgin"
R Palimaka and 6 others reacted to Winnie for a topic
THe details get sparse behind the spar, the "bunkroom" has no interior, until around the rear entrance, where there is a "passenger seat" for dropping behind enemy lines, a toilet and flare chutes. as well as the rear and dorsal turrets of course. I don't have the skill to do a cutaway, but I'll do my best to make it look like a lanc... Second picture shows cockpit attached to the bomb bay floor!7 points -
cockpit parts cleaned up and getting ready for painting basics. Floors need 3 coats... black base, aluminium, then interior green for chipping... Surprised at the amount of flash on the parts, nothing real big, but separation lines on nearly all the parts so far... armrest repaired. It's the left side of the seat if the seat is facing forward.7 points
-
my last built :6 points
-

1:32nd scale Sopwith Dolphin
olgerd83 and 5 others reacted to sandbagger for a topic
Hi all, The lower wing if now fitted and all parts primed white ready for pre-shading. Then it's applying the 'Aviattic' clear Clear Doped Linen and PC12 decals, Mike6 points -

WNW SE5a
R Palimaka and 4 others reacted to Greif8 for a topic
After spending the spring, summer and early fall working on non-LSP builds I have returned to the holy land. I bought this kit from a fellow LSPer, who kindly sold it to me for a very fair price after I mentioned that I was having a lot of trouble finding the kit. I have a bit of AM - HGW seatbelts, Proper Plane propeller, and two Gaspatch MGs that I plan to use on this build. I also will be doing some very minor scratchbuilding, mostly in the cockpit area. I tried to find a colorful paint and decal scheme to replicate, but as I suspected - colorful and SE5a do not go together - at least I could not find anything. I will very likely do one of the aircraft whose decals are in the kit and call it good. I will replace the molded on bracing wire on the fuselage sides and floor with 0.1mm wire so I did some shaving and sanding. After which I added some additional framing using 30x30 Evergreen strip that was test fitted extensively to ensure it did not interfere with the fit of other parts. I have also drilled .2mm holes in the corners that will recieve the wire when the time comes. I carved a slot in the flare pistol holder to make it look a bit less like a pistol butt sticking out of a block of plastic. I have also shaved off some of the chair sides to prevent them from crushing the bracing wires in that area when I install the seat assembly. I will be adding the control lines and have drilled out the appropriate holes in the seat assembly; unfortunately I could not get a well focused shot at the bench to show that. I drilled out the lightening holes on the bottom part of the control stick, as well as the two really small holes that can just be made out at the very bottom of the part. More to follow tomorrow. Ernest5 points -

IPMS Nationals Telford 2022
D.B. Andrus and 4 others reacted to LSP_Kevin for a topic
I'll be there in spirit! Just look for my little sign on the LSP/32SIG table: Hopefully I'll be able to get there in person one year! Kev5 points -
Zactomodels is now open again and it's good to be back! During our move last year I injured my right shoulder. After months of living with it, I finally had it checked. I was diagnosed with a torn rotator cuff, but it turned out to be really bad bursitis with bone spurs. The MRI was excruciating because I had to hold my neck cranked to the side. A week later my neck was aching, my left arm began falling asleep and my left thumb tip was completely numb. I went almost 2 months like that before I found a chiropractor that was able to help. I was almost healed but kept re-injuring myself doing small tasks. Spending almost two weeks in bed with COVID was just what my body needed to recover. Another couple of weeks to take care of things and now I'm ready to go! My apologies to those who have had emails go unanswered. I've done my best to reply to anything related to orders that were placed, but skipped almost everything else... No new products for a while. While the casting area is temporarily set up (still in the dining room and not the garage), my office/modeling room is in-progress. The new home is quite a drive from the Post Office, so orders will be shipping on Mondays and Fridays only. UK is still blocked from purchasing due to VAT regulations. Does anybody know of any small business that has successfully signed up for VAT or found a way around this? EU can order but you'll have to pay your own VAT when your package arrives. Australia and New Zealand are both back after COVID restrictions. Russia and Ukraine are blocked from ordering due to the war. AIM-9X Sidewinder is in limbo until I can get more MV Lenses (or find a replacement). F-16 MCID (large mouth) intake will not be available until after the garage/shop is up and running and I re-engineer the mold. I will be doing a short run re-release of the Revell MiG-29 correction and combo sets in the near future. I'll be casting sets until the current molds wear out and then it's gone. Contact me if you are interested in reserving one. Su-27 and A-7 canopies are not available, but I do plan to re-release them early next year after moving my shop to my garage, even if the parts aren't "Perfect" (I've realized I was too much of a perfectionist when rejecting minor flaws). Chris5 points
-
MV-22 Osprey Hobby Boss 1:48 The model that I can only write about is a great disappointment for me. - Very poor details - Disappearing dividing lines - Poor fit - A very high price for such poor quality5 points
-

Back in business!
Spooky56 and 4 others reacted to Stokey Pete for a topic
Good to see that things are getting back on track. To inspire others, here’s a shot of my Flanker, that had the absolute full meal deal of Zacto’ goodies thrown at it.5 points -

1ManArmy Airbrush Stencils are now available....
RadBaron and 3 others reacted to D.B. Andrus for a topic
... limited quantities on the S.O.W. website. Cheers, Damian4 points -

Z-M Messerschmitt Bf109G-14
TAG and 3 others reacted to tucohoward for a topic
Still trying to follow the instructions for the most part but I was riveting I decided carry on with more fuselage panels. The engine cowlings are all done and went ahead and painted the ones that will be 04. The right, left and lower cowlings were riveted per the ribs on the inside but pretty much matched up with my diagrams. I decided to install the gear legs as instructed. The engagement seems very solid. As long as the fuselage mounting points are in the right place the alignment should be good. Don't think it will be a big deal to paint with them in place. Also got started on the wings. All the inner detail seems a bit much but that's their style. Fortunately the four panels that form the underside skin fit very well. Wing riveting coming soon. Cheers, Jay4 points -
Closed up the fuselage but forgot to paint the firewall. I'll have to see just how much is visible. Onward to the wings, etc.4 points
-
 Pre-order links are open for the AV-8B Harrier Pylons in 1/48, 1/32 and 1/18 scales. These will begin shipping in December. However, as we're currently running a 15% off sale in celebration of the Marine Corps 247th Birthday and our 15th year in business, the links were opened for those that want to take advantage of the sale. The 1/32 LAU-33 are ready to ship https://www.flyingleathernecksdecals.com/p/fl32-2063-av-8b-weapons-pylons-for-trumpeter---pre-order https://www.flyingleathernecksdecals.com/p/fl32-2076-lau-33--500-rocket-launcher-empty https://www.flyingleathernecksdecals.com/p/fl18-1008-av-8b-weapons-pylons-for-hobbyboss---pre-order4 points
 -

About those new tooled 1/32 Phantoms....
scvrobeson and 3 others reacted to John1 for a topic
So let me get this straight - I’m getting close to finishing a year plus build using the Tamiya F-4C, super detailing it and trying to correct the numerous flaws of this kit and someone apparently is close to releasing a very nice kit of an early F-4? YGTBSM. A few years back, I spent a great deal of effort to update The Tamiya P-51D to a Korean War F-51D. A few days after finishing, Tamiya released an F-51D. My spirit is slowly being crushed by the modeling gods.4 points -
Border Models Lancaster B.1 "Victorious Virgin"
R Palimaka and 3 others reacted to Winnie for a topic
A word of warning for the guys building this fantastic kit, the instructions are missing a crucial part, of where to add the cockpit, and if you follow the instructions, when it makes sense it'll be too late! You have to add the cockpit floor to the bomb bay roof, if not, you'd have to carve off all locating pins on the bomb bay roof to get the parts together. this step is overlooked in the instructions. Nigel from "Nigel's Modeling Bench" on YouTube explains this well in his videos, and it's worth a look! Cheers!4 points -
1:32nd scale Sopwith Dolphin
Jayl and 3 others reacted to sandbagger for a topic
Hi all, I've animated the ailerons and elevator. Aileron leading edges rounded and pinned with 0.5 mm diameter Brass rods. The elevator to tailplane joint was scribed through leaving just the pre-molded hinges intact. All were then bent to their required angles, Mike4 points -

Heller 1/72 Connie
D.B. Andrus and 3 others reacted to chrish for a topic
Thanks Gazz! I think it's more persistence and luck with my Alclad getting a good finish. I do thin the final coat about 1:1 with Mr leveling thinner. The "Scotch tape" windows, I use a sheet of the waxy backing paper from "bare metal foil", stretch out a piece of tape on the backing paper (keeps the sticky side of the tape from getting tracks on it) then I use a circle template or "Thinerline Circle Cutter" to cut discs in the Scotch tape slightly larger than the window openings in the model then, just stick the discs to the model. So anyhow, here's where the Connie sits today, nothing like a pretty girl (named Connie) with long legs. You can see the raised edges of the tape windows (the camera is ruthless) in this shot. Awaiting decals now. Thanks for looking4 points -

Nellis AFB Aviation Nation Air Show '22
Ol' Scrapiron and 2 others reacted to chuck540z3 for a topic
I was fortunate enough to attend the Nellis AFB Air show near Vegas for the 10th time this past weekend, which was one of the best shows I’ve ever seen, especially since I love fighter jets. Since just about every American fighter jet model lives there, you’re sure to get the sweet smell of burned kerosene and loud noise all day long. One small disappointment is that there were almost no WWII Warbirds like there usually is, other than a P-51D Mustang. As a result, 90% of my pics are of jets and hardly any props. I took about 2,000 pics, deleted most of them as usual and wound up with about 325 which were good enough to keep. Here are a few of them. One of the reasons I attended this show was to see if I could get some reference pics for my next build, of a Block 32 F-16 Aggressor in the new “Ghost” scheme. Not only was this jet there, but there were two of them, one on the tarmac (86-299)… And my subject (84-220) in the air! This should be a great reference for painting the bottom. It even had an F-22 chasing its tail during a mock war game sequence The Navy usually sends an F-18 Super Hornet, but this year there were 3 of them, with 2 F-18G Growlers And an F-18F CAG bird There were several F-35A’s that flew, including this demo jet flown by Major Kristin “BEO” Wolfe, of Hill AFB, Utah. Not her jet, but I include this pic because there is no mistaking that Nellis is a working AFB, with about a dozen F-16’s parked in the background. Back to Kristin, who put on a terrific show Pretty good water vapor on a tight turn, considering the dry desert air Shortly after the F-35A demo, came the always super popular “Heritage Flight” of the F-35A, F-22 and P-51D Mustang The F-22 demo pilot was Major Joshua “CABO” Gunderson of Langley AFB, Virginia. It turned out that this was his last airshow as the F-22 pilot, so he was looking maybe a little sad as he taxied down the runway. As always, the F-22 demo was awesome. Since it was his last demo, Major Gunderson was soaked with lots of water from water bottles and a few fire extinguishers as he left the cockpit. After about 5 minutes of fun, the F-22 team posed for an official AF pic, which I took as well There were lots of other acts of course, including this jet powered fire truck called “Shock Wave”. Sadly, the other Shock Wave truck crashed and killed the driver only last July, so this act can be quite dangerous. Although a bit gimmicky, I thought the fire truck was absolutely awesome, especially when it drove next to the spectators and let the Rolls Royce jet engines fly. T-33’s are usually there, which are so beautiful in the air. As always, the last act at Nellis was the Thunderbirds, where they are based. Here’s a few random shots, although I’ve got about 75 more! For you photography buffs that might want to know, I used a Nikon Z-7 II camera and a Z 100-400 4.5/5.6 VR lens, which is a bit short for airshows and not as good as a 500mm+ prime lens. However, I have trouble finding the aircraft in my viewfinder at 200mm as it is, so this lens works for me and with 46 MP, most of these pics were cropped a bit, but still showed decent resolution. Unfortunately, the airstrip is almost North/South and you stand on the West side, facing East and the bright sun for most of the day. To compensate for this high contrast situation, I usually boost the exposure by about 1.7 stops so that the aircraft stand out from the sky a bit more. For focus, I used Dynamic Area Autofocus and AF-C, which with this camera combination, seemed to grab the jets out of the sky fairly easily. Shutter speeds were a bit high at 1/1,600- 2,000/sec for obvious reasons, but with the bright sky, this kept the aperture close to f5 while ISO was usually less than 200 and sometimes as low as 64. Hope that helps- and I'm still learning! Cheers, Chuck3 points -
These were just posted on Facebook with only the following text accompanying them: "Finally...we started test prints for first sprue"3 points
-
Not the best pictures, but....3 points
-
DH89 Rapide and Dominie A rather picture heavy contribution of Duxford's Rapides plus some drawings: and a bit about the wartime Dominie: and Lukgraph's kit waiting to be built:3 points
-

1/32 Aviattic Pfalz DVIII
Christa and 2 others reacted to Archimedes for a topic
Hi @LSP_Kevin This should do the trick: Alles Besten mein Freund! Paul3 points -

RAF FG.1 XV571 WILD HARE Phantom Conversion
Iain and 2 others reacted to Anthony in NZ for a topic
Hahaha, well I can hire it out at special LSP rates LOL Thanks Matt! Thanks Ben, I am going to take that compliment from you as I have seen your cockpit skills...thank you sir!! Oh and I am really enjoying your latest project, super ambitious but super cool all at once.... So I made some good progress today, before my eyes clapped out! Pretty much done except 2 red stencils and a yellow/black canopy locking leaver. Then it's on to the front tub, phew Inside details of the placards and periscope (In the Black Box set oddly) You can see the scratchbuilt radar hand controller but most of it is hidden and you cant really see the placards and wear. Cheers Anthony3 points -
1:32nd scale Sopwith Dolphin
dutik and 2 others reacted to sandbagger for a topic
Hi all, Final details for the cockpit and engine. Trigger cables added to the two Vickers machine guns Trigger cables added to the control column. Coolant temperature gauge pipe from the engine coolant tank. Vent pipe from the cap on the rear of the engine left valve gear cover. Mike3 points -
1:32nd scale Sopwith Dolphin
Jayl and 2 others reacted to sandbagger for a topic
Hi all, The Dolphin's cockpit is finished and ready to be closed up in the fuselage. The cabane strut bracing wires are ‘RB Productions’ British streamline wire 1/4 BSF (RB-P32012) with ‘Albion Alloys’ Nickel-Silver 0.5 mm (NST05) diameter tube. Pilots seat is the ‘BarracudaCast’ British wicker seat (BR32234) with cushion (kit seat mount modified to suit). Now its onto closing it all up inside the fuselage, Mike3 points -
1:32nd scale Sopwith Dolphin
dutik and 2 others reacted to sandbagger for a topic
Hi all, A few updates. I managed to lose the Lewis gun ammunition drum container from after it pinged out of my tweezers!! Therefore, I created a new one from 0.5 mm thick plastic card and Lewis drums (from my spares box). The kit supplied seat base has had its seat cushion removed as I'm replacing the seat with a 'Gaspatch' 3D printed seat. Cockpit side frames are braced with ‘RB Productions’ British streamline wire 2BA (RB-P32014) with ‘Albion Alloys’ Nickel-Silver 0.4 mm (NST04) diameter tube. Materials for rigging control cables are ‘Albion Alloy’s’ Nickel-Silver tube (NST04) and ‘Steelon’ or ‘Stroft’ 0.08 mm diameter mono-filament. Wood effects painted using 'Windsor & Newton’ Griffin (Alkyd) Burnt Sienna and Raw Sienna oil paints. The details are painted with either 'Tamiya' acrylics or 'Mr. Color' paints. Now it's onto weathering before assembly is started, Mike3 points -
Hi Guy's, Well after the disappointment with the FW 190D9 that I am stalled on, I thought I'd drag this project off the shelf and get started on it. Now, I am no FW 190 expert, so I may need some help throughout this build, but as far as I am concerned, I have everything that I need to get going. Don't worry about the 'Sturmbock' boxing of the kit, it's actually just a standard A version kit in there, but it was loose so I had to use this box to keep it in as it was the only spare box I had that I could find! So, I have all of these bits and pieces to add in with the build, and a lovely wooden base to put it on as well. I am going to try and open up a few extra panels as well as the engine and forward gun bay, things like Fuel Filler Caps, Main Fuselage Access, Tail Wheel Access Panel, Etc. And the schemes that I have to decide on are: Yellow 8 of JG 301. There are plenty of pictures showing this towards the end of the war with patched up paintwork, patched up and Mismatched panels, etc. (I actually really like the Black/White Chequer Cowl version from 1943. I was also asked by a few people what my work bench looks like: So, with mojo still on a high, on we go................. Cheers!2 points
-
Got em! Enjoy! - dutik2 points
-
Day 38 of my build, I created NVG compatible Cockpit Map Lights for both the Pilot and Co-Pilot stations from scratch. I will add the switches and decal labels and mount them.2 points
-
10 days to get from Poland to Texas. Impressive!2 points
-

Is Airfix about to spring a New 24th scale Hurricane on us?
Archimedes and one other reacted to cbk57 for a topic
Airfix or Meng would do well with a 1/24 Fokker D VII. I think it would be a wise and popular subject myself. A few of the key WWI planes would make a lot of sense in 1/24. I have not purchased a meng DRI yet but just too many other higher priority projects, maybe someday. In hindsight my favorite WNW kit was the Albatros DV and I think that would do well in 1/24 also.2 points -
Thanks for posting this, Rockie! Kev2 points
-
Anthony, I apologize because I've referenced this before but when you post a picture of the cockpit area that includes the adjoining fuselage intake vents I am drawn to those vents like a moth to a flame! Every quality build has for me a point of focus. Yours is the vents. I don't mean to minimize your other major build accomplishments - far from it! It's just that for me my eye goes to those vents every time. Keep going, My Friend!2 points
-

About those new tooled 1/32 Phantoms....
Royboy and one other reacted to CRAZY IVAN5 for a topic
Well, considering that I don't do Facebook, I'd like to know who is putting this out. The afterburners look great! Would like to see a "Brit" Phantom .2 points -
1/32nd A-20G coming from HK Models
Out2gtcha and one other reacted to CRAZY IVAN5 for a topic
That looks nice!2 points -
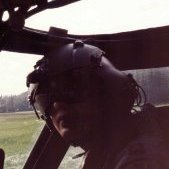
 I do like this photo, just a couple of guys going for a flight, wearing vests...2 points
 -

1/32 Aviattic Pfalz DVIII
phasephantomphixer and one other reacted to vince14 for a topic
If you have any intention of buying the kit, I strongly recommend placing a pre-order - Richard needs these to enable production to go ahead (IIRC he mentioned something about needing to sell 500 kits, and he was about halfway there with pre-orders). The kit should also be on display at Telford.2 points -
A conversion to get a 1/32 De Havilland DH.112 Venom FB.4 (FB.54) in Venezuela 1960s markings. Combined the new Infinity Vampire with the old Matchbox Sea Venom. A lot of conversion effort. Decals custom made. Full conversion details can be found at my website...2 points
-
Silver Wings Gauntlet II
R Palimaka and one other reacted to mozart for a topic
I've been struggling to understand the exact arrangement of these gunsights: so this was my interpretation: but Christopher over on iModeller posted this: .....which started to make a lot more sense of the top photograph. A little more research revealed: Love it when something comes together like this! So the present (and future) arrangements this: This is going to be such a busy area because I've got to fit in those bloody bracing wires which I thought weren't there as well as the (refitted) cabane struts and their associated longitudinal bracing wires! Biplanes.....ggrrrrr!2 points -

Trumpeter A-6A "VA-65"
denders and one other reacted to jeroen_R90S for a topic
Hey Maru, sorry for responding so late, apparently I had missed your comment in my notifications! Thanks for having a look ---------------------- So, with said 1/72 Phantom being a lot more involved than I had originally estimated, work on the A-6 had stalled a bit. However, with the F-4S now getting pretty close to completion and with oil paints needing their time to fully cure I went back to the A-6. FWIW, the small-scale F-4S is here: So, back to the A-6. As this is a big and complex model, both to build and paint, I set about making a to-do list before primer first, which, like the F-4S, turned out a lot more involved than I originally had in my mind. But this was the point of the list anyway, so to make it shorter I started with the outer wings first. These needed some modifications, as well as some PE added to them. I had noticed the flaperspoileronthings (easixpedro explained how they work and what they're correctly called but I can't find the thread any more ) droop a bit on the outer wings when folded, and I intended to replicate this. However, Trumpeter only provides full down or full up, so I used the full up supports and carefully cut and bend them so that they are just a bit open instead of fully opened. This photo gives an idea, and also shows that the inside does not appear to be completely red as Trumpeter indicates,, but just the outer strip, although I have no idea if this was the factory finish for an A-6A or something done later to A-6E's. Edit: I also noticed the inside of the "well" for the flaps/ailerspoilertings seems white instead of red. https://tailspintopics.blogspot.com/2014/01/grumman-6-wing-fold-differences.html Thanks to Tommy Thomassens blog for this nice photo -note that on 1:1 scale there are some overspray issues on the flap- and spoilerairlerthings red as well! Also note how flat the e.g. the flaps side are on the model v.s. the real thing where the edges overlap the frame... So, on to the model. Here's how I eyeballed them, look pretty good if I may say so myself: Then it was onto the navigation lights -as you may recall I modded the wingtips with the old-style lights per AOA instructions and photo's, but the forward lights are standard Trumpeter ones I had intended to fit later into the build to prevent more masking. However, on close inspection they had sink marks in them (yuck) and one of the sprue attachments is on the visible side so I'd need to sand and polish anyway. Also turned out the fit isn't all that great, so on they went, along with the speed brakes: Tamiya Clear Red for one side, 2/3 Clear Blue and 1/3 Clear Green for the other. In case you're wondering why they are not very glossy, that is because I tried to protect them for the next steps and taped them off while the paint had apparently not full cured That'll need an additional coat or hopefully just some polishing will make them nice again. The aforementioned next step involved the PE for the wingfolds. The flat plates look nice enough, but I'm not too thrilled with the lugs. This has 2 causes, 1 of which is of my own doing. I had already assembled everything before buying this PE set, and for using the lugs I needed to remove plastic I had indeed glued very well. This is a lot easier with the parts still unassembled and their installation is neither clean, nor was it fun to to... . The other thing is that the lugs are pretty substantial pieces of metal and these look nice "in scale" but in reality are far too thin. If I were to do this again I'd drill the holes in the plastic part and be done with it. The next step will be some cleanup, and black primer. I learned from the F-4S that the marbe stage is pretty boring so based on my to-do list I've decided to finish as many separate assemblies as I can and prime them black, then marble and put them aside. The final blend (coats) I'd like to do in 1 go to make sure the parts don't look all that different. With all the YZC, metal, white and red area's I predict a lot of masking, though! Jeroen2 points


.thumb.jpg.cd22b958c9e88a898a21e18b862c523e.jpg)


.thumb.jpg.5da8bff9741de420eb2e87addd8f2cf6.jpg)