Leaderboard

Popular Content
Showing content with the highest reputation on 06/23/2019 in all areas
-

My big project! Trumpeter 1/16 Panther G
Uncarina and 6 others reacted to curiouslysophie for a topic
Hello everyone! As I’m new here I thought I should actually show off something I’m working on. My FW-190 isn’t ready to show yet, so here goes with the big, long term, build I’ve been doing. The Panther has always been my favourite tank mostly for how it looks, and I jumped at the chance to grab one of the large scale ones when Trumpeter released it. I wanted to portray a Battle of the Bulge era Panther so the kit needed some modifications to make it into a late version. This kit is a bit of a bugger to build. Trumpeter use an unnecessary amount of parts for each piece, the detailing is way off (and sometimes completely fictional!), flash everywhere, and the tolerances between some parts don’t seem to account for you actually painting them! In the end though fettling away is what I’d fun about this hobby so I got stuck in. Most of the lower hull is done. I’m still painting the shells, and there are a lot of them! The engine was a beauty to build, but is sadly mostly hidden away now. I hope you guys enjoy it!7 points -
Wingnut's new Gotha UWD landed at my house today along with its (uglier...) land-based counterpart. For some reason this plane has always fascinated me, so everything else has been pushed aside to start this one. It's bloody gorgeous to see the plastic in person. Roughly the same length as the Gotha G.IV, with wingspan 2-3 inches shorter. The floats are massive, they are about as long as the span of the lower wing of an Albatros D.V! Day one: Cleanup of sprue stubs and mold separation seams, the floats and rear fuselage have been glued together and the three-piece lower wing has been joined. I'm hoping to make quick progress on this and bring the (completed?) build to the Nats somehow. Transport will be very difficult, but if I can figure out how to get it there, it'll be there.6 points
-
my last built , enjoy ::5 points
-

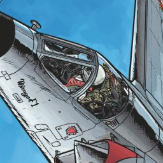
1/32 Revell Fw 190 F-8 & A-8: Working on the wheel wells!
Greg W and 3 others reacted to VintageEagle for a topic
Time flies. I cannot believe that I started this build in 2017. Anyways, the fuselage halves are finally complete. I have summarized below all the changes I made. One thing that took me a while to figure out was the correct position of the tail wheel. Built out of the box, it extends too far out of the fuselage. On 90%+ photos I have seen of wartime Fw 190 the tail wheel does not extend as much and therefore I have decided to reposition it. I finally decided to add a new pin-hole to have the required strength of the assembly. Also, on the Revell kit the fuselage near the tail wheel has a fictitious shape that I filled with CA and sanded smooth. But now everything is ready to add paint to the inside to then finally add the cockpit and close the fuselage halves.4 points -

WINGNUT WINGS LANCASTER!!!!!!!!!
scvrobeson and 3 others reacted to Out2gtcha for a topic
Let's try to keep this one on the straight and narrow boys. Points can be made, and opinions stated, but let's leave the personal stuff elsewhere.4 points -

P-40F WarHawk Trumpeter 1:32
MH Design Scale Models and 2 others reacted to Koralik for a topic
Model Trumpeter P-40F Warhawk 1:32 scale, Made straight from the box, the model is very easy to build. In terms of the compatibility of this model with the P-40F, unfortunately, I can't comment because I have no knowledge about aircraft from IIWW times. The person who ordered this model would like it to be heavily exploited, I hope that the effect has been achieved.3 points -

WINGNUT WINGS LANCASTER!!!!!!!!!
19squadron and 2 others reacted to Ryan for a topic
Fingers crossed the Lanc and the 0/400 could be at the Nationals, I’ll be picking up one of each. As far as cost, don’t really care. I don’t smoke or drink, golf, have a car restoration going on, have a boat, or any other vices or hobbies. Money well spent to me. Ryan3 points -
more work done on this kit the raer suspension Now working on the spoiler at the end Thanks for stopping Mark3 points
-
Available at the IPMS Nationals 2019 in Chattanooga Aug 6-10.3 points
-

HK B-17...C 8/9 movement at the station!
Derek B and 2 others reacted to brahman104 for a topic
Thanks Gaz! Cheers mate! Ain't that the truth Chek! There was some rudimentary armour plates installed at various locations, but it wouldn't have done much against a zero's 20mm. Psychological at best! Thanks Terry, agreed about the cushion. I'll tidy that up a bit later on.... still got a while before that gets attached permanently! Always a pleasure Tom! I still don't know how you do what you do with the vacform kits, and where on earth are you going to put a Sunderland when you're done!? With all the discussion and research on the E/F correction, there's been very little time to lavish on my first love. She sits patiently on the bench waiting for me....... I did finally find the time to do some "contributary" work towards the project though! In order to begin "fitting out" the rear fuselage, I needed a lot of oxygen bottles and ammo cans, both big and small. You may recall that a while ago (probably two years) I made some masters of each and resin copies, but I was never really happy with them (air bubbles, warpage etc). Ever since I brought the photon, it had brought to light just how poor my CAD work was; I thought I'd made an amazing drawing, only to have half of it "disappear" when I brought it into the print setup page! Very disheartening I can tell you! Tim (Wunwinglow) had done his best to explain why my drawings sucked, but I still couldn't understand why they didn't work, which then kind of put me off trying to do detail parts for a while. Anyway, an enforced break is good for the mind so coming back into it, I was determined to get on top of this Rhino stuff. The light bulb moment came when in one line of a youtube tutorial the dude mentioned the command Select Open Surfaces or "SelOpenSrf." I'd seen all sorts of other tutorials about things like "manifold" and "non-manifold" edges, but for a simpleton like myself with no formal CAD training, none of this made any sense. Anyway I used the command and bang! Had it sorted in no time! Still got lots of little errors to work on, but I am getter better. Anyway, here's what you're all reading this for: Yeah it's not 100%, but at the size it is (4.5mm wide) even the photon will struggle with any crazy amount of surface detail, so I stuck to the basics. While I was at it, I also made the tall one for the radio room and bathtub guns (and these are good for the E/F too!) I then made some oxy bottles, and put them all on the bed ready to print. Just over 2 hours later..... I also compared these with the one I made a while ago (the new ones were made from factory drawings, as opposed to comparing pictures like I did last time) Probably just as well I redid them! As you can see, the oxy bottles aren't quite smooth, but at least they're round and aren't riddled with air bubbles! Given my recent success with understanding Rhino better and the results here, I'll continue to make the myriad of little fittings that need to go throughout the fuselage, especially the oxy panels and intercom boxes. I leave for a big trip to the US in a few days where I'll be visiting the MOF in Seattle, Desert Rat in Illinois and the cherry on top: A ride in EAA's Aluminium Overcast at Oshkosh!!!!! Cheers, Craig3 points -

Revell Super Hornet with lessons learned
F`s are my favs and 2 others reacted to hpetiers for a topic
thanks for your support in this one gentlemen! it loos like the most risky work has been done by now. in the mean time the cockpit is as good as ready. pilot and seat got a coat of flat varnish: and a set of resin wheels were delievered to my house. I noticed that the Revell wheels are much too square and have no thread on the tyres: Just finished the primer on the fuselage: surface detail is quite good, no seams visible anymore!3 points -
I bought this kit 2 years ago and have been picking away at it now and then. It's really picked up momentum in the last week going from probably never getting finished to, possibly finished in this lifetime to, possibly finished this year. I will add details (I've got a lot of walk around type pictures here) of the gear bays and (I hope) cast my own engines. I've got about 20 pictures but this is basically where the project sits now.2 points
-
Modifications and additions: Jet pipe and exhaust turbine face scratch built. Seat cushions and belts scratch built Height of tail increased by approx 2mm Rocket rails scratch built Rivet detail added to circumference of belly tank Added brake lines and actuator rods to undercarriage All antenna replaced with wire Cockpit access step scratch built Scratch built Pitot tube Scratch built Nav lights. Airscale decals used for cockpit instruments. Markings and finish: MRP Extra dark Sea Grey and Sky. Kit stencil data decals Small squadron crest decal custom made All other markings masked and sprayed2 points
-
I am busy with a 1/32 Tempest and at the painting stage. The only reliable local paint brand we have is Tamiya. I wanted to try their new lacquer paints for the project. Their colors are a bit of a mystery to me . Light grey is a good match for RLM 76 and Ocean Grey can pass for PRU Blue, so I had to mix the colors to approximate the RAF DFS colors. I had to test it on a model , so the 1/48 Hasegawa Spitfire was used. A very nice kit appart from the incorrect proportions of the fuselage. I used the measurements of the 1/32 Tamiya Spit, scaled it down and then added 3 mm to the rear fuselage and 1.5 mm to the nose with plastic card. Markings from Xtradecal for the serial number. The Squadron codes and roundels cut with Silhouette cutter. Subject 1 Sqn SAAF in Italy 1944. Enjoy Nick2 points
-

WINGNUT WINGS LANCASTER!!!!!!!!!
scvrobeson and one other reacted to vince14 for a topic
I can. In fact, I can afford to get two of them if I wanted. Not sure what it proves. In any case, the Lanc will be a bargain compared to MFH's 1/12 scale car kits. Their Ferrari 250 TR sells for about £800 a pop.2 points -

WINGNUT WINGS LANCASTER!!!!!!!!!
BloorwestSiR and one other reacted to chrish for a topic
I’m not in a majority? I can’t say and won’t fathom a guess what folks spend of their “disposable income” on the hobby. When I bought my first kit over $100.00 (Canadian) it took a couple of months of saving to get it but with two little girls, a poorly paid job, car loan, mortgage, and wife in university I probably shouldn’t even have been buying models at all! Now, I’m nearing 60, great paying job, wife equal to my pay, girls off with their own families, 4 cars all paid for (none purchase new)...still got a mortgage...but a $400.00 to $500.00 kit is (to me) a fairly substantial expense but if it’s something I want it will be purchased. A friend of mine spends that on a weekend golfing and enjoys every minute and that’s only a weekend....the 4-500.00 I spend will give me enjoyment for 4-5 months....and then I can show it (or not) at shows and contests. So as far as hobby/ disposable income money spent (in my opinion) it’s not a bad price. I’m not a wealthy man, I’m an automotive mechanic doing ground support equipment maintenance for a charter air carrier.2 points -
Brick sent me a pic of him after celebrating 5000 hours total time. I finished all of the parts for the buggy and assembled my first ‘test shot’ for fit and to se how it was all going to work. I think the main undercarriage is a little too close to the fuselage so has reworked the master parts of the wings to move them further out and will re-cast these. As I wanted to do Sean’s buggy, I cut out some panels from Thin aluminium sheet and glued them onto the fuselage. Painted, just have to change the wings. Still a lot to do. I will build the trailer and also the tug and am working on designing a small decal sheet.2 points
-
Yes these old kits are a little crude but they are still fun. I just started a Fujimi Ferrari 250 GTO last night myself. Looks great to me.2 points
-

RCAF SPITFIRES.. Mk XIVe..duel build.
Landrotten Highlander and one other reacted to williamj for a topic
Well...we managed to finish one. That's something. Will post some better pics of both to RFI when the XIVe is finished. have enjoyed this a lot.Hope you like. Regards,Bill.2 points -
Revell Super Hornet with lessons learned
F`s are my favs and one other reacted to hpetiers for a topic
during recent evenings I have been busy with paint! taking a step away from my usual 1:72 projects, I must say that the ejection seat and the pilot are already a project of their own. Here is some pictures. The pre-coloured PE worked quite well even though it was meant for the Trumpeter kit: time for a layer of matt varnish for everything and some gloss for the visor and I can think about closing up the cockpit!2 points -
Hi Chrish, thanks for your support. Speaking of support I put the aircraft on a temporary stand to see what it looks like, what I have in mind. that is what I am looking for! still need to do more work on the nos wheels as they are standing too far apart. Also the main landing wheels are too square in profile. All in all the landing gear is not bad, but a bit too skinny. You wonder if Revell had the nerve to deliver the parts for the gear in plastic, they might want to have made the parts at least as thick as in real life. I am not so worried for this one, being up in the air. with some final touches on the cockpit, it's almost time to start painting!2 points
-

Tamiya P-51 with upgrades
scvrobeson reacted to WasatchAviator for a topic
Here is my first build here on the site. Let me know what you think before I put the 2 halves together! HDW Seat Belts and Baracudacals placards1 point -
You can jump to the 7:50 mark if you are not iterested in the rest I didn't realize Airfix did a stressed skin effect on this kit.1 point
-

Dragon Bf 109E-4B
R Palimaka reacted to LSP_K2 for a topic
The engine assembly. So far, fit of these pieces has been quite excellent.1 point -
The IP has been given a dry brushing with a slightly lighter shade of grey, to assist me when painting details. I considered using some aftermarket stuff, but have opted to just go with what the kit provides.1 point
-

1:48 Monogram B-17G Build Log
LSP_K2 reacted to steinerman for a topic
I haven't had a lot of time to mess with this, but I'm still sanding, patching, and sanding........ The fit isn't all that bad, but still, there's a fair amount of work involved. But the main reason I wanted to post was to show you my new toy!! Soon I'll be able to play with the big boys! Problem is, my wife says I can't start it until my B-17 is finished. Should I listen to her or not? Once I start, I'll start a build log. Damn, that looks like it's going to be a lot of fun!! Later gents - and ladies! Lar1 point -
Top deck gun assembly all dolled up and ready for some paint. I certainly won't spend too much time on this, as all cowl pieces will be firmly anchored in place, one way or the other.1 point
-
I may be of the same school. I've been an auto mechanic...pardon me, automotive technician...(the new approved term) for 40 years now and I can't build car models, they make me nuts! I built 3 models of cars I've owned, a '74 Road runner (440 CID), 74 Charger (440) and 78 RCMP police interceptor (440) The Road Runner took 5 other kits parts to make mine accurate, the Charger took 4 other kits and the RCMP interceptor...curb side model of Roscoe's Dukes of Hazard Dodge...Still not happy with it years later but living with it....kinda1 point
-
.thumb.jpg.f0920d798d5d8600fb58b1d8a906ddff.jpg)
Trumpeter P-47D RazorBack Pacific 1:32
Shoggz reacted to shadowmare for a topic
Engine wired, i focused mainly on front because rest won't be visible without cutting cover. Now i must work on whats behind it, because of taken panel.1 point -

Revell 1/16 Hawaiian Funny car build.
mustang1989 reacted to dmthamade for a topic
I remember the bodies of the funny car kits seemed to sit much too high on the chassis. I used to cut the inner tinwork to give a better stance. Pic shows how high it sits with the stock stance. This is what i'll be aiming for. Don1 point -
I wouldn't mind doing one of the front engine dragster kits, something to park beside the Hawaiian. Don1 point
-
I traded off the remnants of this kit a couple of years back, but I'd really like to snatch anther kit one day. I've seen this kit built into the most impressive 1:16 dragster model ever. The guy just did an absolutely outstanding job on it.1 point
-
I agree! Much more fun to just build the model than worry about every little nut bolt or rivet.1 point
-
Nick, you really have done a terrific job on the colours and markings. This Spittie is what boyhood dreams are made of!1 point
-

RCAF SPITFIRES.. Mk XIVe..duel build.
williamj reacted to themongoose for a topic
So beautiful we all actually lose focus on your avatar for a few minutes Seriously though what a perfect job weathering and capturing the details! And the pilot looks superb, a perfect compliment to the Spit.1 point -

RCAF SPITFIRES.. Mk XIVe..duel build.
williamj reacted to Old Dog Flying for a topic
Stunning Bill! Just Stunning!!!!! Barney1 point -

WINGNUT WINGS LANCASTER!!!!!!!!!
alanash1963 reacted to John1 for a topic
Thought I read somewhere that it was coming with 4 complete engines. Could be wrong. Personally, as a cost reduction effort, I'd really prefer if WN were only to provide one full engine and offer others separately for those who just have to show each one exposed. Actually, since engines aren't "my thing", reduce costs even further by not including any engines and allow the individual modeler to purchase 1-4 Merlins separately, per their own whims. With regard to cost, per WN's website, they are trying to have the kit come in between $349 - $399. I'm confused by comments like yours about the mortgage needed to finance the kit. Maybe I'm an exception but I don't think $399 is a deal-breaker for an model like this (to me, the only real concern is the size of the damned thing). I see certain modelers bang out 4-5 (sometimes more) LSP kits a year, all of which probably cost ~ $100/ea (without including any aftermarket). And yet $399 for a kit that would probably keep a modeler (at one like me) busy for a year is somehow extreme? I just don't get comments like that. I understand that some folks on this site are on fixed budgets and this cost is beyond them but I'd be willing to bet that for the majority of the folks here, this cost isn't anything insurmountable. Not aimed at you specifically, just a general observation...1 point -

Andy's box review of the Airfix 1/24 Hellcat
LSP_K2 reacted to Patrick HMD for a topic
Thanks Ron. Must have. I would like to do a simple -3 conversion Doesn't seem to difficult. Hope the AM guys are reading this. Name's Pat1 point -
They do look cool with the flaps down but I want to be historically accurate if I can. If flaps up is correct that's the way I'll go. I will try to follow reference photos of a particular plane for weathering and everything.1 point
-

WINGNUT WINGS LANCASTER!!!!!!!!!
AlanG reacted to esarmstrong for a topic
No one does that on a HK model Lanc thread on this site...1 point -

RCAF SPITFIRES.. Mk XIVe..duel build.
Martinnfb reacted to Troy Molitor for a topic
Some really great efforts on this on William. Well done. Love the five blade prop and spinner combination. Thanks for sharing this with us. Troy1 point -
Looking real sharp. Hard to go wrong with funny cars and fuel dragsters, especially the old front engine variety.1 point
-
That turned out great!1 point
-
1:32 Spitfire MkVIII "Fargo Express" (Tamiya)
williamj reacted to Troy Molitor for a topic
Nice efforts. Love the torque tube to cable connections going on under the seat. Troy1 point -
Dragon Bf 109E-4B
R Palimaka reacted to LSP_K2 for a topic
So far, I've encountered no problems with the engine and various cowl pieces, they seem fine, and fit is just excellent. This will be done up like the 109 featured in one of the Kagero books. Someone here on LSP (I forget who) sent me the decals from the book to use on this project.1 point -
hm, strange this, most of the photobucket pics are gone. Did some more work. Its a bit less productive but i try to do some minor stuff each day. Now at the hobby room its 32°c. First, exhausts done, did it in 2 tries, but, resin and thinner, works great t get rid of the feiled paint attempt. I softened the details in the burner cans. As most know, there is a little detail on the real feathers, and i find the aires details to hard. Now i'm sure that the sanding gives a good grip for the paint. Sprayed with Mr Surfacer Black, Let dry overnight, and then did some Alclad gloss black over it. Made my own maskings for the black part of the exhaust petals, after one night i maksed them all . Pale burnt metal went over it. I let it dry for a couple of hours, and the Gloss clear over it. The tube, inserts and fan sprayed with mr surfacer black, overnight drying and then gloss clear, i drybrushed with white, and silver. Some white wash, here the results. The shrouds are painted with my own blend, some claer gloss, and they look great The rest of the engine covers are fitted, some sanding, removing the support on the inside helped alot.All is flush now. For the fuselage, and boddy, next is filling and sanding. Did the horizontal stabilizers, glued them, filled the panel lines, and then masking. Like on some aircraft, there are panel lines, and later moddels have all the lines filled. So, i wanted to get that look. There is the result, after the masking, some layers surfacer, removed the tape, and then the black primer on.1 point
-
Right - off to grab a small glass of vino - then back to looking at B-24 wings... Iain1 point
-
Very cool. Looks more like a small spaceship.1 point
-
After long thoughts and a lot of doubts the mottling of the wings and the fuselage was a lot of fun. Since there's no picture showing the complete wings or the right hand side of the fuselage - I went with a quite linear mottling (like on a He 219) which is appearant on one picture (at least I guess so). Pulling the otehr masks revealed some more flaws which will be reworked in the next days. Enjoy: So the next steps are: - repairs on the insignia - the RLM76 rectangle behind the swastika - getting some variation into the bigger RLM80 blotches - painting the fuel filler port - wheatering (first time salt fading!) So long Joachim1 point
-
We're sorry , that's simply not allowed here .1 point