Leaderboard


Popular Content
Showing content with the highest reputation since 07/09/2025 in all areas
-

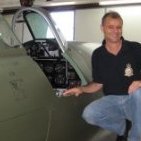
Kotare Bf 109K-4 colour chart and the dreaded RLM 83 discussion. Also preorders close Monday!
DagR and 28 others reacted to Mark Robson for a topic
Hi All I have delayed putting this post up for fear of being named a troll, but I do feel that some sort of heads-up needs to be posted about the paint guide in our new 109K-4 kitset. Firstly, and sadly for me, we have deleted Humbrol from the chart. I posted in Britmodeller a few months ago for help with paint mixes for Humbrol, and the consensus was "don't even bother". Coming from British modellers who imbibed Humbrol with their mother's milk this opinion had to be heeded. At the same time we need to include paints that can be used with a brush, and that are safe and acceptable to parents. As a former model shop owner, I can tell you that many parents do not want their kids using solvent-based paints in the house. It was suggested that we just list the RLM colours, but the problem with that is again what happens to the poor model shop owner? Someone buys the kit and opens the instructions and asks the shop owner/staff member to find them 10 RLM colours. Good luck with that with a lot of the paint ranges and that does not even cover the variations in RLM 76 etc. Then there are geographical considerations, not all paint ranges are available everywhere, so we had to at least have Tamiya acrylics because they are close as it comes to a world wide paint brand. But; Tamiya has almost no RLM colours out of the bottle. I canvassed the net and FB for paint mixes and tried them all. To be honest I wasn't that impressed, so have largely made up my own, matching them to "averages' of several other brands. Many will disagree with them, but they will be close enough for you to tweak to your heart's content. I have had great help from several paint brand experts, including Scott at SMS, Rene and Martin at Mr Paint, Javier and Carlos at Mig and also Sam Dwyer who is a bit of an ambassador for AK. Thanks to all of them and everyone else who gave their opinion. All mistakes are my own. There are some colours listed that are not used in this first kit edition, but it seemed worthwhile to have them in there to make future editions easier. NOW; RLM 83!! Every Luftwaffe enthusiast will have an opinion on this. I don't claim to be an expert, and everyone is of course welcome to their own ideas. I have had some lovely and extensive conversations with David E Brown who has convinced me that he, Michael Ullman and others have demonstrated that RLM 83 is a blue maritime colour. So; we don't list RLM 83, we call it an unidentified dark green. You of course can think we are idiots and call it RLM 83 if you use that colour on your model, no hard feelings! PREORDER CLOSURE I am excited to announce that manufacture of first batch of kitsets is finishing as I type this, and our preorder stocks will be flying from China to NZ early next week. Once we prise them from the grip of the Customs department, they will be packed into all the pre-labelled shipping boxes as quickly as the Kotare elves and hobbits can manage. So preorders close on Monday, see our website (www.kotare-models.com) for details. Our American distributors have not ordered any Ks, and we don't blame them because the costs are too uncertain for them to budget. So US customers might as well preorder now because then you will get a free art print and 3D printed exhausts. We do not currently have an Australian distributor so that same comment applies to you Aussies. Hope you enjoy building the kit as much as we have enjoyed creating it! Cheers Mark Robson Kotare Models29 points -

F-8C Crusader - HOT ROD FLAMES!!!
Castor and 25 others reacted to mconnelley for a topic
Hello: Here's what it looks like with all of the masking removed. Things worked out really well, and I'm extremely pleased with the results. Mike26 points -
The last project on Cripes a Mighty would be the bomb racks. These (the real thing, on Lope's Hope): Surprisingly, effective on -B/C models, the bomb rack is made of some kind of internal re-inforced molded plastic. Earlier versions were magnesium (on -A models, A-36, etc - I think). The two configurations vary a bit but not much. Anyway, the drawing says the rack is to be gray, to match the underside of the wing with the standard gray and OD paint job that these aircraft were delivered with, up until they began to arrive with un-painted aluminum. As discussed already, -D models introduced an entirely different rack. Also previously discussed was sway brace bolts, and whether or not they included the large round pads. Mine would have the round pads: I designed the holes in the pads to have a lip at the opening with a tiny bit of interference fit for the bolt ends. And the bolt ends had a bit of a bulge at their ends to snap into place in these holes. The bolts: See the bulged ends? Put together (carefully) and I got this: Snap! Yes they actually swivel. I was amazed - true micro-engineering. There they are next to my 3D printed and gray painted bomb rack. For the umpteenth time, I thank Airscale for the decals. My intent here was to be able to mount 75 gallon tanks and have the pads swivel into place with little to no gap betwen pad and tank. It worked, but read on. A finished bomb rack with sway brace bolts: And here are the 3D printed tanks: I had to do some educated guess work as to the shape and size of the tanks. Both my racks and my tanks are designed at the attach points for removal and re-attach. It works somewhat but not great. In real life the tanks were identical, but I have a LH and a RH tank. That is because the little fittings where fuel lines connect are oriented differently LH to RH. These tanks are not ready for prime time, and will receive decals one day. But for now, I have decided NOT to use them. I never intended drop tanks to be installed permanently on Cripes - they hide too much of the landing gear and I do not want them hidden. They would instead be removable. But I have found that what I have here is an amazingly large, unwieldy, and fragile P-51 model. Every corner of it has something that breaks off all too easily. And installing or removing those tanks, along with their plumbing, would be a labor intensive and delicate task, subjecting Cripes to part breakage every time I mess with it. MOF - turning the model upside down to install the racks resulted in this: The external rear-view mirror broke off, after being on the aircraft for what - a week? Well, that was merely an opportunity to tweak the mirror design a bit - a touch shorter, with slightly wider base pads - print it up with some spares, and re-bond it to the windshield. No prob. But - the wing tips are uber-fragile, and the fix is much much more complicated. Here one is, BTW, finally freed from its protective padding and tape: Just look at how delicate that tip is. It just had to be a frequent maintenance item during the war. I am proud of it and I do not intend for it ever to be subjected to potential for breakage. Other parts are very fragile. The pitot mast for example, that part very close to the bomb rack. The gear doors - they cannot be bumped or the links will break. That would break my heart. The movable tail feathers - also fragile. So I will keep the tanks around, but I will not install them at this time, perhaps never. Here is Cripes with its newly installed bomb racks: Pan back and you see here the final WIP picture of Cripes, with her racks and new mirror, before I put together the RFI post: Oh one more thing - Antonio made up a model of pilot George Preddy,and gave me the file. After some back and forth about George's height (he was a fairly small person I understand), I scaled him to be about 5 foot 6 inch and printed him up. And here he is: Dam Antonio - you are one talented dude. I will paint him one day, but not today. OK RFI post upcoming. Thank you all so much for sticking with me on this 2-year adventure. So appreciated.25 points
-
A few years ago I started building the ZM He-219 kit without having a build log. I had already completed several ZM kits so went into it with high confidence. Yes, I had read about the flash and fit issues, but the engines and cockpit built up nicely. Then I rushed assembly of the fuselage and ended up having panels that were not lining up to the point that I was not happy. I ended up selling the started kit. I realize in retrospect that it is such an appealing subject aircraft that I rushed to see it come together. Here's the only photo I have from that build: Fast forward several years and I'm ready to revisit it. I have the kit, the matching Quinta set, the AML Models He-219 074 or A2 conversion set, the 1ManArmy masks for the Revell kit (including A2 markings), and Montex expanded mask set for the Revell kit (probably redundant with the 1ManArmy set), ResKit wheels, and a set of G-Factor landing gear. Here's the scheme I'm planning to create: And here's where I'm at so far: As before the engines and cockpit assembled without drama, just with some test filling and occasional flash removal. Here are some more detail photos: Engines: And cockpit: My plan at this point is to leave the outer skin of the airframe unattached at least until the front and rear fuselage sections are ready to come together. And since the largest outer fuselage panels go over molded detail I am planning to drill holes in places to allow me better control over getting those panels to fit flush. I'm hoping to complete this kit at last! Cheers, Tom23 points
-
She's up on her feet. Still some weathering left to do, finish the HGW seatbelts and seat, and a few others, but it's coming along. I inevitably lose steam at this point after staring at this thing for the last 6 months.20 points
-

1/32 Mig-25_Foxbat PD
Serkan Sen and 18 others reacted to Bekim for a topic
here is the printed Cockpit with the Tempmodels ejection Seat .. and from the another side.... All the Best Bekim19 points -

HK B-17...C 7/11 I'm still alive! :)
MikeMaben and 18 others reacted to brahman104 for a topic
And you guys thought I'd given up...... Nope, she's still going. Getting towards the end on one entire wing, top and bottom! It's been a slog and there's a whole other wing to do yet, but the optimist in me says that I'm halfway. At least now I'm doing the leading edge I can finally start doing some recessed rivets.....These are like a dream compared to the 8 gazillion raised ones I've done so far. A tricky challenge on the latest point has been trying to shape a single piece of skin to fit in between the two nacelles, as there's a whole heap of different geometry going on there. I got it close, but the saving grace will be the strips running around the edges of the nacelles which will (hopefully) hide any gaps. Overall I'm pretty chuffed; just trying to get a panel done, whenever I can. On the flip side, I've still got a long way to go before I really have to think about where to put it once it's done! Cheers19 points -

1/32 Hasegawa Grumman Hellcat F6F-3
KUROK and 17 others reacted to Tolga ULGUR for a topic
Some progress Oil paint washing and a matt coat applied18 points -
1/32 Hasegawa Grumman Hellcat F6F-3
Juggernut and 16 others reacted to Tolga ULGUR for a topic
Some progress Exhaust traces etc.17 points -

1/32 Infinity Models SB2C-4 Helldiver
Greif8 and 16 others reacted to monthebiff for a topic
So, a bit of an update and first of all test fitted the upper dive brakes to the wing This then allowed me to measure and cut the inner wing section that needs filling in, now this section is included in the etched dive brake set but in reality an etched part here doesnt really work and its definitely plastic card all the way due to the filling , sanding and rescribe work required Also been working on the undercarriage and so pleased to have a set of S.O.W replacement U/C for this build as this is now a very heavy model with still plenty to add. Straight away I decided I needed to drill and pin with brass rod all joints for maximum strength. Kit part on the right and S.O.W on the left with some work started with first leg built up with minimal glue prior to test fit Both all completed . and test fitted in to the bays Those U/C legs are pretty tricky to get right and patience needed to let one part dry properly before fitting another to ensure best strength and overall fit. Regards. Andy17 points -

RAF FG.1 XV571 WILD HARE Phantom Conversion
denders and 15 others reacted to Anthony in NZ for a topic
LOL...fat chance, I dont have enough years in my life Thanks Derek! Ok so Canopy time This is one of the real shortfalls of this kit. The way the clear parts attach to their frames. Thankfully @Ali62 has come to our rescue and produced these lovely one piece crystal clear canopy sets which includes frames and glazing all in one piece as well as some 3D printed internal bits. Absolutely highly recommended I must say. One day some time back I also ordered a set of 3D Chutes Phantom canopy frames with all internal latches, seals, mirrors and framing...just beautiful! RESIN2detail also now has a GORGEOUS looking cockpit set. Of course I couldnt be happy with just using one or the other and decided to see if I could grind out the interior sill frames on the Aerocraft canopies. Ugh...someone should have stopped me LOL, I created a lot more work for myself in the process. However if I was to do it again I could do a better more efficient job-probably. I thought I was all set to go when I remembered the Tamiya kit also had potential shape/size issues. I studied and studied and to the best of my ability using Soyuyo's drawings and photo references (much like I did for the fwd fuse size issue). My conclusion is that if I can correct the sill line I have sorted the biggest issue. Now I know that apparently the cockpit is slightly too wide and potentially too short in the rear canopy (I am still unconvinced about that still) I felt I could live with that and I could wait a lifetime for a new 1/32 Brit Toom and it still wont be perfect. I guess I had to choose my battles. To me though Tamiya have done a great job still. Ok so here is the issue and in hindsight I dont know whether or not its worth doing, but here it is. Aerocraft Canopies 3D Chutes printed canopy frame set The Phantom canopy has some unusual shapes and is best explained by the man himself who discovered the issue and analyzed everything https://soyuyo.main.jp/f4/f4e-1.html#bottom But essentially this is the conical shapes he's talking about First up I ground off the inner sills and shaved the sills back with a flat blade to the new slightly curved shape at about the same line as the Aerocraft outer sill line and then I masked the interior to protect it. I then masked the new frame line on the outside to match the above photo. I then used JB Weld and back filled it up to the tape line and sanded smooth. When I removed the tape, there I had the revised sill lines. Very difficult to tell unless you get at the correct angle. With both inner and outers done You get the idea, and yes I broke a latch off but have a spare off a damaged part Difficult to photograph the two different curves front and rear The canopies also respond well to Tamiya Finishing compound and wax I was going to completely finish them before posting. But due to the discussion on the Discussion section here I thought I might post this whilst the discussion was fresh Oh I also added a bit of an inner frame to the 3d parts as this will simulate the piece that should be there and where the edge of sealant will show through from the inside (as well I will have a sealant bead on the outside slightly lower so as to replicate the real canopy glazing attach. Thanks for tuning in on this painfully slow build once again Cheers Anthony16 points -
Moving toward the finish line. All the suspension is in place. Little things like antennas, ANO, etc. are in place. There's a problem with the bottom of the flaps. They can not become in place, interfere with the tanks, so that their angle of installation had to change somewhat. The lantern left for last. And there is something to work with. The idea to make it open immediately failed, it is already fuselage on a little more than 1mm. It will be in the open position. In the kit Iris missing imitation fabric upholstery (most likely it is Kevlar undercoating) on the inner parts of the lantern. Made it out of epoxy two part putty. Found a suitable textured surface. The photo shows the process. The only condition is to oil the surface that would be able to remove the parts. Removed when the resin has already slightly cured. Looked at the photos of modification E and did not come to a clear opinion in what color I paint inside the lantern. There are two options, gray or almost black. On earlier modifications seems to be light gray. Maybe someone can clarify this issue in more detail, I will be grateful. It remains to imitate the locks, mirrors and instrument section.16 points
-

32nd Revel P-51D - Dominican (Republic) Air Force
jeroen_R90S and 15 others reacted to Mistral for a topic
The result of much masking and airbrushing - around 4 hours of work... Aircraft numbers were masks cut by my fellow modeller, HP Industries (thanks Herman !) : So far, so good. Next will be the wing and fuselage roundels.16 points -
Thanks for the support all 😉 Purchased a few more bits for the build as I don't want a green/brown Hurricane Mk.ll I want to build a Hurricane used in Operation Rutter but can't find the underwing bomb carriers and exhaust glare shields so I've been trying to make them for myself. Here they are just placed on the wing, not the final version or location Finally, here's the main airframe with a coat of rattle can primer to highlight imperfections, there's a few! You might notice that the outer guns have been replaced with brass tubes and the inners have one faired over with foil. Also removed the cockpit vents on the outside as these weren't on UK aircraft I believe. These will be covered with tissue made to look like red doped fabric. That's it for now. ACW 🙂16 points
-

F-108 Rapier.....it's here.
F`s are my favs and 14 others reacted to Dandiego for a topic
More printing. Central fuselage with main landing gear bays. Tape and magnets prevent the print from moving/dislodging during the print process. Most of these prints are between 12 and 20 hours. Cardboard wing. Just to get a idea of the size and to help in determining where to separate the wing so it fits the printer. All fuselage sections printed. I use an electric palm sander to knock down the layer lines and then apply putty. First wing section. There are 3 per side. Dan15 points -

Mals Way goes Maritime, Arado 196A-3
monthebiff and 13 others reacted to Mal_Belford for a topic
Allright. geez real sparse info on that fire extinguisher in Arado, but there are alot of similarities with Stuka on many things in layout....oh well later, Focusing on that navigator/gunner seat, as mentioned, the one provided in the model is superior compared to HGWs in this case, so work on that, reference pics i got, yes ad detail so Plastic Card to the service, drill em holes and glue them in to place, paint, wash...all that, and yes, seen many attach them belts under the seat, nope they should be attached on the arms/console...and yes try so random as possible and make em lay down natural with metal parts...took i while. This will do just fine for me, it looks like im getting closer to get another model in my glass cabinet.14 points -
F-108 Rapier.....it's here.
F`s are my favs and 13 others reacted to Dandiego for a topic
So, here are the latest prints. Mostly cockpit stuff. This is resin printed and a bit of a fingers crossed kind of exercise. About half of what I put on the plate is an unusable print. Not sure what is going on. Dan14 points -
The Barracuda wheels turned out well: And I had to check out the Tiffies in my new (not yet fully assembled) IKEA Rudsta cabinet: The wheels look in proportion.14 points
-
It's been a long road with this one. I used some Airscale (prop, pilot's sight, .30 cal gun and tailhook), not yet installed. Wheels by Phase Hanger. Decals by GMM. Tackling the rather extensive greenhouse next... Tim W13 points
-

airscalePro 1/32 Typhoon - kit design WIP
wunwinglow and 12 others reacted to airscale for a topic
evening fellas bloody hot one it is here in the UK too - scorchio... I have just sent the revised design where all the mods have been incorporated and I changed things so as to not have to split the fuselage - a much better result ..the idea is that the cockpit is built onto the bottom wing section and then enclosed so I am printing this out to make sure it will work.. we will see Well, it would of course be possible and I think if I stayed on 3D only I would be printing final prototypes by now, but there is so much involved it wouldn't really make sense to do that - I actually want to move onto my next kit believe it or not I have some excellent drawings and am itching to start so focus is really important. I couldn't do both - I have chosen this hybrid path, I need to prove it and then, well then, anything can happen :) Hi Breaker - yes just Rhino - I am a novice as can be seen by how I design and surface things - pro's would look at these and think what a muppet... The shapes are right, but I go the hard way in getting them. I am too old in the tooth to learn something new I think, much as I would like to use something simpler like Solidworks TTFN Peter13 points -
F-108 Rapier.....it's here.
scvrobeson and 12 others reacted to Dandiego for a topic
More printing, gluing, sanding....... Time for some big clamps. Canopies dry fit. Next section, with the main wheel bays is printing. 26 hour print, so see ya tomorrow. Dan13 points -

New Spitfire from Kotare
Archimedes and 12 others reacted to Zola25 for a topic
I hope their next Spitfire is a Beaufighter 😉13 points -

1/32 Hobby Boss B-24J Liberator
Troy Molitor and 11 others reacted to FLMattModelling for a topic
After starting on the cockpit, I decided that I didn't like how it was looking. Pulled off the Eduard PE for the panel and got the Yahu version. The color looks much better. That caused me to question the cockpit floor. Out came the paint stripper and some fresh paint. The MRP Interior Bronze Green that I had seemed a little too bright. Toned down with a mix of 10:2 with MRP black, and that gave it a hue I was happy with. This is all dry-fit for now as I determine how to weather this more than I have it now. Still have to add the throttle quadrant levers. I also opened up the rear cockpit bulkhead and created a shelf on the radio room side. Will try to create some radios that seem to be missing from the kit for this area. Wont be any updates for the next two weeks. Have to make the annual work pilgrimage to Oshkosh, WI for EAA AirVenture.12 points -
Well heck y'all. Or bloody hell in old English. The LH 75 gallon tank actually can be inserted into the hooks of the bomb shackles and stay in place as designed (the RH tank not so much). Here it is in all its glory: To my eye, that looks pretty darn cool. And, adding the fuel supply and pressure lines would add to the look. As well as the decals that are not there yet. What is lost is the unobstructed view of the landing gear and gear door, in a side view at least. What I think I cannot do is have this tank removable. For the reasons I already went through - the model is too fragile to subject it to alot of handling. So, I think this P-51 is either going to be with drop tanks, or without. I am on the fence. I would love to see some opinions from those who have been following this.12 points
-
Hawker Hurricane 1/12 scale scratch build
Philbucknall and 11 others reacted to hurribomber for a topic
Thank you all for looking in. Here the first "Fairey-fasteners" for the rear access panel.12 points -

…And Kill MiGs - Tamiya F-4B conversion (8 Jul: intakes)
jeroen_R90S and 11 others reacted to easixpedro for a topic
Quick shot of me hacking away on the stabilators to remove the leading edge. A straight edge and a razor and I was in business…left side has been done (captain obvious here)12 points -

Avro Lancaster B Mk.I Border Models
Supersonic and 11 others reacted to Martinnfb for a topic
Beauty, the linked pictures above didn't work. I took the liberty to repost the relevant links in more direct form. Cheers Martin https://www.minireplika.pl/index.php/59-aktualnosci/580-lancaster-z-szachownica-border-model-1-32-czesc-3-mr-123 https://www.minireplika.pl/index.php/59-aktualnosci/573-lancaster-z-szachownica-border-model-1-32-czesc-2-mr-12212 points -
Hello folks. I would like to present to you my 2-year long project "Cripes a' Mighty" P-51B-10NA Mustang, flown by Major George Preddy of the 352nd FG ("Blue-Nosers"). Scale is 1/18 - she is a big girl for sure. She is about 99% 3D printed using an Elegoo Saturn 2 printer. All components were designed in Rhino 7, using original NAA engineering drawings obtained from Aircorps Library. The build thread can be found here: Here she is: Before I present more pictures, let me offer some comments on the build. First, the reason I picked this subject (a P-51B) was mostly two-fold. One, I really wanted to do a Malcolm hooded, natural metal finished -B model. And two, the P-51 is just about completely defined by micro-filmed engineering drawings available from Aircorps Library. That, along with learning Rhino 7, and purchasing a good 3D printer, allowed me to produce a model with near perfect dimensional accuracy. That applies not only to the fuselage, wing, and tail, but also every detail I chose to include. No guesswork. No errors. As for the selection of "Cripes A' Mighty" - well that was mostly from a vote by many of those who were following the build, and my concurrence. This was my first effort at creating a model totally by 3D printing, and what a learning process it was. 3D print resin is amazing stuff, but it is fragile. I cannot count how many times I broke a part and either had to repair it or print a new one. But when done properly, what results is detail that often cannot be obtained from plastic, or scratch building. As a result Cripes is by far the most realistic model I have ever built. She is the most fragile model I have ever built as well. Also, this is my second effort with aluminum skinning using .005 inch thick aluminum sheet. Not easy to do, but this process results in very real-looking natural metal finish. I learned this technique from Peter Castle - we know him as Airscale. He has been doing it for years. This project was a mix of elation and pride - why we build models - and panic/anger/fear/frustration. Cripes was no easy build. And big mistakes were made (all were ultimately fixed). How about mislocating the flare gun hole one full bay and royally screwing up the left-hand cockpit sidewall. Or putting the three colored ID lights on the wrong wing. Or screwing up the main landing gear rake angle by a couple of degree. Or a huge one - tipping it over late in the build and breaking off the centerline gear doors and the left hand landing gear strut. OMG that was awful. There were painting disasters, disbond issues, fractured parts too numerous to count. But there were also moments of huge victory and accomplishment and pride. I think perhaps the most interesting and successful element of this build was the use of a 3D printed highly accurate fuselage assembly jig. Here is a picture of it: With some fuselage parts loaded onto it: I show this because this jig provided the foundation for the entire build - an accurate forward fuselage with cockpit, and accurate attach points for the wing, engine cowling, and aft fuselage. Had to have that before everything else. Another interesting element of this build was my decision to use 3D printed transparencies. As opposed to vacuform. Injection molded parts were of course not an option. Ultimately most (but not all) the canopy and windshield and aft window parts were provided by Shapeways at high prices, after I just flat failed on many of those parts. The concern of course was clarity. Most of the followers of the build were very skeptical of 3D printed clear resin to deliver. I will let you judge for yourselves. The area where I had to do some serious guesswork was the Malcolm hood and the cockpit modifications for same. Dozens of pictures both period and from restos helped immensely. During that time of the build, I learned a whole lot about the Malcolm hood modification, and how involved it actually was. Some of you may not be aware that the Malcolm hood was a field modification entirely. A -B or -C (or even an -A) model would go into the field hangar, and several days and hundreds of man-hours later, it emerged with a big fishbowl sliding hood replacing the greenhouse style canopy found on production aircraft. The mod was a big deal - major surgery for the cockpit. Pilots absolutely loved it, as seeing was everything (along with speed and fire power). Visibility with the Malcolm hood was superb. At any rate, the hood was driven by a crank handle and chain drive. I am not aware of any modeler other than myself attempting to model the various cockpit modifications for the hood. Look for that in the pictures. This model is heavy - about 2.5 pounds or so. So the landing gear struts needed help, especially the tail gear. This was the first time I re-inforced landing gear struts with metallic rod (brass or music wire steel). Here is a picture of the tail gear strut and an internal stiffening rod formed on a 3D printed forming block of my own design: The main gear struts were re-inforced similarly. The re-inforcements have worked. To my horror, after the main gear were installed onto the airplane, I discovered the rake angle was off by a noticeable couple of degrees. That after being so careful to design it right. I still don't know what happened. So I created a fixture where pressure could be applied over days to the gear struts via shims with ever-increasing thicknesses, to force the struts back to a correct rake angle: See the white shims? I show this because it was some of the most stressful days of the build - hoping to get some permanent deformation on very stout gear support parts without breaking something important. Believe it or not - it worked! Lastly some details to look for in the pictures: - Mismatched tires (you see alot of that in period pictures) - 3D printed chains nested in the upper longerons which drive the Malcolm hood - 3D printed clear transparencies - External rails and rollers for the Malcolm hood - Spitfire-style exteral rear view mirror - Malcolm hood that can actually be slid fore/aft - Movable tail surfaces - Head rest pad and seat back pad (thank Antonio Argudo for that!!) - The crazy shaped bomb racks Here we go: I guess that is enough. I would like to thank first of all the 40 or so followers of my build thread. All were very patient and supportive during the 2-year effort. And special thanks to Airscale for giving me the extensive decal set for his 1/18 P-51C Lopes Hope, hundreds of pictures, and a few helpful Rhino files. Oh, and the 1/18 scale seat belt hardware. Also Antonio Argudo for designing some really great models for me - the head rest, seat back cushion, and tail gear bay canvas cover. Also Thunnus who provided me with nose art decals and stencils, and stencils for other things like squadron buzz letters, tail serial numbers, national insignias, and kill markings. Also TAG and Antonio for priceless period pictures of anything and everything P-51B. And lastly Aircorp Library - OMG. Their collection of engineering drawings and other documents is absolutely priceless. I hope you like Cripes a' Mighty. She is not perfect, and she appears rode hard and put up wet. But it is the best I can muster! Thank you.11 points
-

SW Imperial Tie Fighter
patricksparks and 10 others reacted to ShelbyGT500 for a topic
Hi my friends this is my last finished project - Imperial Tie Fighter at 1:24 scale. It is a scratch-build from spare parts, pvc tubes, a lot of polistirol sheets and carbon foil. For main "fuselage" I've used a clear polistirol sphere for Christmas decorations and it is excellent to glue with our model cements - Tamiya, Gunze, Revell and etc. The interior is also scratch - from different spare parts from various kits - same technology like the real models from the first movies So here it is: Thank you as always for stopping by, I hope you will like it Cheers guys and have a nice day.11 points -
This build has been in progress since March, but stalled for a while. It's my first large scale build since returning to the hobby and I went all in on the aftermarket. Cockpit is Quinta Studios, with a few pieces of Eduard PE, and HGW belts. Added Eduard PE flaps. I've read that RAF pilots were trained to retract flaps as soon as they left the runway so you wouldn't normally see them extended on the ground. We'll just pretend they're getting maintenance or something like that. The build was smooth overall except for the wing to fuselage fit. I think this was my fault, but not sure what I screwed up. The fillets were just a bit too narrow to seat in place on the fuselage and I had to do a good bit of sanding and scraping on the right side to make them fit. After priming I realized that the right fillet had collapsed a bit - I guess I took too much material in working on the fit. I didn't take pics of the damage, but the fillet was sitting a good 2-3 mm lower than the side of the fuselage. I used green stuff putty to fill in most the sunken area and Tamiya putty to fill in the top layer. It took about 4 rounds of sanding and priming to get the edges even and the shape reasonably correct. Finally yesterday and today I have been painting. All MRP paints - I marbled the top camo with RAF light earth and light green, then finished with dark earth & dark green. The camo was done freehand with the airbrush. I'm not unhappy with the result, but if I had it to do over I think I'd mask it. The bottom was marbled with white, and then the white side got some additional marbling with earth yellow before a top coat of white, and the black side got additional marbling with haze grey before a top coat of "black night". Going to put a gloss coat on tomorrow so the paint has some protection, then this weekend I will be trying out those 1ManArmy stencils.11 points
-
I got the main stencils done. There are a few dozen fastener markings that still need to be added, and taking these pics I noticed overspray on the wing roots, so that needs some touch up...11 points
-
Repaint done, this time using Mr. Hobby's old reliable H417. Now I can sleep at night. Kev11 points
-
Just been away for a few days in the Channel Islands, and apart from some nice walking and visiting relatives, I found that modern-day rarity, a real life model/hobby shop. And in that shop I found one thing I did not expect to find: one of the Revell glider series at under a tenner! Yes, really. And it's an LSP that is small enough to fit in my small hold bag, so it just had to be bought, it would have been rude not to.11 points
-

El Corsair Grande, Numero Quatro
Memphis and 10 others reacted to David Hansen for a topic
Well, latest progress report.... The model has a full coat of ANA 623 on it, though there seems to be a discontinuity between the paint on the right wing and the center section. I'm not really sure what happened. I'm positive i got the mixing ratios correct and the pipettes were pretty clean. I *might* be overthinking things. Gonna repaint some of the control surfaces, to see if they begin to agree with the rest of the model. Also i think once the 1 inch walkway lines, non skid walkways and red filler caps go on it will distract the eye and make it less noticeable. By the way, the model does have a coat of super clear on it now (the topsides, anyways), so it's definitely easier to handle now. -d-11 points -
Just think...when Kotare comes out with their 1/32 Hellcat, there will be no RLM 83 controversy. Cheers Collin......bolting for the door.11 points
-
…And Kill MiGs - Tamiya F-4B conversion (8 Jul: intakes)
jeroen_R90S and 10 others reacted to easixpedro for a topic
Might have solved the intake problem fairly easily. I usually just automatically jump to aftermarket replacements (this is my 4th LSP Phantom at this point)…no sense torturing oneself if it isn’t required - so if your like me, you’ve forgotten just how bad the intakes are. Yikes Old trick I’ve used forever is to use the thinnest sheet of styrene you can and just cover the unsightly mess. Sometimes I even use plain white paper soaked in glue. 90% of the time it gives good results. Here ‘s one of the intakes clamped down and drying After a couple days of intermittent finagling, they look passable. The splitter fits well and will be added later on. Close enough for gub’ment work! Up next, working on the stabs. As I start those, I’m planning on a VF-142 jet circa August 1967. What are the odds they had the slotted stabilizers? All photos I have are not good enough to break it out. For more on that topic, once again Tommy to the rescue: https://tailspintopics.blogspot.com/2011/09/f-4-flapstabilizer-change.html -Peter11 points -
32nd Scale Hasegawa North American F-86F - SAAF Korean War
scvrobeson and 10 others reacted to Mistral for a topic
Now for the orange, blue and white tail flash. Masked off with Tamiya tape : White base coat on : Orange and blue on. In the image below I have also stated to mask the SAAF roundels : First white base airbrushed on, then inner white section masked and dark blue ring airbrushed on - SAAF Sabres had 30" diameter wing roundels and 36" fuselage roundels : The orange Springbok on the white section of the roundels still to be masked and airbrushed on :11 points -
I had seen on the Book of Face that a new model shop had opened in Rugby - 10 miles away from Châteaux Shoggz - so at the weekend I took a trip over. I ended up spending over an hour in there - basically just chewing the fat with the owner - Timothy! (I did eventually buy some AK Marker pens and a new hobby-knife!) It was such a joy to peruse an actual bricks and mortar outlet - much as I've embraced the online world of model-making. So, anyone in the Rugby area (probably just me!) give it a visit.10 points
-

Avro Lancaster B Mk.I Border Models
Isar 30/07 and 9 others reacted to Artur for a topic
Witam wszystkich. Przedstawiam model kolegi Avro Lancaster B Mk.I ex WnW a obecnie Border Models. Mimo źle narysowanej instrukcji, model został wyposażony we wszystkie dodatki według bardzo obszernej dokumentacji. Poszczególne etapy sklejania modelu można prześledzić w czasopiśmie modelarskim miniReplika, numery 121-123, które można nabyć pod adresem: https://www.minireplika.pl [img]https://www.minireplika.pl/images/01_Galeria/Lotnictwo/Lancaster/P1010055.jpg[/img]10 points -
32nd Revel P-51D - Dominican (Republic) Air Force
jeroen_R90S and 9 others reacted to Mistral for a topic
looking like a Mustang. A bit of a fit issue at the wing roots. Primed with Mr. Colour black surface primer Base coat of Tamiya LP-70 gloss aluminium. Various panels were then masked off and treated to a darker shade of the gloss aluminium by adding small quantities of gloss black. The masking for the shark mouth and rudder markings has also been applied :10 points -
1/32 Hasegawa Grumman Hellcat F6F-3
Stew Dapple and 9 others reacted to Tolga ULGUR for a topic
And the decals I used Techmond's decals. Once again, I was not satisfied. They are extremely brittle and crack easily. Also, they tend to wrinkle a lot during placement on the surface. I applied the liquid decal film to all decals before applying.10 points -
Almost done with this one, couple of shots as finishing is in the final stages.9 points
-

8 Ball
Fanes and 8 others reacted to blackbetty for a topic
working on the waistgun and chute9 points -
Humor?
thierry laurent and 8 others reacted to Martinnfb for a topic
While I was digging in our garden I found a chest full of gold coins. I wanted to run straight home to tell my wife about it. Then, I remembered why I was digging in our garden.9 points -

1/32 Republic F-84F Thunderstreak
TankBuster and 8 others reacted to Jim Barry for a topic
Still playing around with foiling practice getting my game on. I like it and it’s very easy but there’s a ripple that the soft balsa is causing so I probably need a heavy primer base first here.9 points -
F-8C Crusader - HOT ROD FLAMES!!!
scvrobeson and 8 others reacted to mconnelley for a topic
Hello: Since I had used the hot rod flames decal, and it broke into a million pieces, I couldn't make a photocopy of it. But I did find a review of the decal sheet that included a picture, so I scaled that picture and printed it to make a template. To make the outer hard edge between the flames and the gray, I placed a thin piece of clear plastic (ziplock bag) over the template, put the Tamiya tape on the plastic, and traced over the pattern. To make the interior edge between the yellow and red, I made two other templates. I glued the paper print to some card to make it a bit stiffer. The little 'tadpoles' on the left are for the licks of flame that are aft of the main flame, to help cover the yellow as I paint the red edge. Here we are, most of the way done. Things are going really well so far. You can see the shadow of the 'tadpoles' to the left on the 3 licks of flame. The last step is to paint the lick of flame that's right below the intake warning. To help place this, and to avoid a future conflict with the intake warning, I traced over the intake warning decal and made a tape template, so that I could see the space that the decal will occupy. I then placed the outline of the flame just below the intake warning, then removed the intake warning tape template. This is what it looked like once the red edge was done, and I had removed most of the tape protecting the yellow: Mike9 points -

1:32nd scale Caudron G.3 (Anzani engine)
scvrobeson and 8 others reacted to sandbagger for a topic
Hi all, I've spent four days pre-rigging and creating rigging holes for the Caudron. Here's a few shots, but most are rigging locating holes in the wings and tail unit. Combination of 0.4 and 0.5 mm diameter tube and 0.08 and 0.12 mm diameter mono-filament. Turnbuckles are a mix of Gaspatch 1:48th scale metal and Proper plane 1:32nd scale resin. After assembly I'll final rig the rest of the wires and cables, Mike9 points -
Much to my own dismay, I ended up sawing the canopy off again, as it was sitting crookedly at the front. It turns out that the canopy fit issues weren't entirely my fault, as a flush fit at the rear creates a slightly skewed fit at the front. I did my best to average it out, so now it doesn't fit anywhere properly. You can see the evidence for that around the windscreen, revealed so bluntly by the primer, so I've still got some remedial work to do yet. This build (much like most of mine these days) has officially entered the "just get it done" phase. Kev9 points
-

1/24 Spitfire Mk IXc, Kicked Up A Notch, July 6/25. On hold for now.
scvrobeson and 8 others reacted to chuck540z3 for a topic
Since it's been a couple of months since my last post, I thought I'd give an "update" of sorts if anybody cares, to confirm that this build is still alive, but with warm weather finally here, my modeling has ground to a halt like it always does during our short Canadian summers. When I model I want to be totally focused on the task at hand, which probably won't happen until at least October when indoor activities are more attractive than chilly outdoor ones. 🥶 In the meantime, thanks for your continued interest as I plod along. Cheers, Chuck9 points


.thumb.jpg.745e9c32fdfafef712dcea77f75e8a27.jpg)


