

mconnelley
-
Posts
27 -
Joined
-
Last visited
Recent Profile Visitors
615 profile views


-
 airscale reacted to a post in a topic:
1/18 Supermarine S6B - S1595
airscale reacted to a post in a topic:
1/18 Supermarine S6B - S1595
-
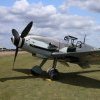
Hello: I second the Hawker Sea Fury. Wikipedia says 864 of them were made. Mike
-
Marcin_Matejko reacted to a post in a topic:
Brown B-2 „Miss Los Angeles” 1/32
-
PieterGSXR reacted to a post in a topic:
Crusader time..!
-
Hello: How did you do the white border around the windscreen panels? Mike
-
Hello: How did you make the propeller? Is it covered in foil, machined from a piece of aluminum and then polished, or something else? Mike
-
Archimedes reacted to a post in a topic:
GEEBEE!
-
blackbetty reacted to a post in a topic:
GEEBEE!
-
patricksparks reacted to a post in a topic:
GEEBEE!
-
Hello: Spraying black on the inside is a good tip. I sort of did sprayed the inside black, but it was more to hide the fact that most of the interior is missing than to add opacity. One problem on this kit is that the thickness of the plastic is quite variable, and is very thin near the wing roots. In those areas, the black shows through a lot more than in other parts of the model. I applied the most primer to those areas to hide the black that was showing through the thin translucent plastic. Mike
-
Hello: Here is the Geebee in primer, and the first coat of white paint. The primer is a bit translucent, and the white plastic is translucent as well, so I put a few layers of primer on the help build some opacity, especially since the white paint isn't going to help much. The stick coming out of the nose is a piece of sprue that I glued into the hole (for the engine) to help handling of the model during painting. After the first coat of white paint. The paint finish looks a little pebbly, and didn't spray that nicely...it always felt like the airbrush was nearly clogged. I thinned the Vallejo paint with Future, but maybe that's a bad idea. I might give the paint a fine sanding to smooth out the bumps and paint again. I'll try thinning with something else (Googling suggests just plain water as a good idea...definitely not alcohol), and I'll give it another coat of white. Sorry that there isn't much dramatic to see...just white paint over white plastic. Mike
-
And before too long, you have something that looks like an airplane. The main tricky part here was setting the dihedral, since the wing attachment was (you guessed it) a bit vague. I found a drawing that showed 4 degrees of dihedral, so I made a template out of a cardboard box to set the dihedral as the glue set. At this point, the canopy is just set in place. It's quick thick, which is good as it's also somewhat frosty and needs a good sanding/polishing inside and out. That I did, and a dunk in Future floor polish as well. Here it is now, with the canopy attached, masked, and ready for primer. In the photos below, the engine is just press-fitted into place. To mask the canopy, I cut 1 mm wide tape strips and laid them into the canopy where the frames will be. Then I put Tamiya tape over that, and traced out the outlines of the frames. I removed all of the tape, cut along the traced lines, and put the canopy masks back on.
- 21 replies
-
- 28
-
-
Next I worked on the cockpit. I haven't found any period photos of the interior, and the instructions are a bit vague on colors and such, so here's my interpretation. The cockpit parts fit together quite well, but the location of the cockpit in the fuselage leaves a lot of guesswork. Since I had cut open the side door, I tried to align the bulkheads to be on either side of the door. Also visible are some of the tabs that I glued to the fuselage near the seam to aid in the alignment of the fuselage halves.
- 21 replies
-
- 13
-
-
Hello: In between an F-4 and an F-8, I thought I'd do something light and fun: a Geebee! It kind of has to be out-of-the-box since I don't think there is any aftermarket stuff for the old William's Bros. kit. So far, it's been pretty good. A lot of flash but the fit is quite good. The engine is very nice out of the box, which is good as that's front and center on the Geebee. I cut off the kit connector rods from the gear box due to some bad mold misalignment, and I made new ones from some Evergreen styrene rod. The plug wires are some craft bead copper wire. Mike
- 21 replies
-
- 14
-
-
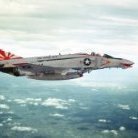
Hello: Here's my recently completed F-4J that was rescued from the shelf-of-doom. Enjoy.
- 10 replies
-
- 23
-
-
F-4J from the SHELF OF DOOM! (thank your local ordnanceman)
mconnelley replied to mconnelley's topic in Works in Progress
Hello: I'm declaring victory on this one before it has a chance to notice that it's done. Here is one picture...more soon over on Ready for Inspection. Mike -
F-4J from the SHELF OF DOOM! (thank your local ordnanceman)
mconnelley replied to mconnelley's topic in Works in Progress
....nearly there...- 16 replies
-
- 11
-
-
F-4J from the SHELF OF DOOM! (thank your local ordnanceman)
mconnelley replied to mconnelley's topic in Works in Progress
Hello: Here are the Mk.82s assembled and painted. Photos showed that the fins were often a slightly different color than the bomb itself, so the while the bomb is olive drab I painted the fins IJA gray since it's close but a bit lighter and I had it on hand. Here are the Sidewinders on the pylons, and the TERs painted and weathered a bit. While test fitting the bombs to the TERs, I found that there wasn't much to really define the location of each bomb. So, I put in pins at the location of the mounting lugs. I drilled in a small hole and glued in a short length of wire. These pins match holes in the TERs, so the bombs were almost a press-fit. With the pins, the bombs went on very easily and well aligned. Mike -
F-4J from the SHELF OF DOOM! (thank your local ordnanceman)
mconnelley replied to mconnelley's topic in Works in Progress
Hello: Since this my dad is an ordnanceman, I've added six Mk.82 snake eyes on the inboard pylons. The Mk.82s are resin and come in two main pieces: the bomb body and the fins. Having cut them free from the pour stubs and filed the mating surfaces more-or-less flat, there was nevertheless a slight gap in the mating area. The filing left the two mating surfaces slightly convex as it's really hard to file something truly flat. So, I drilled out a shallow spot face onto the end of the bomb body, and now they fit together better. On the left are the two 3D printed TERs. Mike -
F-4J from the SHELF OF DOOM! (thank your local ordnanceman)
mconnelley replied to mconnelley's topic in Works in Progress
Hello: I'm declaring victory on the canopies before they have a chance to notice. The first part that was done is the middle section between the cockpits. The canopy mask set, despite being (allegedly) designed for the Tamiya kit, was rather undersized. Nevertheless, it helped to get things done much faster than otherwise. Here's what it looks like dry fit to the model. The green decals on the canopy sills were too narrow to fill the space between the bottom of the sill and the clear area. I attempted to match the decal color and paint in the gap. I'm reasonably happy with how the canopies came out. It's hard to see where the blemishes are where the spurs attached to the clear parts. So the thing I was dreading for years is done, and the project can move on. Next stop: ordnance. Mike -
F-4J from the SHELF OF DOOM! (thank your local ordnanceman)
mconnelley replied to mconnelley's topic in Works in Progress
Hello: Canopies: the part of this build that I've been procrastinating on for many years. For some reason Tamiya decided to curse us with canopies where 1) the sprue attachment point is on the clear part and 2) where the canopy frames are separate. The canopy frames being separate gives them more freedom to design the frames, but the joint between the clear part and the frame is an internal air-plastic interface that can reflect light. In the picture below, I've test fit the clear parts on the frames At the aft end of the clear parts, you can see a bright reflection from light that is inside of the clear plastic reflecting off of the back of the clear part. I have painted the insides of the frames back, so that light is reflecting from the back edge of the clear part. Here's another example from the front windscreen, where the clear part meets the fuselage. My solution is to paint the edges of the clear parts with black primer. That suppresses the internal reflection, and eliminates that bright edge: Mike