

Anthony in NZ
-
Posts
4,866 -
Joined
-
Last visited
-
Days Won
29
Content Type
Profiles
Forums
Events
Posts posted by Anthony in NZ
-
-
Thanks guys, really appreciate it!
Well I have actually been steady with progress, but with such things I didnt really have much to show until today
A package arrived in the mail from Kerry!
Somewhere in here is an FG.1 leg test print!
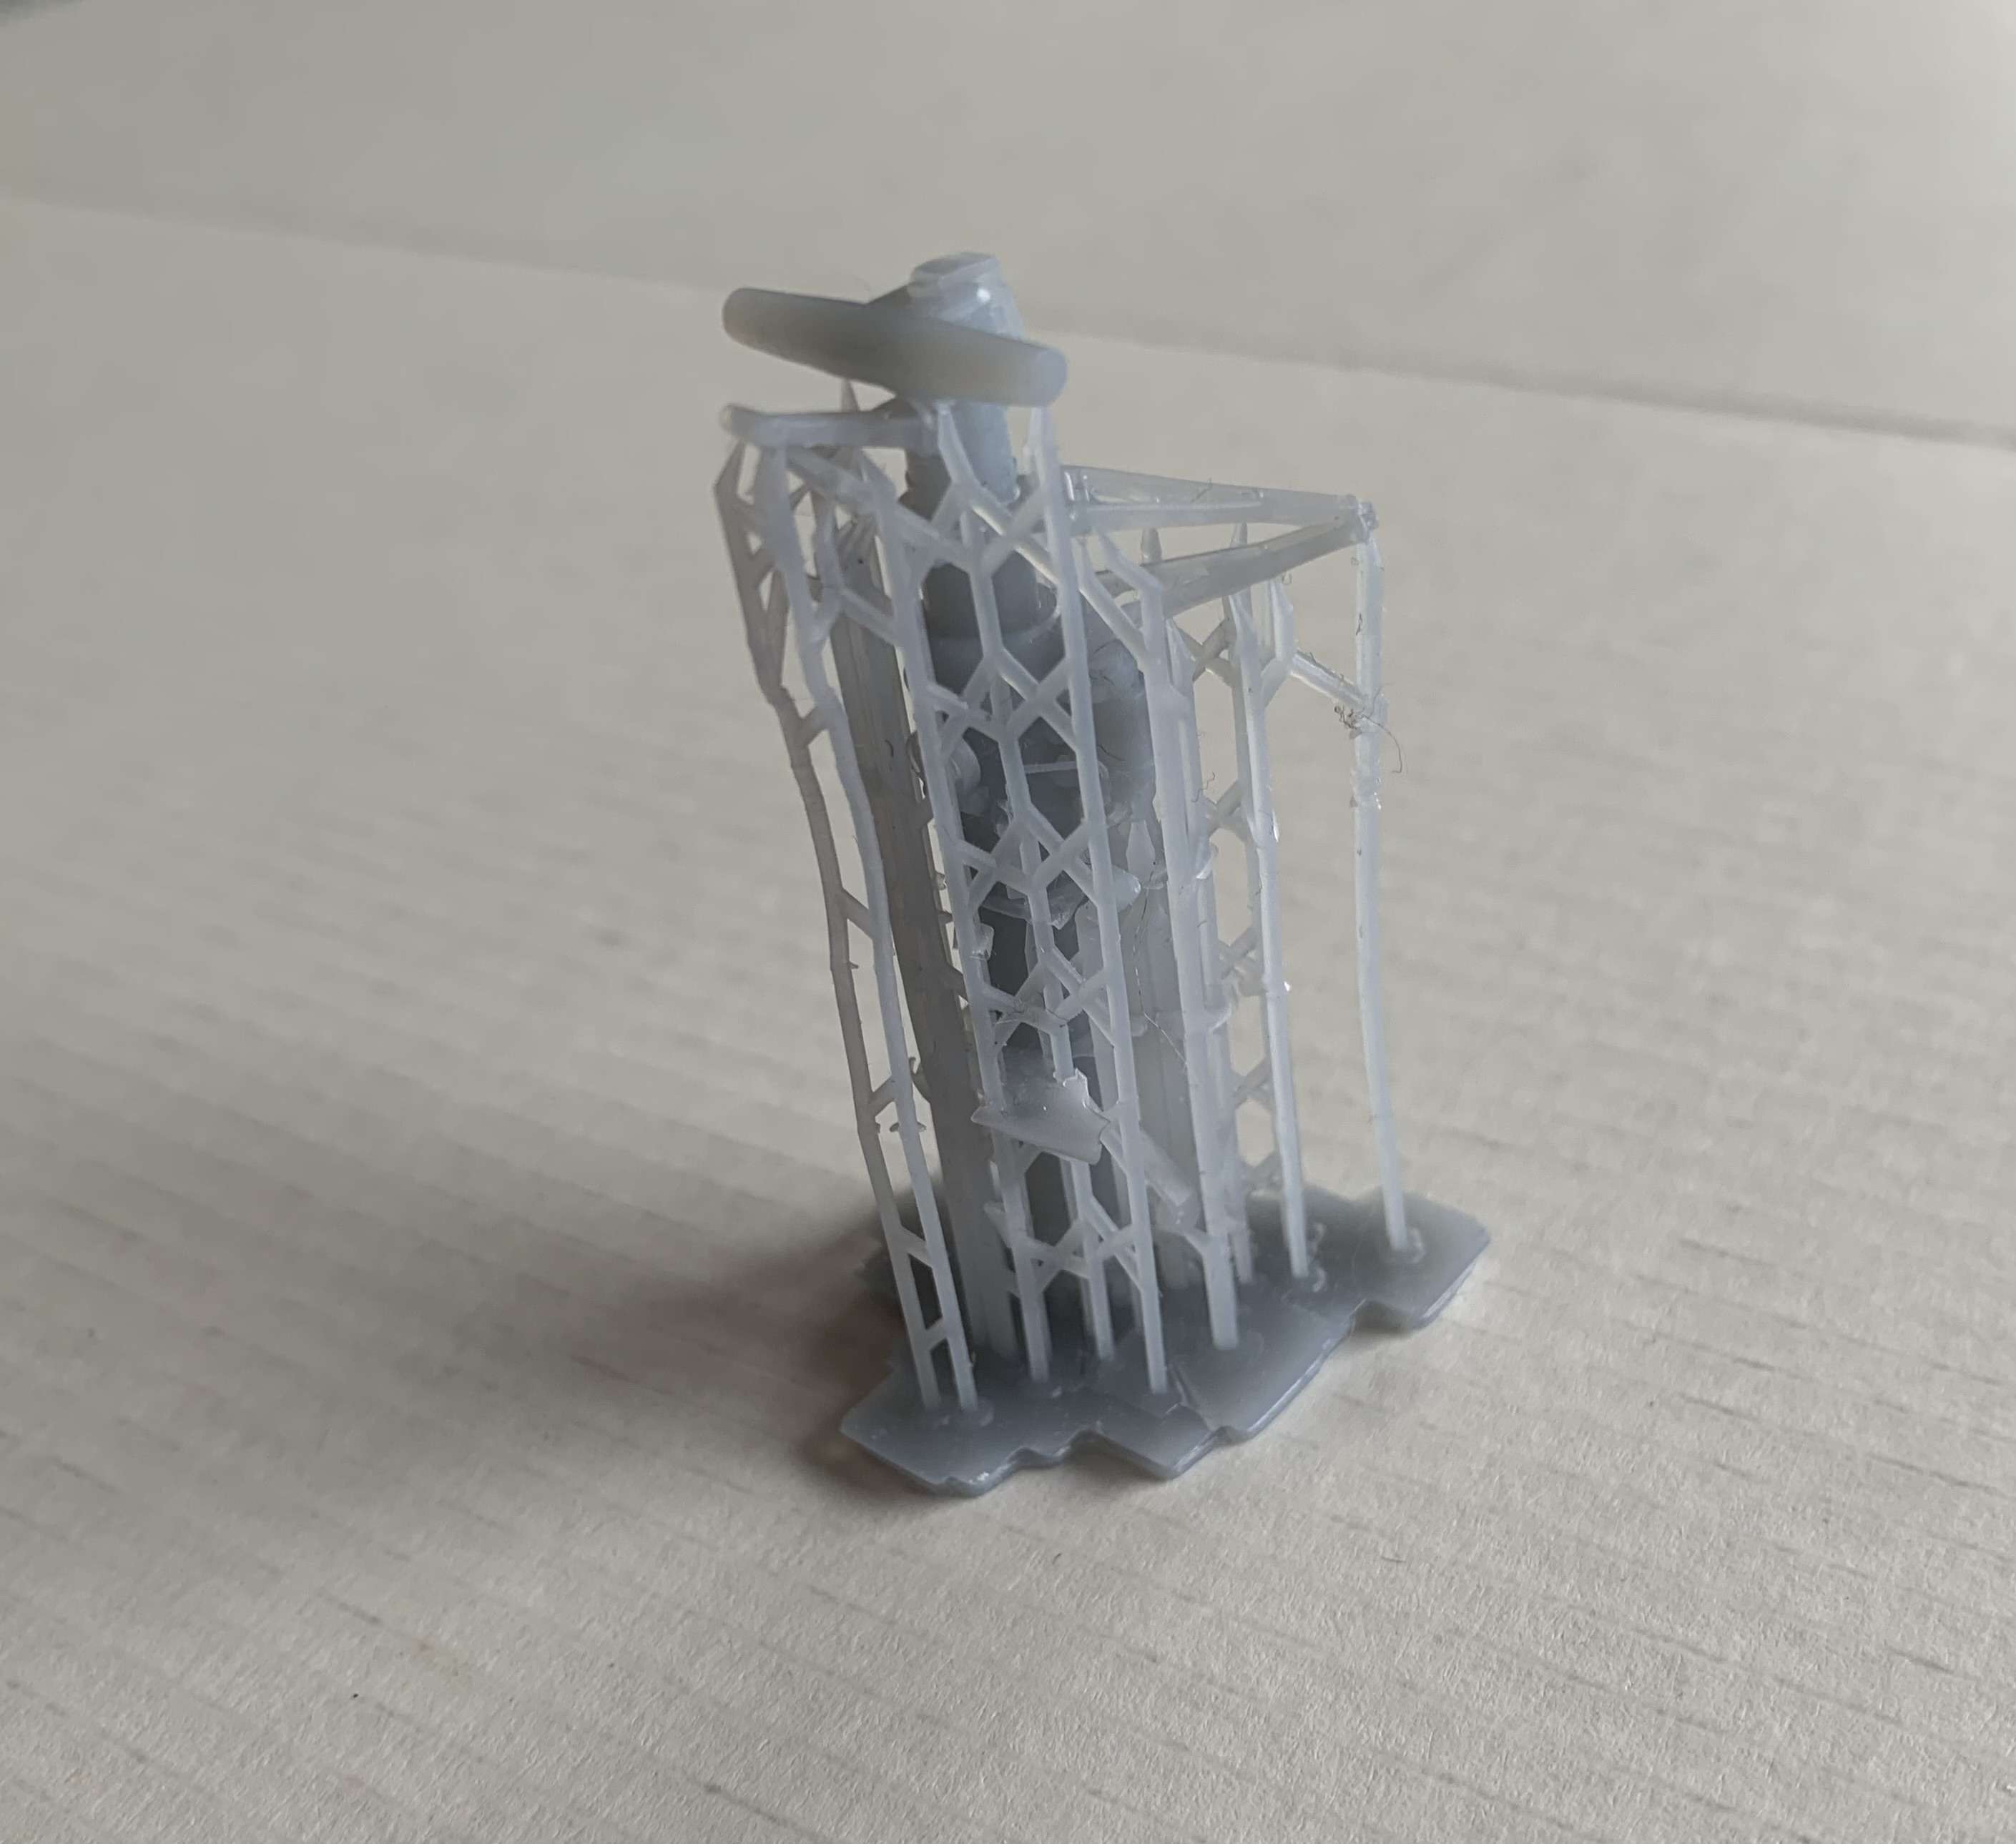
I know that because I have seen this....
So I set about trimming and found this inside
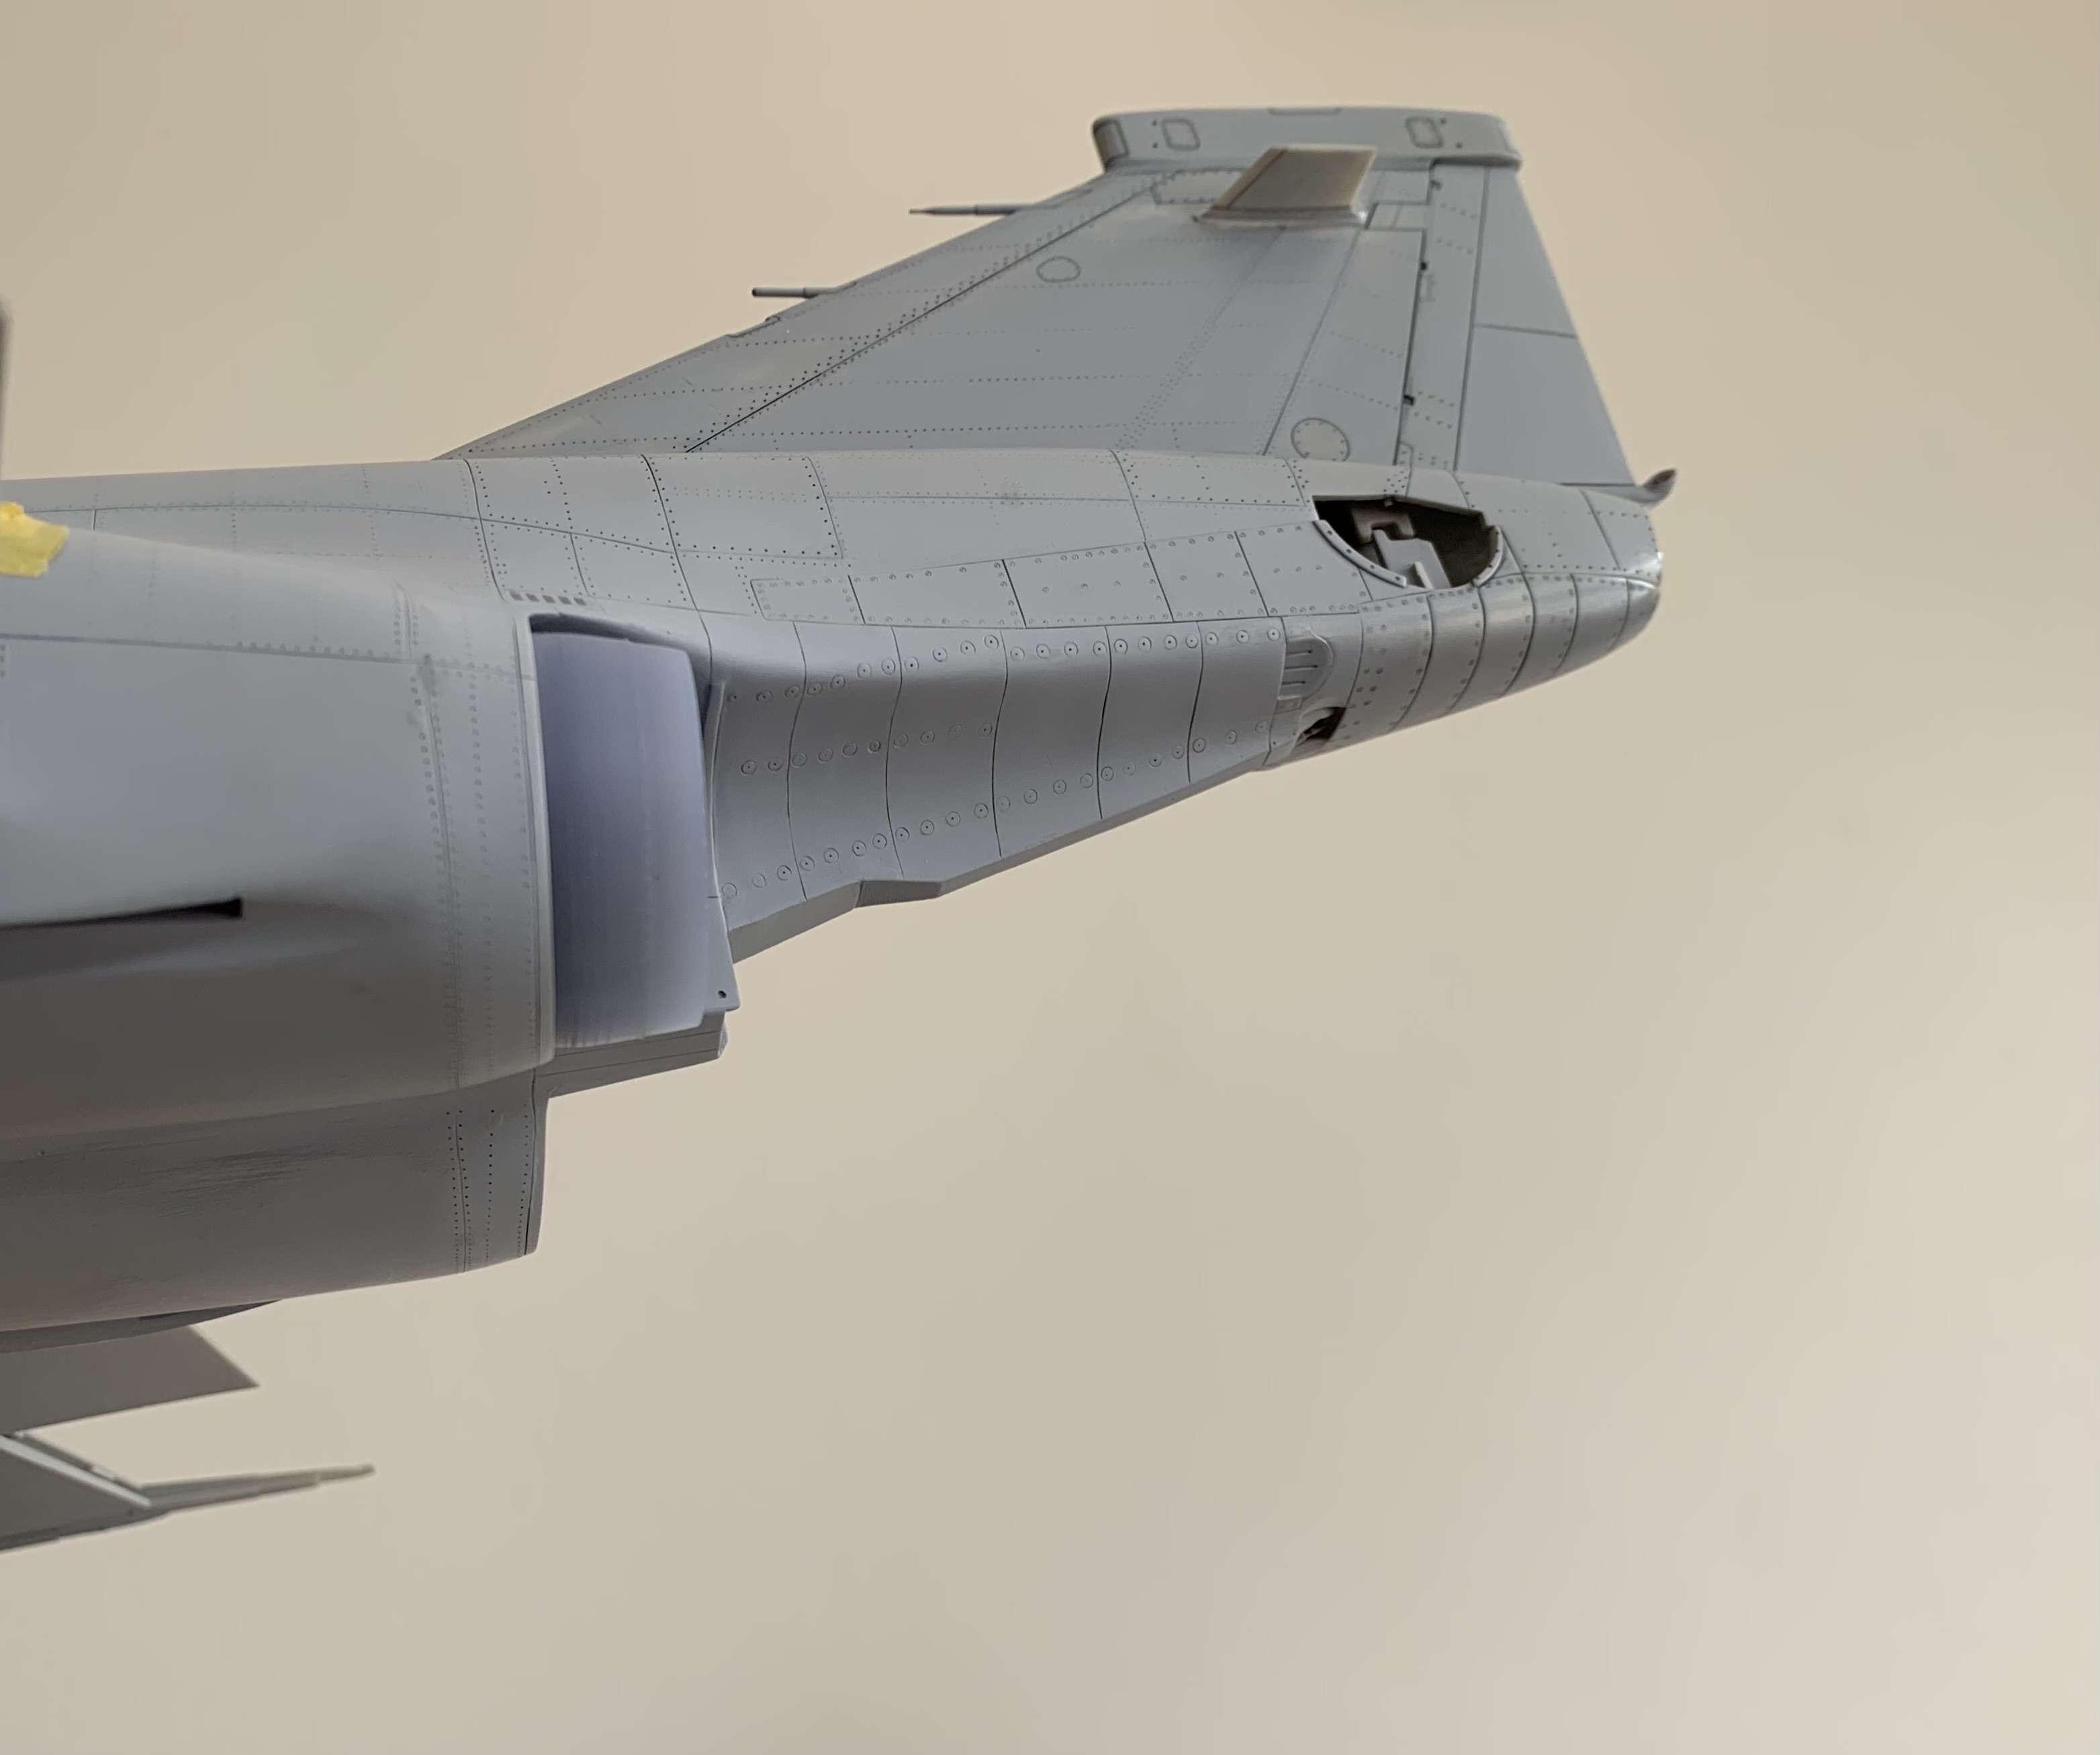
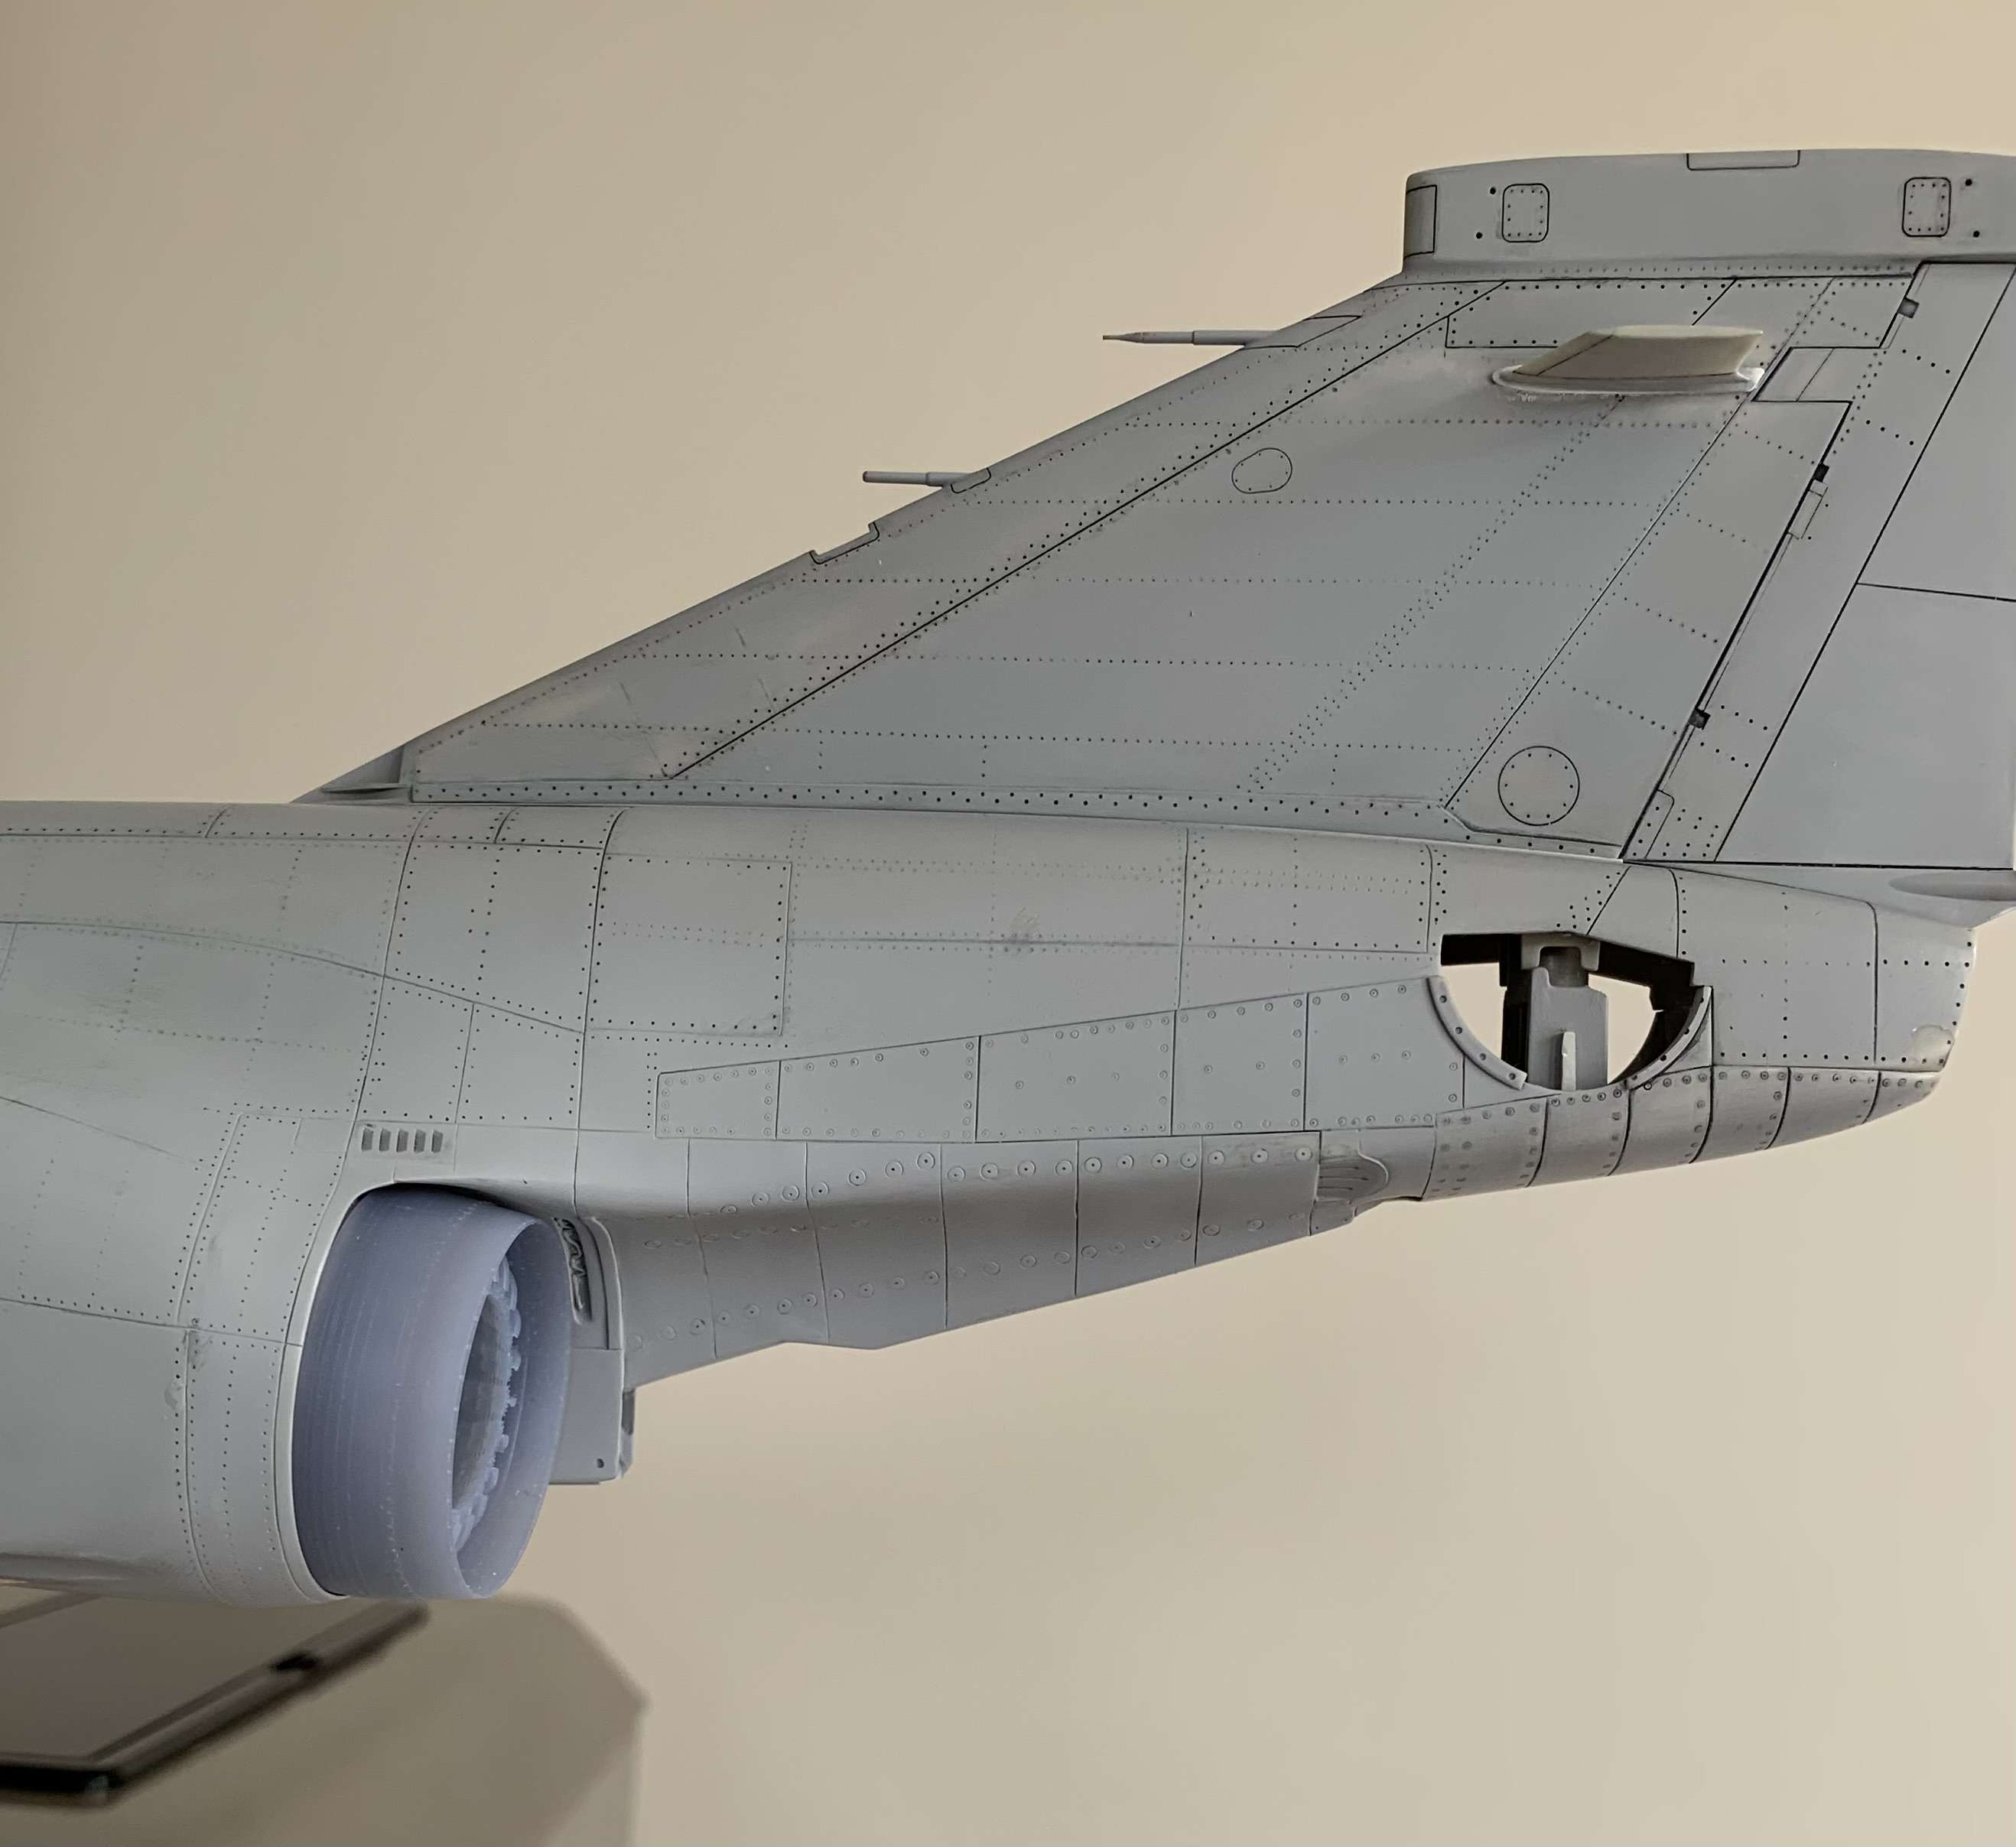
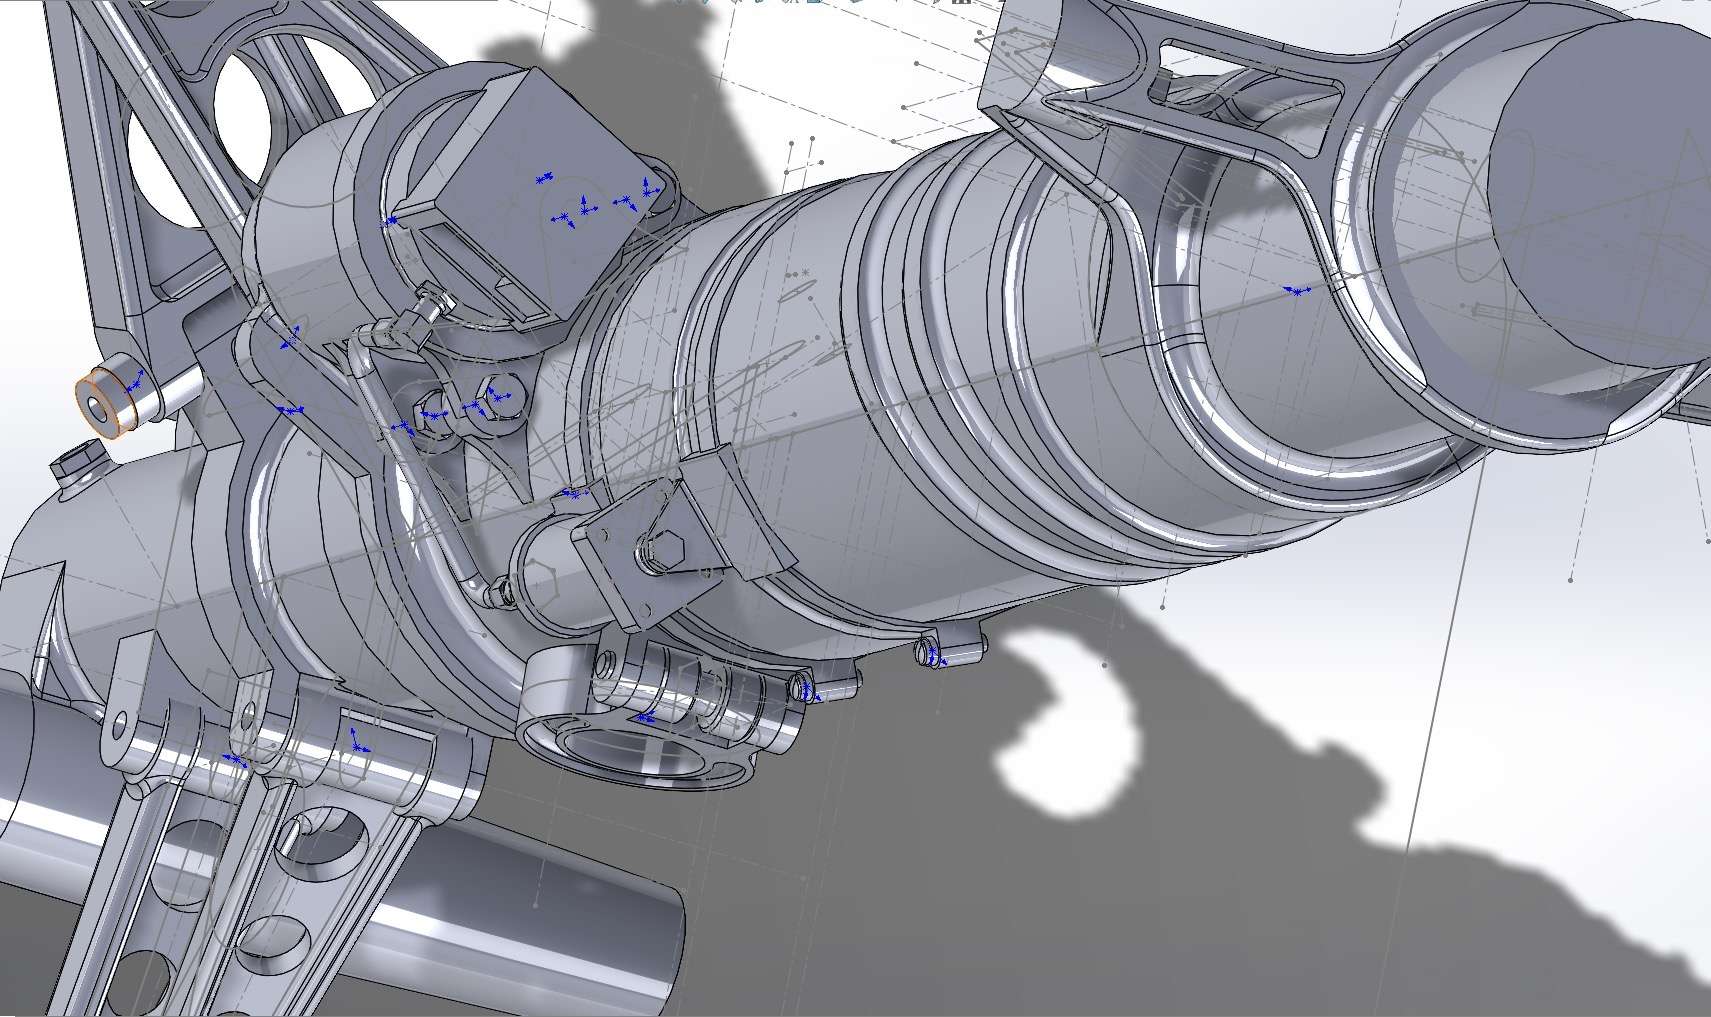
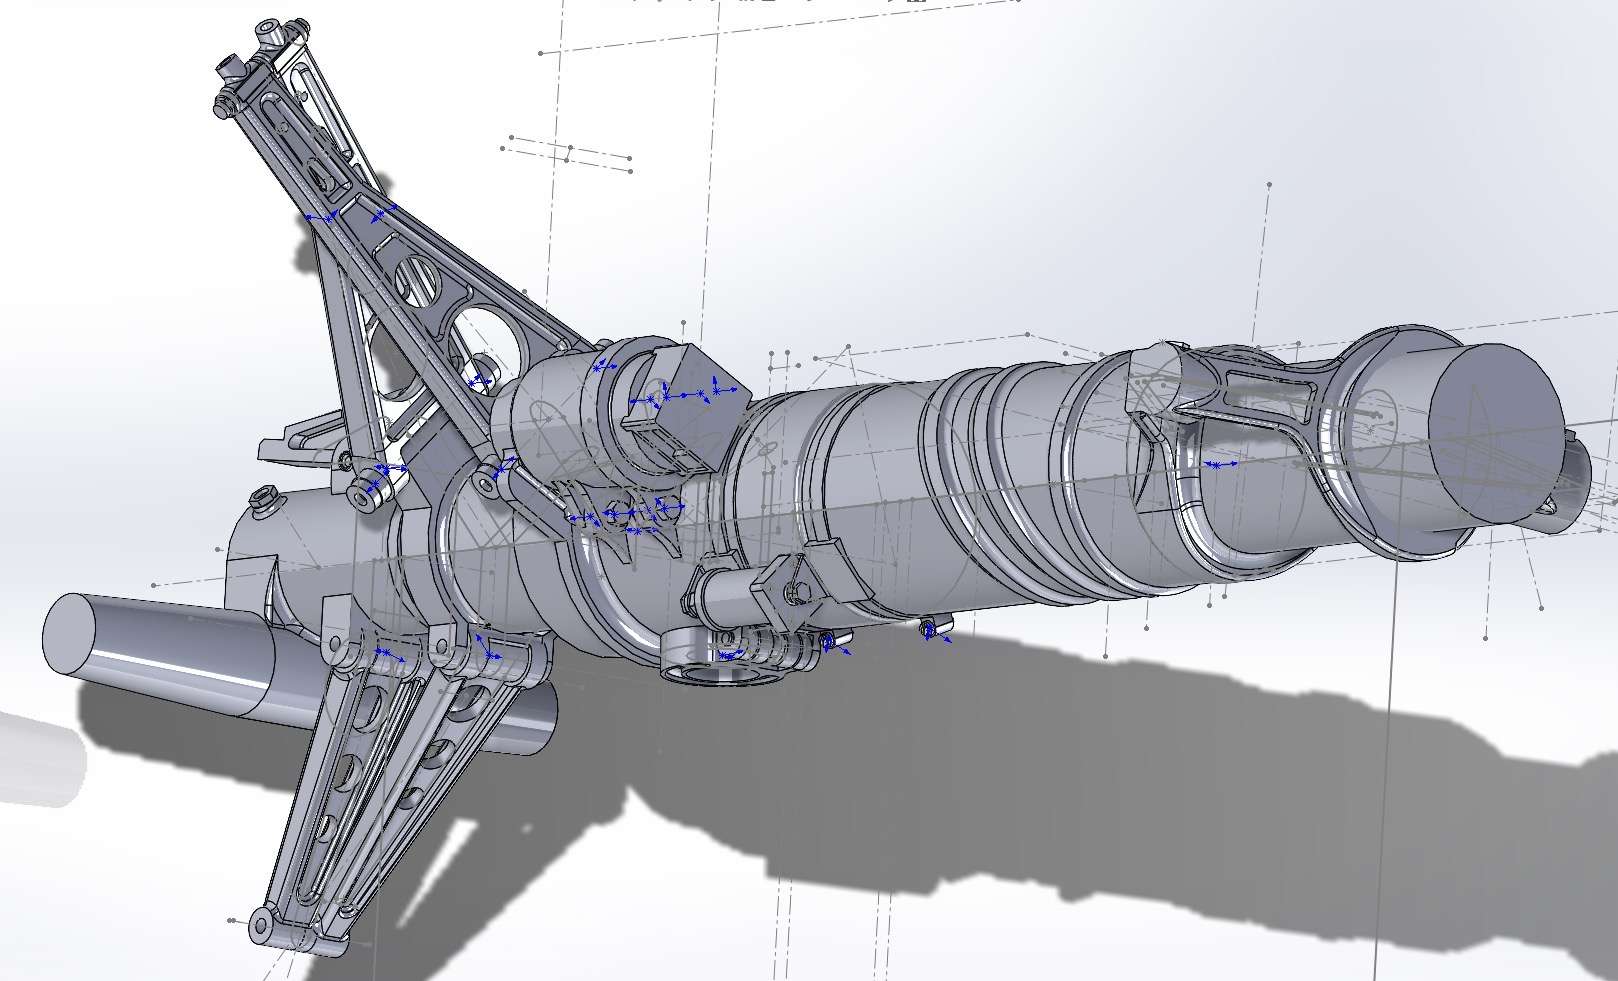
Now for those who cant remember, the reason for the completely new leg is because it is very different to a std Phantom NLG. Aside from the double extension with extra scissor link, the actual oleo itself is of a bigger dia and rakes rearward
He nailed it.... a perfect fit!
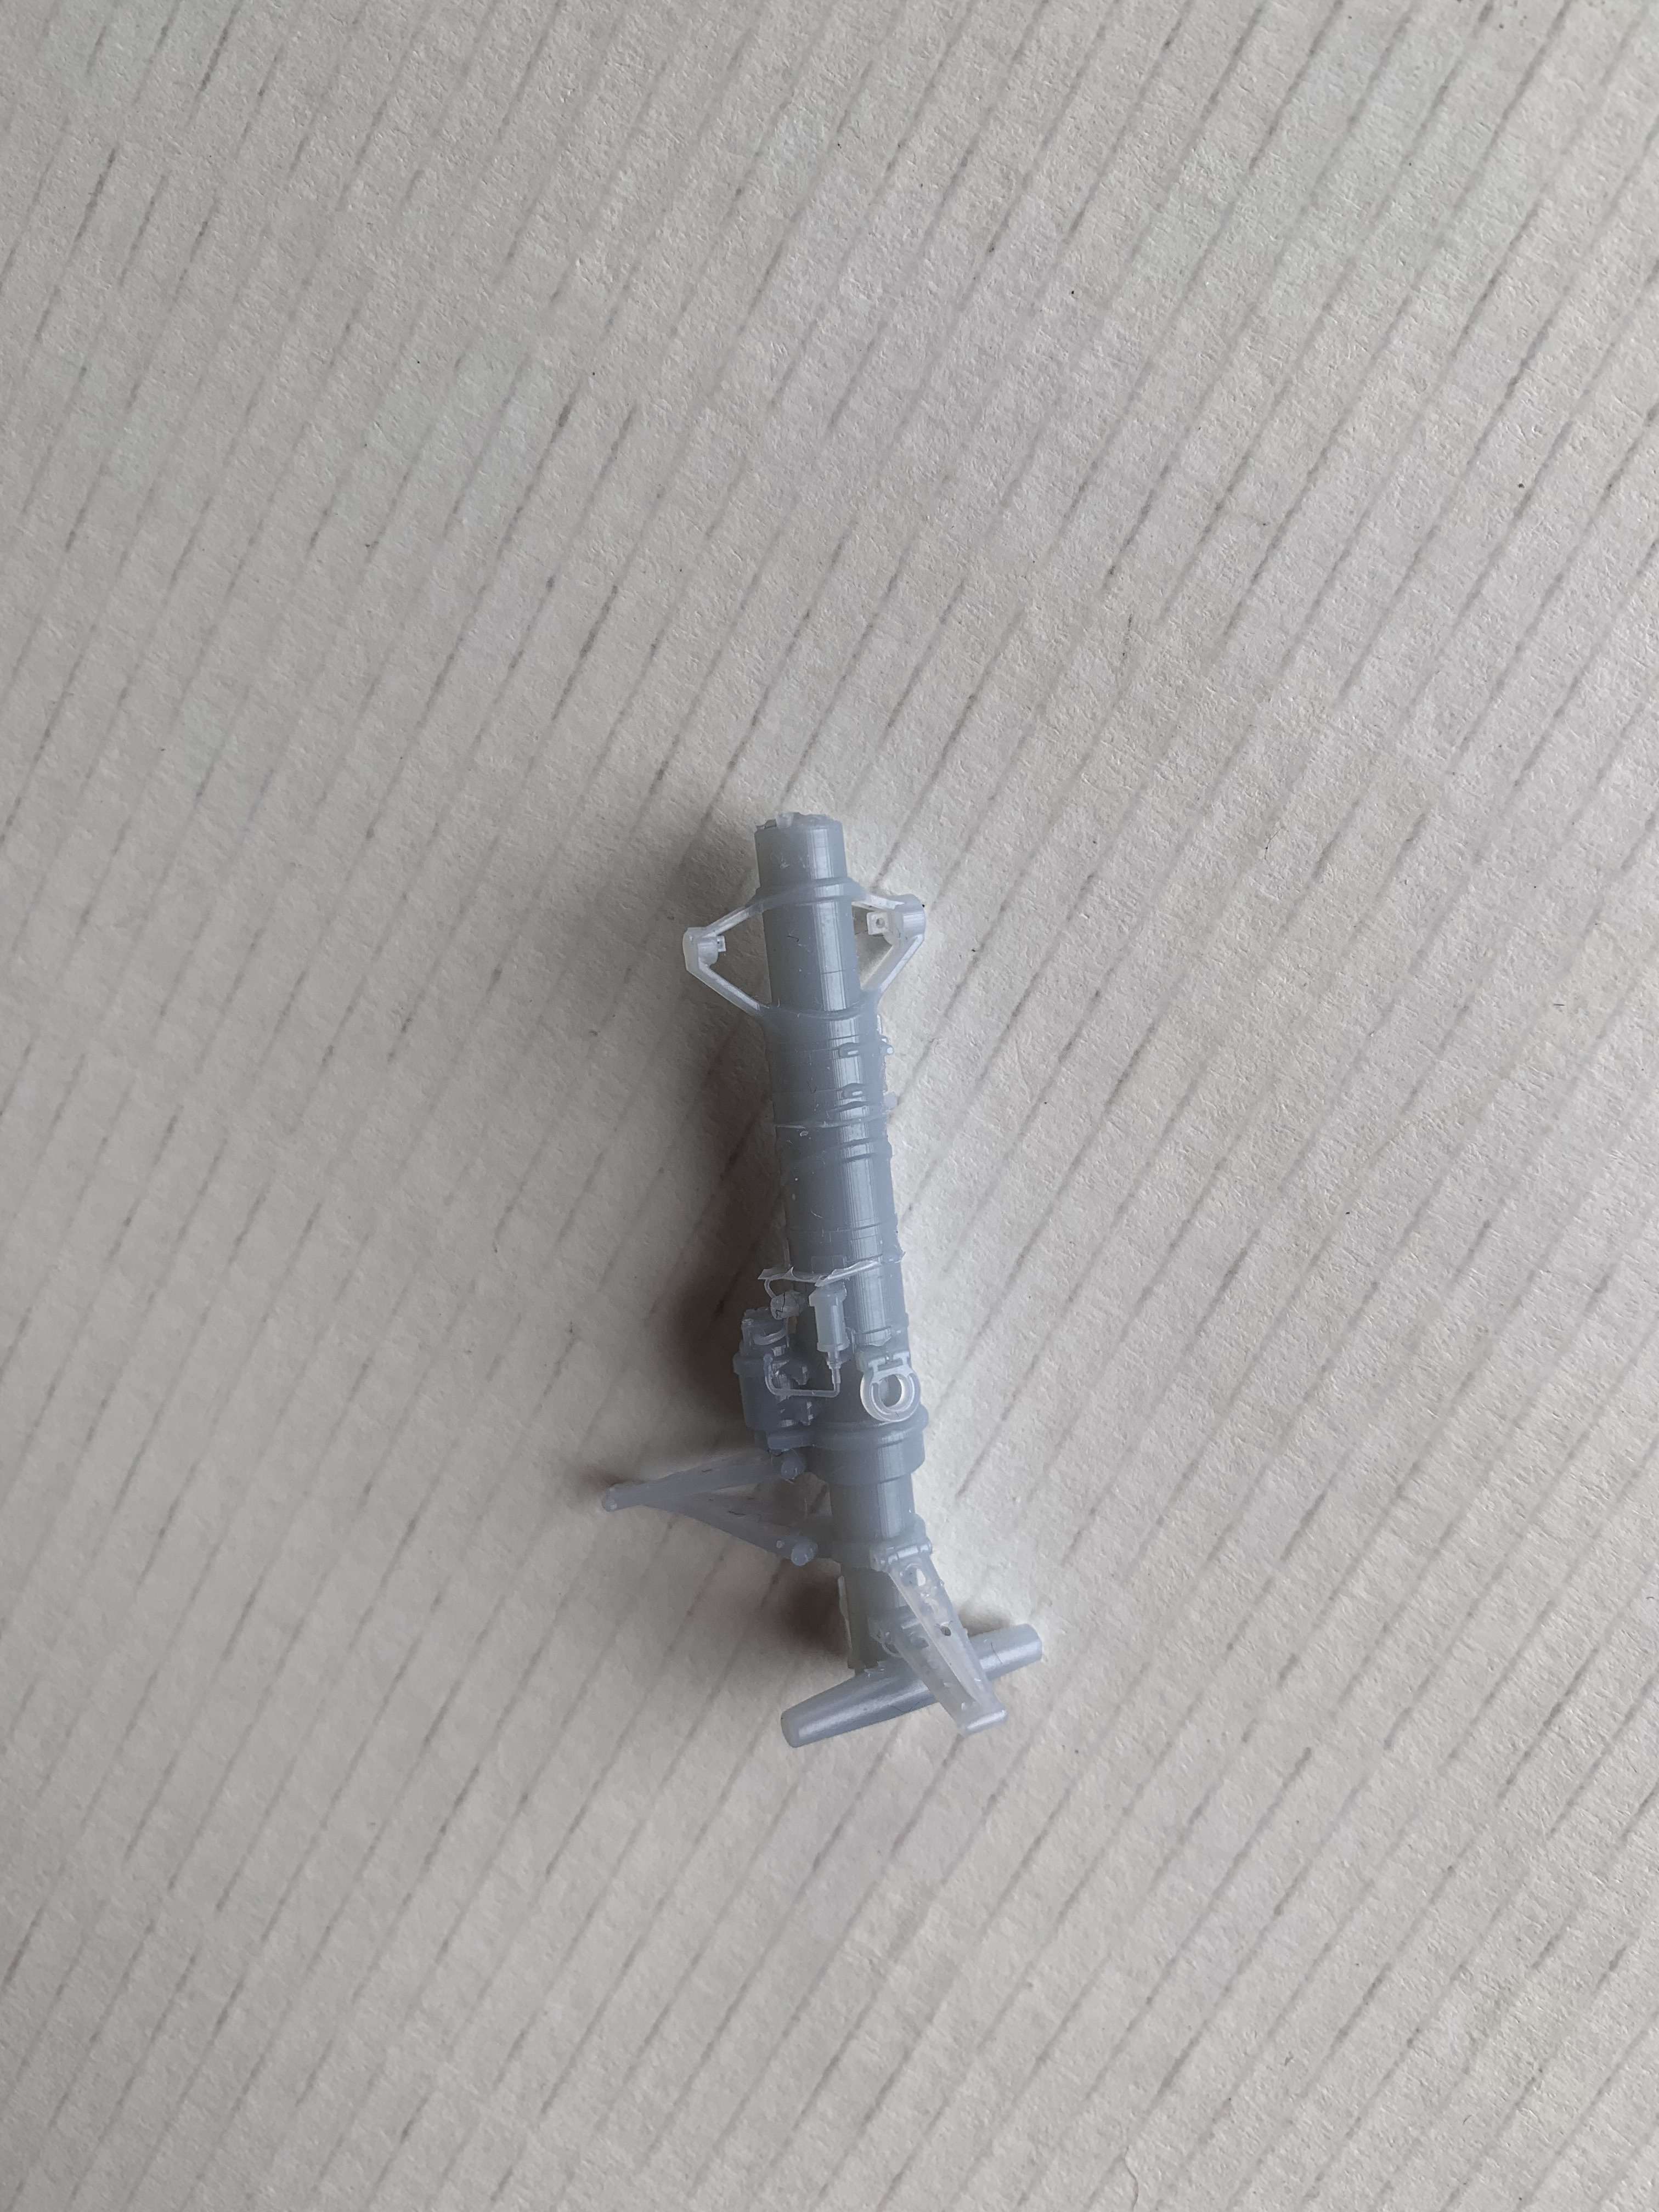
An overall shot showing the rearward rake, only done by eye, not actually glued in properly of course. I have started testing all the dimensions and so far so good!
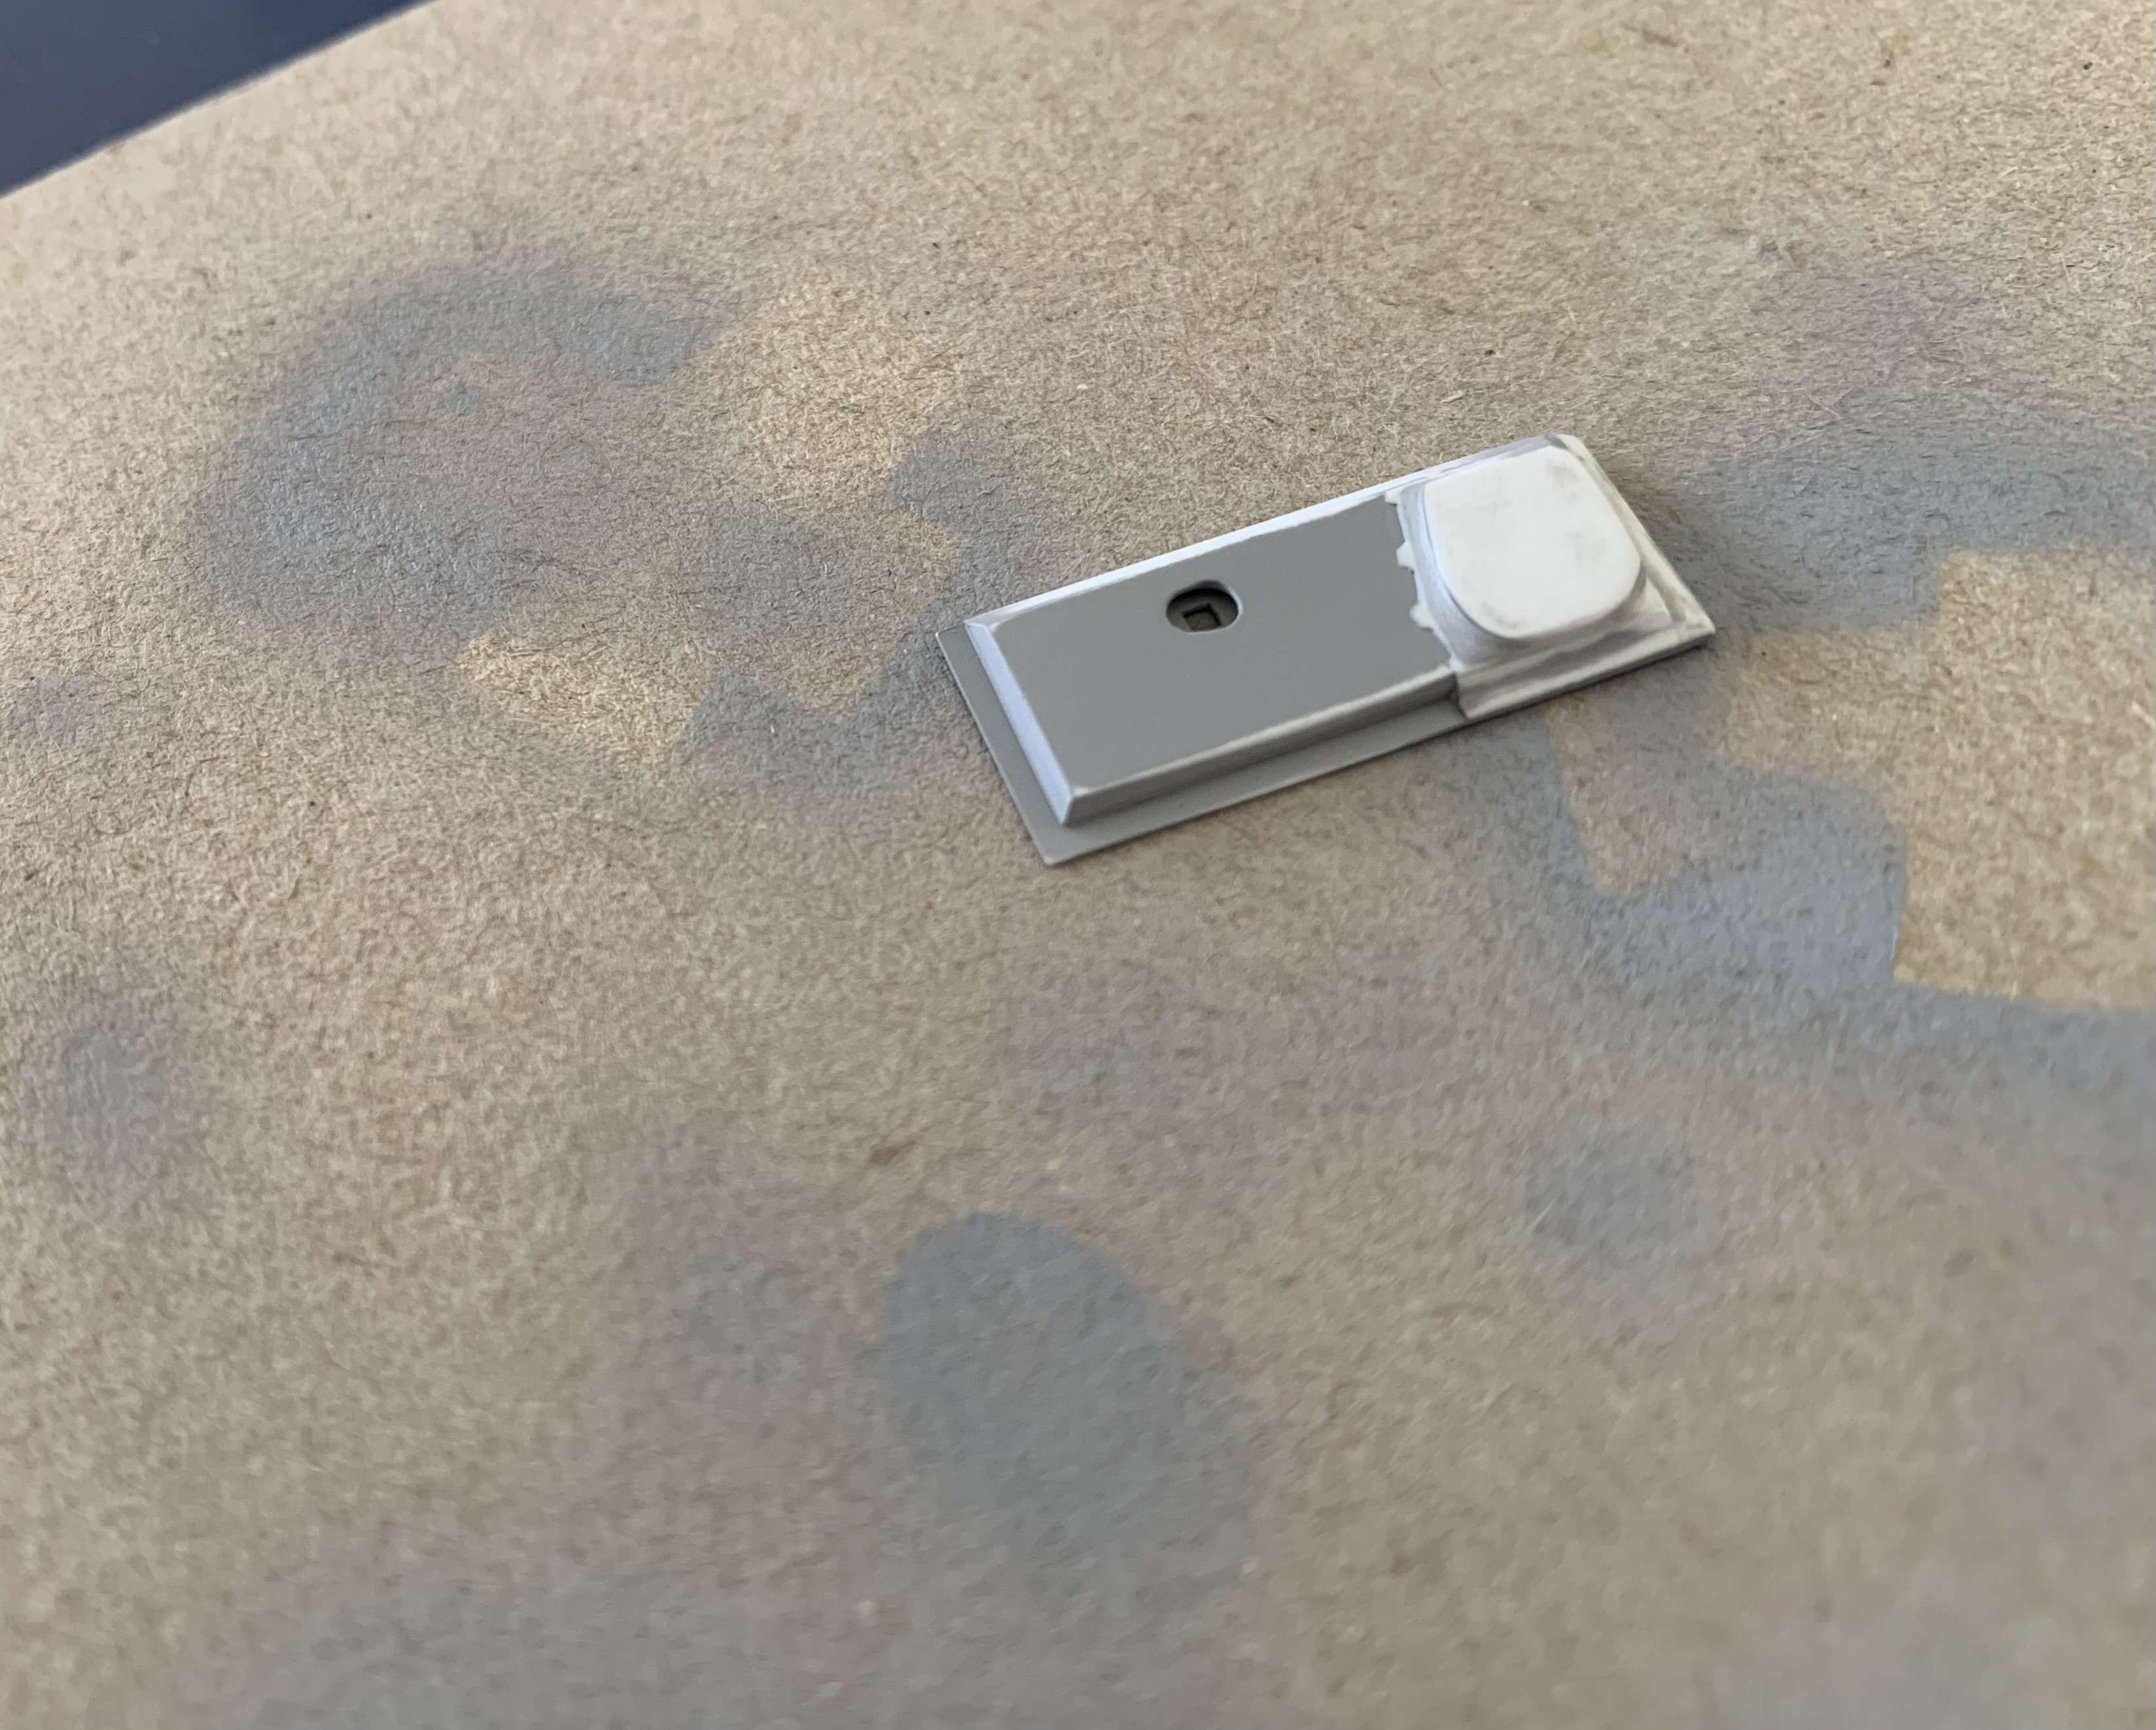
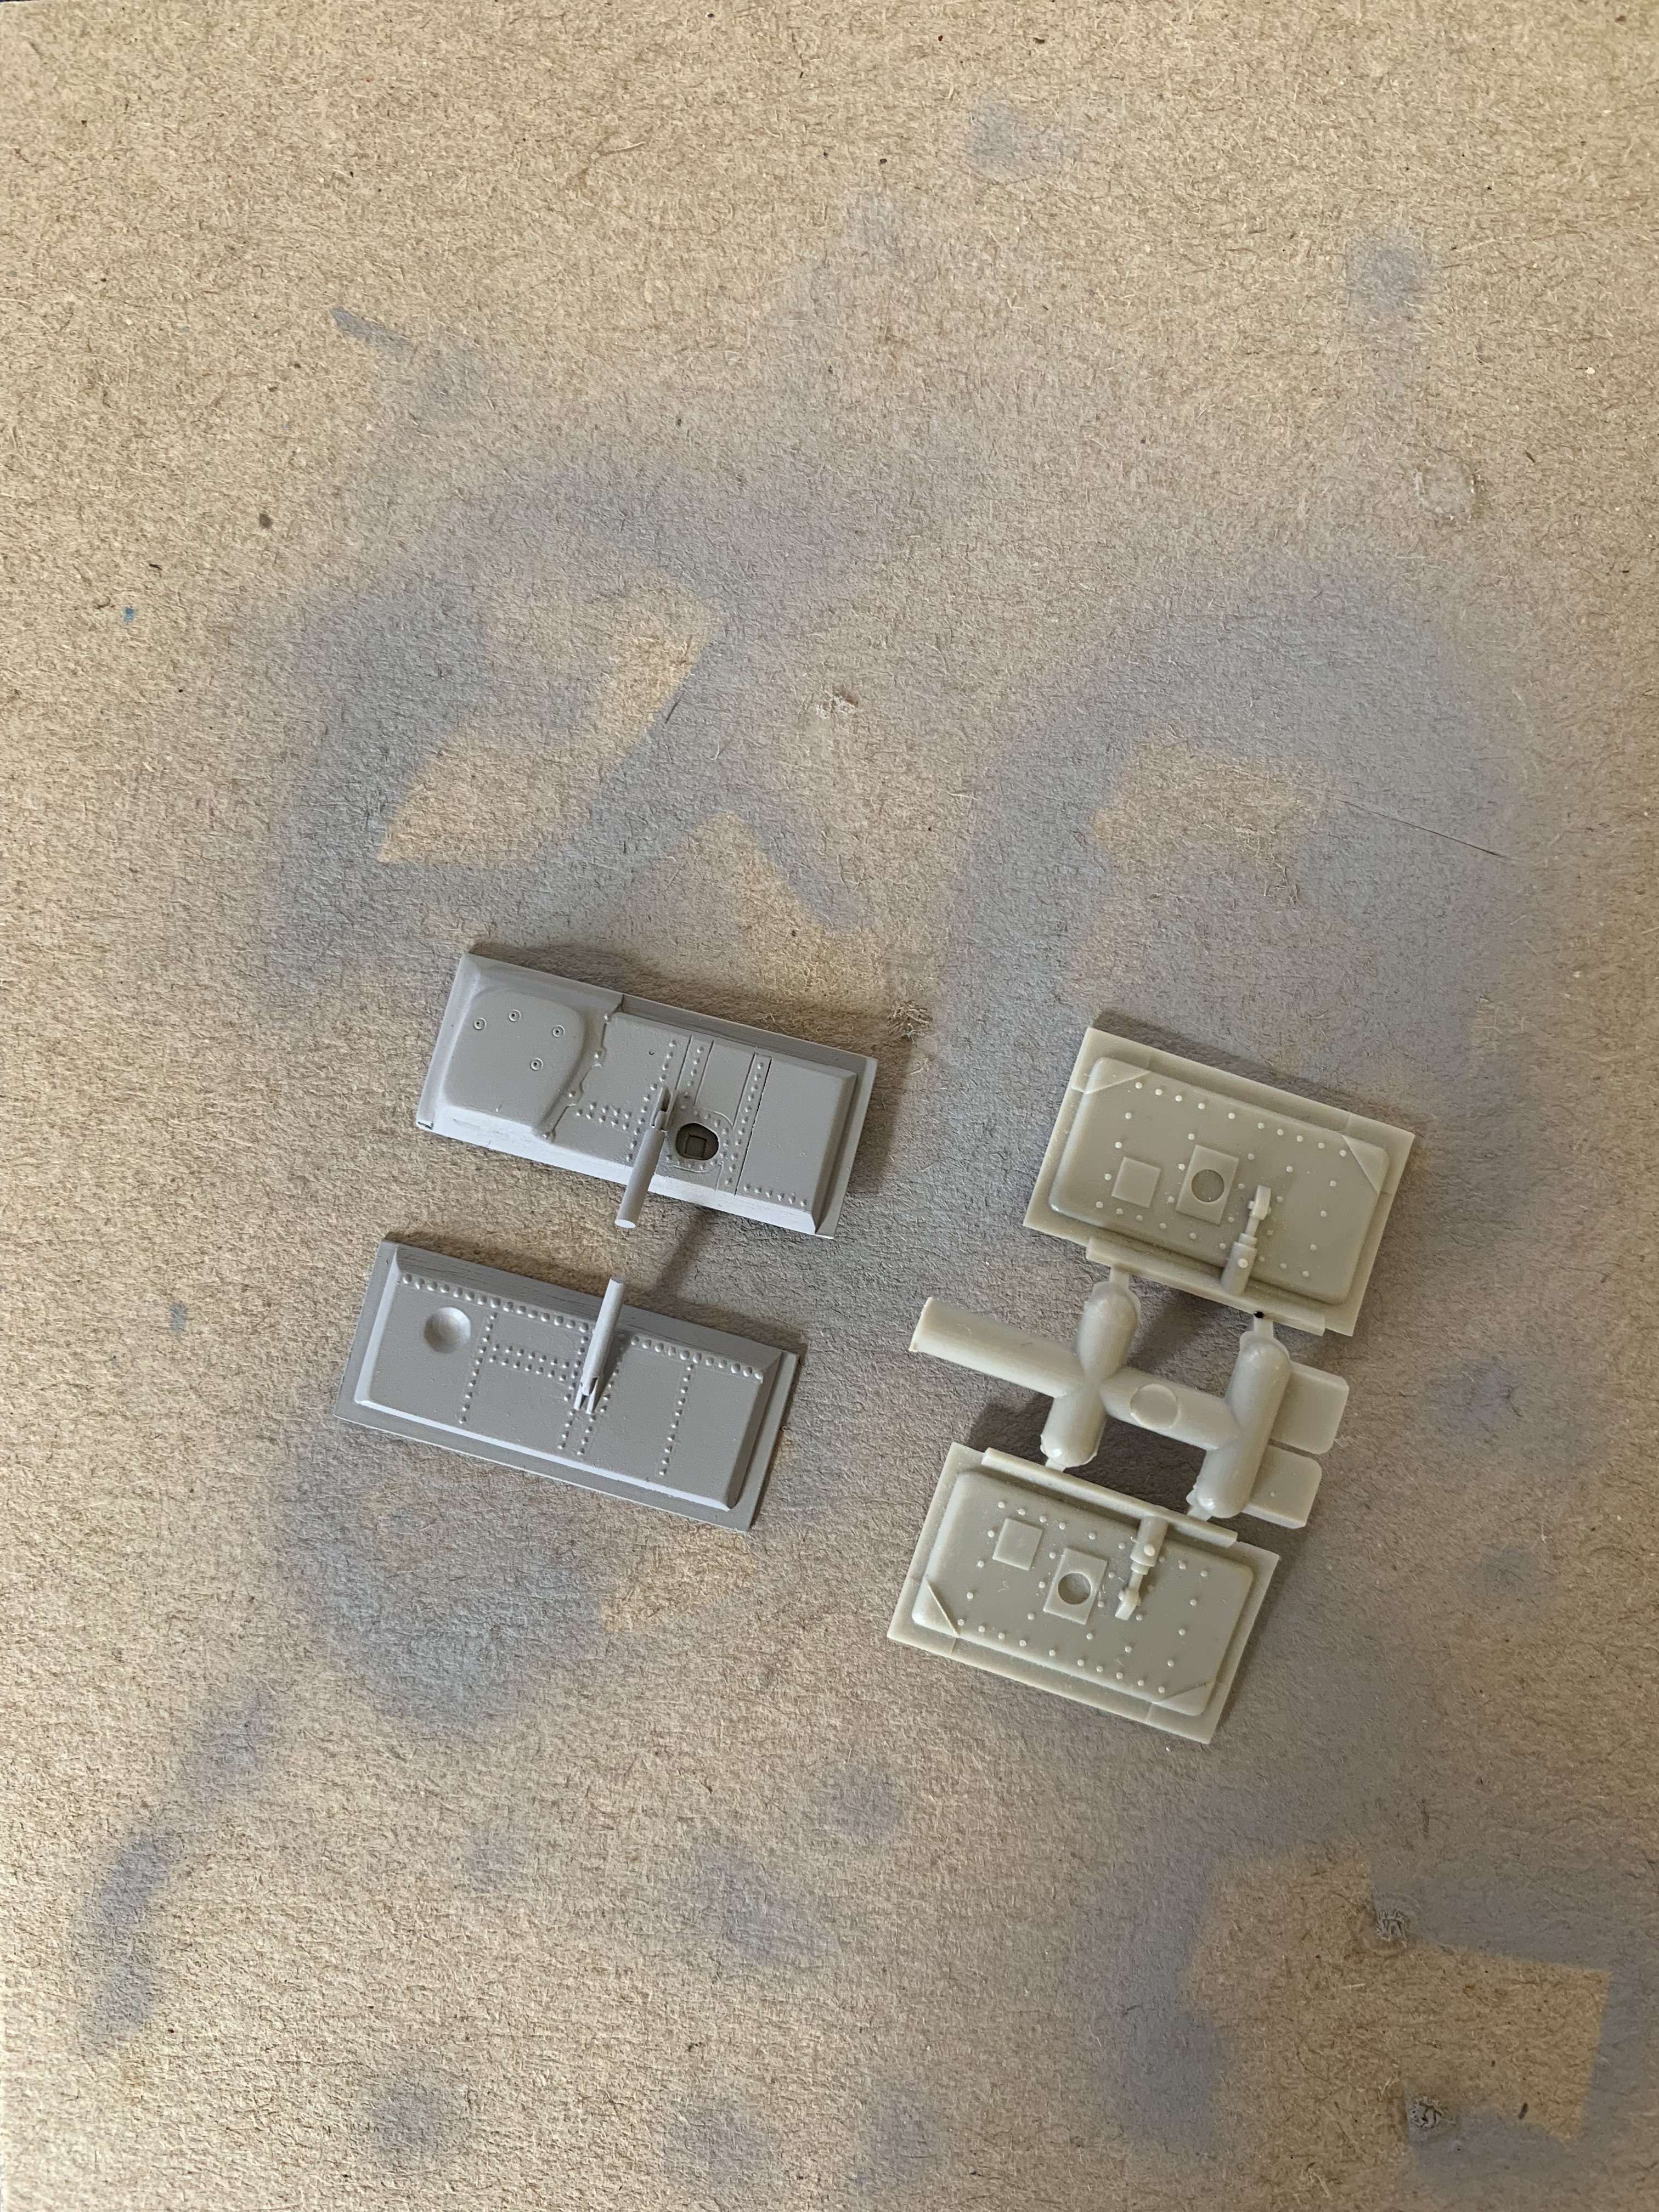
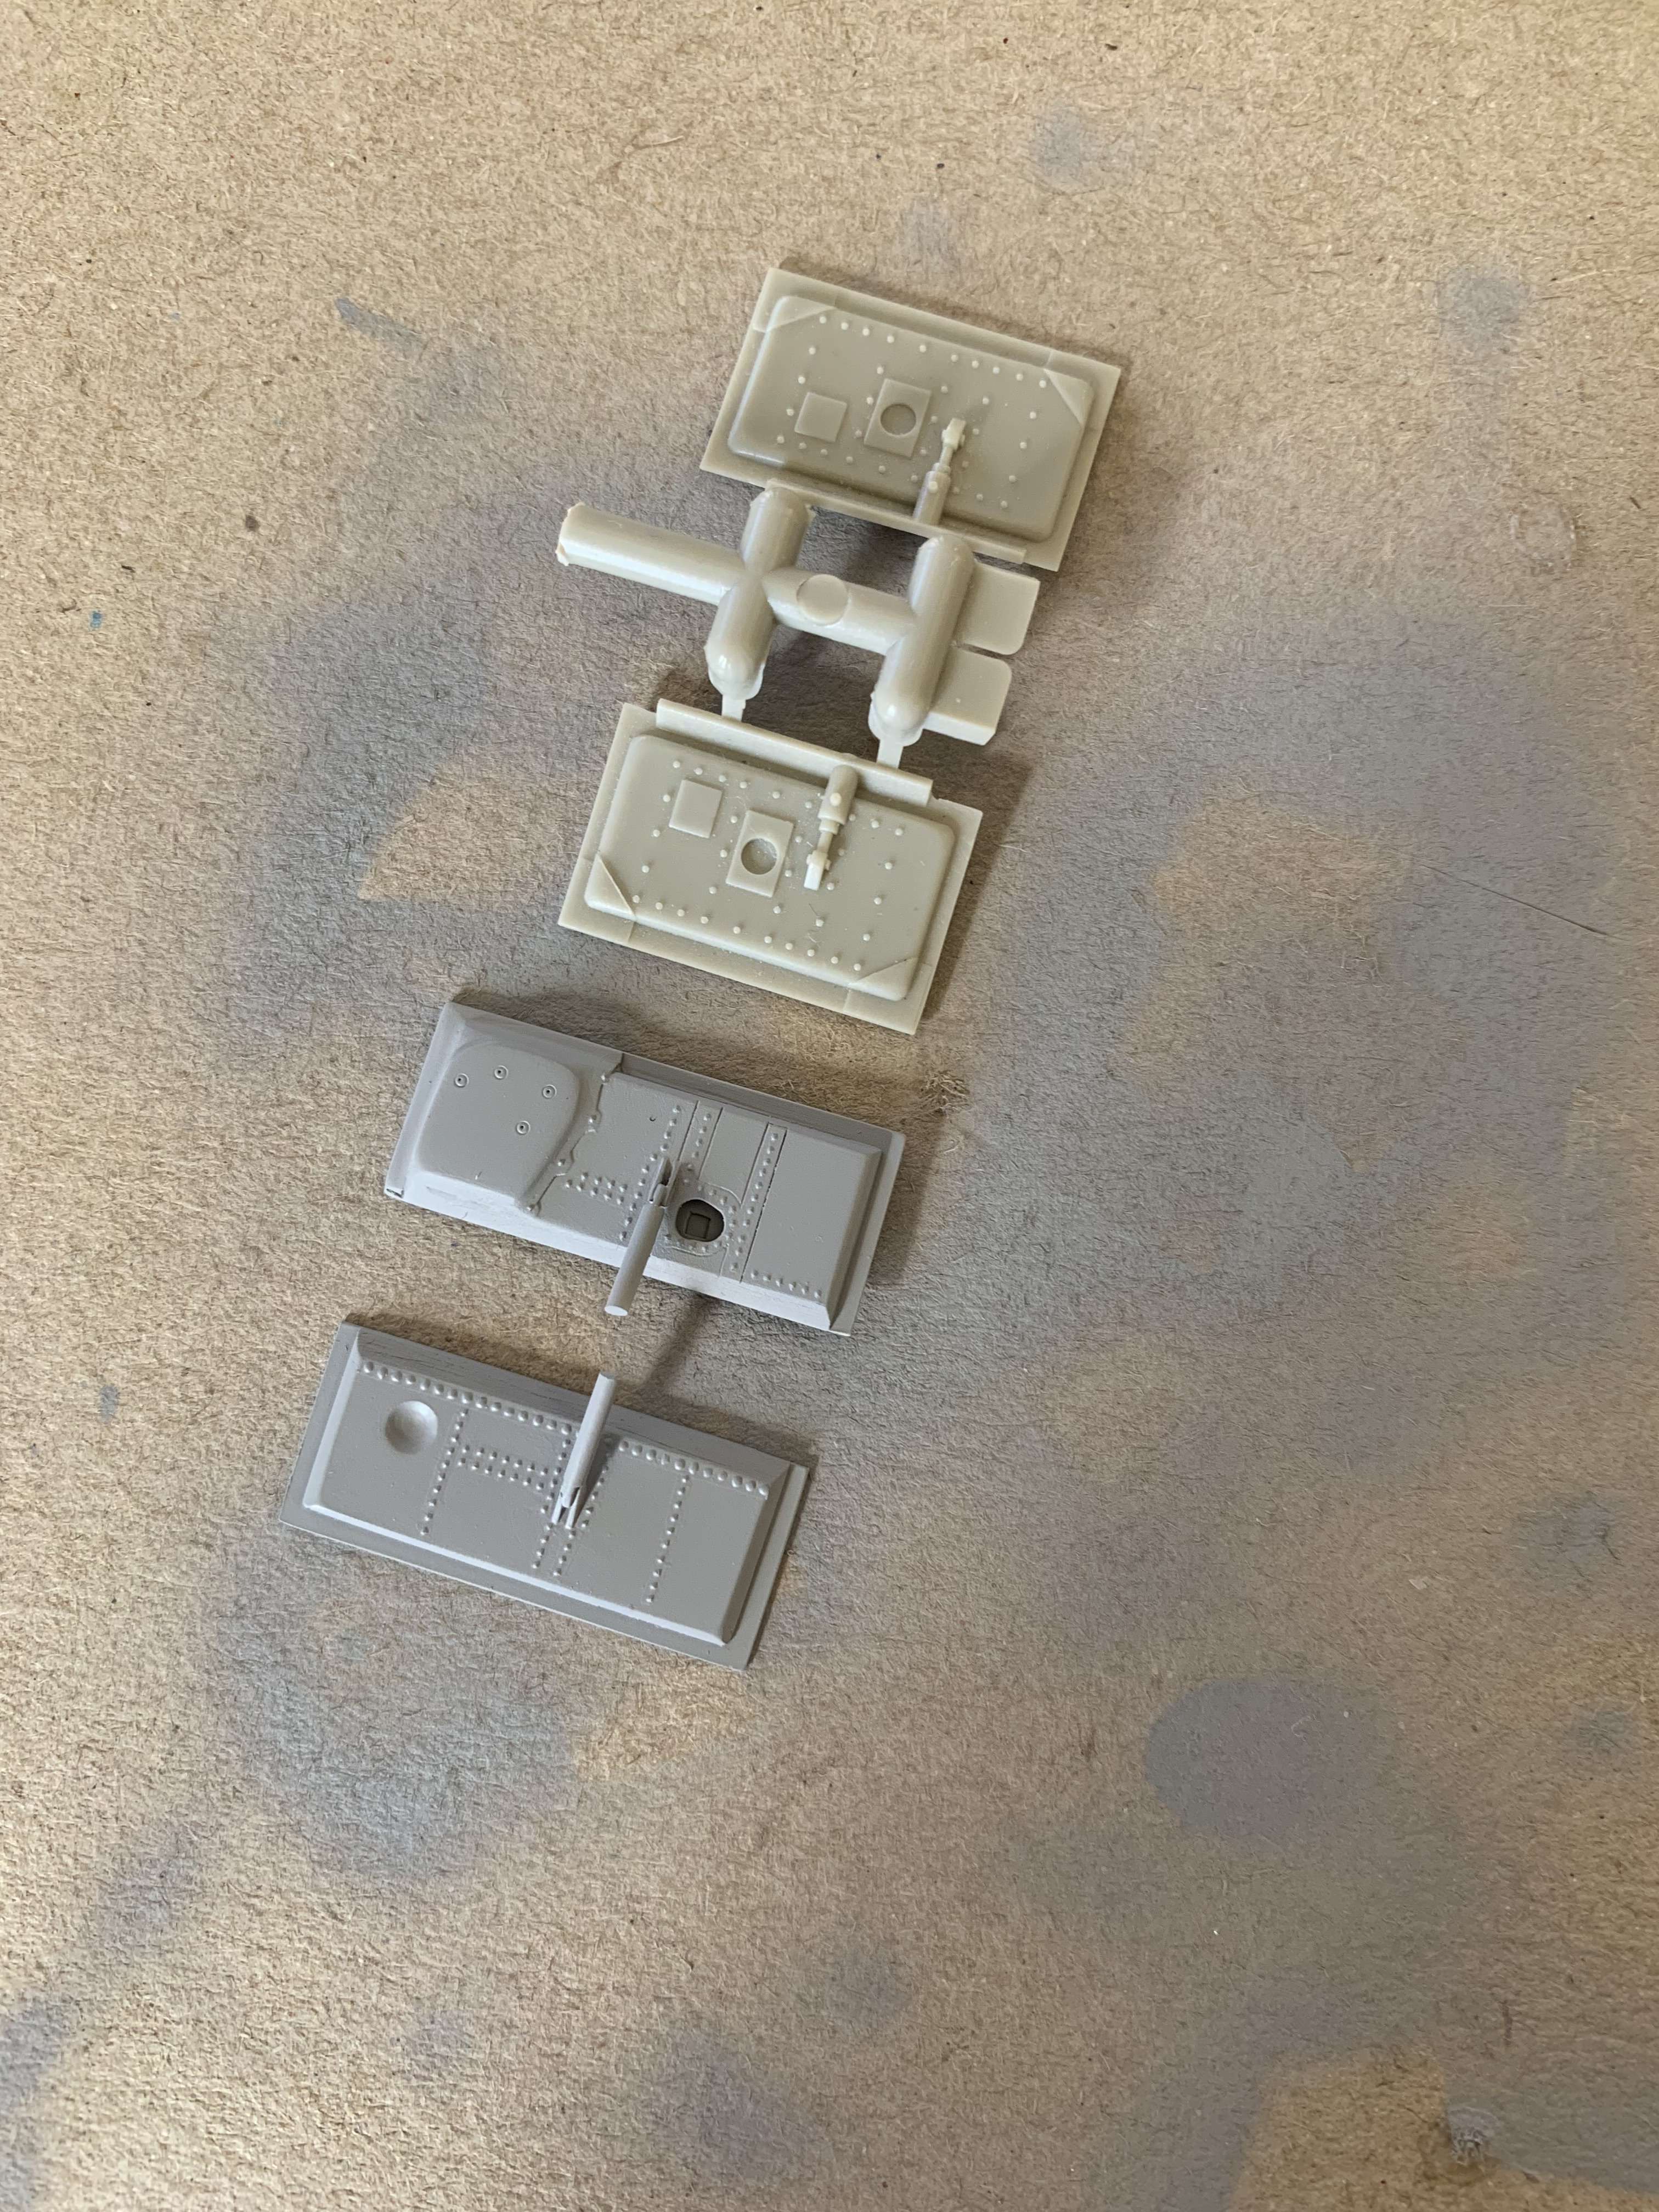
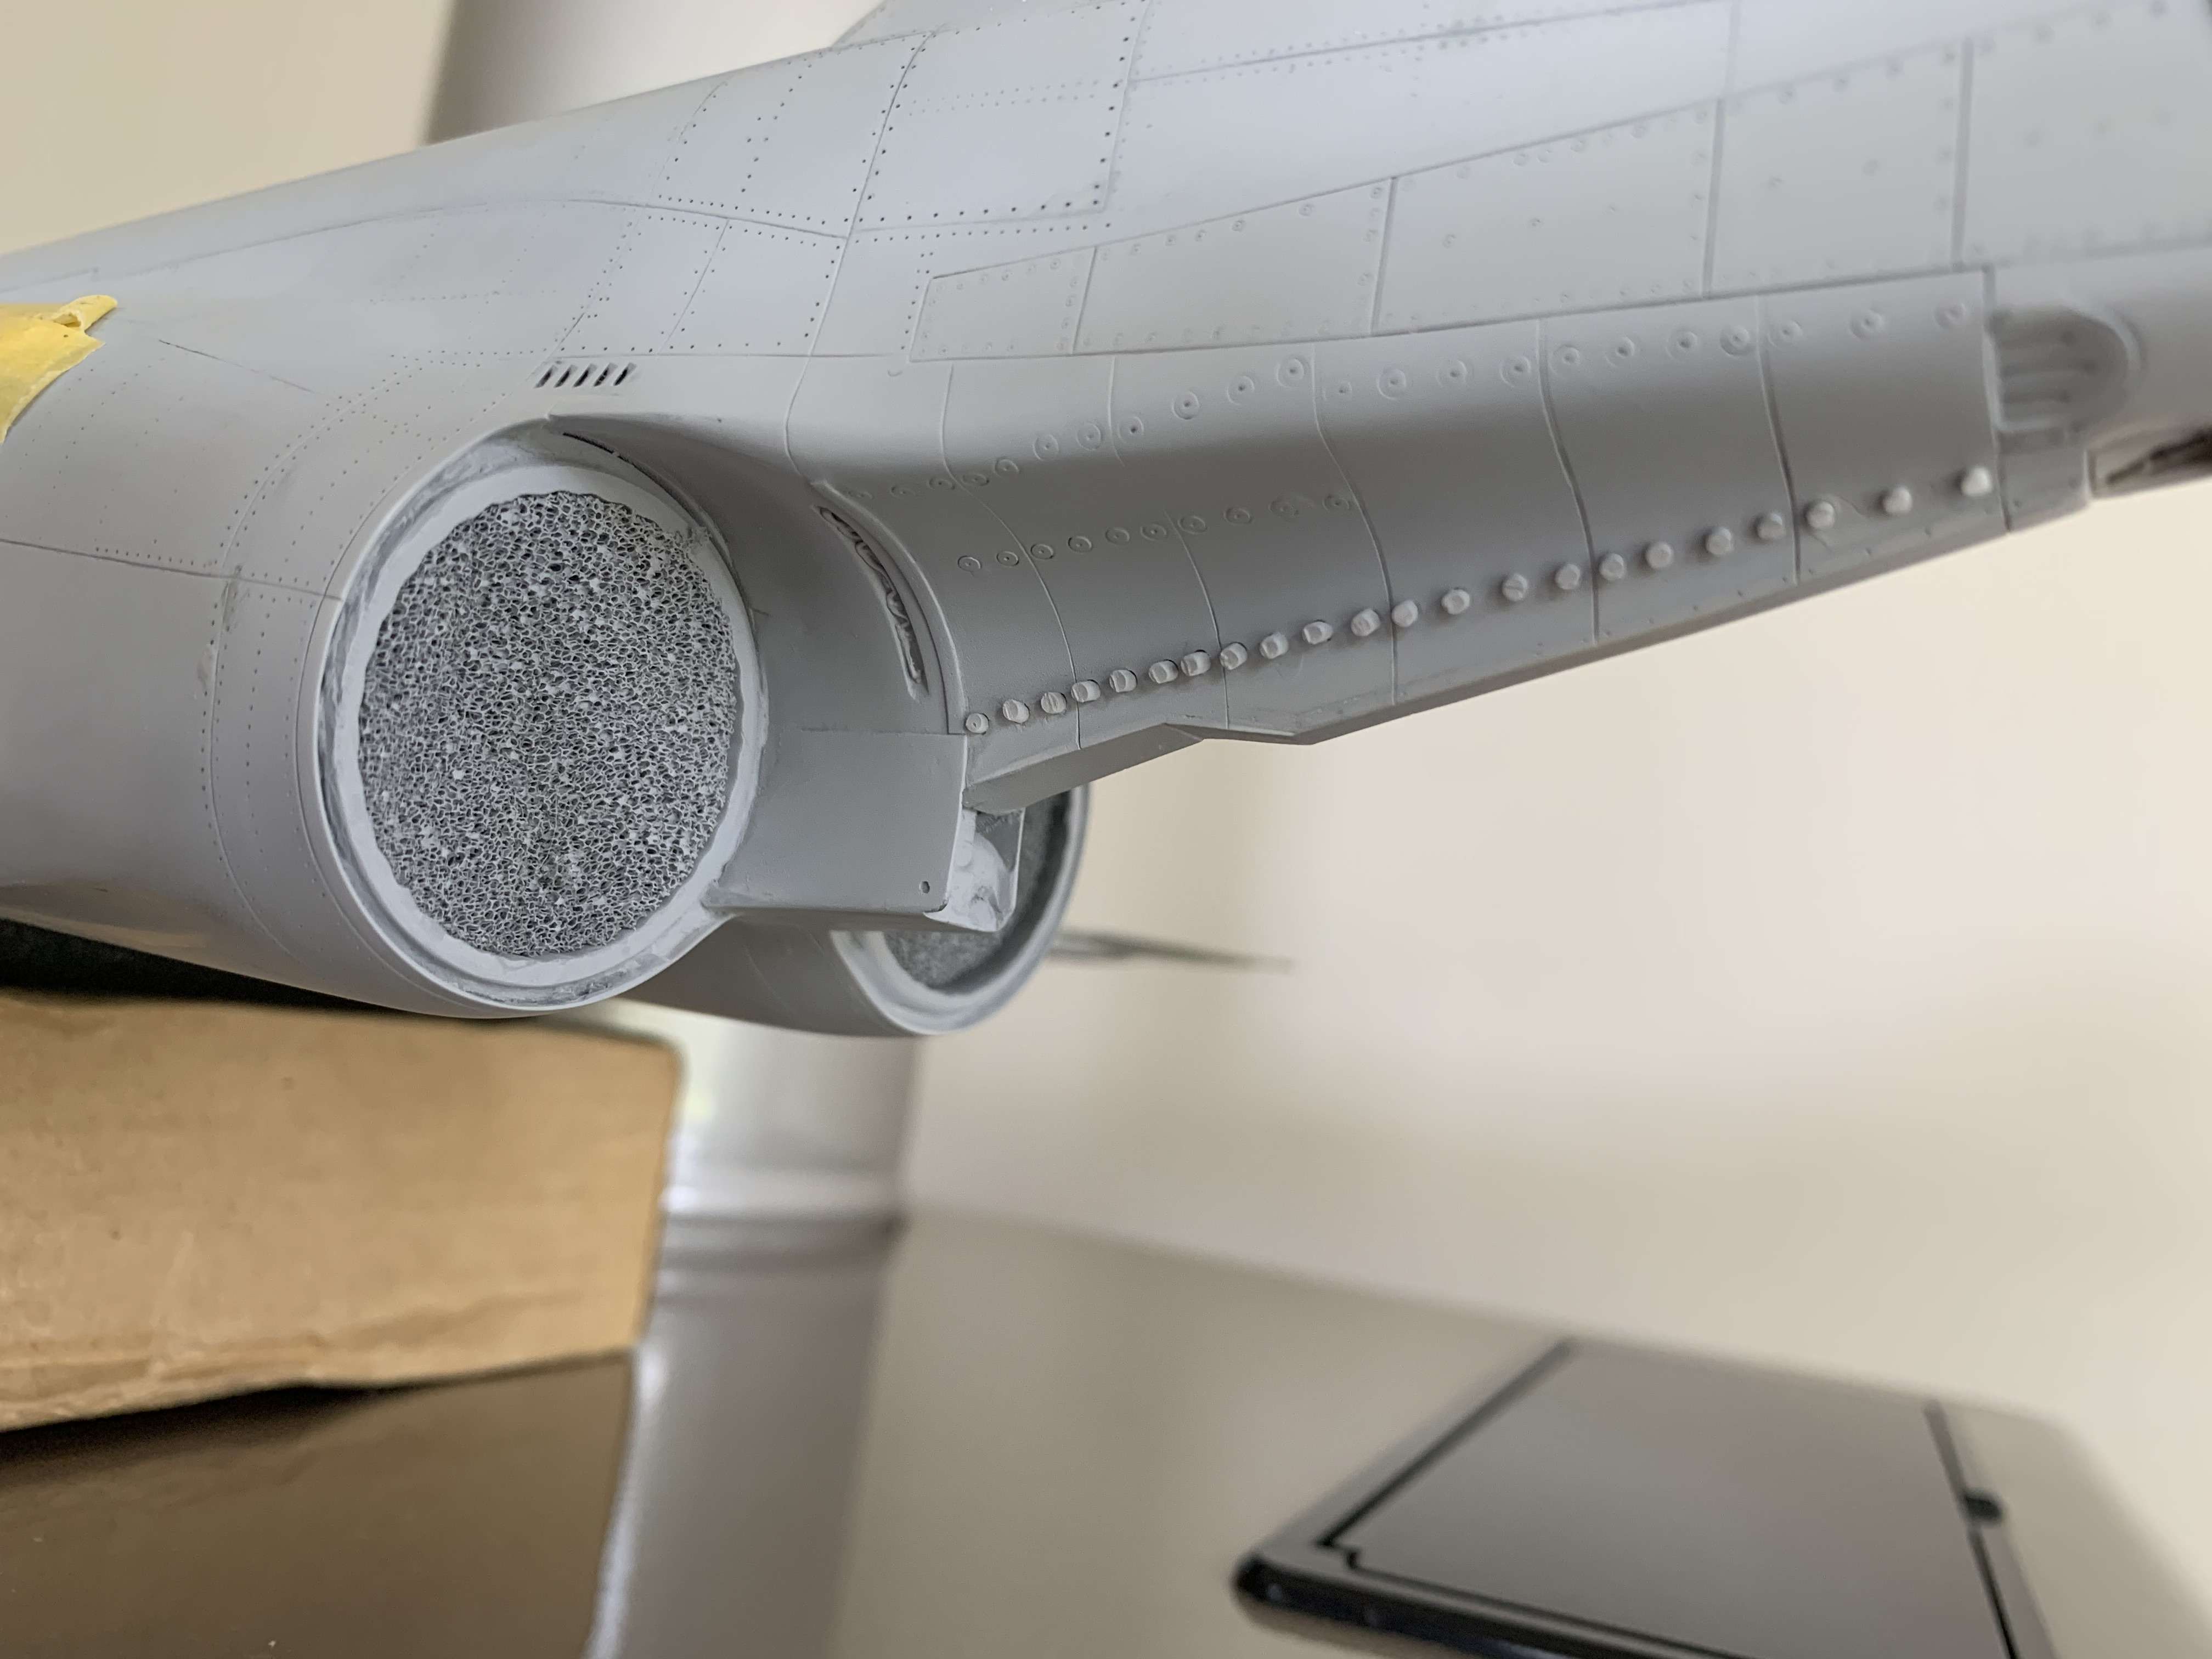
Also an area that needed attention was the aux air doors top and lower. Both sets needed scratchbuilding. First up are the lower ones, just basically layer upon layer of plasticard and raised rivet decals, followed by a layer of Mr Surfacer
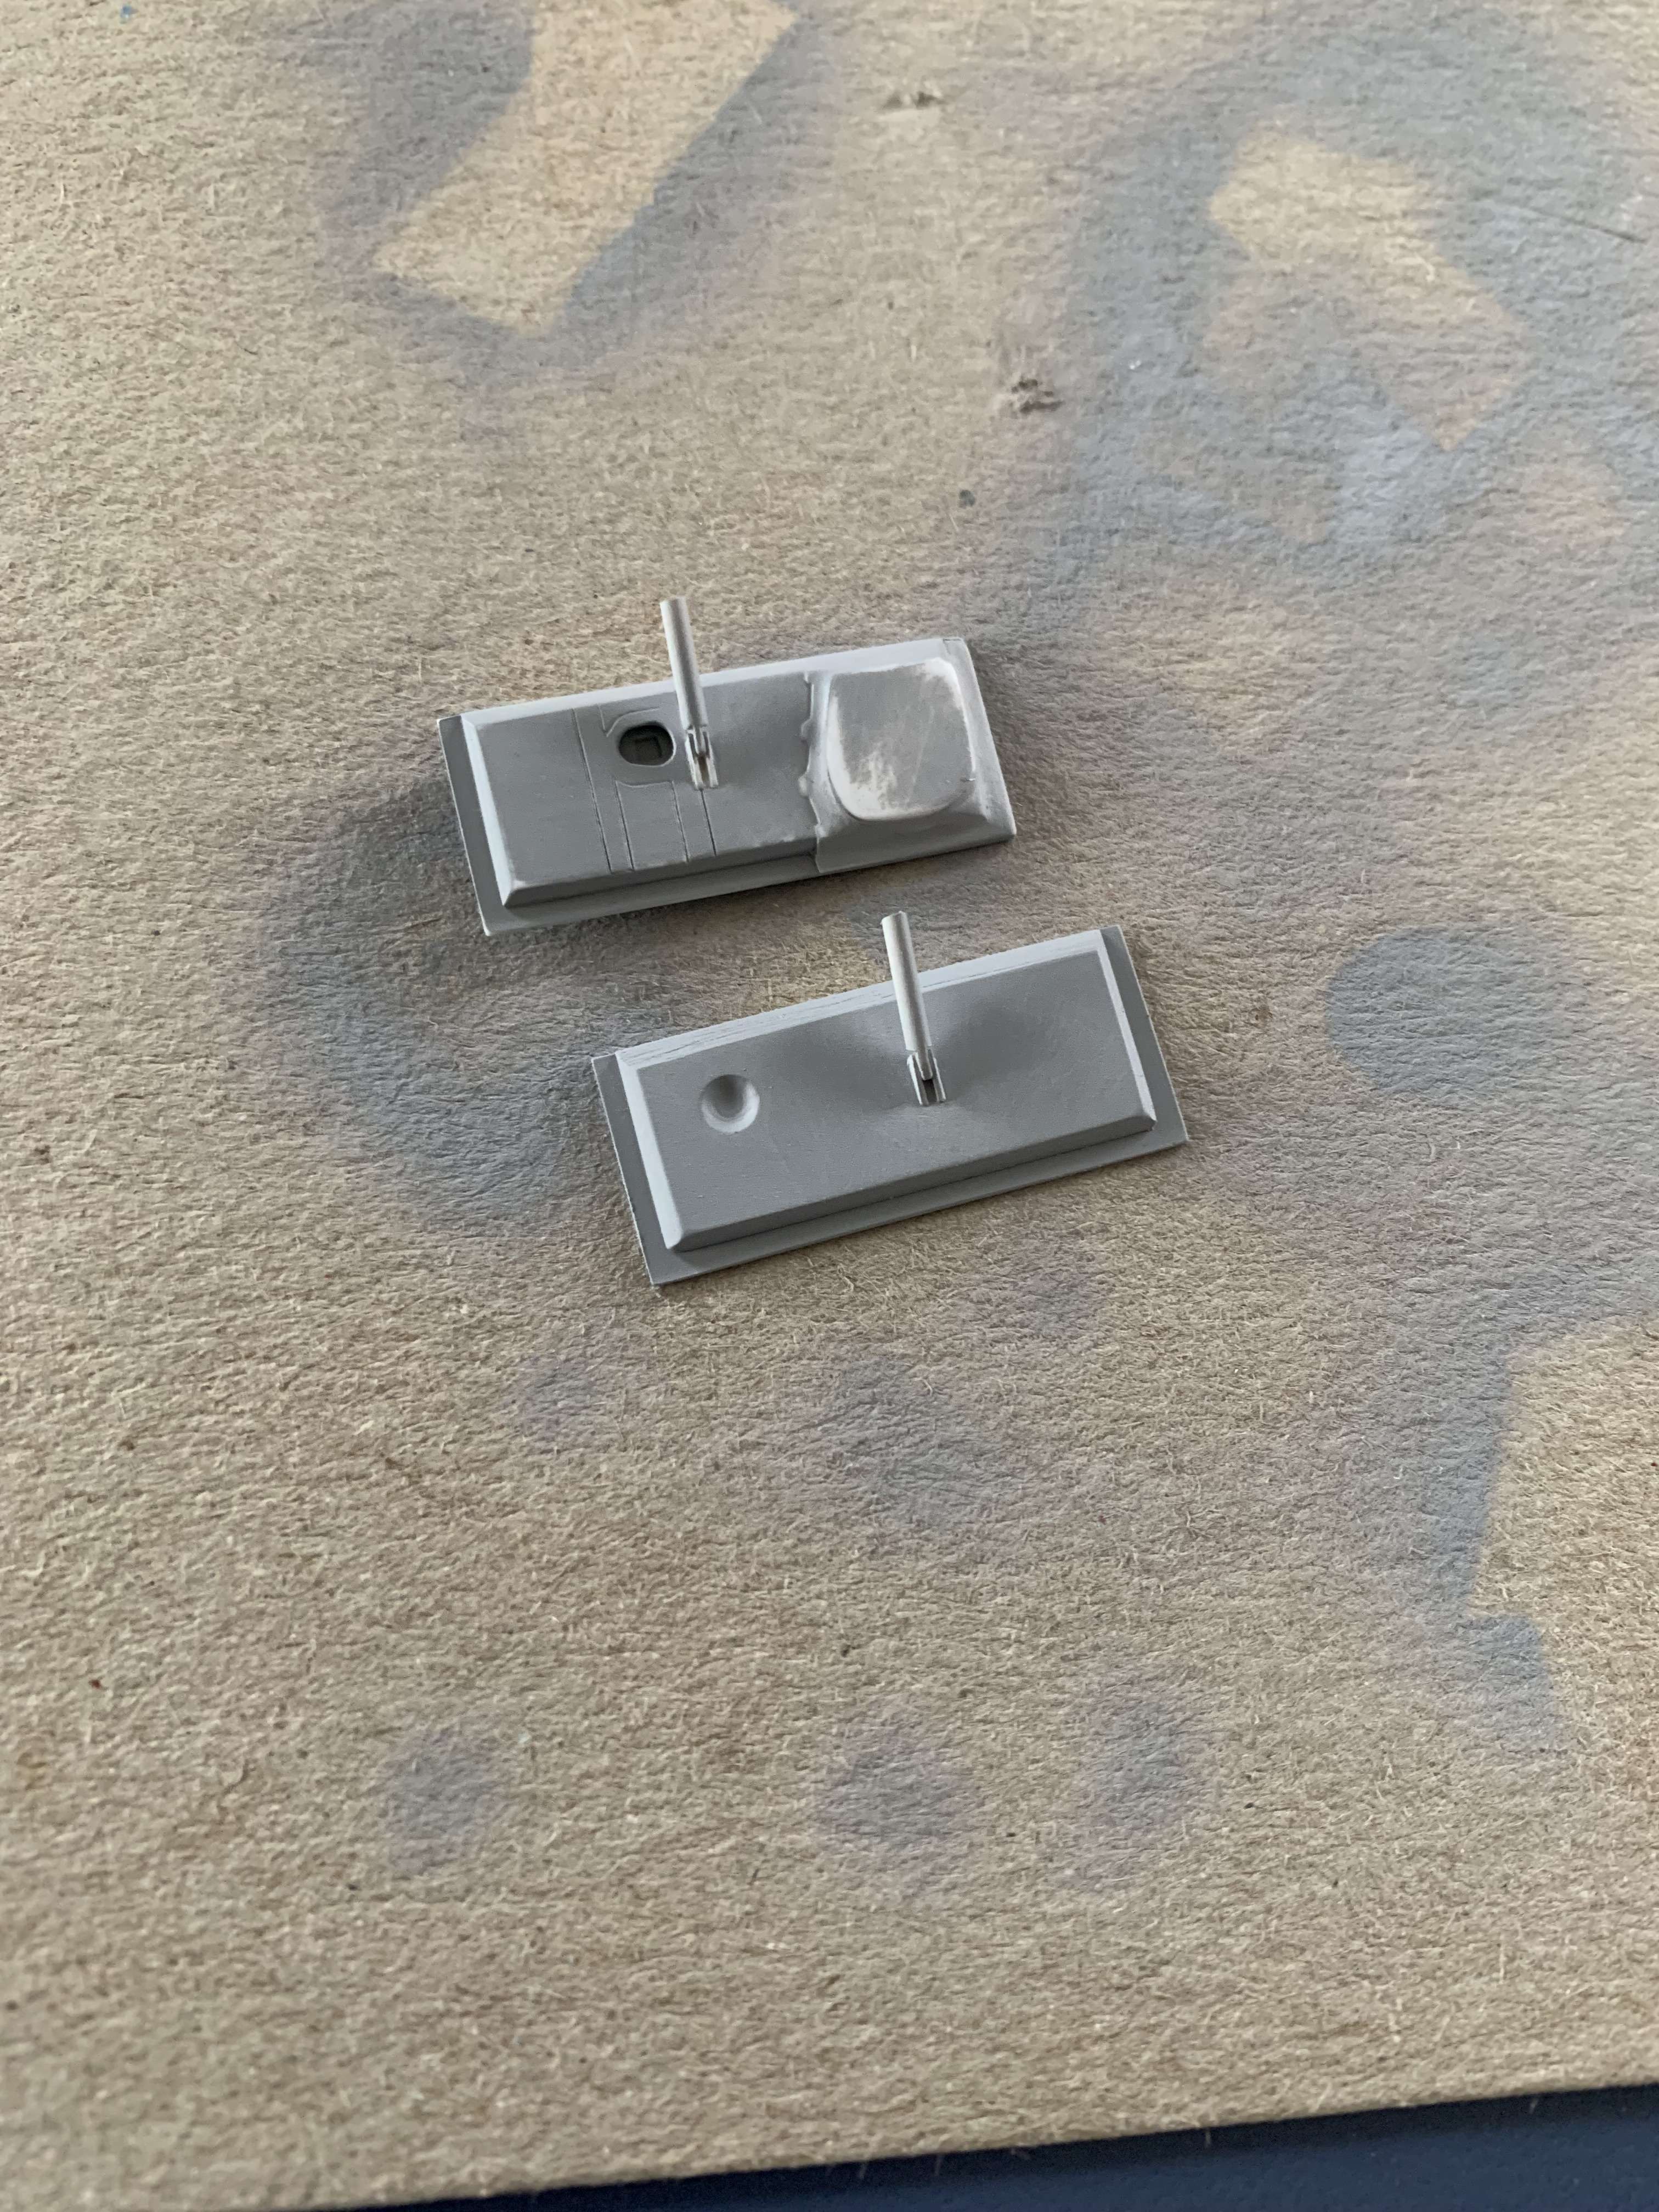
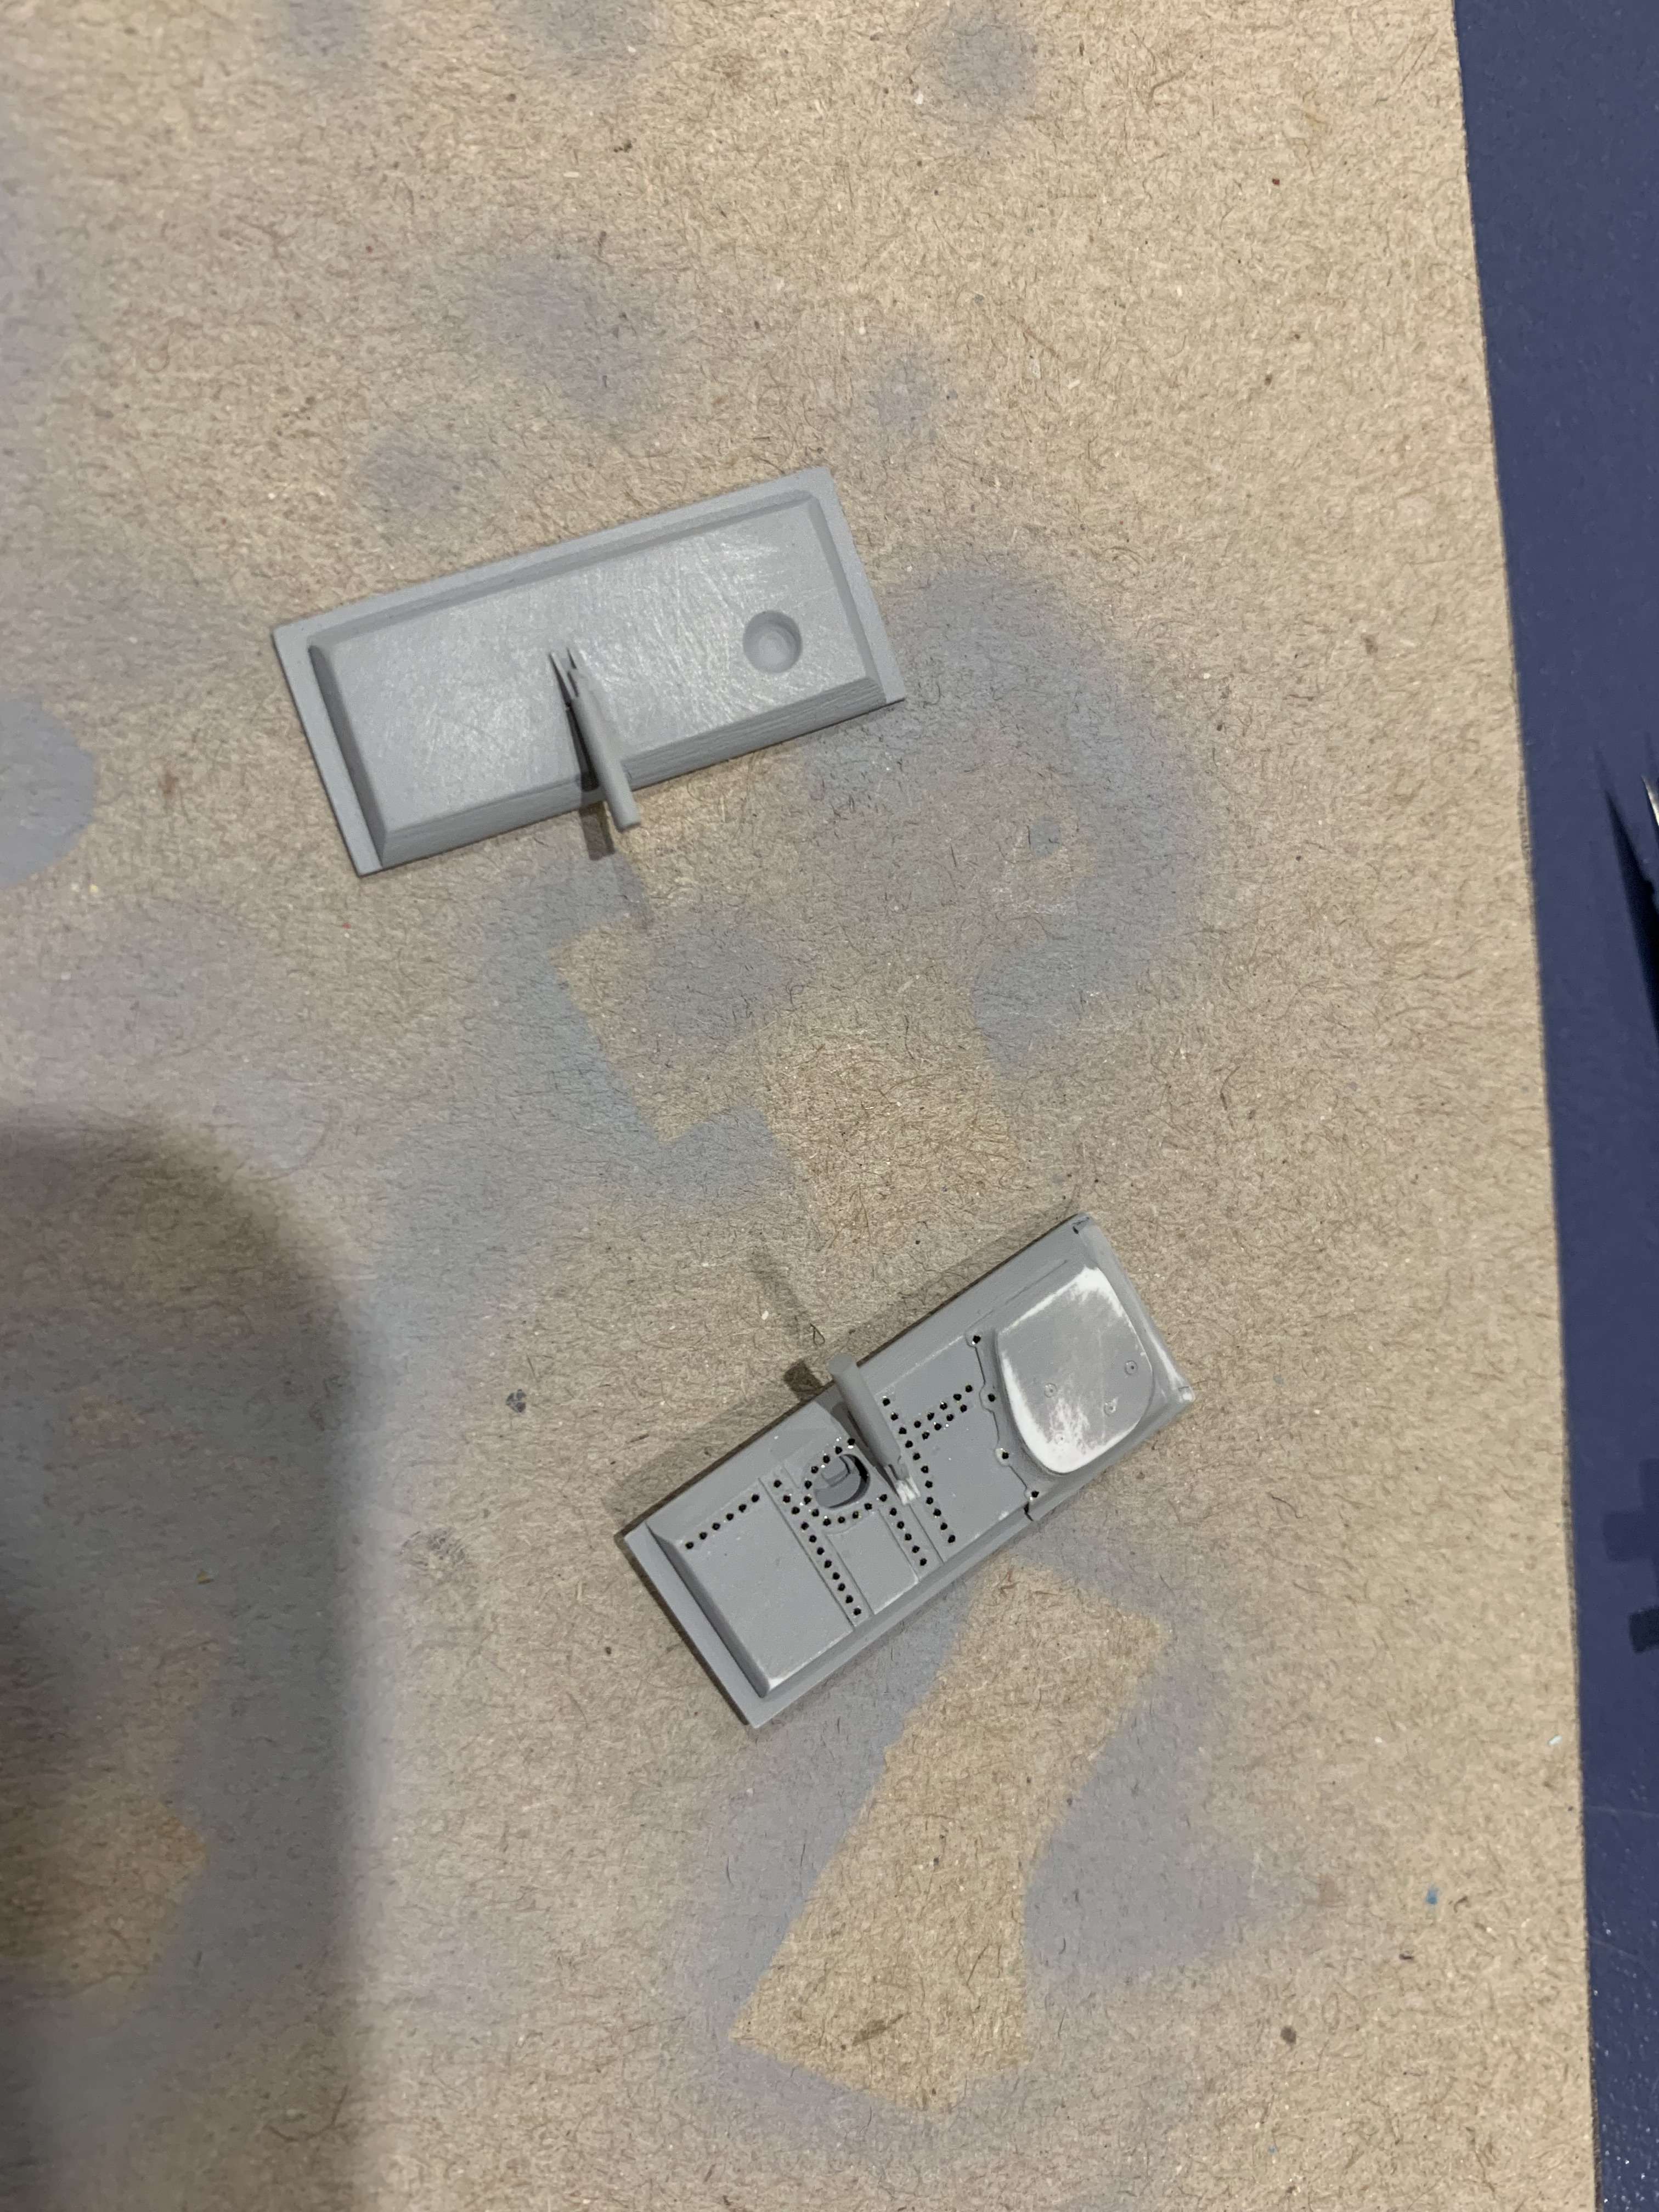
Raised rivets and extra details on the other side....
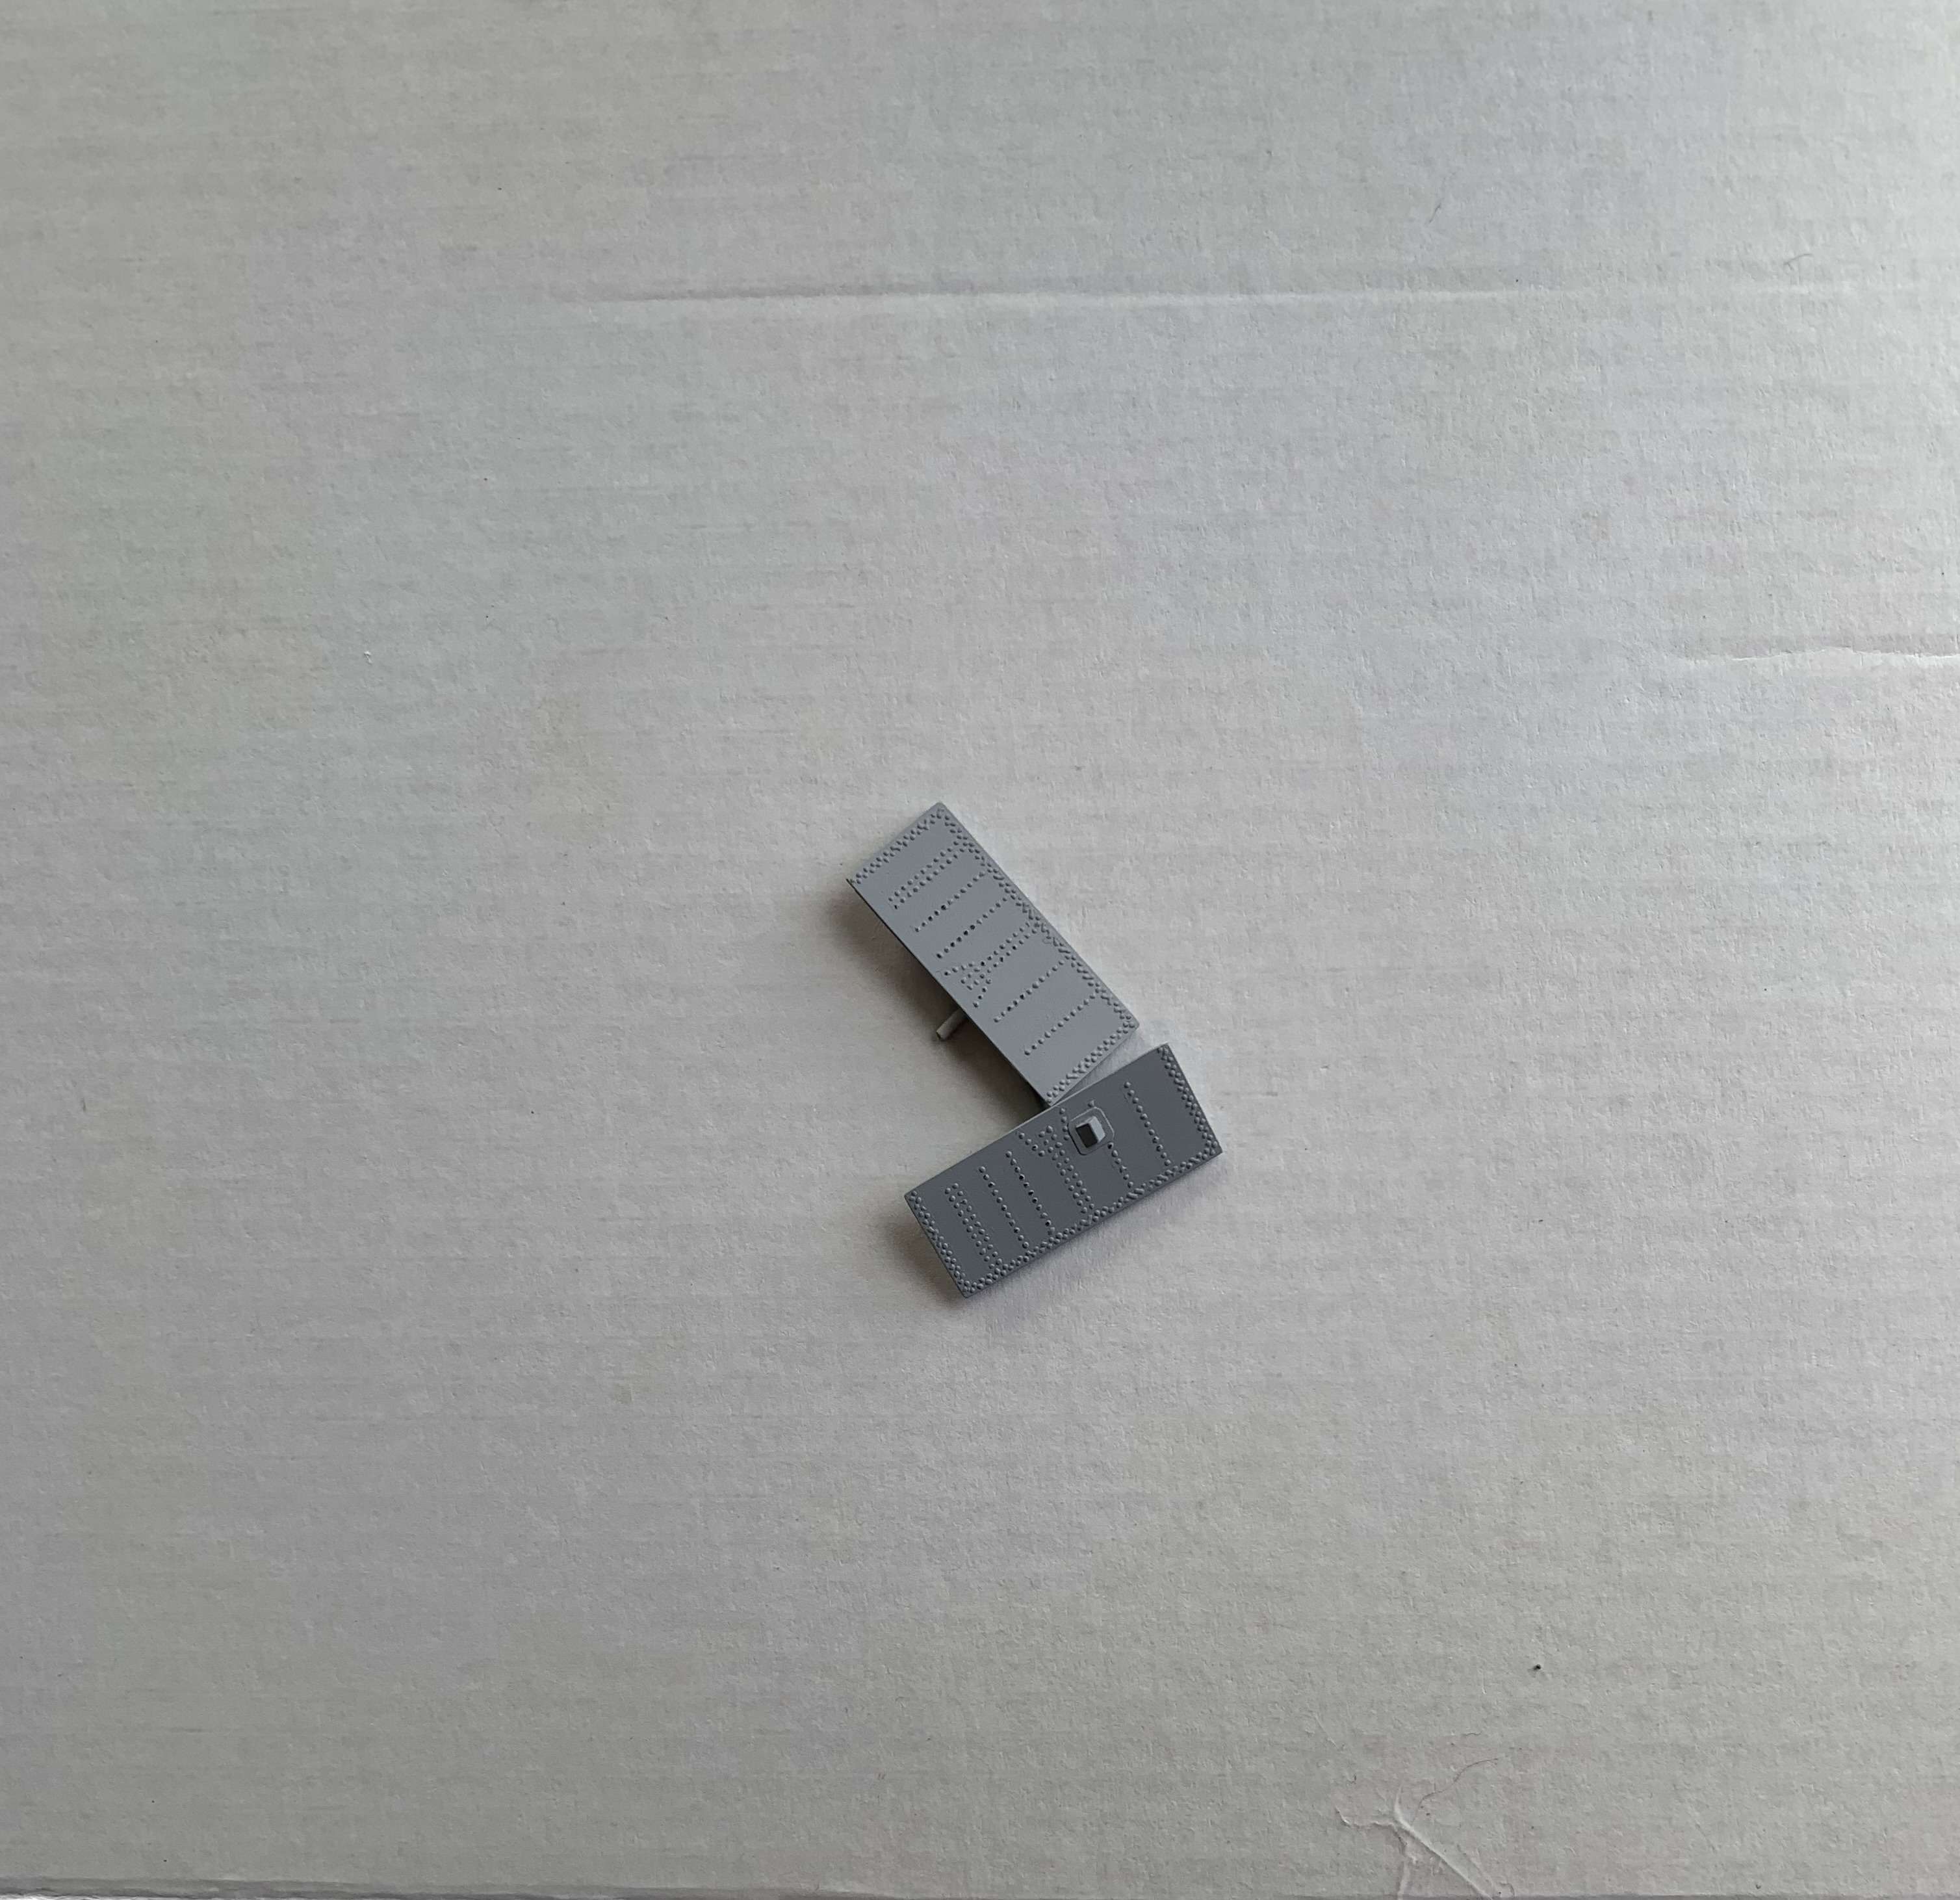
And a comparison on the other side with the kit ones. The kit ones are smaller and further back.
Apologies for the lack of updates, had a bit going on. But still not stopped on this...she is still alive!
Cheers guys and thanks for stopping by
Anthony
- Shoggz, Starfighter, Kagemusha and 22 others
-
 25
25
-
-
Thanks Kev!
Sheesh 9 years ago I started this...where has the time gone. This GB is the first ever I have done and is just the motivation I need to finish it. So thanks again and appreciate letting me join.
So I have just moved it off the SOD and she has not fared overly well, some parts are broken, and there is a thick layer of dust all over her. Thankfully I covered up the cockpit parts with cling film so it is still good in there. I am not sure everything is there as I kind of resigned it to the parts bin and have given spares away through the traders board thinking I would never finish her.
So time for a clean and inventory and an update soonish.
Oh and for those worried, I am working on the Phantom whilst I wait for epoxies to dry etc. I think it will be good for me to be able to chop n change.
Cheers Anthony
- Azgaron and Archimedes
-
2
-
Yes all very interesting discussion. I know extensive discussion has taken place about either a full kit or conversion. My personal thoughts would be for a conversion for the Tamiya kit myself personally. A lot has already been designed but I totally see the risks involved on making even a conversion for a smaller 'cottage industry' company. There is still a HUGE amount of time and effort required to just do the CAD, let alone test printing, redesigning and reprinting again etc. Then find there is a kit coming....that's still a huge investment when you would probably not sell many and could have made something that brings in money.
Personally I dont think a kit is coming anytime soon(as much as I would like one), and there are a lot of us wanting Brit Tooms now. I think maybe a new fuse compatable with the existing Tamiya kit and if you have already got a lot of bits already CAD'ed up then that will save time too
 .
.
I dont know, and it's not my money in time etc. All I can say is that I am here to help if anyone needs it because, as you all know to do properly they are a completely different beast that looks like a Phantom. My vote would be a printed conversion for now to capture the market gasping for one.
Just my 2cents worth
Cheers Anthony
- Gene K, Spooky56, Daniel Leduc and 1 other
-
4
-
-
4 hours ago, Greg W said:
Ha! I see what you did there.
Anthony, we were so close to having Sea Harriers in 1/32, my finger was itching to press a buy button. Grab some tissue before watching the video below...
alas, this project was not to see the light of day.
*Sigh* yup I remember that...can only hope it still comes about. The 3D printed parts looked really nice in there too.
LOL thanks for the reminder
- Greg W and zerosystem
-
2
-
-
Look after yourself buddy! I will keep an eye out too. Nice having you still active on the forum as well

-
Oh Greg! Now we're talking mate!
I absolutely LOVE the FA.2, probably my fav variant Harrier ever. I am still in disbelief there is still no decent kit of this generation harrier available in 1/32....anyhoo, I digress.
Nice clean work so far my friend, I will be 'glued'to this one for sure....awesome start. Man that's going to be impressive in 1/24!
Cheers Anthony
-
Even I would be up for this, I like the silver idea myself.
How about a kit we started 25years ago?
 (I'd easy find something LOL)
- geedubelyer, Christa, Alain Gadbois and 3 others
-
1
-
 5
5
-
11 minutes ago, Crossofiron said:
Absolutely mate!
Feeling a double build coming on.
And an application for an extension on the house to put it

Oh yeah, just the encouragement I need! I'll finish my Phantom and you this Spitfire and maybe we can do a double build?
LOL yes I might need an application to do the same!
-
13 minutes ago, amurray said:
This build just gets better and better! Your skills are without equal. But equally impressive are the number of fellow modelers who have lent their expertise to you to help you achieve this work. And there are those who helped with aftermarket parts and their own custom made parts (e.g., TonkaXV, Kerry, et al.).
It is amazing to me how the internet has made our hobby what it is especially in the realm of one-on-one personal advice and assistance even going back to the old rec.models.scale in the early days of the web circa 1995.

Oh absolutely mate! This build would be nothing without the help of a lot of other people.
I cant thank enough Kerry, @Derek B, @Gene K, @Greg W, @scjh, @Iain in the early days....... my goodness I am too scared to do a list because the help has been endless, even just the encouragement from people like yourself, @wunwinglow, @airscale, @chuck540z3, @Ali62, @Cees Broere, @Marcel111, @vvwse4, @Spooky56, @Starfighter, @AlbertD, @DonH, @Troy Molitor, @Tony T, @scvrobeson @Kagemusha, @LSP_Kevin, @mozart, @spyrosjzmichos, @Barry, @GMK, @Chek, @jenshb, @Jet Passion, @Turecki, @Landrotten Highlander, @IainM, @jimbo59, @Rainer Hoffmann, @geedubelyer, @easixpedro, @D.B. Andrus, @MDuv, @thierry laurent......honestly these are the names that just quickly pop into my head, but I know that as soon as I hit submit I am going to remember more, and I am going to feel terrible about that! I honestly appreciate everyones help and support, as well as a bunch of guys over at Britmodeller!
And sadly, Mike @seiran01, it's all his fault! He sold me the kit and conversion......and mate, I thought we were friends!

Sorry if I missed anyone out, I hate making lists like that because you invariably set yourself up to fall by forgetting someones valuable comment at just the right time, or part supplied to make my life a little easier.
THis hobby has changed for sure, but only for the good!
Now I need to hurry up and finish this so you guys get a state of the art Brit Toom in 1/32!
Cheers Anthony
-
On 2/4/2024 at 1:28 PM, scvrobeson said:
Exceptional levels of research that are going into this build
Matt
Thanks Matt, surprising myself at whats coming up as well. Then you speak to the appropiate(usually groundcrew) person, they go ...oh yeah, we did that all the time or, yes that's how it should be etc.... Hopefully this is getting it all in one place for future Brit Phantom builds.
So, back to the 'hot area' I really need to deal with this as its what has me on the brink of walking away LOL.
So the rod insert thing seems to do the trick, painfully slow but working. Here is a couple of pics of where I have got to. As you can see there are still a few 'rogue' washers and some with dodgy screw holes in the centre, but I will fix those. The aim here is to get close and then let everything cure and sink for a few days then hopefully I can do all the fine tuning and finish this side
Then of course there is the other side

Note above also here there are extra washers/fasteners down the side panels too
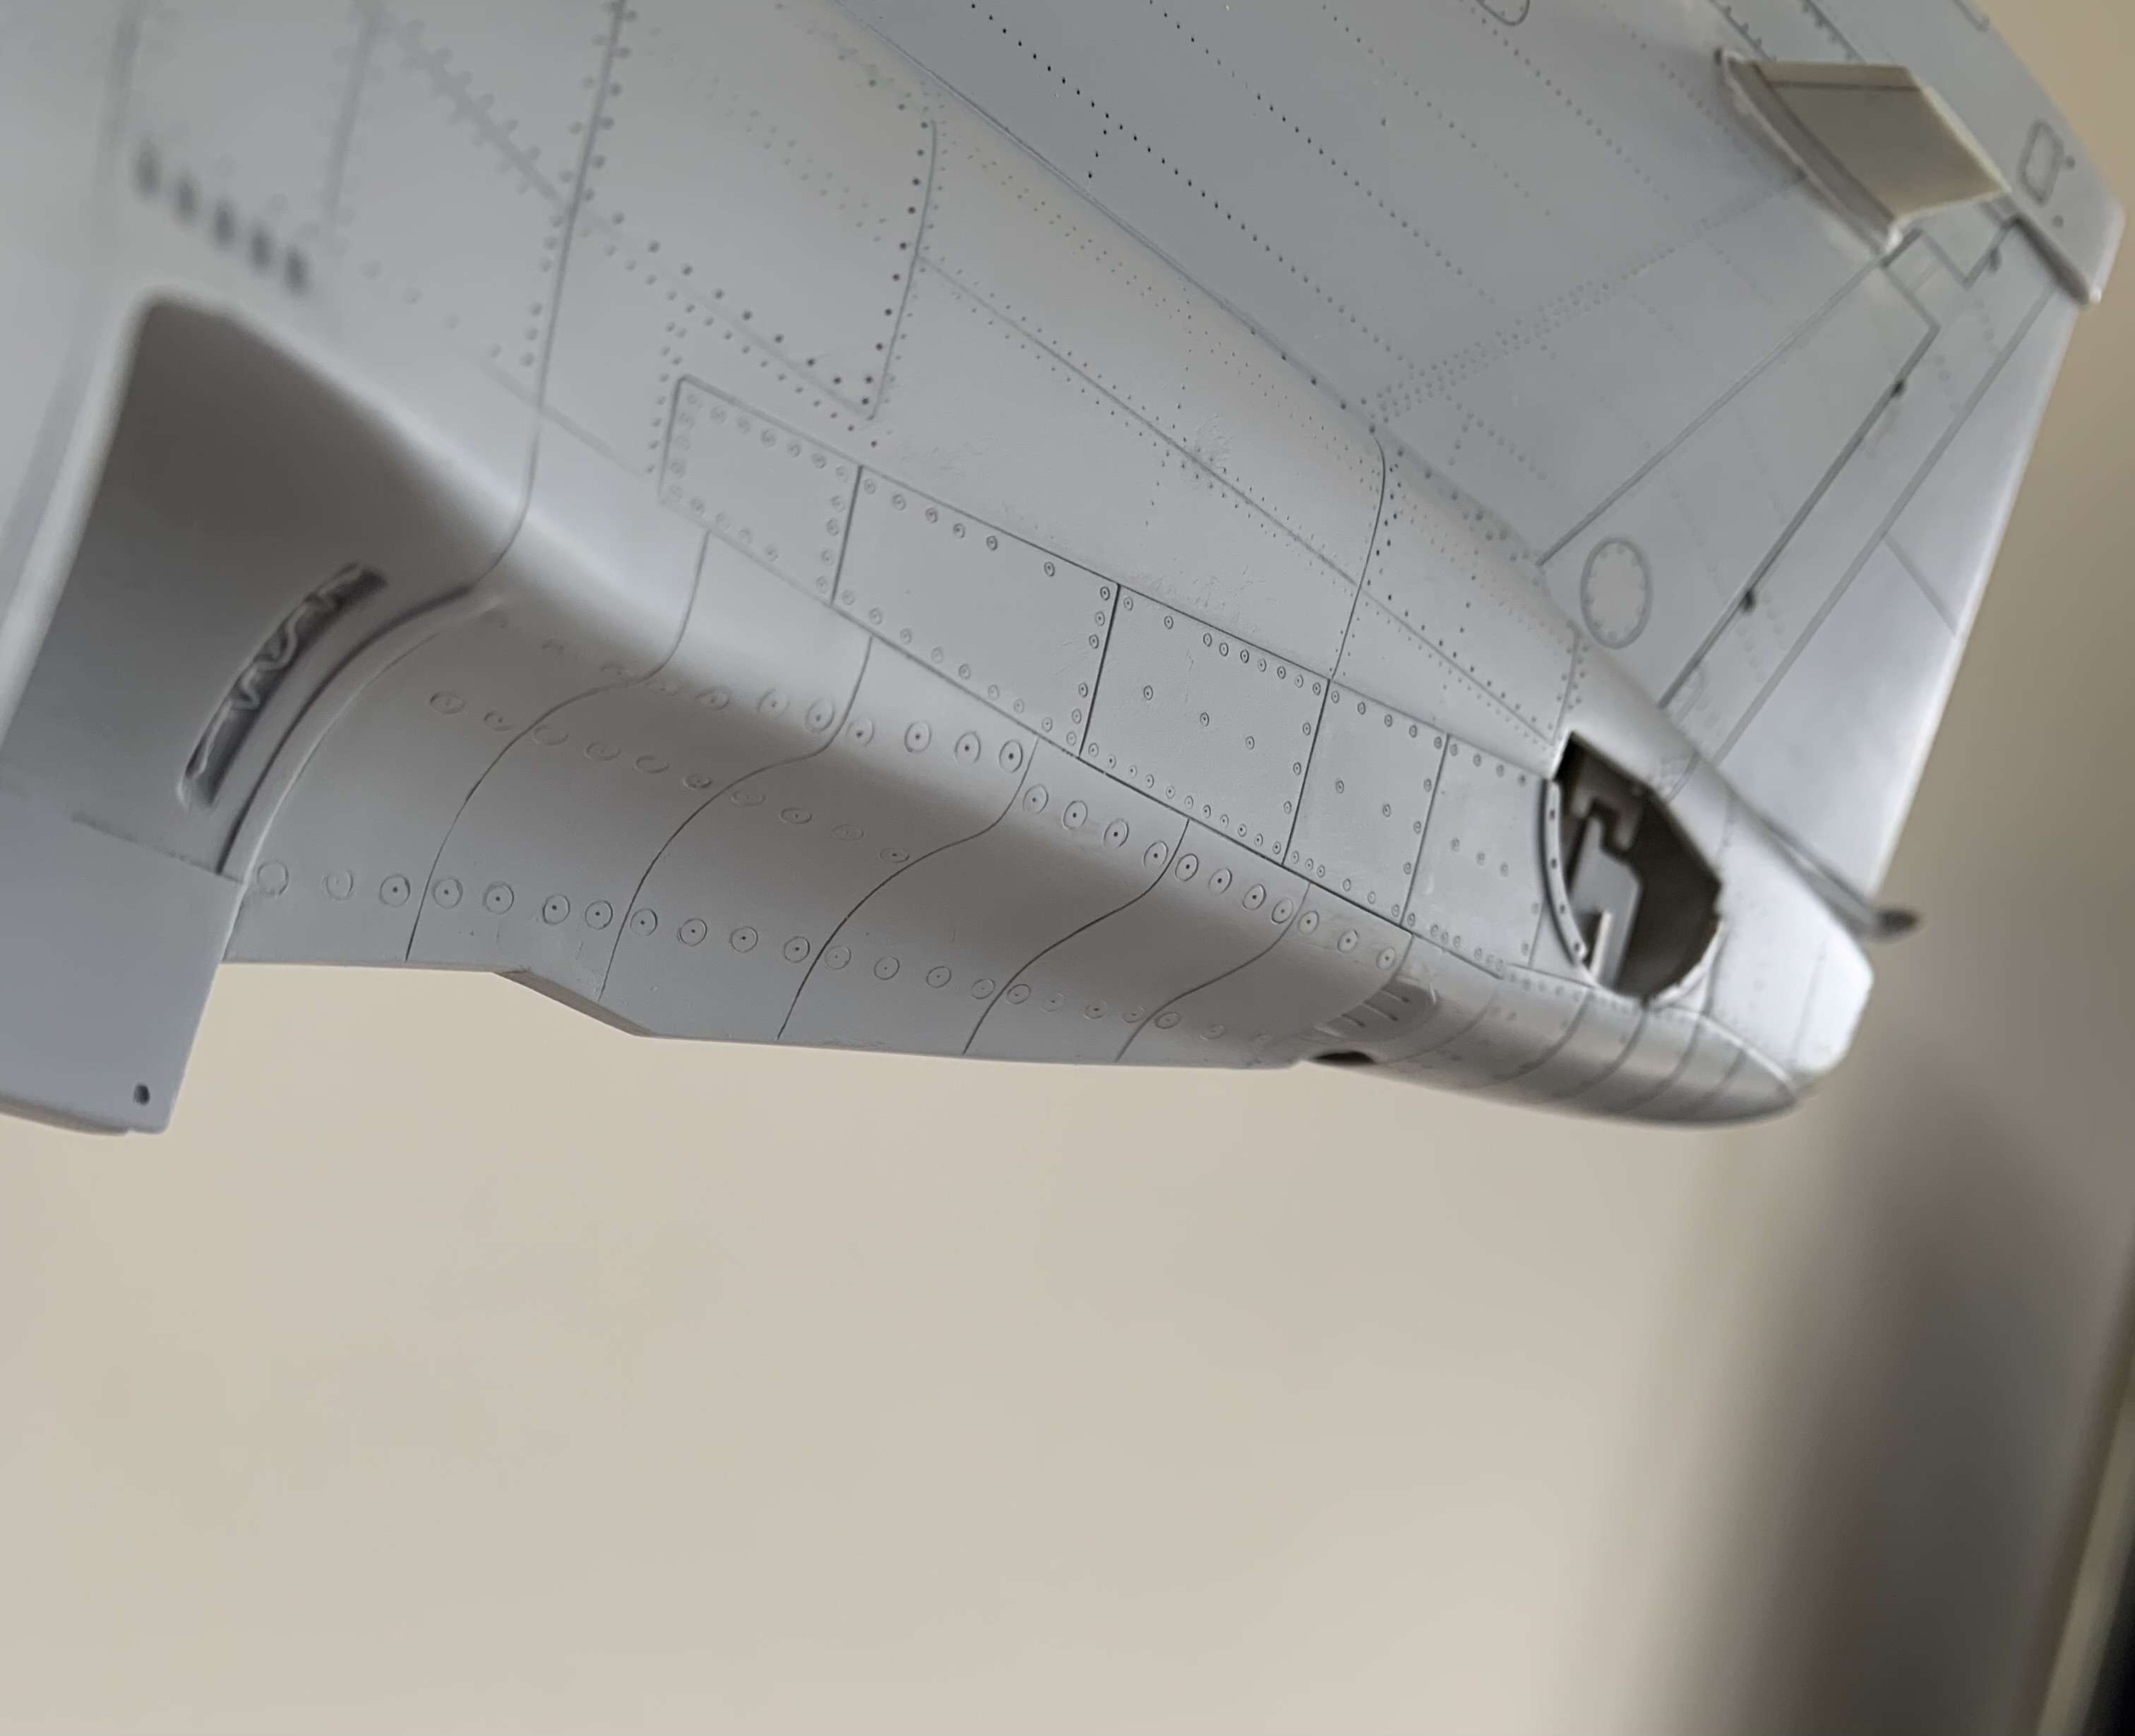
Placed a reheat can in just to see how it looks overall

Yikes these huge pictures really show up all the imperfections etc!
Still obviously a bit to go here to make it look better, but time to breathe, step back and look at the big picture again
Might look at the Vari ramps while this area all cures
Cheers Anthony
-
-
Wow, very cool! You are very talented and your printing and panel lines look exceptional! I look forward to seeing your future projects...awesome entrance into LSP manufacturing!
-
Well seeing this Steve, is giving me an itch with 24th scale again......reminds me we should both get back to work on those big Mossie's!!
Stunning mate!
- Derek B, KiwiZac and Crossofiron
-
2
-
 1
1
-
Yup, you're an inspiration to many of us here as to what can be achieved!
I am learning Solidworks 2024 atm, I can only dream of what you guys make at the moment.
Daddy.....when I grow up I want to be just like you
- TheBaron, geedubelyer, Archimedes and 1 other
-
2
-
2
-
On 2/2/2024 at 12:08 PM, monthebiff said:
Looking good Anthony but when can we have some paint please
Regards. Andy
LOL, yes sir, as soon as I can....I hope I am not sub consciously stalling like I did with the cockpit
However I am excited to paint her once all the prep is finished.
On 2/2/2024 at 8:13 PM, geedubelyer said:Smashing work on the ladder Anthony. Very realistic.
Did you consider punching out discs of metal foil for the washers on the hot area?
This has become the ultimate F-4 build. So many beautiful details. Keep at it, you'll get there in the end. There's less of this elephant left to eat now. Remember, small bites
")
Thanks!
Yes I did but the trials I did I just wasnt super happy with. They still looked like they sat too proud and when I used thinner foil I struggled to get a clean 'çut' and when primering and buffing the surface they fell off or got easily damaged. I had some PE discs but they looked like saucers stuck to the side in scale...
Actually you are right, I have almost eaten the Elephant, I definitely can see the end in sight now!
On 2/3/2024 at 12:34 AM, Derek B said:Awesome ladder Anthony (much kudos to TonkaXV for producing such a fantastic set of ladders). Looks like you are making some real progress on this Anthony, even if the hot end is causing you some pain.
My Phantom days with British Aerospace (BAe) back in the late 80's/early 90's:
Thank you my friend! Yes those ladders saved me another scratchbuild job! I always love your photo's and advice, you always inspire me! Interesting to see several variations of the rear ladder too.....
19 hours ago, scvrobeson said:Stellar work Anthony! Your Phantom continues to set the standard. Your attention to detail really will make it all worthwhile at the end.
Was there a standard for the ladders? You did yours green, but the picture from Derek has it red, and I think I've seen yellow as well. Was it just whatever the ground crews had on hand?
Matt
Thanks Matt, and thanks Derek for providing such a detailed answer for me!
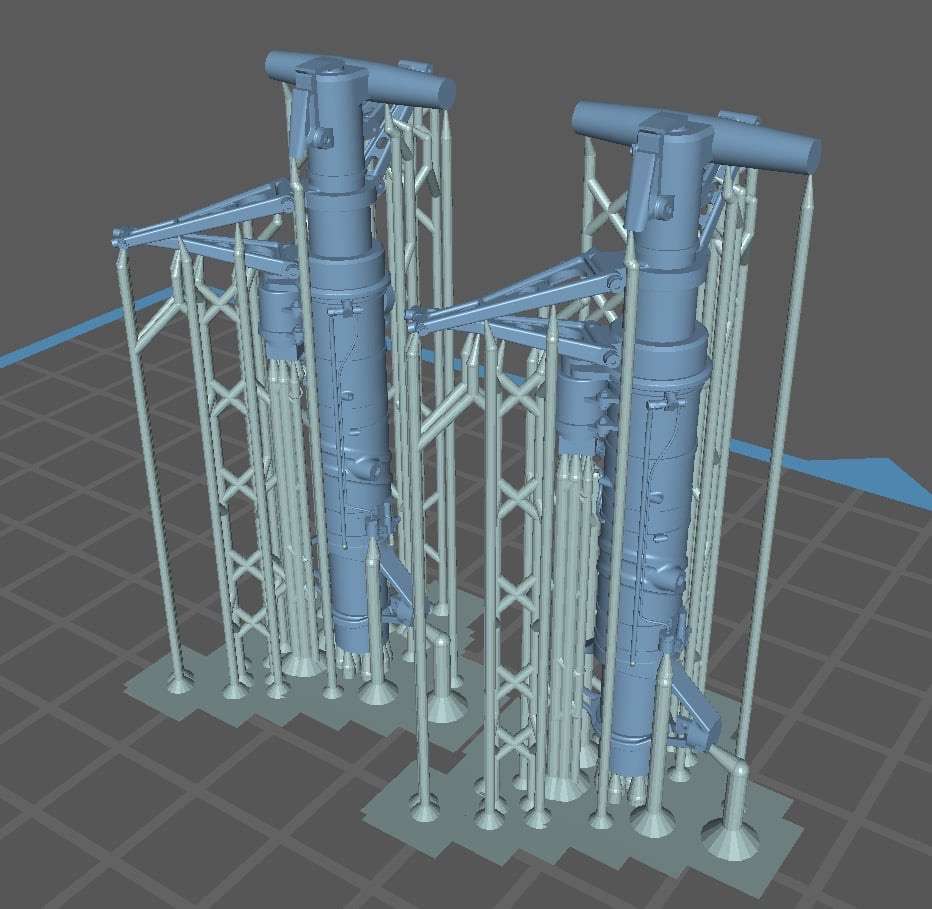
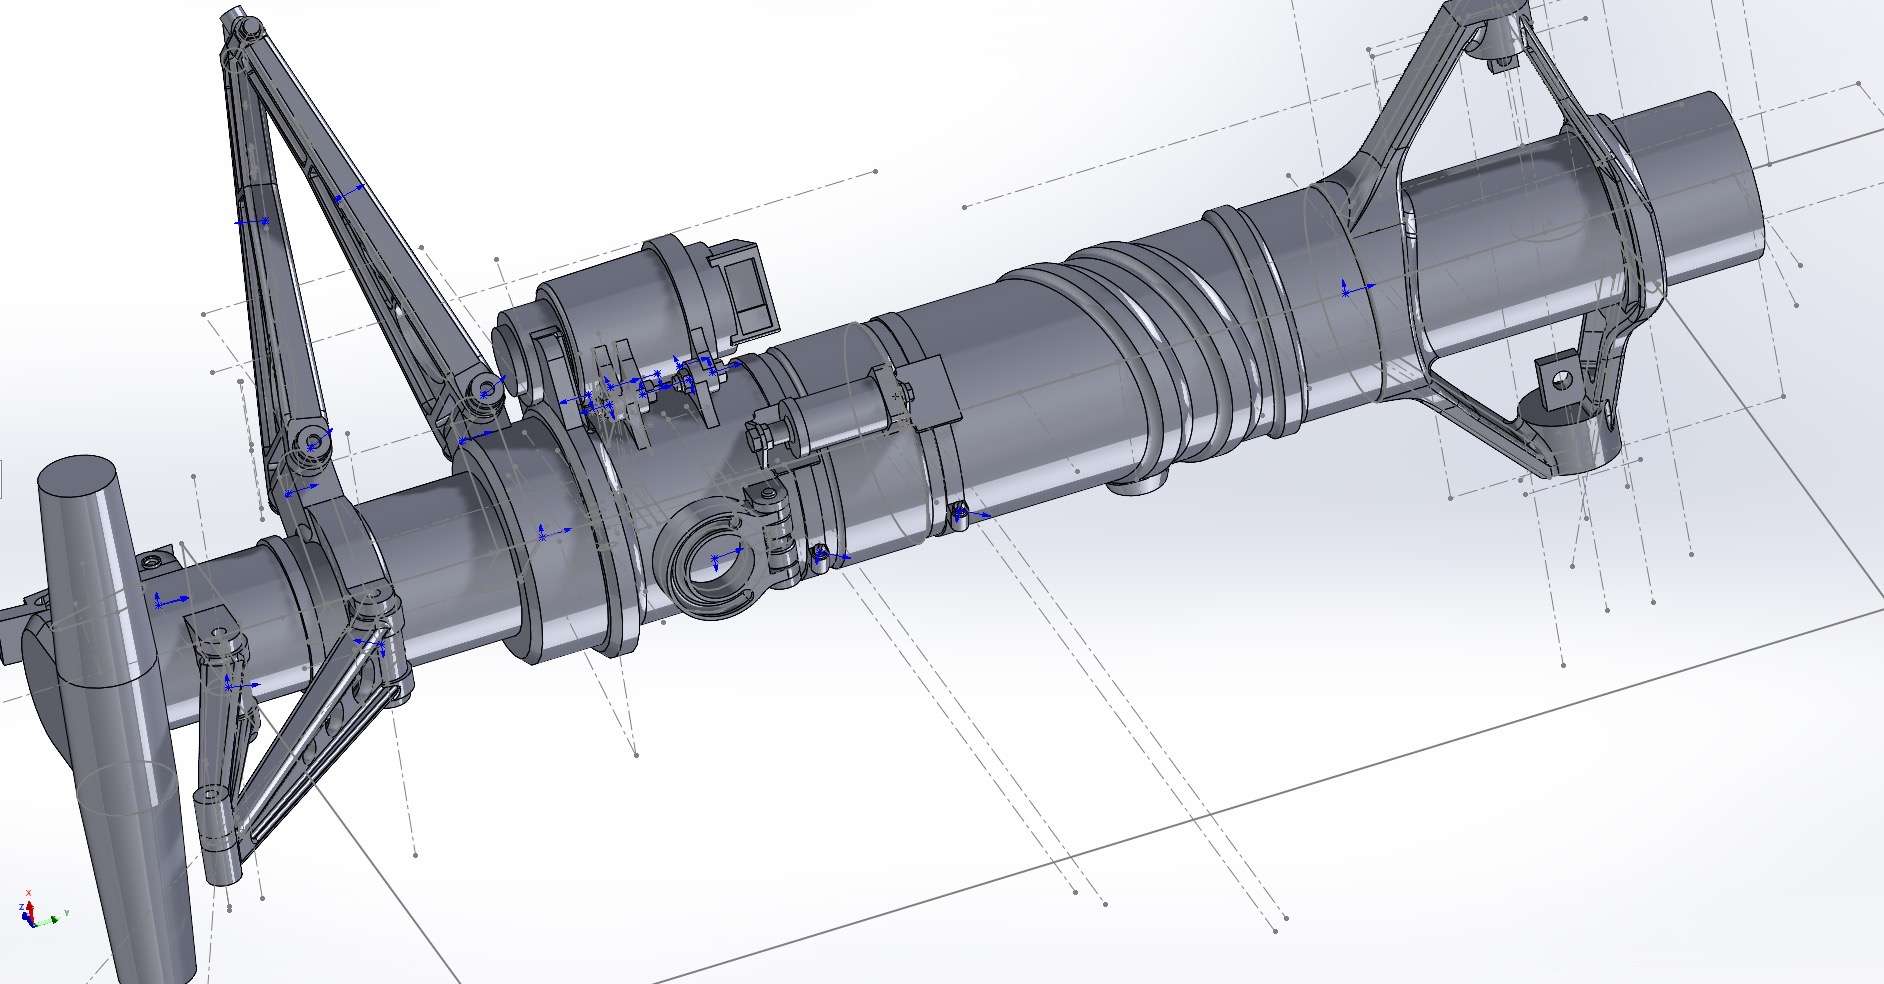
Not too much to add except Kerry's exceptional work on the nose leg continues....almost finished now, I think he said there is a little plumbing to still do. During Kerry's study of the leg he noticed it was slightly assymetric (or very slightly off centre) You can see that in the top of the leg where the triangular flanges are bigger on one side compared to the other. So aside from being thicker the FG.1 leg was very slightly offset. Oh and the side u/c door opens up past 90deg
Cheers guys
Anthony
-
On 1/9/2024 at 2:11 AM, Derek B said:
Welcome to the AMS (Advanced Modellers Syndrome) club my friend...resistance is futile!
Exceptional work as always Anthony, all very inspirational. I hope that your next modelling project will be more restful for you.
Cheers
Derek
LOL I hope so too....Although I have been looking at my Tamiya Spitfire I have started converting to a Vc and I am trying to learn Solidworks 2024. Clearly a sucker for punishment!
On 1/9/2024 at 2:35 AM, vvwse4 said:Hi Anthony,
Looks marvellous as usual, cannot beat that.
For someone who has an F4J on the feared shelf, and for now no intensions to finish the damn thing and not want to start allover allthough that is unavoidable, I might have an idea for those big washers. I used a large drilbit to make it some deeper and in the center of that just punched with an gemstone setting tool, it didn't look that bad at all after some practice on a piece of plastic.
Hope this makes sence.
Cheers Rick
Thanks Rick, this heat shields has had me going around in circles. You're a better man than I am, I couldn't get your system to work very well, although it ended up leading me to the way I am doing them now.
Seriously, this 'Hot section'has challenged me more than anything else I think! I am at 'Plan R' and we know what is after R? S and S= SOD! However I just couldn't put her on the shelf as I feel like I would be letting too many people down after so much amazing help and encouragement. I ended up drilling holes and them reaming them out to take a piece of Evergreen rod number 221 3/64" or 0.047 dia. Because there is so much resin, CA, plastic card and other crap in there I had to slowly ream out otherwise the edges were crumbling and I got a few cracks between hols, Ugh. Finally I have a method that seems to work. Anyhow I decided to take a break from that section as it has been really intense for me to get consistent results. But I think I can get a nice accurate representation eventually
Not flash but I can make this work and there is still a lot of work to go in here
So, time to clear my head and do something else
So TonkaXV on BM has done some gorgeous 1/32 RAF Phantom boarding ladders, thanks so much to you they are awesome and really look great fitted to the model. Highly recommended!!
I have decided to only use the rear one as often you see the built in front step down for pilot access and a rear ladder fitted only. So I gave it a light sand/buff down to remove some very light print lines, I lost a few bolt heads and so added Archer ones to replace them. Then primered Mr Surfacer 1200 and then Silver, topped off with a clearcoat
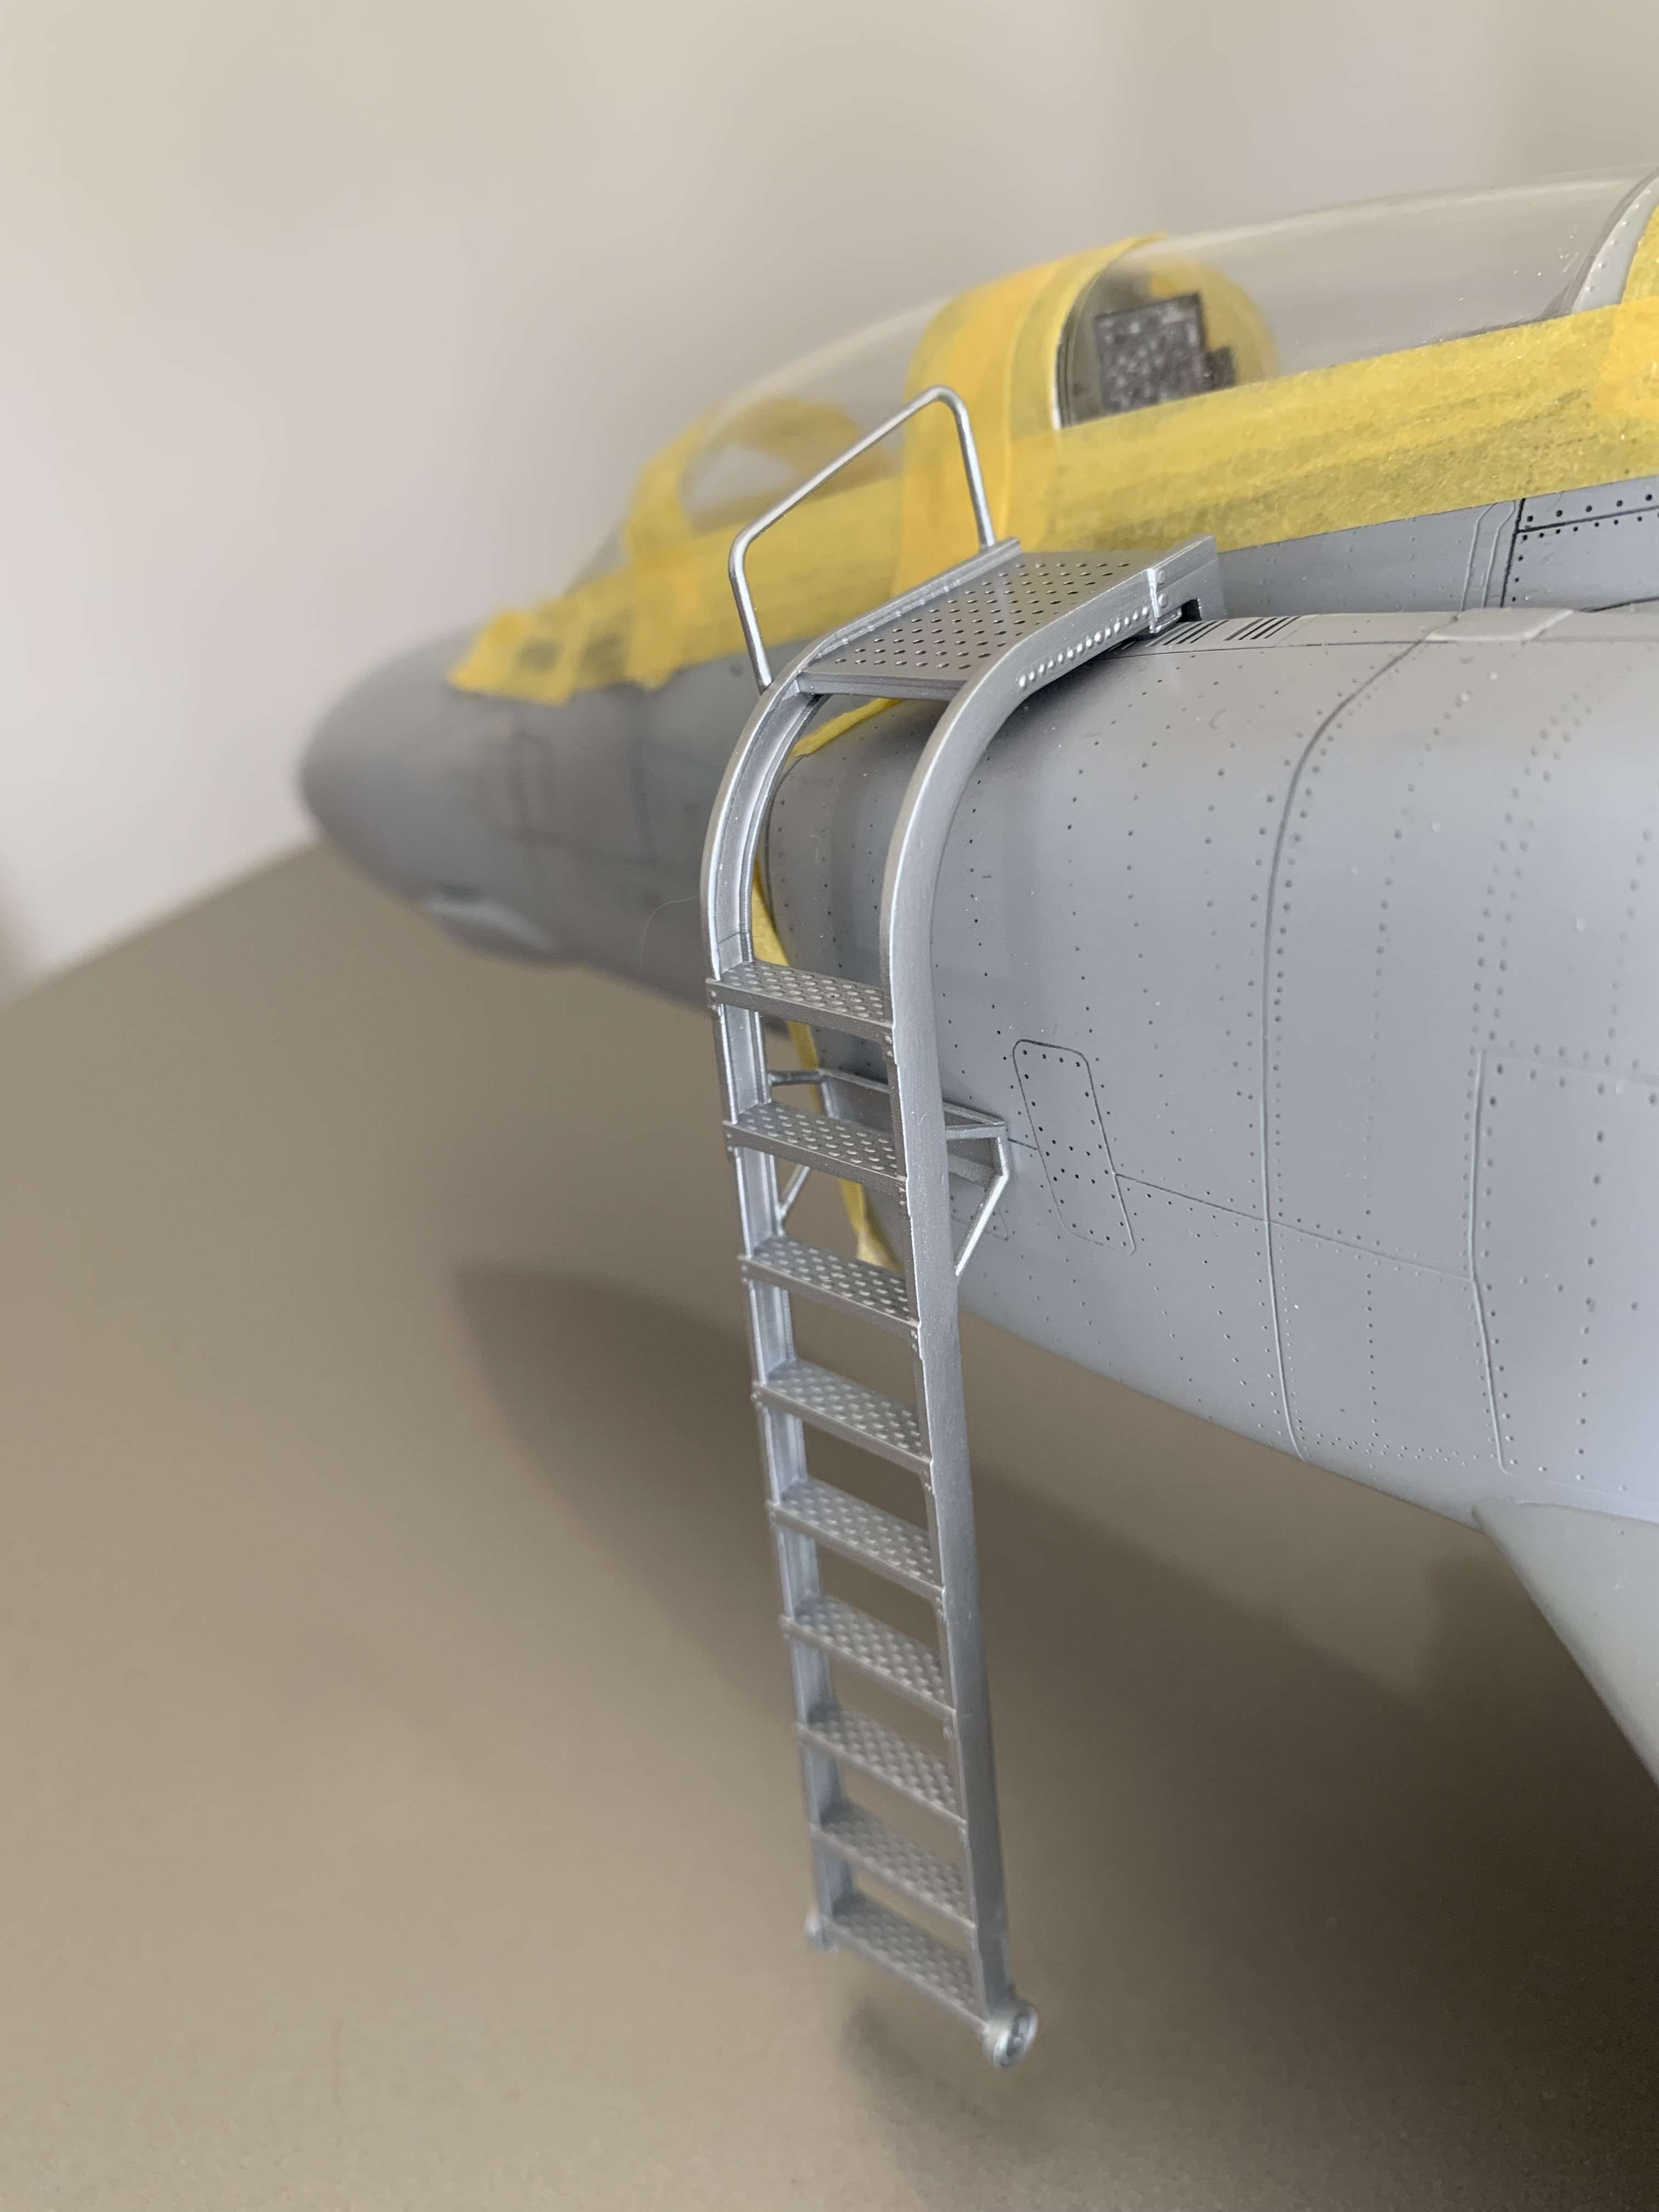
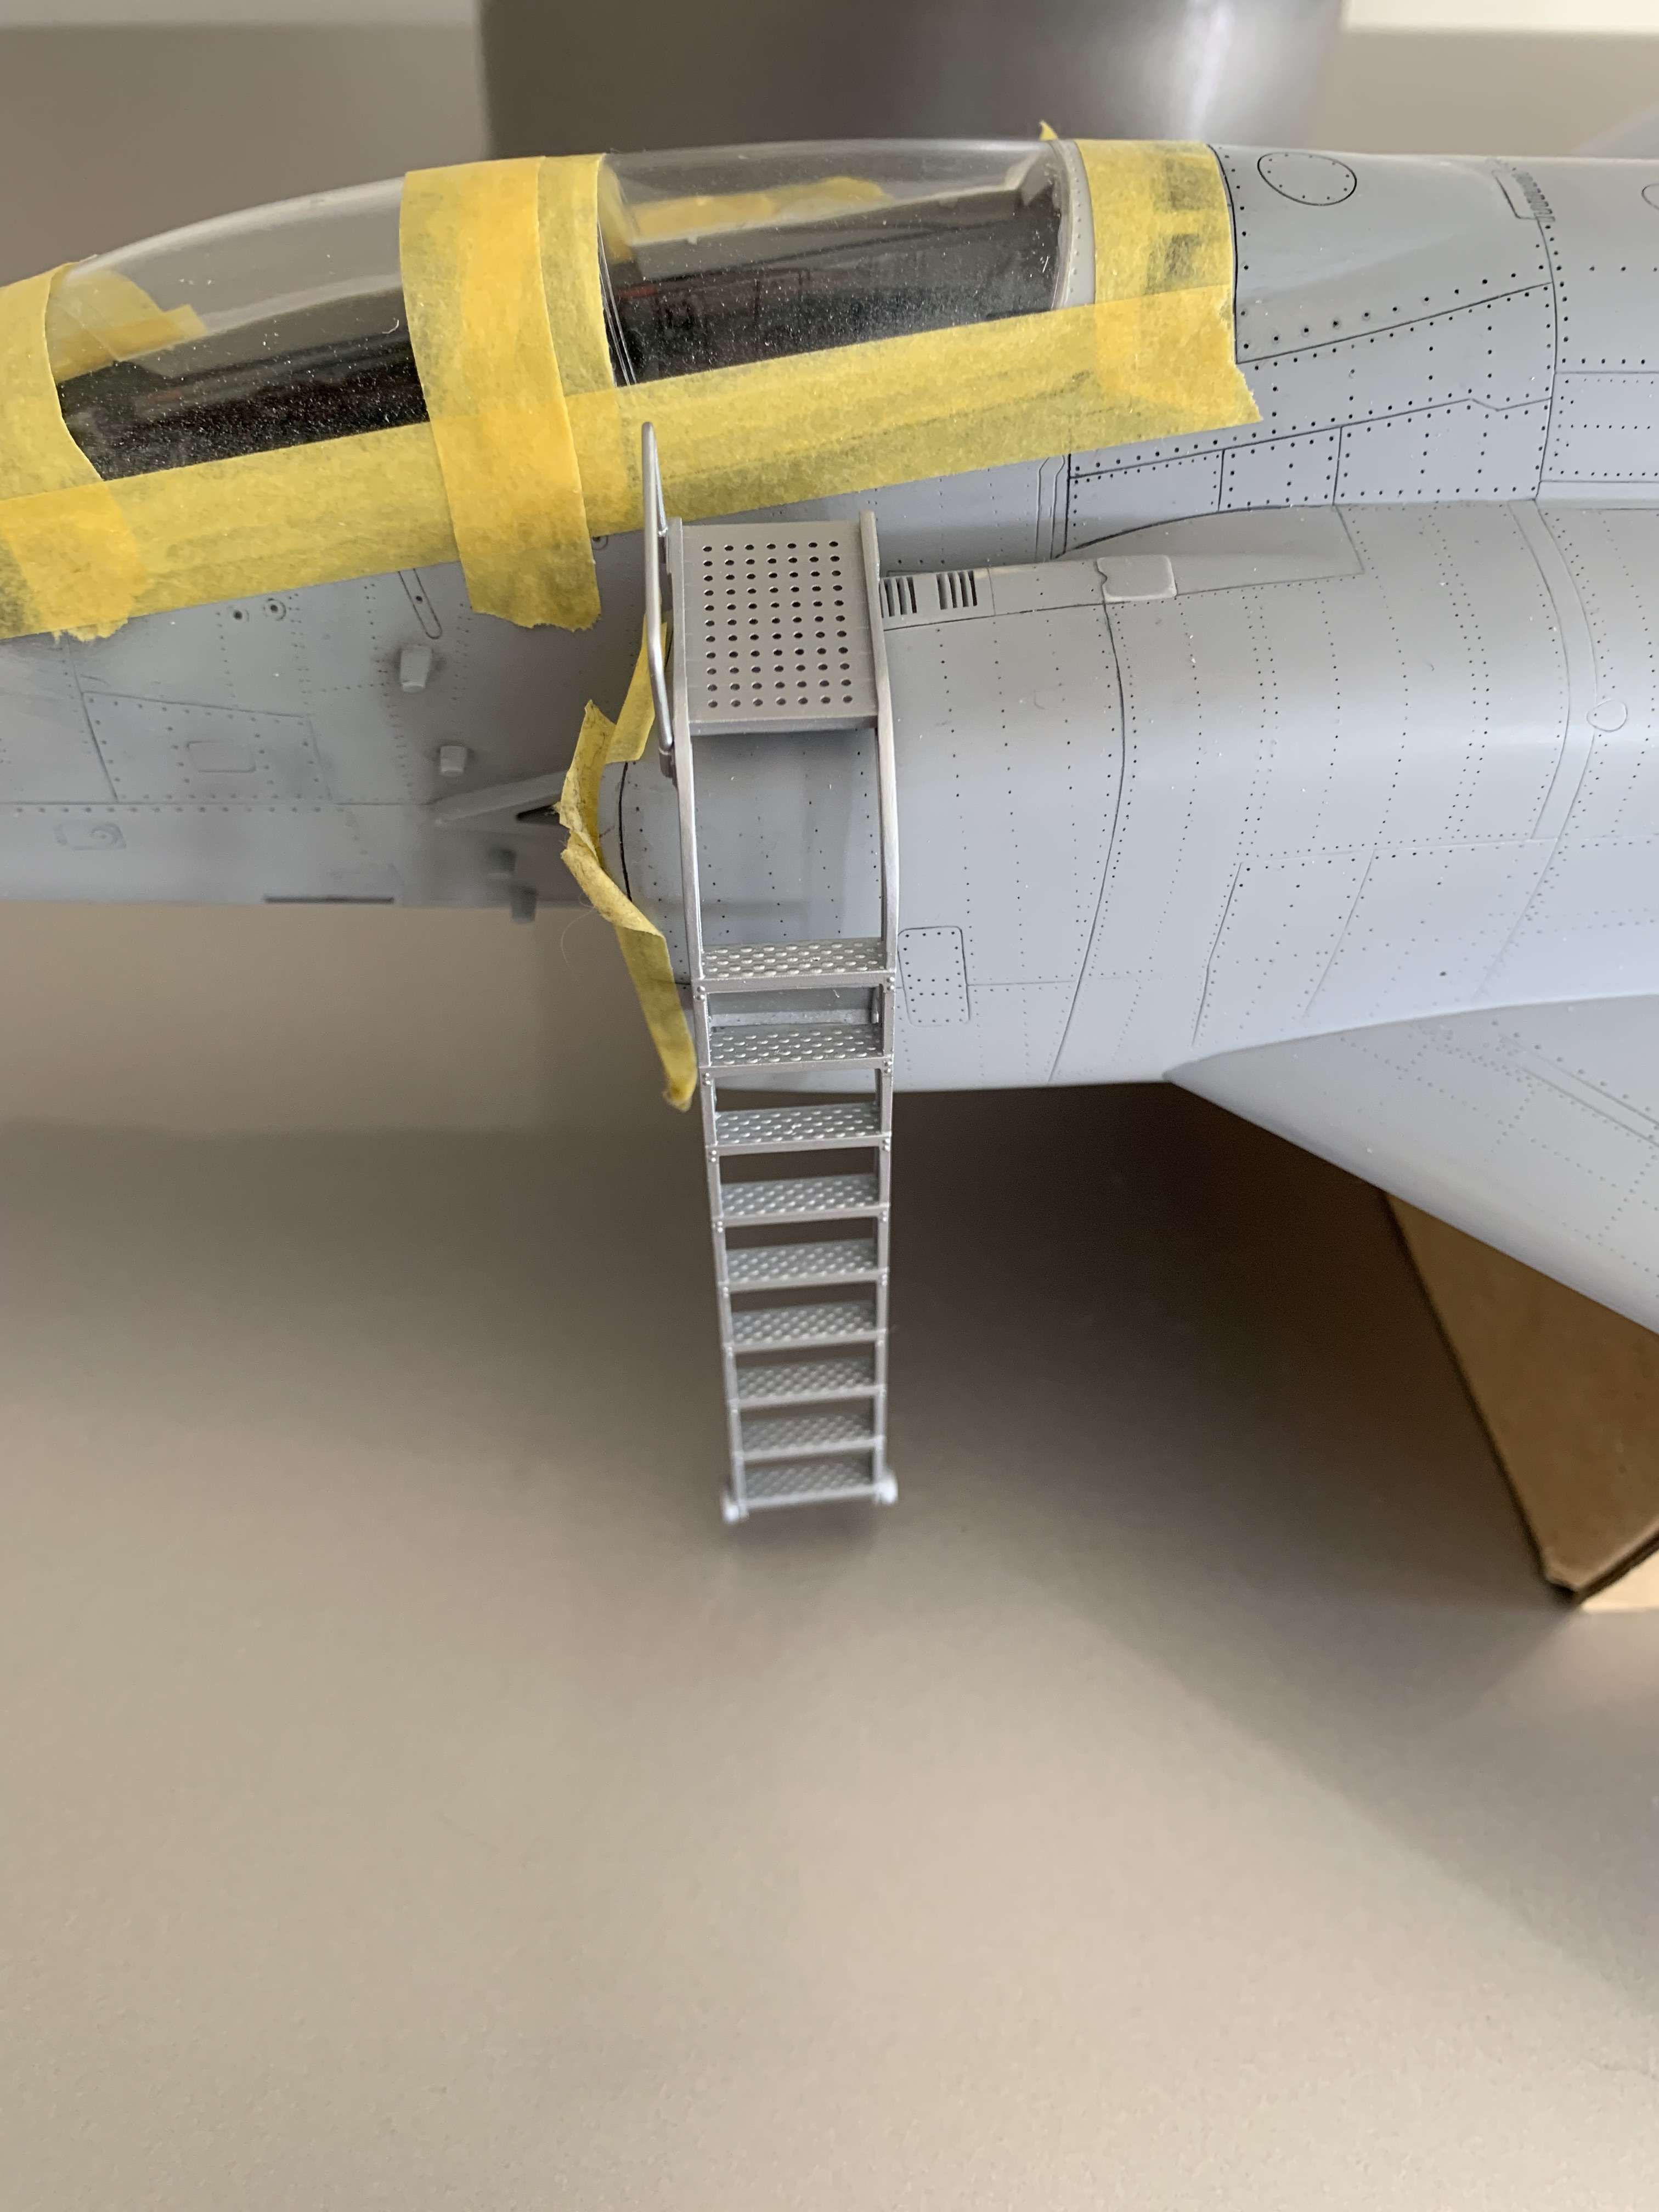
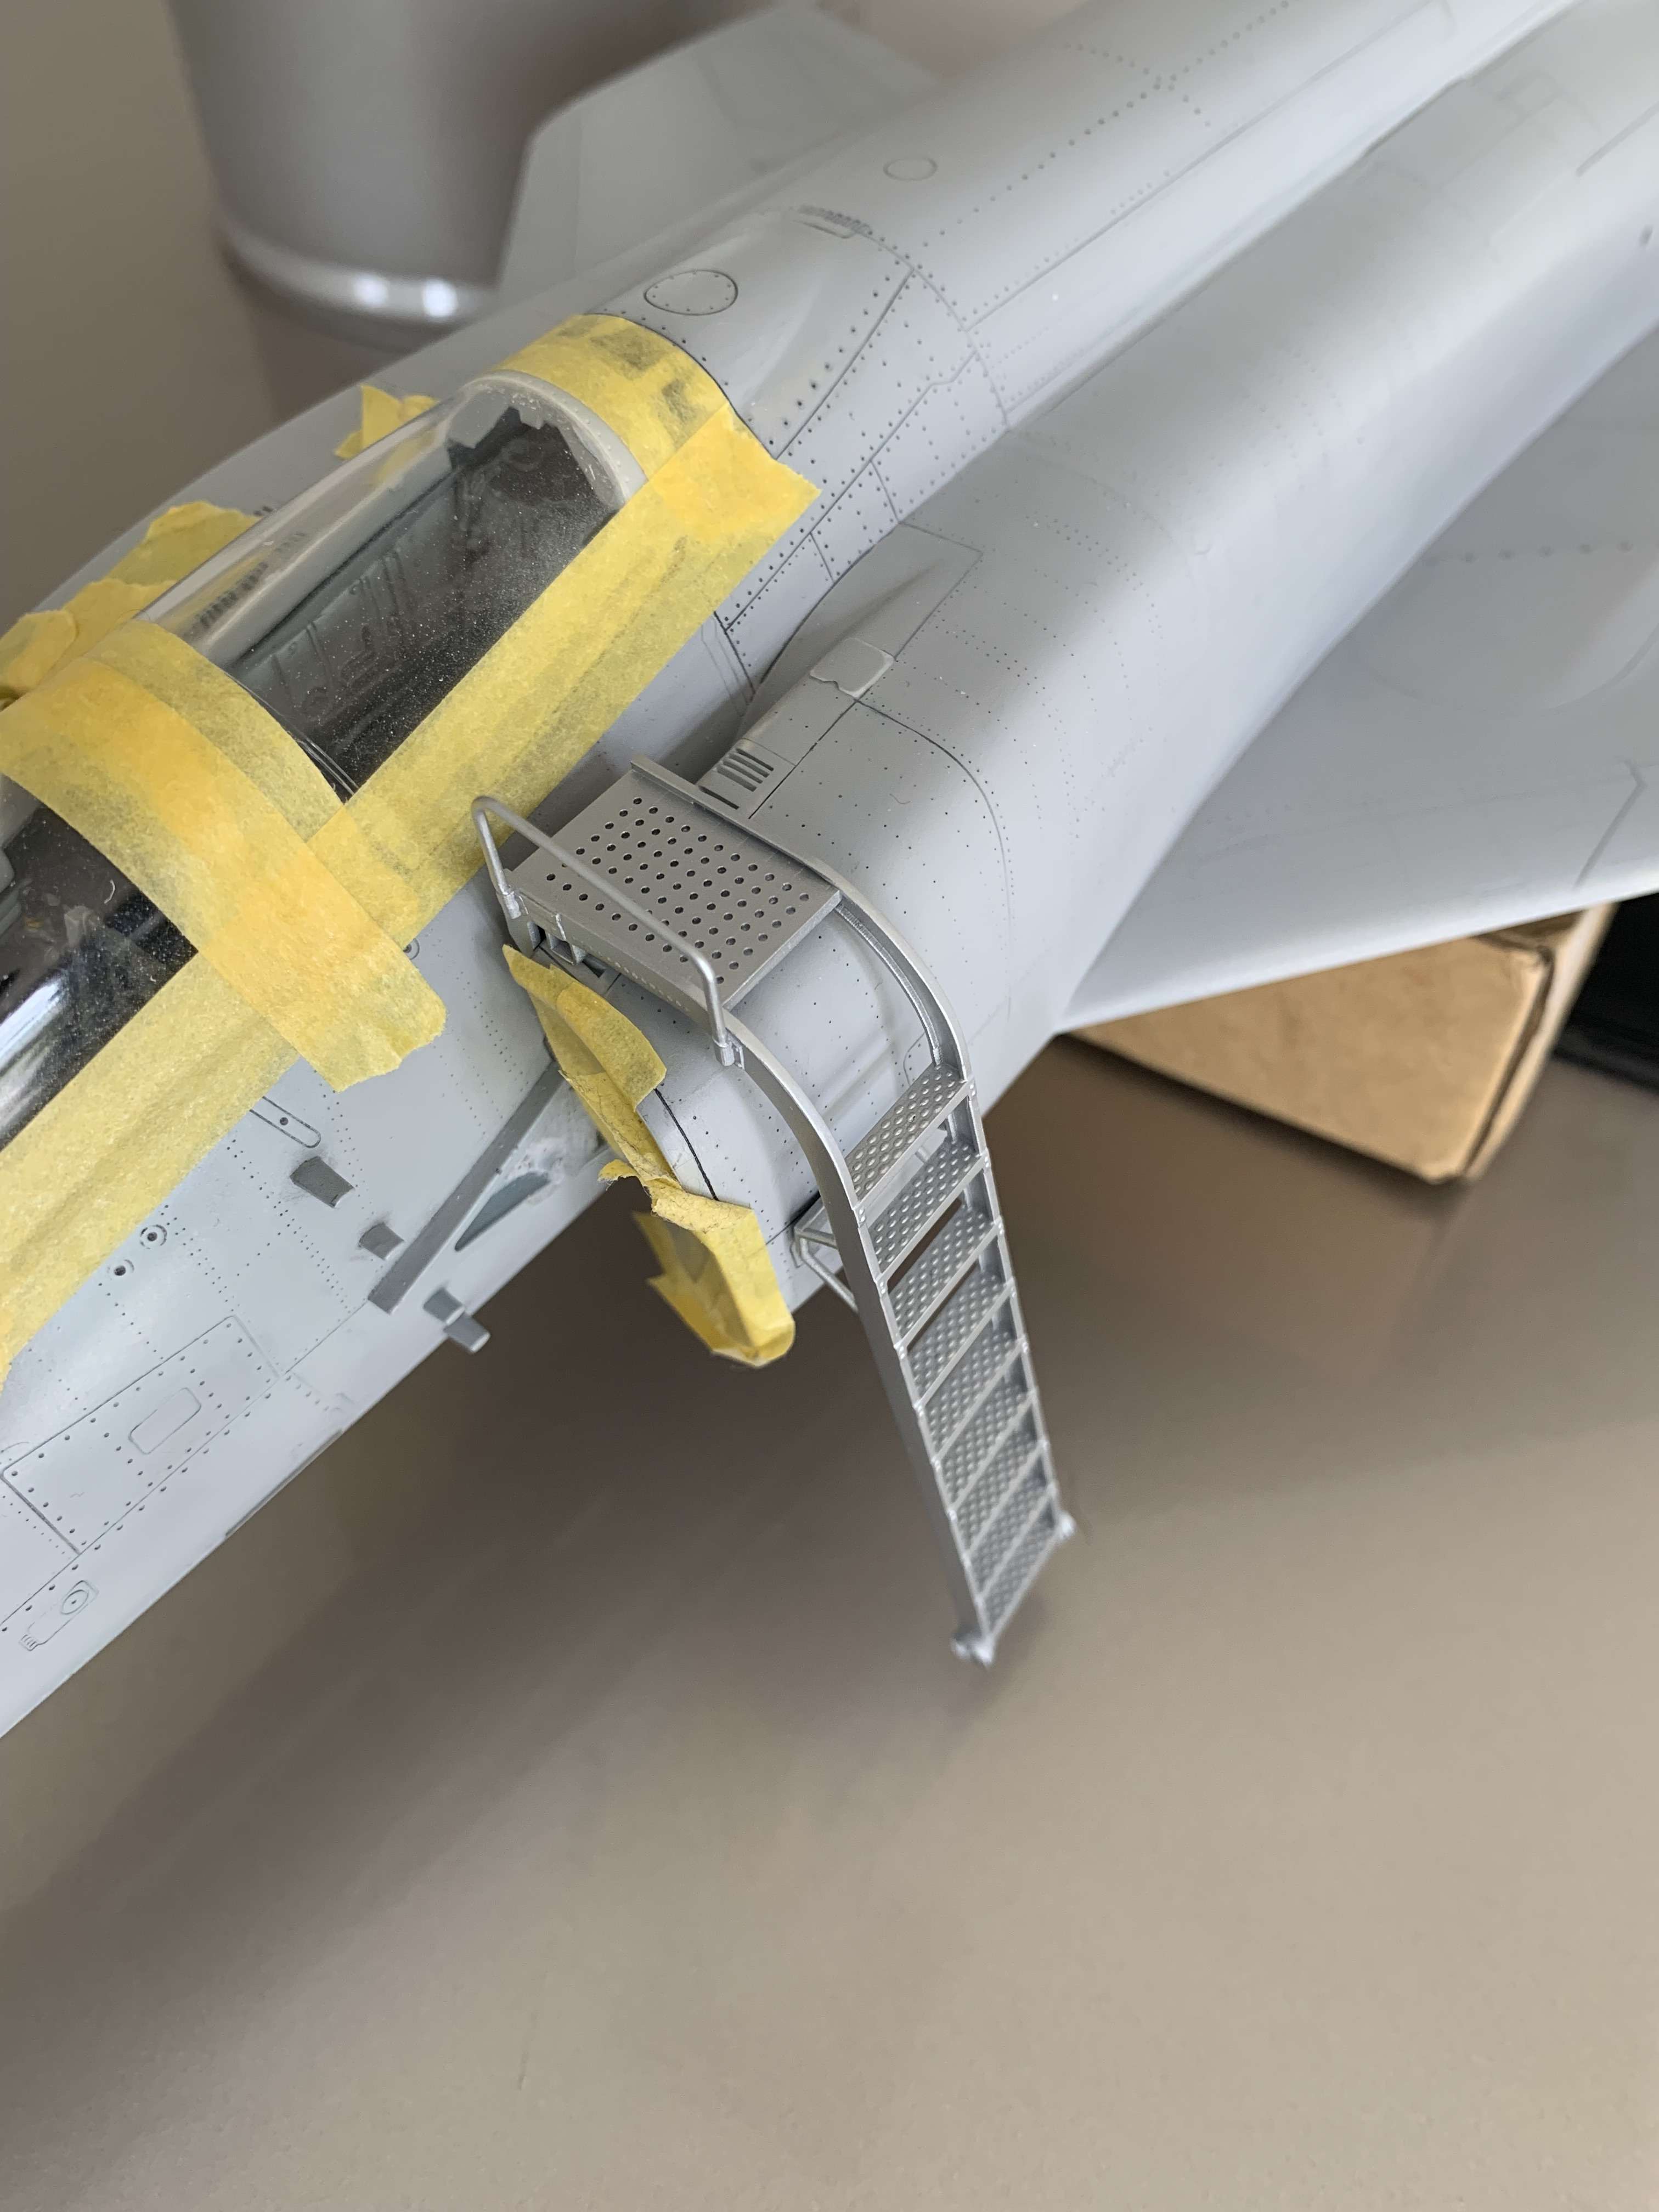
Then I made a mix of Dk green/olive drab and sprayed the ladder. I left 24hrs and then used micromesh, fine sanding sponges and a piece of worn smooth emerypaper. to very carefully wear through to the silver, the clearcoat was there as an added barrier in case I went too deep and hit grey primer. Added some stencils matching a few photos and a '43'as sometimes the sqdn marked their own stuff. These ladders got really rough, but I didnt want to go too overboard. Then a flat coat and a gloss on the silver to make it shine a little. Oh I also lightened and darkened the green to look like oily rags and handprints had tarnished the paintfinish.
This is what I ended up with
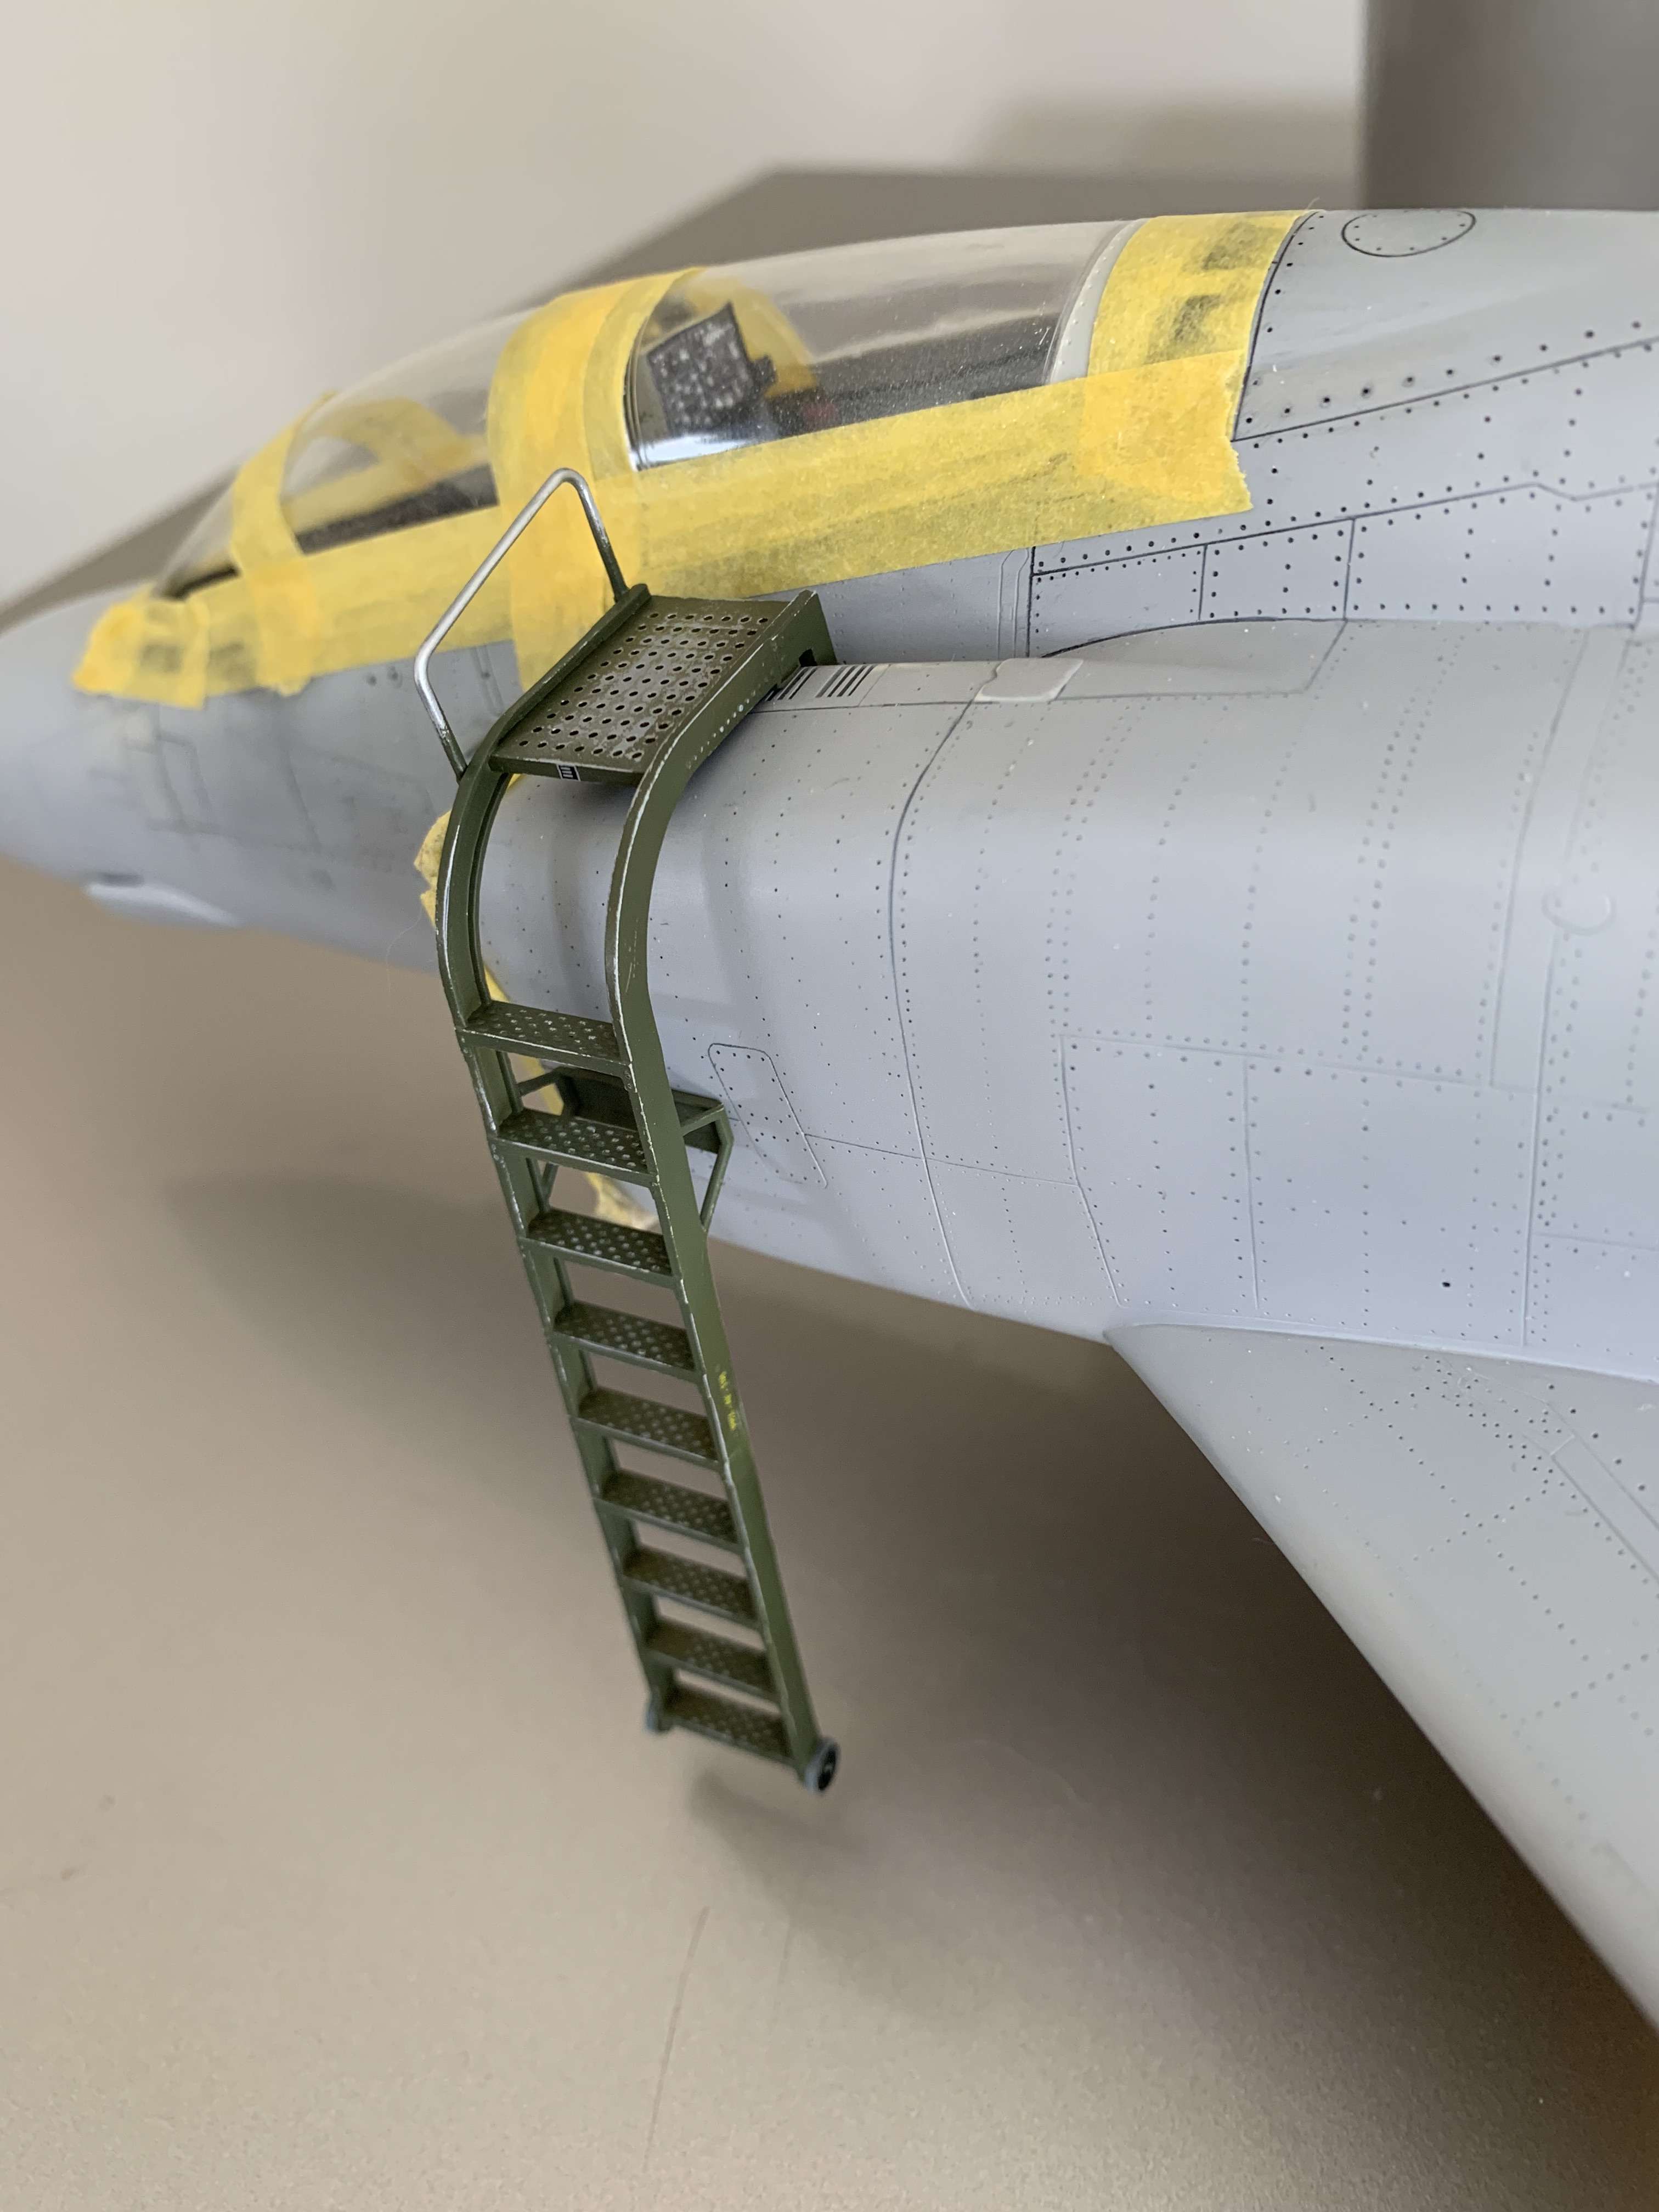
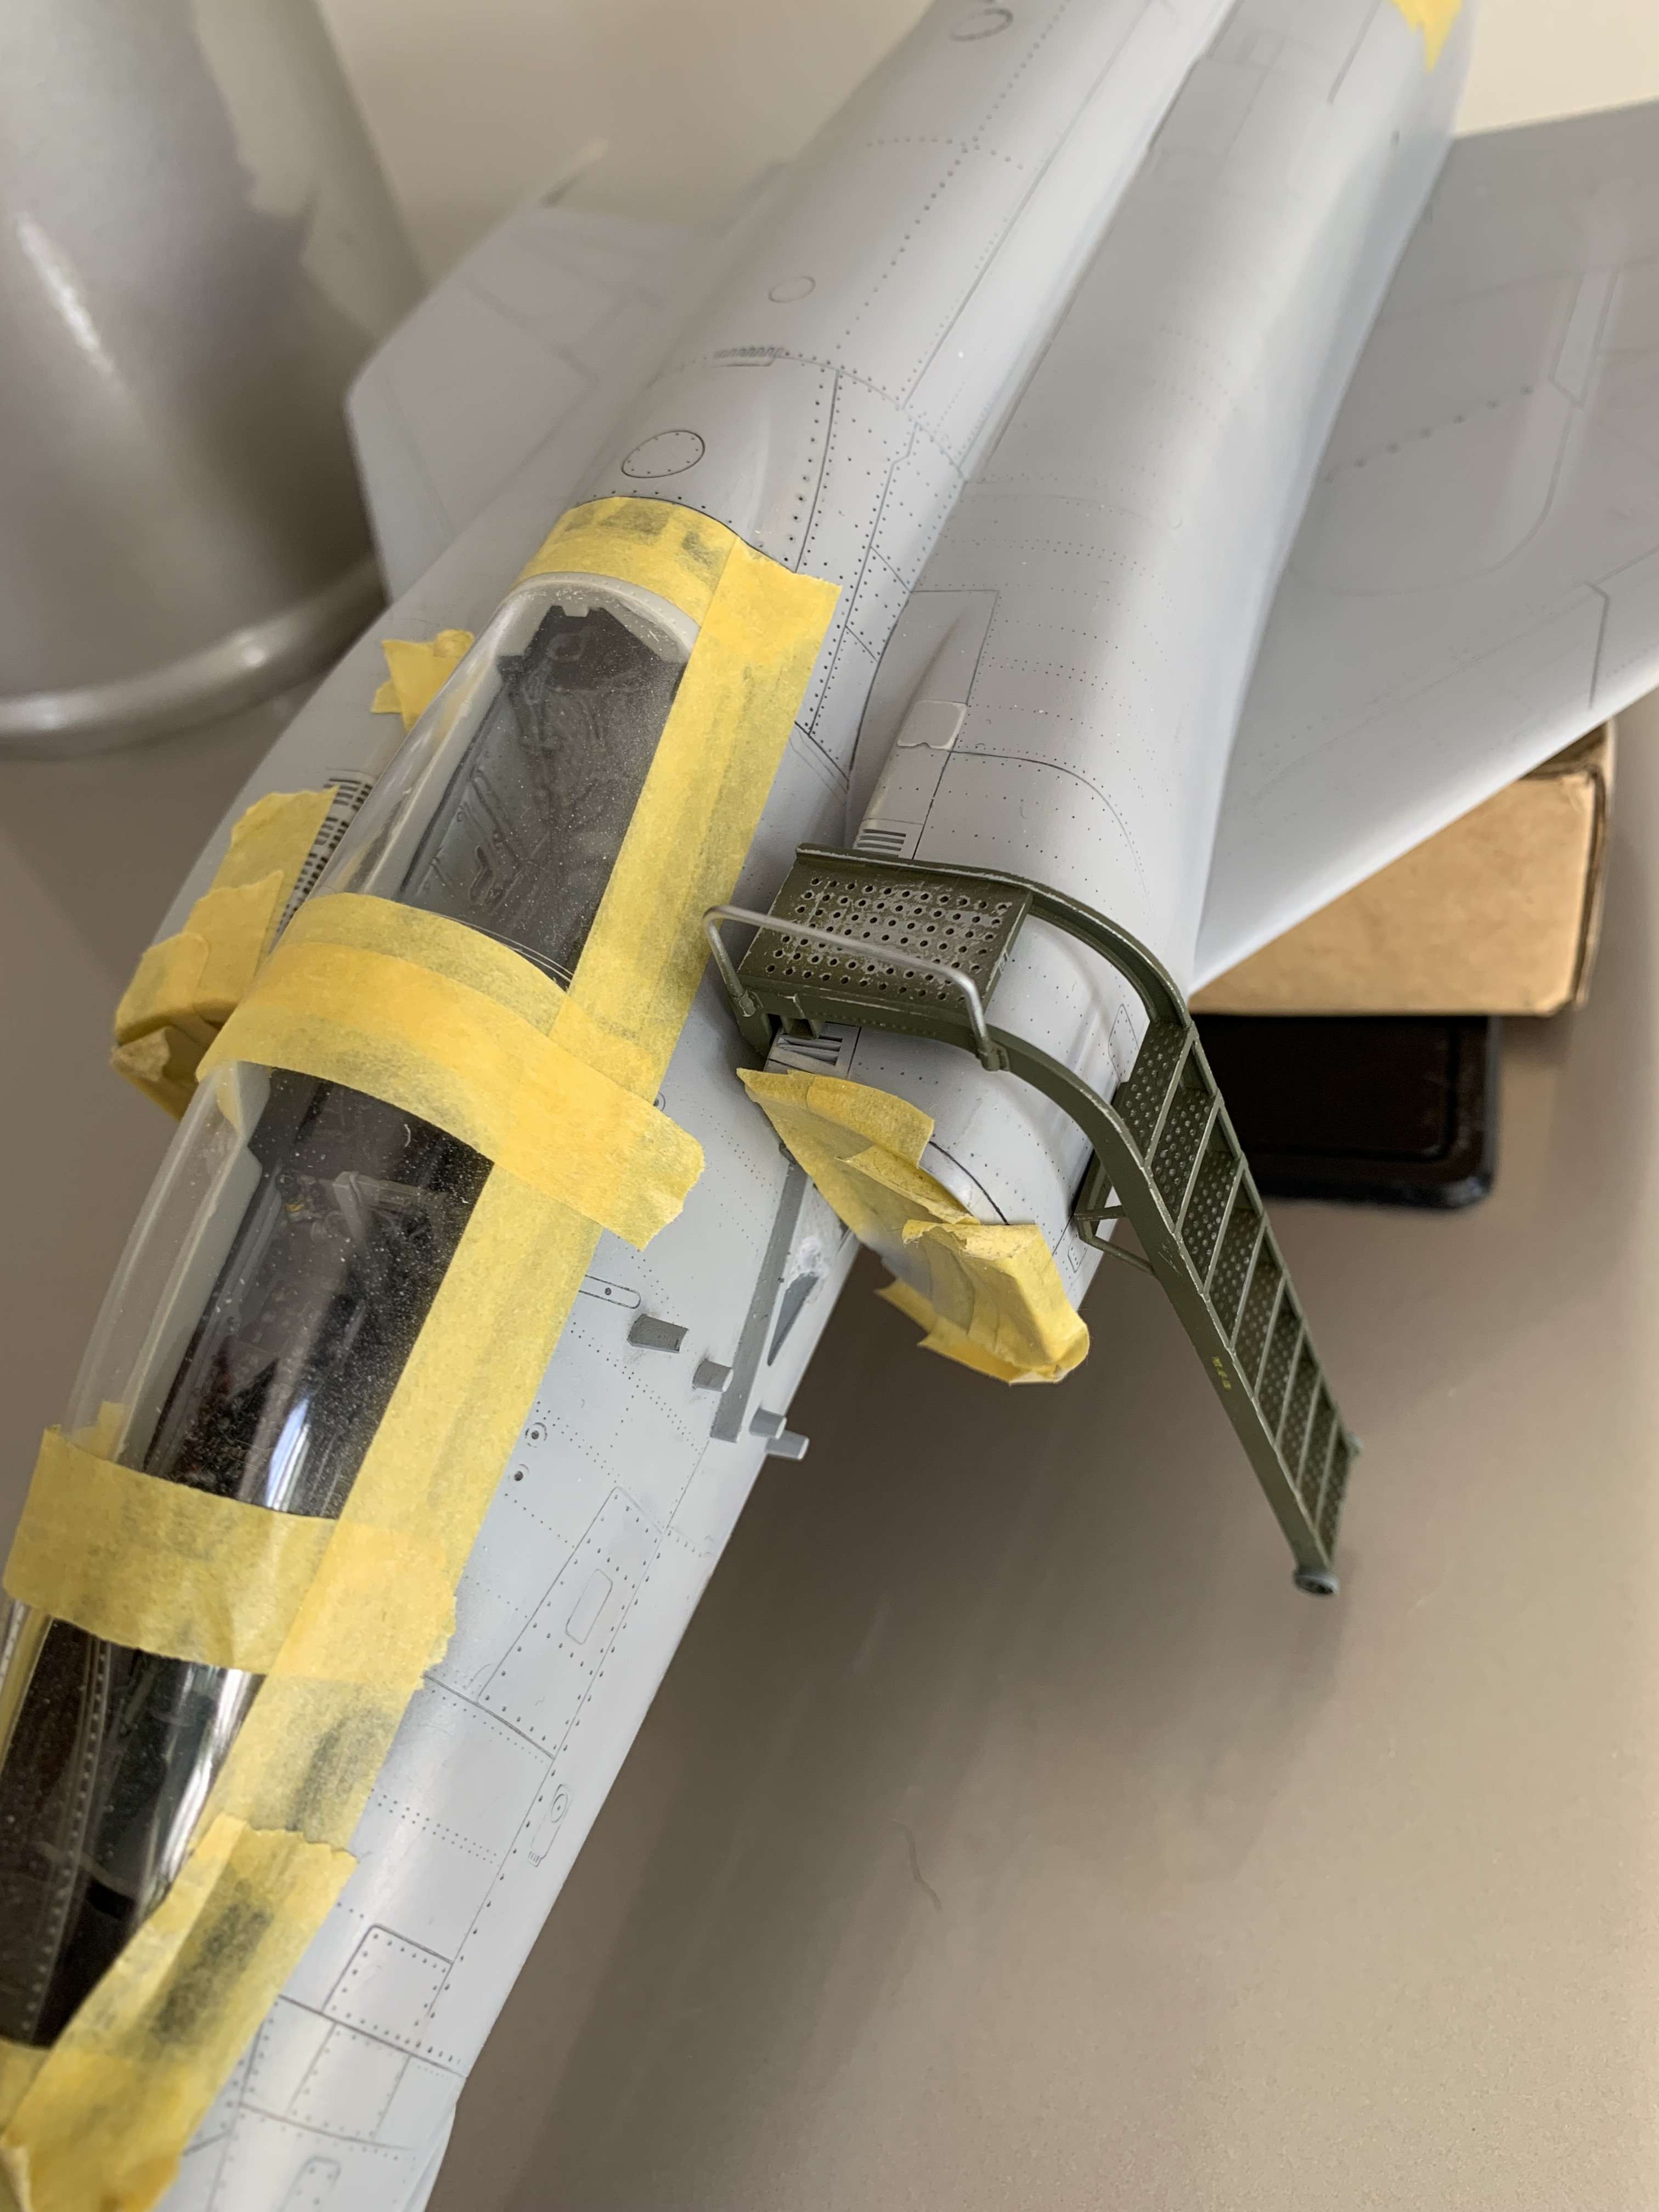

Someone got something right between Tonka and myself as it fits perfectly!
So I am feeling better now and can face doing more washers at the back....
Thanks for tuning in team
Cheers Anthony
-
Lucky you! I always wanted to get a Gamecock to convert into a Grebe.
I dont know why I didnt check Ali's website, for some reason I thought they were all sold.
Looking forward to seeing your awesome build of this kit!
Cheers Anthony
-
-
-
-
Great to see you back here Chuck! Great renovation with the model cabinet...love it!
Yes the model scene is going through a lot of change (for the better) but it is hard to keep up at times.
Great to see you back on your gorgeous F-16!
Cheers Anthony
RAF FG.1 XV571 WILD HARE Phantom Conversion
in Works in Progress
Posted
Thanks Kev, loving your airliner builds atm by the way!
Thank you Niels! Really appreciate it
LOL I dont think I will know what to do with myself once it is finished. Actually I am kinda hoping the Icelandic Fine Arts FA.2 Seaharrier or my good friend Tony's 1/32 Wasp he's printing me...
Although I should finish some stuff too lol
Hey Matt, yeah the new leg looks awesome dosent it?
I've done a few structural 'tests'and it is pretty darn strong, I have no worries it wont hold the weight of the kit
Thanks buddy! means a lot coming from you
Thank you sir! It's not without your help and photo's we could get it so accurate!
Thanks John, I am super pleased you are still hanging in here! I am still using your Phantom for some of my refs
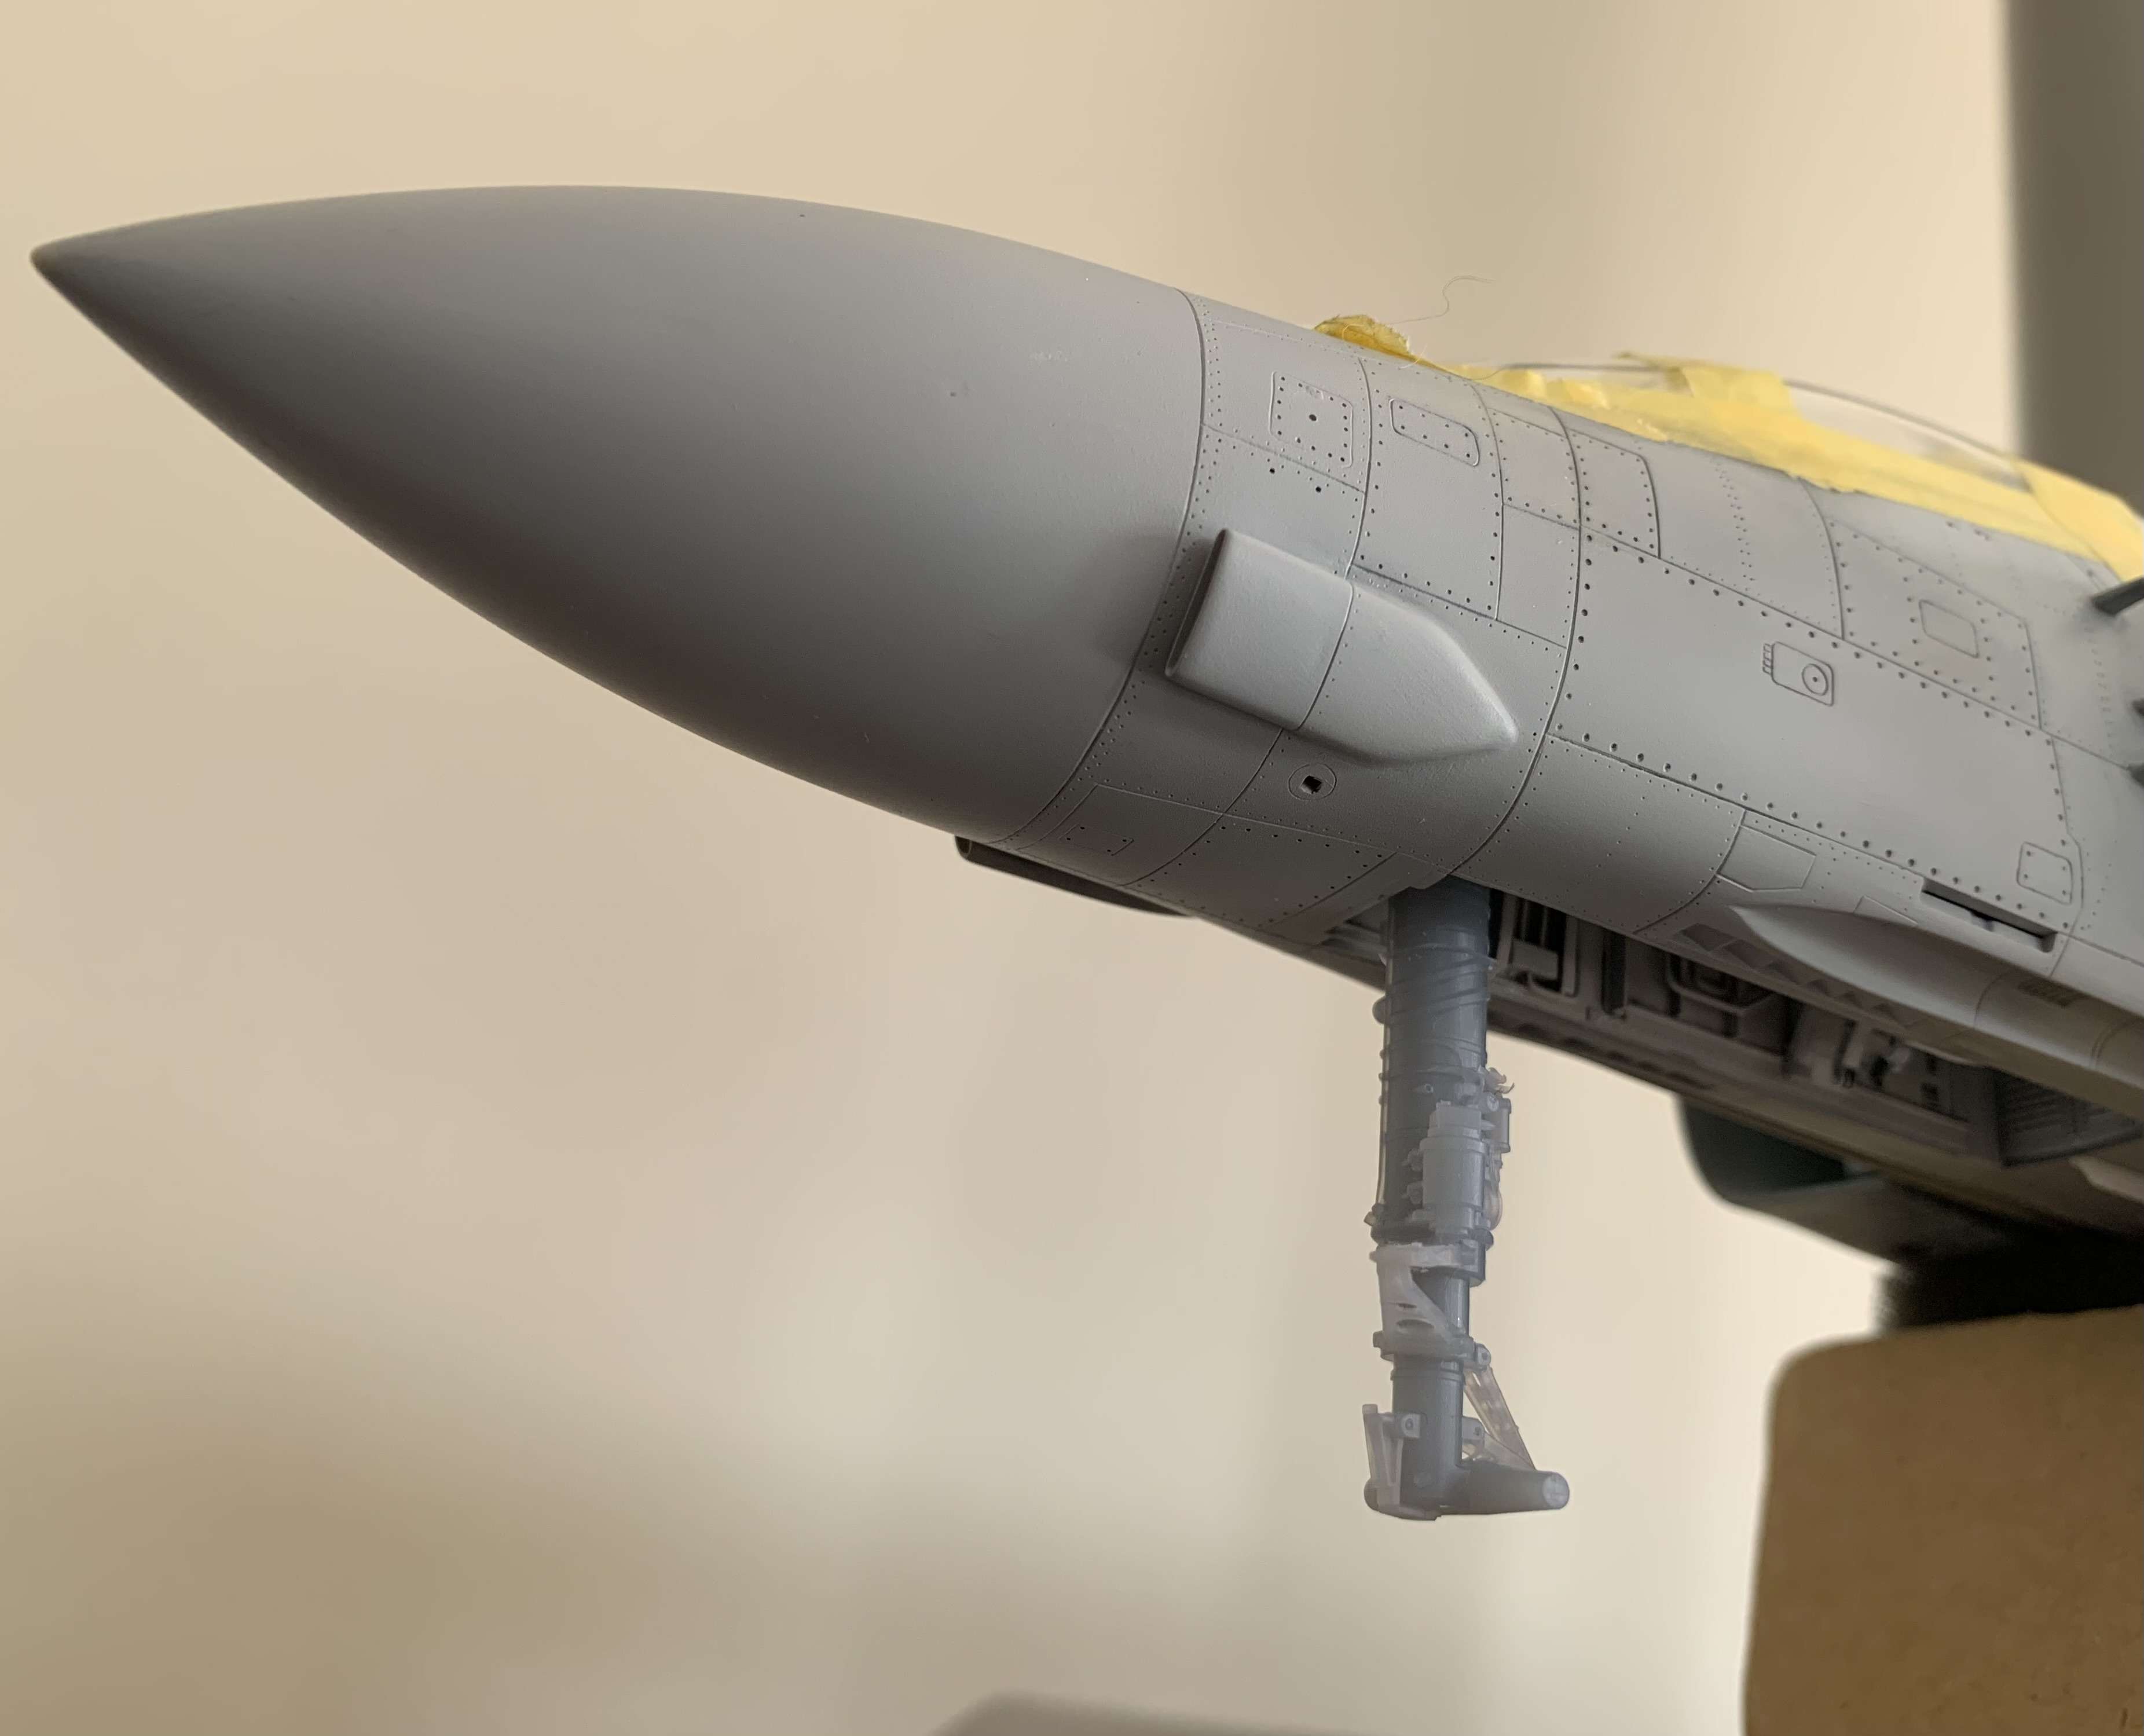
Thank you! Yes that noseleg is is very different when you know.
Thanks Chris! Really appreciate it my friend
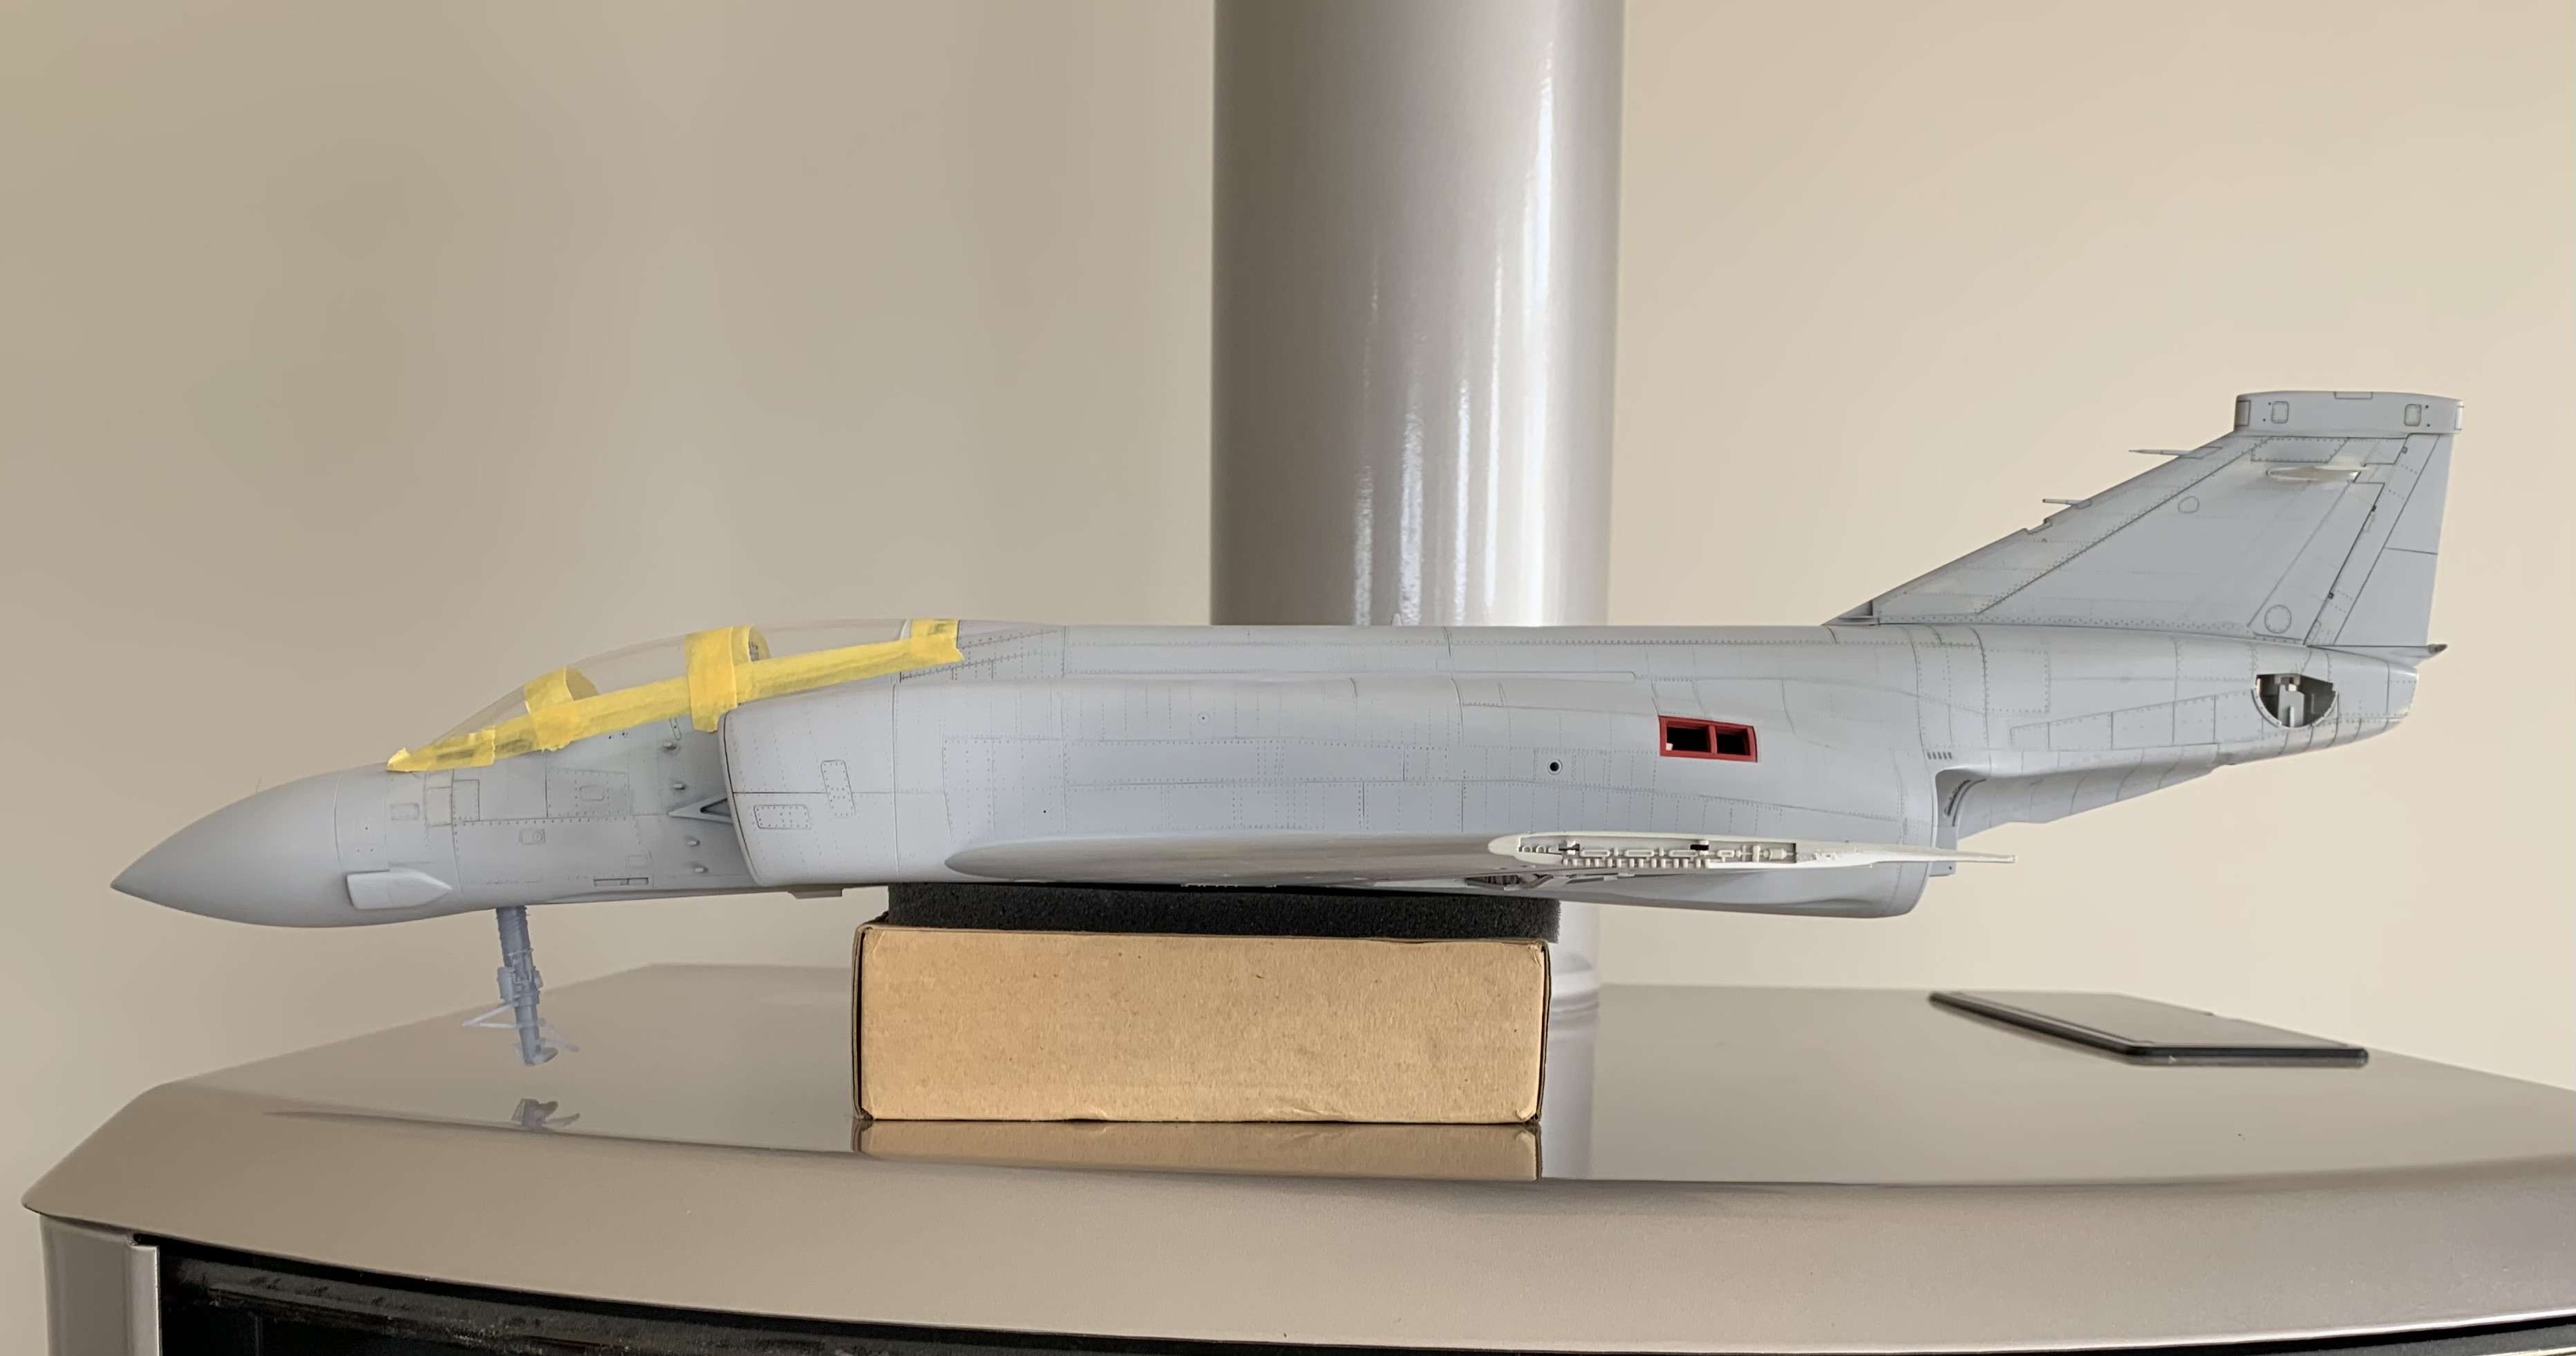
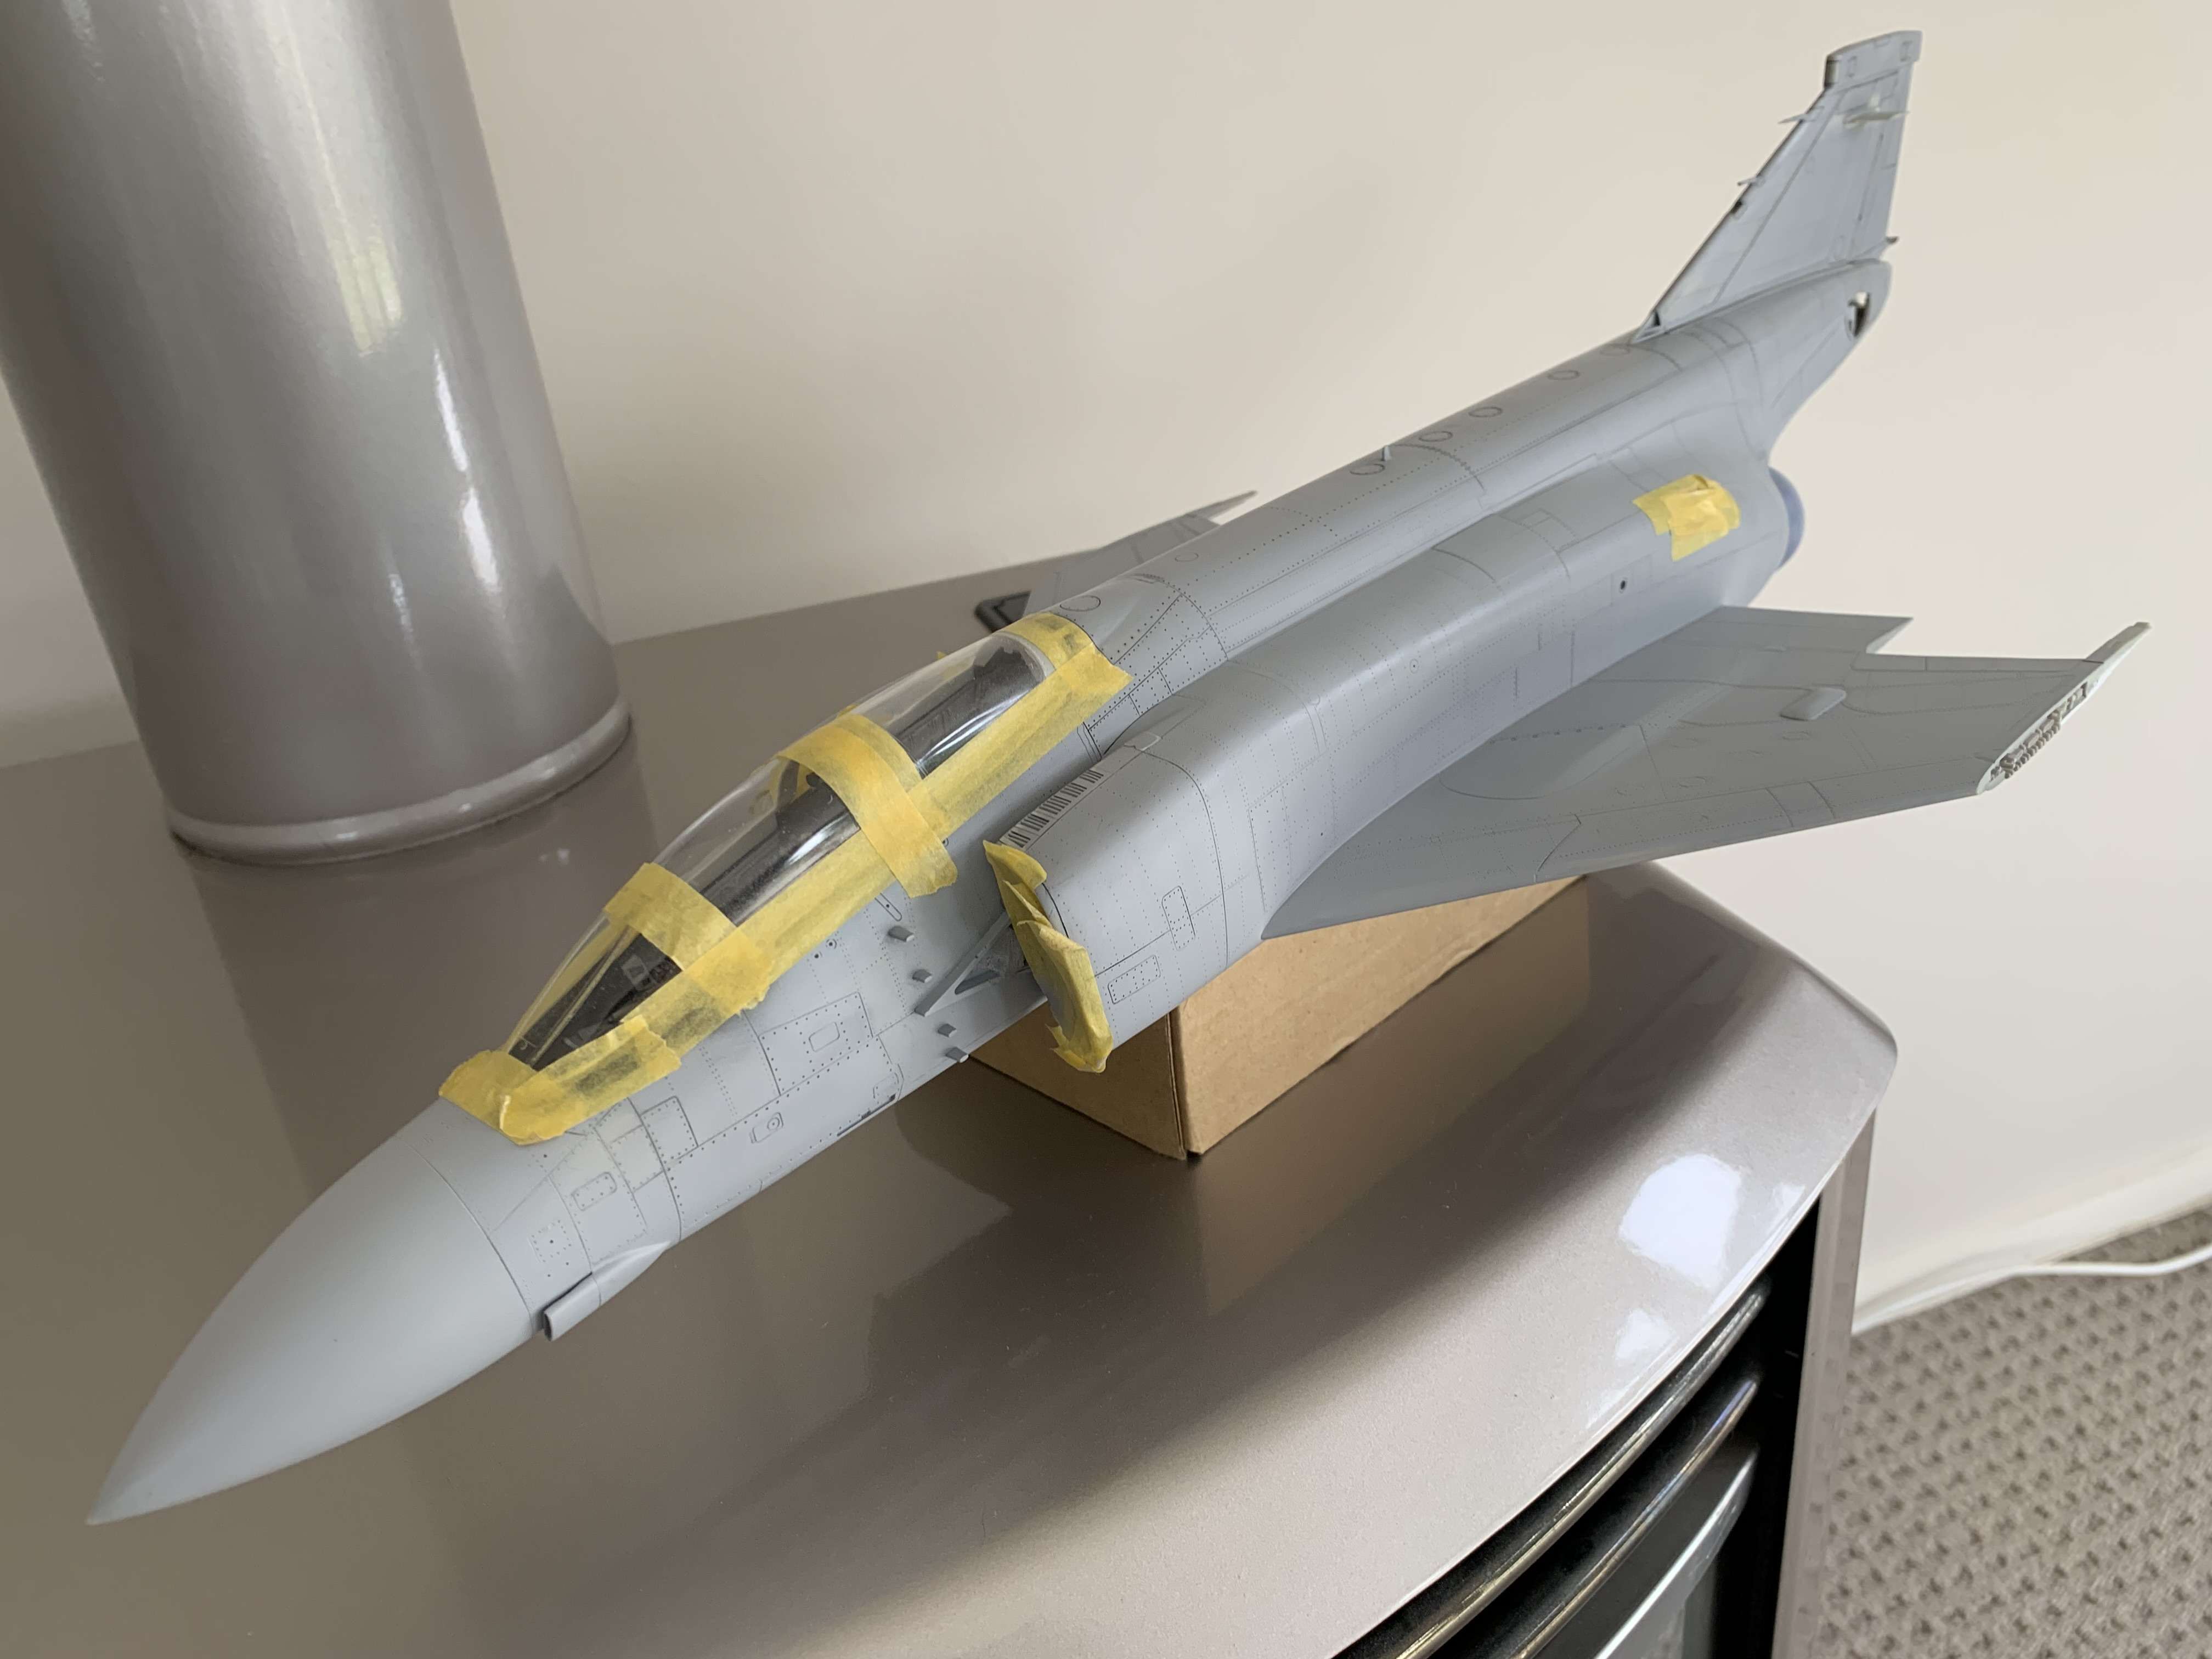
Small update tonight
Undercoat of silver done before a little more tidy up on stuff you just wont probably see
On with some colour, sheesh that red is bright!
Now toned down with an oil wash and flat coat. This area got quite oily and sooty, considering how filthy the belly of the Phantom got it probably should be worse, but I didnt go too overboard
On to something else now, running out of things to do before paint!
Cheers team, appreciate your feedback and likes
Anthony