Leaderboard
Popular Content
Showing content with the highest reputation on 05/19/2021 in all areas
-

TA-7C / EA-7L "Twosair" - Trumpeter conversion
Martinnfb and 10 others reacted to Starfighter for a topic
Well, it's been a while... I have to admit I thought this project would be more easy and straight forward, but life got in the way. Anyway - I have started preparing a basic cockpit shape for the Twosair. There is a lot of tweaking to do, but the base is not too bad. The initial plan was to use two modified Avionix cockpits, but not only the casting quality is rather disappointing, it will be rather difficult to make them fit the heavily modified fuselage. I may use some of the details from the sets If I'm not in the mood to draw new panels, though. We will see.11 points -
RAF FG.1 XV571 WILD HARE Phantom Conversion
Spooky56 and 10 others reacted to Anthony in NZ for a topic
Thank you Sir, I love having your feedback! Well, pretty much finished the top halves of the intakes now. I went to use my contour gauge to start matching up both sides and cannot find it So I ordered a new one off ebay. I got notification saying delivery eta 22 June! Ugh. Not a lot to see, but hopefully tonight I might finish putting a slight curve in my sides. Always stressful pouring boiling water on the resin section of this kit!!! Because of the primer you cant really see the new shapes, I will try and take some with the sunlihjt or something on them, I am pretty happy where they are at now. I just need to make sure I have both sides matching and then re-install all the surface detail As always, thanks for tuning in Anthony11 points -
This is my recently completed Meng F.1, which represents Wener Voss's aircraft that he had his last dual in. The kit is well WELL worth the money if you have any kind of hankering for WWI subjects and/or the Fokker DR.1/F.1. The only real flaws the kit has are some warped wings and a tendency for a single part of the cockpit combing to be broken off in the box. Both were true of my Meng example. 10 min or so of work with hot water and some bending in the opposite direction did the trick for all 3 wings. The cockpit part was simply glued back on. AM used was the Aviattic decals, some Gaspatch turnbuckles, along with some Bobs Buckles 3mm cut tubes soaked in blackening fluid. The prop is an LF Models Axial prop that I cut down (was substantially too big) and re-varnished. I also used my Silhouette cutter to cut out the Voss cowl face, as the provided Meng version was WAY wrong. I also used Uschi rigging for the rigging and control lines as well as in the cockpit. I used some copper marker pens to color some black Uschi rigging for the engine. Overall the detail is very "WnW like" and the engineering is all over this kit, as it goes together extremely well. I had a few issues with the Aviattic decals, as I don't think I glossed enough, and they had some silvering issues. After being away from the model for a tiny bit, the silvering is still there, but it doesn't seem as pronounced. I am happy with how the model came out, and will definitely be buying another 1 or two. They are indeed great little kits, and without too much work can be turned into gems. Highly recommended! Link to the build can be found here. MORE..............10 points
-
Received this yesterday. I think I'll give it a light flat coat to dull down the sheen, but otherwise it's utterly gorgeous.10 points
-
Go out and get yourself a copy of the Meng kit if you havnt already, its a GEM! Cheers all,10 points
-
It's the last 20% of the model. The dreaded last 20%....or as the Model Geeks podcast calls it....MoJo Killers. Decals on, wash on, flat coat on. Canopy unmasked. Now its time for: Painting the pilot Painting and detailing the ordnance & Sniper pod Landing lights Mounting the weapons and stores Installing the engine nozzle Static wicks...a lot of them And a coat of graphite powder on the main body to simulate the shiny yet grimy look of the HG. Off we go....8 points
-
Both were then vacformed...I know..lousy picture. While the parts havent been cleaned up or squared, this is what it turned out to be... Thats does it for this installment. Still much wing work to do. The fuselage is on its way back from John Wilkes (Tigger) in the UK and Id like to have this well along before it gets here. Hope everyone is well..be safe Best Geoff7 points
-
A brief diversion v2
Rick Griewski and 5 others reacted to Panzerwomble for a topic
I read the title and wondered what was version 1 of a brief distraction ??? Never mind ...I'll just park this pic here to show my appreciation6 points -
1/32 Supermarine Spitfire LF Mk.Vb YO-A 401 Sqn RCAF.
KiwiZac and 5 others reacted to monthebiff for a topic
Apart from the radiator and oil cooler I'm thinking I have the A toB wing conversion done. I'm sure under a full coat of primer a little more work will be needed but happy so far. The AML resin needs some careful cutting and sanding but fits very nicely as does the Tamiya clipped wing tips. Regards. Andy6 points -
1/32 ICM Gloster Gladiator converted to a J8
DrDave and 5 others reacted to Pastor John for a topic
Hi everyone, almost finished my 1/32 ICM Mk Gladiator/AIMS J8 conversion that uses nearly every AIMS Gladiator product I do! Adverting haha. It has taken a long time to get this far due to my hand problems but nice to see it coming along. In the next few days I will add my AIMS bracing wires. Issues - left main wheel wants to splay out - very weak and will need pinned to a display. Tail plane very fragile and I dare not take it on a Hungarian road! Also rudder 0.5mm wider than tail fin?????? As for my decals - the White 8's at the front need cut in half and the gun trough painted in and the fuselage roundels just cannot settle over such a raised angular hatch with a prominent corner in the middle of a 2 dimensional decal - you need to slice around the hatch asap and then babysit the decal. O and just before the photos were taken the left rear cabane strut bottom popped out causing a mess and the temptation to use bad language! Also be aware that even with a well printed white you will see a high contrast demarcation line underneath the ghost decal so be prepared. Points of interest - note the fuel level indicator and missing hatch added to the fuel tank area, then behind that the thin aerofoil bracing (which I had never ever spotted on the Gladiator till a week or so ago!!!!) and then behind that the Swedish Iron sight seen on this aircraft and a few others. The gun sight inside is a German Revi 12. On the left side in front of the hatch is a flight maintenance card holder. My AIMS J8 conversion includes the different weapon barrels, different clearance blisters, Radio equipment and the Gloster Gauntlet propeller and hub (if needed). Also note the J8 does not have the belly shell and link ejector ports which will need removed and neither does it have the underwing gun fairing side openings which will need filled. To the rear lays the only non AIMS after market product in the form of the Gas Patch RAF turn buckles used as a pair on each rudder pylon. Paint - I confess that I just could not find the paint colours I saw recommended on the internet and so used what I had and so the Olive is Xtracolour WWII Ovlive Drab X112 and the lower colour is Xtracolour RAF Barley Grey X17. The inside of the cockpit upper is RAF Interior Green with the seat and the area normally silver in an RAF machine painted a shade darker than the RAF Interior Green. The inside of the AIMS landing flaps is Mr Paint silver and the exhausts and exhaust collector ring is Alclad Jet Exhaust with a faint highlight of Alclad Pale Burnt Metal. The whole model has low lights with Tamiya Smoke and a little Raw Umber oil paint run into to panel lines to leave an otherwise well cared for J8 as per the majority of photos. OK if you see something that interests you that I have not thought to mention please let me know and I will try to help. I see ICM are releasing a J8 boxing which was an obvious choice and was why I did not pay to get 3D designed and printed skies done for my J8 conversion but to do the J8 correctly you need to change many things - hence having a conversion set available! Hope you like it so far and hope some of what I have tried to write helps you understand the J8, thanks., John6 points -
Make the others jealous
Uncarina and 5 others reacted to ironman1945 for a topic
Arrived yesterday. Yesssss!6 points -
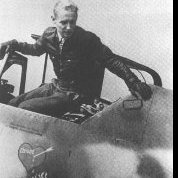
FW-190D-9, Hasegawa 1/32, Gerd Barkhorn
Kagemusha and 4 others reacted to Hartmann52 for a topic
Good afternoon, comrades. In the process "Dora" from Hasegawa in the version of the commander of the 6th Geshwader Gerhard Barkhorn. Now in this form. Used etching from Eduward, hood and various little things from Quickbust. Dashboard - Eduard, resin. Painted with paints from Ganza, the set from HGW is present in full. Crosses - homemade, chevron - decal. The most interesting is ahead5 points -
Make the others jealous
scvrobeson and 4 others reacted to Rick Griewski for a topic
Mine is almost built and ready for painting. You will really like this kit.5 points -

1/48 Tamiya F-14A VF-84 Jolly Rogers
Hartmann352 and 4 others reacted to Thunnus for a topic
Thanks guys! As promised here are some additional shots of the Quinta Studios side consoles. The labels and markings alongside the knobs and switches are short of being legible but the effect is very convincing nonetheless. And keep in mind how small these pieces really are. The next set of parts to be enhanced with the Quinta decals. The instrument panel and radar panel were not given a semi-matte coat. Each individual dial has a glossy face to simulate a clear lens and I didn't want to remove that effect. The fit of the Quinta panels has been perfect on all of the parts so far. Some of the Quinta decals have a slight white edge, which can be touched up with careful painting.5 points -
Greetings All As Im sure you already know, work continues on the Ryans wings. Last we spoke, I think I said I would do the tips next. While the tips did get addressed, there a was a slight detour which had me thinking about the LE's. The more I thought about it, the less I liked the idea of trying to bend sheet around the front edge or piecing it together in a way that would require more sanding. Vacforming seems like a viable alternative. It would still leave a seam but they would be small and if the and if the pulls came out good enough they should match perfectly and create a nice straight LE. A mold Basswood plug was made up and given a test shot. As a quck aside, I did make up straps from litho to aid in capturing the wing mounting tabs. The made things much more stable and much stronger. Anyway, back to the LE. The first test shot was encouraging. The shape was a bit to flat on the top and bottom surfaces and a slight reshape was done. Heres the first test shot and plug. After playing around with it for a few minutes, I decided this was direction for me. The back edge of the LE attaches to the front spar. The frong edge of the wing planform acts as a stop to keep it straight. A bunch of examples were pulled after the plug was reshaped a bit to take away the flat appearance. It takes two and a half pieces per side. The inboard side is purposel left long because Im not sure how that end will be handled. The LE is straight and align nicely event in their rough state. As you cab see, a balsa plug has been shaped for the top and bottom tip surfaces. This is the bottom wing surface..somewhat different than the top at the LE. The tips, while largely the same, differ slightly at the trailing edge. The tip on the left is the bottom. The angle cut into the TE forms the aileron pocket at the outboard end.5 points
-

A brief diversion v2
Uncarina and 4 others reacted to Panzerwomble for a topic
some more glamour shots ....(sorry for the thread hijack Richard ) Apparently there was once a 1/72 model of it ! https://www.scalemates.com/kits/akatombo-works-35-blackburn-f3--9558345 points -
Spitfire MK I (Revell Spitfire IIa conversion)
MDuv and 4 others reacted to monthebiff for a topic
Very nice project Jeff and nice stablemate to your E-4. I built one of these as DW+Q a few years back and really enjoyed the project. The Barracudacast radiator is pretty easy to install you just need plenty of dry fits with the upper wing. Hope those pics help but most of all I hope all goes well with your chemo and wishing you a speedy recovery. Regards.Andy5 points -
Hello everybody. New set: 32015 in available now... Link for: Weapon bays for Tamiya 1/32 Spitfire Mk.IXe or Mk.XVIe. Thank you for your support (as everytime)! Cheers. Jan5 points
-

1/32 UH-1D Huey in-flight scene (20 May: Seats)
mgbooyv8 and 3 others reacted to easixpedro for a topic
Right then lads, Allow me to introduce my third concurrent WIP. Sometimes I get a scene/idea in my head and then all reasoning is out the window... Prowler's on pause because I'm waiting for some figures to arrive, and the mojo for this overtook the Phantom. Frankly I blame Pig. Watching him do that Pavehawk and now the MH-6 got the ideas churning. Bit of background though. Have had these ideas for awhile and managed a few in 1/48th scale. Did a HC-7 Seasprite rescue scene that took the better part of a year to backdate the Kittyhawk kit to an A variant. Fortunately the early Covid shutdowns allowed me plenty of time to finish it off... Then there's this one. This took almost 2 years (while building the above scene). It's 1/48th as well. Watched "Scramble the Seawolves" on PBS, and read a few books and was hooked. Read a bit about HAL-3 in Vietnam--fascinating story! Anyway, I decided to make a scene, but thought that 1/35th would be too big, but that meant using the archaic Monogram Huey Hog (and all it's issues) and scratchbuilding my own PBR. Managed to do it all, and keep my sanity. Again Covid shutdowns to the rescue as it allowed me unlimited time at the bench to kitbash the Kittyhawk UH-1D to the Monogram Huey Hog. I'd gone back to thinking about LSPs and getting after other ideas in my head...then enter Pig and his helo builds. I got to thinking about recreating any of these iconic Huey pics. Specifically, I'm going to model something from November 1967 during the Battle of Dak To. My father was there with the 4thID, and lets just say I've been fascinated by it for awhile. Down side is you can try and build the archaic 1/32 Revell Huey that was first issued in 1967, or try and find a 1/35 Panda/Dragon Huey that was at least issued this century. The Revell kit is readily available, but the Dragon kit on the other hand is rarer than hens teeth and expensive. They regularly go for $100 plus on Ebay. I've been watching for awhile, but haven't been able to score anything. They go instantly. So I grabbed the Revell kit from Sprue Brothers for a mere $15 and a couple of MasterBox figure sets, and we're off to the races. Upon opening the box it was a trip down memory lane. Must've built this kit 5 times in my youth. Even used one to win the 6th grade science fair, (circa 1984) for a project on how helicopters fly (magic). Vivid memories of sitting down with one of the judges who was an airline pilot and former helo pilot in Vietnam. He was as fascinated with my project as I was with him! Anyway, the kit is actually quite good, especially considering it's age. Sure there's flash and some cleanup required, but overall, a nice canvas. Scratchbuilding, here we come! Pretty sweet details considering this was first issued in 1967! Check out the dials and knobs on the overhead console! Love this floor. I'll scribe between the panels, but that etching is perfect to replicate the real deal--and if I can pull off the weathering like Pig has taught us, it'll be a wonderful canvas! The detail on the outside is actually pretty good. A mix of raised and recessed details. I'd rather try and preserve the raised rivets than try and replicate them. Biggest issue with the Revell kit is the nose is all sorts of wonky. I think it can easily be fixed. There's a nice write up on ARC here: http://www.arcforums.com/forums/air/index.php?/topic/290663-what-exactly-is-wrong-with-the-revell-132-uh-1h-kit/&do=findComment&comment=2778562 Here's my own way of showing the exact same (yes it's a UH-1B, but the nose profile is the same). What you can't see clearly cause I just laid the model on my Ipad, is that the windscreen is too small, as is the nose. So I started off by cutting off the offending nose. Here's the first cuts--took me longer to write all this than it did to cut everything! Anyway, we're off to the races now! I obviously need some help, because who in their right mind has three WIPS going at once. And all crazy complicated scenes to boot... Will plug along on this till I get the required stuff for my Prowler and see if I pick that up again or continue down this path. More to follow, -Peter4 points -
I just use some plastic card and file it until it matches the the required contour shape to use as a cross section shape template (or sections shapes, if you need more than one) on the good side - preferably at some convenient panel line. Once I am satisfied that it matches the cross section template shape perfectly, I simply reverse it and file/sand the opposite side of the model to match the plastic card contour (you'd probably have it done well before the new contour gauge arrives - it is actually more accurate, as there are no little 'steps' to join up in order to determine the shape, which you have to do with most contour gauges!). Cheers Derek4 points
-
RAF FG.1 XV571 WILD HARE Phantom Conversion
Greg W and 2 others reacted to Anthony in NZ for a topic
LOL, I think you're right Andy...always the way! Yep, I couldn't wait and that's precisely what I have just spent the last hour or so doing. I just had to keep my momentum going so it dosent end up on the SOD! I thought I had both sides close but I really didnt! I guess its only microns I am sanding down to now, not 2mm chunks. Thanks for the reassurance on accuracy, it makes sense too. You're not just a pretty face are you? Cheers guys Anthony3 points -
1/32 UH-1D Huey in-flight scene (20 May: Seats)
easixpedro and 2 others reacted to Finn for a topic
How about a side view of the co-pilot's seat: Jari3 points -
Magnificent work Brian! The Aviattic decals really look the part and your build inspires me to have a go at this kit as well. Cheers, Tom3 points
-
Thanks gents! There are. Its just with the Uschi rigging for the thinner control lines the top ones are hard to see against the white cross fields.3 points
-
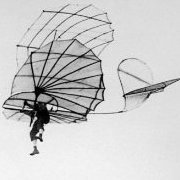
A brief diversion v2
Rick Griewski and 2 others reacted to RLWP for a topic
Lots of flat bits are now lots of tuby bits Richard3 points -

1/48 Tamiya F-14A VF-84 Jolly Rogers
Paul in Napier and 2 others reacted to Thunnus for a topic
Thanks guys! Yes! The Quinta panels are loosened from their backing sheet by soaking in water just like a decal. After removal, I dry them off with a clean cloth and then use PVA (white) glue to attach. The instructions say that you can also use CA glue but to be very careful in placement. PVA glue seems to work well and I have the luxury of pushing them into position. I'll try and get some better close-up shots of each panel. The 3D effect is quite impressive especially given how small these pieces are.3 points -
Revell Focke Wulf Fw 190 S-8
N.H.71 and 2 others reacted to Chris Wimmer for a topic
Hello Everybody, time for an update! At least I managed to (almost) finish the engine: Still some wiring and plumbing needs to be done: The pic below shows the wheel well of the Hendon aircraft. I think it's remarkable that the central cover ist missing and I'm wondering whether the bird was actually flown in this condition. In any case this circumstance provides a much better look into the engine bay, so I did the same to my build. I also think about removing the inner covers as well. Still not sure... Thanks for looking in! Chris3 points -

1/48 Tamiya F-14A VF-84 Jolly Rogers
Hartmann352 and 2 others reacted to Thunnus for a topic
The Quinta Studio set requires the removal of the kit parts' raised details. So before I jump into mass removal on multiple parts, I'm going to perform a test application on a single console just to get a feel for the material. Here is the kit part that I'm going to perform the test on with the raised detail still intact. A quick swipe of the knife removed most of the bumps and knobs. I then rubbed the piece on a piece of sandpaper taped to a flat piece of glass. I chose to leave a remnant of the raised details to help guide installation of the Quinta Studio part. The paint was then sprayed an interior gray (Tamiya XF-19 Sky Grey) and allowed to dry. Quinta Part No. 34 is the corresponding placard to placed on this part. Like a decal, the Quinta placard was cut off the decal sheet, soaked in warm water. After it slid off, I dried it. It is flexible but much stiffer than a decal due to the material thickness. The reverse side of the placard was white. I used PVA glue (white glue) rubbed on the Quinta part to attach it to the console. It fit perfectly. Pretty impressive I must say, with each individual knob and button sanding proud. Based on this singular application and result, this looks significantly better than any phototech without the painting/decal effort of a resin set. The only drawback I could see from this piece is that the red color of some of the knobs is very much faded. Perhaps they could touched up with some careful brush painting. Just to test my previous observation, I sprayed this with a light satin coat (2:1 flat/gloss mixture) to remove a bit of shiny glare. Can't really see any difference in the photos but I think it looks a bit better after this treatment.3 points -
Finally something new... starting tomorow....3 points
-

1/32 UH-1D Huey in-flight scene (20 May: Seats)
Greg W and 2 others reacted to easixpedro for a topic
The hardest part will be the chin bubbles. The overhead windows and the windscreen should be fairly straightforward...I think/hope! Yeah buddy, lots of thoughts in my head on this one. Will get the helo sorted enough to then start messing with the figure layout. Figure if I do it on a hill, I can have one side exiting directly on the ground and run a wire through them to the skid or fuselage similar to the other builds above. Then the other side can be leaping into the air from a different height. Yeah, I’ve been looking. Will see, actually have some in a spares box too. Also includes some Jack-booted Nazis in dramatic poses. Have been hauling those forever, but their poses are so dynamic that I might use ‘em (with modifications of course). Yesterday was just plain fun. Managed to get one armored seat built. Oddly enough the Revell seats are a good representation of the mesh seating inside the armor—found a good pic of that. I used some of the Revell seats just for grins. Would probably look neater being completely scratch built...I’ll call it a nod to the designers of the kit. And just sitting there Here’s a good view of the armor seat, sans the webbing for the actual seat, (used for illustrative purposes only). Found it here in this link: http://cs.finescale.com/fsm/modeling_subjects/f/16/t/143140.aspx?sortorder=desc If you look, you can see how I just built the armor around the seat cushion and added the legs-worked like a charm! Thanks for following along and the comments! I think everyone loves the Huey... -Peter3 points -

F/A-18 A+ Aggressor - Finished
blackbetty and 2 others reacted to Dukie99 for a topic
And I call this one done. Overall a very fine kit and a very enjoyable experience. I am actually thinking a building a C for the air superiority GB (in Swiss markings). We'll see. Here are the pictures of the finished bird. Cheers, David3 points -

Caudron G.III from CSM!
Rick Griewski and one other reacted to LSP_Kevin for a topic
On their Facebook page, Copper State Models has just announced a Caudron G.III in 1/32 scale. Kev2 points -
The final gallery of my newest build - the well known Roland C.II Meerkatze from FFA18, 1st half of 1916. It drew my attention because of that possible unusual colour suggested in WNW instruction book. So I suppose I have a little different Roland C.II after all2 points
-
1/32 ICM Gloster Gladiator converted to a J8
Qvarre and one other reacted to Pastor John for a topic
Hi everyone, I am making my ICM Mk I Gloster Gladiator as a J8. The kits cockpit was already started as it was my display model for advertising the AIMS cockpit detail set so trying to paint it up nice as an afterthought means it is by far my best work. There are some more bits to add to the right side but these cannot be added to until the halves are together. Also on the J8 the IFF control on the upper left side was changed to underneath the Flygradiostation type III device but mine was glued solid as had not intended making the kit! Anyway apart from my mistakes I hope you like. thanks.2 points -
I finished this build today a bit before noon. It is one of the "Brown Box" WNW kits that they sold near the end of their existence last year. The aircraft represents the Albatros DVa flown by Hans Böhning, a 17 victory ace assigned to Bavarian Squadron 76b. I thought the color scheme was eye catching and wanted to try out the wood decals from Proper Plane, so decided to build the aircraft in those colors. I also used a Proper Plane "Prop and Pipe" set, as well as some Taurus spark plugs, Gas Patch turnbuckles and Spandaus and HGW seatbelt. The figures are by Model Cellar and were fun to build and paint. Ernest The first of a few "in progress" photos. The engine has not been weathered yet. I scratched the ignition wires and control cables. Close up of the engine, still in factory fresh condition.2 points
-

1/32 Hasegawa Fw 190D-13 Yellow 10
Feed me Jack and one other reacted to Thunnus for a topic
Heh... I'm glad you noticed that! I was debating whether or not to replicate what the archive photos were showing and decided to go for it, even though the OCD in me hates having a single kit tire and a single Barracuda replacement tire. Thanks Jeff! Thanks alot! Thanks for following along Bill! Thank you so much Matthieu! Although my "sweet spot" is late war Luftwaffe subjects, there is always opportunity to branch out into different areas. Right now, I am doing a F-14A that I'm posting on the Non-LSP board. Thank you Hartmann! Looking forward to more of your Dora! I'm not an expert on paint compatibility but I reckon if you let the enamel dry thoroughly, you could spray hairspray over that and then an acrylic over the hairspray to do the chipping effect.2 points -
Hi we got some other request for 1/18 figures... you know the US Navy pilot at left, second left is a french mirage 2000 pilot, then they are US Navy flight deck photographers cheers Norbert2 points
-

RYAN STA 1/18
R Palimaka and one other reacted to Ironwing for a topic
Richard Thank you for looking in and your kind comment, If this build in some way can help you, I would be thrilled..many thanks. Regards Geoff2 points -
2 points
-
Great work Anthony, looking at the conversion, this is arguably the most difficult part. Have you seen this, the fuselage doesn't seem to flare out so much where it meets the intake parts. Pity accurate drawings are so hard to access. Just looking at the Jumpei Temma drawings, and the intakes are raised in the fuselage mid-section on the FG.1/FGR.2, resulting in the hump, but looking at the way Frank made the conversion, it seems he only widened them, hmmm...2 points
-
Fantastic, with a suitable background and photographed in black and white I think you'd be hard pressed to tell it from the real thing.2 points
-
I meant from the fuselage to the underside of the upper wing.2 points
-
To be honest, I didn't stop to look at the subject matter, only that it was a paper/card kit. So in that sense you're probably right, and we should probably move it. I hope you're OK with that, Richard! Kev2 points
-
This is going to be epic, I can feel it2 points
-
Jeezzz, I thought the Fe-2b had some rigging!... Jeff.2 points
-
Reference photo give me some great detail of the exhaust. Now the challenge is to duplicate. Or at least come close. Test fit yields an oversized look. Had I secured the ResKit upgrade earlier in this build I'd make the adjustments. This is what happends when yopu get a resin upgrade after the kit is 90% complete. Pardon the dust... Overall Alclad 101 Alumnimum then a wash of Tamiya Clear Blue followed with Tamiya Clear Orange. A wash of thinned black/brown blends everything down.2 points
-
well thank you for so many kind words you guys are too kind I have finished up all the panels around the radiator, but that will have to wait until next time as there is bigger news... guess what this is... ..it's the build jig for one of the upper wings - I translated (& corrected) plans, interpreted photo's and drawings and drew up my own plans - this is the underside of the wing - the most critical part as this is where all the strut mounts, rigging mounts and spacing needs to be super right to mate properly with the lower wing and cabane struts.. ..the lines represent the ribs and a block & carrier are at the leading edge to hold half round stock up above the plan where it needs to meet the nose of each rib - keeps it all straight too.. speaking of which, there are 41, thankfully all the same profile (apart from at the tips..) here they have been made by using a brass template with two holes at the spars that are a tight fit for big press pins to pin stock plastic to balsa and cut each rib's outline. There are a lot of them & once done they are broken out and put together like this for block sanding.. ..I started with the centre section, by now the pin holes in each rib have been enlarged to be a tight push fit on the brass tube spars ..thicker end ribs were added and card fills in the spaces to give torsional stability, also little bits of tube added for strut mounts.. ..the wings are the same method except a black card tip is cut to shape & let into the structure - black so I can see the centreline when shaping later.. ..I bent the few degrees of dihedral into brass rods and used the centre section slid on to the wing structure before the rod spars were fixed to get the relationship to the wing right ..a small square brass sub spar was added to the top where the aileron is and again stock filled up the gaps.. ..times two - soon had the entire upper wing done.. ..I made up a stiff card jig that maps the relationship between the fuselage and wings - it sits on the lower wing and sets the exact position of the upper wing (or it will when I come to make struts & fit it), but useful to see what it all looks like.. ..we have my first biplane ..looooong way to go, but thats a big step forward.. TTFN Peter2 points
-
Will check it Mark... but now I´m working on Spirfire bays....2 points
-
1/32 ICM Gloster Gladiator converted to a J8
Paul in Napier and one other reacted to Pastor John for a topic
1/32 ICM Gloster Gladiator - AIMS J8 conversion - getting there! Until doing the lower details I had never before spotted that the Kulspruta weapons used on the Swedish, Finnish and Norwegian machines do not have the belly spent cartridge ejector chutes.2 points


