Leaderboard

Popular Content
Showing content with the highest reputation on 03/18/2024 in all areas
-

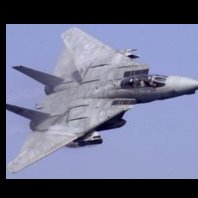
P-38L-5-LO, s/n 44-26412, "Shady's Lady", August 1945
Pfuf and 23 others reacted to Miloslav1956 for a topic
Trumpeter 1/32 model, Kagero decals, Reskin wheels set, Phoenix cockpit, All colors MRP24 points -
As always; striving for mediocrity Thanks for looking15 points
-
thank you all, very kind So, the painting stage is looming.... I needed to get some new etch primer as it only has a 12 month shelf life and frustratingly it is still not here yet.. I have worked out the colour (I think) - some of the original paint is still on S1595 in the Science Museum (it was repainted ages ago in the wrong blue, likely roundel blue) so I did some samples and arrived at what i think is a reasonable match given the limitations of eyeballs, digital sampling and light I took all my similar blues and did a tester, photographed in natural and artificial light and ended up mixing a shade from what I had - this is the analysis.. It is what it is, there are no colour pics so sue me if I am wrong... ..while waiting I busied myself and there is absolutely no construction remaining.. Pitot tube done - complex little thing.. ..cockpit canopy done, another complex little thing - i hate doing transparencies as they are just a huuuuuge opportunity to fu#k up.. also all the beaching gear was made of plastic and wood, and the wire wheels finished.. ..again with no colour photos, I painted them what I thought / interpreted - basically battleship grey as it's likely marine paint.. ..added the petrol cans and trolley.. ..and thats it - the next time I post, it will be all painted.. wish me luck ..in other news, I have decided on my next subject - something I have wanted to do for ages but thought it wouldn't fit in my display cabinet - I measured again and I think I can just squeeze it in - any ideas? TTFN Peter14 points
-

Why Keep Threads On Topic?
Archimedes and 8 others reacted to Iain for a topic
Without the very light moderation we do here - things *would* go down hill - and potentially rapidly, as we've seen at times in the past. We're damned if we do, damned if we don't: but we have seen things get nasty before now so, sometimes a little pre-emptive action is required. Moderation is *never* an exact science - but we're all volunteers and try our best to keep things on an even and friendly keel. And we're human... It does get a little tiring having to deal with what, at times, seems like endless, and petty, sniping - some of us would rather go and build something. Iain9 points -
The last few pieces have been attached to the model and it's officially got a fork stuck in it (done) The Reskit pylons and stores are installed; I'll find a clean spot and get some pics for RFI Thanks for looking Thanks to all who commented/ added images and contributed to my delinquancy9 points
-

Silver Spitfire 'The Longest Flight'
R Palimaka and 7 others reacted to kkarlsen for a topic
First tests with foil... I did some initial testing with chrome paint, but decided to go for the aluminum foil. It's a lot of work, but I think it's going to pay off in the end. The shininess isn't too much, it has scratches and ripples, the rivets are barely visible as on the original aircraft. Overall the Foil adds to the 'illusion' of the aluminum surfaces. There will be some imperfections, but overall I'm satisfied with the result. Cheers: Kent8 points -

Revell 1/24 N-1 Starfighter
TankBuster and 7 others reacted to The Madhatter for a topic
Clear coated the red first. Worked a treat - as expected Sorted out the on/off button - so no external button or switch to be seen, and it'll be fully self contained power too - no leads I'll put some button cells in a holder below the base, and to change the batteries just pull the droid out by the head - at least, that's the plan8 points -
Takom 1/35 AFH-64D Royal Netherlands Air Force. For a long time, in order to keep the variety, I have been urging to make a helicopter. For the most part it is an OOB build with the exception of the cockpit, I used Eduard's update set for that. The FLIR lenses were made from an old DVD. As paint I used US HELO drab from AK real color. I have recently started using AK Real color and I really enjoy airbrushing with it. For the weathering process I mix the main color slightly lighter with the different tones, then I used the wethering sets from AK. The model is quite detailed. apart from the few challenges it was a pleasure to build and I didn't encounter any major issues I used LSP and You Tube for inspiration. the last four photos I used for the weathering process cheers Otto7 points
-

1/32 Trumpeter P-47D-22 "Kansas Tornado"
LSP_K2 and 6 others reacted to Tolga ULGUR for a topic
Some panels got different Alclad tones.7 points -
Revell 1/24 N-1 Starfighter
Tnarg and 6 others reacted to The Madhatter for a topic
yes or no?7 points -
Today's update: I decided to tackle a couple items today. First, I wanted to fill the holes in the nose as mentioned yesterday. I left plenty of extra material on the outside of the fuselage so I'd have plenty to sand and feather. The inside of the fuselage will not be visible, so I wasn't as worried about getting that as smooth. While I was/am waiting for that epoxy putty to cure, I decided to start looking into the turret question. As expected, the internal components for the A6C (of which this a/c has 2) are nothing like those in the Emerson front turret. So, with no other options, I'm going to have to do my best to scratch build the internals for one of them. These are the parts in question. To be fair, I did check eBay for a parted out kit, but alas no Z-sprue is available. I don't have a 3d printer either, or I'd probably build these in there. I had started the build expecting it to be a pretty simple, straightforward thing. Surprisingly, it's already throwing up a challenge for my scratch building skills. The good news is, I'm already making some pretty good progress. The main armor plating/framework roughed in. I recreated the bend by carefully cutting partway through the plastic sheet, then back-filling the new gap with stretched sprue. A compass helped cutout the ring. And here you can see the fit of the factory part vs the blank of the scratch part. I will use the scratch parts in the tail turret along with the kit-supplied split turret. The factory turret innards will go in the CWS single-piece turret. I've got the other side plate started, but it's very rough at this point. Still, it's off to a good start. I'll add details like the control boxes and wiring after I get the rest of the main structures together, but I'm pretty sure that once the turret is closed up and painted, nothing will really be visible of the interior.7 points
-

HK Models Bristol Beaufighter?
scvrobeson and 5 others reacted to Archimedes for a topic
Hi All Below is a picture of a LIDAR scanner owned by Neil Yan’s HK Models that is being pointed at the Bristol Beaufighter TF.X at the RAF Museum. Thanks to the indefatigable ‘Homebee’ on Britmodeller for picking that one up! It was also noted that they were also pointing the scanner at the museum’s Bf-109 E… Curiouser and curiouser… Kind regards, Paul6 points -

HK Models Bristol Beaufighter?
scvrobeson and 5 others reacted to Scotsman for a topic
I would sacrafice a decent part of my stash for a newly tooled Beaufighter .. oh please say it's true6 points -

Northrop YF-23 Black Widow II 1/32
F`s are my favs and 5 others reacted to Bekim for a topic
Hi Back side area modified......... adding the Panel Lines6 points -
I finished last night and forgive me but I didn't want to post anymore, I was too sleepy. For now the camouflage has been applied at the ready, I still have to use the paint masks and decals. Ps. Thanks for the hints.6 points
-

1/16 scale scratch built AT-38B Talon-The Smurf jet is back!
Paulpk and 5 others reacted to Pete Fleischmann for a topic
The long slow march towards the front of the jet continues- cheers P6 points -
damn how long! the wait for the colors was long, and honestly I don't know how worth it it was: I wanted to try the MRPs, which are very airbrushable and already diluted, but not very opaque, with a thousand thousand shades that are difficult to manage, for me who have the eye denied with colors. furthermore, once given they are absolutely not "revisable" like acrylics... with the latter if you are really not satisfied you arm yourself with Chante Clair and a toothbrush and start from scratch. with these NO. they cling to the styrene of the model (or to the primer, it's the same) with the same obstinacy as the old Humbrols. However, they have a very high fineness of pigments, so even by applying several passes, thickness is not created. okay, enough chatter, let's see what I've done? before seeing the colors in action, a small "technical" parenthesis: to connect the lights to the ground I found this solution. I stripped a wire from a phone charger cable and soldered it to a 1mm brass tube. the tube crosses the wheel from side to side, so that at the bottom I will have a hole in which a powered pin can provide the electrical contact, as well as stopping the aircraft at its base, while at the top I will have the flexible cable and in a position which will allow me - I hope - to be able to play on its length simply by rotating the wheel. the width of the landing gear leg will finally allow me to be able - if necessary - to stow the extra cable that I may not have been able to fit back into the fuselage through the lower wing. a lot of talk for little substance, in short. well, we were talking about the colors: the four samples on the left are MRP, the fifth on the right Lifecolor, while on the model there is a first layer of MRP sand. I think you can see clearly how none of the MRP "giallo mimetico" corresponds to the only Lifecolor proposed in the regia aeronautica's color set. here on the right the Lifecolor and on the left the MRP closest to it... in the end I decided to mix two of the MRPs to obtain a more or less credible base, the one now on the model, but not yet saturated. here it is after at least four (!) glazes. For me, used to the building thicknesses of Lifecolor or the covering capacity of Tamiya, Gunze or AK, it was brutal, having to apply so many coats just to get a decent base. given that, in addition to being poor with colors, I am also incapable of managing camouflage like this freehand, so I traced the spots in pencil at least on the upper wing. even the spots turned out to be a PITA a notable source of caltrops: both colors are a mix, and this is the third edition after several retouches, always with the remote help of my helpful friend, the color master. paradoxically I am more satisfied with the stains on the lower wing, done in a haphazard manner without much study. It's true that here the surfaces are tiny and therefore easier to manage. the spots on the fuselage are at least simpler, having a completely different pattern and documented by the photos. here the problem lies in the fineness of these colors: each splash must be passed over at least three times to give it a minimum of consistency, which requires skills that I obviously don't have, unfortunately. the nose is a completely separate matter, in period photos you can see a pattern of more or less horizontal lines, apparently darker than the blotches on the fuselage, which thickly and roughly cover the lower part of the engine cowl. in the upper area there is a color that could be black or dark blue grey, the two colors used by the regia for night fighters. now it's drying well, then white for the band on the fuselage and the cross on the tail, and the transparent gloss in view of the decals, either from the box and custom created ad hoc for this little project. see you soon, I hope! cheers, Paolo5 points
-

Border Models Lancaster - it will be my last LSP build
scvrobeson and 4 others reacted to Stokey Pete for a topic
Things have changed since my last update here, having decided to liquidate the remains of the stash. This will now be the last of my model builds of any sort. I’ve felt like I’ve been going through the motions, and won’t be starting anything new after this is finished. The next mini model is ready for construction, the port main gear assemblies, and wing construction.5 points -

1/32 Kotare Spitfire Mk.I (Early) K9795 19 Squadron October 1938
Fanes and 4 others reacted to monthebiff for a topic
Thanks Dennis, looking forward to getting some markings on now! Also had a play with different Vallejo Metals From left to right is Aluminium, White Aluminium and Semi Matt Aluminium. I've settled on on the Semi Matt Aluminium for the undersides Time for another major masking session tonight. Regards. Andy5 points -

Brown B-2 „Miss Los Angeles” 1/32
Azgaron and 4 others reacted to Marcin_Matejko for a topic
Thank you Yes, I cut the propeller from a piece of aluminum and then polished its surface. The end: Best regards Marcin5 points -
… like diplomats talking5 points
-
Getting closer. The bottom seams, which I had thought to be near flawless, are really not, as the primer reveals. I'm guessing that one or possibly two more treatments will get me where I need to be though.4 points
-

HK Models Bristol Beaufighter?
scvrobeson and 3 others reacted to Dennis7423 for a topic
A 1/32 Beaufighter would absolutely be right in HK's wheelhouse. That would be a wise release on their part. A 109E, I'm not too sure. It would likely be more expensive than the Cyberhobby/Hobby 2000 kit, which is a darn nice kit. I'd like for them to stick to stuff that other manufacturers haven't touched yet. I'm also not sure, however, if their A-20 sales have been very robust. They seemed to make it onto the "Lightning Deals" section of Sprue Brothers rather quickly, and have shown up in other sales quite frequently. - Dennis S. Mount Juliet, TN USA4 points -
First progress. Don't compare this ancien kit with Hasegawa or Trumpeter. No cockpit and engine worth showing. Bad fitting.I added a small screw inside to fix the wings stronger to the fuselage. So,again,this will be all about the "overall look" I plan to do this as a "museum" plane with full stripes.4 points
-
HB B24 discussion: AM and fixes
zeusbheld and 3 others reacted to Dennis7423 for a topic
Because we had been discussing propellers, I stumbled across this great shot of the needle blade props fitted to earlier B-24D's. This shot is circa 1942, posted by LIFE Magazine: - Dennis S. Mount Juliet, TN USA4 points -

Why Keep Threads On Topic?
Christa and 3 others reacted to Panzerwomble for a topic
I thought we had just retired our Herculaneums ?4 points -
2 French magazines, one on aviation (a special issue on the JG 77, really well done) and one on plastic model aircraft. This month, among others, Border Model's Stuka in 1/35 scale with a winter camo. And a Swedish showcase that my dearest wife and 2 boys gave me for my 59th birthday. The sharpest eyes will have noticed a dedication from my favorite MX/SX racer, J.M BAYLE (the only rider ever to win all three major AMA motocross championships in the same year (Supercross, 250cc and 500cc). For the moment, this display case is a little empty and my FW190 feels a little lonely, despite my wife's matryoshkas...4 points
-

Northrop YF-23 Black Widow II 1/32
Martinnfb and 3 others reacted to F`s are my favs for a topic
Looking good. Just noticed, you might want to stretch that edge just a little bit more - here with the yellow line. Check out the proportion of the ''lightning'' shape, in relation with the adjacent edges (in red).4 points -

Hawker Hurricane K5083: the prototype
R Palimaka and 3 others reacted to mozart for a topic
Better, but too big: Tweaked, smaller, covering of Oramask: More work needed but coming on well. The last two were cut from 10 thou card.4 points -
the Tail will be movable ... All the Best Bekim4 points
-
as next the panel lines will be done ....4 points
-
from below.....4 points
-
Hi Folks Finaly , the outside Shape is done ....4 points
-
1/32 Kotare Spitfire Mk.I (Early) K9795 19 Squadron October 1938
TankBuster and 3 others reacted to monthebiff for a topic
A nice quite Sunday morning at home so out with the masking tape in readiness for the hard edged dark green camouflage seen on early Spitfire's and with the masks removed completely Next up is the silver undersides Regards. Andy4 points -
Puh, such a tricky area ......4 points
-
seems that Bv-138 is almost ready Mirek posted some updates over on modelforum.cz and states that first pieces should be available for the Moson Model Show (20th of April)3 points
-
Something old-school - scratch-built 1:32 Dart Kitten - using old and new tech!
Archimedes and 2 others reacted to Iain for a topic
Further progress with Fusion 360 - coming on leaps and bounds now! Bear in mind these designs are simplified - they are small in 1:32 so any smaller detail won't print well, or be seen! All now printed and painted - look really good - but haven't had a chance to photograph yet. Engine is printed as 6 separate components. And this took about 10 mins to draw up - basic, but does the job! A few more parts to draw up - but might, actually, finish this shortly! @wunwinglow - you really have created a monster... Blue skies, Iain3 points -

Looks like Eduard is reassessing 1/32
LSP_K2 and 2 others reacted to thierry laurent for a topic
Neither did I but an attendance to any modelling exhibition or event demonstrates it quickly and I regularly got the same feedback from various resellers from different western European countries.3 points -
Regardless of your personal feelings or opinion, "any negative comments triggers thread kill " is NOT a factual statement. That is a fact. Im also not really sure why you laugh reacted to every post a mod has made in this thread, after you posted your opinion on it. Nor am I sure what was so laughable about the comments.3 points
-

Looks like Eduard is reassessing 1/32
Archimedes and 2 others reacted to Tony T for a topic
A three figure kit would probably be a special edition with a book and a shedload of etch, löök etc Remember you can buy bells-and-whistles 1:48 Profipacks for about £30-40 and weekend editions for £25ish. I'm guessing a Weekend edition 1:32 Spitfire might actually come in at around £55-60, an overtrees set for £35-40. A Profipack without a limited edition book and pilot figure for £75. Now, Eduard's figures may differ of course, and they may just want-in on the £100-is-now-normal Tamiya, GWH and Kotare single-engined prop avenue, but I think they'd be missing a trick not to slide in with cocked guns just behind Kotare and Tamiya. And blast away. And the Spitfire IXc is a good-looking mark to start with, assuming they do actually bite into 1:32 scale. Tony3 points -
Trumpeter MiG 29 C (digital Ukrainian camo) finished
chaos07 and 2 others reacted to Stokey Pete for a topic
Love it! All thats left is for you to send it to me so I can put it with my Flanker, this saving me the job of building one and going through that paint job.3 points -
Looks like Eduard is reassessing 1/32
discus and 2 others reacted to thierry laurent for a topic
I'm regularly reading that. This is true but limiting the logic to basic economics is an error when there is another elephant in the room: modellers demography! Our hobby is aging and the renewal of the population has a very bad rate except in a very limited number of western countries and European brands do not really sell in China. This is important as a new product will not be bought by many 'new' customers. It is targeted to the same population than the prior one we already have in the stash and that will be possibly difficult to surpass... So, yes, the availability of existing competing products has an obvious impact on profitability. I can give you ten examples of cases of releases I did not get or just purchased one kit of the range because I already have multiple copies of that topic in my stash. I know all my friends are doing the same and typically this applies to "topics that sell"...3 points -

Looks like Eduard is reassessing 1/32
Gary Needham and 2 others reacted to Splatman812 for a topic
I'm surprised also. I have both kits and they are VERY nice.3 points -
Looks like Eduard is reassessing 1/32
discus and 2 others reacted to thierry laurent for a topic
We already got THREE correct and different Mk.IX! Even if any Spit sells, I'm not convinced they will sell tons of them. Do not forget when they released their 1/32 Emil (Me 109 sell as well!), there was no good available kit and they did not look thrilled by the sales...3 points -
what a lovely Bird, the Pav 2 is coming closer...3 points
-
Academy F18D Hornet 1:32 "Night Attack"
themongoose and 2 others reacted to Mel for a topic
well guys, yesterday I thought I had finished polishing the missing details but no, I finished dirtying the landing gear bays but a problem arose, the damn cone, can any of you think of a method or idea to leave the tip of the cone right? Damm it!! :-(3 points -
Sarcasm duly noted. Civil discussion is fine. Differences can be discussed with out any nastiness, or un-civil language. We used to do that as a society. I'm not sure where that ceased, but here, at LSP civility is expected to be the norm. For all members. Given the average age of LSP mrmbers is at least 45 years, I do not know why this even has to be said out loud. Any that feel the moderation or expectation is too high, needs to make some choices.3 points
-
Why Keep Threads On Topic?
Alain Gadbois and 2 others reacted to mozart for a topic
Second-hand re-conditioned ones also obtainable in Herculaneum too I understand.3 points -
I don’t know much about thread drift but can anyone suggest a good place to get a nice lava lamp?3 points
-
Did you actually read anything we wrote? Obviously not.3 points