Leaderboard
Popular Content
Showing content with the highest reputation since 07/03/2025 in all areas
-
33 points
-
1/32 Hasegawa Grumman Hellcat F6F-3
denders and 27 others reacted to Tolga ULGUR for a topic
Some more progress28 points -
F-8C Crusader - HOT ROD FLAMES!!!
Isar 30/07 and 22 others reacted to mconnelley for a topic
Hello: Here's what it looks like with all of the masking removed. Things worked out really well, and I'm extremely pleased with the results. Mike23 points -

1/24 Spitfire Mk IXc, Kicked Up A Notch, July 6/25. On hold for now.
CODY and 18 others reacted to chuck540z3 for a topic
Since it's been a couple of months since my last post, I thought I'd give an "update" of sorts if anybody cares, to confirm that this build is still alive, but with warm weather finally here, my modeling has ground to a halt like it always does during our short Canadian summers. When I model I want to be totally focused on the task at hand, which probably won't happen until at least October when indoor activities are more attractive than chilly outdoor ones. 🥶 In the meantime, thanks for your continued interest as I plod along. Cheers, Chuck19 points -
Almost done with this one, couple of shots as finishing is in the final stages.18 points
-

MDC + Revell car door Hawker Typhoon kit bash
Philbucknall and 15 others reacted to mozart for a topic
I’m very relieved to announce that she’s finally up on her legs, not terribly elegant looking right now but all seems well: Still a long way to go and still a dilemma about the wheel covers, but one step at a time! I'm watching, and very tempted by, another MDC Typhoon on eBay, I have made a silly offer and if accepted another Tiffy will be added to the stable!16 points -
First print in 1:32 scale. 8.5 inches so far. Dan16 points
-
Thanks Matt for the details about the Gunze GX2. I'm gonna stick with the MRP LPB black primer for now to see if the NMF paint works for me. If not, I’ll give your method a shot. So, I’m not really happy with the rivet lines I made using the Galaxy Tools. When I look closely, the holes aren’t really "round", they look more like little "triangles" in some spots on the model. Since NMF paint tends to highlight every little flaw, I’ve decided to redo all the rivets I made with the Galaxy Tools... I used a needle tool (sorry if that’s not the right word), you can see it in the pic. It took forever, obviously, but I used the existing Galaxy Tool holes as a guide since they were well positioned. I just went over those nasty little "triangles" with the needle, pressing gently, then sanded everything down with some 1200 grit. Now the rivets look the way I want them to. Denis, who now has sore fingers, wrist, and eyes…15 points
-
HK Models Do-335A-12 at Oberpfaffenhofen
Dpgsbody55 and 13 others reacted to jeroenpeters for a topic
I've always loved the look of this huge Do335 with the US soldiers gazing at it and swarming around it like ants. For the base I used a very high res US map from 1945 that I had printed on canvas and then... cut it up. No decals were used. All masks. Lots of Eduard and Master upgrades and a Tamiya Jeep with Alpine figures. I could have gone all out on the weathering, but I didn't.14 points -
The end is near and I can't wait to get back to something flying I recently had confirmation that the way the shell were passed from inside the boat to the deck through the conning tower side hatches and not the big hole in the front. So I opened the port hatch and scratched the door internal with the step retaining the shell before the deck crew can take them. Luckily the hatches are supplied in the RCSubs PE fret, all it takes is to detail the inner side with leftover PE bits The shell comes from a Tamiya 1/48 kit back as if nothing happened Glad to have identified this just in time. Some other details: The capstan (normally it retracts under the deck One of the two spent casing on the deck (artistic licence as I wasn't able to confirm that one) It adds nice deck details anyway Stay tuned for the final lap14 points
-

MDC + Revell car door Hawker Typhoon kit bash
Philbucknall and 13 others reacted to mozart for a topic
Thanks once again Dennis and Alan, much appreciated. Found this useful reference pic last night: and whilst I had the Tiffy upside down in the jig I thought I’d test the fit of the lower parts of the Sabre. The aft end of the scoop couldn’t fit because I hadn’t cut enough of the fuselage underside away so it was out with a sharp knife and razor saw for some delicate surgery. Needs a lot of tidying up, as do the wing roots, but it’s now more promising:14 points -
The seat has yet to be installed, used the Eduard PE set as well as some ANYZ to dress up the cockpit. Still have some work to go on the bottom.13 points
-
1/32 Westland Whirlwind with exposed engines, guns and everything else.
TankBuster and 12 others reacted to jeroenpeters for a topic
Haven’t been able to do much lately, bit just lasered this small wooden base for the Norton. Small steps!13 points -

MDC + Revell car door Hawker Typhoon kit bash
Philbucknall and 12 others reacted to mozart for a topic
A bit more, hopefully correct, progress. The length of the main oleo is a bit of an imponderable, Peter's 3D printed ones are understandably overlength so I needed to adapt them to the MDC kit seating shape and depth within the wing. This latter aspect concerned me the most, but when thinking around it I concluded that its (most likely ) length would be determined by the other parts of the mechanism, most of which aren’t easily seen. Hopefully this pic illustrates it: If location points 1 and 2, then 3 and 4 which are moulded in the wing are right, then 5 (the MDC/Airscale interface) must be right? And this then determines how the oleo sits. I haven't really tested its strength yet...... A few pics culled and cropped from some on Ebay today: Armourers getting some 1000lbers ready for an op., 193 Squadron MN982. Two points strike me; firstly how the D obscures the middle digit of the serial number in the first photo, and in the second the port squadron codes are painted the other way round to the norm, so X-DP rather than DP-X. These codes were applied at squadron level so 193 had their own method!13 points -
Now for the orange, blue and white tail flash. Masked off with Tamiya tape : White base coat on : Orange and blue on. In the image below I have also stated to mask the SAAF roundels : First white base airbrushed on, then inner white section masked and dark blue ring airbrushed on - SAAF Sabres had 30" diameter wing roundels and 36" fuselage roundels : The orange Springbok on the white section of the roundels still to be masked and airbrushed on :12 points
-
1/32 Hasegawa Grumman Hellcat F6F-3
HB252 and 11 others reacted to Tolga ULGUR for a topic
And the decals I used Techmond's decals. Once again, I was not satisfied. They are extremely brittle and crack easily. Also, they tend to wrinkle a lot during placement on the surface. I applied the liquid decal film to all decals before applying.12 points -

F-108 Rapier.....it's here.
Anthony in NZ and 11 others reacted to Dandiego for a topic
Ok a little more work done. Fuselage sections glued together. Sections 1 and 2 are glued together. And sections 3 and 4 have been glued. Rear IP printed out with the CRT below. And Chad has sent me the rest of the files. Coolness, Dan12 points -

Mals Way goes Maritime, Arado 196A-3
Biggles87 and 11 others reacted to Mal_Belford for a topic
Allright, all day in my mancave. that Compass is finnished, as detailing and weathering, mediterranean enviroment is sure harsh on aircraft, and dried salt is a must,....note the real micro particles, and few yes it will be gone, as it is from pastel pencils, aswell as the micro fibres and will be long gone before fuselage halfes is glued.12 points -

Mals Way goes Maritime, Arado 196A-3
Biggles87 and 11 others reacted to Mal_Belford for a topic
Allright, at last, my favorite part, yes it takes time, and im not even close to finnish. Tamiya Panel line washes, breaking up that monogone RLM02, postshading that RLM66....and oils....seat will get more treatment, now eyes and mind must rest and resetted....it is very easy to overdo it at this stage, best cure is to rest. use one teqh or two at the time. It might work hey, nothing isnt sealed yet.12 points -

F-108 Rapier.....it's here.
patricksparks and 11 others reacted to Dandiego for a topic
More printed parts. 17 inches long, 18 more to go. Ejection seats need to be reprinted, not a good print. Dan12 points -
This afternoon has been a bit of a head-scratcher involving the undercarriage and covers. Peter's wonderfully detailed u/c legs are a MUST for me, but I initially encountered a slight problem with using them alongside the other MDC parts. The parts that Peter has supplied to me are the main oleo plus an actuating arm: but the MDC u/c parts have the same, though less detailed, actuating arm. There is also a smaller arm which, on the Airscale offering is at the wrong angle to fit correctly into the MDC wheel well. So after much thought and trial fits, I have reluctantly cut off the "Airscale arm" at the indicated point: Not a lot is visible of the detailed parts so I'm ok with what I've had to do, but I'm slightly worried about the strength of the u/c structure; it's already quite a weighty model so I'll have to make sure that the oleo is firmly glued in place to take the brunt of the weight. But there's another difficulty too, the Airscale main wheel well covers, so detailed and beautifully rivetted, are considerably larger than the MDC ones: This is a shame but I'm afraid I'll have to use the original MDC ones, fortunately it appears that the Airscale oleos fit well with them: Next!!12 points
-
my last built :11 points
-
11 points
-
Quick end of weekend update - fabricated a blind flying hood for the aft cockpit, out of lead foil from a wine bottle and some plastic rod, added a couple of maps for the glareshield (anyone remember them? No GPS in 1982) and added a few smaller bits. Finally, added the windscreen and touched up the exhaust staining on the fuselage sides. Almost there... Thanks for checking in!11 points
-
1/32 Eduard (Hasegawa) P-40N Warhawk "Miss Frances III"
Anthony in NZ and 10 others reacted to Tolga ULGUR for a topic
Some progress; Lower surfaces painted11 points -
I received notice the 1/32 kit was shipping while on the road, was pleasantly surprised to find it in the mail on return. Initial impression is extremely positive, having built three fisher SPADS before the fire as a benchmark, this one has extreme potential for a great build. It's next on the bench, having to work a bunch of other "gottados" before I can get to it, but the overused term "buy with confidence" seems to apply. TT modelworks has really gone out on a limb with this project, and so far I have had nothing but a positive experience! More later as I get to it...11 points
-
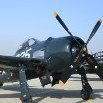
1/32 Republic F-84F Thunderstreak
TankBuster and 10 others reacted to Jim Barry for a topic
I redid the wings and tail and dry fit them. It’s such a sculpture! probably at 20 hours now11 points -
Here are some screen shots of the STL files. This is going to be amazing. This will be a slow process for me as I am not a computer whiz. I need to separate the components and get them ready to print. Dan11 points
-

Mals Way goes Maritime, Arado 196A-3
Biggles87 and 10 others reacted to Mal_Belford for a topic
Allright. Detail painting, and then clearcoat, let dry for couple of days now, perfect for Tamiya panel line washes, yeah looks brand new hey doesnt it...perfect canvas to work on, so yes getting closer to the real fun part that i enjoy most...yes you all guessed it, for those who know me know that lol, can spend hours. Various mediums and techniques will be used. Not sure if back cushion will be used, yes..no...yes..no11 points -
1/32 Hasegawa Grumman Hellcat F6F-3
denders and 10 others reacted to Tolga ULGUR for a topic
Painting is almost complete11 points -
Since the Bf 110 has been declared done, it's time to start something new. I've been wanting to get done with the 110 so I could start this. It is intended to be a gift for a niece when I finish it. So, the kit The AM that I've acquired. Note that I bought two oil cooler/radiators and the aircraft only has one. And I'm not sure whether I'll use the masks for the markings or the decals. We'll see. I haven't decided which marking I'm going to use yet. Two books that I acquired and there are more on my kindle app. And paint. I couldn't find specific Polish colors in my favorite paint (MRP) but I found these from Hataka. I've never used their paint. Bought straight from Hataka because I couldn't find a source with the correct colors until after I ordered these. It looks like it should be a fun project. And I've already started on a base for it (later).10 points
-
Here is the profile10 points
-
A couple of years ago I picked up a Dragon Bf-110D/E kit and a Revell Bf-110C-0/C-7 kit. The goal is a G4 (I have the AIMS conversion), but I wanted to build a 110 of more generic assembly before attempting the G4. So, this was it. I decided on Falck's aircraft and had intended on painting all the markings except the squadron and personal markings. In the end I just used the EagleCals decals for everything. I used various Eduard PE, Aber and Master gun barrels, and the Quickboost exhaust set. The paint is mostly MRP with the use of AK Markers for some small items and touchup.10 points
-

Revell Hurricane Mk.IIb
Isar 30/07 and 9 others reacted to SteveM for a topic
Thanks for the support all 😉 Purchased a few more bits for the build as I don't want a green/brown Hurricane Mk.ll I want to build a Hurricane used in Operation Rutter but can't find the underwing bomb carriers and exhaust glare shields so I've been trying to make them for myself. Here they are just placed on the wing, not the final version or location Finally, here's the main airframe with a coat of rattle can primer to highlight imperfections, there's a few! You might notice that the outer guns have been replaced with brass tubes and the inners have one faired over with foil. Also removed the cockpit vents on the outside as these weren't on UK aircraft I believe. These will be covered with tissue made to look like red doped fabric. That's it for now. ACW 🙂10 points -
I hope their next Spitfire is a Beaufighter 😉10 points
-
1/32 Infinity Models SB2C-4 Helldiver
chukw and 9 others reacted to monthebiff for a topic
So, a bit of an update and first of all test fitted the upper dive brakes to the wing This then allowed me to measure and cut the inner wing section that needs filling in, now this section is included in the etched dive brake set but in reality an etched part here doesnt really work and its definitely plastic card all the way due to the filling , sanding and rescribe work required Also been working on the undercarriage and so pleased to have a set of S.O.W replacement U/C for this build as this is now a very heavy model with still plenty to add. Straight away I decided I needed to drill and pin with brass rod all joints for maximum strength. Kit part on the right and S.O.W on the left with some work started with first leg built up with minimal glue prior to test fit Both all completed . and test fitted in to the bays Those U/C legs are pretty tricky to get right and patience needed to let one part dry properly before fitting another to ensure best strength and overall fit. Regards. Andy10 points -
Hope this will do, it's limited run, about 3500. Looks a bit nicer than the 1/72 Frog kit I built over forty years ago, can be built as an F.1, PR.2 or F.3. From the book of farce... "DH.103 Hornet test shots in 1/32. It is coming - it is going to be very accurate - it is going to be big. We were overjoyed to receive the test shots for our Hornet last week. We are just finishing off the design of the decals, PE and 3-D printed parts. You will be able to make an F.1, PR.2 or F.3 from the kit. This will be a limited run kit. More news to follow - we hope to have it ready for Telford. Sprues will be on display at the Farnborough show."10 points
-
1/18 Scale P-51B 3D Print Build
Philbucknall and 9 others reacted to JayW for a topic
So y'all didn't think I was finished did you? The bomb racks and the 75 gallon tanks have been occupying me lately. I realized fairly quickly that if I am to make removable 75 gallon tanks a reality, then I have to integrate the design of both. So I have begun the design of the bomb racks from scratch - a Rhino adventure extraordinaire, what with the teardrop shaped sway brace cross-sections and ends, and their faired connection to the rack housing. And also the tanks from scratch - easier. Some guesswork on the tanks; no guesswork on the racks. Here is what I have so far: Parts will be printed up in the next few days I think. Will report out soon as I can. Then it will be RFI.10 points -
I've been working on the tank suspension. Can't do without the pins. I've tried them on so far. I will glue the whole suspension at the finish line.10 points
-

Trumpeter A-4E VA-164 (5 July: Finished)
Finn and 9 others reacted to easixpedro for a topic
Finished up the last 2 items - the UHF antenna cockpit. Kit offering was crap and easy enough to make from styrene. Next up were the pitot tubes. Saved ‘em for last as I surely would’ve knocked them off so without further adieu, pictures of the completed scene. This picture is my favorite for certain! And if you missed how I mounted it, here’s a good view. Not that anyone will ever be able to see this much Thanks for following along! Likely won’t do An RFI post , as I’m already cooking up the next project. -Peter10 points -

Hampton "Hammy" Gray's Restored F4U-1D Corsair Vintage Wings of Canada Version
Dpgsbody55 and 9 others reacted to Totalize for a topic
Canopy Frame using ANYZ Canopy frame set for the Tamiya Corsair. I had some mirror stickers from echelon Decals so cut them to fit the mirrors on the frame. Rear Facing Front Facing.10 points -
Here are some more printed parts. Rear cockpit IP. Loads of detail, should look fab when painted. Cockpit shells printed and dry fit. Loads of detail still to print. Fit is fantastic. Both front and rear cockpits slide into place. The nose gear well is a separate piece and slides under the front cockpit. First print of the canopies. Both prints are less than perfect, but that is on me. Stay tuned, Dan10 points
-
Das Werk 1/16 Leopard 2 A7V
Model_Monkey and 9 others reacted to Merad for a topic
Tracks are complete. I used an 80 grit sanding stick to scuff up the pads and took some random chunks out of them with a hobby blade. I think looks overdone in the photo but it's more subtle in person and hopefully will be even more so after paint. Rear panel of the body is together and on the chassis. Probably can't tell at a glance but 30+ parts went into detailing it. Working on the top of the body now, which gives us the chance to see just how big this big boy is going to be (Extra Thin for scale). Last but not least the track support rollers got painted and clear coated with a touch of black wash. I think I'm go ahead and start painting the tracks and road wheels since there is going to be so much painting to put on this thing.10 points -
Okay, I'm declaring this finished. Hopefully I'll get to RFI photos this week. Now to figure how I'm going to pack it to take along to NATS. Should be fun.9 points
-
F-108 Rapier.....it's here.
KiwiZac and 8 others reacted to Serkan Sen for a topic
I understand this unpleasant issue, Dan. I'm sure it's not a printer problem but rather something that happens due to the physics of the resin. I had to spend a significant amount of time finding a solution for such warped and distorted prints. I realized that this occurs when the part has a very long open cross-section in the Z-direction. My solution was to use supporting structures or temporary ribs/surfaces: I always use Elegoo printers. Currently, I have a Mars 3 and a Saturn 3 Ultra in use, and a Mars 4 Ultra unboxed. I must admit that the old Mars 3 has better quality than the Saturn 3 Ultra. However, I used the Saturn 3 Ultra to print all YF-12A fuselage parts, pushing it to its limits in all X, Y, and Z dimensions. There were misalignments at few z positions but the overall result was impressive: Serkan9 points -
El Corsair Grande, Numero Quatro
KUROK and 8 others reacted to David Hansen for a topic
Well, the time has arrived to (cautiously) begin painting the Big Blue Corsair... As mentioned before, this is my custom mix for ANA 623 Gloss Sea Blue, made from Tamiya Sea Blue, Flat Blue, White, Deck Tan, and Super Clear. These photos were taken shortly after the model was painted, and some of the gloss has been lost. This is partly because of the underlying flat primer (acrylics shrink a lot as they cure) and because i think i did not dump in as much Super Clear as i normally do (i'm running low). In case you were wondering, i masked off the formation and identification lights using (i think?) Tamiya tape and my trusty punch and die set. It might have been 3M 2093 but now i can't remember. The reason i masked off the wing, is partly because the wings on the real plane arrived at the factory pre-painted and marked. Also, this is a large model and it takes a while to cover the surfaces area and multiple batches of the paint need to be mixed up. If there is any minor variance between batches, separating the two along a panel line i think will mitigate the mismatch. I will mask off and paint the left wing the same way. This model is also the first test drive of the One Man Army insignia and stencil mask set. I decided to begin on the lower right wing, and my initial experience laying down the mask has been problematic. I think it's operator error, in terms of selecting the transfer tape. 3M 2093 Blue is just too dark and you can't really see the insignia through the tape. Not only that, but the location of the star and bar marking on Corsair wings is very specific. I did the best i could, but it felt a lot like pinning the tail on the Donkey. And that fuel vent mast didn't help, either!! This is *also* a test of Tamiya Insignia White, LP-35. In the bottle it looks like a very light grey, sort of like FS 36622 or ANA Light Aircraft Grey. However, according to Dana Bell's books Insignia White is actually a 50-50 blend of plain white and light aircraft grey. I was reluctant to use it on my 48th and 72 scale models because it looked too dark and grubby, relative to the blues. However, after viewing results somebody else got on their Airfix Hellcat build, i thought i would try it. As you can see here, it really does not look dirty or grey at all. Up next i need to apply the Insignia Blue surround. I made a dogs breakfast of the paint mask trying to get it in position, so i had to cut it into smaller pieces in order to coax everything in place. It's done with the Mk 1 eyeball and the disc may not look perfectly round when done....but that's why we started with the undersides. -d-9 points -
Hello, some news for you guys.... F-16 Barak conversion sets are restock. 32039 Blk 40 48020 Blk 30 48021 Blk 40 F-16 horizontal stabilizers are restocked also... 32036 32038 One new thing about them, the dischargers are 3D printed now. and one new set: 32063 B-17 Bomb bay doors are now available. (for those who dont need complete bomb bay) Thank you for your support! Cheers, JAN9 points
-

Digital HARM shooter FINISHED
easixpedro and 8 others reacted to blackbetty for a topic
pretty hard to take pics where the whole thing is on them9 points -

Happy birthday Martin!
Michael931080 and 8 others reacted to Martinnfb for a topic
Thank you kindly gentlemen, this community gave me quite a few good friends throughout the years and keeps on giving by keeping me occupied and out of trouble, while continuously supporting my habit of sniffing toxic fumes and hoarding plastic. I always thought that growing old would take a wee bit longer. OK, now I have to get off the toilet while I can still feel my legs....9 points -
Back to the Bench. 1/32 Hasegawa Spitfire Mk.Vb Night fighter. Got the interior installed, just need to add the seatbelts which comes from the Eduard P.E. set, not the greatest, a little too stiff, they really don't like to be manipulated a whole lot, since they are pre-painted, you can't heat them up to get that effect. Oh well. Getting the gear bays, oil cooler, and radiator P.E. installed, it was tricky installing the gear bays, you have to hold your mouth right to get the proper circular bend and not having small diameter fingers didn't help. I had a couple gaps on my first try, the second try not so much. I recommend tacking this in with CA, then follow up with 5 min. epoxy to make it robust. I filled the gaps with 3M Acryl putty and smoothed with denatured alcohol. I removed the kit flap on the radiator; this will be replaced with a P.E. part. The radiator had two nice screen parts installed until my Monkey brain didn't plan ahead, so I had to practice battle repair on that. Thanks for all the encouragement. Respectfully, John B.9 points


