Leaderboard
Popular Content
Showing content with the highest reputation on 07/15/2025 in Posts
-
1/18 Scale P-51B 3D Print Build
geedubelyer and 5 others reacted to JayW for a topic
Well heck y'all. Or bloody hell in old English. The LH 75 gallon tank actually can be inserted into the hooks of the bomb shackles and stay in place as designed (the RH tank not so much). Here it is in all its glory: To my eye, that looks pretty darn cool. And, adding the fuel supply and pressure lines would add to the look. As well as the decals that are not there yet. What is lost is the unobstructed view of the landing gear and gear door, in a side view at least. What I think I cannot do is have this tank removable. For the reasons I already went through - the model is too fragile to subject it to alot of handling. So, I think this P-51 is either going to be with drop tanks, or without. I am on the fence. I would love to see some opinions from those who have been following this.6 points -

Make the others jealous
TankBuster and 2 others reacted to Shoggz for a topic
The usual impeccable service from Jadlam.. I got excited for a second thinking it was a 'normal' box, but alas I was mistaken - it's still a flap and flop version - just slight more robust than usual.3 points -
RAF FG.1 XV571 WILD HARE Phantom Conversion
TankBuster and 2 others reacted to Anthony in NZ for a topic
LOL...fat chance, I dont have enough years in my life Thanks Derek! Ok so Canopy time This is one of the real shortfalls of this kit. The way the clear parts attach to their frames. Thankfully @Ali62 has come to our rescue and produced these lovely one piece crystal clear canopy sets which includes frames and glazing all in one piece as well as some 3D printed internal bits. Absolutely highly recommended I must say. One day some time back I also ordered a set of 3D Chutes Phantom canopy frames with all internal latches, seals, mirrors and framing...just beautiful! RESIN2detail also now has a GORGEOUS looking cockpit set. Of course I couldnt be happy with just using one or the other and decided to see if I could grind out the interior sill frames on the Aerocraft canopies. Ugh...someone should have stopped me LOL, I created a lot more work for myself in the process. However if I was to do it again I could do a better more efficient job-probably. I thought I was all set to go when I remembered the Tamiya kit also had potential shape/size issues. I studied and studied and to the best of my ability using Soyuyo's drawings and photo references (much like I did for the fwd fuse size issue). My conclusion is that if I can correct the sill line I have sorted the biggest issue. Now I know that apparently the cockpit is slightly too wide and potentially too short in the rear canopy (I am still unconvinced about that still) I felt I could live with that and I could wait a lifetime for a new 1/32 Brit Toom and it still wont be perfect. I guess I had to choose my battles. To me though Tamiya have done a great job still. Ok so here is the issue and in hindsight I dont know whether or not its worth doing, but here it is. Aerocraft Canopies 3D Chutes printed canopy frame set The Phantom canopy has some unusual shapes and is best explained by the man himself who discovered the issue and analyzed everything https://soyuyo.main.jp/f4/f4e-1.html#bottom But essentially this is the conical shapes he's talking about First up I ground off the inner sills and shaved the sills back with a flat blade to the new slightly curved shape at about the same line as the Aerocraft outer sill line and then I masked the interior to protect it. I then masked the new frame line on the outside to match the above photo. I then used JB Weld and back filled it up to the tape line and sanded smooth. When I removed the tape, there I had the revised sill lines. Very difficult to tell unless you get at the correct angle. With both inner and outers done You get the idea, and yes I broke a latch off but have a spare off a damaged part Difficult to photograph the two different curves front and rear The canopies also respond well to Tamiya Finishing compound and wax I was going to completely finish them before posting. But due to the discussion on the Discussion section here I thought I might post this whilst the discussion was fresh Oh I also added a bit of an inner frame to the 3d parts as this will simulate the piece that should be there and where the edge of sealant will show through from the inside (as well I will have a sealant bead on the outside slightly lower so as to replicate the real canopy glazing attach. Thanks for tuning in on this painfully slow build once again Cheers Anthony3 points -

New Spitfire from Kotare
RBrown and one other reacted to geedubelyer for a topic
It would bookend the Spitfire lineage nicely. I drool at the idea of an FR-47 or MK24, especially by a company like Kotare who have shown themselves to be passionate about their products. We live in hope2 points -
New Spitfire from Kotare
geedubelyer and one other reacted to CRAZY IVAN5 for a topic
That would suit me to a 'T', I'm getting tired of having to "drop down" to 48th scale to do a Griffon Spit. The only ones that I know of in big scale is the PCM MK XIV and the ancient Matchbox MK 24.2 points -
The Bubble top I'm building now is very nice. The only thing I've noticed is I've had to trim the male location pegs on a bunch of parts, especially the weapons to allow them to seat flush. Might want to get the advance kit as it allows for dropped flaps. Tim2 points
-
My boyhood model shop! I lived in (Old) York for my first six years and my dad took me there a few times.2 points
-
RAF FG.1 XV571 WILD HARE Phantom Conversion
Martinnfb and one other reacted to Anthony in NZ for a topic
Thanks buddy....hmmm thats a good question. I really want this done, I really really do!!2 points -
The last project on Cripes a Mighty would be the bomb racks. These (the real thing, on Lope's Hope): Surprisingly, effective on -B/C models, the bomb rack is made of some kind of internal re-inforced molded plastic. Earlier versions were magnesium (on -A models, A-36, etc - I think). The two configurations vary a bit but not much. Anyway, the drawing says the rack is to be gray, to match the underside of the wing with the standard gray and OD paint job that these aircraft were delivered with, up until they began to arrive with un-painted aluminum. As discussed already, -D models introduced an entirely different rack. Also previously discussed was sway brace bolts, and whether or not they included the large round pads. Mine would have the round pads: I designed the holes in the pads to have a lip at the opening with a tiny bit of interference fit for the bolt ends. And the bolt ends had a bit of a bulge at their ends to snap into place in these holes. The bolts: See the bulged ends? Put together (carefully) and I got this: Snap! Yes they actually swivel. I was amazed - true micro-engineering. There they are next to my 3D printed and gray painted bomb rack. For the umpteenth time, I thank Airscale for the decals. My intent here was to be able to mount 75 gallon tanks and have the pads swivel into place with little to no gap betwen pad and tank. It worked, but read on. A finished bomb rack with sway brace bolts: And here are the 3D printed tanks: I had to do some educated guess work as to the shape and size of the tanks. Both my racks and my tanks are designed at the attach points for removal and re-attach. It works somewhat but not great. In real life the tanks were identical, but I have a LH and a RH tank. That is because the little fittings where fuel lines connect are oriented differently LH to RH. These tanks are not ready for prime time, and will receive decals one day. But for now, I have decided NOT to use them. I never intended drop tanks to be installed permanently on Cripes - they hide too much of the landing gear and I do not want them hidden. They would instead be removable. But I have found that what I have here is an amazingly large, unwieldy, and fragile P-51 model. Every corner of it has something that breaks off all too easily. And installing or removing those tanks, along with their plumbing, would be a labor intensive and delicate task, subjecting Cripes to part breakage every time I mess with it. MOF - turning the model upside down to install the racks resulted in this: The external rear-view mirror broke off, after being on the aircraft for what - a week? Well, that was merely an opportunity to tweak the mirror design a bit - a touch shorter, with slightly wider base pads - print it up with some spares, and re-bond it to the windshield. No prob. But - the wing tips are uber-fragile, and the fix is much much more complicated. Here one is, BTW, finally freed from its protective padding and tape: Just look at how delicate that tip is. It just had to be a frequent maintenance item during the war. I am proud of it and I do not intend for it ever to be subjected to potential for breakage. Other parts are very fragile. The pitot mast for example, that part very close to the bomb rack. The gear doors - they cannot be bumped or the links will break. That would break my heart. The movable tail feathers - also fragile. So I will keep the tanks around, but I will not install them at this time, perhaps never. Here is Cripes with its newly installed bomb racks: Pan back and you see here the final WIP picture of Cripes, with her racks and new mirror, before I put together the RFI post: Oh one more thing - Antonio made up a model of pilot George Preddy,and gave me the file. After some back and forth about George's height (he was a fairly small person I understand), I scaled him to be about 5 foot 6 inch and printed him up. And here he is: Dam Antonio - you are one talented dude. I will paint him one day, but not today. OK RFI post upcoming. Thank you all so much for sticking with me on this 2-year adventure. So appreciated.2 points
-

F-18E Super, War Party
geedubelyer reacted to F`s are my favs for a topic
All trailing edhes are properly thinned - here is a comparison of the flaps before and after: Their assembly is not... let's say ''just''. There is nothing that regulates the thickness along the interface with the wings, kinda each (bottom or top) halve of a control surface needs to be glued to the wing first, and then the other halve. But that way it would have been impossible to create a perfectly straight edge. So, I ended up making some ''alignment'' pins by adding this stuff: Fortunately it was needed only for the flaps and ailerons. The front surfaces went pretty straightforward, and their leading edges were flawless, no need of sharpening at all. Here they are just taped up... Next up - cockpit time. I plan to jazz it up with a resin pilot/seat + the Red Fox Studio's 3D decals for the IPs:1 point -

An actual model shop to visit!
TankBuster reacted to Shoggz for a topic
I had seen on the Book of Face that a new model shop had opened in Rugby - 10 miles away from Châteaux Shoggz - so at the weekend I took a trip over. I ended up spending over an hour in there - basically just chewing the fat with the owner - Timothy! (I did eventually buy some AK Marker pens and a new hobby-knife!) It was such a joy to peruse an actual bricks and mortar outlet - much as I've embraced the online world of model-making. So, anyone in the Rugby area (probably just me!) give it a visit.1 point -
DBMK Sea Fury 1/32 release
scimitarf1 reacted to Kenneth for a topic
For other continental European LSP‘ers, Aviation Megastore in The Netherlands now has it listed for November 2025. Great move, DBMK, this makes it so much simpler and cheaper for us to get one 👍1 point -
I recently ordered ASK Distribution decals for the P-40B in 1/32 scale. I noted at the time that they were much less expensive than any alternatives I could find. They were delivered promptly and appeared to be fine. The instructions and diagrams are excellent. But the decals themselves shattered into hundreds of pieces. Very disappointing!1 point
-
RAF FG.1 XV571 WILD HARE Phantom Conversion
Martinnfb reacted to Michael931080 for a topic
INCREDIBLE!!!!!!1 point -
Not large scale but just got shipping notice from Super Hobby in Poland. Pretty stoked!1 point
-

Trumpeter 1:144 SSN-21 Seawolf
TankBuster reacted to LSP_K2 for a topic
I thoroughly glued the shroud support into position and primered the assembly but now fear that the stator won’t fit in from the rear. I’d check, but apparently the stator is currently playing hide-and-seek.1 point -

Trumpeter 1:144 SSN-21 Seawolf
TankBuster reacted to LSP_K2 for a topic
If there’s something out there besides bad luck, I certainly haven’t experienced it lately. Last night while scrubbing off the old paint, the plastic propeller, which is not particularly brittle, had a small piece of a prop blade break off and promptly down the drain it went! I faked up a replacement immediately and after a teeny bit of clean-up, I should be back in business (I hope).1 point -
1/18 Scale P-51B 3D Print Build
geedubelyer reacted to Anthony in NZ for a topic
Jay this has been a joy to watch right from the start! Personally I think drop tanks on. I'd take some good pics with them off then affix them as to my eye they make the Mustang look purposeful and ideally shows her as a long range escort. The clean line is obscured by the flaps down anyway...but tanks on in my humble opinion. Either way its a masterpiece and wont detract Thanks for taking us on this journey Cheers Anthony1 point -

SW Imperial Tie Fighter
TankBuster reacted to ShelbyGT500 for a topic
Hi my friends this is my last finished project - Imperial Tie Fighter at 1:24 scale. It is a scratch-build from spare parts, pvc tubes, a lot of polistirol sheets and carbon foil. For main "fuselage" I've used a clear polistirol sphere for Christmas decorations and it is excellent to glue with our model cements - Tamiya, Gunze, Revell and etc. The interior is also scratch - from different spare parts from various kits - same technology like the real models from the first movies So here it is: Thank you as always for stopping by, I hope you will like it Cheers guys and have a nice day.1 point -

SW Imperial Tie Fighter
ShelbyGT500 reacted to The Madhatter for a topic
I would never would have guessed this was scratch built if you didn't say. This is beyond any superlatives I have in my vocabulary to describe. I only have the highest respect for guys like yourself who can scratch build to this standard. This belongs somewhere that had a lot of foot traffic to get the admiration it deserves. Brilliant artistry!1 point -
Does Miniart do decent kits? I've never owned one.1 point
-
1 point
-
1 point
-

Large update set for A-7E/D coming..Reskit
Bill Cross reacted to petrov27 for a topic
It does seem close to the point of "why not just do the whole fuselage" as a set1 point -
Which of these aircraft tugs are Vietnam era?
easixpedro reacted to Peter Greengrass for a topic
Aboard Kitty Hawk in 19661 point -
1 point
-
More awesomeness!1 point
-
Nice one, eagerly awaiting mine. Cheers Dennis1 point
-
An actual model shop to visit!
MikeC reacted to europapete for a topic
Awesome! And if anyone is in the York area, don't forget Monk Bar Modelshop1 point -

F-108 Rapier.....it's here.
turboprop4 reacted to Dandiego for a topic
More printing. Central fuselage with main landing gear bays. Tape and magnets prevent the print from moving/dislodging during the print process. Most of these prints are between 12 and 20 hours. Cardboard wing. Just to get a idea of the size and to help in determining where to separate the wing so it fits the printer. All fuselage sections printed. I use an electric palm sander to knock down the layer lines and then apply putty. First wing section. There are 3 per side. Dan1 point -
Hey, here is the A-10C Thunderbolt II from Trumpeter… Vacu canopy, GT Resin and Olimp set, TwoBobs Decals and Master Gatling barrel and pitot and other bits and bobs…. In all pylons and external stuff are micro magnets, so everything can be taken off ore repositioned…1 point
-
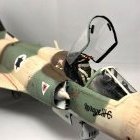
It's been a long road with this one. I used some Airscale (prop, pilot's sight, .30 cal gun and tailhook), not yet installed. Wheels by Phase Hanger. Decals by GMM. Tackling the rather extensive greenhouse next... Tim W1 point
-

Fixing warped 3D printed clamps
TankBuster reacted to BiggTim for a topic
I've had pretty good luck warming that stuff up with a hair dryer and then clamping it (obviously with a different clamp 😁) in the position I want until it cools. Maybe very hot water as an alternative, but nothing as hot as a heat gun. Tim1 point -
Miniart P-47 Razorback Inbound
Martinnfb reacted to Dave Williams for a topic
I’ve been waiting for this release too. Debating whether I want to order now, or pick up the Squadron boxing at the Nats next month.1 point -
The engine. Had to fabricate a magneto from spare bits. Not sure why it was missing from kit. And, of course, my own ignition harness from lead wiring.1 point
-

Das Werk 1:16 75mm Pak 40 anti-tank gun
TankBuster reacted to LSP_K2 for a topic
It’s not altogether uncommon to see old doors and such used in the vicinity of the gun, so I’ve faked one up from some scribed sheet and given it a base coat of a wood color (Tamiya XF-57). This may or may not get used, I haven’t decided for sure yet. This gun seems to have the spades particularly well dug -in, but that was not nearly the case at all times, for whatever reason.1 point -
RAF FG.1 XV571 WILD HARE Phantom Conversion
Martinnfb reacted to jeroen_R90S for a topic
Really nice, and great to see you're still working on it!1 point -
I'm absolutely loving this build, watching how it progresses. So much I never knew about the Spey birds....your work and attention to detail is phenomenal @Anthony in NZ....but how much longer till we can see her in all her resplendent finished state?1 point
-
RAF FG.1 XV571 WILD HARE Phantom Conversion
Martinnfb reacted to Anthony in NZ for a topic
Awww thanks, I appreciate that. TBH, your Phantom build was my kick up the pants I needed! Thanks Matt, I am glad it was of interest. Modelling is such an enjoyable learning curve as well as lessons in history that are often as interesting as the build itself Cheers guys Anthony1 point -

RAF FG.1 XV571 WILD HARE Phantom Conversion
Martinnfb reacted to scvrobeson for a topic
Incredible attention to detail, as always. Finding out about the shape of the canopies was an illuminating diversion of the thread, but it was really cool to learn. Matt1 point -

RAF FG.1 XV571 WILD HARE Phantom Conversion
Martinnfb reacted to easixpedro for a topic
Excellent work, as always! Every post is a treat with this build.1 point -

Which of these aircraft tugs are Vietnam era?
CRAZY IVAN5 reacted to Bill Cross for a topic
Thanks, everyone, especially @thierry laurent for the photos and comments. Reskit said in a FB post they are ALL VN-era, but that seemed like a stretch. They ARE expensive, but I purchased the Z-M and it had no decals. I believe I have a V-A one or someone else's, and again, not the same level of detail. Reskit is hard to top, and they're making these things while their country in under attack by a much-larger neighbor (who once upon a time guaranteed Ukraine's security in return for them giving up their nukes).1 point -
1/32 Hasegawa Grumman Hellcat F6F-3
Splatman812 reacted to Tolga ULGUR for a topic
Some progress Exhaust traces etc.1 point


.thumb.jpg.745e9c32fdfafef712dcea77f75e8a27.jpg)
