

Piero
-
Posts
229 -
Joined
-
Last visited
-
Days Won
1
Content Type
Profiles
Forums
Events
Posts posted by Piero
-
-
1 hour ago, chuck540z3 said:
Everything looks terrific Piero! Lot of neat looking details everywhere.
Where did you source the "No Push" placards on the engine nozzle? I'm having difficulty trying to find something similar.
Cheers,
Chuck
Hi Chuck,
first of all thank you for the compliments!
Your F-16 "Aggressor" is an inspiration source for my F-16... you are doing a really great work on it!!!
The "No Push" placards on the P&W engine nozzle come from the Uprise Decal sheet with "Black Stencils" for F-16s.
CIAO!
Piero
-
13 hours ago, geedubelyer said:
This would look great parked next to the F-15 Strike Eagle demo bird 71-291 that Daniel Leduc is building in the group builds.
I love the Strike Eagle demo bird in Europe One camo with tons of CBU hanging all around it.
-
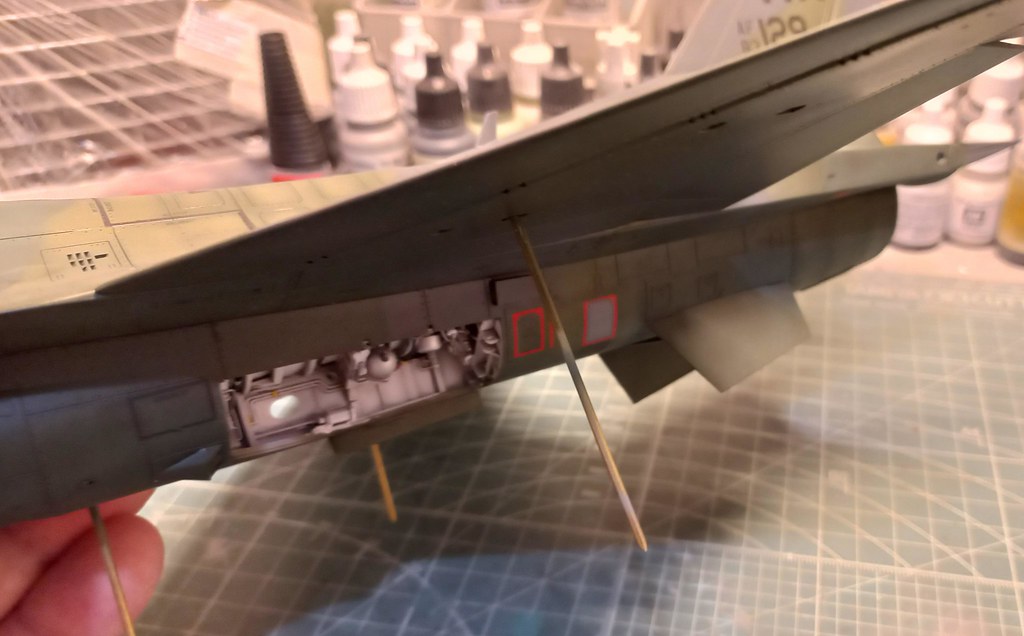
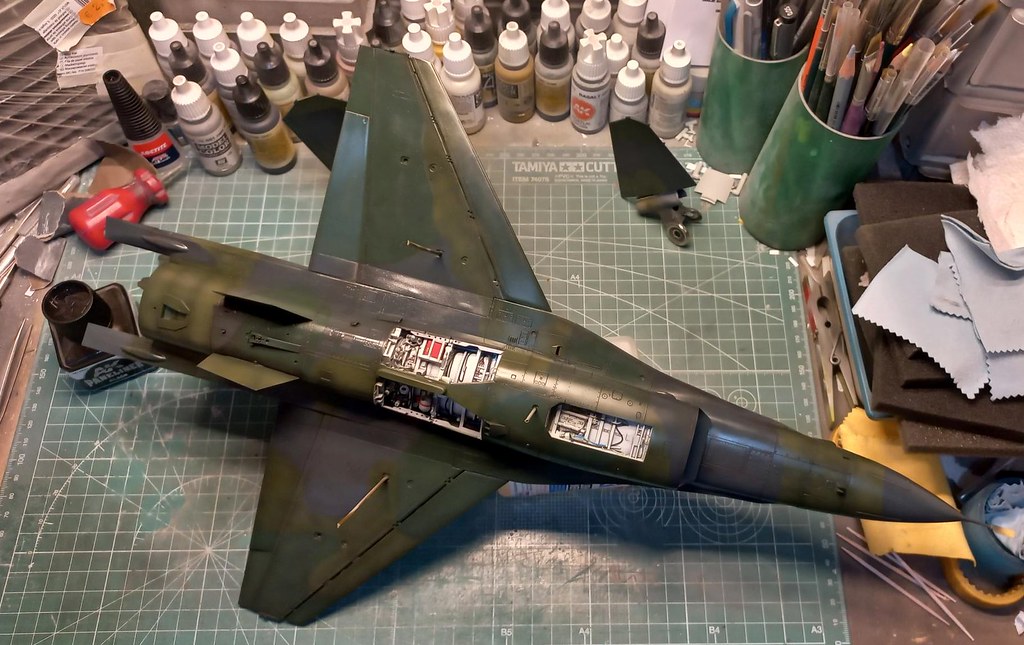
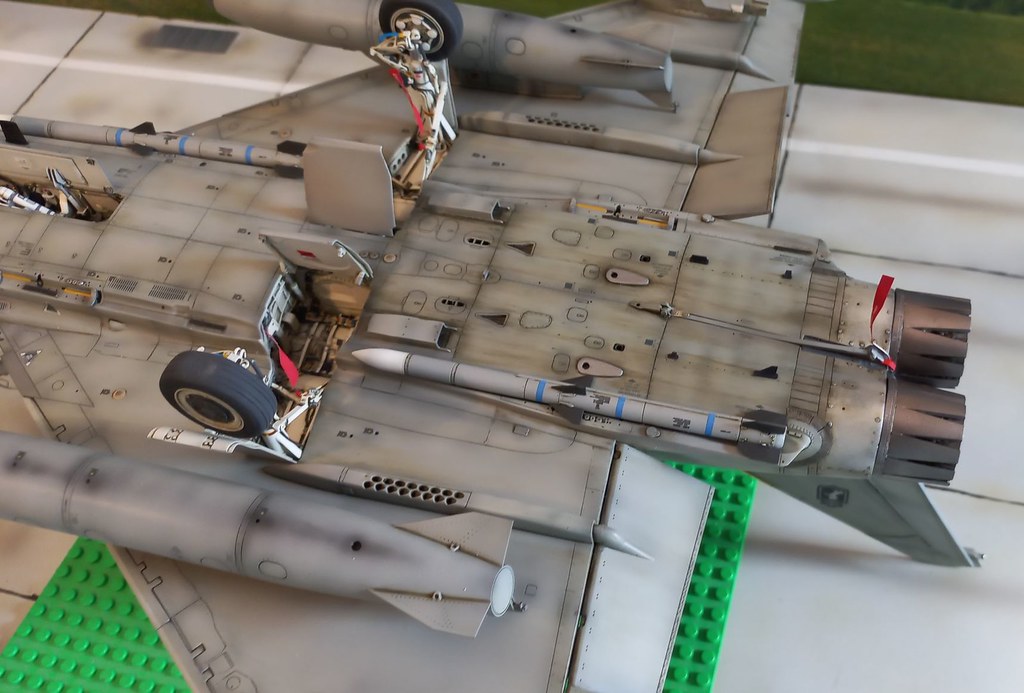
it's time to put together some pieces that have been prepared separately.
The Pave Penny laser tacker pod on the right side of the main jet intake...

You can see also the FOD guard fitted to the main jet intake with the yellow falcon head.
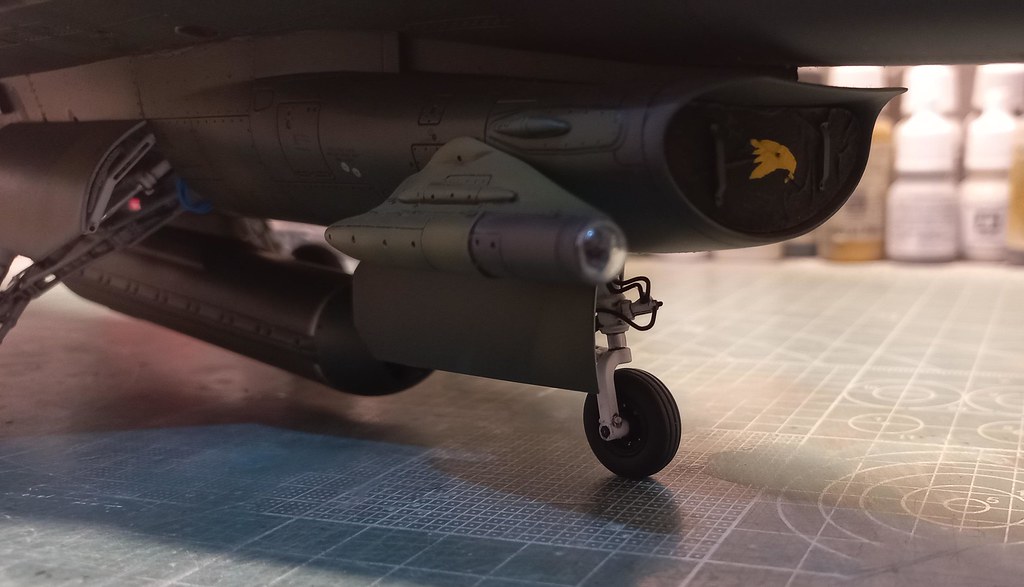
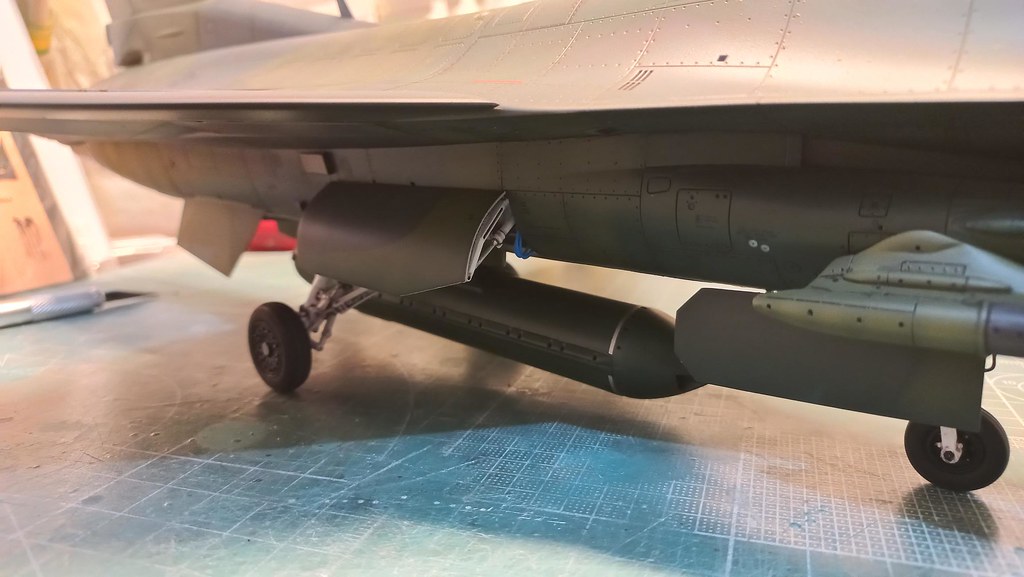
Under the belly the big GPU-5/A gun pod fitted with a modified pylon/adapter.
The engine exahust fitted...

The main undercarriage with cable sand hydraulic lines fitted...

Note the red stencils around these panels...
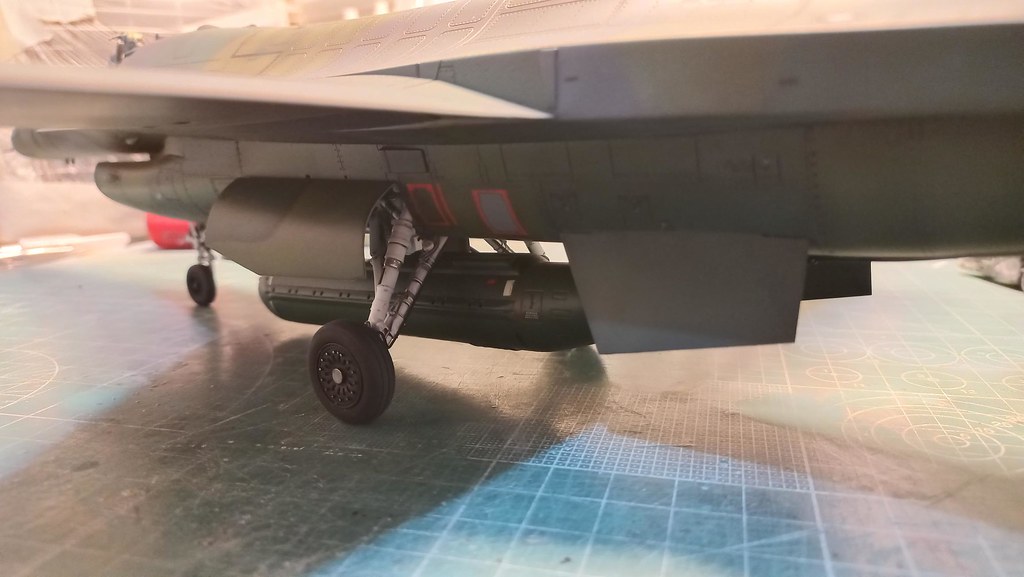
Again the big gun pod...

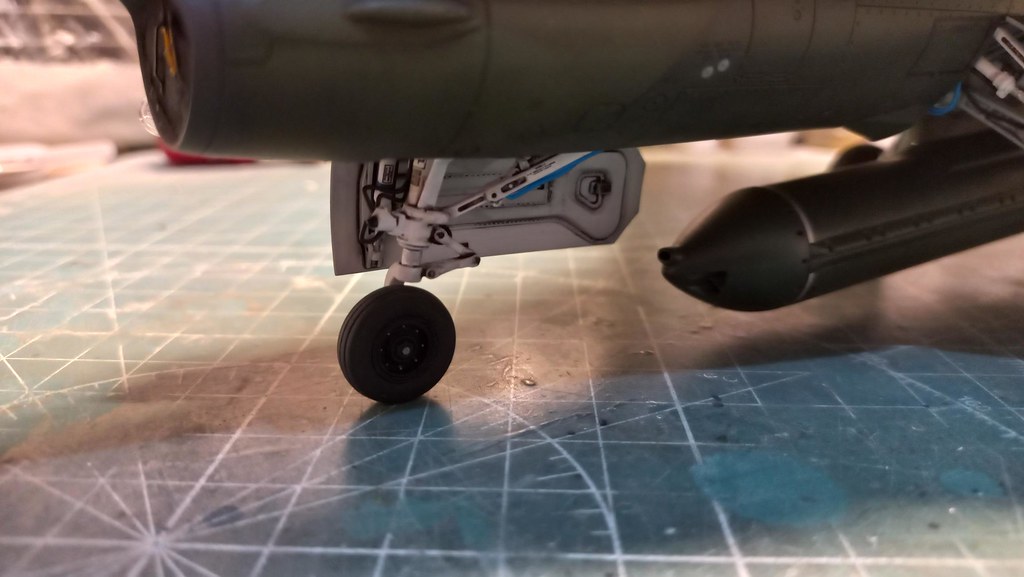
The front undercarriage... also here cables and hydraulic lines has been add.

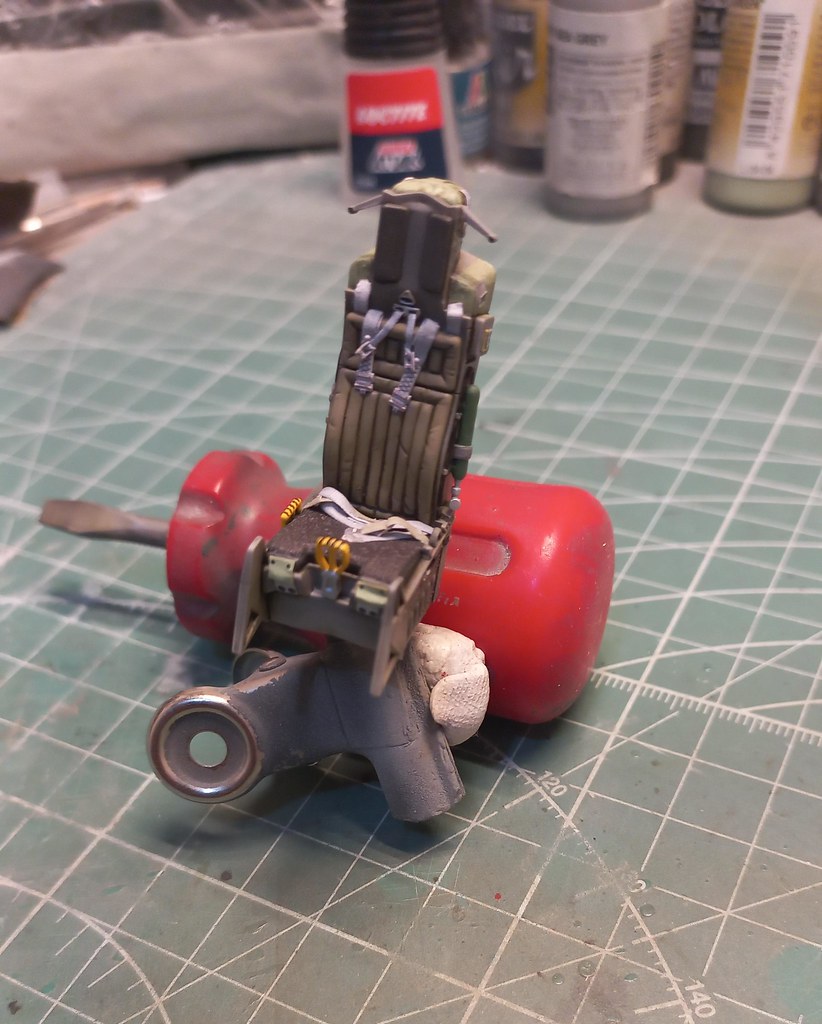
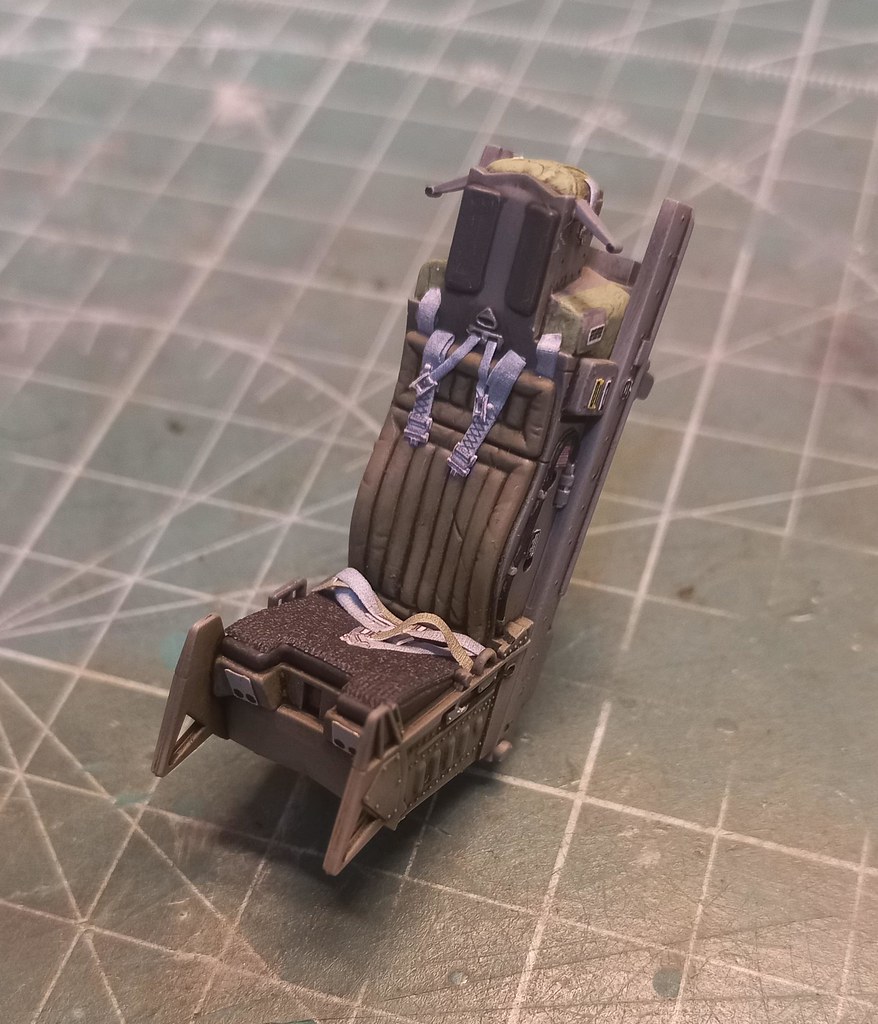
Last for today, the ACES II ejection seat installed into the cockpit tube. This part is from the plastic kit...
CIAO!
Piero
-
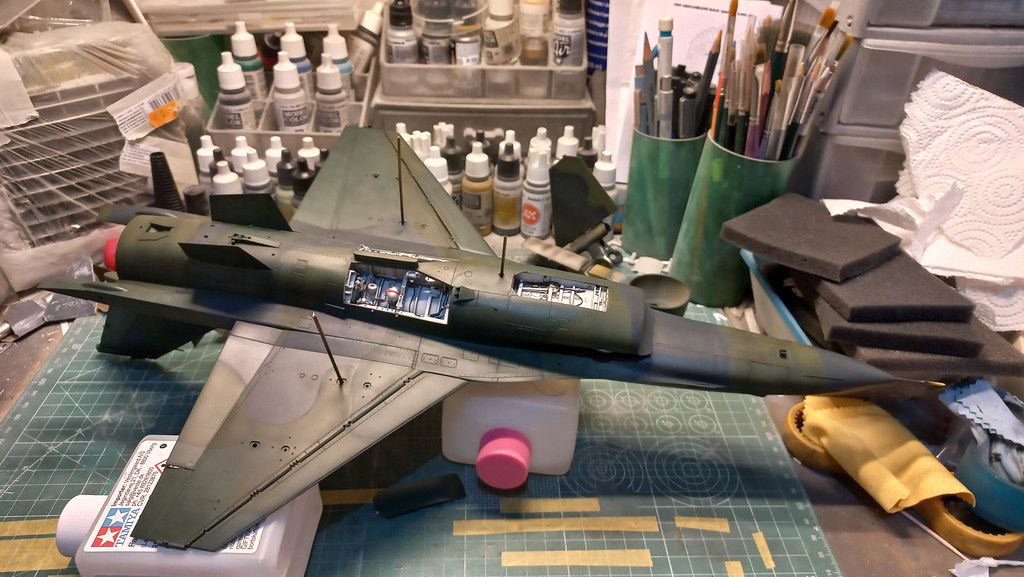
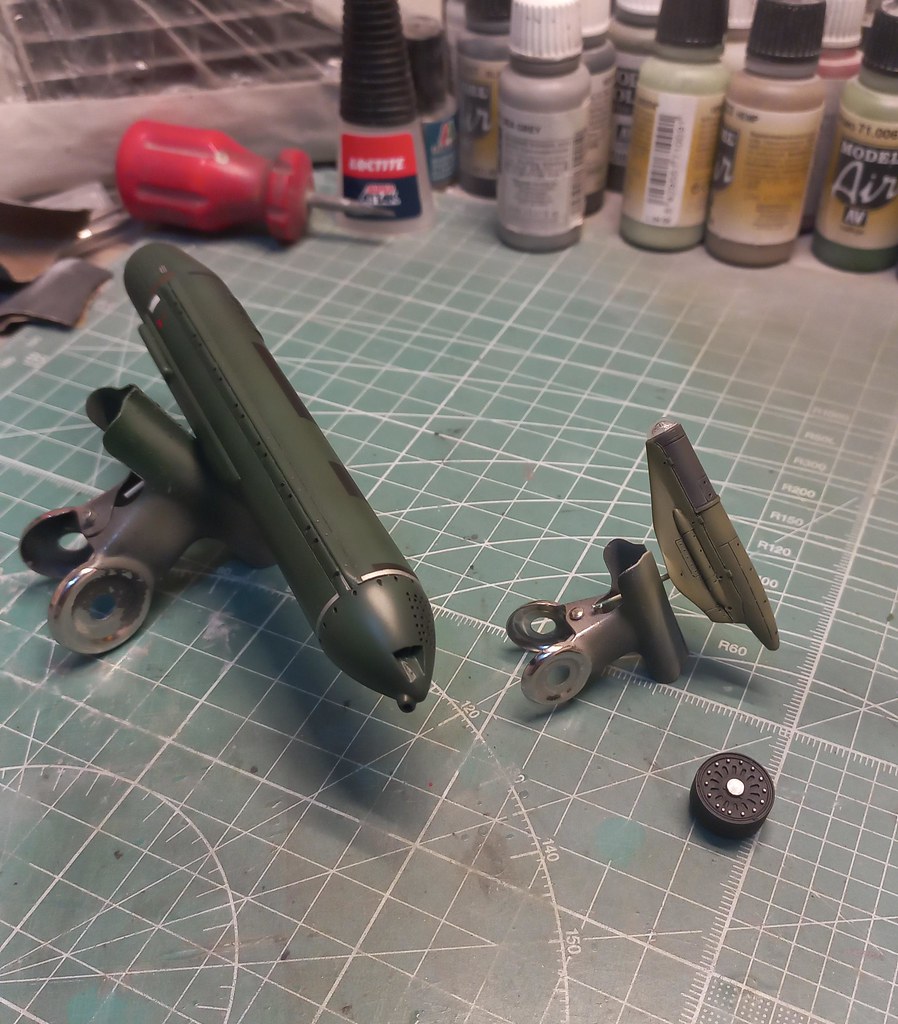
Hello,
some progress here.
The external load is ready with a "drill" of an AGM-65 Maverick. It's a resin missile+rail came from Eduard Brassin.
Body and rail are painted in Olive Drab.

Under the other mid-wing pylon there is a TER, from Edaurd Brassin too, with 2 "inert" 500lb slick bombs.
Olive Drab for the main part of the bomb plus light blue for the front part.

Now the engine exhaust : this is a mix of the Reskit P&W plus the tube from Aires resin set.
This because I already had the Aires engine resin set... but the exhaust is smaller in circumference when it joins the rear plastic piece of the kit.
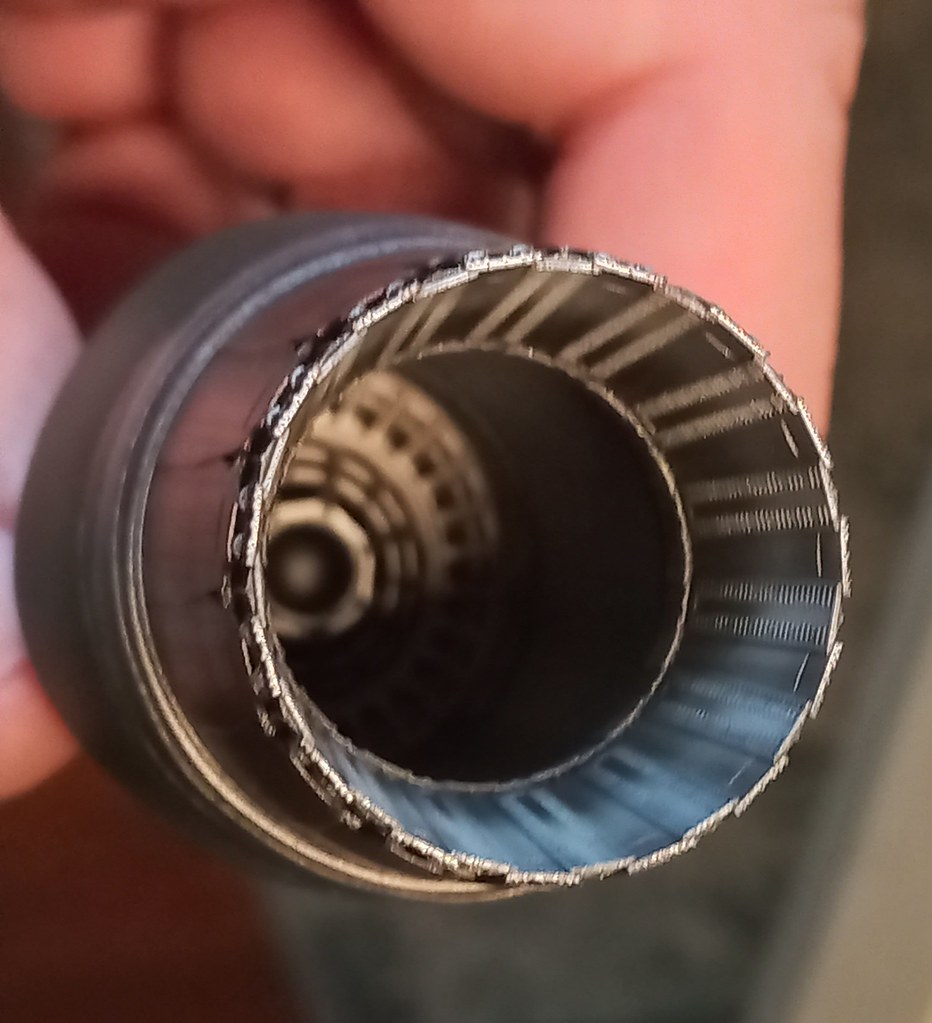
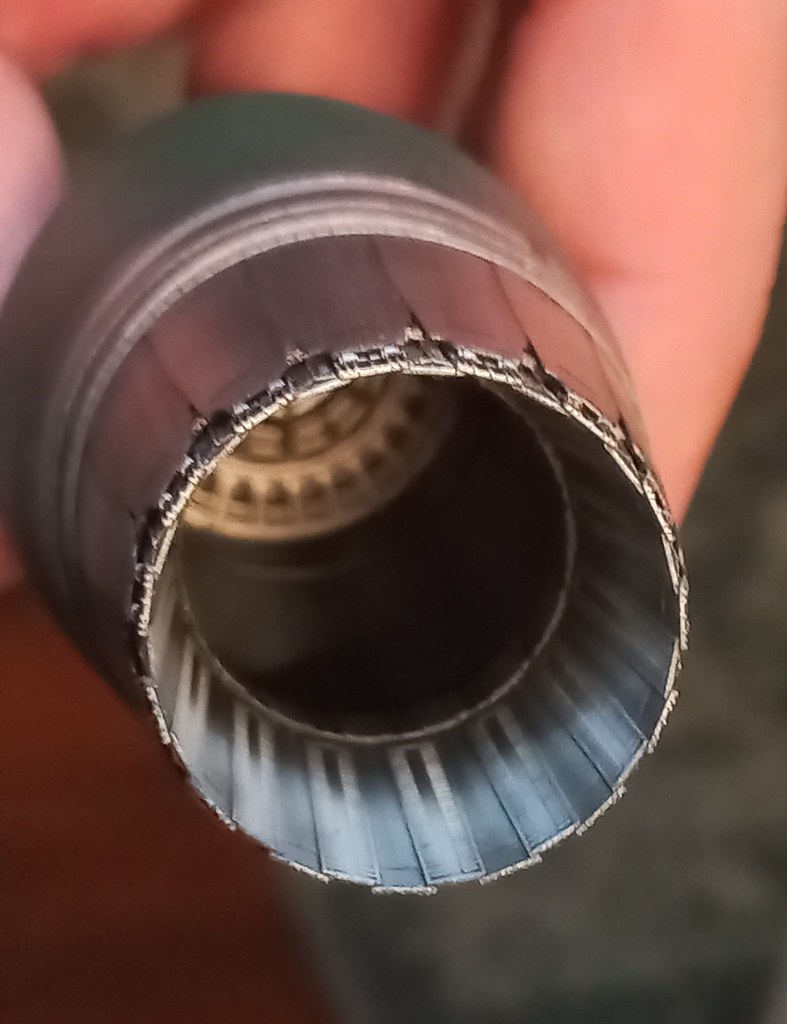
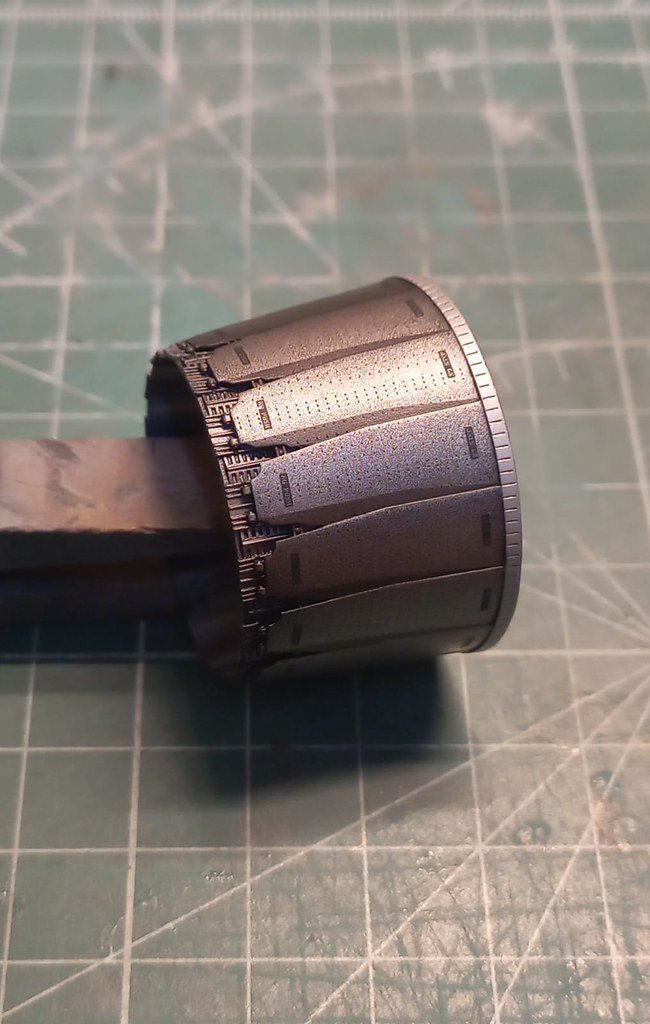
All the metal colors are from Vallejo Metal acrylics reference.
CIAO!
Piero
- Madmax, Shoggz, TankBuster and 10 others
-
 13
13
-
On 4/26/2024 at 7:17 AM, periklis_sale said:
Wow excellent
What colors did you use?
Gunze acrylics reference thinned with Gunze Leveling Thinner.
H301 Dark Grey + a couple of drops of blue
H302 Forest Green
H303 Medium Green
-
Hello,
here is the CAS Viper finally with the decals applied and a nice, truly matte finish.
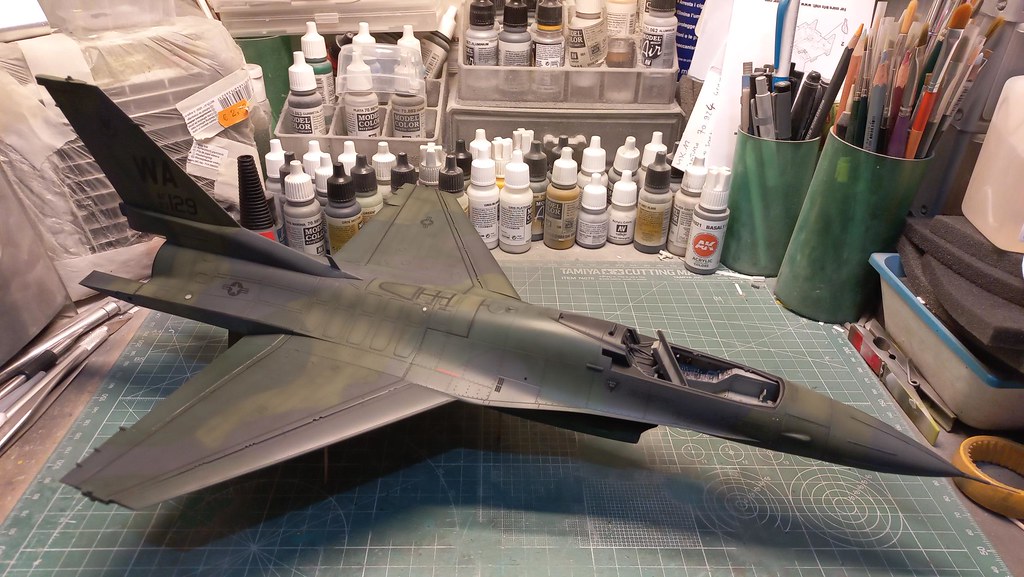

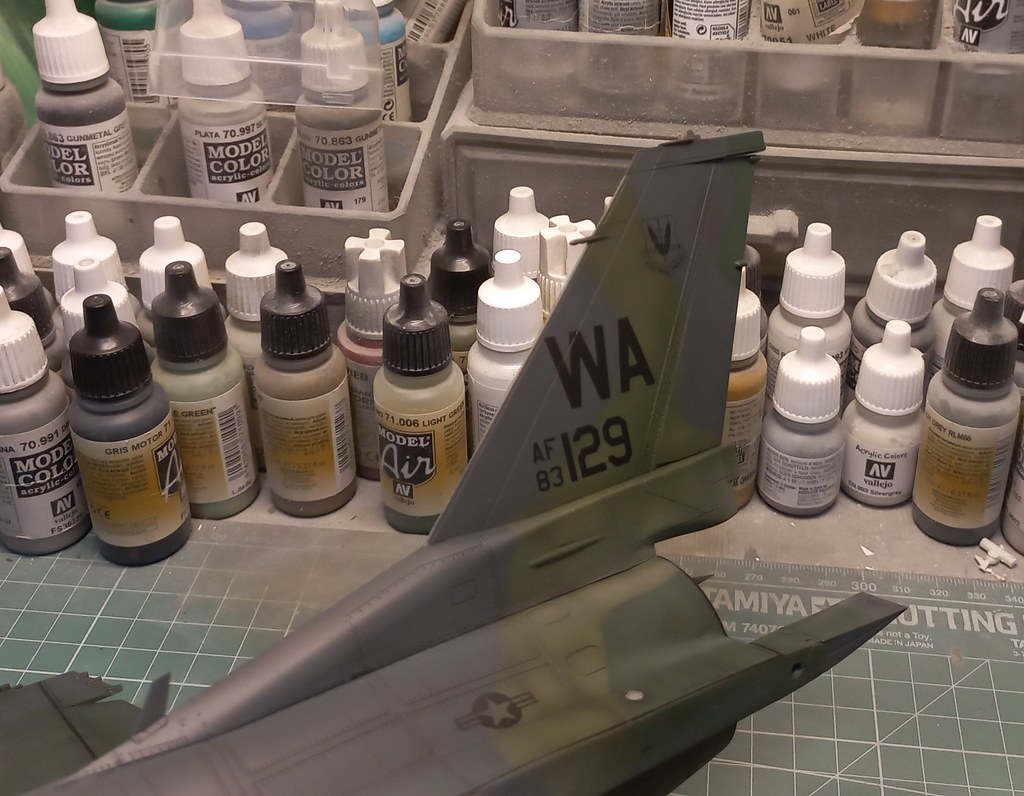

All the black stencils come from the Uprise decal sheet printed with FFA technology.... simply fantastic and very easy to use... saved me so much time, without needs to apply layers of glossy and matt clear varnish and no danger of silvering because no clear film remains on the model.
The only "legacy" decals are the codes & numbers on the vertical tail that cames from a Two Bobs's decal sheet and the red outline around the ventral jet exhaust outlets.
Now it's time to work on the undercarriage legs.
CIAO!
Piero
-
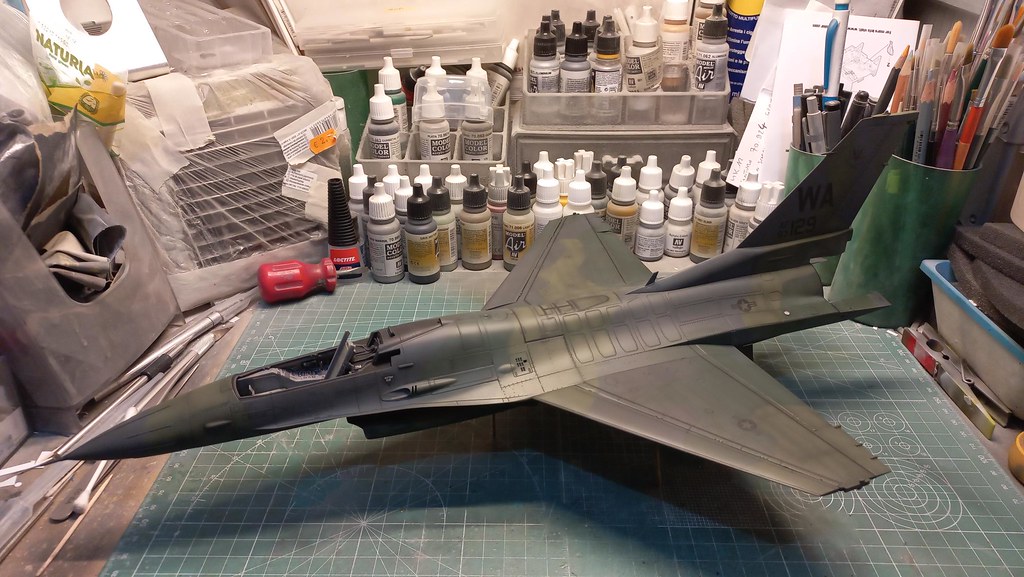
Hello,
the wrap-around camouflage Europe 1 is done!
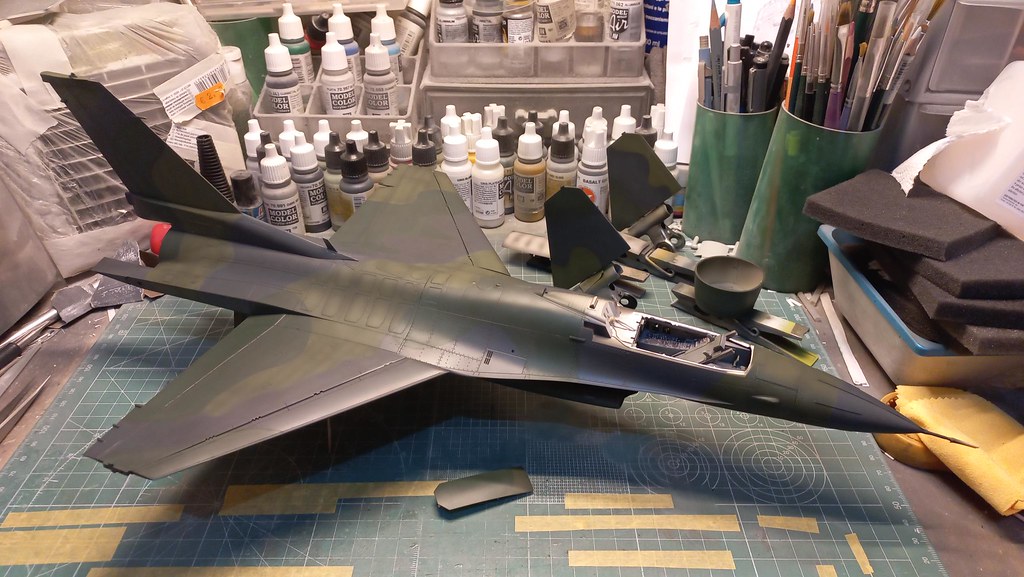
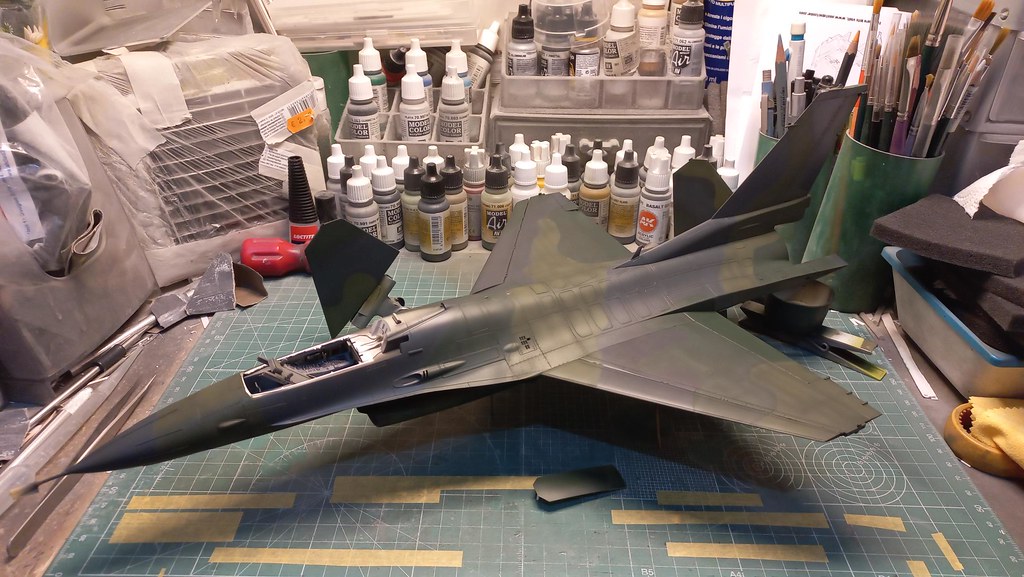
And then after a thin layer of Clear Gloss Tamiya X22 and AK Panel Liner applied.
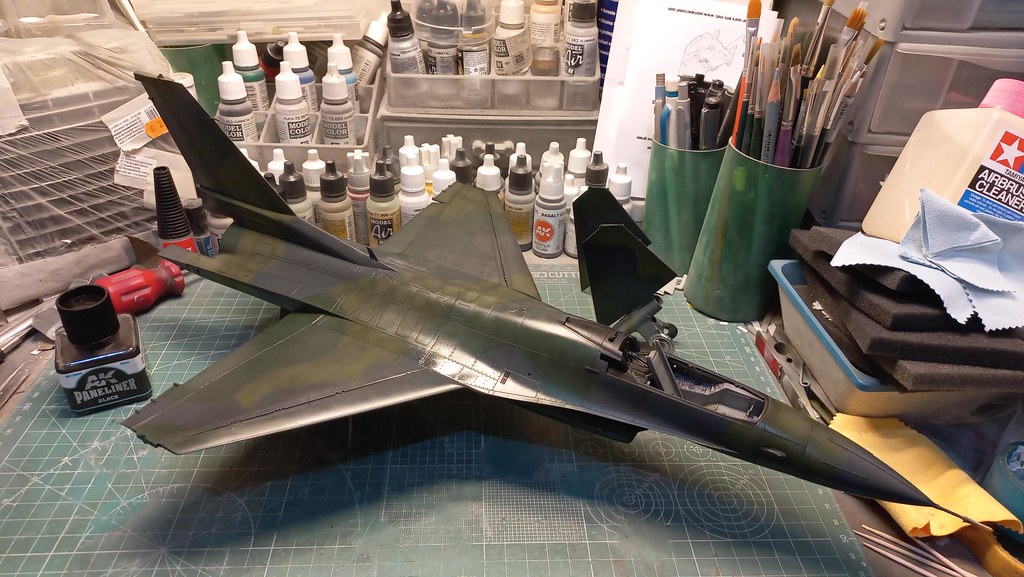
The area around the cockpit is painted with black and details piched up with some dark grey.
Now is ready for the decals.
CIAO!
Piero
-
Frighteningly spectacular... dear George
")
CIAO!
Piero
-
Hello,
some progress on the CAS Viper.
The ejection seat is now completed but will be installed only at the end.
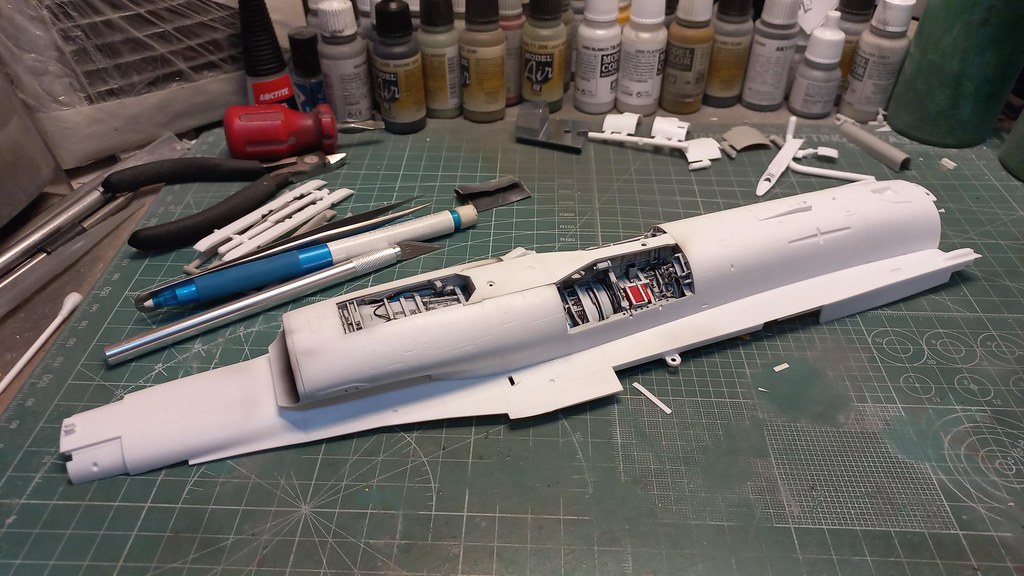
The main fuselage has been assembled with the undercarriage bays and cockpit tube inside.
As you can barely seen due the white plastic, on the Block-25 the inner slat attachment point has 2 "finger" instead of 3 that you can find on Block-40/50.
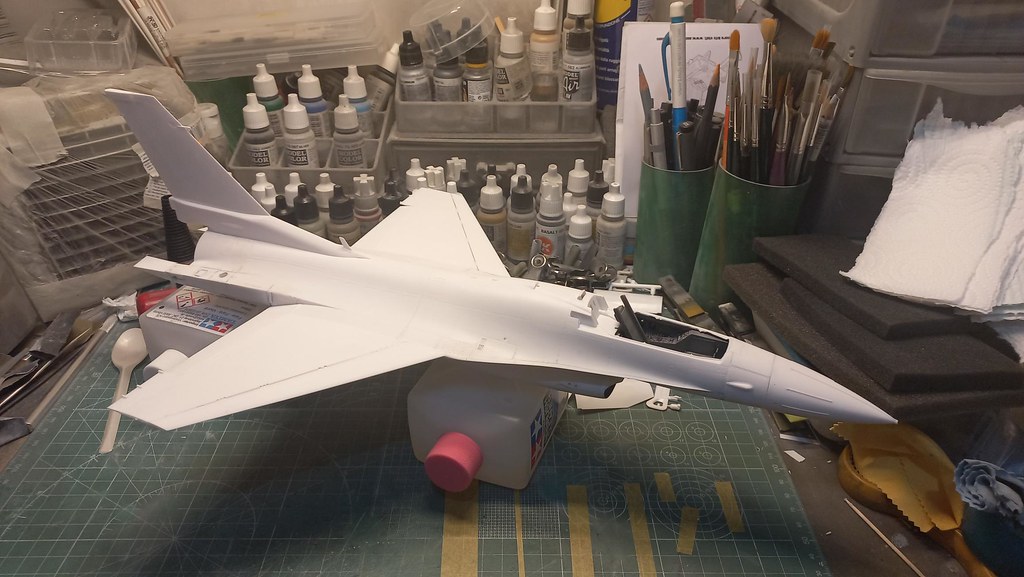
Some progress also on the external weapon load.
The GPU-5/A gun pod came from the Revell's F-15E kit.
The plastic parts has been modified to obtain a good replica of the gun pod used under the F-16C.
At the same time, I made almost from scratch the Pave Penny laser tracker pod that will be installed on the right side of the main air intake.
You can also see a "black" undercarriage wheel with the correct design.
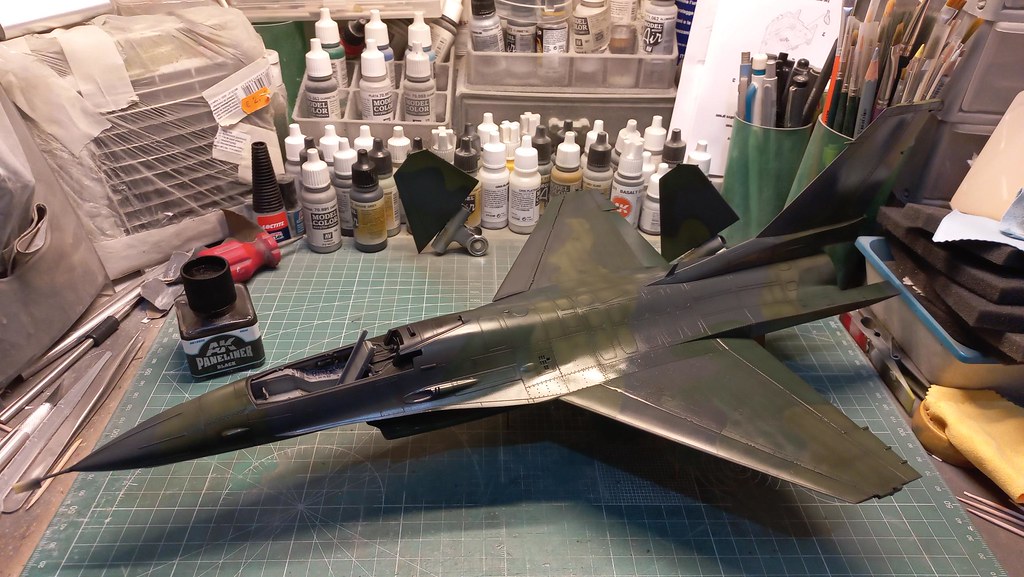
Here a first try of the Europe One 3-colors on an horizontal stabilator.
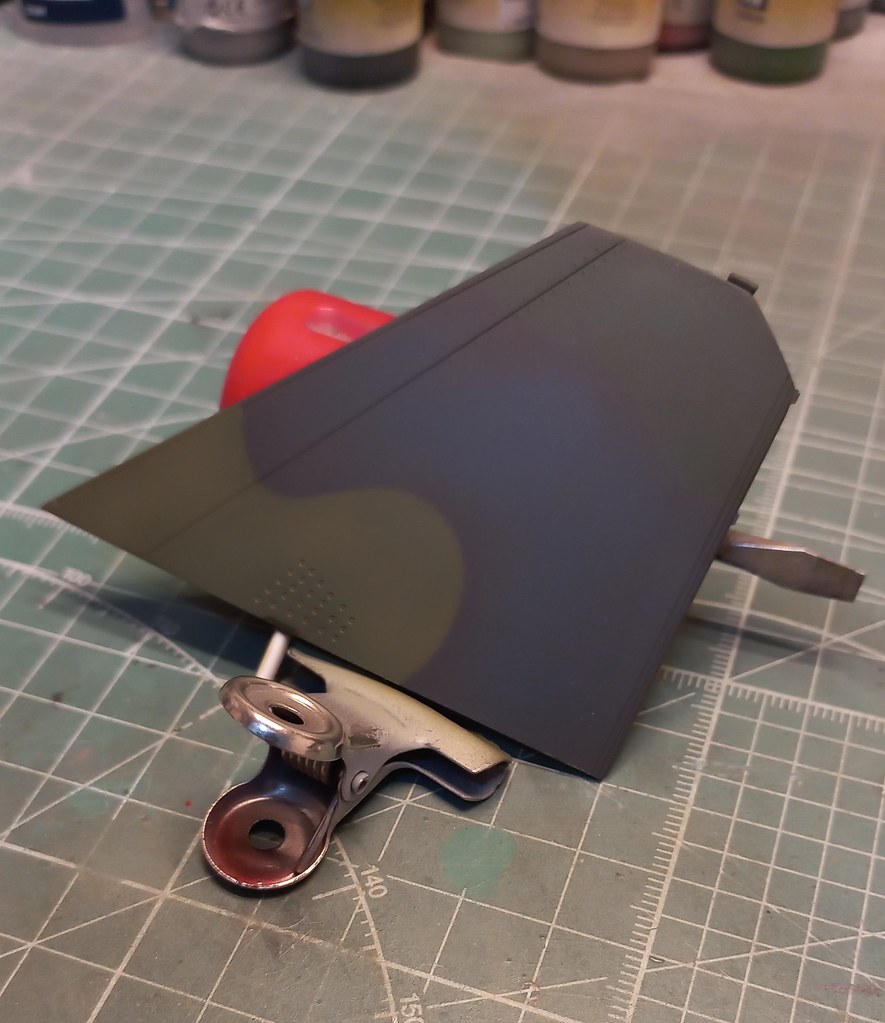
Colors are:
- 36081 Extra Dark Grey Gunze H301 with some drops of Blue-Grey.
- 34092 Forest Green Gunze H302
- 34102 Medium Green Gunze H303
CIAO!
Piero
-
Hello,
to celebrate the 50th Anniversary of the F-16 Fighting Falcon, I decided to build a rather particular F-16, which was probably one of the few if not the only case of “unsuccess” of this phenomenal and innovative multi-role aircraft.
In the second half of the 80s the USAF was looking for a replacement for the A-10 and so they thought of using a version of the F-16 equipped with ground attack devices, such as a FLIR, a laser tracker and a big cannon in an external pod derived from that of the A-10.
Another aspect that certainly makes the subject unique is the camouflage, the Europe 1 or so called "Charcoal Lizard", also derived from the A-10.
For the test phase, 7 F-16C Block-25 and a B two-seater were chosen. Before these there were some other tests with a couple of F-16As if I remember correctly.
The test did not go well, in particular the cannon hanging from the ventral pylon when it fired caused various problems, both structural to the airframe and to the avionics of the jet, in addition to the fact that the strong vibrations made it decidedly miss the target: anyway, USAF is still waiting for a replacement for the A-10 (...).
So, F-16 elegant shape + Europe 1 camouflage + external heavy weapon load has made this jet just spectacular and irresistible for me
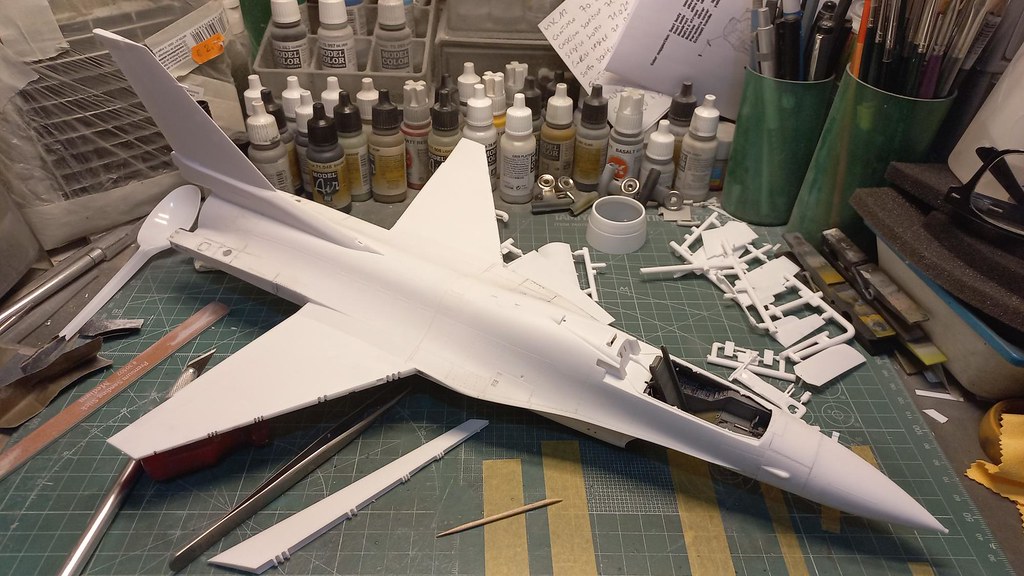
For this project, I'm going to use the Tamiya 1/32 F-16C "Thunderbird" kit.
This kit contains the parts to make a Block-32 and with a few small adjustments it can be converted into a Block-25.
I decided to use few aftermarket for this because the kit parts are really good just adding some details.
The cockpit received instruments and consoles from Quinta Studio 3D set.
Other than this, all the other parts are from the kit, including the ACES II ejection seat.
Some electrical cables has been added on the back of the tube area.
The undercarriage wheel bays are from the kit after, to my unpleasant surprise, I discovered that the resin parts of the Aires set are definitely too short to fit the plastic parts of the fuselage.

Cables and pipes were added with some other small details.
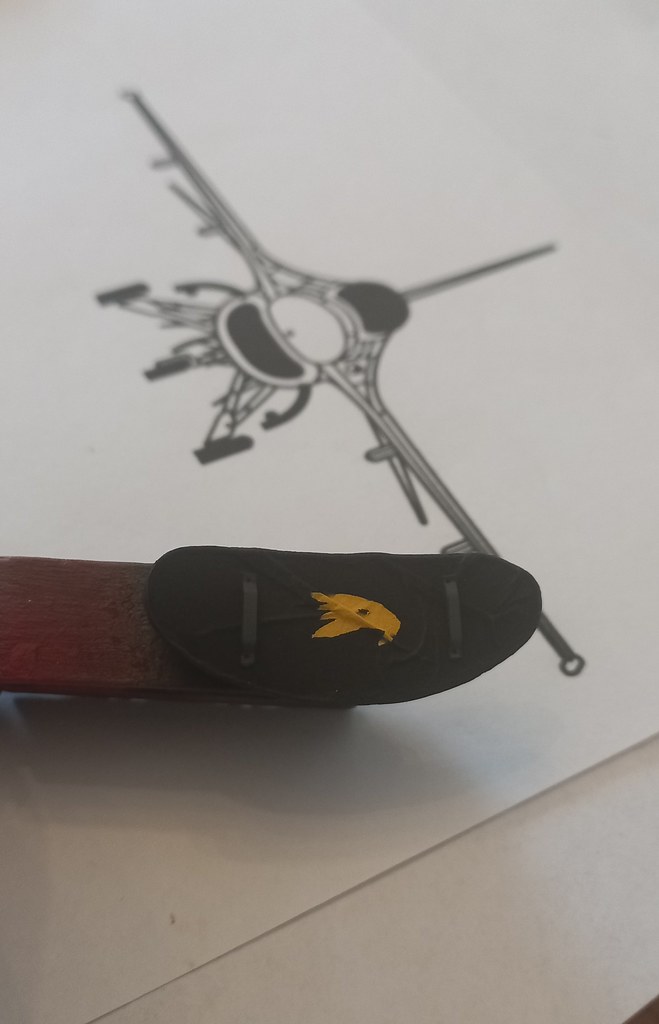
Since I had decided from the beginning that I would put a FOD cover in the main air intake, I saved myself from having build and fit the air intake duct: the FOD cover has a yellow head of a falcon drawn in the center.
At that time these Block-25 F-16C didn't have the bulges above and below the wing roots and the "beer cans" RWR at the slats. These parts has to be removed from the plastic parts.
Same for the 2 extra chaff&flare box dispensers under the left side.
CIAO!
Piero
-
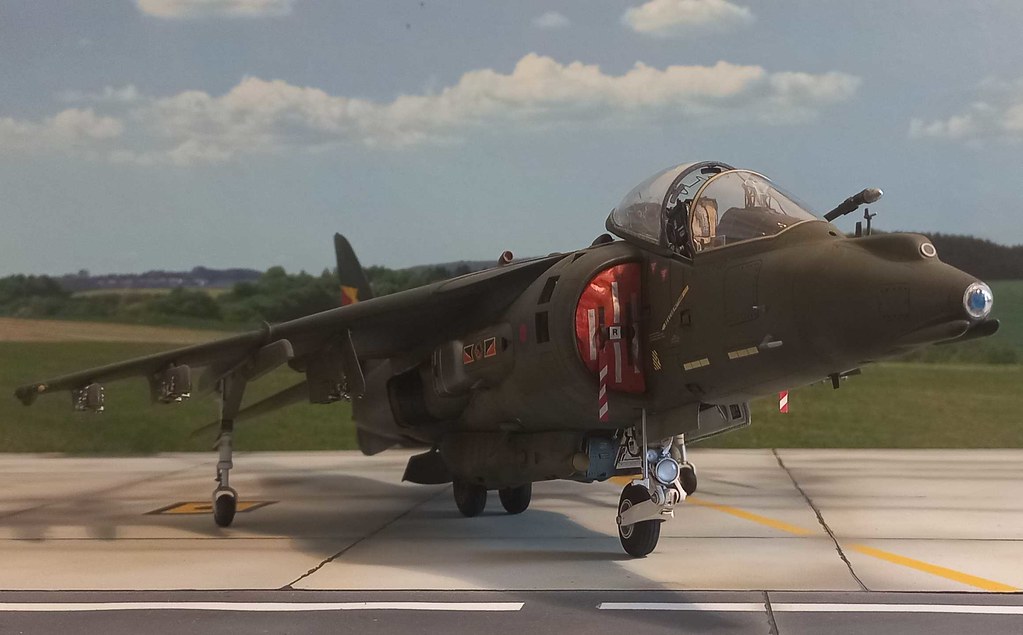
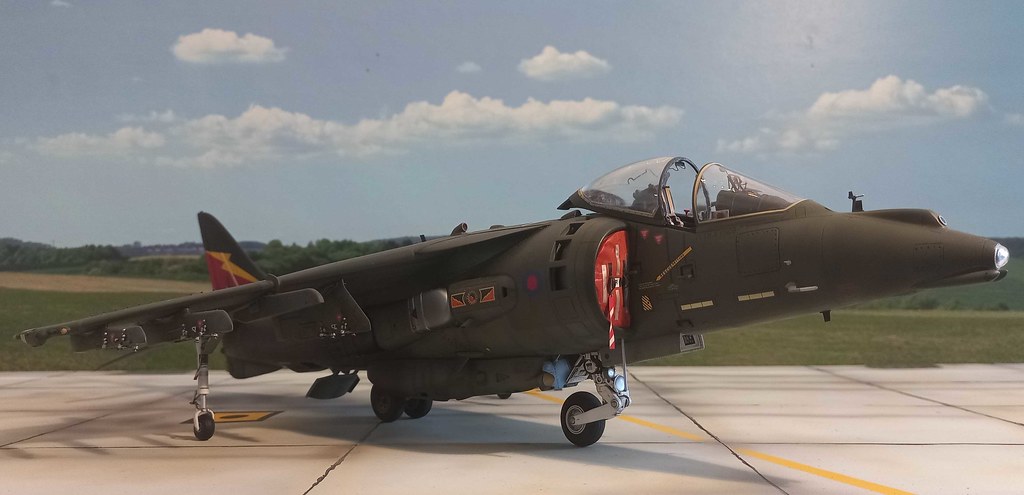
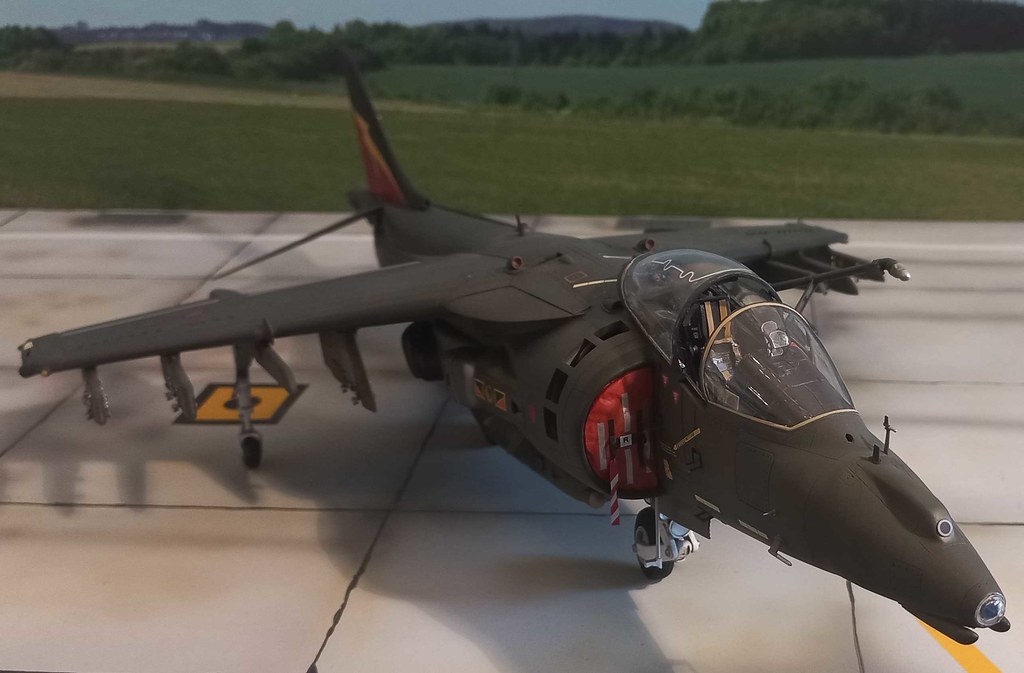
Hello,
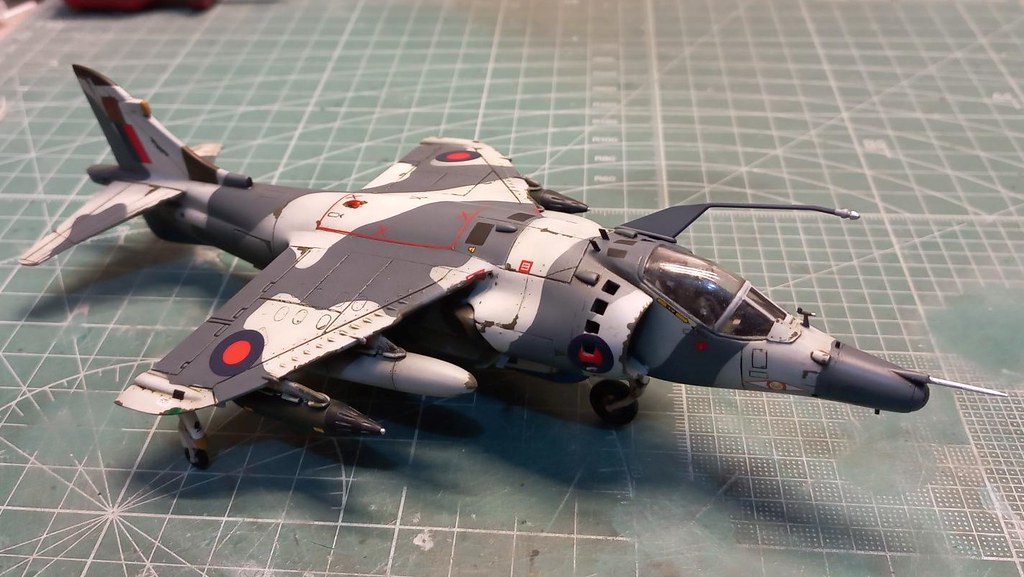
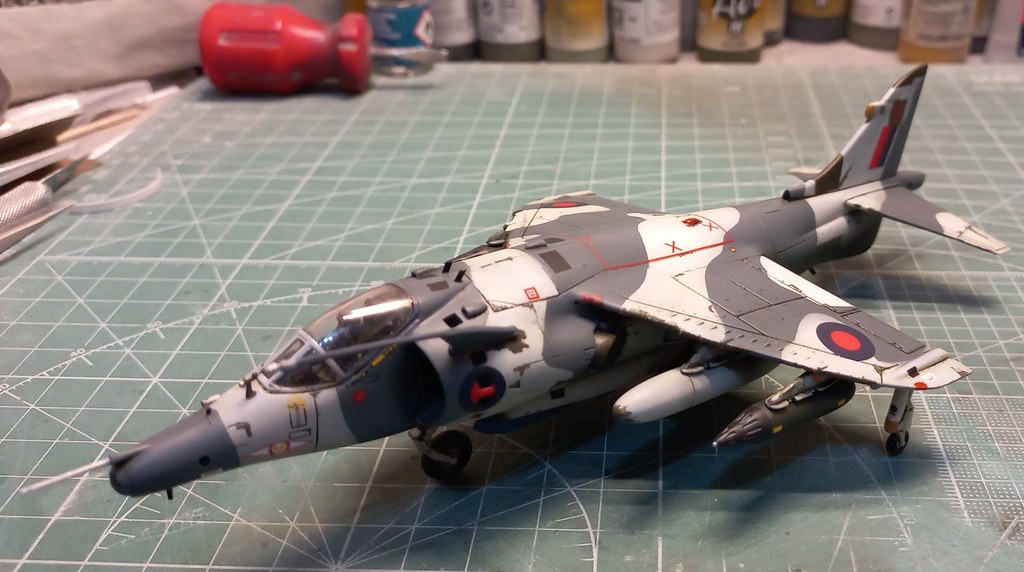
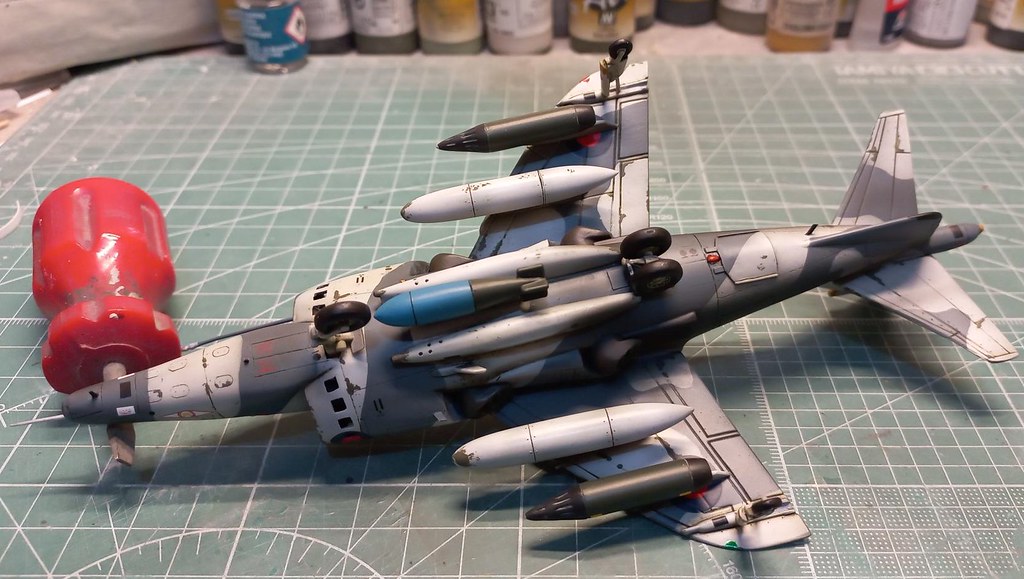
every now and then I get an attack of dreams from when I was a child... and then I neeed to build a Matchbox kit.
This is my RAF Harrier GR.3 in the 1980s during NATO exercises in Norway.
A few small details have been added, but basically the kit is from the box.
Decals are from an old SuperScale sheet.
Next, already in progress, will be an Hawk trainer.
CIAO!
Piero
-
10 hours ago, LSP_Ray said:
Beautiful! May I post it on the website?

Oh yes!
Ciao!
Piero
-
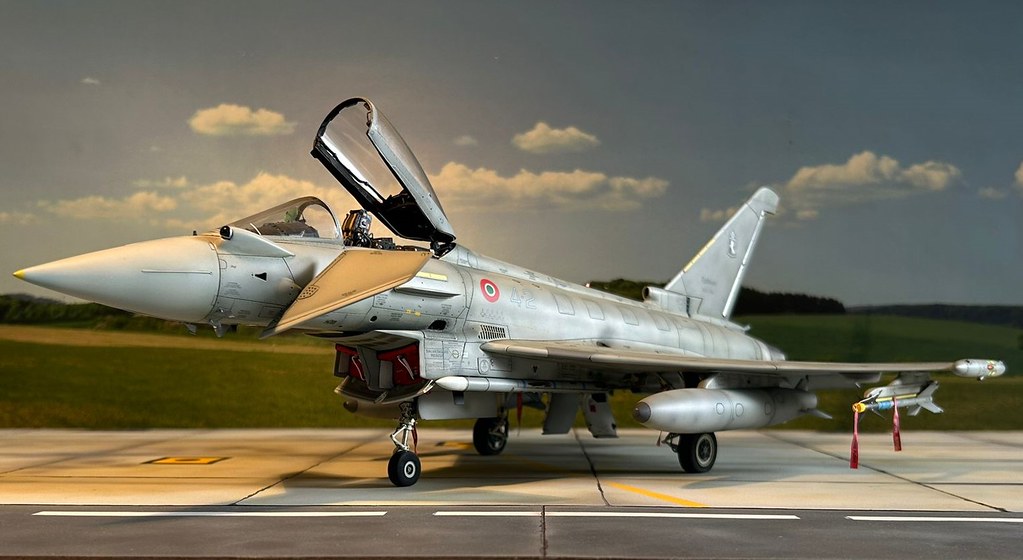
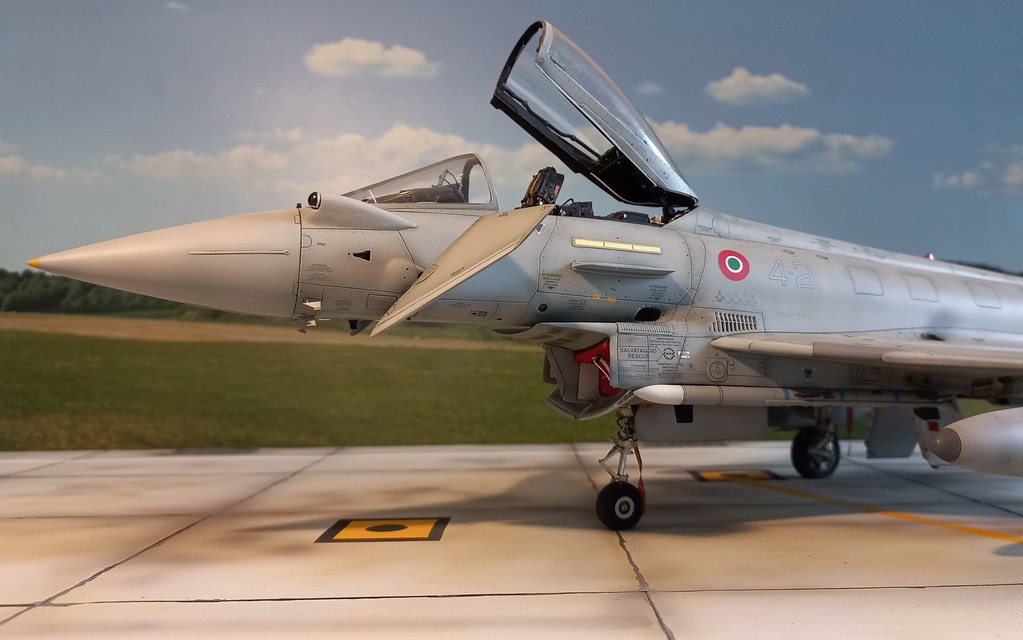
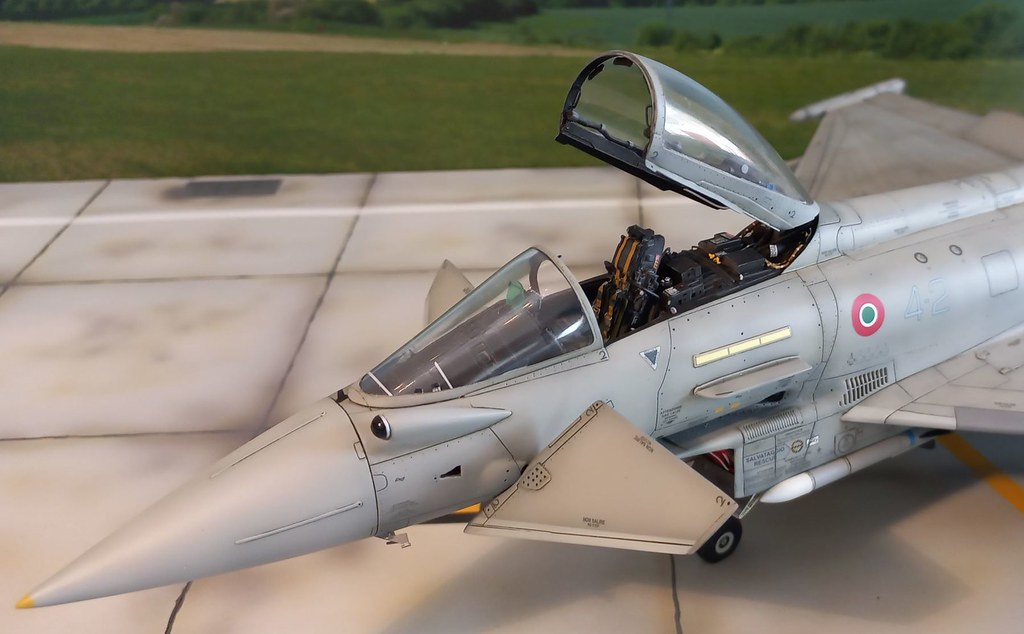
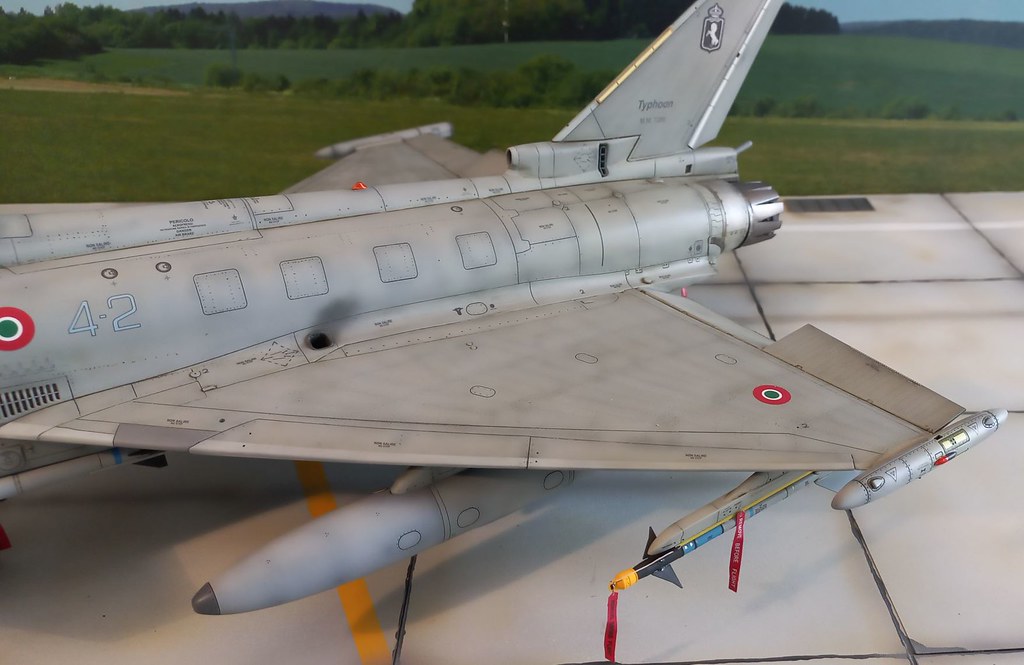
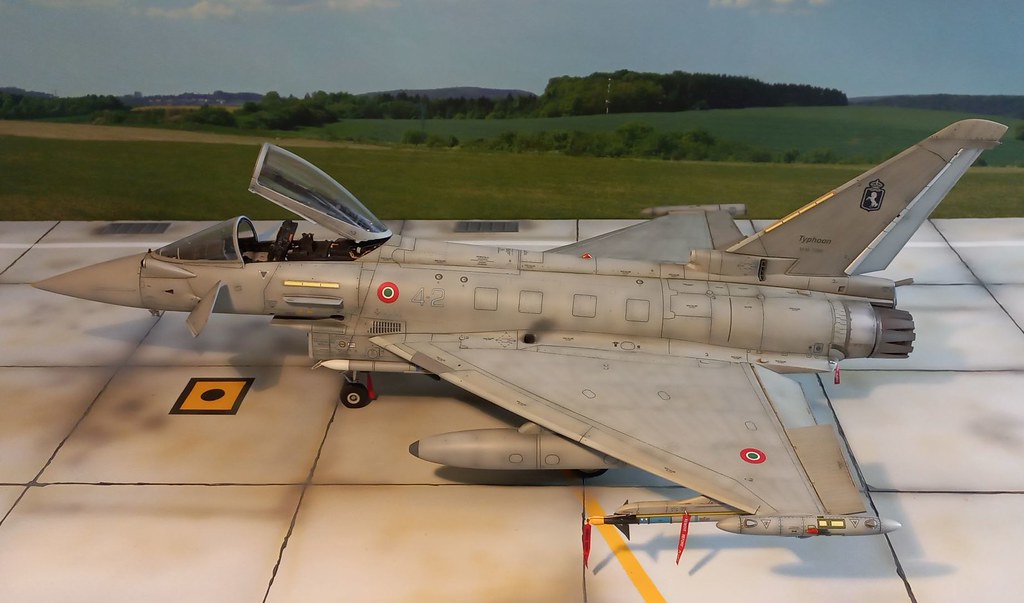
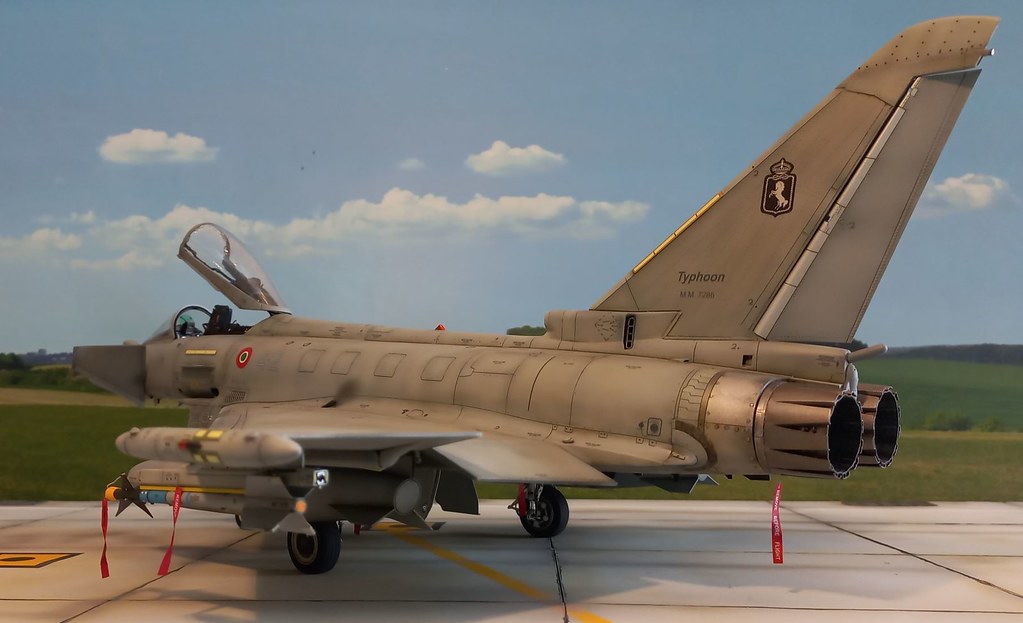
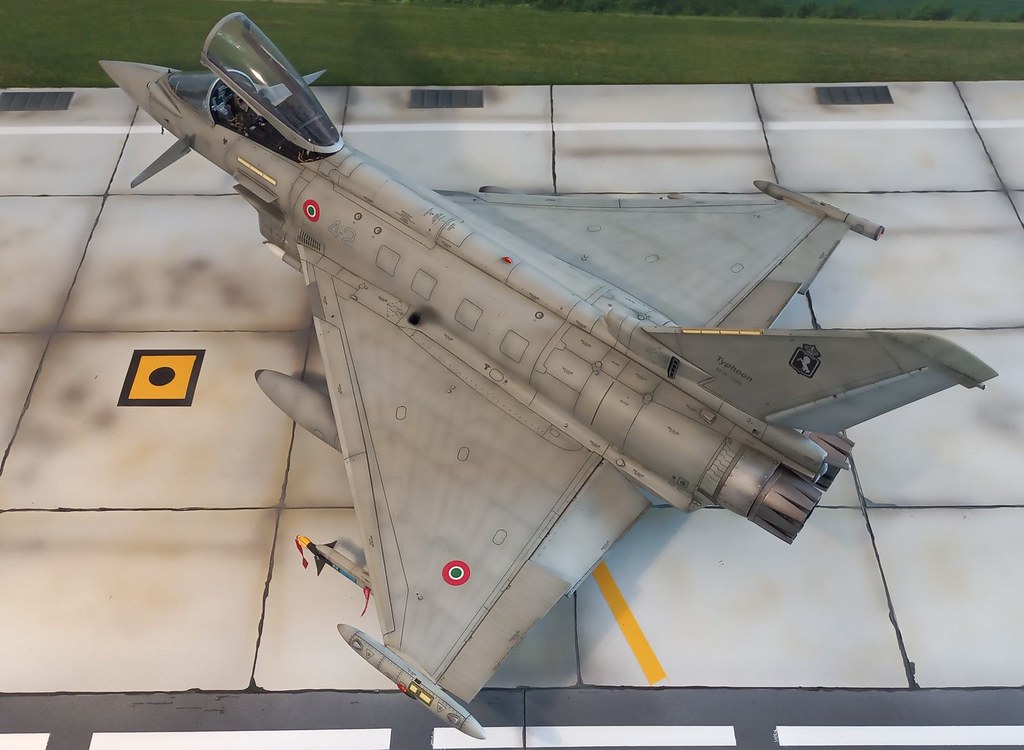
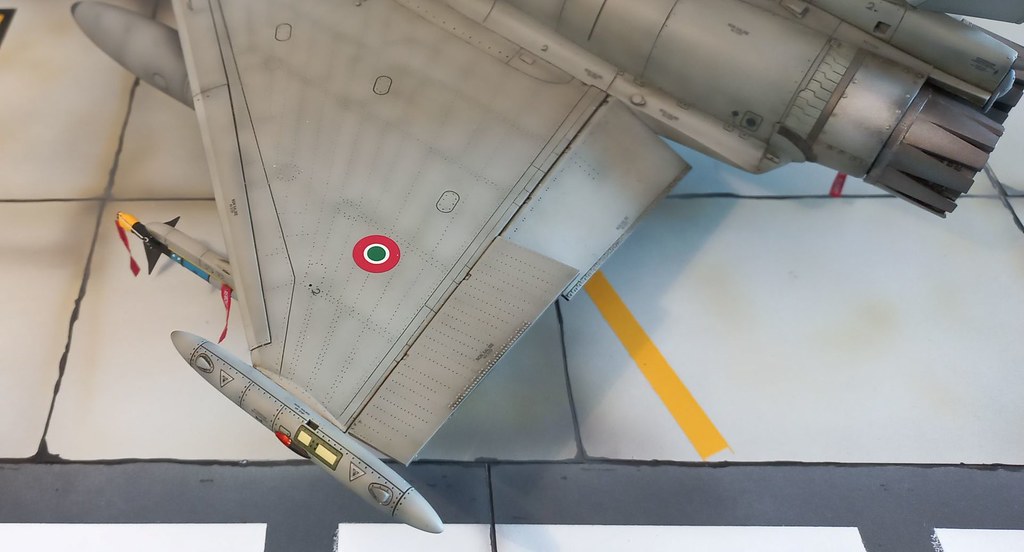
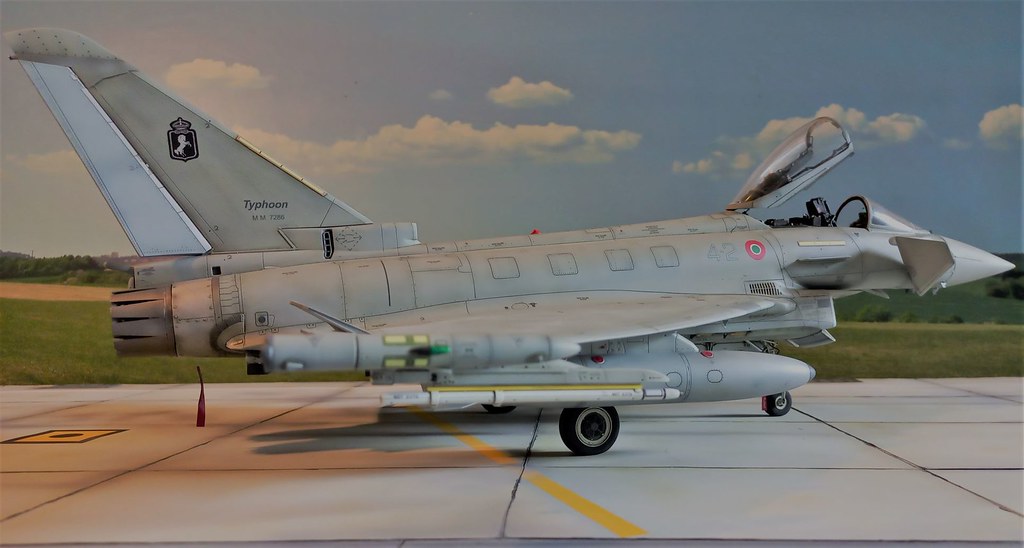
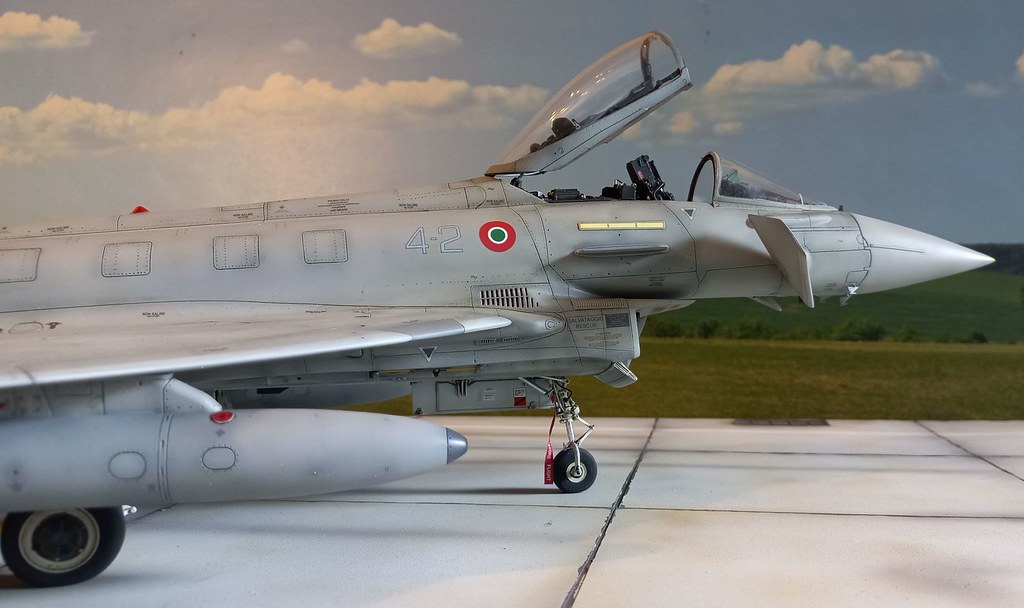
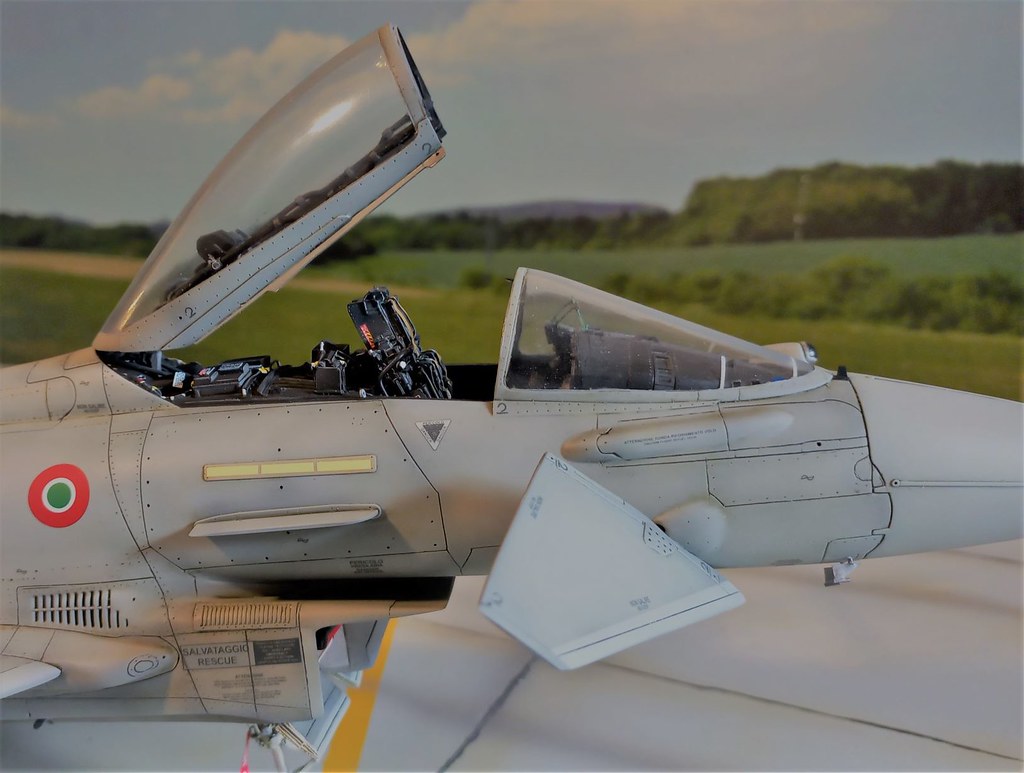
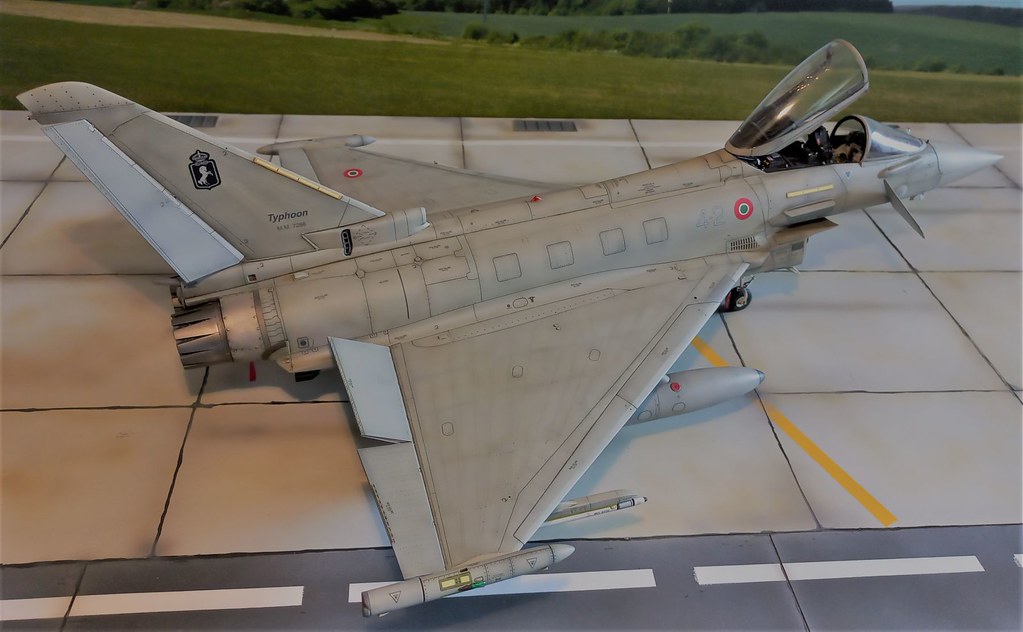
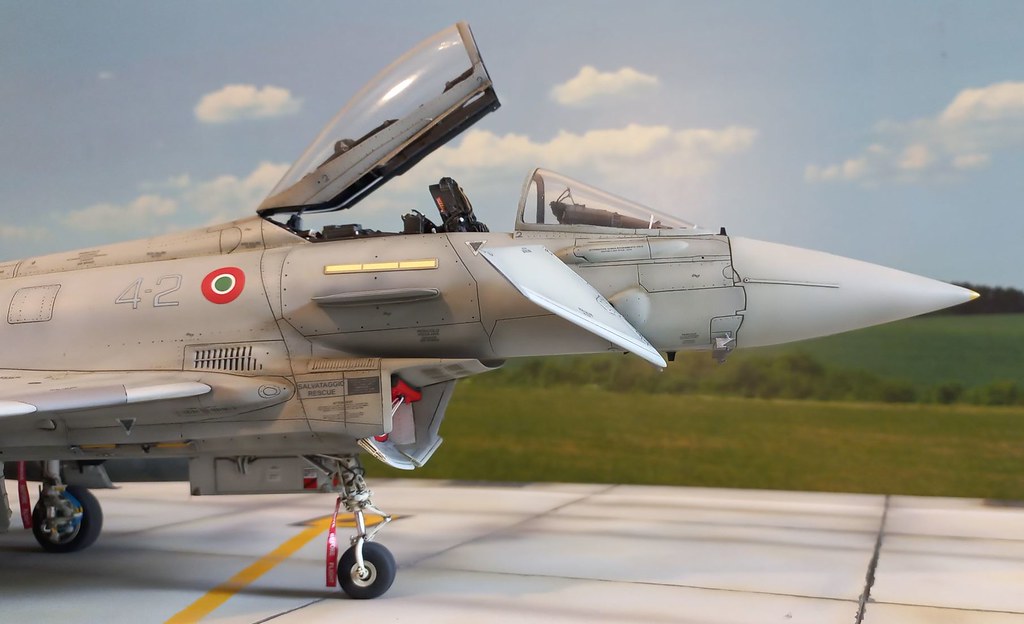
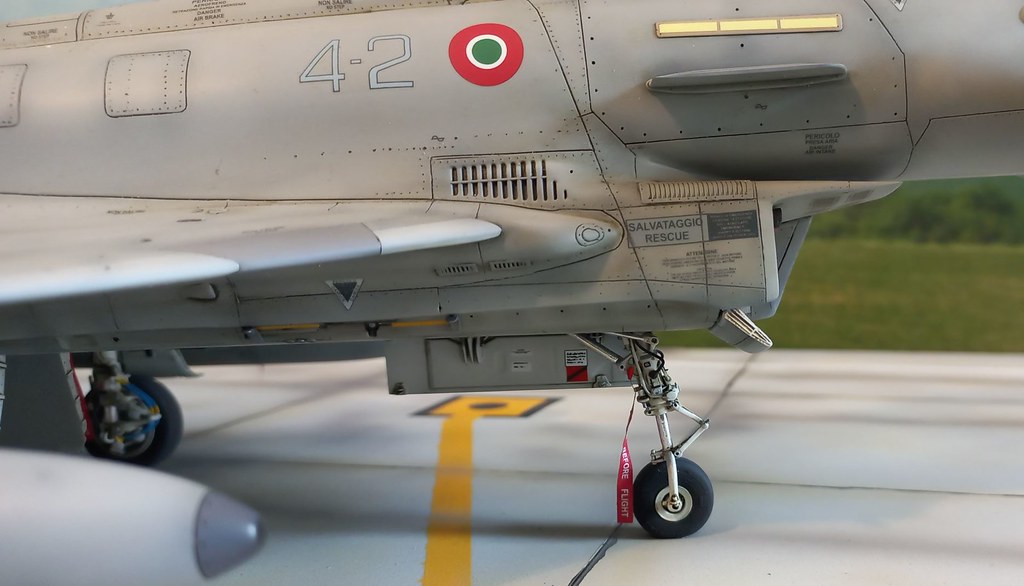
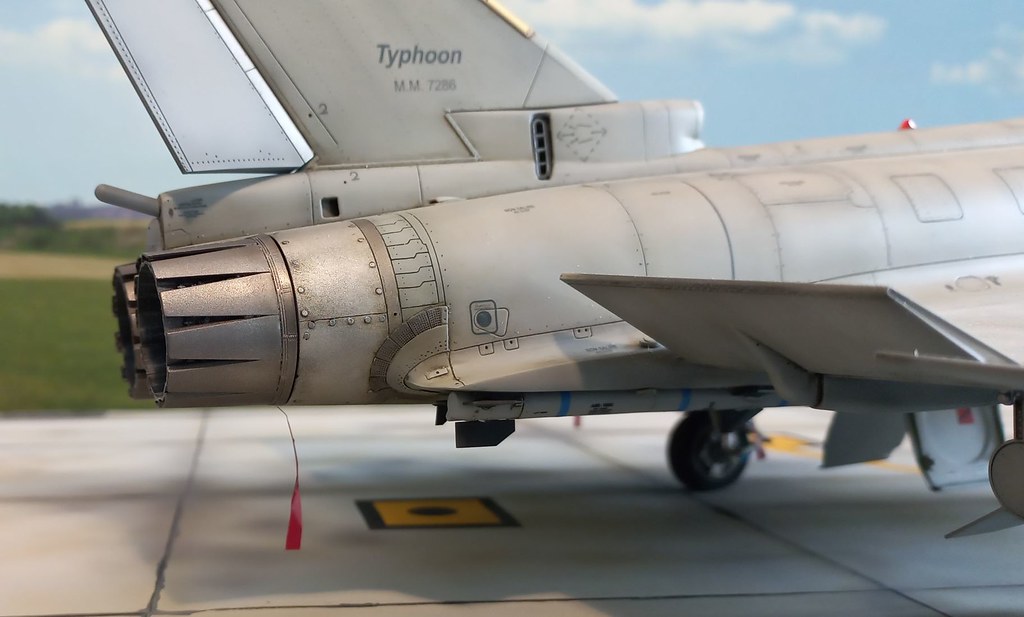
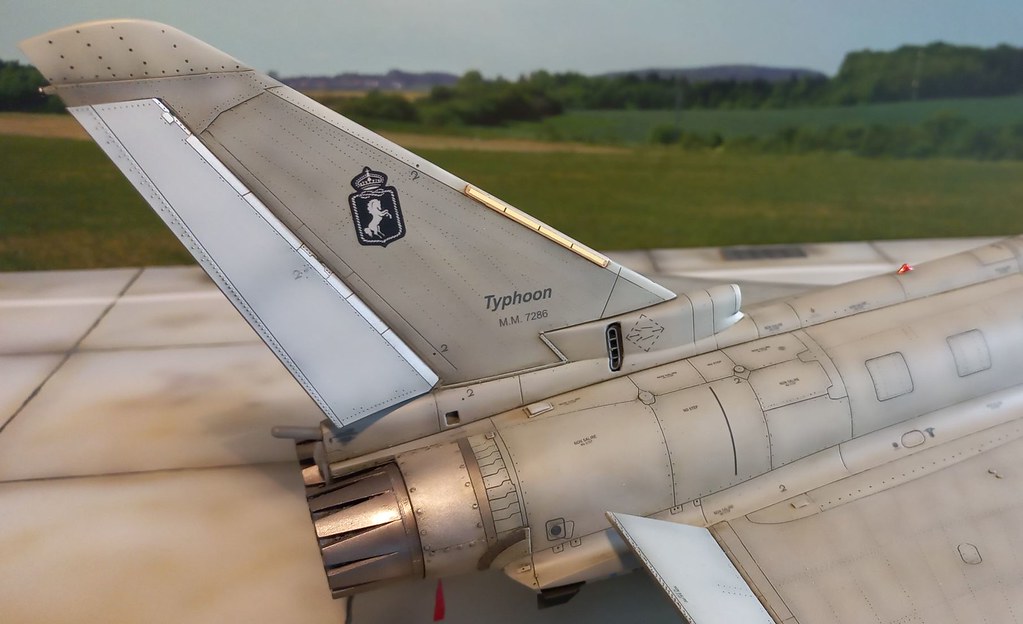
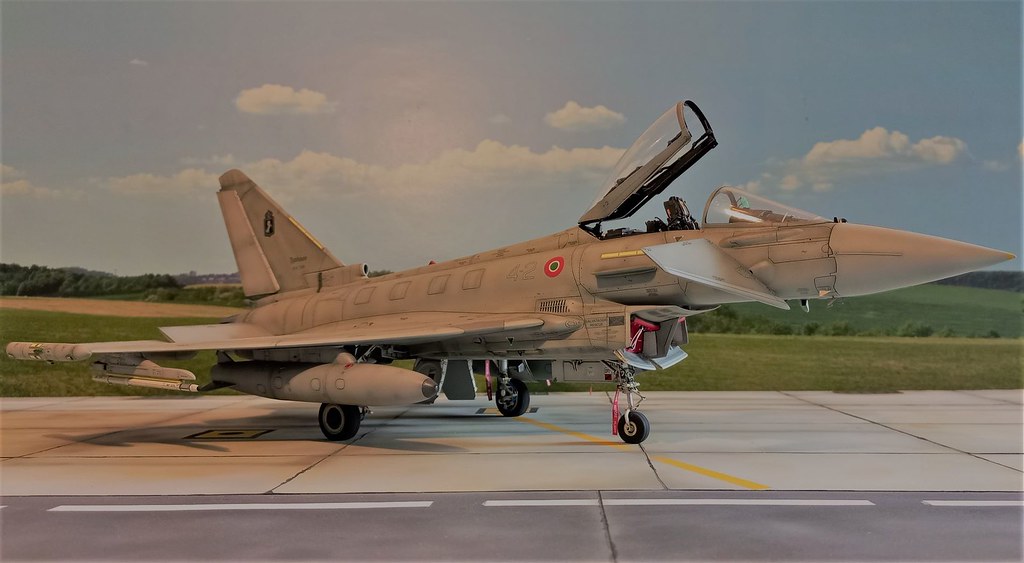
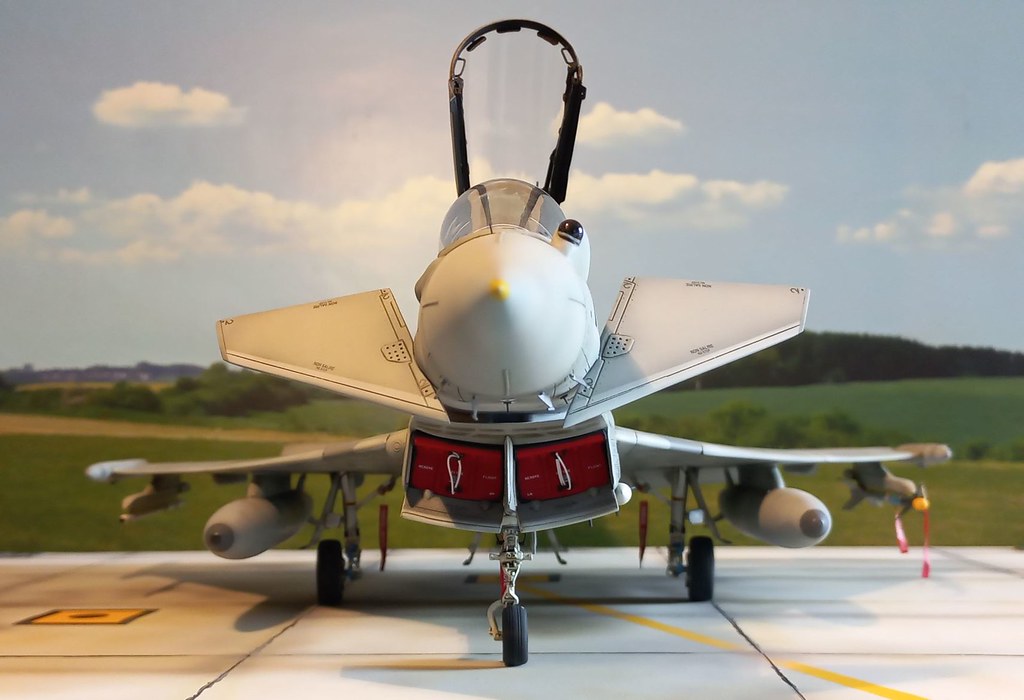
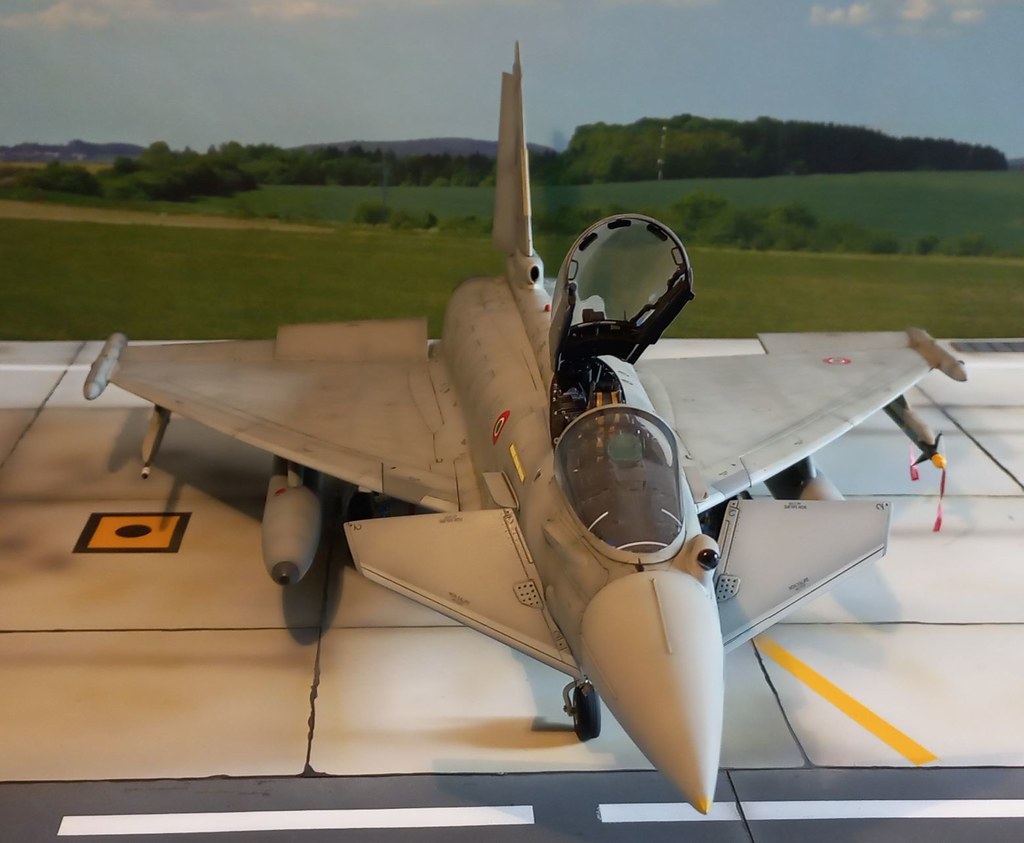
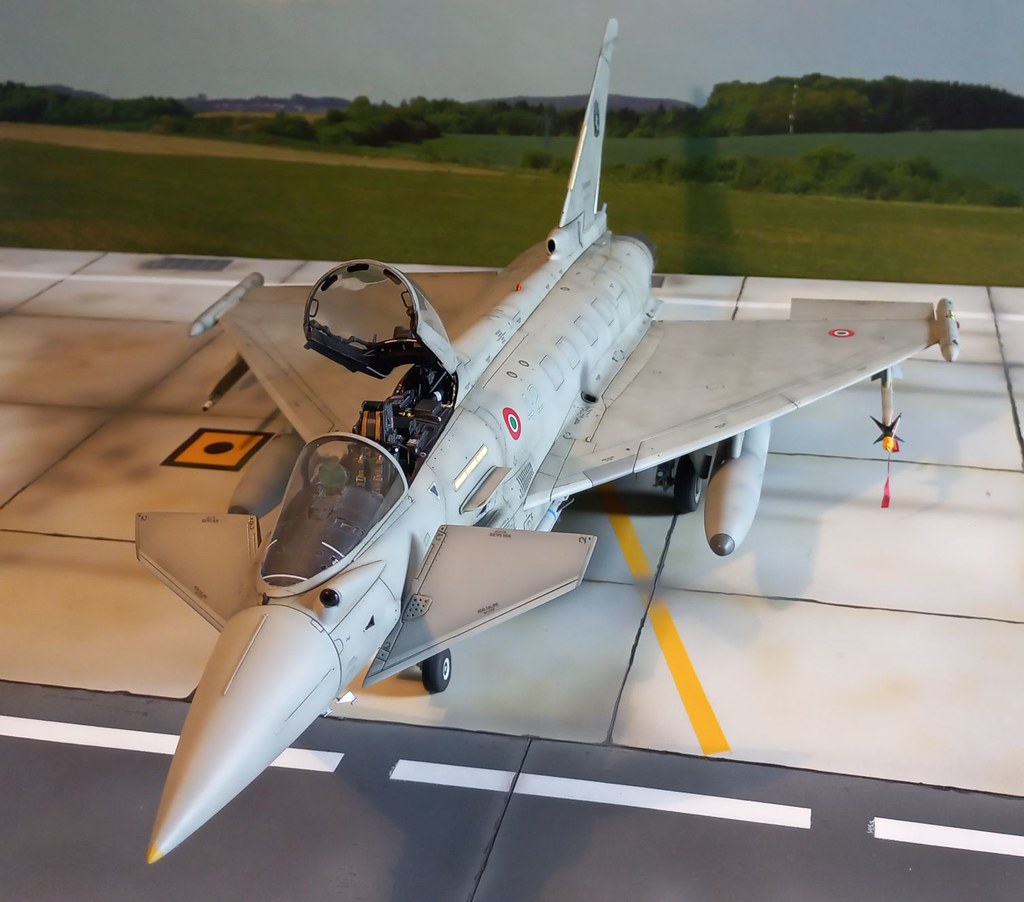
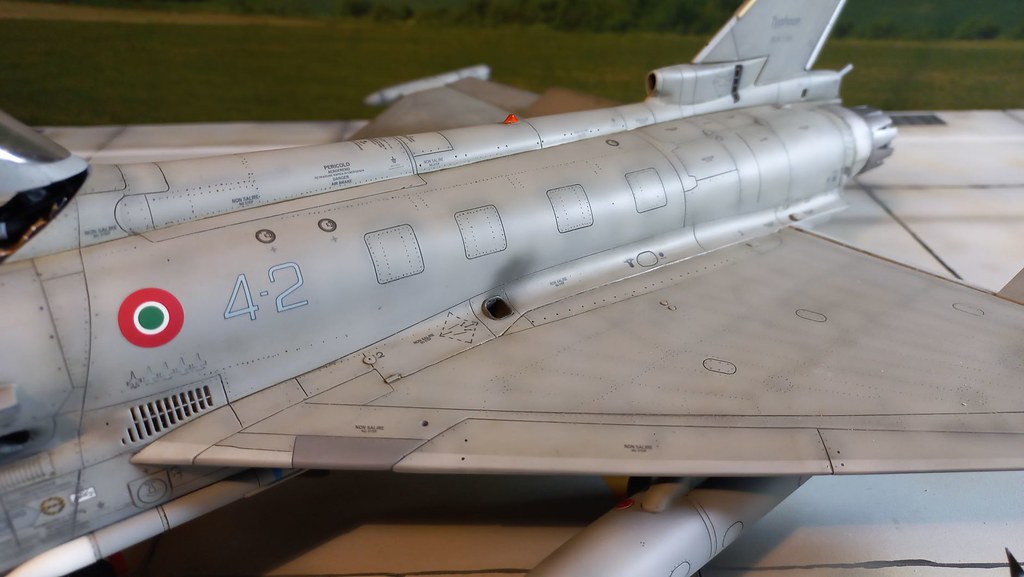
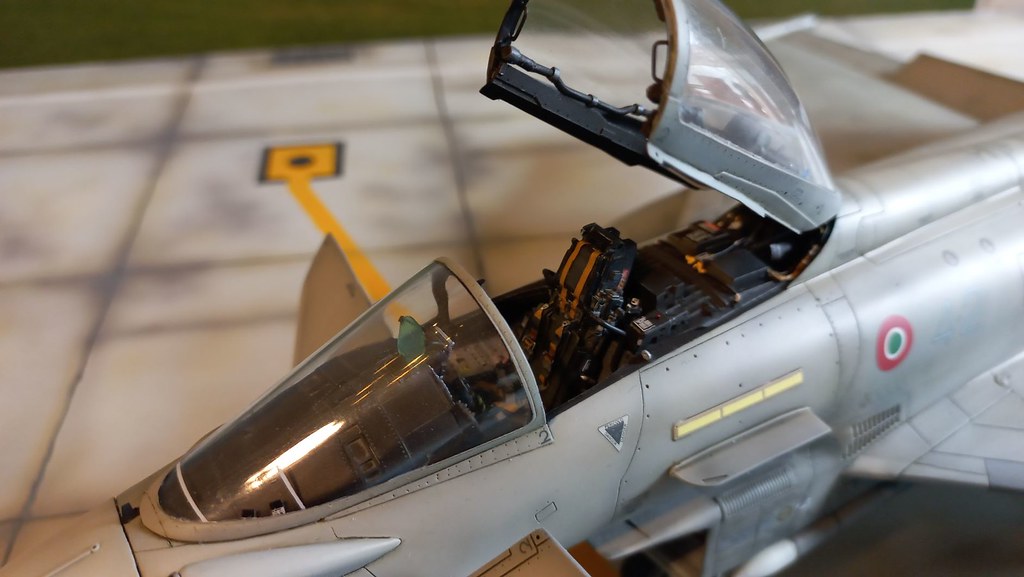
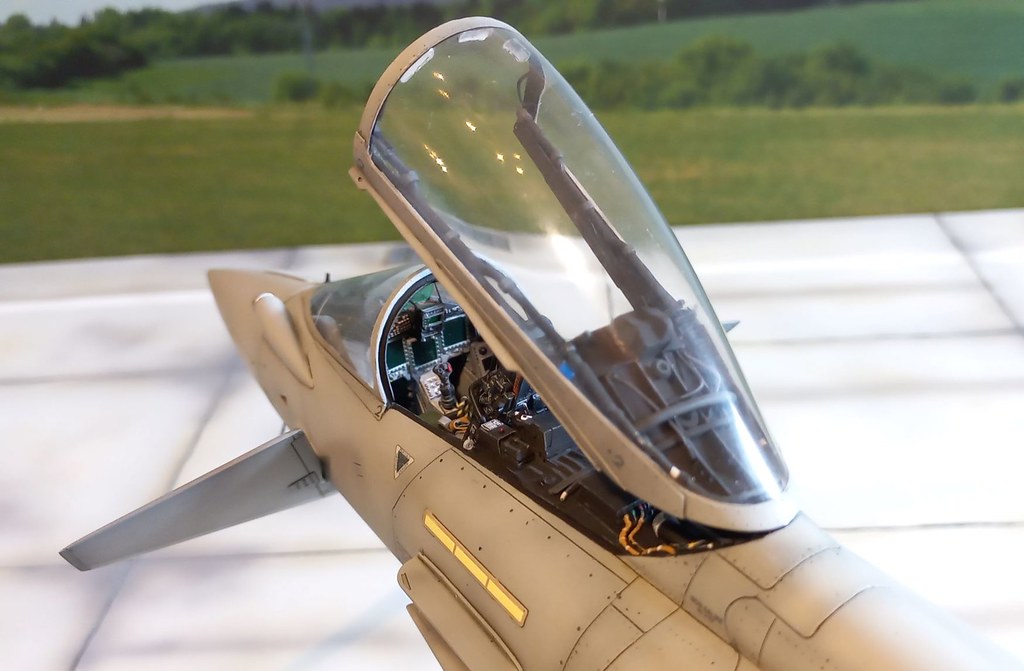
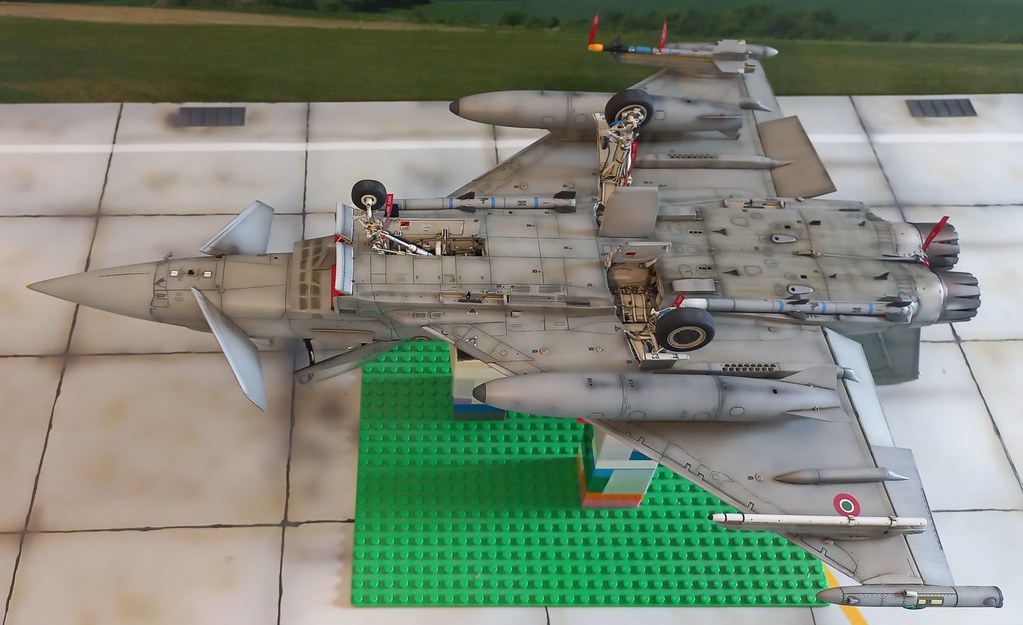
This is my Typhoon F-2000A in AMI (Italian Air Force) 4 Stormo colors, based in Grosseto-Italy.
The model is built using the “old” Revell 1/32nd kit: this has details that are a mix between the pre-series Typhoons and the two-seater ones, not the best start to build an up-to-date single-seater Typhoon.
Most of the panel lines has been rescribed and details added from scratch and using aftermarket sets too. Here is a list of the set:
· Aires resin cockpit set
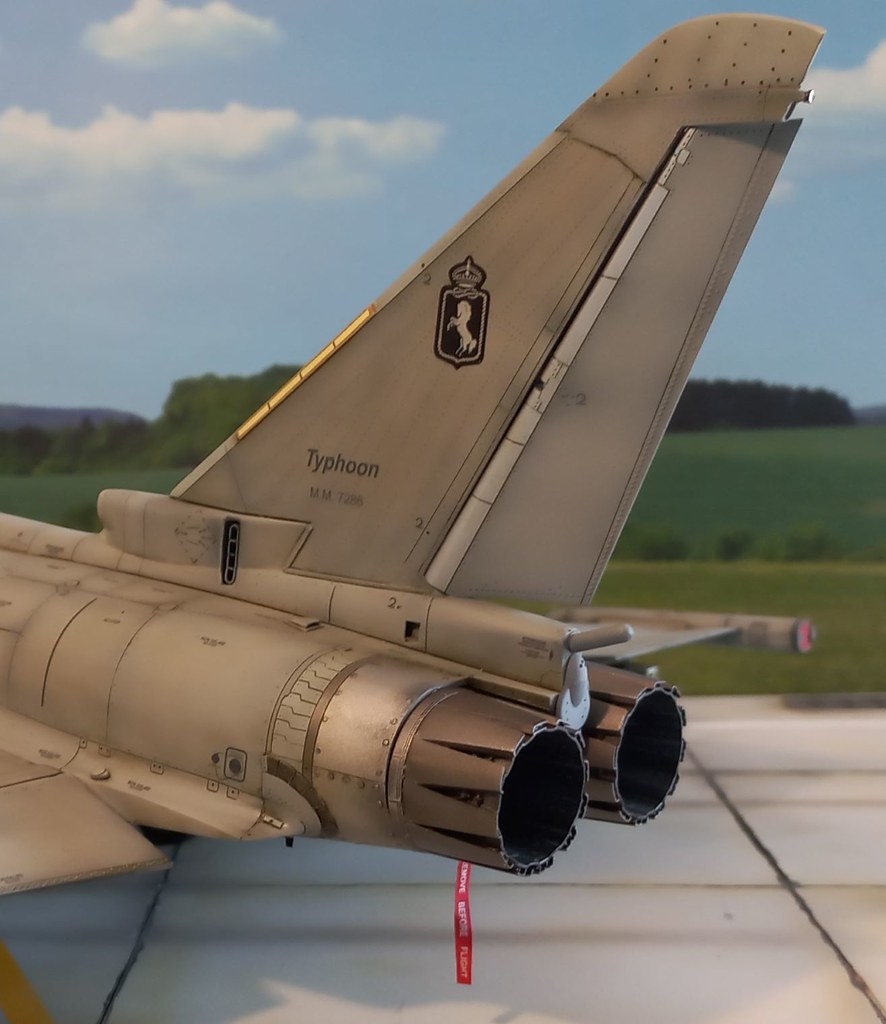
· Aires resin exhaust nozzles
· Aires resin wheel bay
· Cold War Studios PE splitter plate
· Cold War Studios PE canopy details
· Two Mikes resin FOD intake covers
· Wolf 3D Resin Parts external fuel tanks
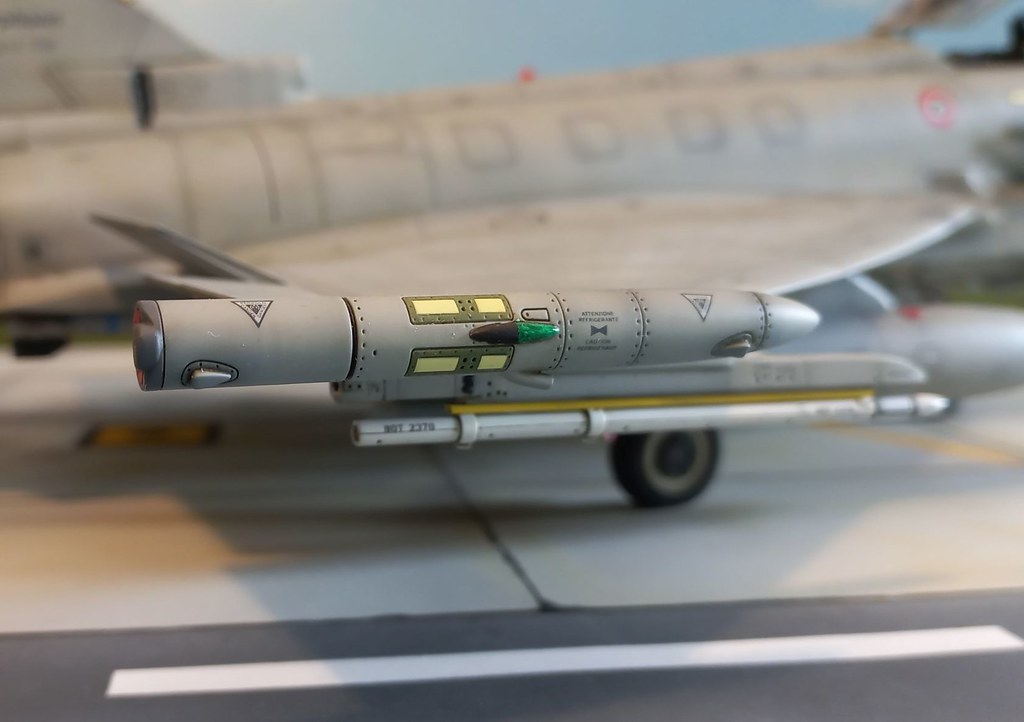
· Wolf 3D Resin Parts ESM-ECM pods
· Wolf 3D Resin Parts antennas and exterior details
· Wolf 3D Resin Parts APU & precooler outlet
· Wolf 3D Resin Parts gun air vent
· Wolf 3D Resin Parts flaperons & rudder
· Wolf 3D Resin Parts wheel set
· Wolf 3D Resin Parts MEL missile eject launchers
It's a lot of resin sets and a bit of money... but they're worth it because they definitely help in quickly modifying the kit.
The painting was done using airbrushed acrylics from Gunze and Tamiya.
The metallic colors are Vallejo acrylics.
For the brush details I used Vallejo colors.
The decals are mostly from the Two Bobs sheet for the "Italian Typhoons": however, the Italian roundels and the 4 Stormo badge are incorrect in size and details. In this case I preferred to use the Tauro Models decals.
In the end I'm satisfied with this model and I hope you like it!
CIAO!
Piero


- Isar 30/07, Hartmann52, drsquid142 and 22 others
-
24
-
 1
1
-
Hello,
I received my 2 AJ37 kits last Tuesday.
Better package, amazing kit as per the previous JA37.
Two separate shipments... double customs duties
 .
.
CIAO!
Piero
- Scotsman, IvanVasili, mattcour and 2 others
-
5
-
Hello,
Jetmads emailed me just now.
They are going to shipping batch including my order shortly to my packaging station.
Let see.
CIAO!
Piero
-
Hello,
anyone has already received the new AJ37 Viggen?
I'm still waiting mine and I don't have any news from Jetmads.
CIAO!
Piero
-
-
-
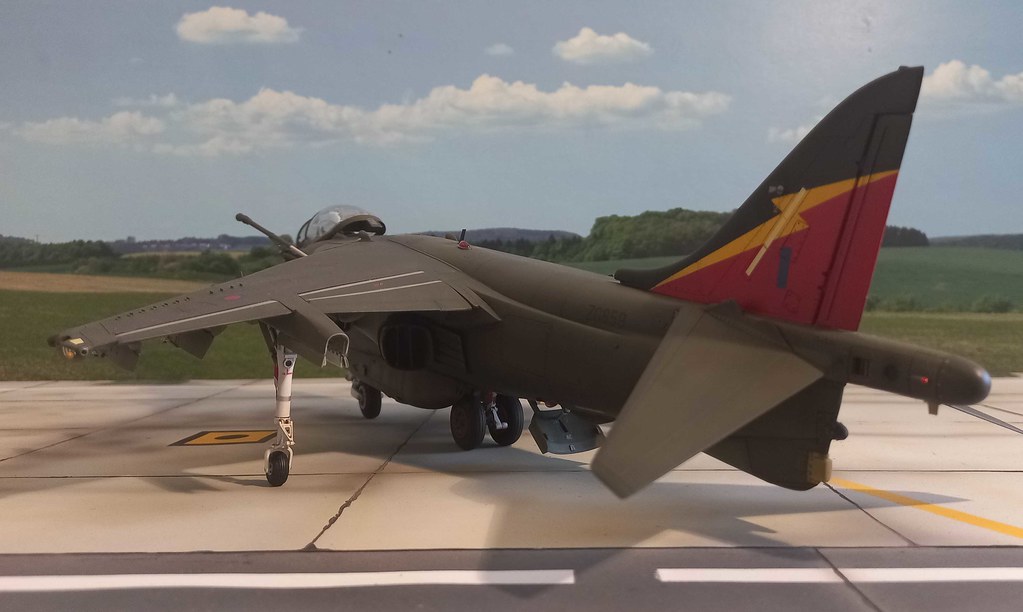
Hello,
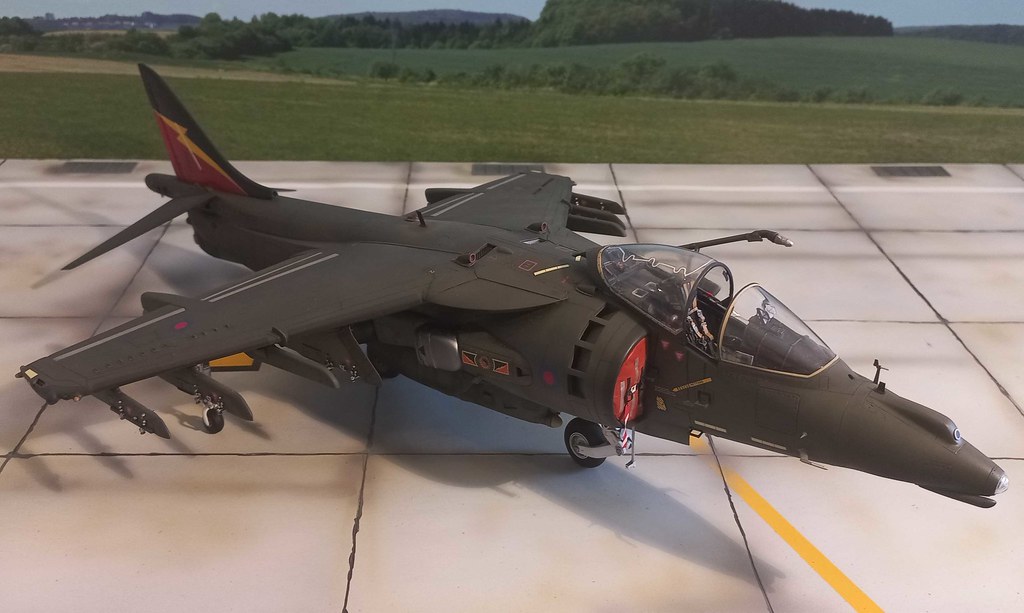
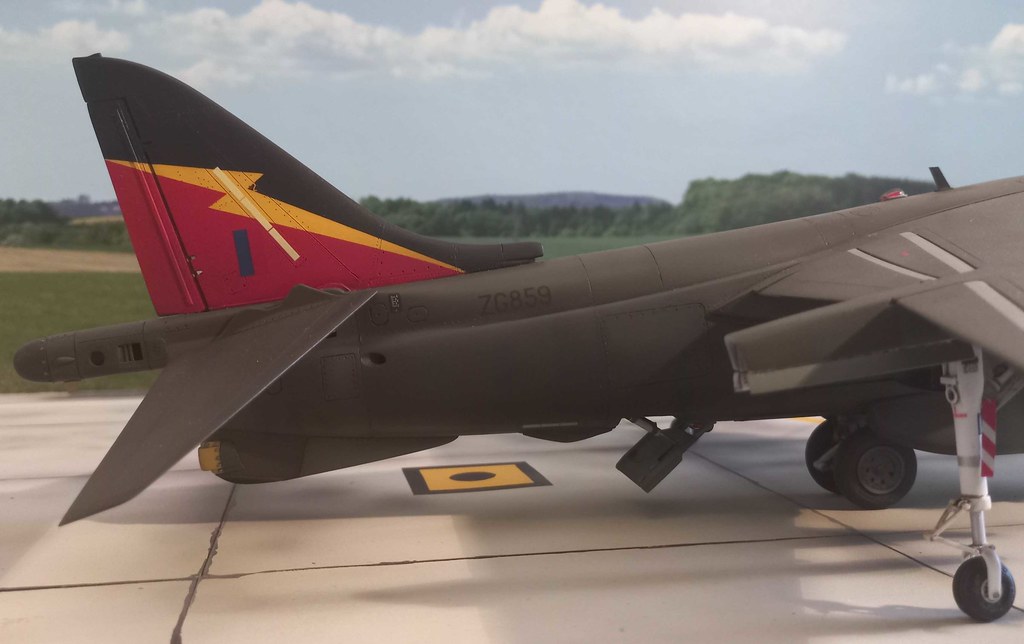
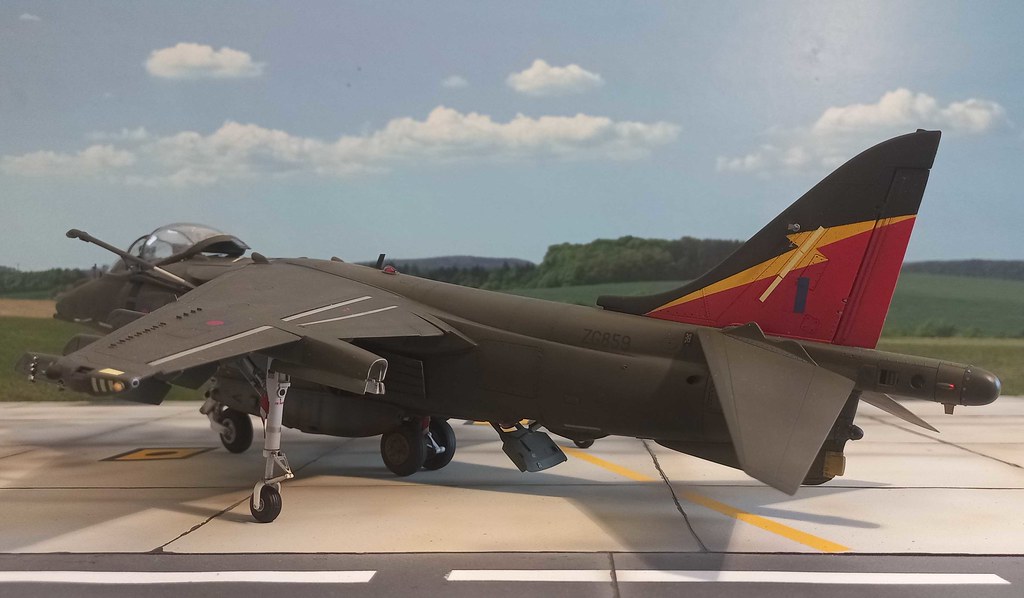
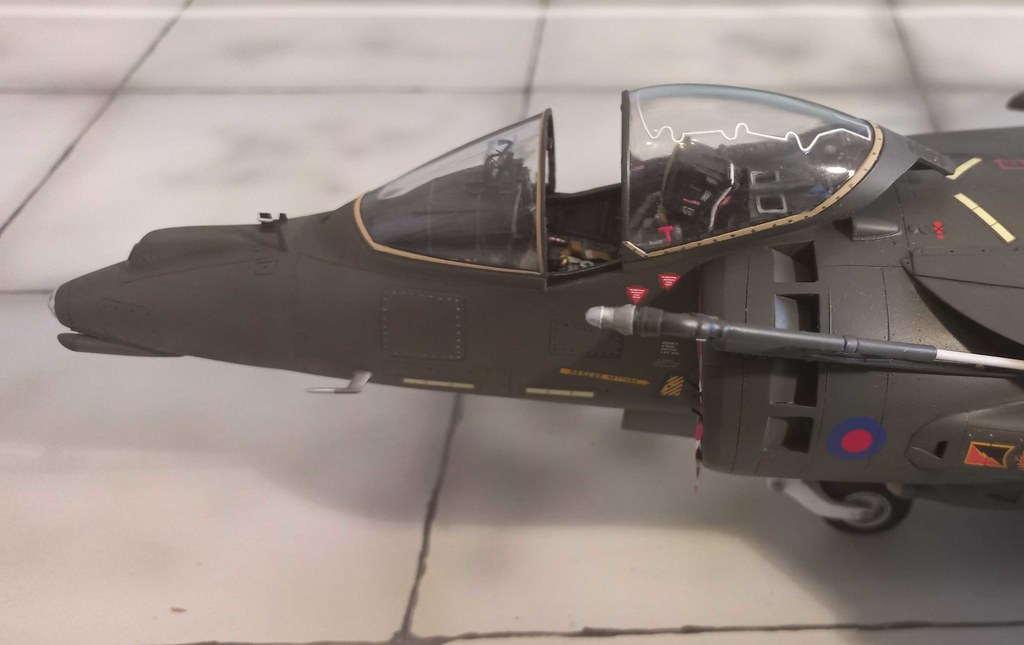
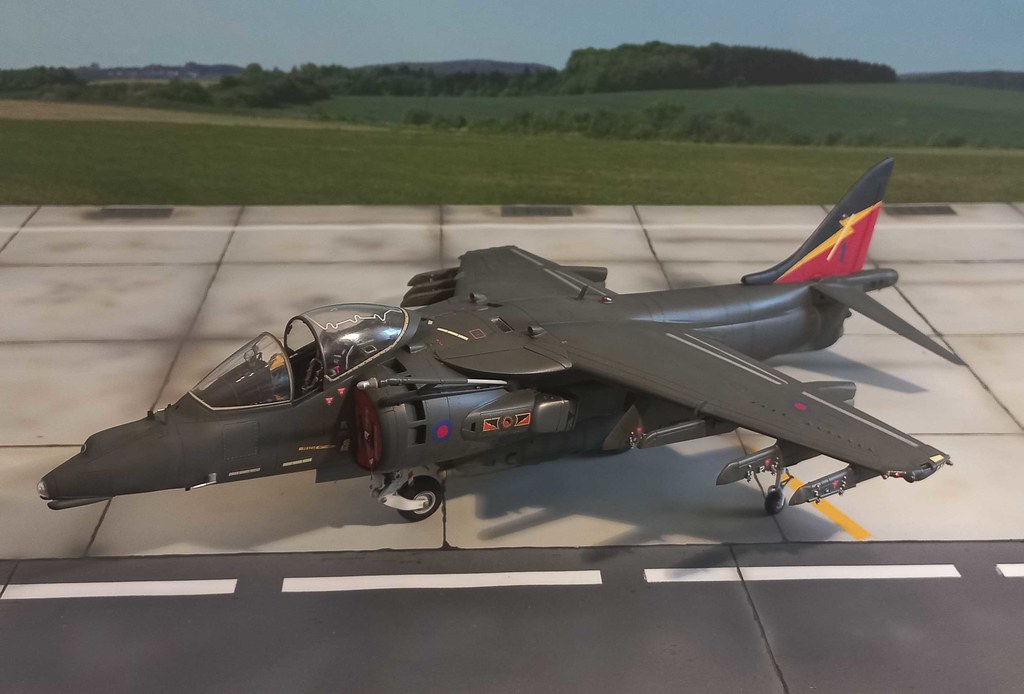
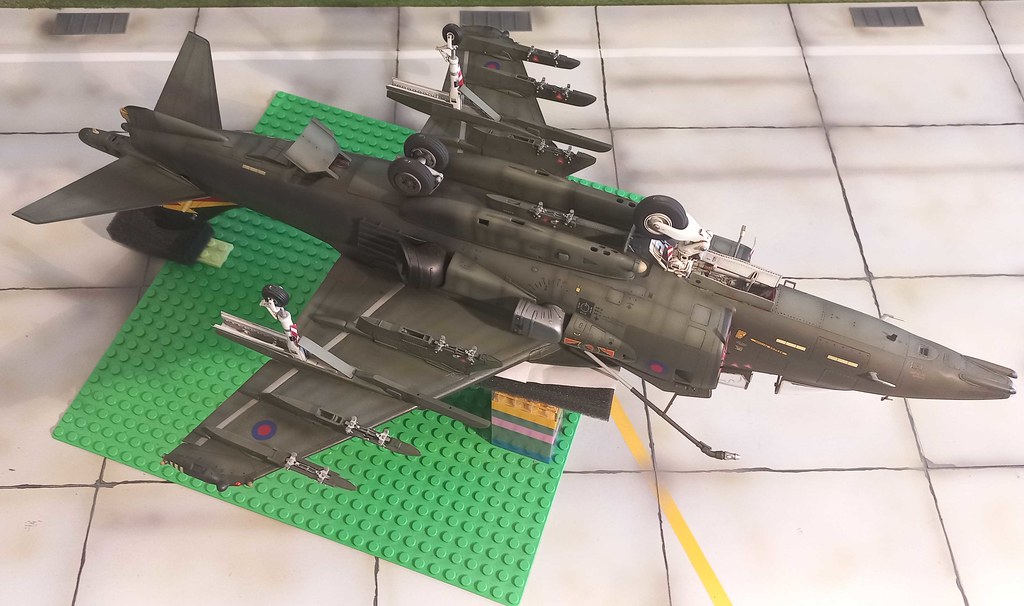
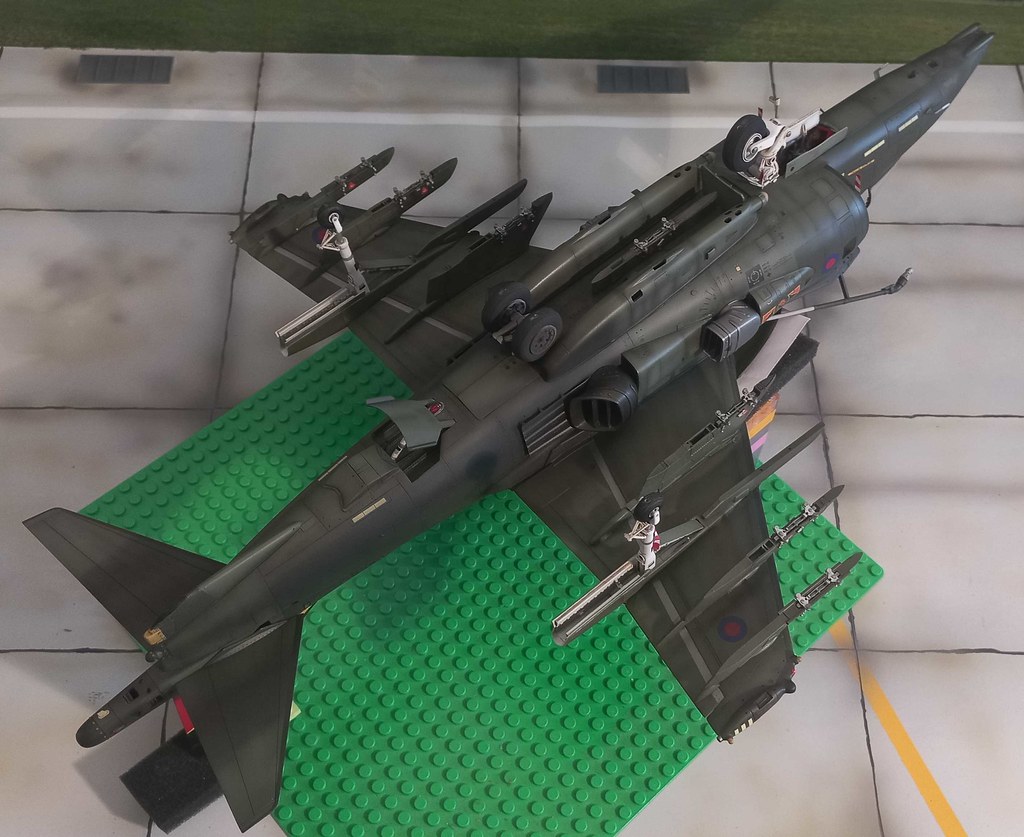
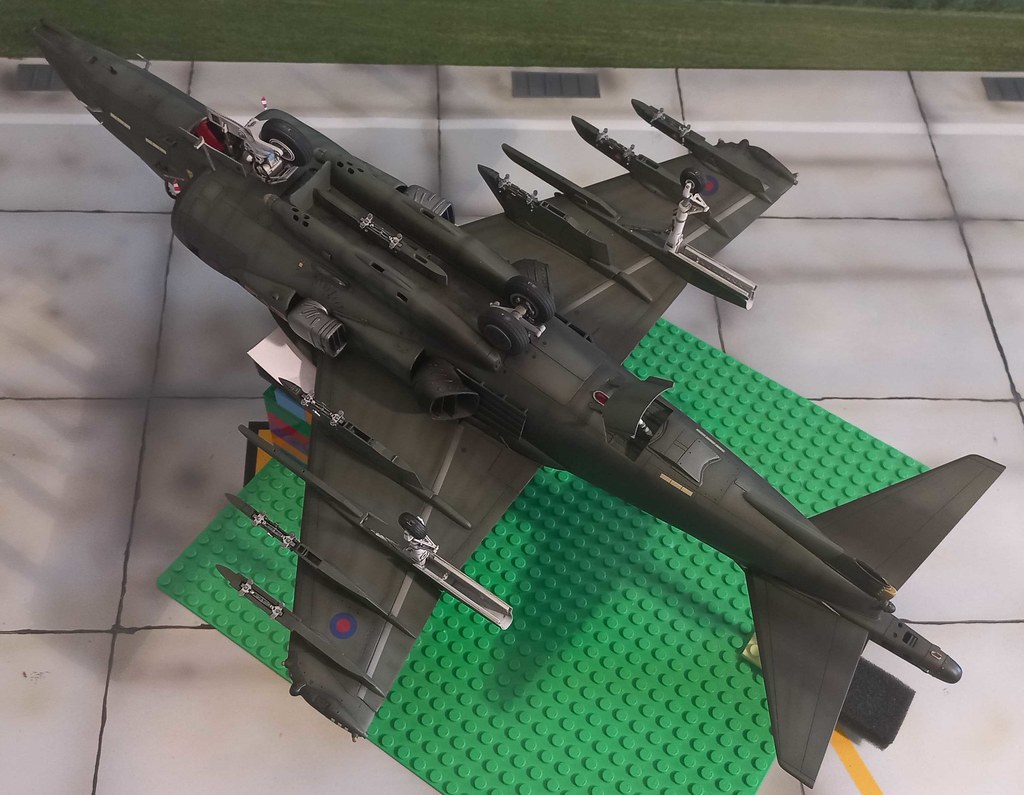
this is my latest Harrier in 1/32.
The starting kit is always the same old Trumpeter... unfortunately, Tamiya doesn't want to give us this gift…
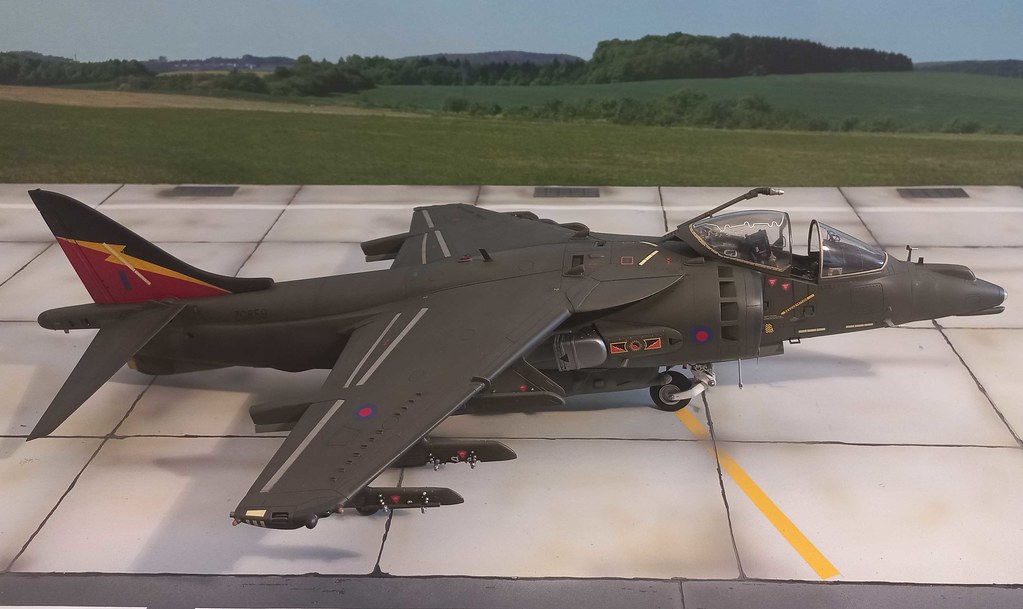
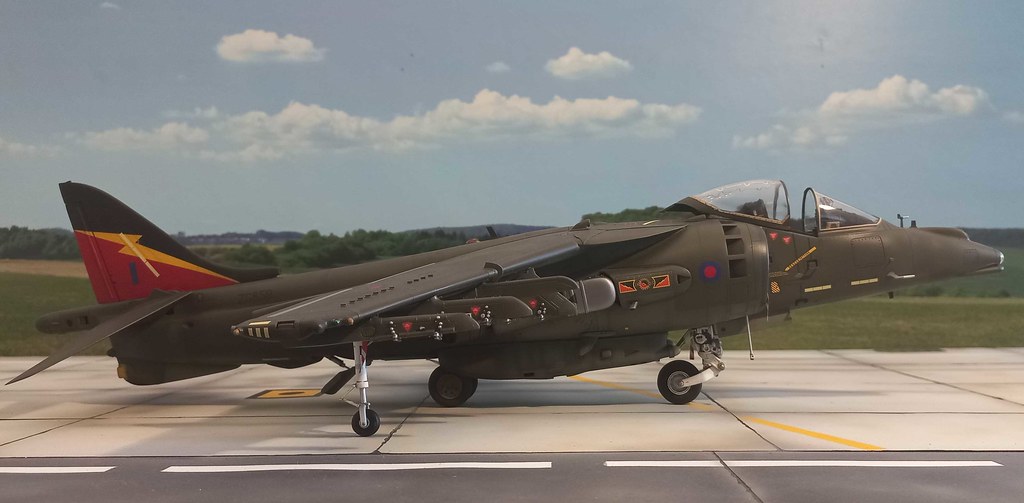
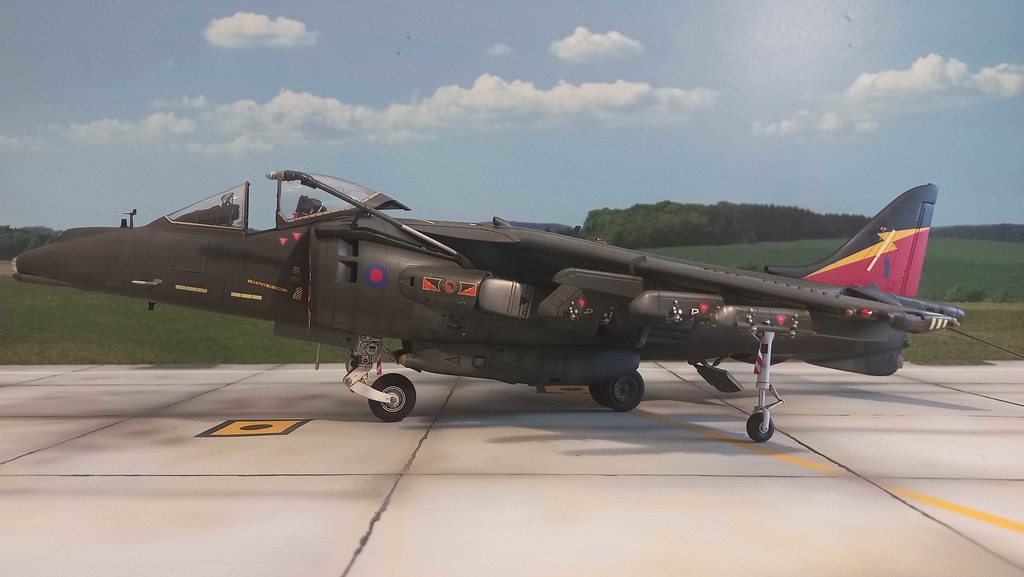
The model represents an RAF Harrier GR.7 based at Laarbruch in Germany in 1994.
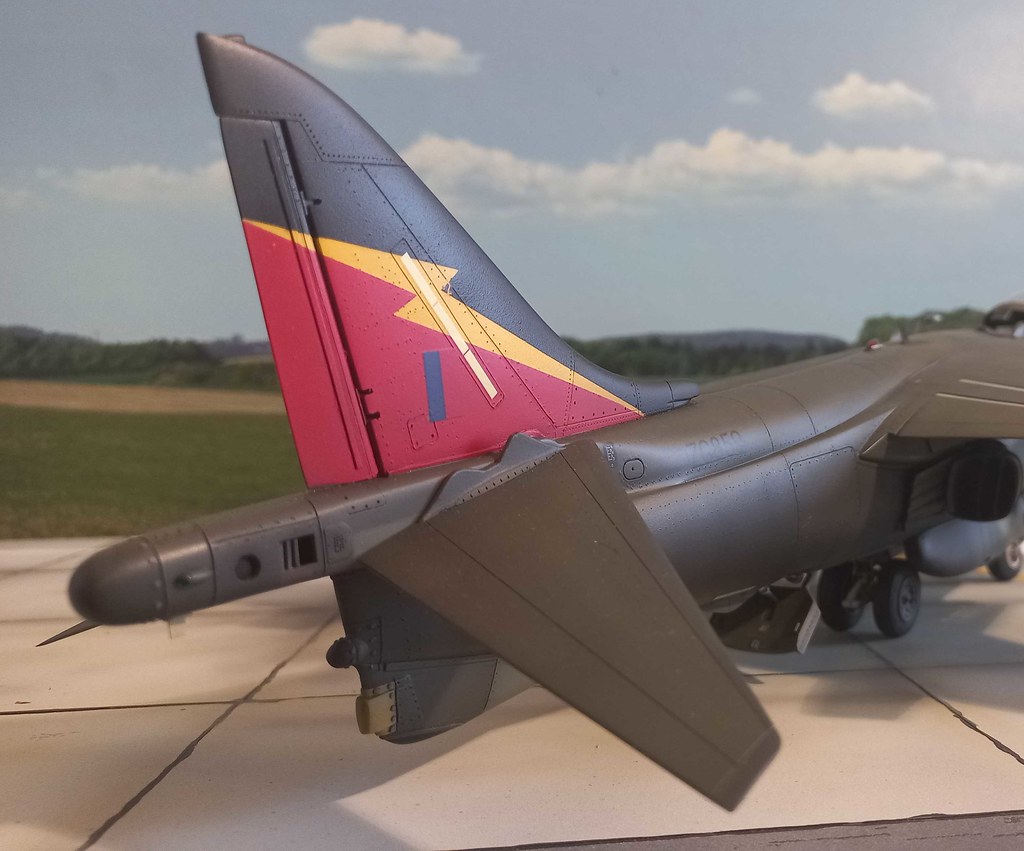
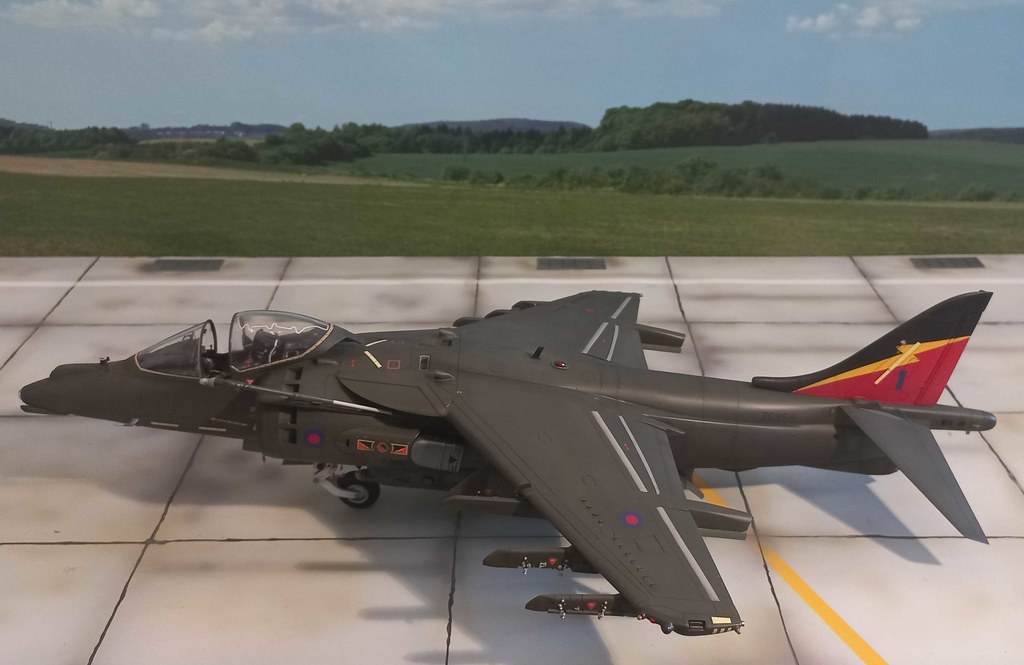
It has a beautiful tail adorned with the colors of the IV(AC) Squadron: this choice was adopted as a safety measure in terms of "visibility" during very low altitude flights and I believe also because this Harrier was used to participate in the summer airshows of that year.
Speaking of the model, as I have already said with the previous Harriers that I have made, there are many things that need to be modified and added to this kit:
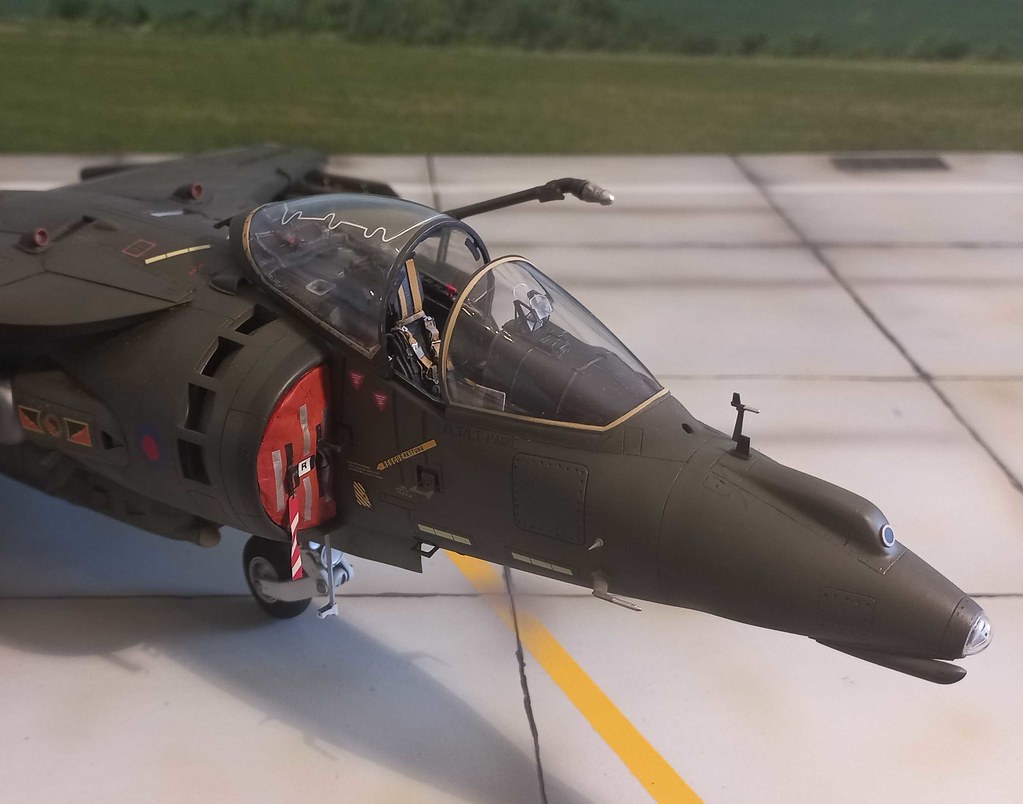
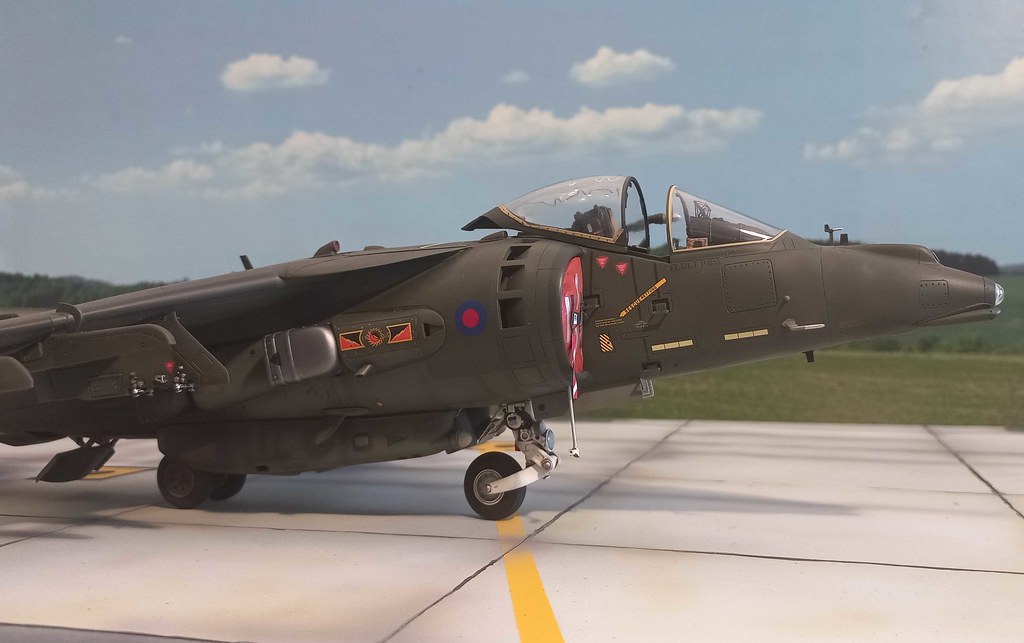
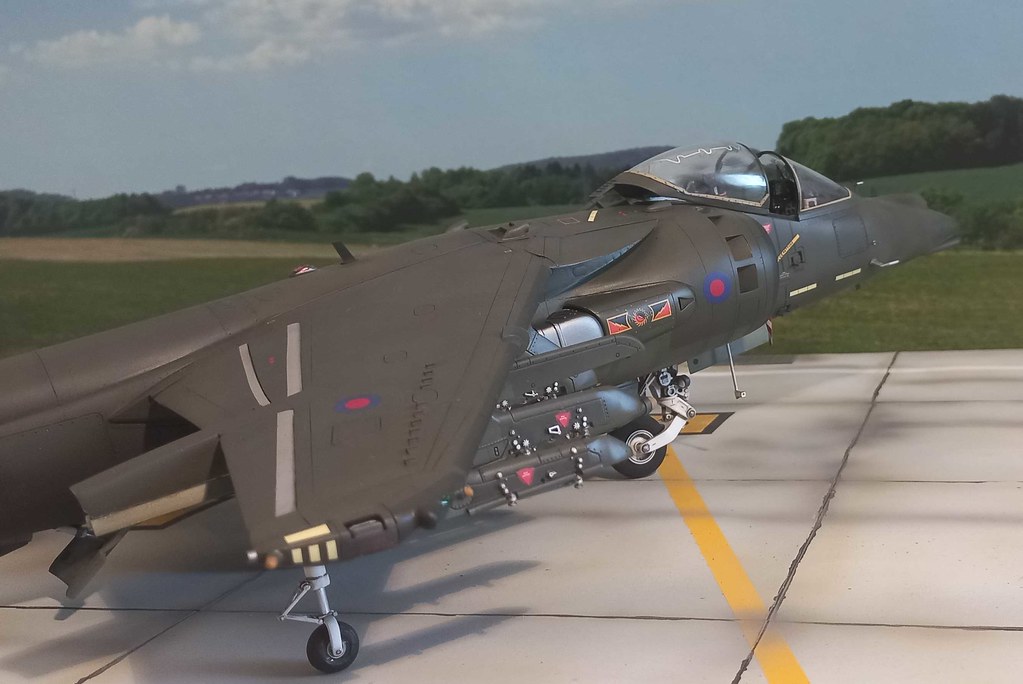
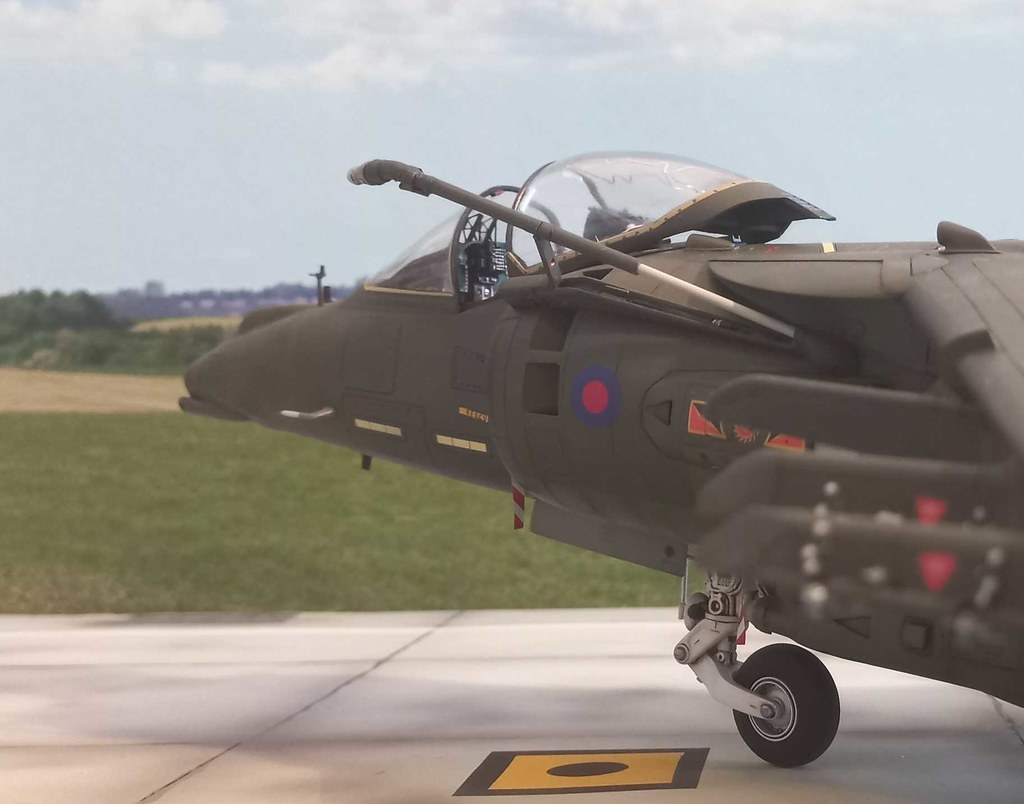
- A new resin nose made by me replaces che same plastic part of the kit that is really poorly made with completely incorrect details such as the FLIR and the ECM Zeus antennas. Furthermore, the panels are wrong and a slight square bulge is missed in the lower part, Also the RCV is completely redone because wrong. The glass covering the ARBS targeting system sensor must also be replaced with one of a more suitable shape.
- For the cockpit I’ve chose to use the Aires resin tub with a MK.12 seat made by me based on an MK.10 resin seat. For the HUD I’ve used the beautiful resin piece made by Flying Leathernecks Decals.
- The nose gear well also comes from an Aires resin set, the detail of which is unmatched
- The legs of the undercarriages are completely redone by me, while the wheels come from the Reskit resin set, beautiful.
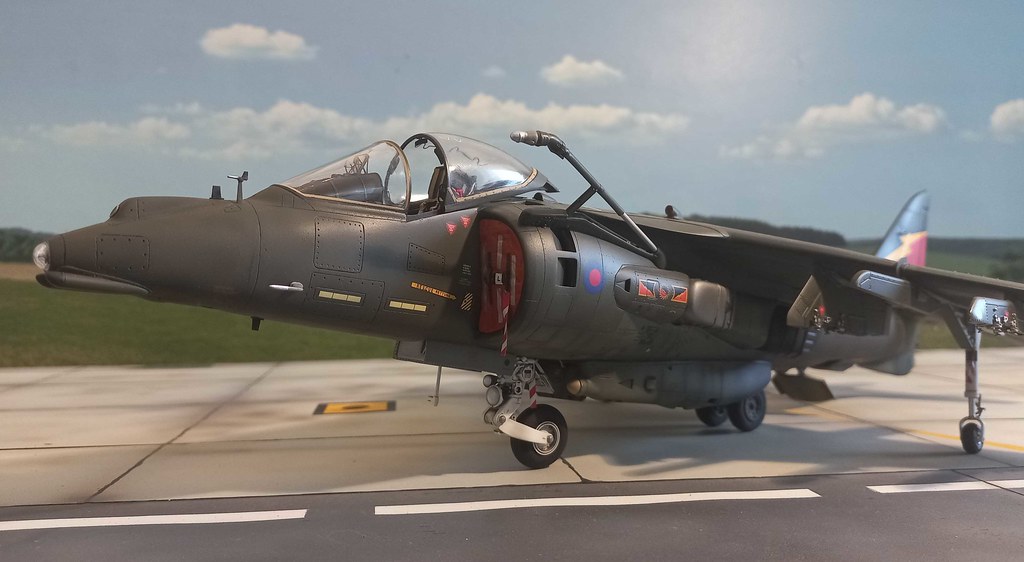
- I didn't spend much time to work inside the large air intakes, because I had already decided from the start to apply a couple of anti-FOD which give also a bit of color once finished.
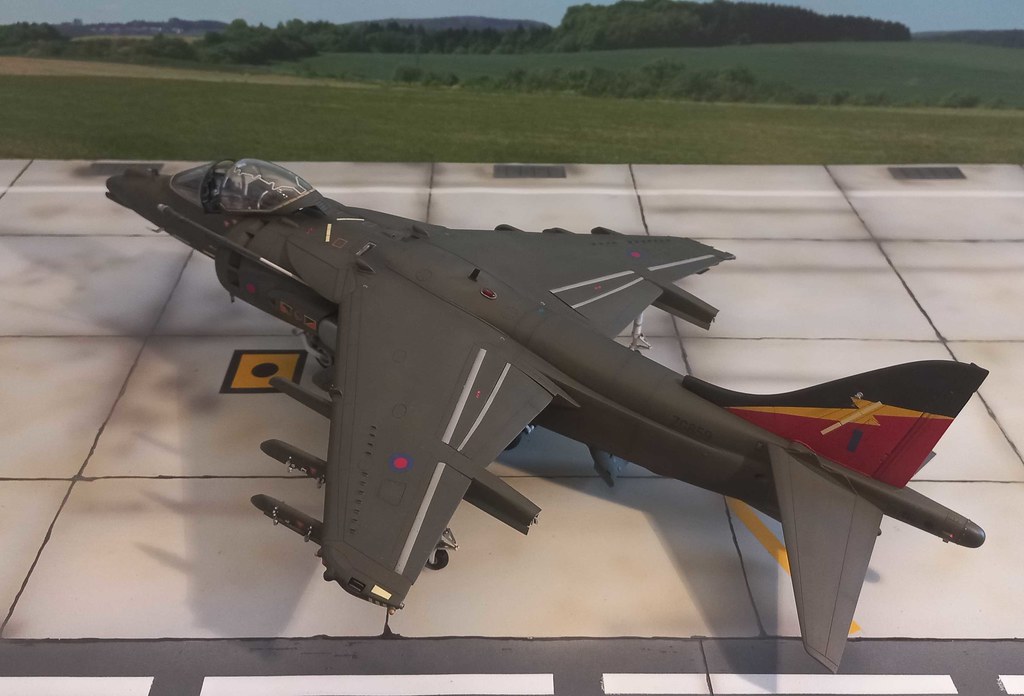
- This GR.7 had 100% LERX since it left the factory: these pieces were made by me using plasticard and detailed to match the fuselage panels and wing edges.
- The entire wing has been completely revised in its profile because the pieces of the kit are really poorly made: therefore the only solution is to study the profiles carefully with the photos and go down hard on the plastic parts with putty and sand paper. All the panel lines needs to be redone.
- All the panels lines must be redone also because those in the kit are completely wrong.
- The 4 exhaust nozzles of the Pegasus engine have also received care and details to make them a little more similar to the real ones, as for the protection metal plates.
- All 9 pylons have been replaced with the Flying Leathernecks Decals resin set: great 3D resin pieces with beautiful details. However, adaptation work to the wing plastic parts is also necessary here if a correct alignment of each pylon is desired.
- The empty gun pods are the plastic parts of the kit that need to be shortened and heavily detailed... I feel like I'm being a bit repetitive...
- One piece completely missing from the kit that is characteristic of all second generation RAF Harriers is the chaff&flare launcher box which is placed behind the ventral airbrake. This is a resin piece of my own making.
- All the bulges and antennas of the ECM/RWR system on the ventral fin and on the tail cone have been redone and detailed.
- As I said before, all the panels and rivets have been redone, as the various antennas and sensors.
- I’ve opened the access steps, added a retractable ladder and extended the In Flight Refueling Probe.
The model is painted using Gunze (H) and Tamiya (XF) acrylic paints:
- The topside is in NATO Green, obtained with a mix of H-64 and H-309.
- The underside is in Lichen Green, obtained with a mix of XF-65 and XF-73.
The decals come from various sheets (Model Alliance, Xtradecals, Zotz…).
CIAO!
Piero


-
Hello,
does anyone know when these stiffener plates were applied to the rear fuselage section of the RAF Harrier GR.7?
Especially if they had already been applied in 1994, and I can't find any reference about it.
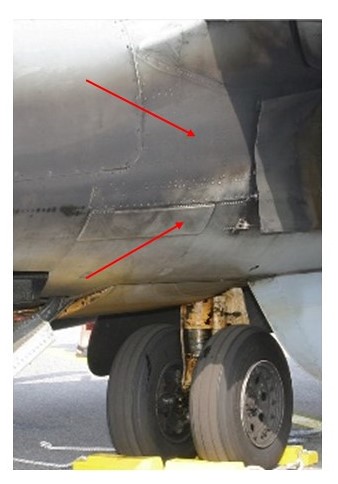
(picture is used for plastic modelling discussion only)
CIAO!
Piero
-
-
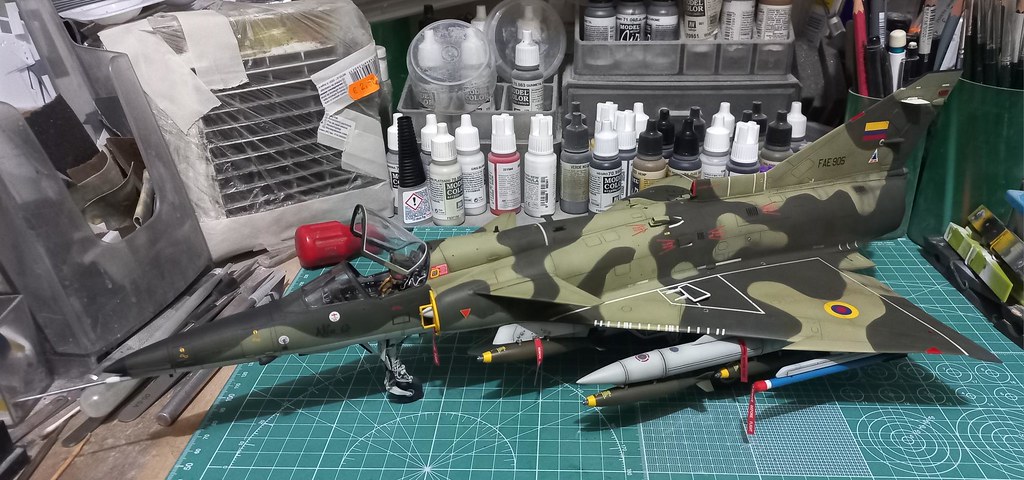
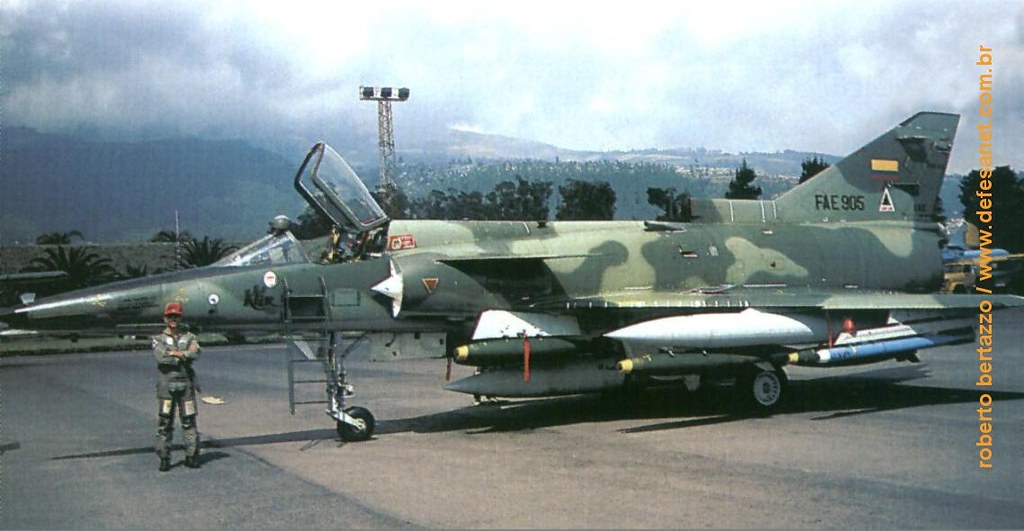
Hello,
my Ecuadorian Kfir C.2 is finished.
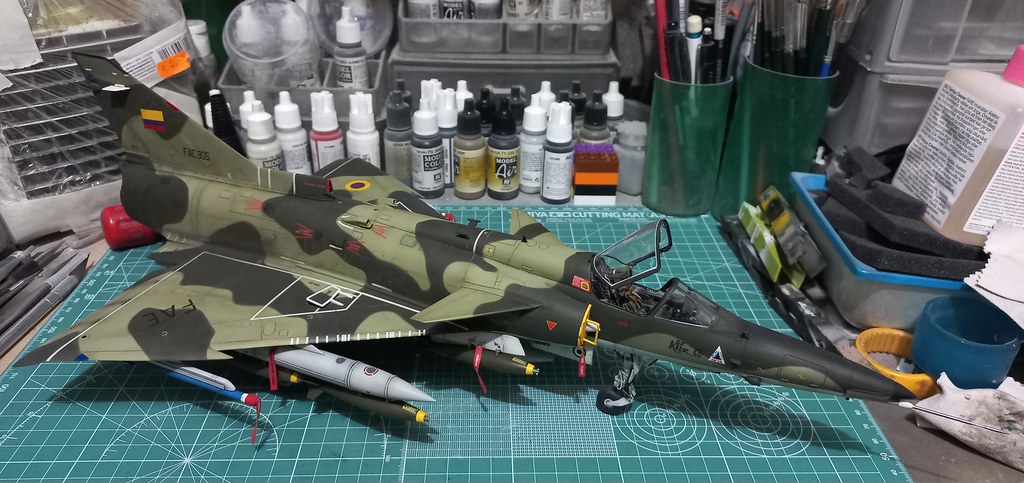
More pics in the RFI forum section soon.
CIAO!
Piero
- HerculesPA_2, denders, LSP_Kevin and 13 others
-
16
-
On 2/2/2023 at 9:43 AM, Piero said:
Hi Alain,
yes, the camo colors are Light Green and Dark Green... the problem with my pictures is due my smartphone camera setting in auto mode and with the green cutting mat.
CIAO!
Piero
Here a picture just to try to explaine what I mean...

CIAO!
Piero
-
On 1/19/2023 at 7:35 PM, alain11 said:
I liiiike this scheme !!!!! ............odd stuff it looks rather " brown" and sand on my screen
 .
.
Alain
I found FS refs for the green colors : light green FS 34257 , FS 34083 dark green
Hi Alain,
yes, the camo colors are Light Green and Dark Green... the problem with my pictures is due my smartphone camera setting in auto mode and with the green cutting mat.
CIAO!
Piero

![20230215_003938[1964]](https://live.staticflickr.com/65535/52706168712_71560b4ae4_b.jpg)
![20230219_134203[1944]](https://live.staticflickr.com/65535/52707095885_004d8e63b5_b.jpg)
Tamiya 1/32 F-16C CAS Viper - 50th Fighting Falcon Anniversary
in Works in Progress
Posted
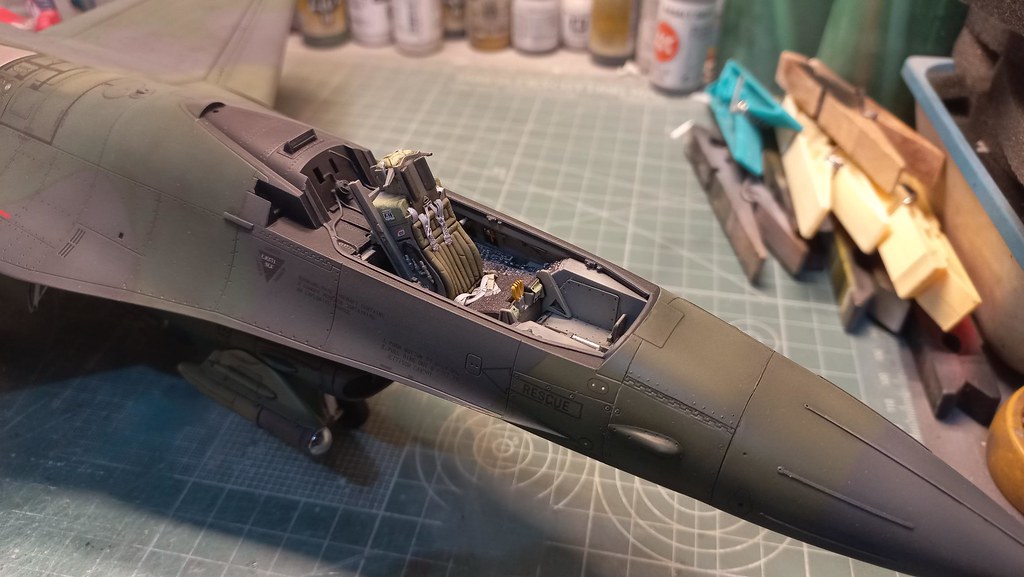
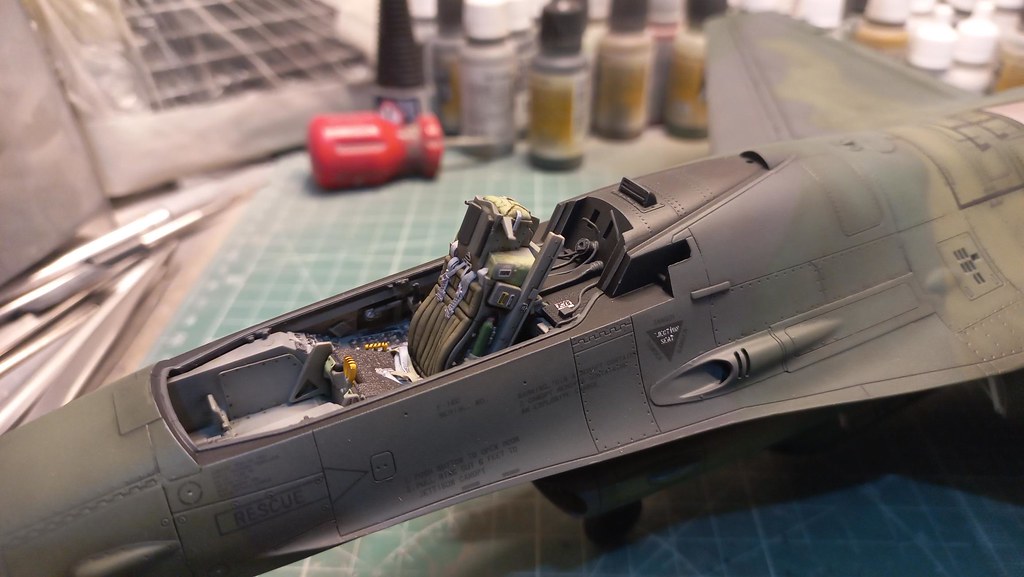
Hello,
I've completed the cockpit and put together all the parts: almost everything is out of the box, only the instrumentation is from the Quinta Studio 3D set.
Master metal parts fro AOA sensors and pitot tube.
I put here and there some red Remove Before Flight tags as showed when the F-16 is parked and... to add a splash of color.
In the next step I will add the underwing pylons and canopy parts... and should be finished.
CIAO!
Piero