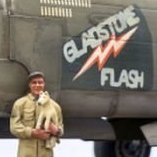
ChuckD Posted January 15, 2023 Posted January 15, 2023 (edited) Hello, all. Another year, another big twin on my bench. Not entirely sure where I'll display it, but that's future me's problem. In this tread, I'll be struggling through the 1/32 scale Trumpeter P-38L Lightning. I say "struggling" because, well, multiple review threads indicate that this was not a Trumpeter "A-team" effort, a la their delightful TBF Avenger series. Apparently fit issues abound and if you don't reinforce the upper wing piece, it droops and throws off the geometry of pretty much everything. In any case, I'll give it the ol' college try and hope to come out with a decent result. For this build, I'll be using just a few aftermarket sets to gussy it up a bit. Aires wheels Grey Matter props Master model armament set Eduard mask A seatbelt kit of some variety. Probably something 3D printed as my patience for building the microsocopic HGW sets is thin... but then again, I may have some in the spares bin. Time will tell. I've got a set of Kits World decals on the way and am, as of this writing, leaning towards this paint scheme for no other reason than I found it amusing. According to Kits World, this is a P-38L H5-C from the 392nd FS, 367th FG, called 'Gung Ho' sometime between April of 1944 and February 1945. David Doyle's Legends of Warfare book cites this as belonging to LTC Edwin Chickering and the photo being taken on January 3rd, 1945. I do prefer OD paint schemes, but by, near as I can tell, no P-38Ls were so painted, and I'm not sure I'm up to doing the work required to backdate it to a J model. So, here I am, just a couple months after proclaiming that natural metal finishes would be a "few and far between" prospect for me, diving into an incredibly complex NMF project. Quoth the ChuckD, "Few and far between." Somethingsomething... glutton for punishment... somethingsomething... Seriously, if anyone's aware of compelling evidence of an OD Green P-38L, I'm all ears. Anyway, I cracked the box yesterday, ordered a few of the above goodies and got to work. With only a few hours of time at the bench, the yesterday's work was... minimal. While large, the kit doesn't appear overly parts-heavy. Most of the duplicate sprues are, predictably, for the twin engines and boom sections. And here we see the sum total of yesterday's work. While the engines are really detailed, there's no provision in the kit to display them, so I'm only going to build enough of them to support the propellers. Accordingly, the build here is minimal. Beyond supporting the prop, I'm hoping that minimizing the bits hanging off the engines will 1) minimize fit issues with the boom 2) allow me to add lead strips to the inside of the engines to help keep the nose on the ground. As this kit is now old enough to vote in the US, there's a decent amount of flash and other nasty bits to clean up, and correspondingly, the fit isn't stellar. The cooler "pans" for lack of better term are obviously not well-fitting, but they'll be hidden anyway, so it's not a huge deal. The engine components, such as they have been constructed, seemed to fit reasonably well themselves. Anyway, back to the bench. Edited May 20, 2023 by ChuckD Dany Boy, Dpgsbody55, rafju and 14 others 17
ChuckD Posted January 16, 2023 Author Posted January 16, 2023 Okay, moving on. As outlined above, I originally planned to build enough of the basic engine structure to support the propeller. After spending several hours fuddling around with the left boom trying to get the engine and gear well to fit properly, I decided to ditch the idea. Call it cheating or whatever you want, but I'll be tossing the engines as they simply cause too much interference with the fit of the boom, the gear wells, and the intake scoops. I'll just glue the spinner to the front of the nacelle and call it good. Here are the gear wells, mostly dry fit. As you can see, the detail here is pretty sparse. I'll add some wires and brake lines here and there for visual interest, but I probably won't go ham on it as it'll never be seen once the kit is done. There's a glycol line included in the kit that I didn't have in place here, but that's really the only missing detail included with the kit. Some wires and clamps will spice things up a bit there and will be a good return on a relatively low investment. Dry fitting the left well into the boom showed quite a gap between the two assemblies. By cutting off significant chunks of the alignment lugs, I was able to reduce that gap to something that can be corrected with some super glue. A little better. Having built a number of Trumpeter kits over the years, I often find that they're heavy on detail in places that 1) will never ever be seen and 2) often cause fit issues for the parts around them. I'm thinking of the fully-realized, but poorly-fitting turbocharger assembly in their P-47D kit. Neat concept, but being so poorly executed, why bother? These engines are kinda the same story. Great little engine kits, but they just cause fit issues that I don't have the patience to deal with. So, they can take their rightful place next to the t-bolt's turbocharger in my local landfill. The good news is that, by ditching them, I'll have a great platform to add lead weights to the forward part of the booms. Also, since I have a little more flexibility in the forward part of the boom, I was able to fit the intake scoops nearly perfectly so that they do not stand proud of the booms themselves. The instructions call for adding the PE mesh screen to the front of the intakes, but I popped them off and glued them to the back of the intake scoops on the cowl. They fit and line up better there. The intake scoops have only been glued to one side of the boom so far, but dry fitting shows a promising fit for both the other half of the boom and the prop spinner itself. Here you can see that the engines themselves really add very little to the final kit. After fuddling around with the left boom for quite a while, the right boom went together fairly quickly. The kit props are unimpressive to say the least. In the end, I'm pretty optimistic with the progress today. I've got a long way to go, for sure, but by nixing the engines altogether, the Goldberg-esque construction of this complicated little beast should be greatly simplified. Anyhoo, I need to open up some scoops and clean up some vents as they've got lots of flash and plastic nubbies sticking off them, but at least we have a good plan going forward. Rockie Yarwood, Boch, MikeMaben and 26 others 29
themongoose Posted January 16, 2023 Posted January 16, 2023 Looks like you’re making the best of a tough kit. And I would totally agree with dumping the engines! Good practical realistic idea since they will never be seen. BiggTim 1
chuck540z3 Posted January 16, 2023 Posted January 16, 2023 Great to see this new build started! As you mention, this kit has a lot of challenges, which is why you seldom see a build thread of it here at LSP. If it can be of any help, I did one about 8-9 years ago at the link below. Sadly, all the pics are still watermarked by Photobucket, because I wouldn't pay their ransom demands, but the key pics are still clear enough to probably be of some use. Trumpeter P-38L "Kicked Up A Notch" Cheers, The other Chuck Paul in Napier and BiggTim 1 1
ChuckD Posted January 16, 2023 Author Posted January 16, 2023 Thanks, Also Chuck. I spent most of Saturday reviewing your thread and found it very very helpful. I'll be taking some pointers from it for sure, but I gotta say you're much more meticulous than I am and I envy your patience and skill. Your end result was just wonderful. Glad you're along for the ride. BiggTim and chuck540z3 2
Steve Eagle Posted January 16, 2023 Posted January 16, 2023 You are doing a nice job with the kit. It really is a shame that we modelers don’t have a better canvas to work with. Make it a Mona Lisa somehow. BiggTim and KUROK 2
ChuckD Posted February 4, 2023 Author Posted February 4, 2023 (edited) Good morning, Gents. Back at the bench and I'm strongly considering a change of direction for this build. Years ago, before they went out of business, I bought the Rutman-based backdate resin set for this kit from Grey Matter Figures. Pretty much everything you need to convert the J/L model to a G-H model '38. As I'm looking through the instructions however, something's not lining up in my brain and I can't find an image online that confirms or denies my suspicion. The large nacell plugs... shouldn't they be handed? They have panel lines for the nose gear viewing mirror, but both parts have that on the same side. My suspicion is that GMF sent me two of the same pieces by accident, when I should have gotten parts that are specific to each side. It looks like I have two right hand nacelles. While I can probably rescribe panel lines without *too* much headache (can't be worse than grafting the resin into the build in the first place...), I'm concerned that there may be other contours that are out of shape that will not line up correctly on the left side. I wouldn't know until I'm long past the point of no return with cutting, so I'm hesitant to start with that until I dig deeper on this. Anyone who's used the GMF/Rutman backdate set have any info on whether or not these pieces should be handed? Edited February 4, 2023 by ChuckD BiggTim, Derek B, Sasha As and 7 others 10
ChuckD Posted February 4, 2023 Author Posted February 4, 2023 Ugh. The more I look at it, the more I'm fairly certain I'm out of luck. Looking at the rear profile of the resin nacelles shows that there's a difference in the curves and contours of where the nacelle would meet with the plastic boom. They wouldn't mate up correctly as far as I can tell. Back to plan A. BiggTim, Landrotten Highlander and themongoose 1 1 1
dmthamade Posted February 4, 2023 Posted February 4, 2023 It's great seeing one of these built. They do have their challenges, but you are rewarded with a unique build. Did one of these a while ago, one of my favorite builds. Don BiggTim 1
Dpgsbody55 Posted February 5, 2023 Posted February 5, 2023 I haven't seen one of these in years in my local hobby stores. It's such a pity that the kit is so average as a good P-38 would be on my bench very soon if it existed. Cheers, Michael BiggTim 1
ChuckD Posted February 5, 2023 Author Posted February 5, 2023 (edited) To heck with it. I'm going for it. I'll figure out the paint scheme I want to do later, but I'm favoring something from the 339th FG to go with my growing cavalcade of Guadalcanal warriors. A huge thanks to @BiggTim who not only confirmed for me that I did get two right nacelle pieces by mistake, but whose kind words of encouragement were the push I needed to try tackling the GMF backdate set. Fortune favors the bold, as they say. If worse comes to worst and the parts just don't fit, well, at least I tried. It's better than this kit sitting untouched on the shelf for eternity. I figured I'd start with the right nacelle as it would be the "easier" of the two and would give me a feel for what I was up against. First I identified the cut area. In the end, the main horizontal line will be one long, straight cut, but I wanted to err on the side of caution for the first cut. After the cut, this is what I had left. This seems promising. After cutting, sanding, test fitting, and repeating ad nauseum, I was able to anchor the nacelle in place with super glue. Not too shabby. I repeated on the other side as well, but couldn't take pictures as I'd left my phone at my dad's house by accident. The process was much the same for the inboard side. The only kicker was that I found when I tried to mate the two halves of the boom with the landing gear bay assembly in place, the rear of the resin nacelle interfered badly. So, I had to hack away at the rear of the nacelle and sanded the forward end of the gear bay down to nothing to get everything to fit. Lesson learned there. After much fussing, sanding, and gluing my damn fingers to the model kit (facepalm), I have this roughed in for the right boom. Clearly there's some more cleanup to do along with rescribing and riveting, but so far I'm pretty happy with the results. Next, I'll tackle the left nacelle, followed by hacking the booms themselves off to splice in the resin supercharger intake bits. As challenging as this is, I'm happy because I'm motivated. I was kinda ho-hum on this kit and was afraid it would either linger on the bench in perpetuity or worse, get banished to the shelf of doom. But, this surgery is a good challenge and I'm pretty excited now. For those of you who are P-38 fanatics. These are the major items I'm aware of for backdating that I need to address. Resin bits like supercharger intakes, superchargers, block tread tires, etc. Landing light gets moved to bottom of left wing. Holes for rocket trees need to be filled. Rounded windscreen from resin kit needs to be used Remove the gun camera bulge from the drop tank pylon Instrument panel is different. This I'm not sure if I can address or not. Maybe it'll be a good excuse to buy a 3D printer and print one up. Anything else I'm missing for a G model conversion? I know there were thousands of changes to the 38 line during its run, but I think those are the major visible ones. Edited February 5, 2023 by ChuckD to != too Greg W, Jayl, LSP_Kevin and 15 others 18
BiggTim Posted February 6, 2023 Posted February 6, 2023 Looks like you're nailing it, just as I expected you would! ChuckD 1
Troy Molitor Posted February 6, 2023 Posted February 6, 2023 Go go Go! Love this one ChuckD. BiggTim and ChuckD 2
ChuckD Posted February 19, 2023 Author Posted February 19, 2023 Hello, all! After an unexpected, covid-induced break from... well... everything, I'm back at the bench. Thankfully it was an exceptionally mild case and I'm more or less back to 100% after about 5 days of illness. Since the updates above, I've only had a couple working sessions on this project. Fortunately, after checking the boxes on my honey-do list this morning, I've had most of the day to pick away at the Lightning, so I've made some good progress. When last we left, I'd done the right nacelle conversion as it would be the easiest. It was time to start the left nacelle. This would prove a lot more challenging since the resin piece was for the other side. The process was much the same, however. I marked the cuts, following panel lines where it made sense. And began the gruesome task. Respirator on. I basically cut in from the top and from the side at 90* angles to lop off the top corner of the resin nacelle piece. After a lot of finagling on both halves the boom, I was able to tack the pieces in place with thin super glue. I then filled the gaps with thick superglue. My intent had been to let the superglue set for a little while then sand it before it turned rock solid. But, it took too long to cure, so I just went to bed instead. ... Then I got covid. So, by the time I got to it, the CA had, in fact, turned to stone and it took me quite a long time with an 80 grit sanding stick to knock it all down and smooth it out. But, in the end, it didn't turn out so bad. I'm going to have to fill most of the remaining panel lines on this and rescribe them in mirror on the other side. Super neat. Rescribing is my *least* favorite part of building. The top of the cowl didn't meet all that well and was slightly stepped at the fore and aft end, so I elected to fill it heavily with magic sculpt, sand it down, and rescribe it. Both sides of the nacelle turned out pretty well. While the magic sculpt was curing, I set about converting a few other items. The molded on hinges and housings for the dive/compressibility flaps had to go. Checking my sources showed that the bulge was not present on the G and H model, so I have to surmise that it was a fairing for something to do with the dive flaps. In any case, off it all went. I filled the backs of the holes here with plastic card and filled the holes themselves with more magic sculpt. The landing light fairing has since been removed as well as the G/H models had the landing light in the bottom of the left wing. As has been mentioned in several places, the wings tend to droop on this kit unless they're properly buttressed with internal supports. I opted to thin down the end of some balsa sticks I had epoxy them to the upper wing section. This is doubly important with the backdating I'm doing as the turbocharger deck, which forms a bridge between the inboard and outboard wing sections needs to be cut out. Here, you can see how little material is left holding the wing together once that bridge is removed. The fairing for the landing light has been removed on top and bottom, and I've marked the approximate location of the landing light. I'm still pondering how to tackle that exactly, but I'll figure something out. I'm going to use the landing light from a P-40 as a reference as I figure they'd likely be pretty similar. The two holes for the rocket trees will need to be filled as well. Here, you can see the cutting required for the turbocharger deck. Quite a bit of material has to be removed. Roughed in, the fit isn't too bad. The same, of course, cannot be said for the dry fit of the under wing. As others have found, there's pretty extensive gaps that will need to be shimmed and filled. Hey, at least it won't be natural metal finish anymore. :| Kinda starting to look like a P-38 if you ask me. Though you can't really see much of it, I did get the control surfaces built and dry fit. Both turbo decks are in place and will require a bit of filling. I'm going to hold on on permanently affixing them until I tackle the next big milestone. The nacelle sanded pretty nicely and is ready to be rescribed. I'll probably hit it with some primer before I go too nuts on rescribing just to make sure the edges of the filler are feathered properly. So, that is how things stand now. The next major milestone I mentioned is to saw the booms off and splice in the resin replacements for the intakes. All without knocking the alignment of the tail out of whack. I mean, what could go wrong? denders, chukw, Citadelgrad and 16 others 19
Recommended Posts
Create an account or sign in to comment
You need to be a member in order to leave a comment
Create an account
Sign up for a new account in our community. It's easy!
Register a new accountSign in
Already have an account? Sign in here.
Sign In Now