
geedubelyer
-
Posts
3,518 -
Joined
-
Days Won
3
Content Type
Profiles
Forums
Events
Posts posted by geedubelyer
-
-
25 minutes ago, mozart said:
What’s an “assembly ship” please for the edification of ignoramuses like me!?
Hi Max.
These aircraft were used as a hub to gather the formations together for a raid. Often brightly painted to be more easily seen the other aircraft would formate on their position before beginning the raid.
At least that's my understanding......

Have a squint here
- mozart and monthebiff
-
 1
1
-
 1
1
-
Would a dH Vampire qualify if it was painted silver?
")
-
1 hour ago, dennismcc said:
They also put doped newspaper on the spent cartridges chutes.
Cheers
Dennis
Have you ever seen any images Dennis or any to share?
That would be a neat feature to replicate.
-
Wow! This is amazing

What a fantastic way to tackle the glazing allowing for impossibly thin glass.
Excellent

-
Sorry to hear your trip was postponed Chuck but glad you're ok now.
Nice job on the gear bays

-
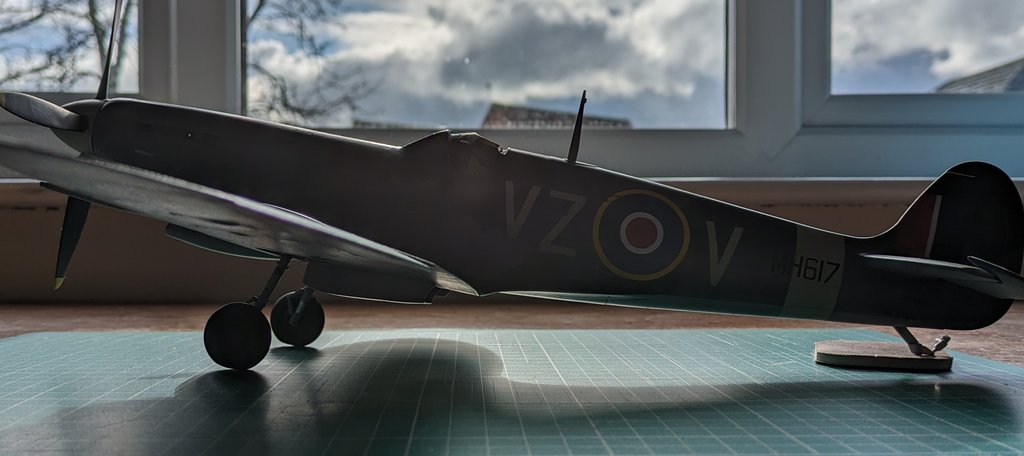
As it turns out, this build is getting perilously close to completion
I keep looking for jobs to do and realise there's not alot left

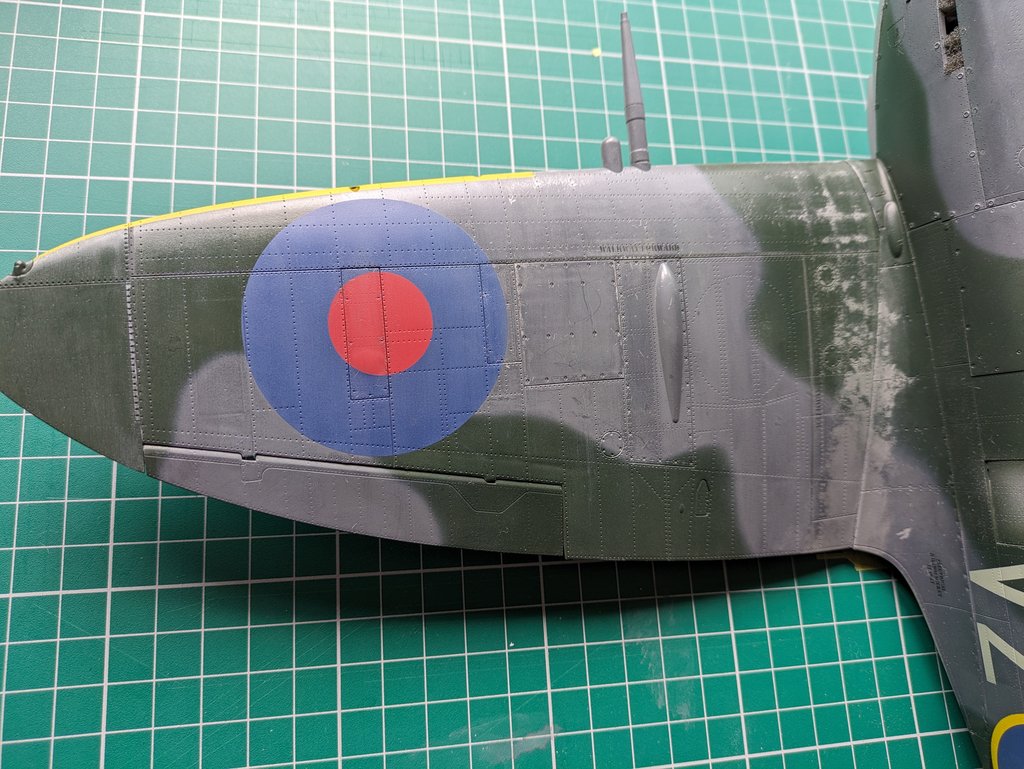
One thing I had been mulling over was how to recreate the gun port coverings often seen on WWII RAF aircraft.
After help from the Aviation resource forum I learnt that the tape squares were pre-formed and 8"x8". My calculations made this equivalent to 8.4mm in 1/24th scale.
Airfix provide decals which I could have used but you know me, why make anything simple, right?

So instead, I mixed up a brick red shade and painted some cigarette paper. Cut that into squares and used diluted PVA glue to adhere them to the airframe.
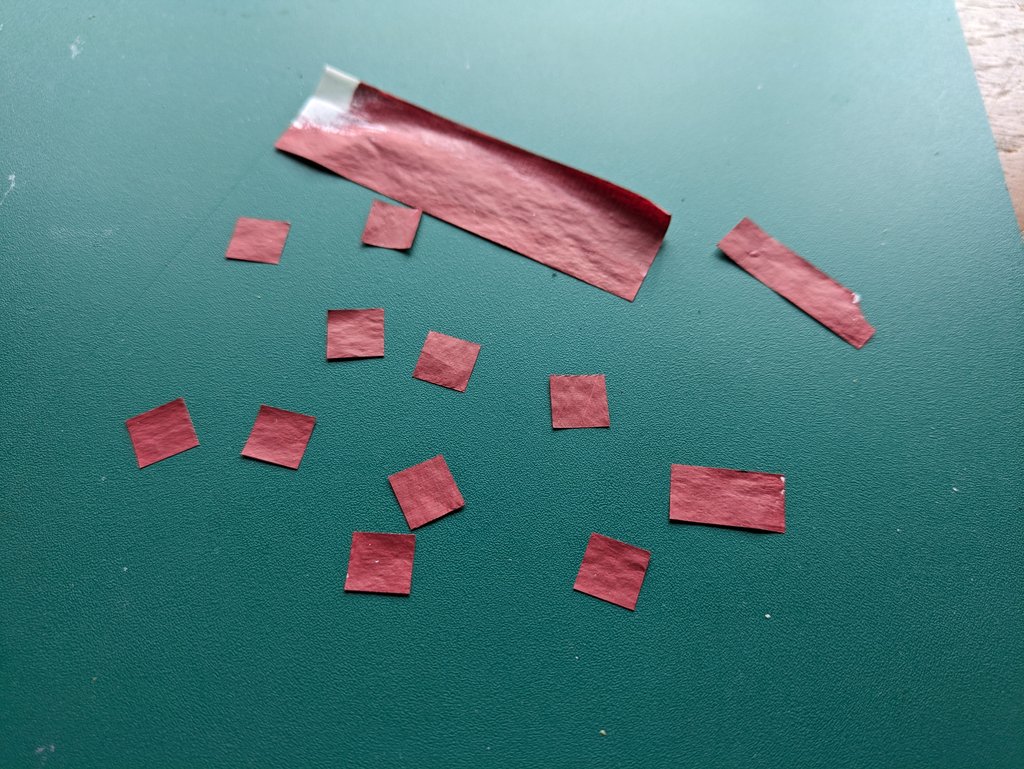
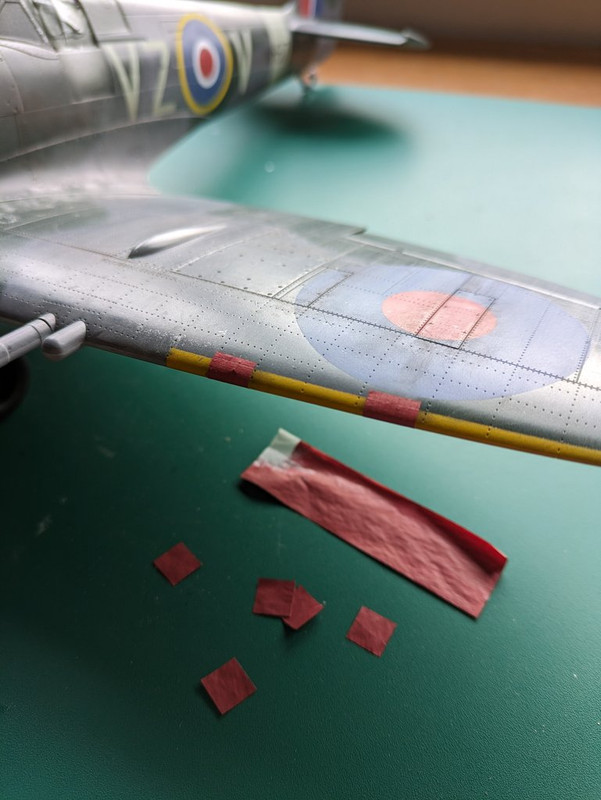
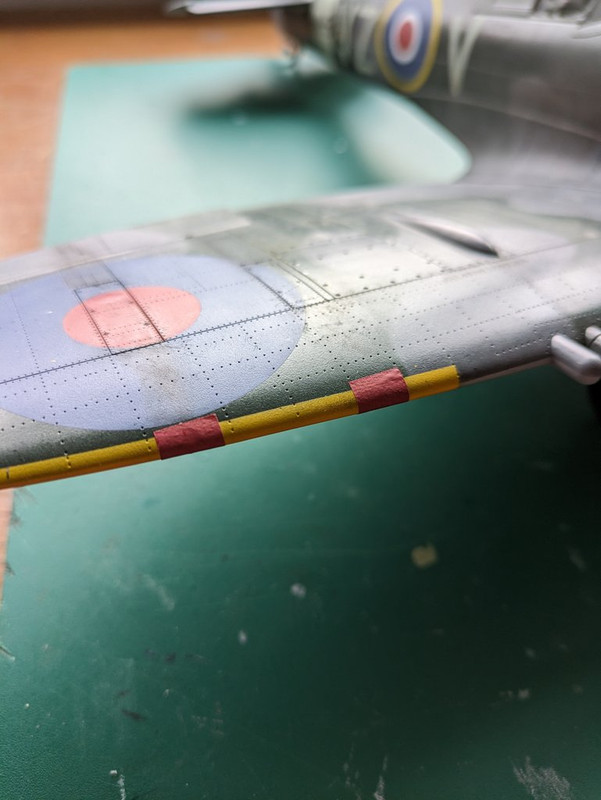
The intention was to create a little more texture than the decal would have given.
As you can see, I intentionally haven't been too careful with the placement in an attempt at realism. I doubt the fitters in the field got rulers and squares on these.
-
After spending a minute spilling various shades of red into a mixing pot I got something I felt happy with.
After I'd created my tape squares it dawned on me that I could simply have used roundel red for the patches since the colours ended up very similar

-
1 hour ago, Pete Fleischmann said:
UniFormation GK2 10.3” 8K resin printer just landed-

Let the magic begin

-
13 hours ago, CraigH said:
Hi again Guy
Somewhere in the back of my now Stuka obsessed mind, I remembered checking the oleo extension to scale while building my Spitfire last year. The font of all knowledge, Monforton, kindly gives us the extension with the full weight of the plane sitting on it at 12.45cm which back of a fag packet maths gives us 5mm at 1:24. I think you'll find Airfix are spot on with their extension, no chopping needed
Hi @CraigH, excellent information and good to know. Thanks for your explanation.
13 hours ago, Timmy! said:Got dang GW. You consistently nail the random variation of finish with your models. Well done brocheese!
Hi @Timmy!, thanks man. That's a really kind comment and much appreciated. Glad you're enjoying things so far.
5 hours ago, mozart said:Where’s the missing starboard exhaust Guy, or am I “missing” something?
Hi @mozart As @Nighthawk Calling 1 explained I inadvertently fed the carpet monster a snack. 
I'm going to use a kit part for now but leave it unglued in the vain hope that the errant Eduard part is regurgitated at some random time in the future
 5 hours ago, Nighthawk Calling 1 said:
Reading above he feed it to the carpet monster lol.
Carpet monster's gotta eat, right?
My builds are not complete unless I lose some part or other or break something


-
Brilliant info folks, very much appreciated
This should allow me to create some patches for my current build rather than relying on the kit decals.
By my reckoning 8" translates to 8.4mm(-ish) in 1/24th scale

Cheers
-
-
Hello fellow plastic manglers.
Here's a few quickies.
Does anyone have any info on the tape used to cover the gun ports on WW II RAF aircraft please?
I am aware that it was a red in colour but what sort of shade?
Bright, scarlet red or (perhaps more likely) a darker shade like a brownish, brick red?
Was the tape similar to modern duct tape in texture?
How wide was the tape and how was it typically applied if anyone knows.
Any info is much appreciated, thanks.
Cheers
-
Hi Jay. All good, valid points.
Your first observation regarding the rake of the gear makes sense but the mounting that Airfix have designed is almost foolproof.
It holds the legs in very positively and securely so there's not much the builder can do about it.
Next up is the strut extension.
I fully agree with your comments regarding the weight of the laden aircraft and it would be great to be able to remove a section to adjust the sit but I'm beyond that point on this model tbh. Maybe on the next one........
Lastly I think you're on to something with sanding the tyres, at least a little, which is sure to improve things.
My plan going forward is to sand the tyres a little, create a grassy scenic base and add wheel chocks in front of the completed model.
I'm optimistic that these measures will adequately disguise the misaligned flat spot.
In other news, I've misplaced one of those lovely Eduard exhaust stubs so will be forced to use one of the hugely ugly kit parts (what were you thinking Airfix?)

*sigh* What a battle.....
-
-
On 3/1/2024 at 11:00 PM, Palm-tree said:
Hi - is your model sitting on it's tailwheel correctly?
Your photographs do not show whether this is the case or not.
You may find that the flat spot sits more accurately if the tail wheel is installed?
In truth I haven't fitted the tail wheel at this point but I had installed the leg and placed a spacer under it to simulate the radius of the wheel.
I'll attempt to get a clearer photo later today.
Thanks for the input all.
The solution may involve a combination of ideas?
EDIT*
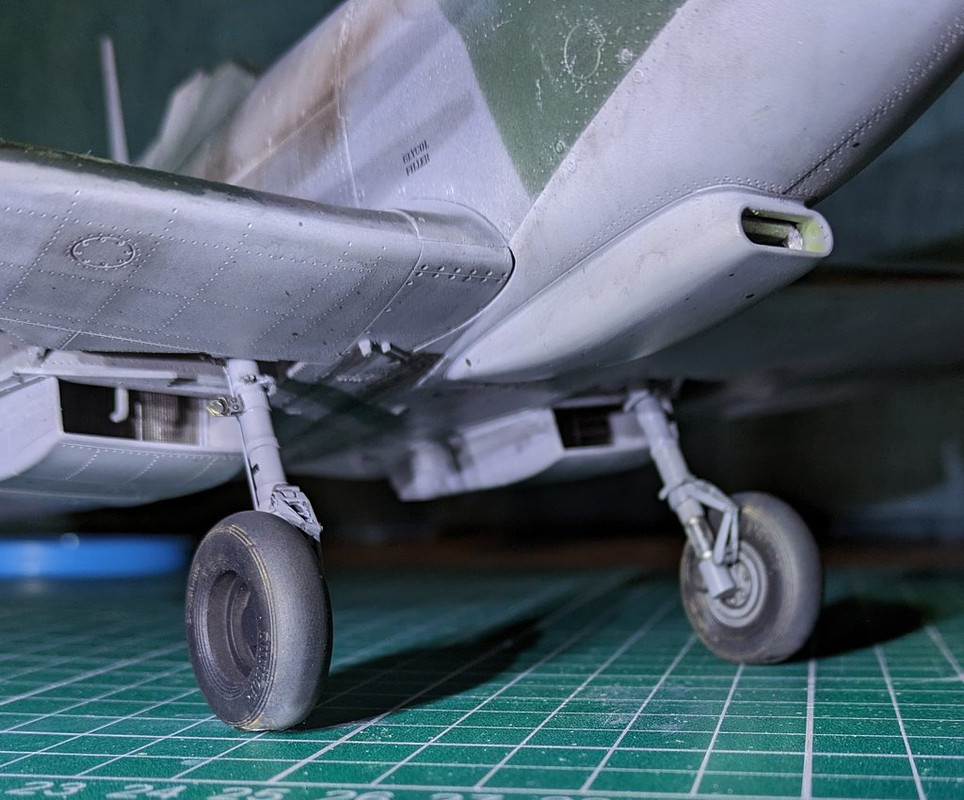
Here's a couple of pics to more clearly illustrate what we're looking at.
The micromesh pad is about 4mm thick. Probably marginally more than the radius of the rear wheel.
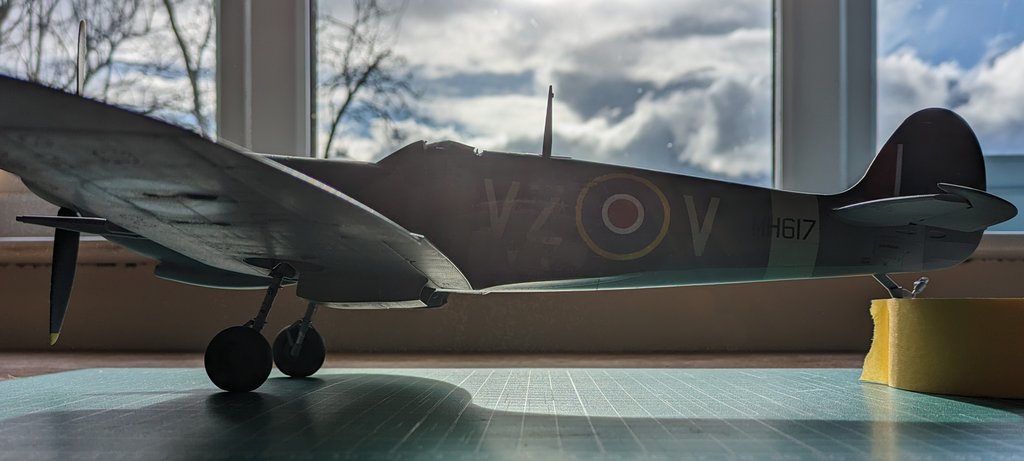
In this second image the tape roll that the tail is balanced on is 40mm. Notice that the flat spot sits happily at this angle.
Sanding all of that off is probably too much.
Removing and repositioning the wheel is the ideal solution but I have concerns over the resultant axle's strength. That and it will be darned awkward to do.
After considering everyone's input and my options I'm leaning towards disguise.
It comes down to who's going to view the model. (Me).
Balanced against the joy sapping thought of converting the gear it may be sufficient to go with long grass for a base and chocks in front of the wheels

-
Hi folks.
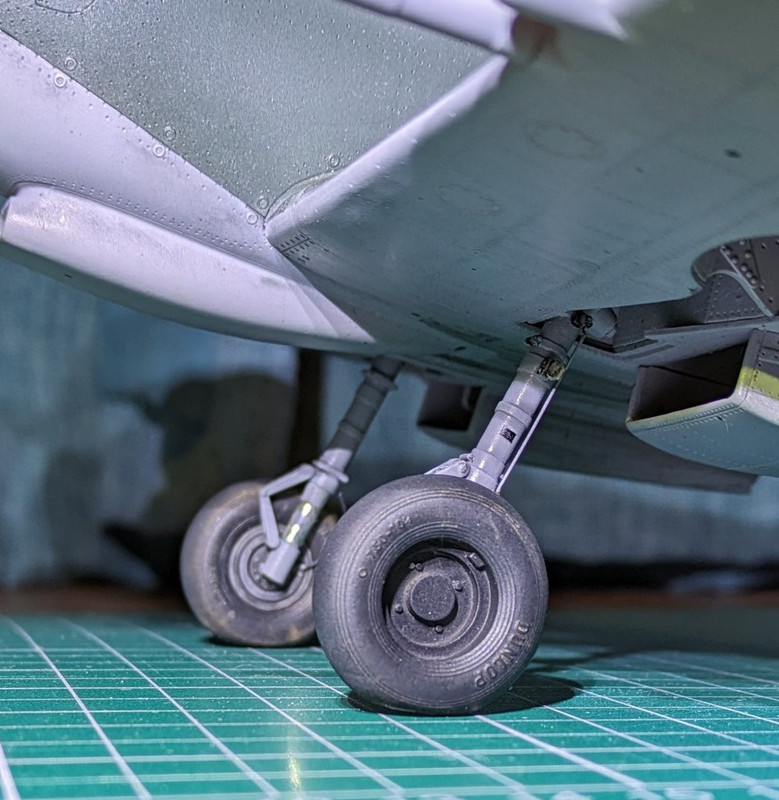
I've been tinkering with the undercarriage this week.
The legs are complete and I attached the Eduard wheels. I had to remove some of the wheel attachment plastic tab to accept the resin wheel but that was easy.
I have come across an issue however. I'm pretty sure I've fitted them on the correct side but the flat spot doesn't sit correctly.
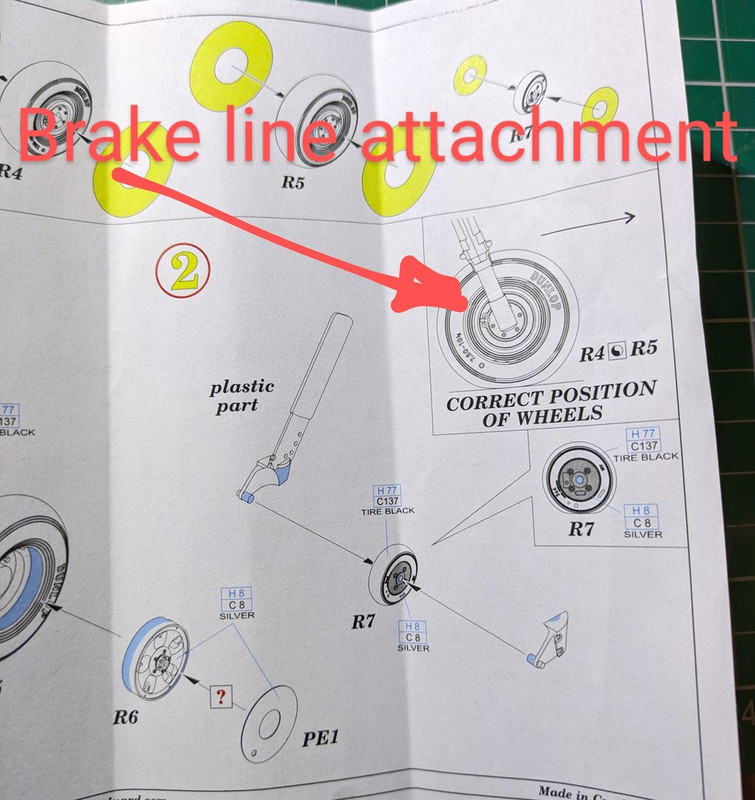
Each wheel has a suggestion of a connection for the brake lines molded on and this goes at the rear.
With the wheel attached there is light under the front of the tyre....

I can think of a number of solutions.
These are attached with CA so I might be able to de-bond them with something but that won't adjust the sit. Besides, swapping them over would put the brake line attachment at the front of each gear leg.
I may be able to sand the tyres away by gently dragging the model across some abrasive.
Tricky but doable with care and patience (neither of which I exhibit in abundance
)
Perhaps some creative work with a grassy base might disguise the discrepancy sufficiently? Add some chocks in front of the wheels with their rope curled around the tyre a bit, that might work?
Failing that I could be forced to cut off the whole wheel and tyre, drill them and the gear leg, insert a rod of some description then re-attach everything at the correct angle.

What would you guys do?
Answers on a postcard to: Sand the wheels flat competition, c/o LSP, P.O. Box.......

-
Thanks Andy, much appreciated.
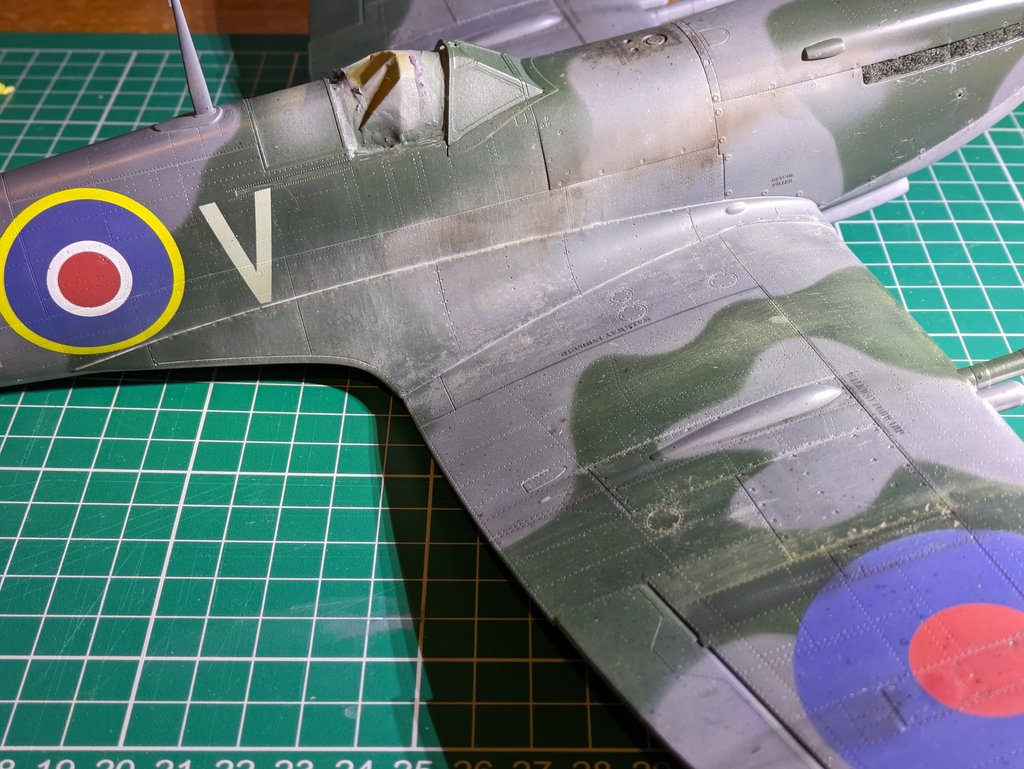
I laid down a coat of Tamiya rattle can silver followed by hairspray before using Mission Models acrylics. I let the colours bake for at least 24hrs before weathering the finish.
On this occasion the top coat was actually too easy to remove and if I were to repeat this technique I'd try it without the hairspray.
I had to spray the area where I wanted to add the exhaust stains with matt varnish to protect it otherwise I'd have been removing even more colour as I manipulated the pastels.
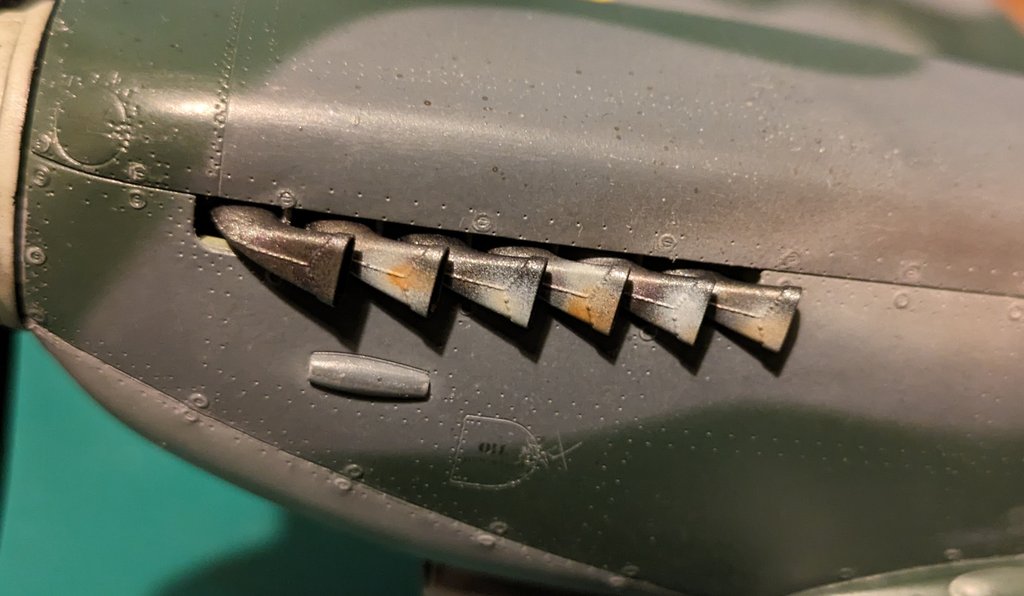
The sprayed arc of initial exhaust colour was from a weathering set by Lifecolour Tensocrom. I've had them ages and I used the burnt brown. The paler shade over the burnt brown was mixed using some Citadel acrylics.
The streaked effects are dry pastels manipulated using moist brushes and cotton swabs.
When I've seen it in the daylight I can decide whether I need to go further
HTH
-
-
20 minutes ago, MikeC said:
So just to clarify, is the qualification:
(a) "silver" AND "25"
(b) "silver" OR "25"?
Thanks
(c) "silver" AND/OR "25"


-
Exhaust stains.
Quite a challenging effect to get looking right.
On a war weary bird there's likely to be lots of exhaust residue along the sides of the aircraft.
Getting the colour correct is equally challenging.
I'd appreciate any feedback regarding my attempts folks if you feel like it.
I started by airbrushing a light tan in a gentle arc.

I have seen some images with the sides of the airframe caked in crud but I'm not confident I could achieve that effect convincingly. (This more restrained option isn't much easier).
To create heavier soiling I've used dry pastels which are a poor man's weathering powders.
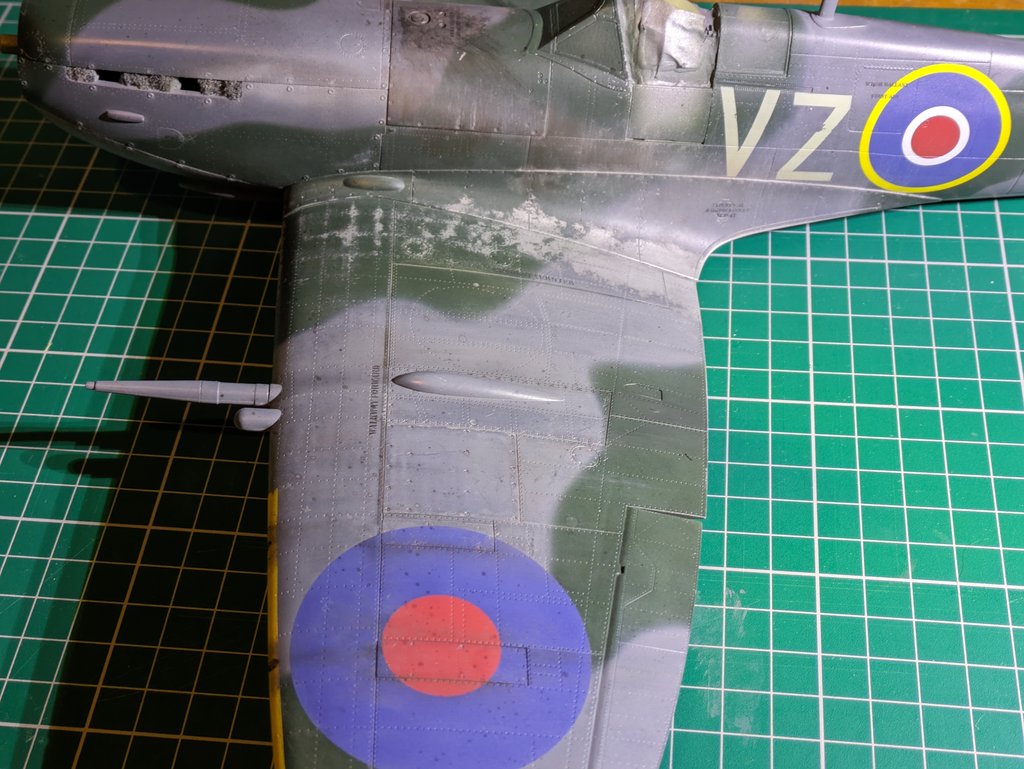
This task was conducted in artificial light so I shall have a look in natural light before I decide whether any further adjustment is necessary.
I am open to any criticism and if you can support your critique with images so much the better.
Cheers
-
This video may prove helpful.
-
39 minutes ago, JayW said:
Wow Guy - very convincing chipping so far. I cannot remember - did you apply a layer of future between silver and topcoat? You must have.
Thanks Jay.
No. The silver was Tamiya rattle can and the top coats are water based acrylic.
I applied hairspray over the silver then the colours on top of that.
I'm now wondering whether I'd have got a better result without the hairspray.
The colours are almost too easy to remove.
-
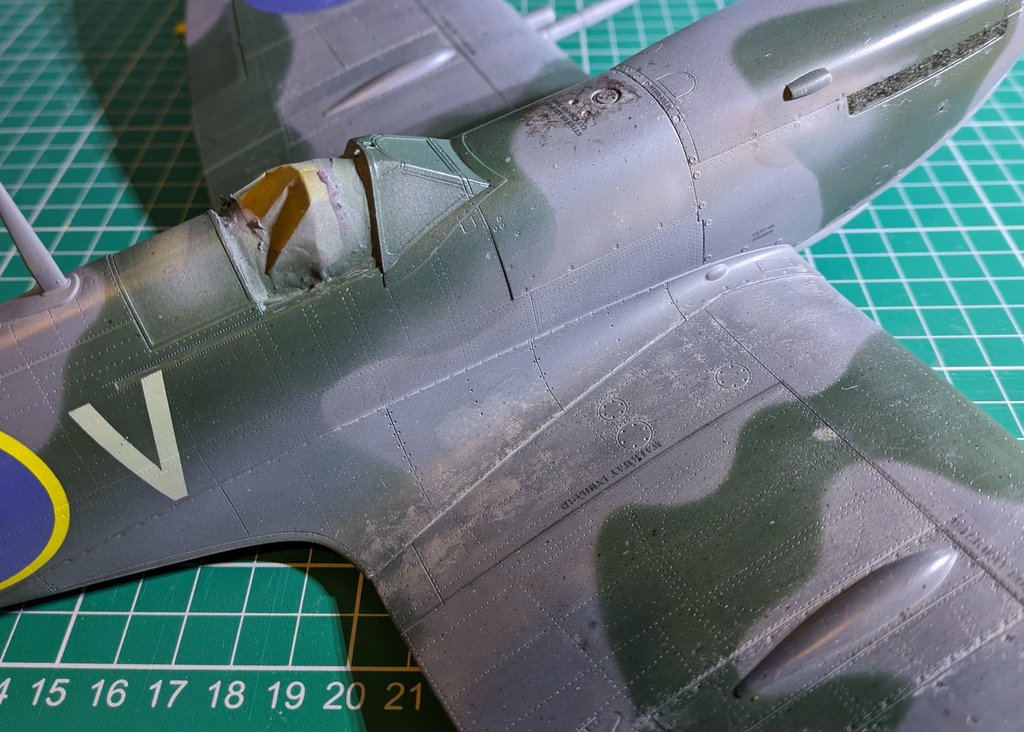
My impatience has got the best of me again and I hard to start the weathering process.
This is likely to be a multi level procedure and my thinking is to work outward from the skin.
To begin with I've chipped and worn the paint at the wing roots.
This is the highest wear area as far as I can make out.
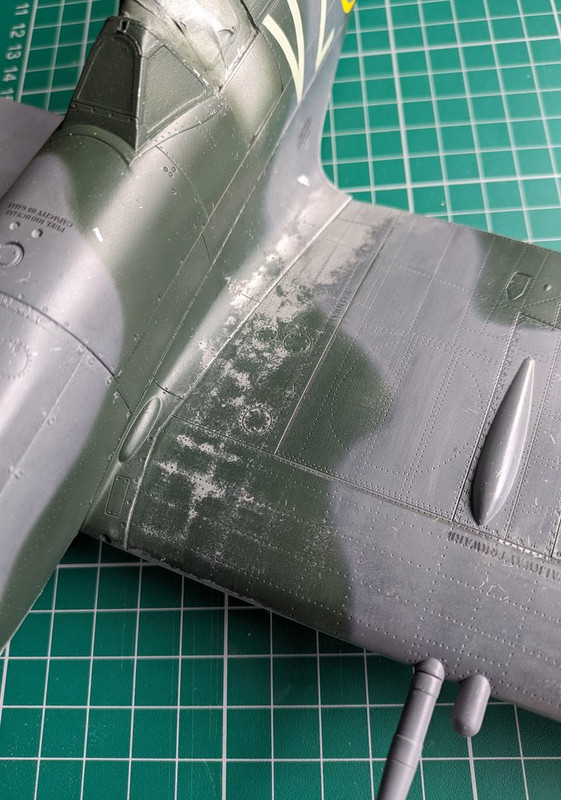
The starboard side also exhibits wear but to a marginally lesser extent.
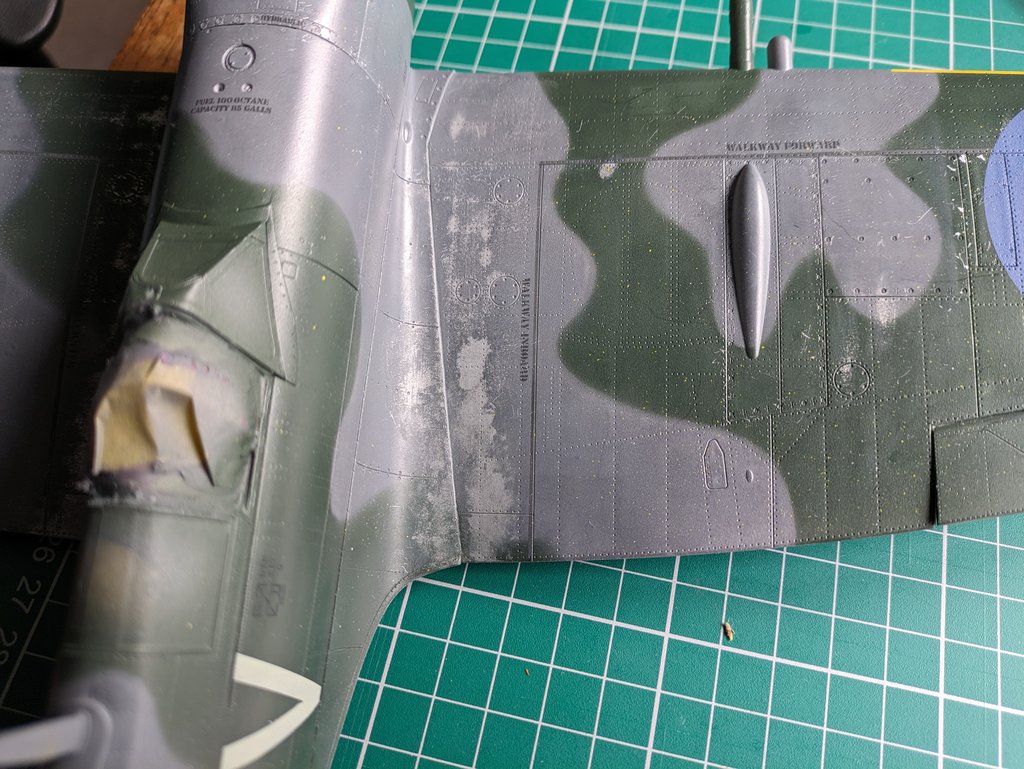
I achieved this using a combination of stippling with an old toothbrush moistened with water and gentle sanding with a micro mesh pad.
Any and all feedback is welcome as are any alternative techniques.
Cheers
- Shoggz, patricksparks, Dadeo911 and 10 others
-
13
-
Hi Mike, she looks good on my device.
Gloss finishes often benefit from some light sanding and buffing.
I generally use distilled water when I thin Vallejo paints without issue.
They do produce their own thinner and airbrush cleaners also.
I'm eager to see the red go on.
Keep at it.

Cheers


Pussycat Zipper FINISHED
in Works in Progress
Posted
Very nice