

Anthony in NZ
-
Posts
4,868 -
Joined
-
Last visited
-
Days Won
29
Content Type
Profiles
Forums
Events
Posts posted by Anthony in NZ
-
-
On 10/2/2023 at 7:31 PM, mozart said:
You continue to amaze me every time I look at an update Anthony! That side shot is sheer sublime beauty.
Thanks buddy! I went back and looked at that pic after your comment and finally saw a Brit Toom and not a Tamiya F-4J
On 10/3/2023 at 9:46 PM, TheBaron said:The sense of physical presence which you have given to something named a Phantom is quite uncanny Anthony. Pretty sure there's an Arthur Machen story about one of your builds...
LOL that's very poetic of you my friend!
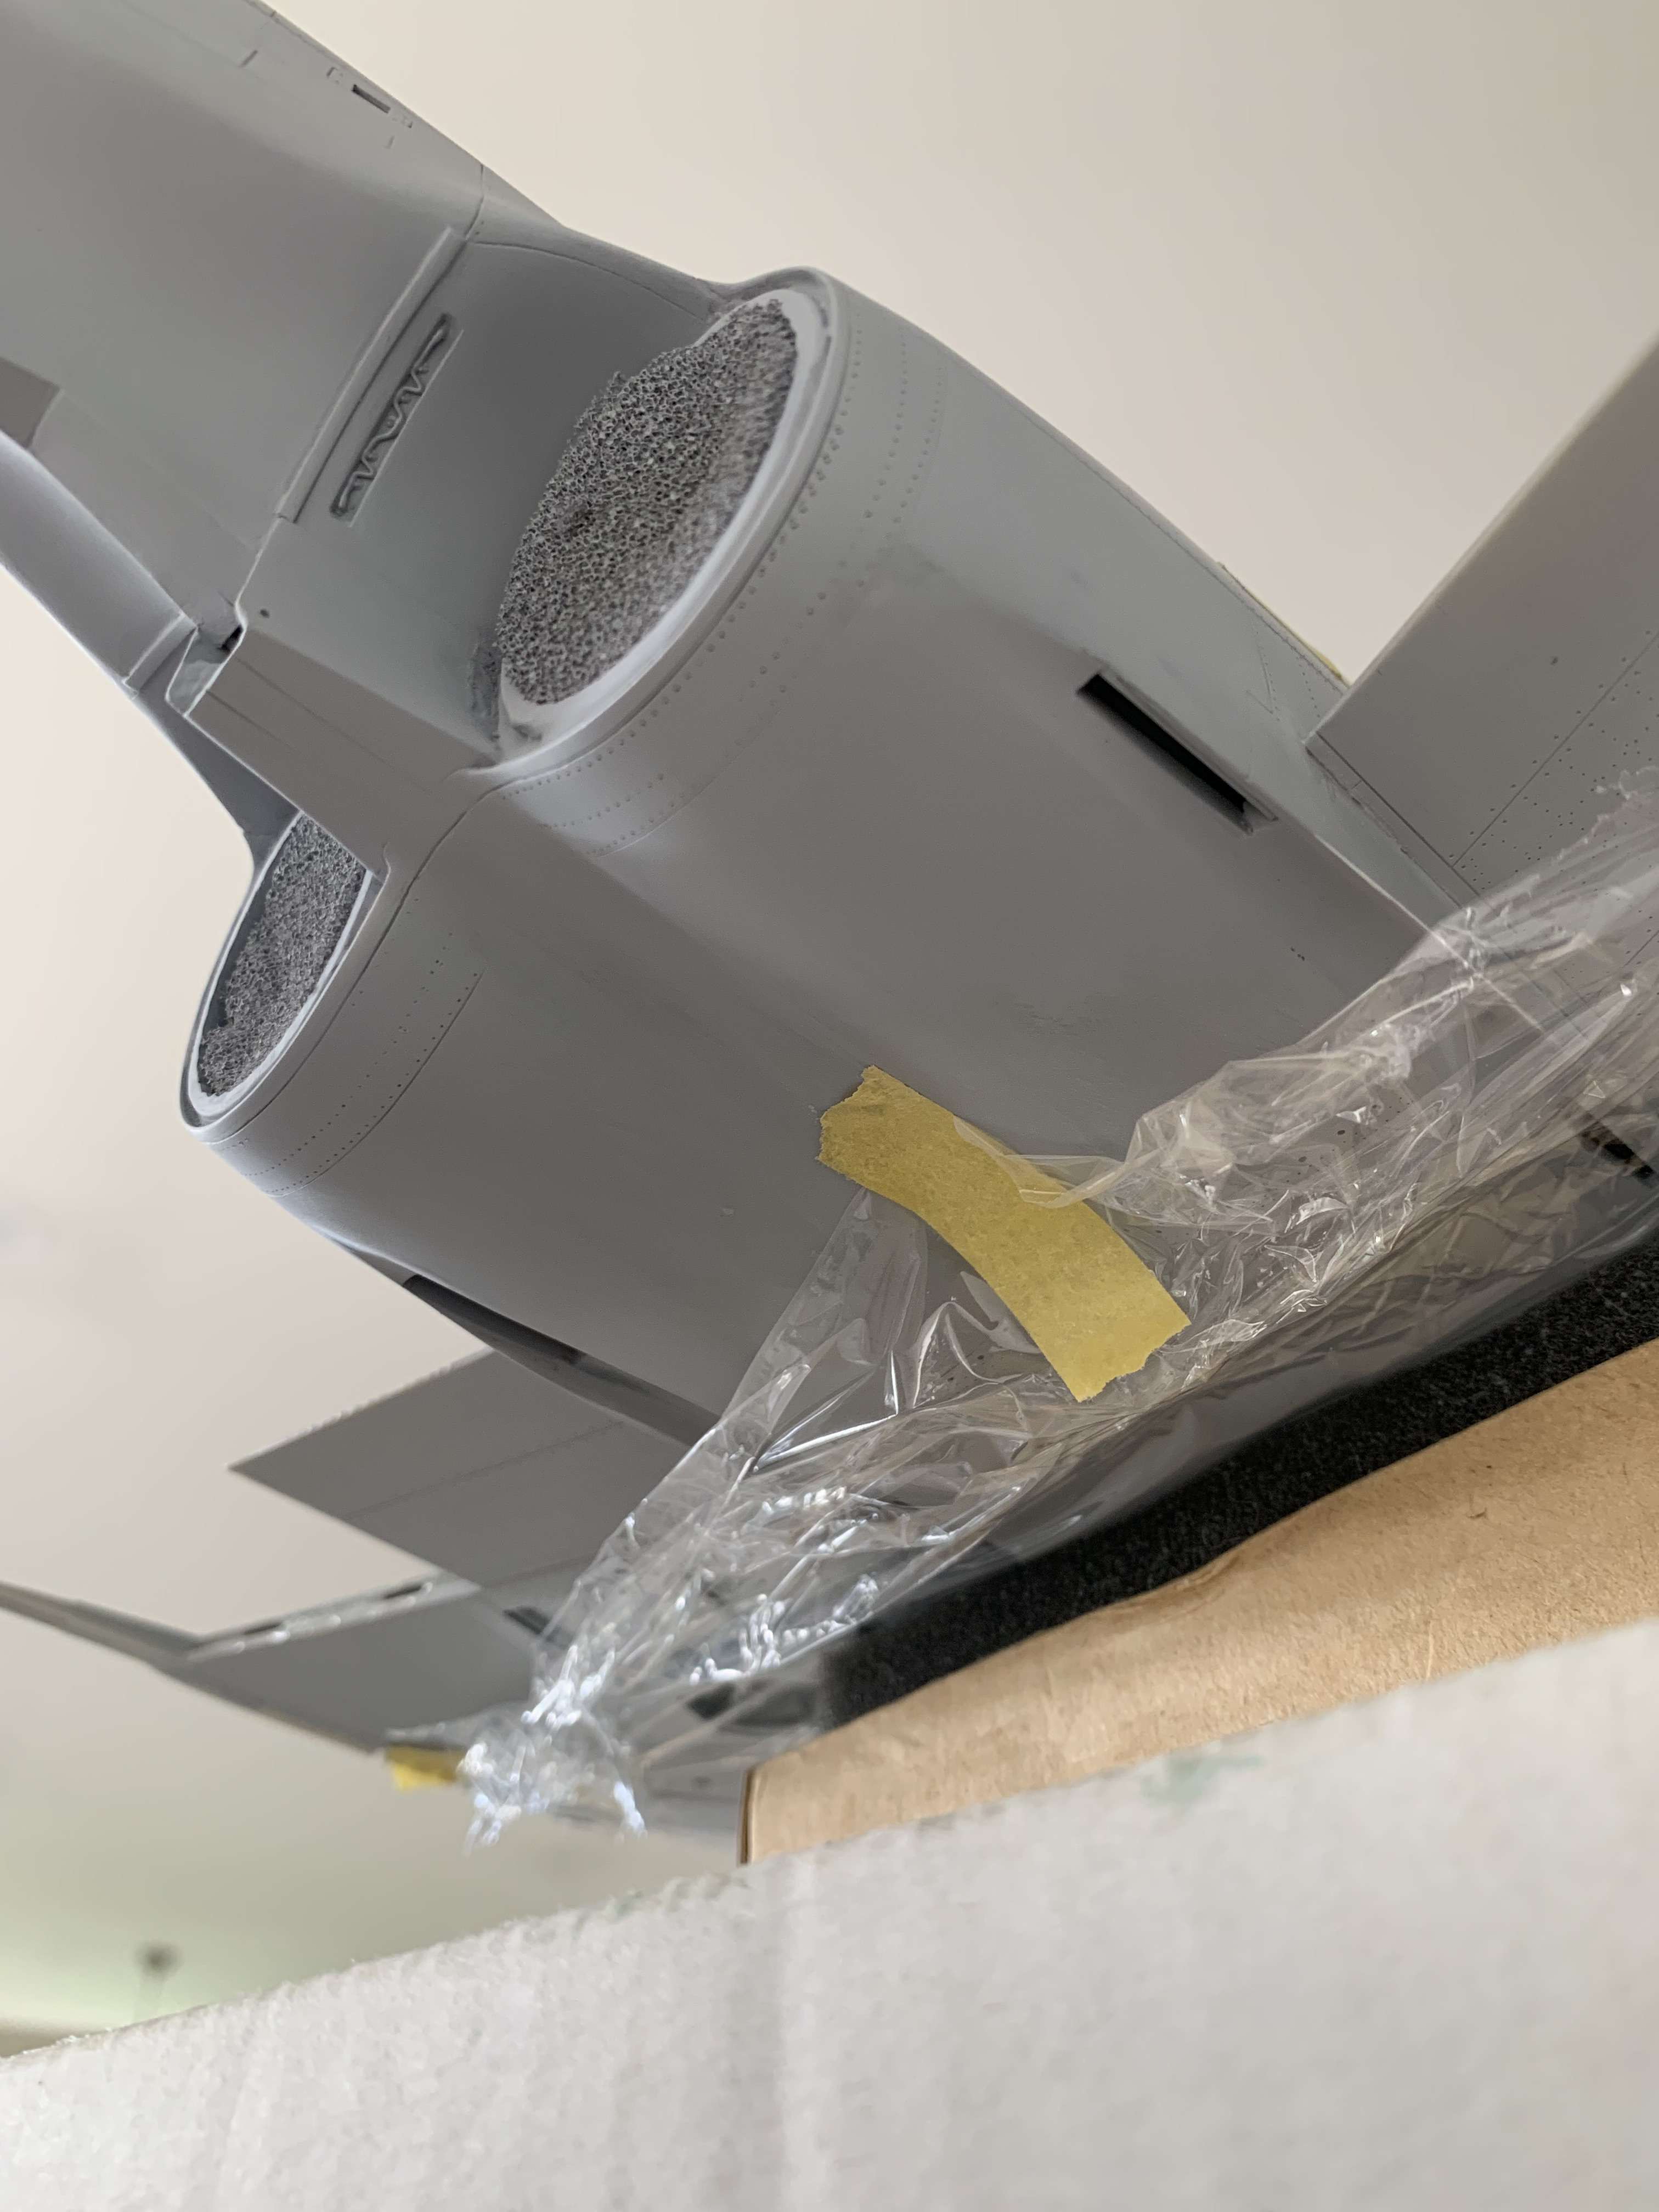
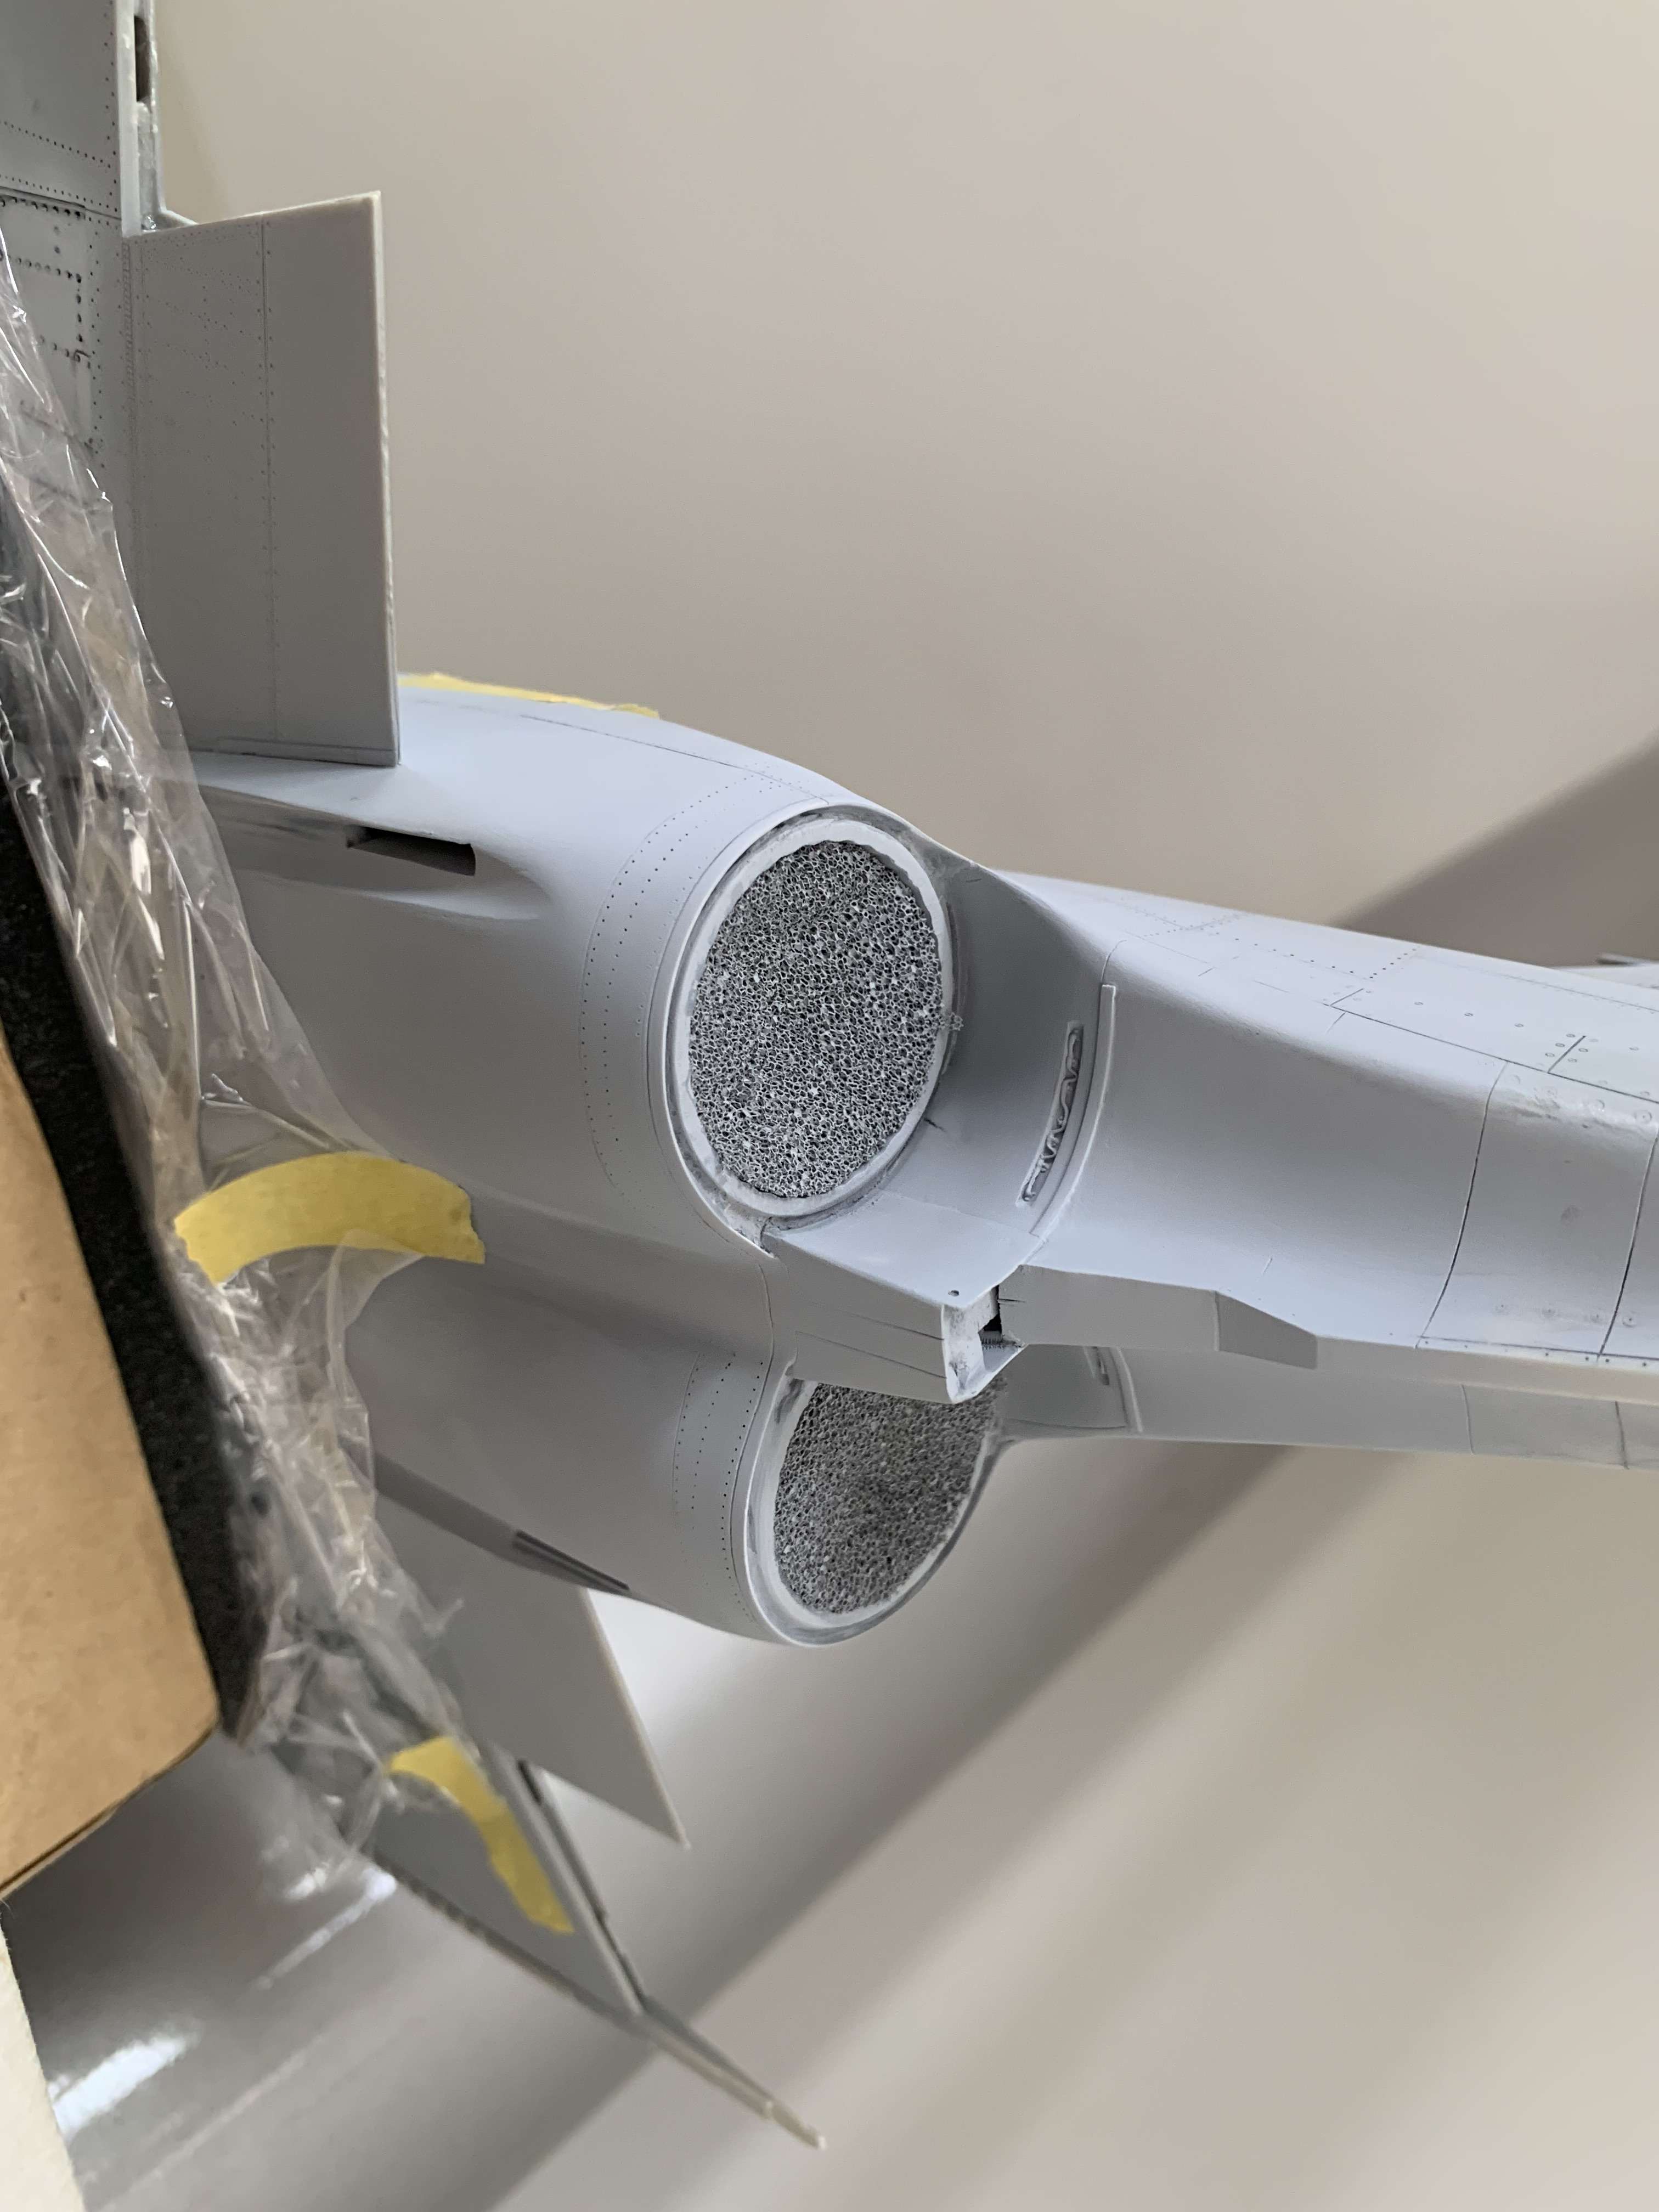
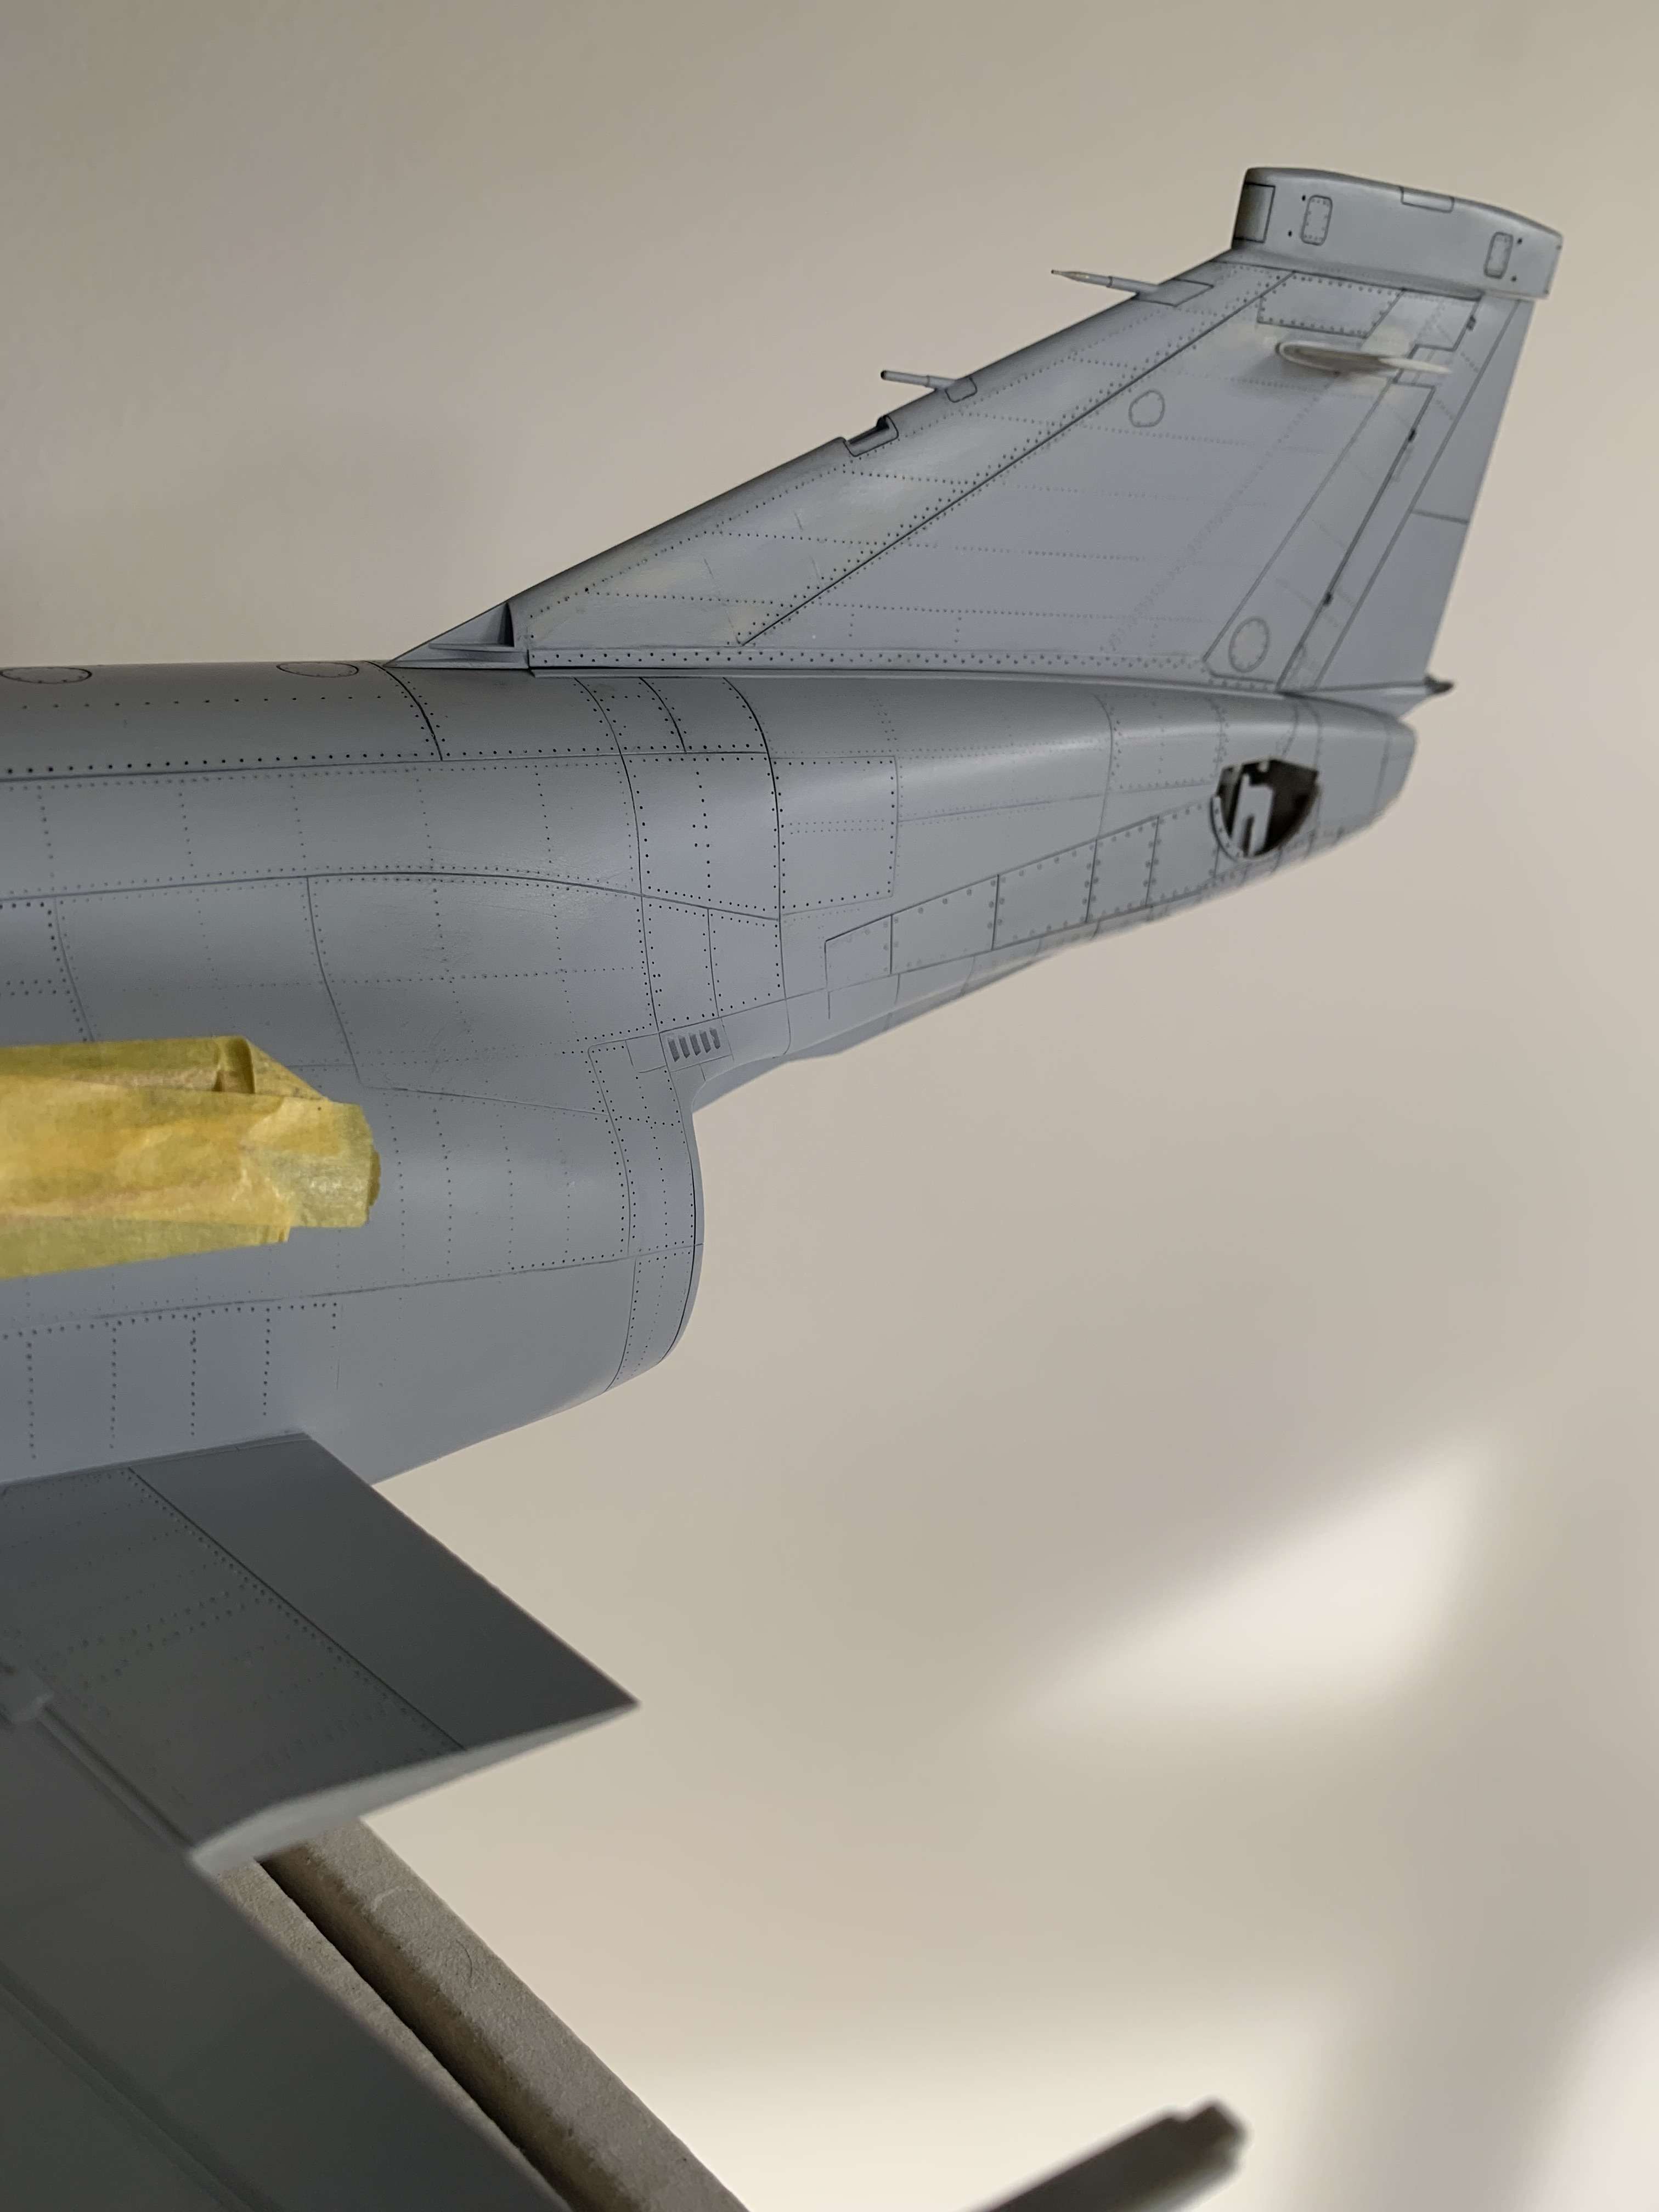
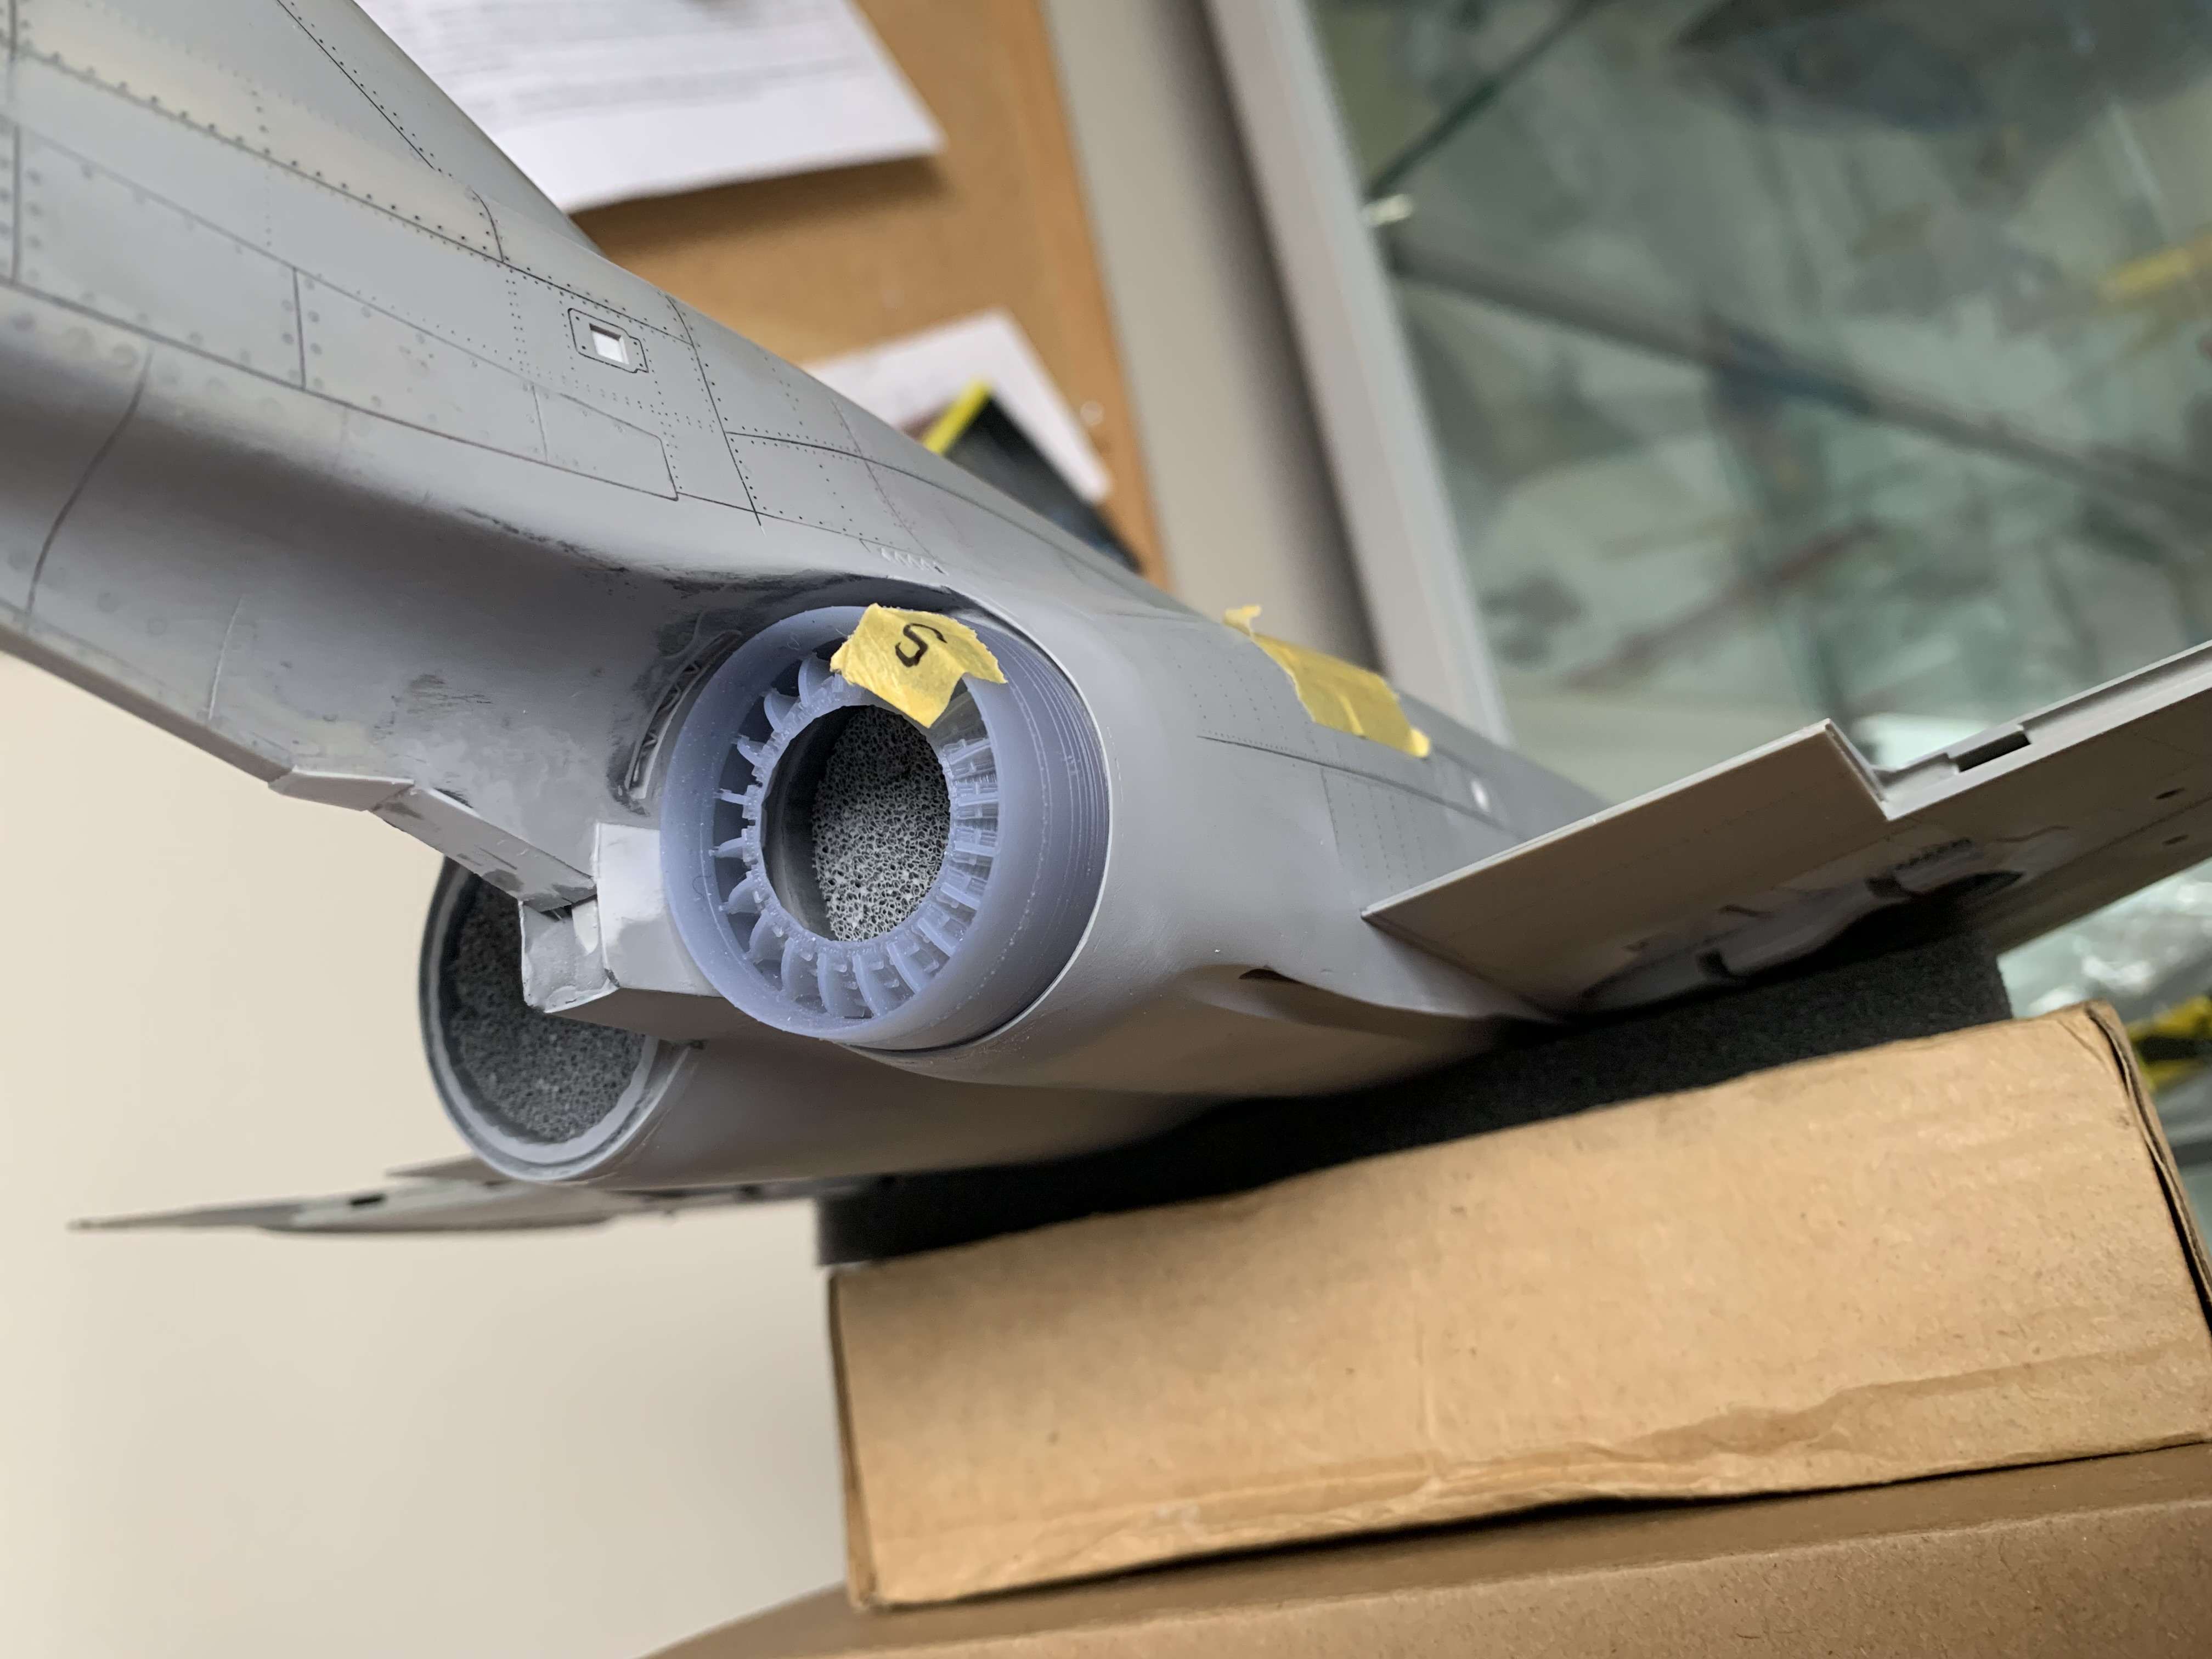
So I have actually still been grabbing time at the bench every chance I get and its still a process of smaller details.
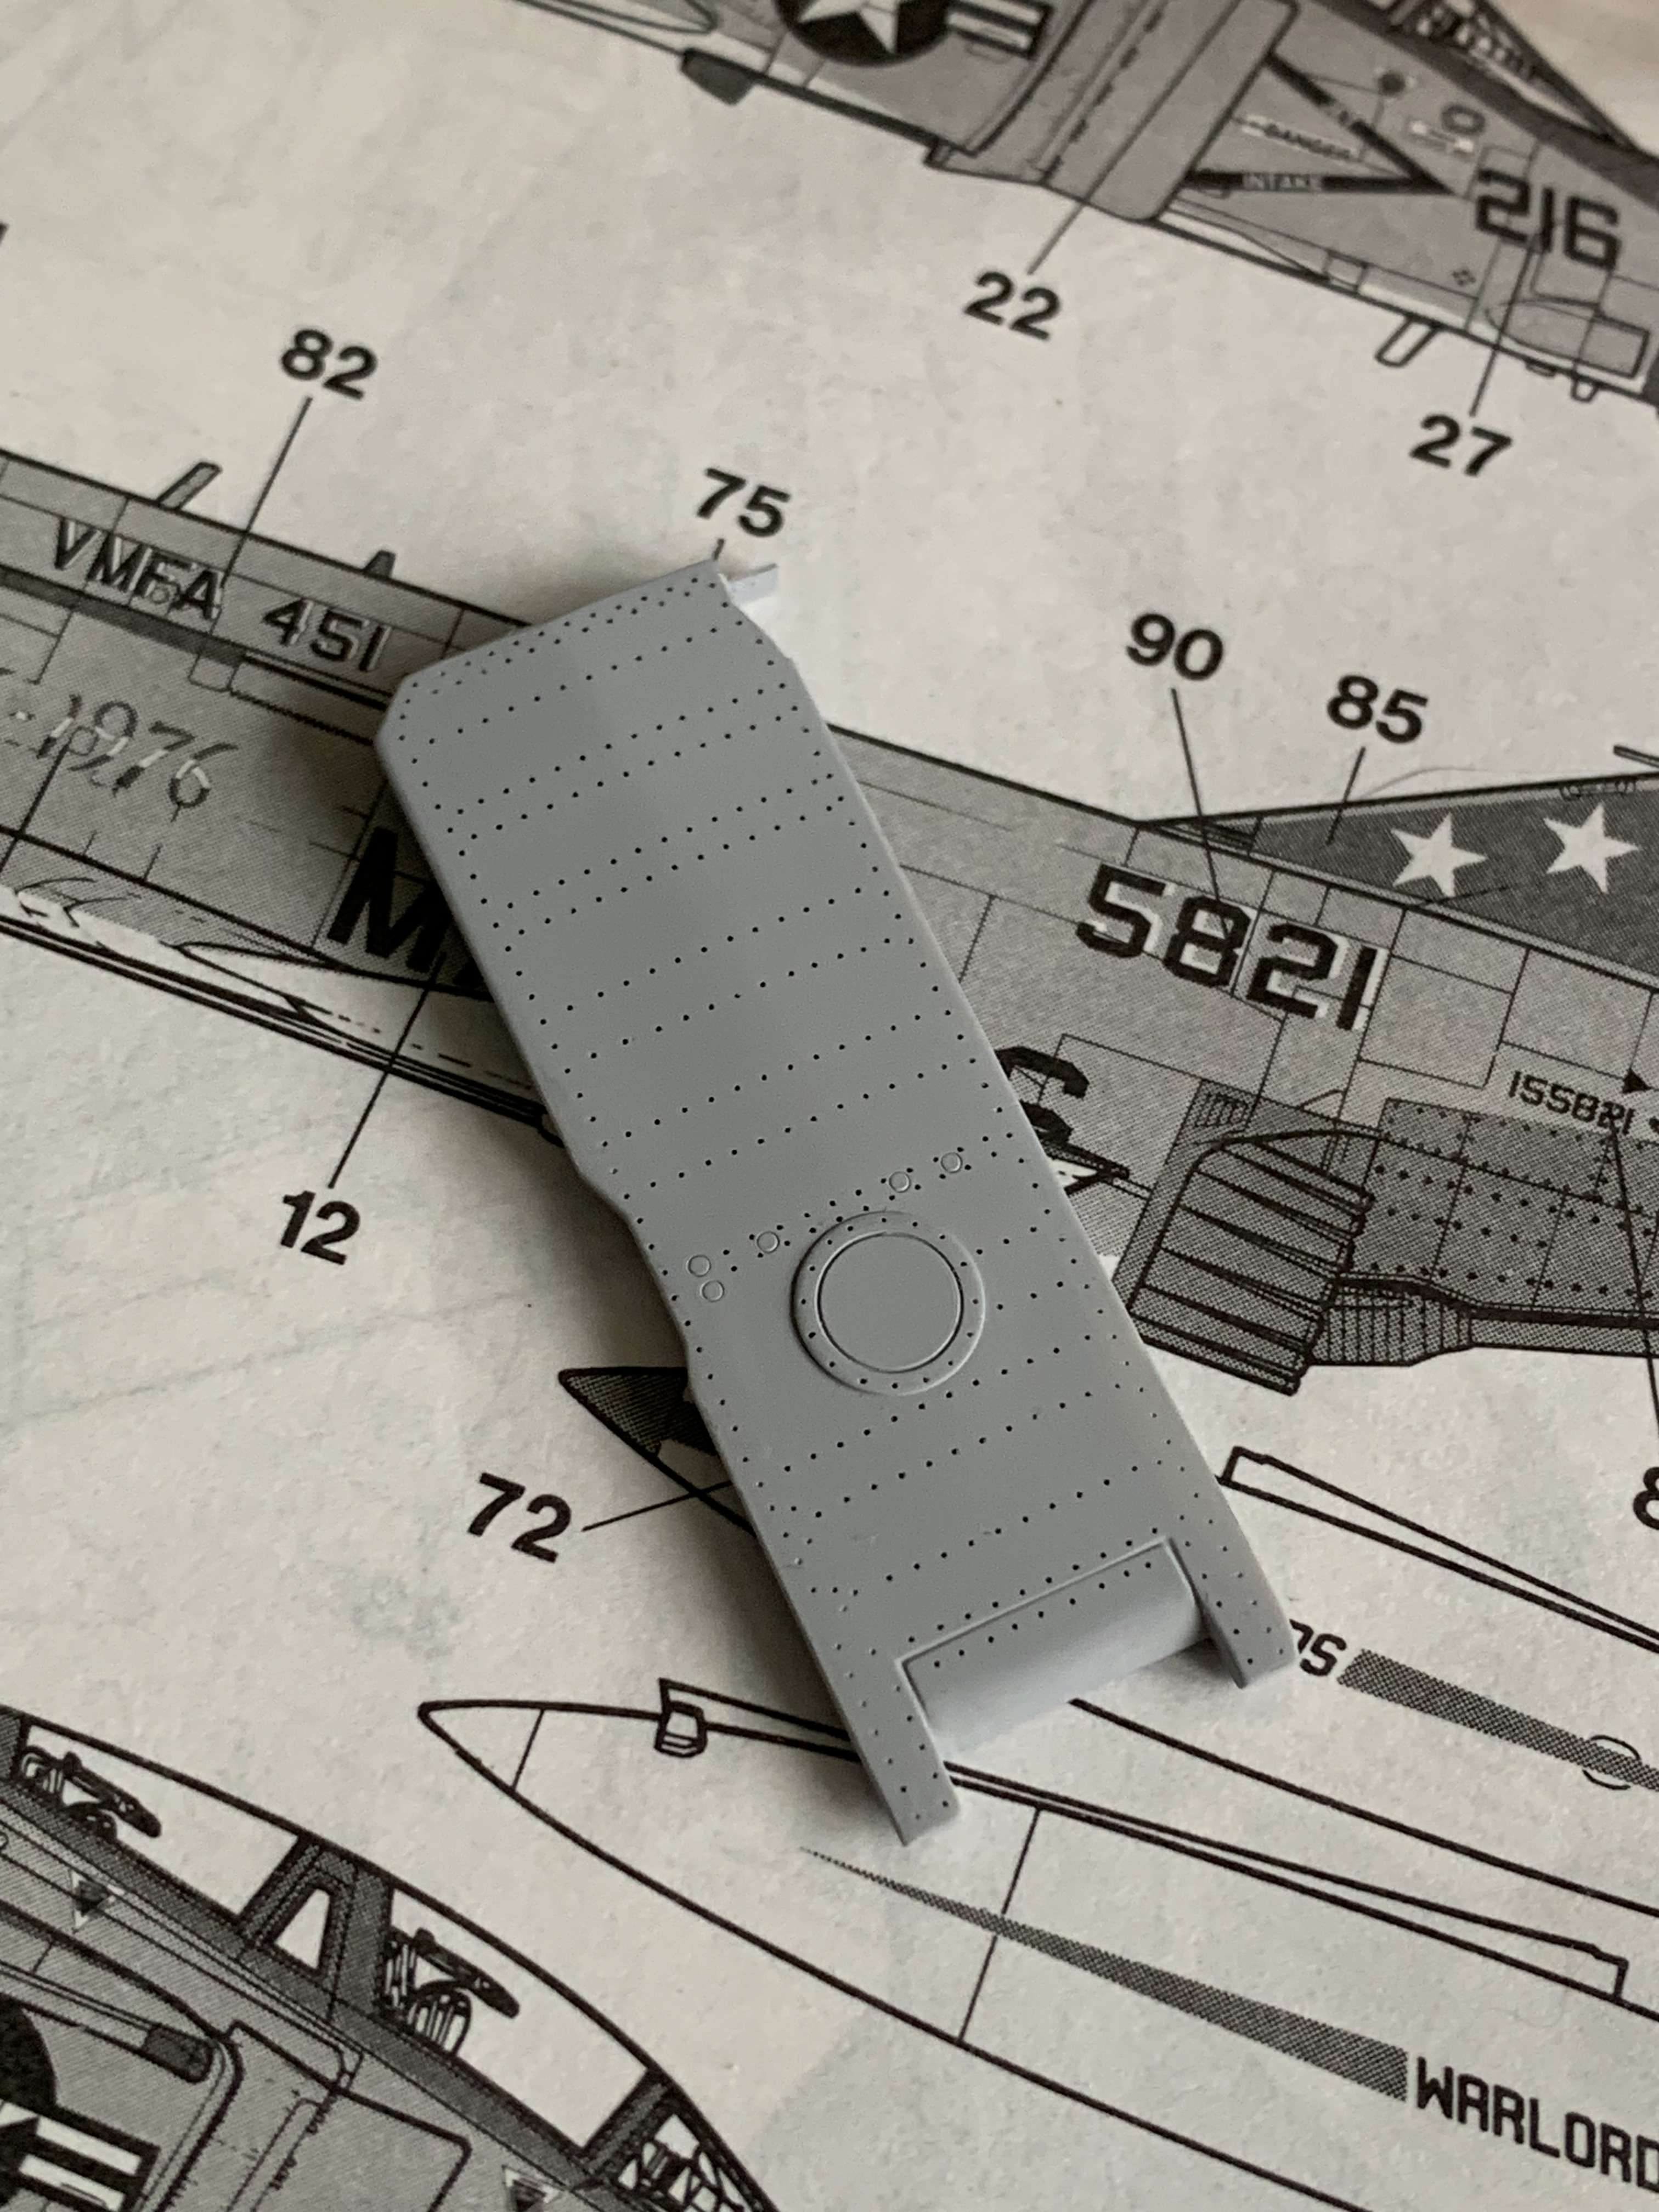
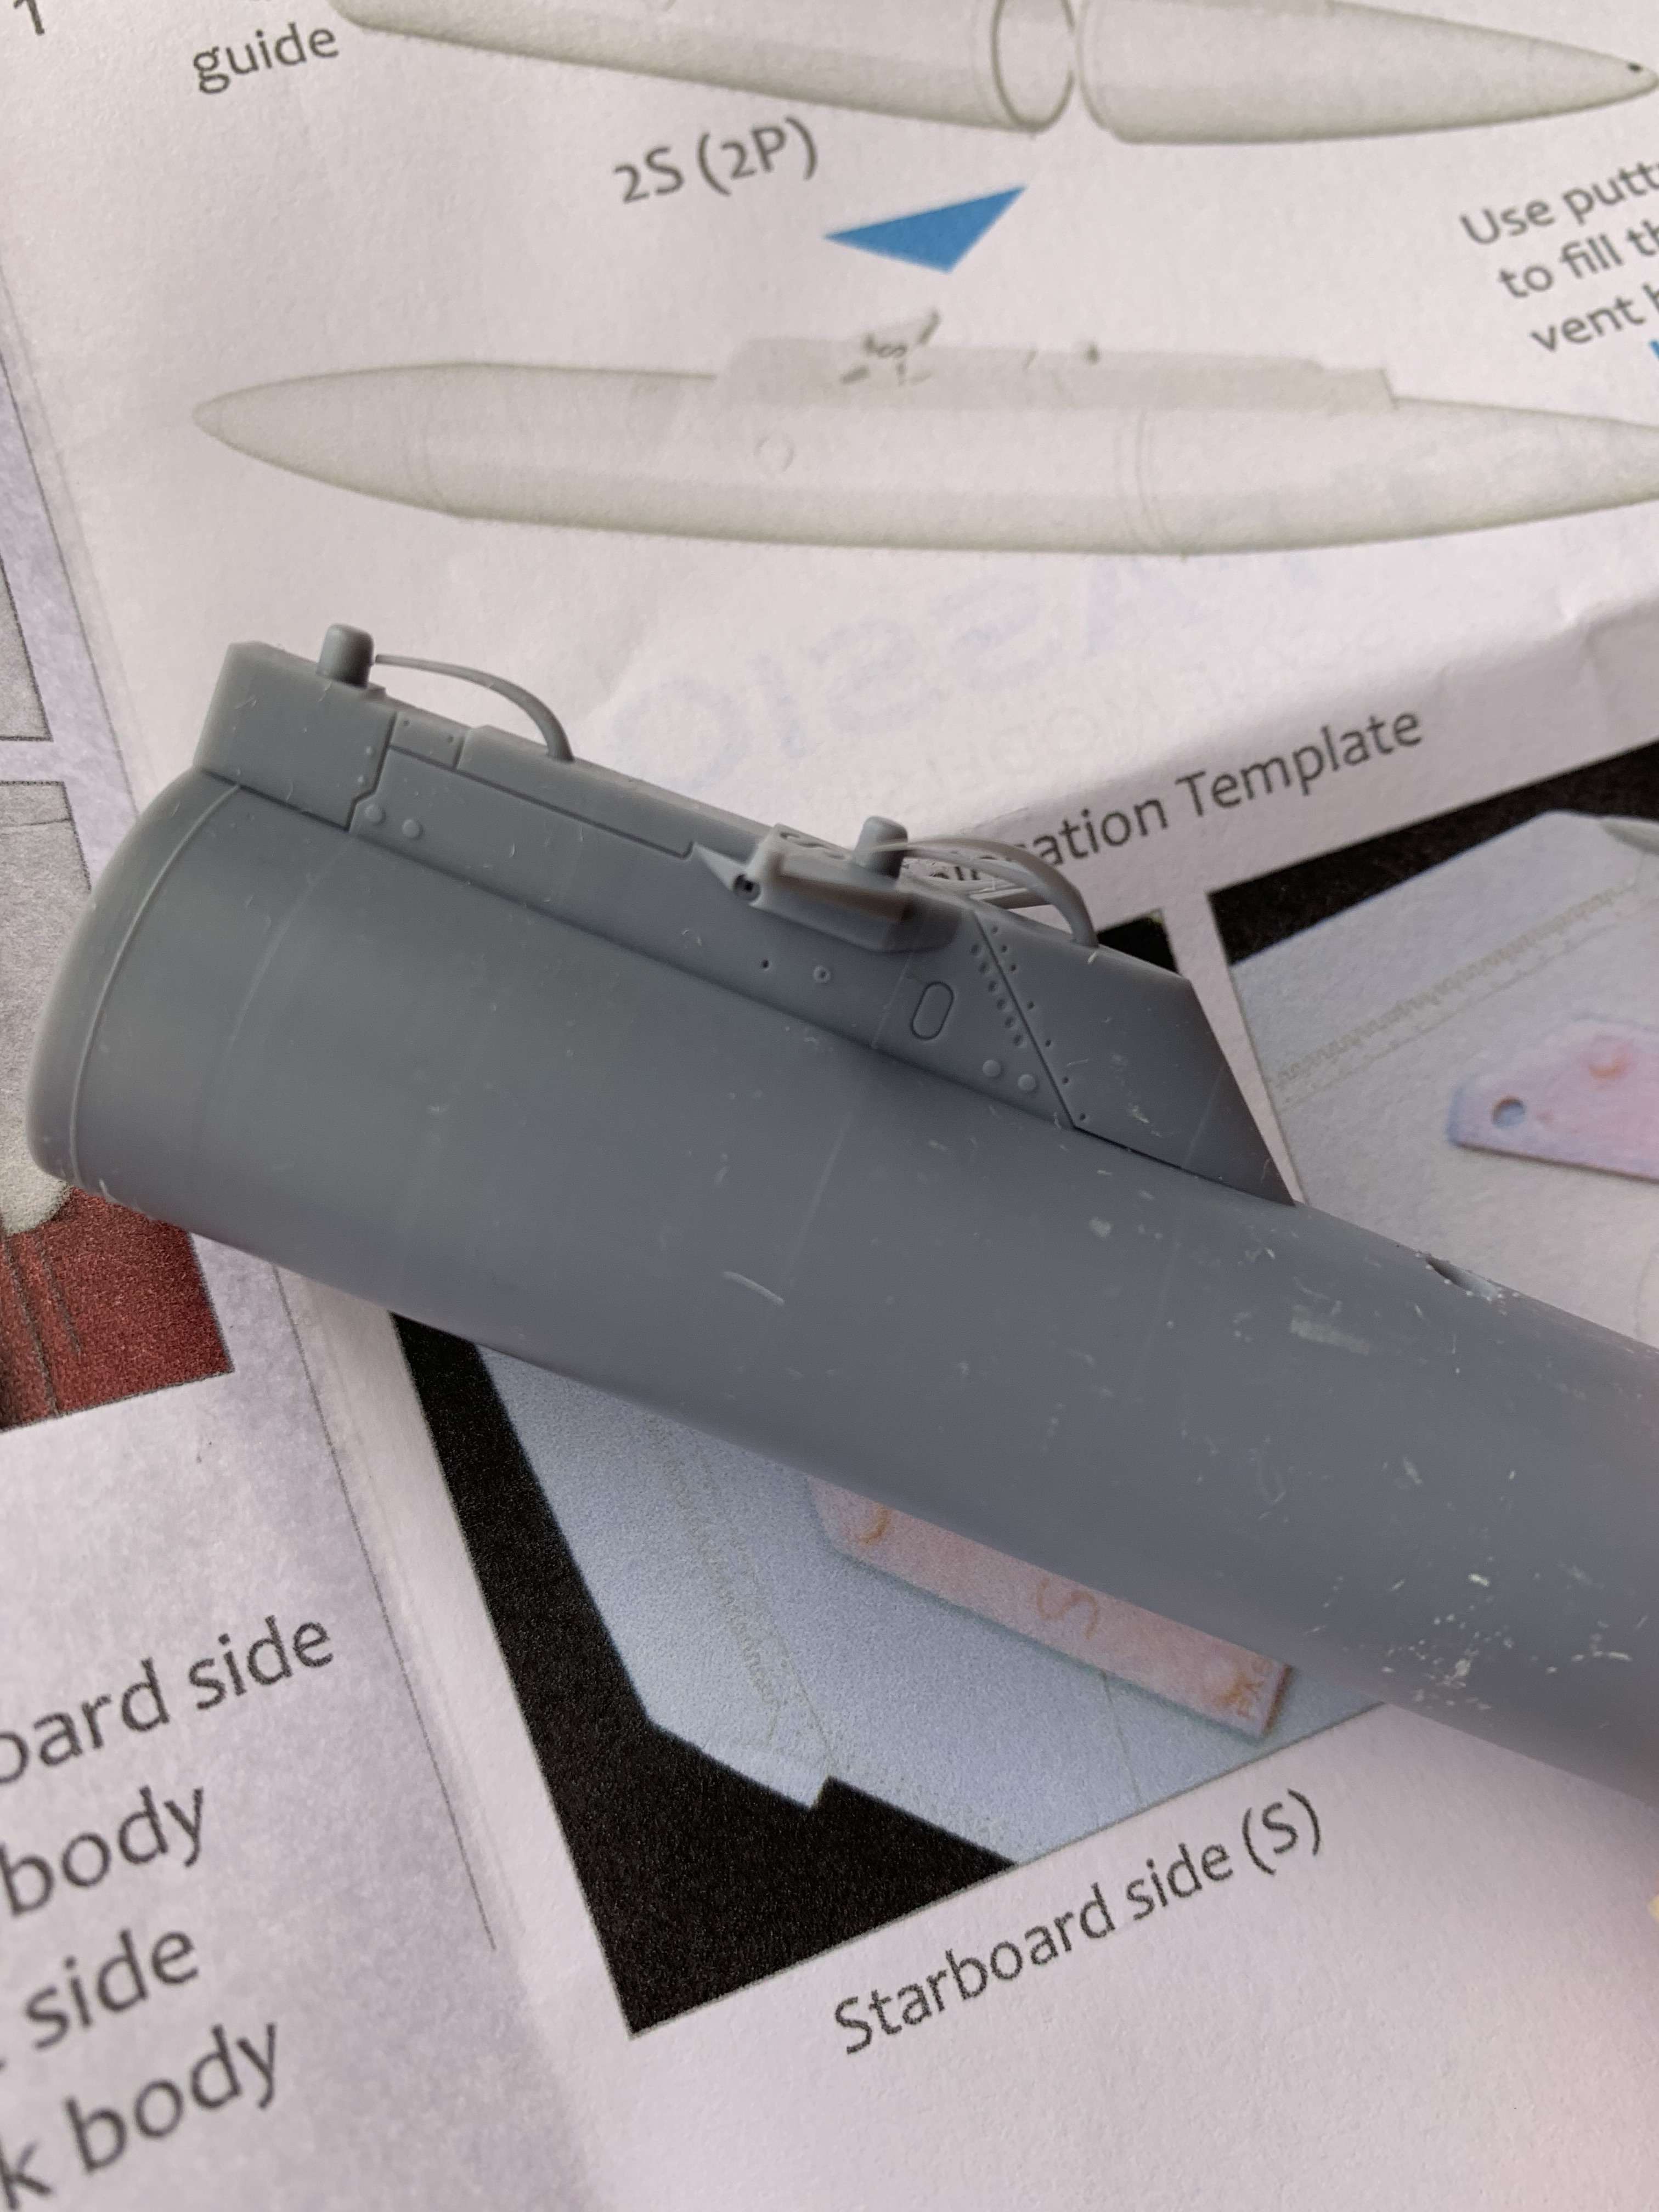
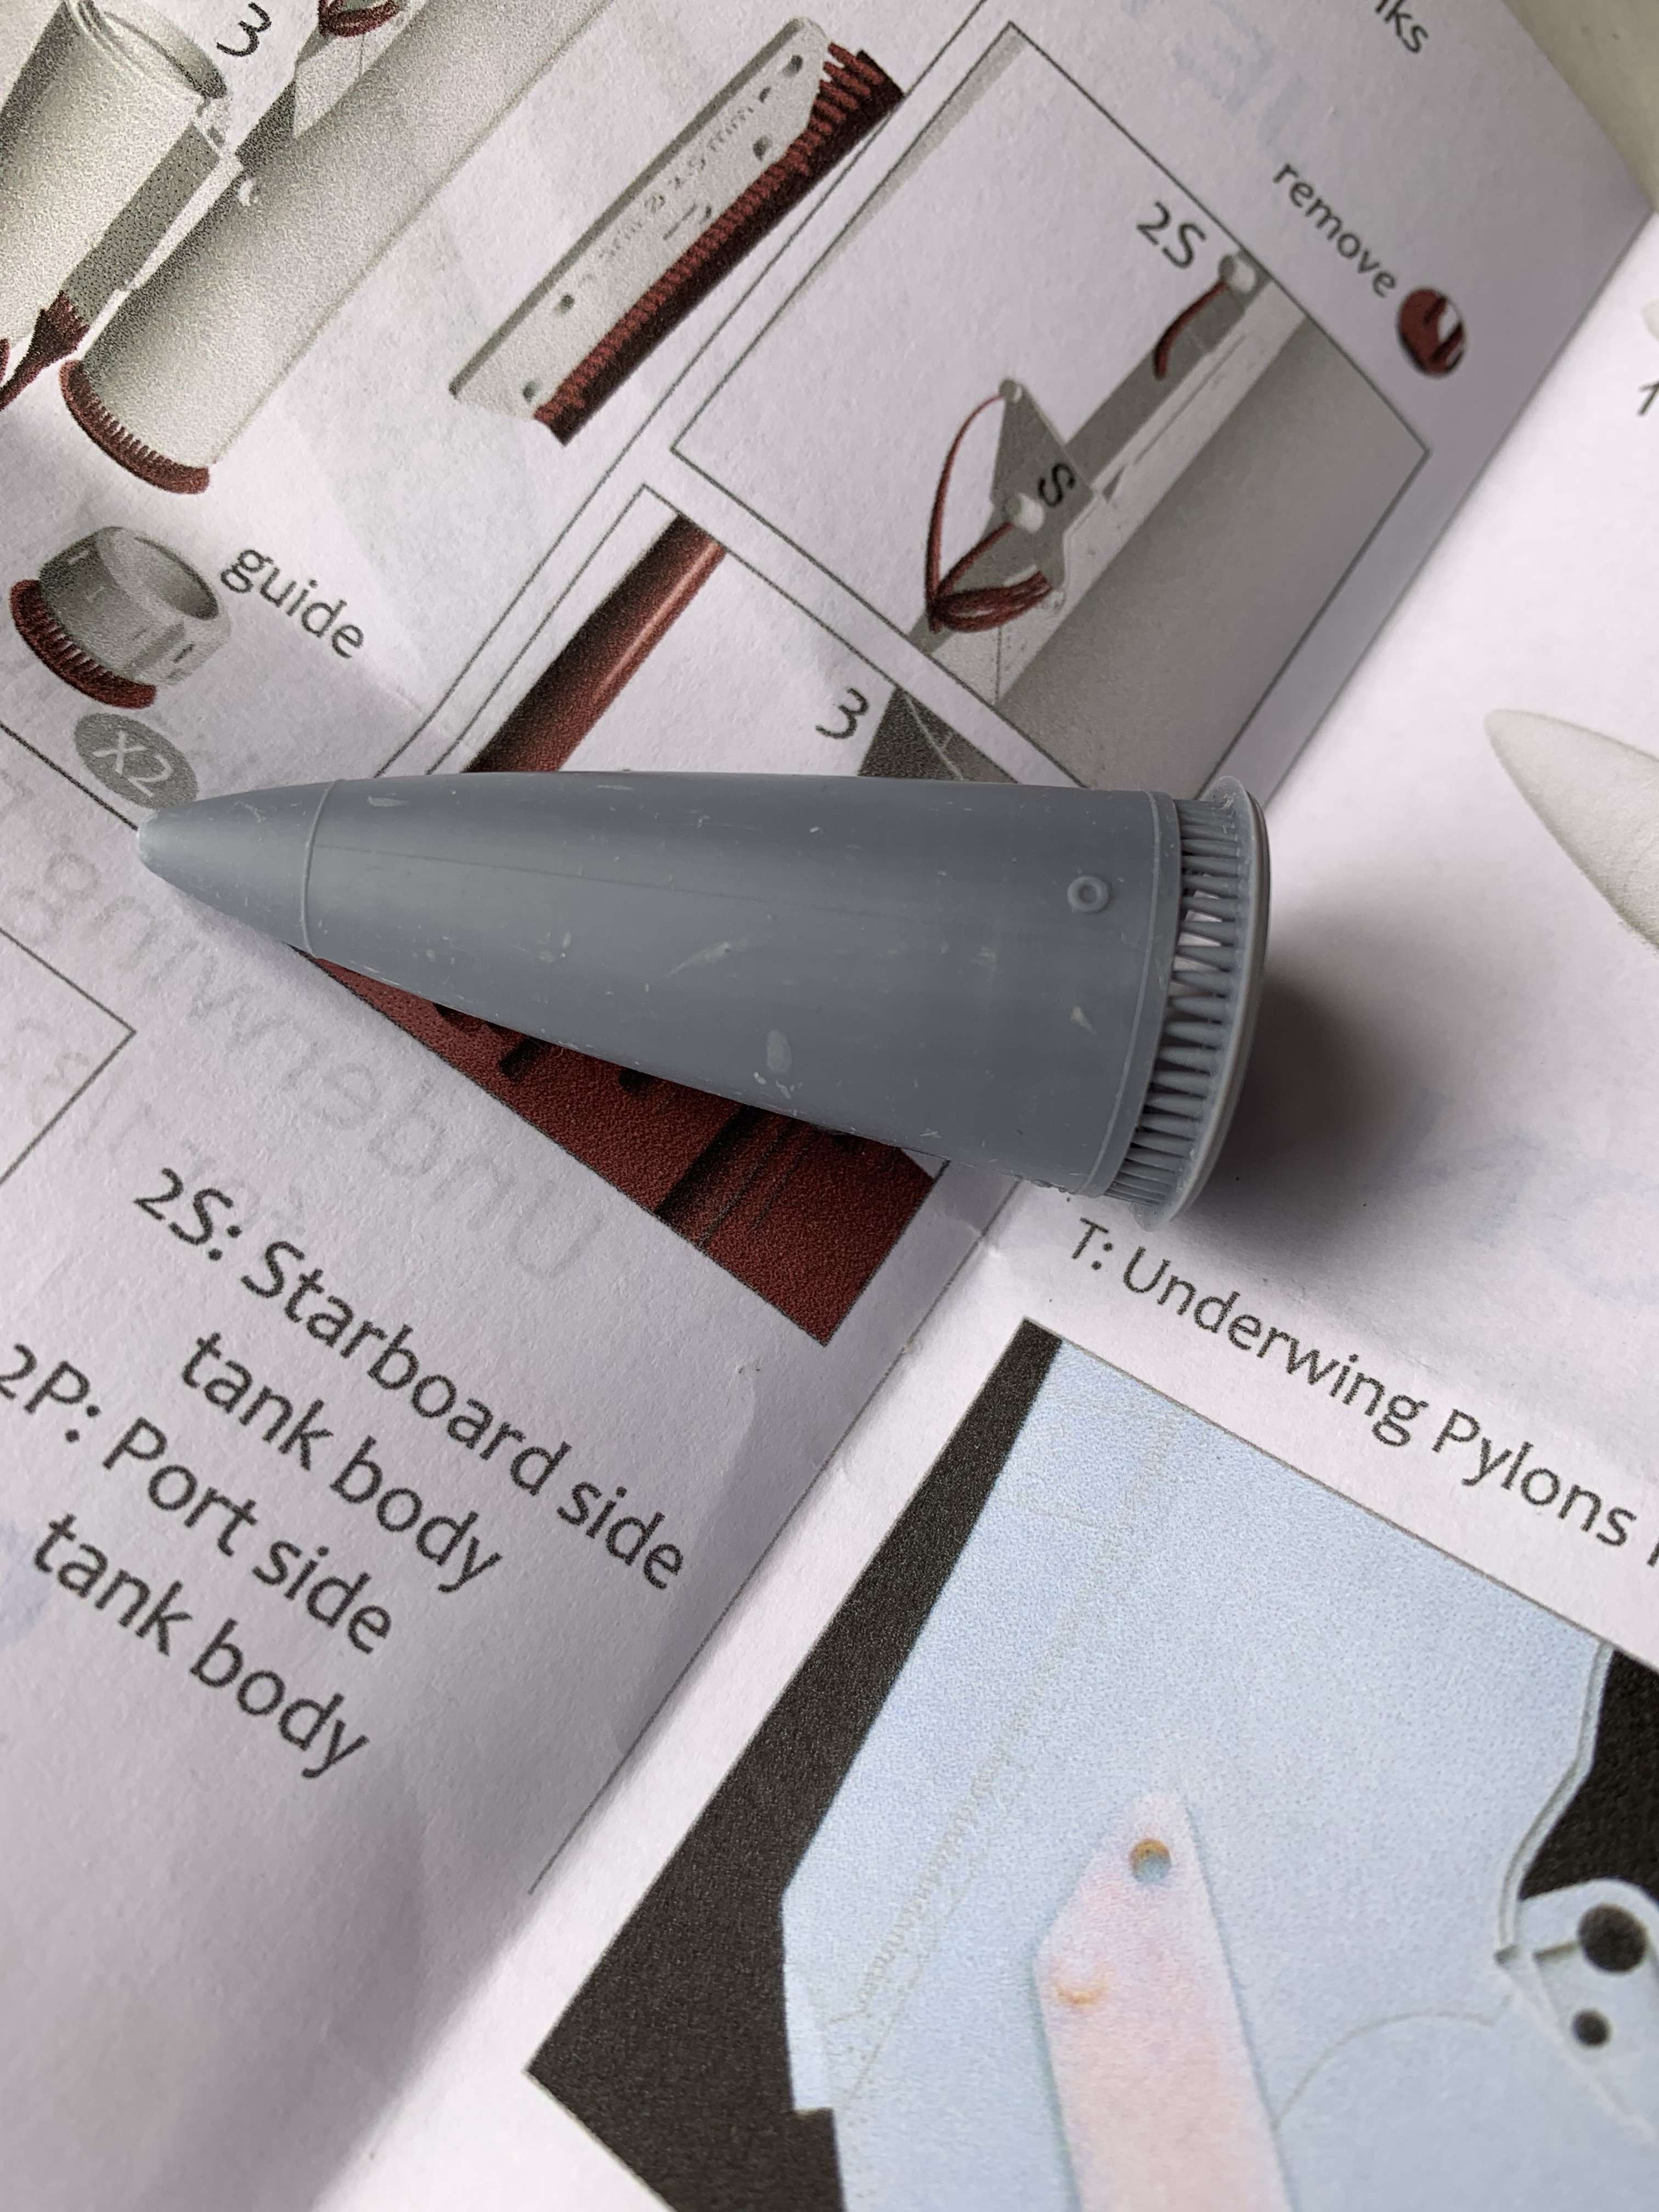
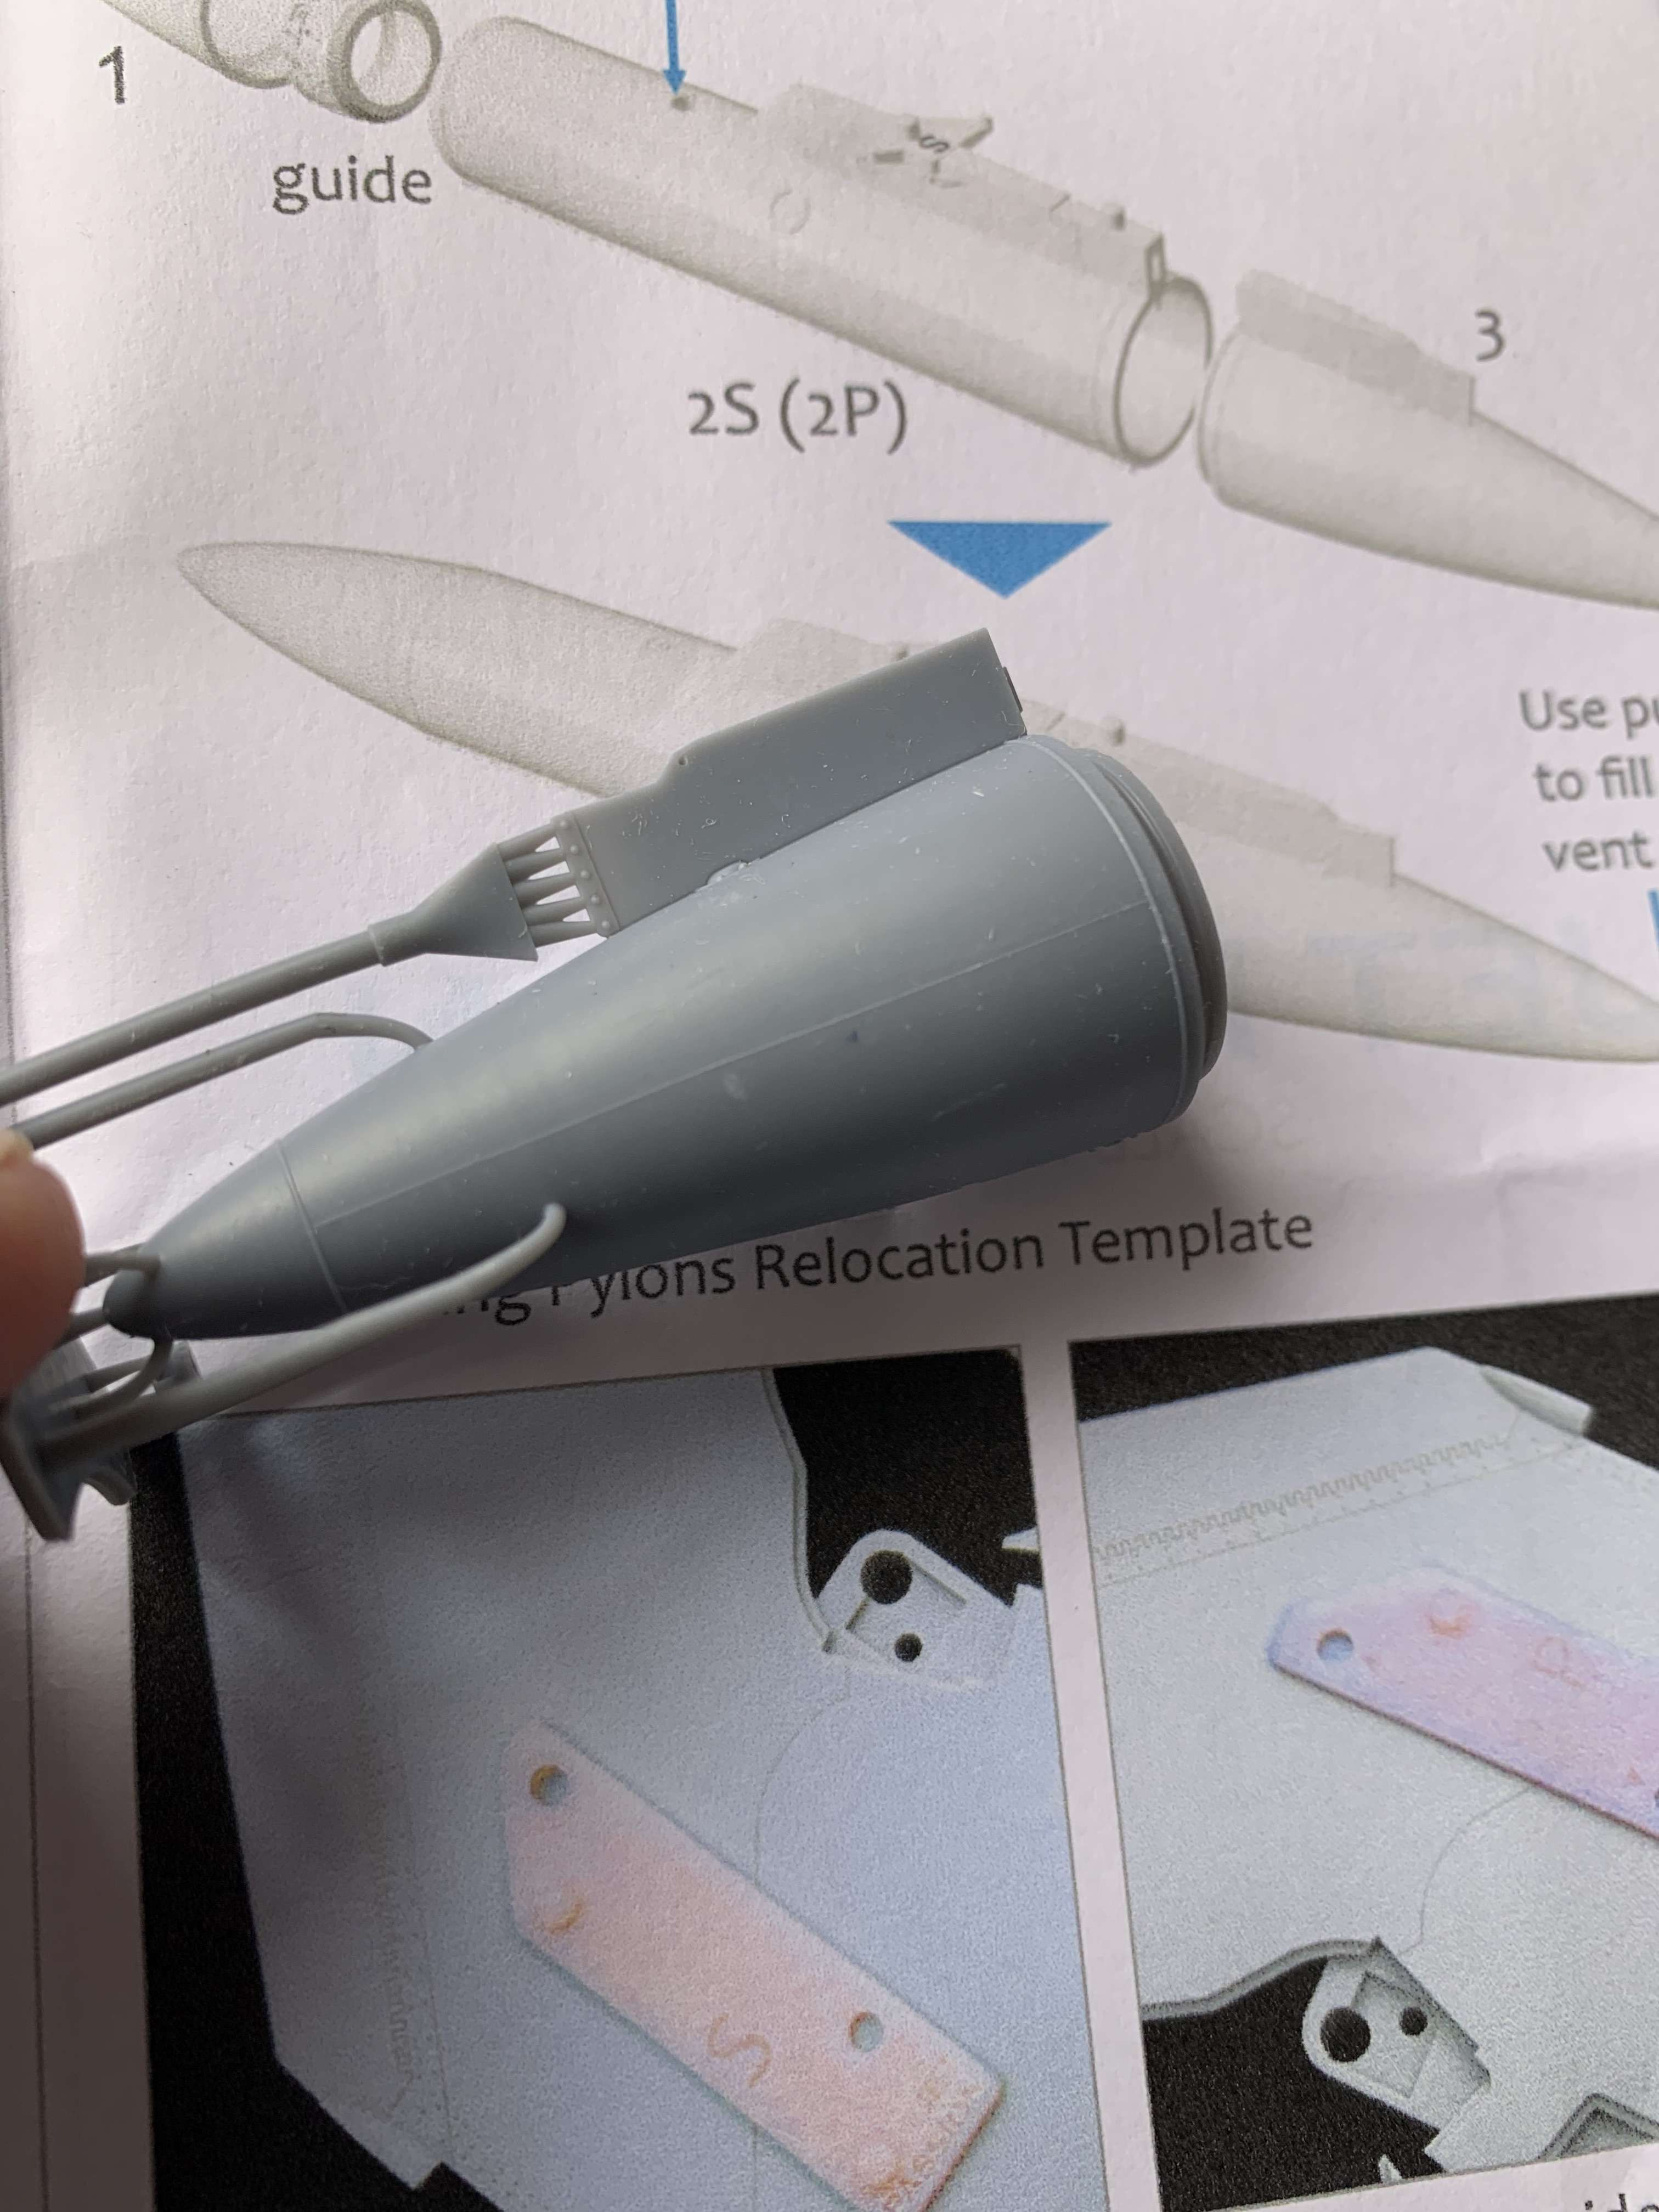
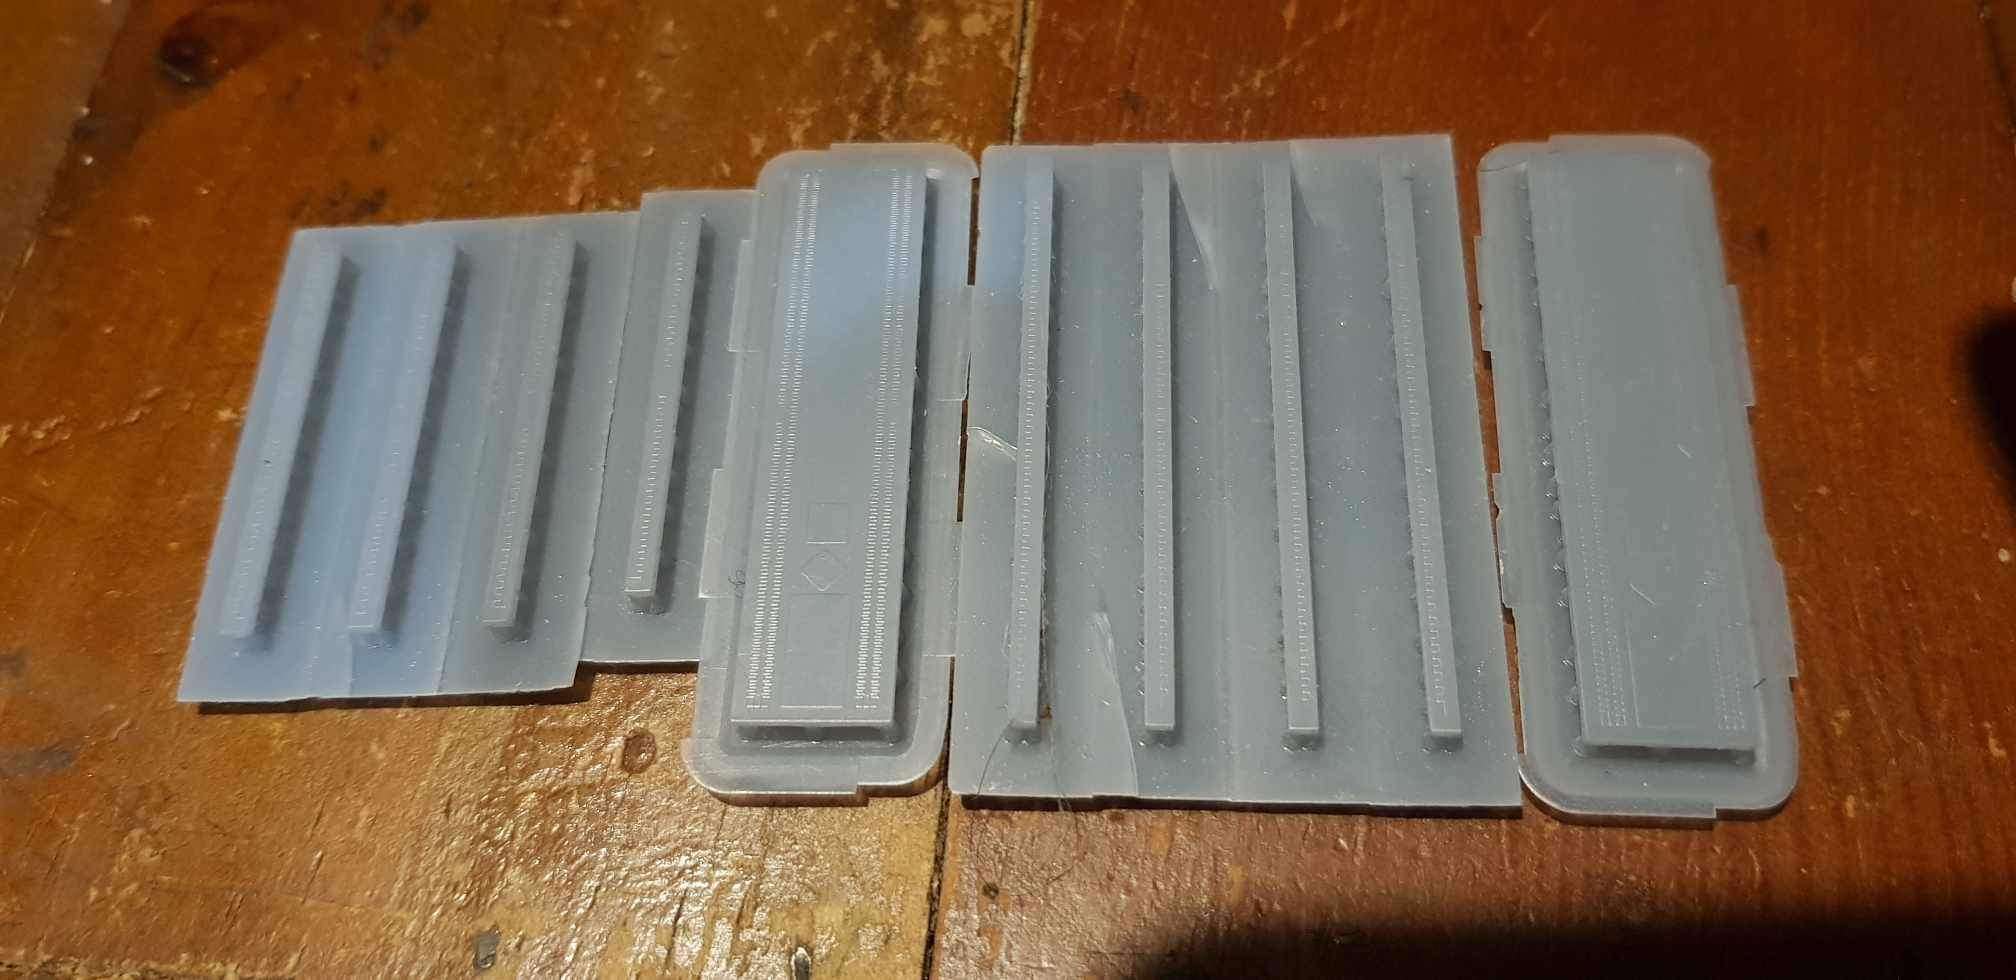
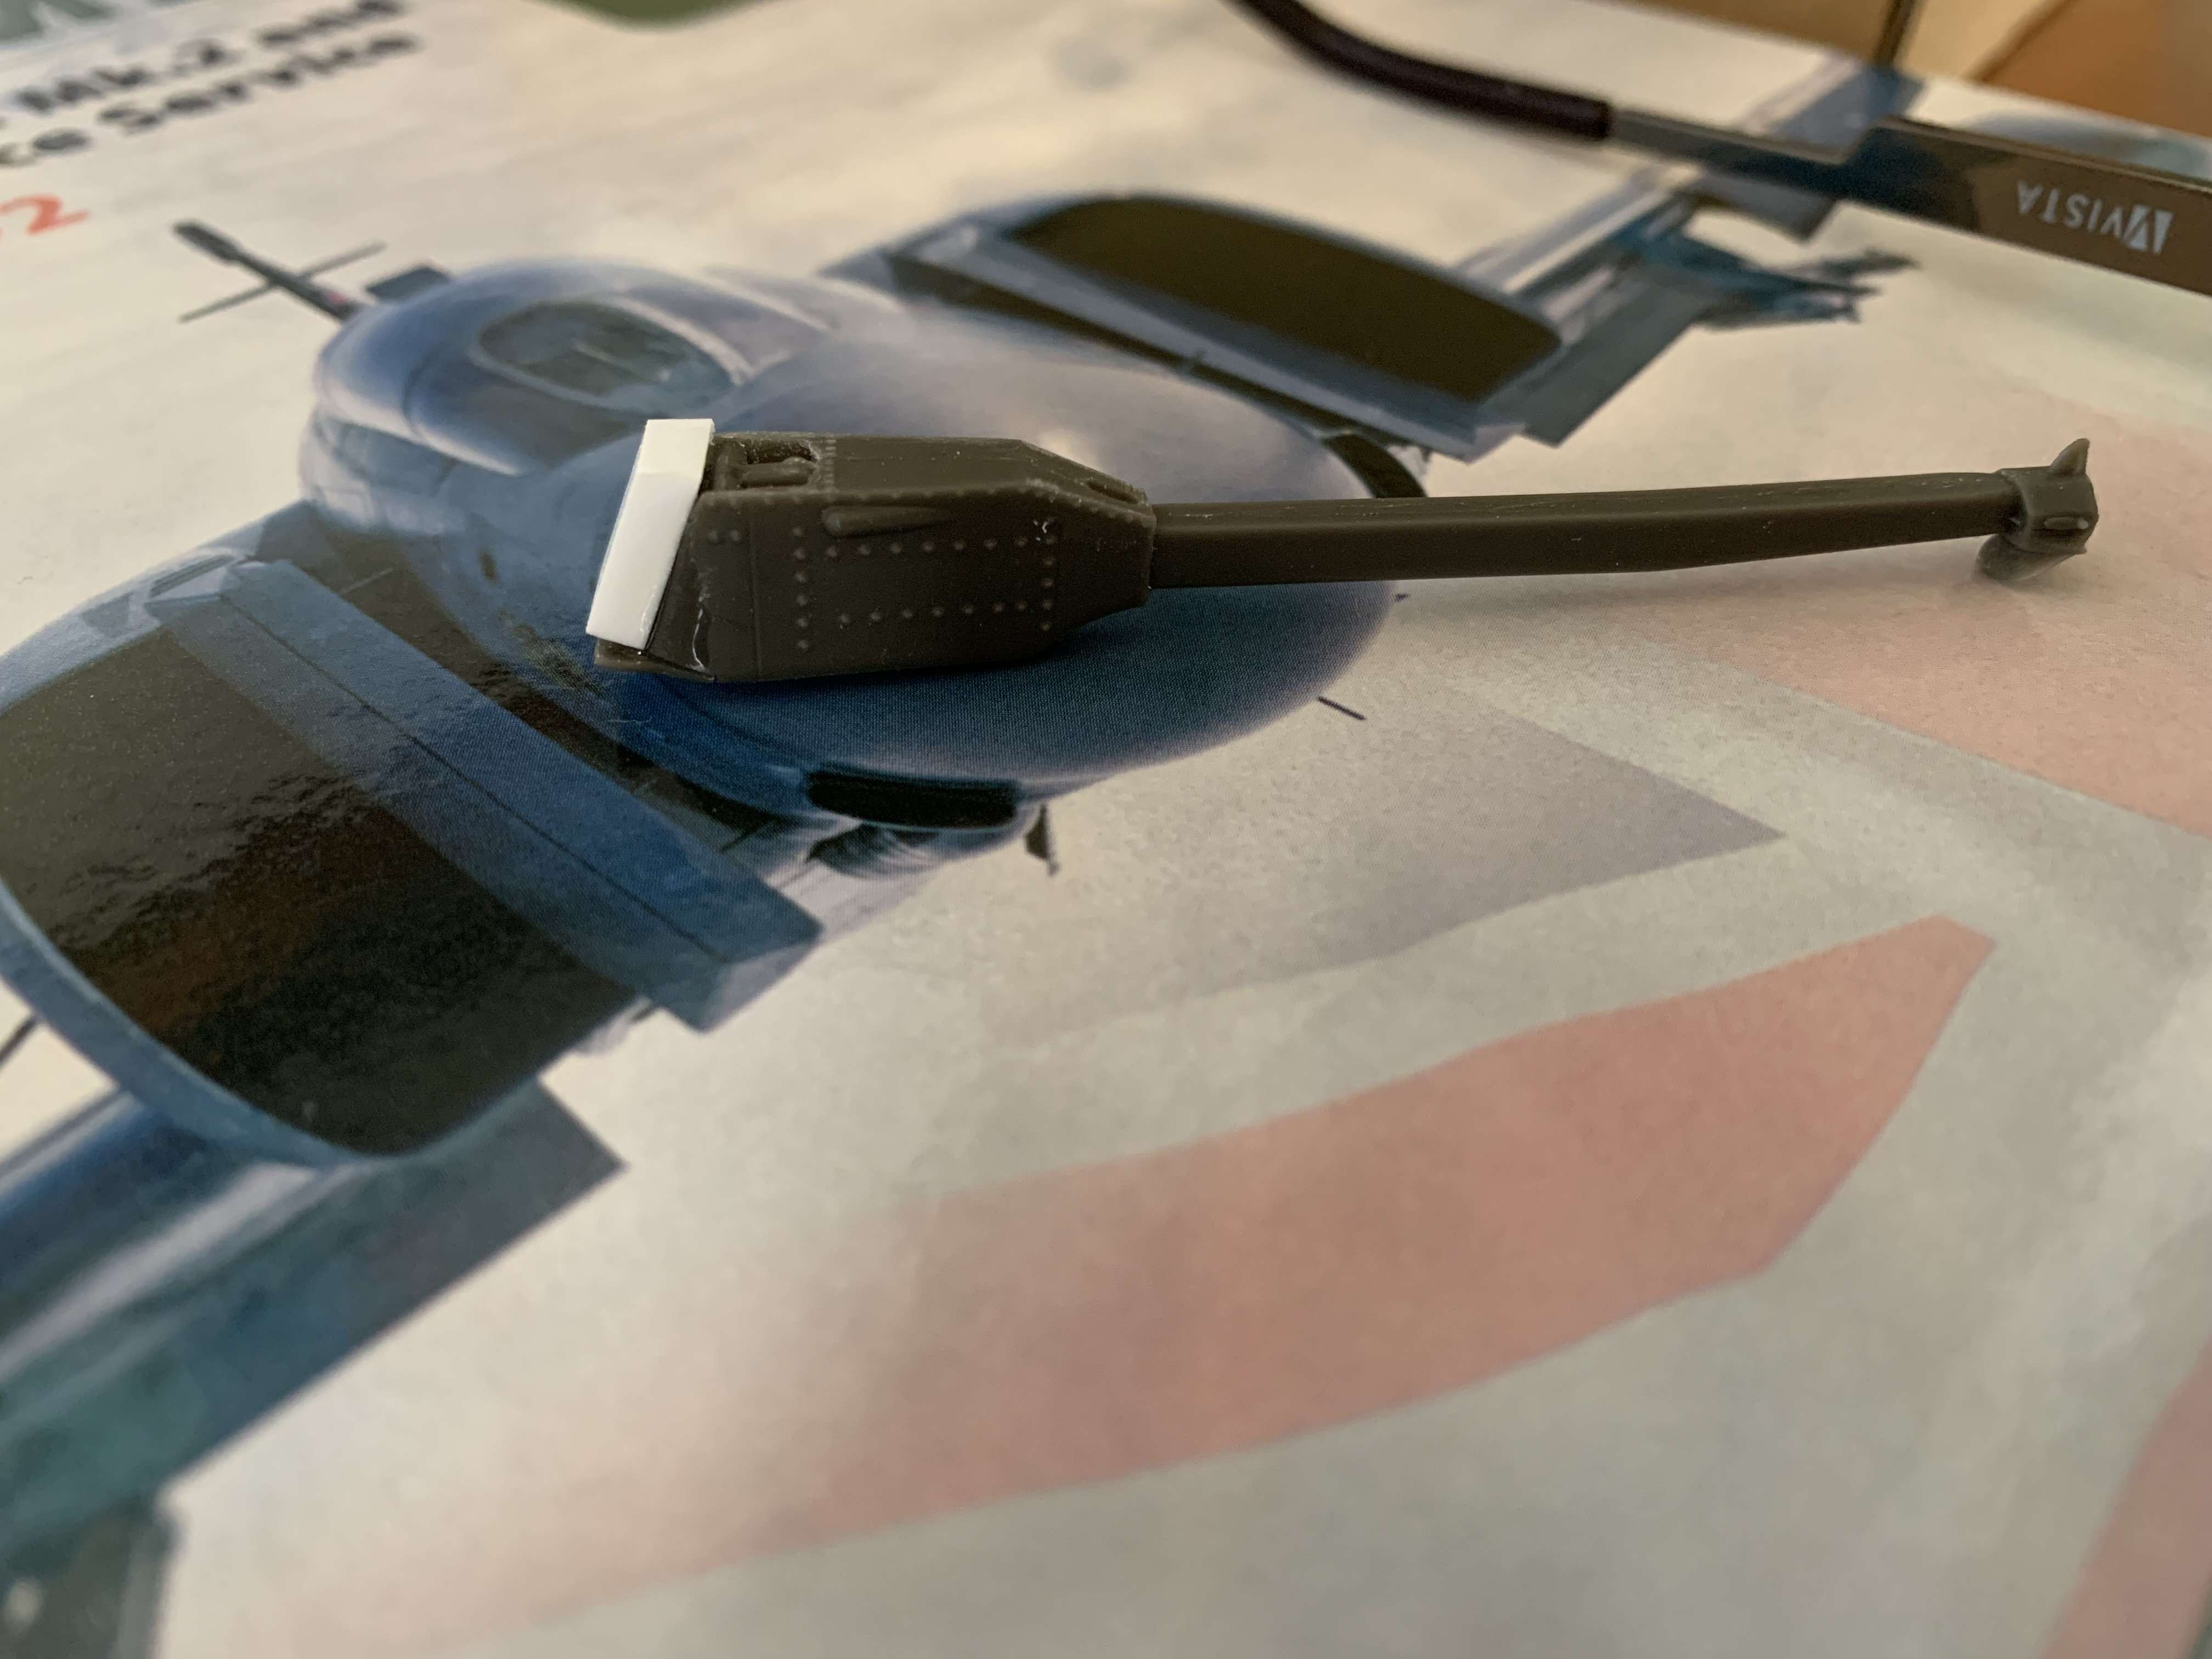
One thing that has impressed me is a set of underwing fuel tanks by @Jet Passion these things are amazing! I was dreading detailing the kit ones as they were severely lacking in shape and detail.....then Jet Passion Models come to the rescue! Eduardo is a one man band with a love of Jet aviation, and he seems as obsessive as I am with getting correct details. He has produced this gorgeous set that will make such a prominent feature of the Phantom truly special.
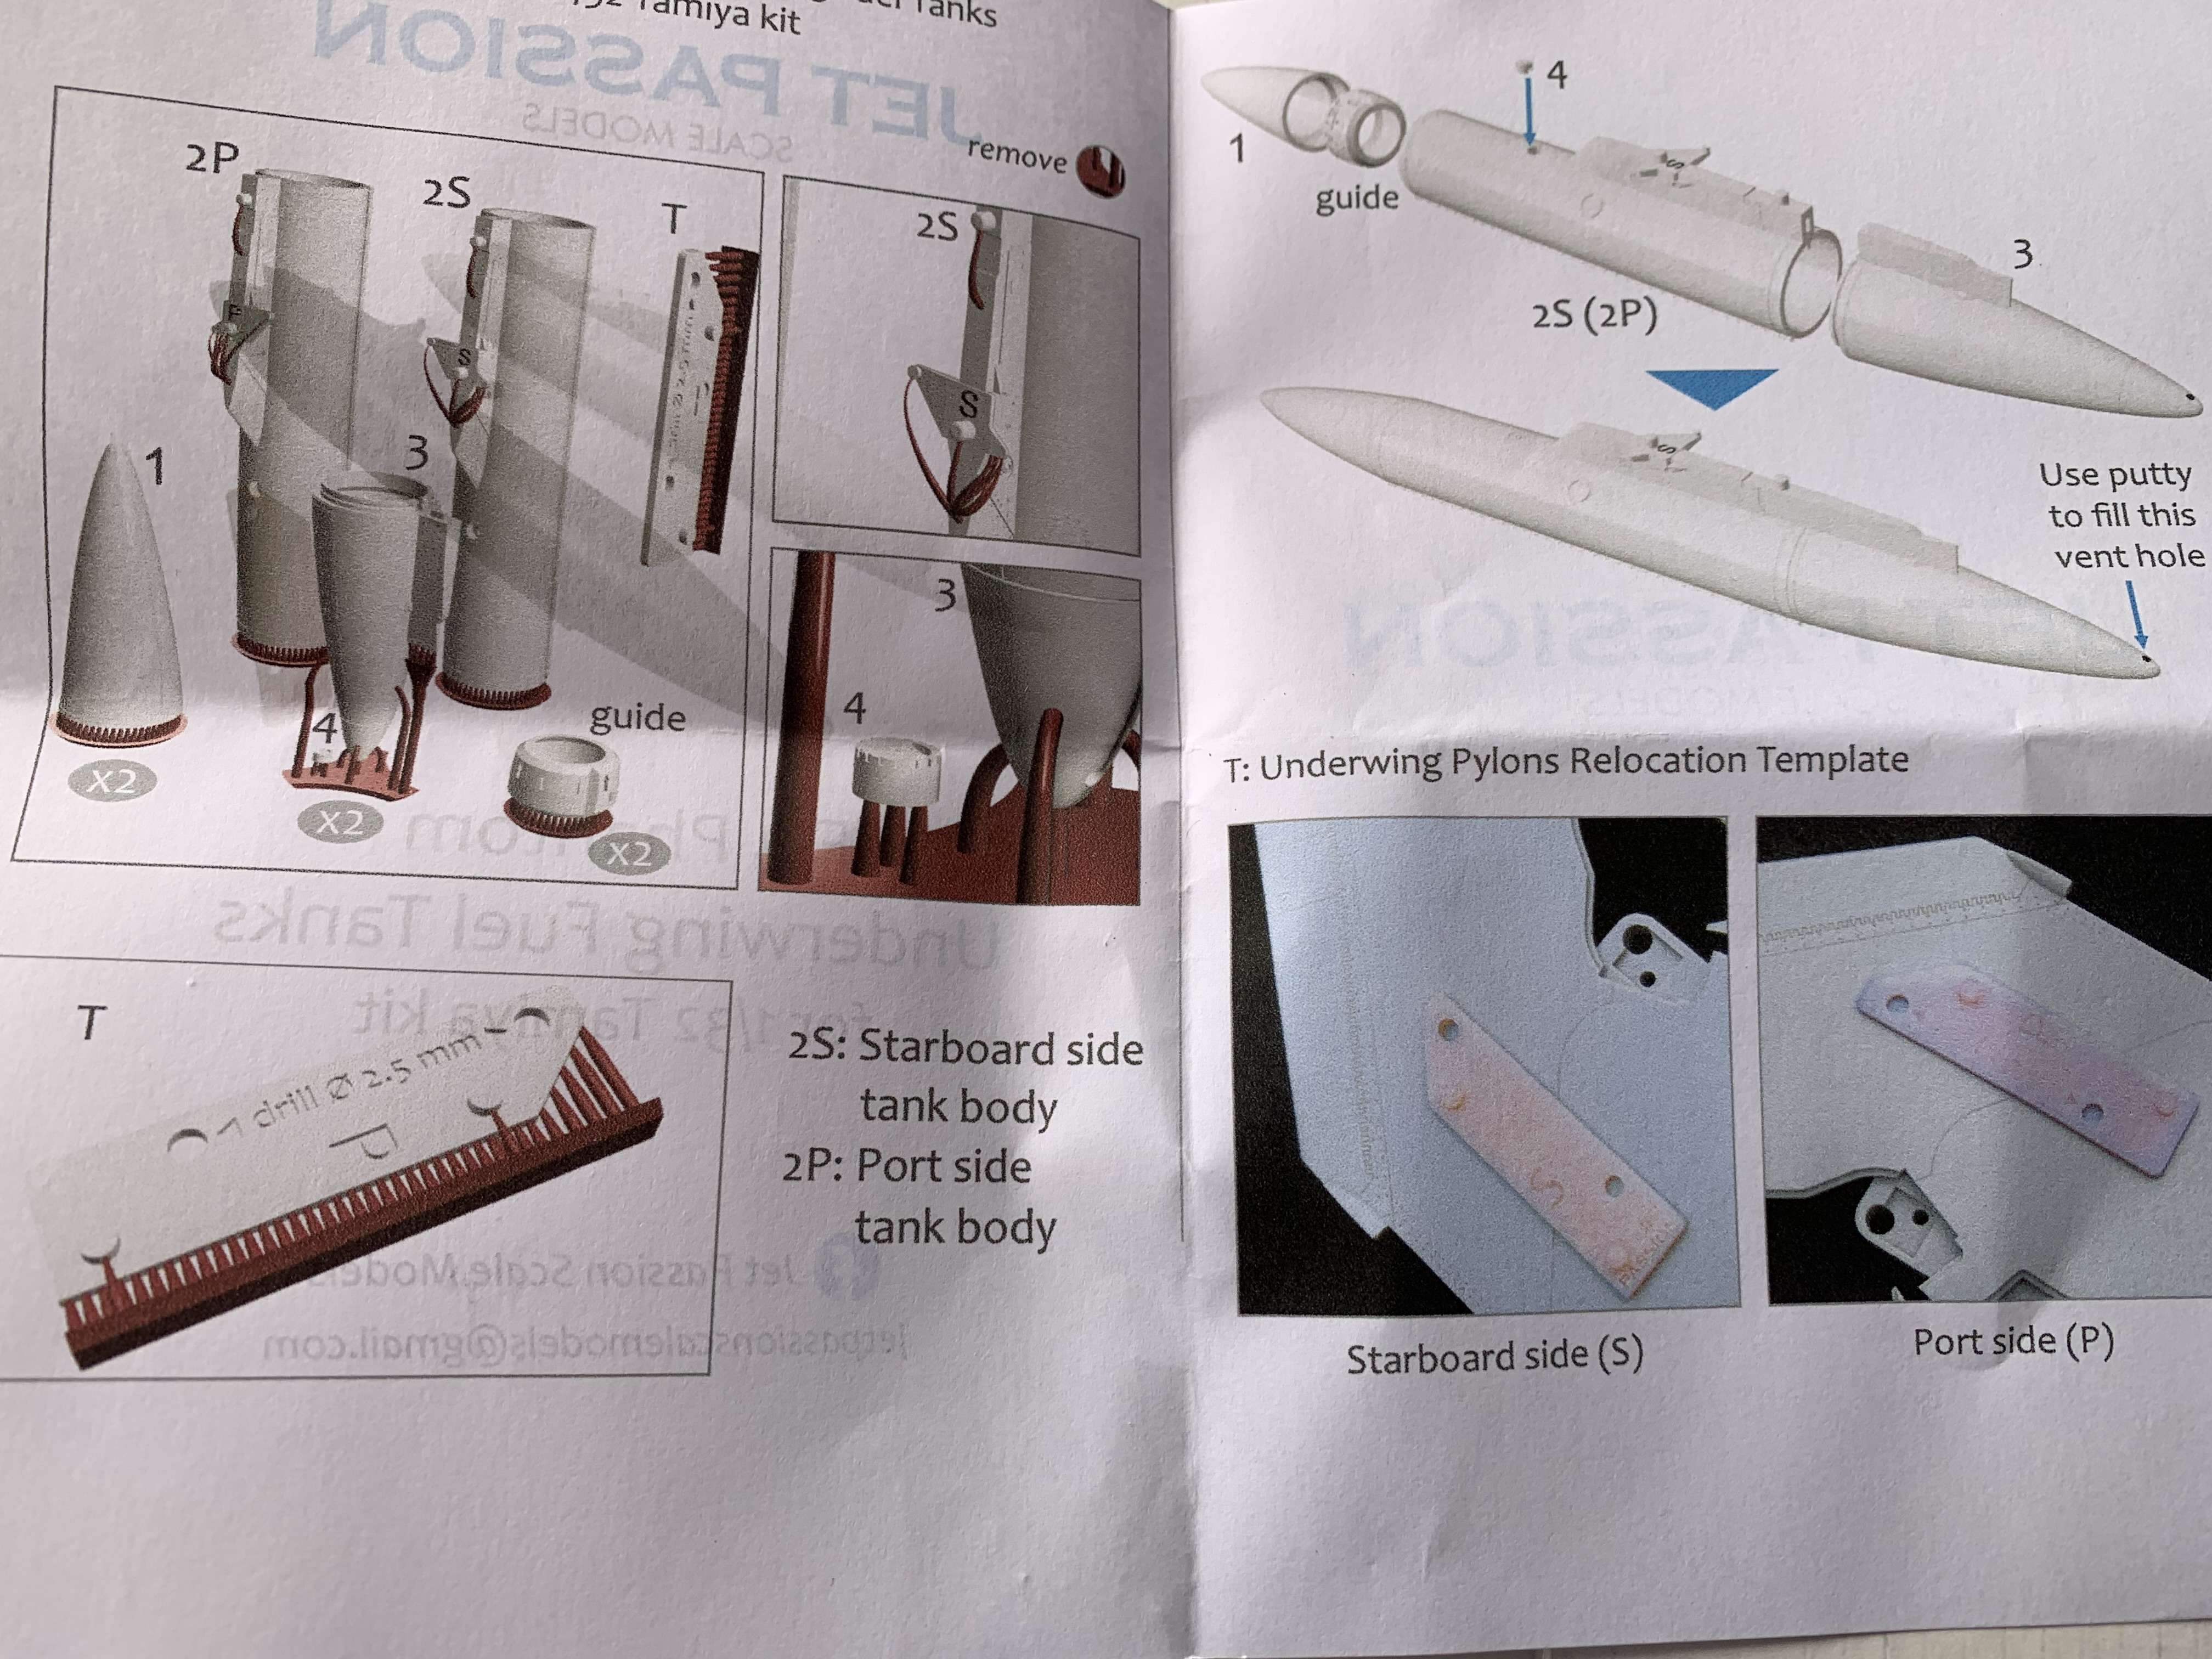
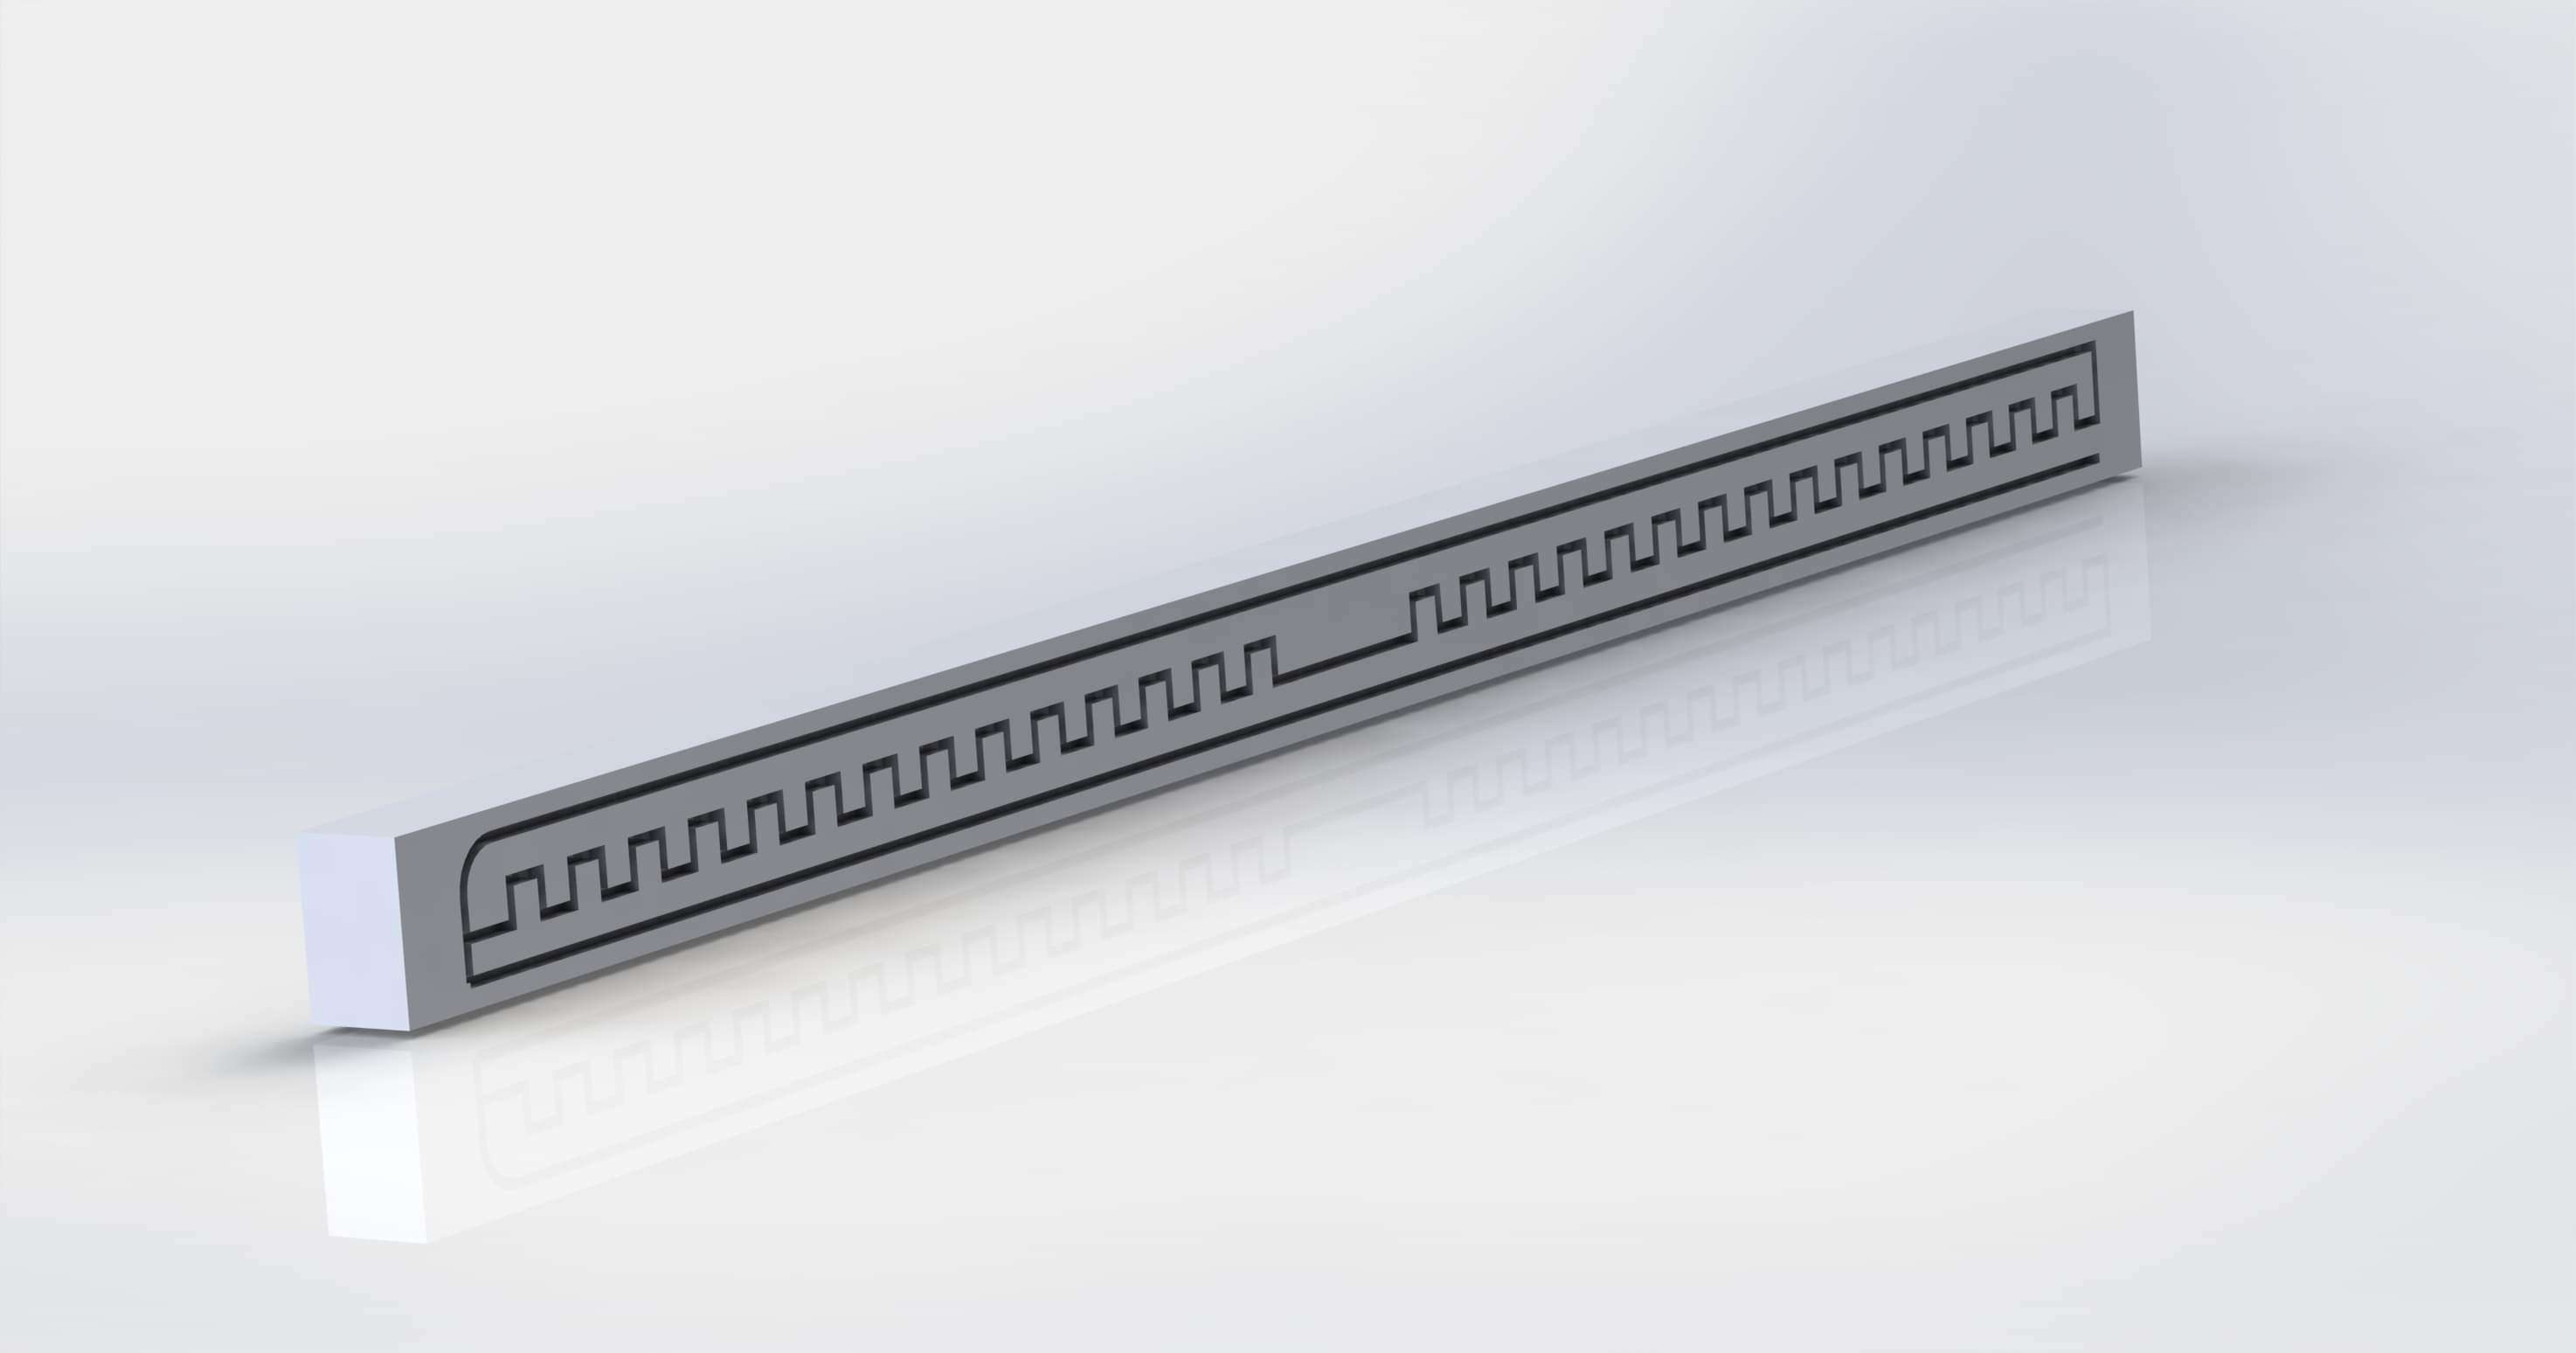
As you can see there is this handy little jig to redrill the holes in the correct position to relocate the pylons as well as little inserts to make sure the pieces all align.....too easy!
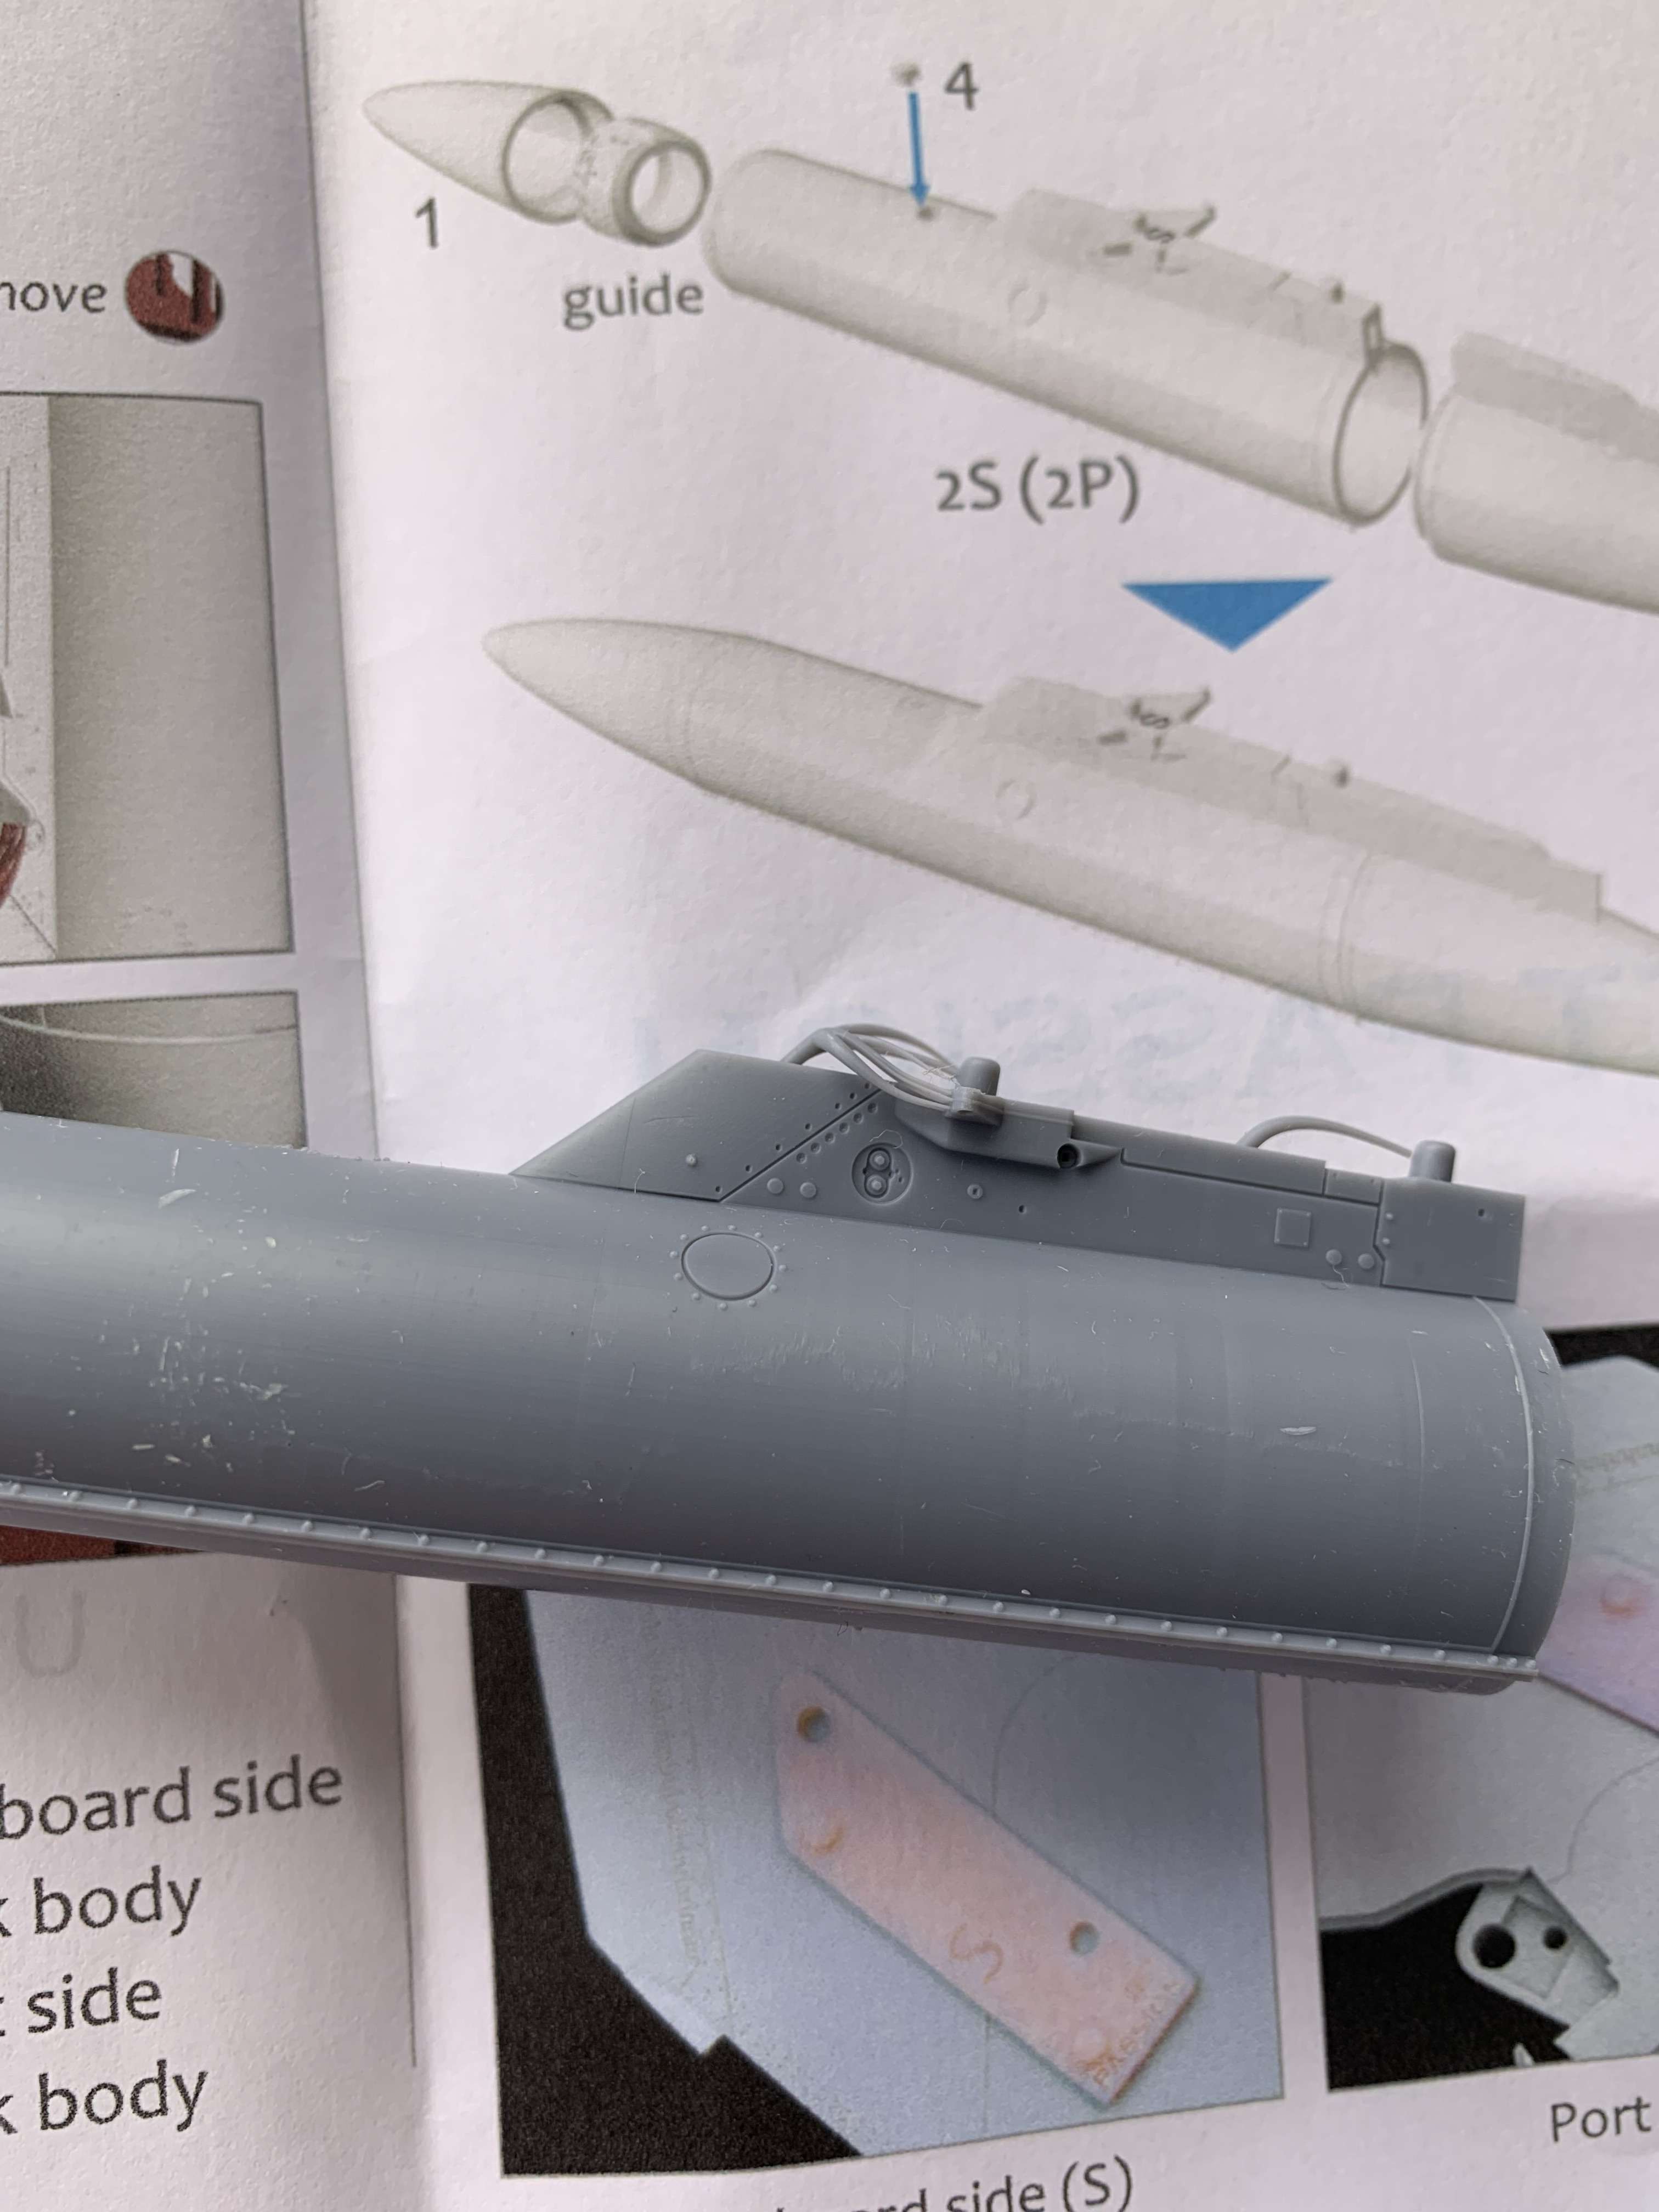

Weld lines, drain plugs, the photos really dont do them justice
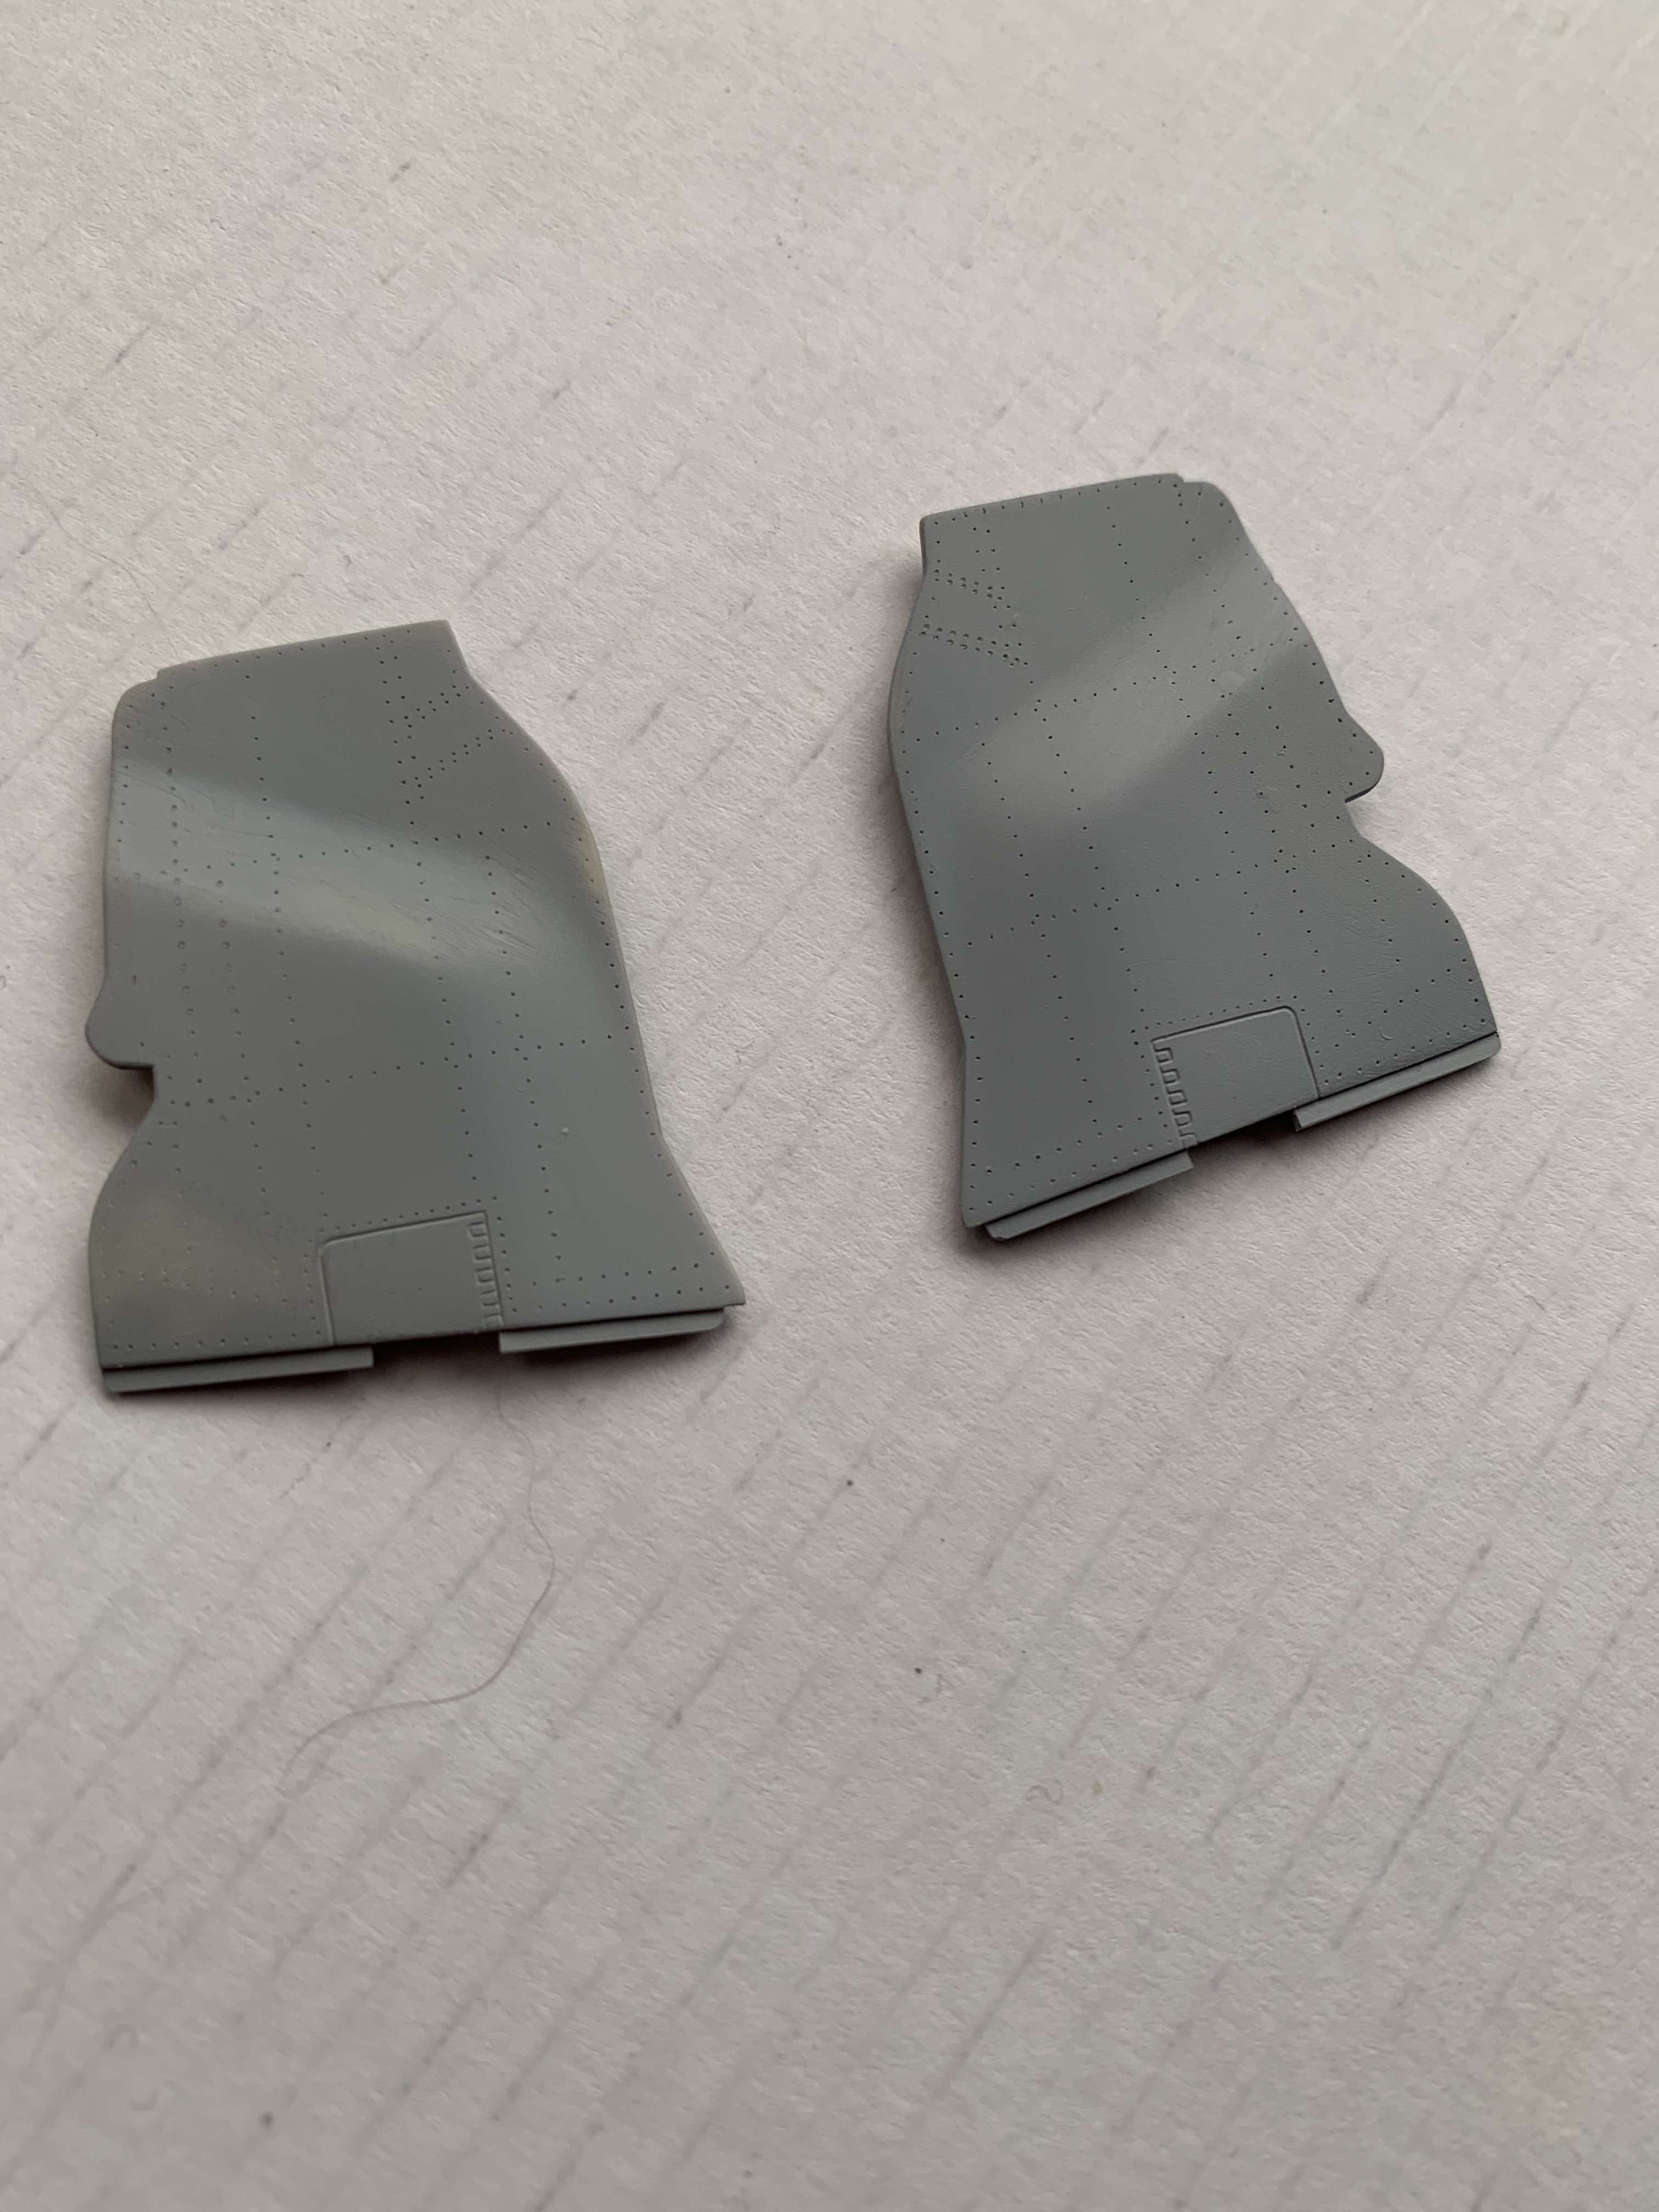
Kit ones

Jet Passion Models ones, no filling or sanding yet and a primer finish of Mr Surfacer 1200...they will only need a slight sand/buff. I know this is going to sound terrible but I am going to put a few dints and dings on the nose sections as they got beat up in service...I wont go overboard!
More on these later and some other goodies on their way!
I got the nose gear door finished, riveted and primed but I didnt take a pic....looks good ...honestly LOL
So I was now onto tweaking the other nose door, a little shape adjustment and all surface details removed
Few more plastic card additions and Archer rivets again
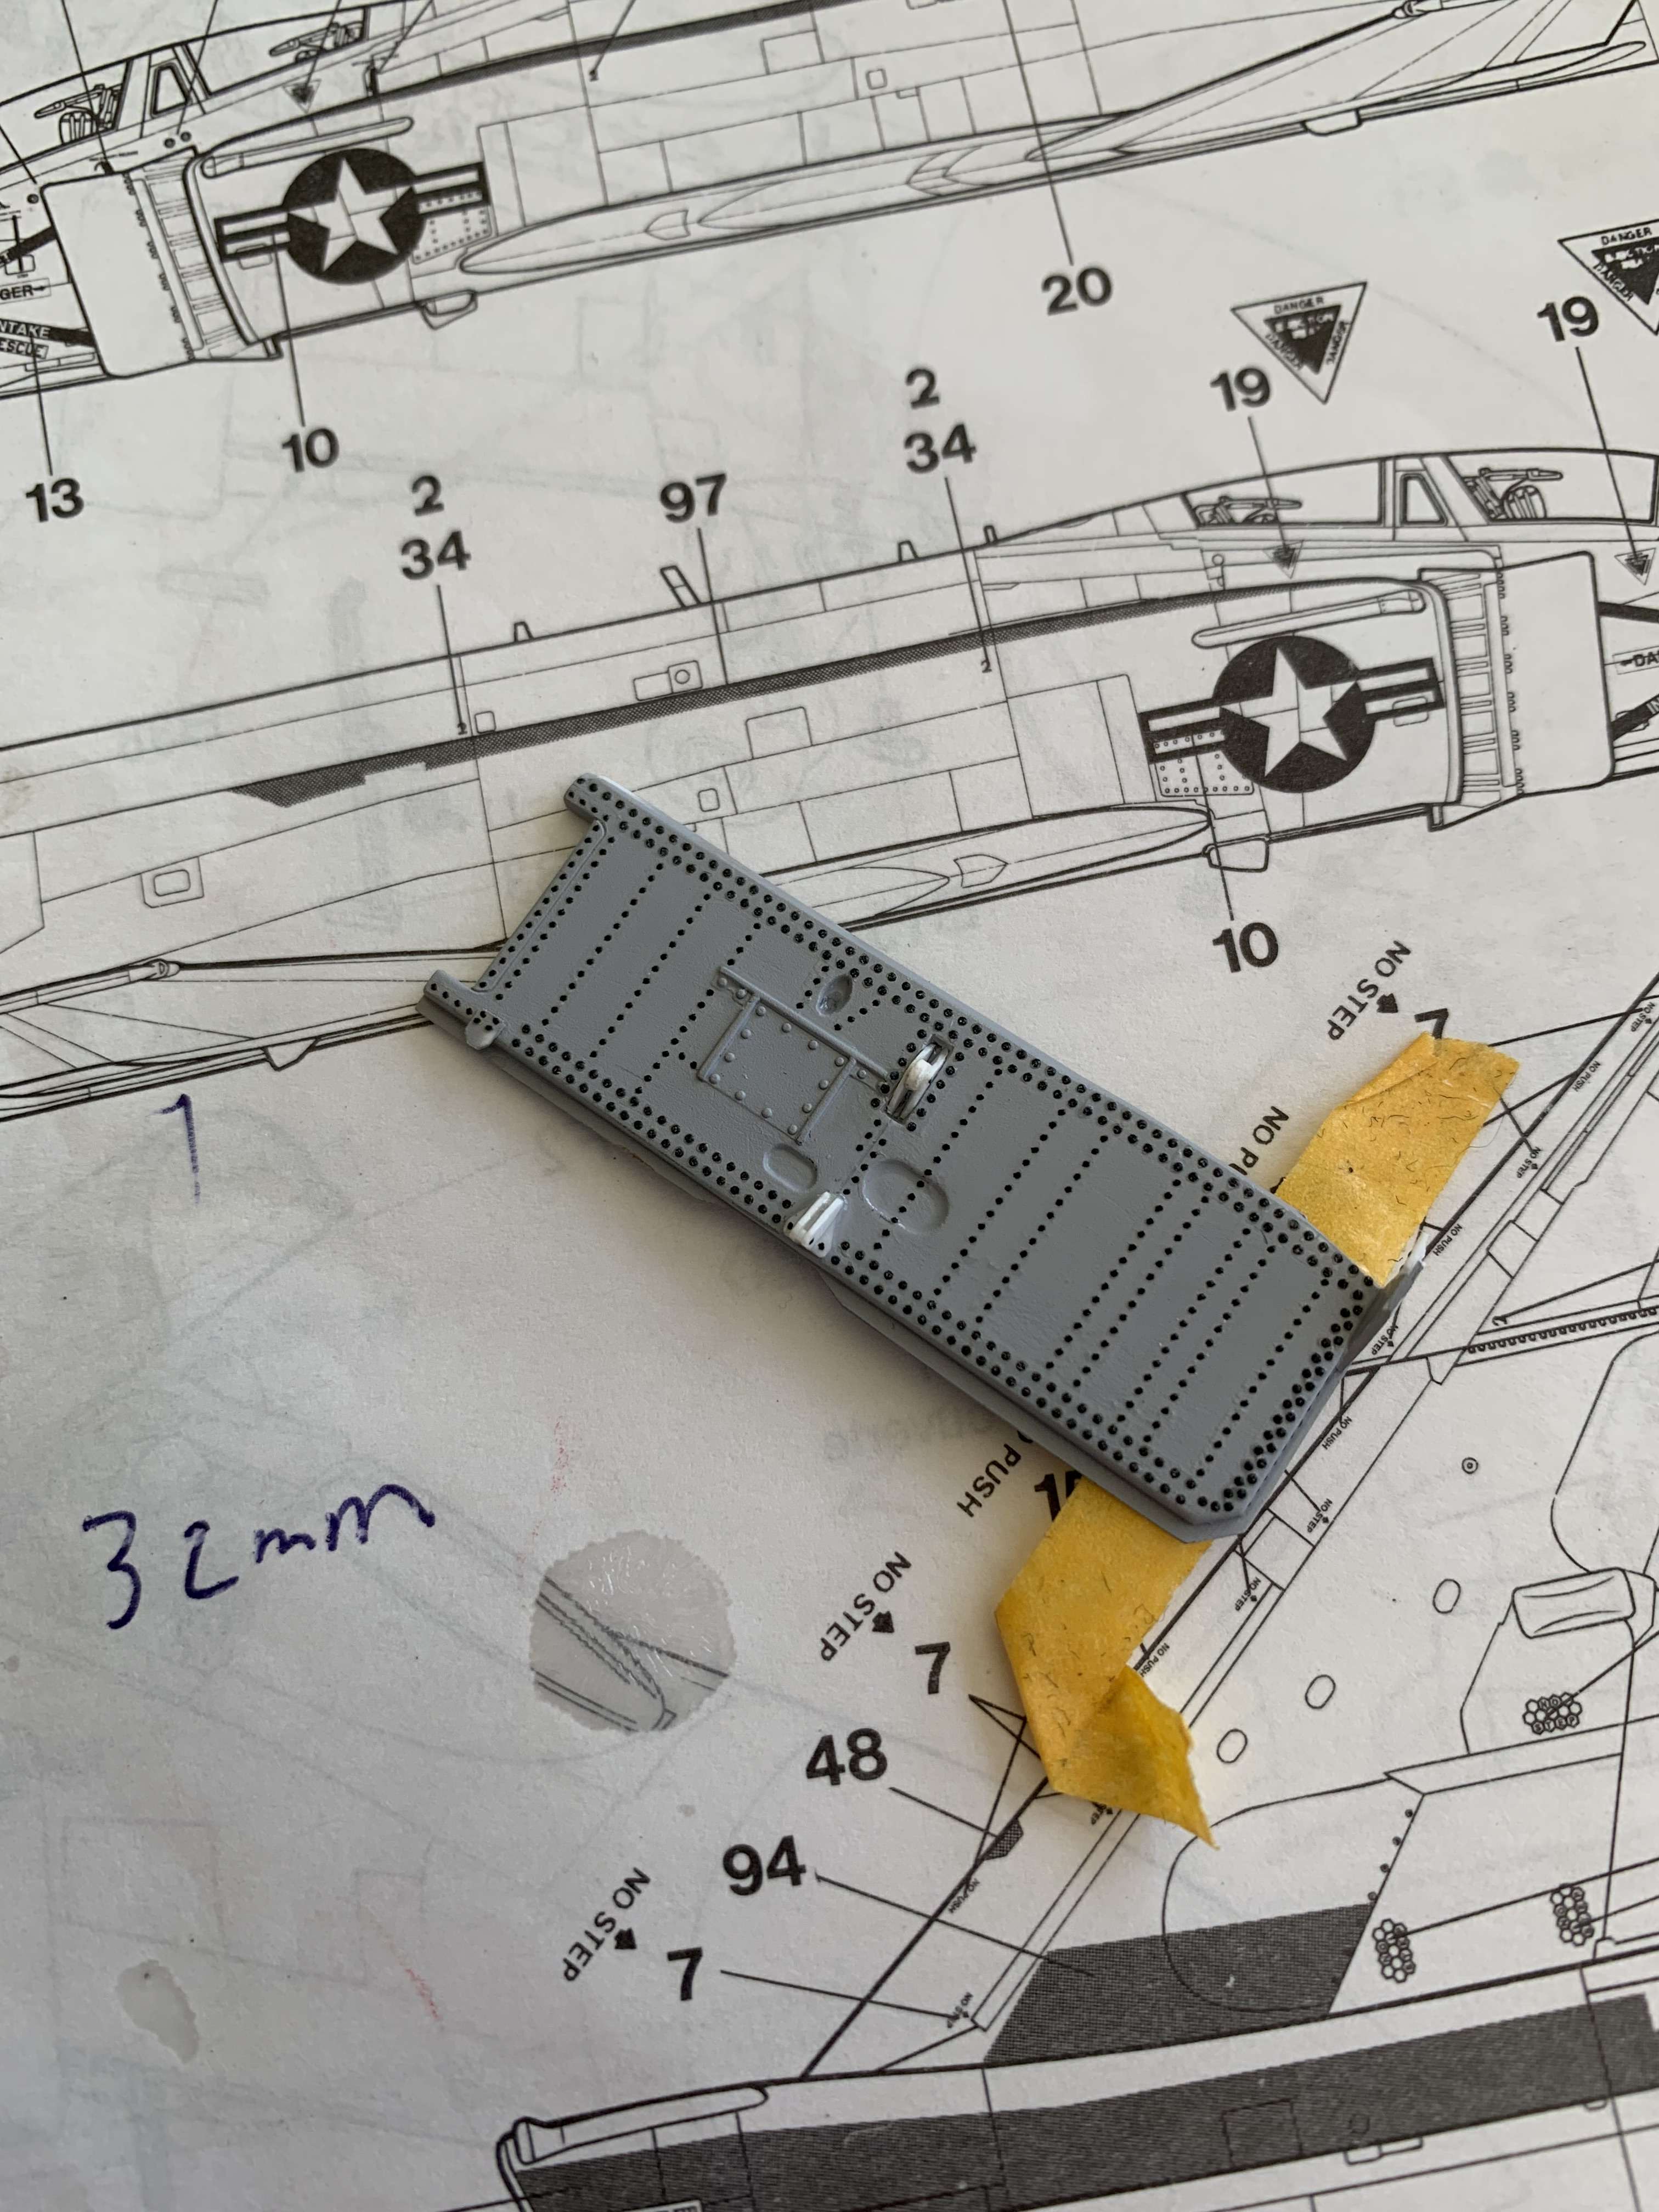
Aaaannd Mr Surfacer 1200
Then the other side riveted
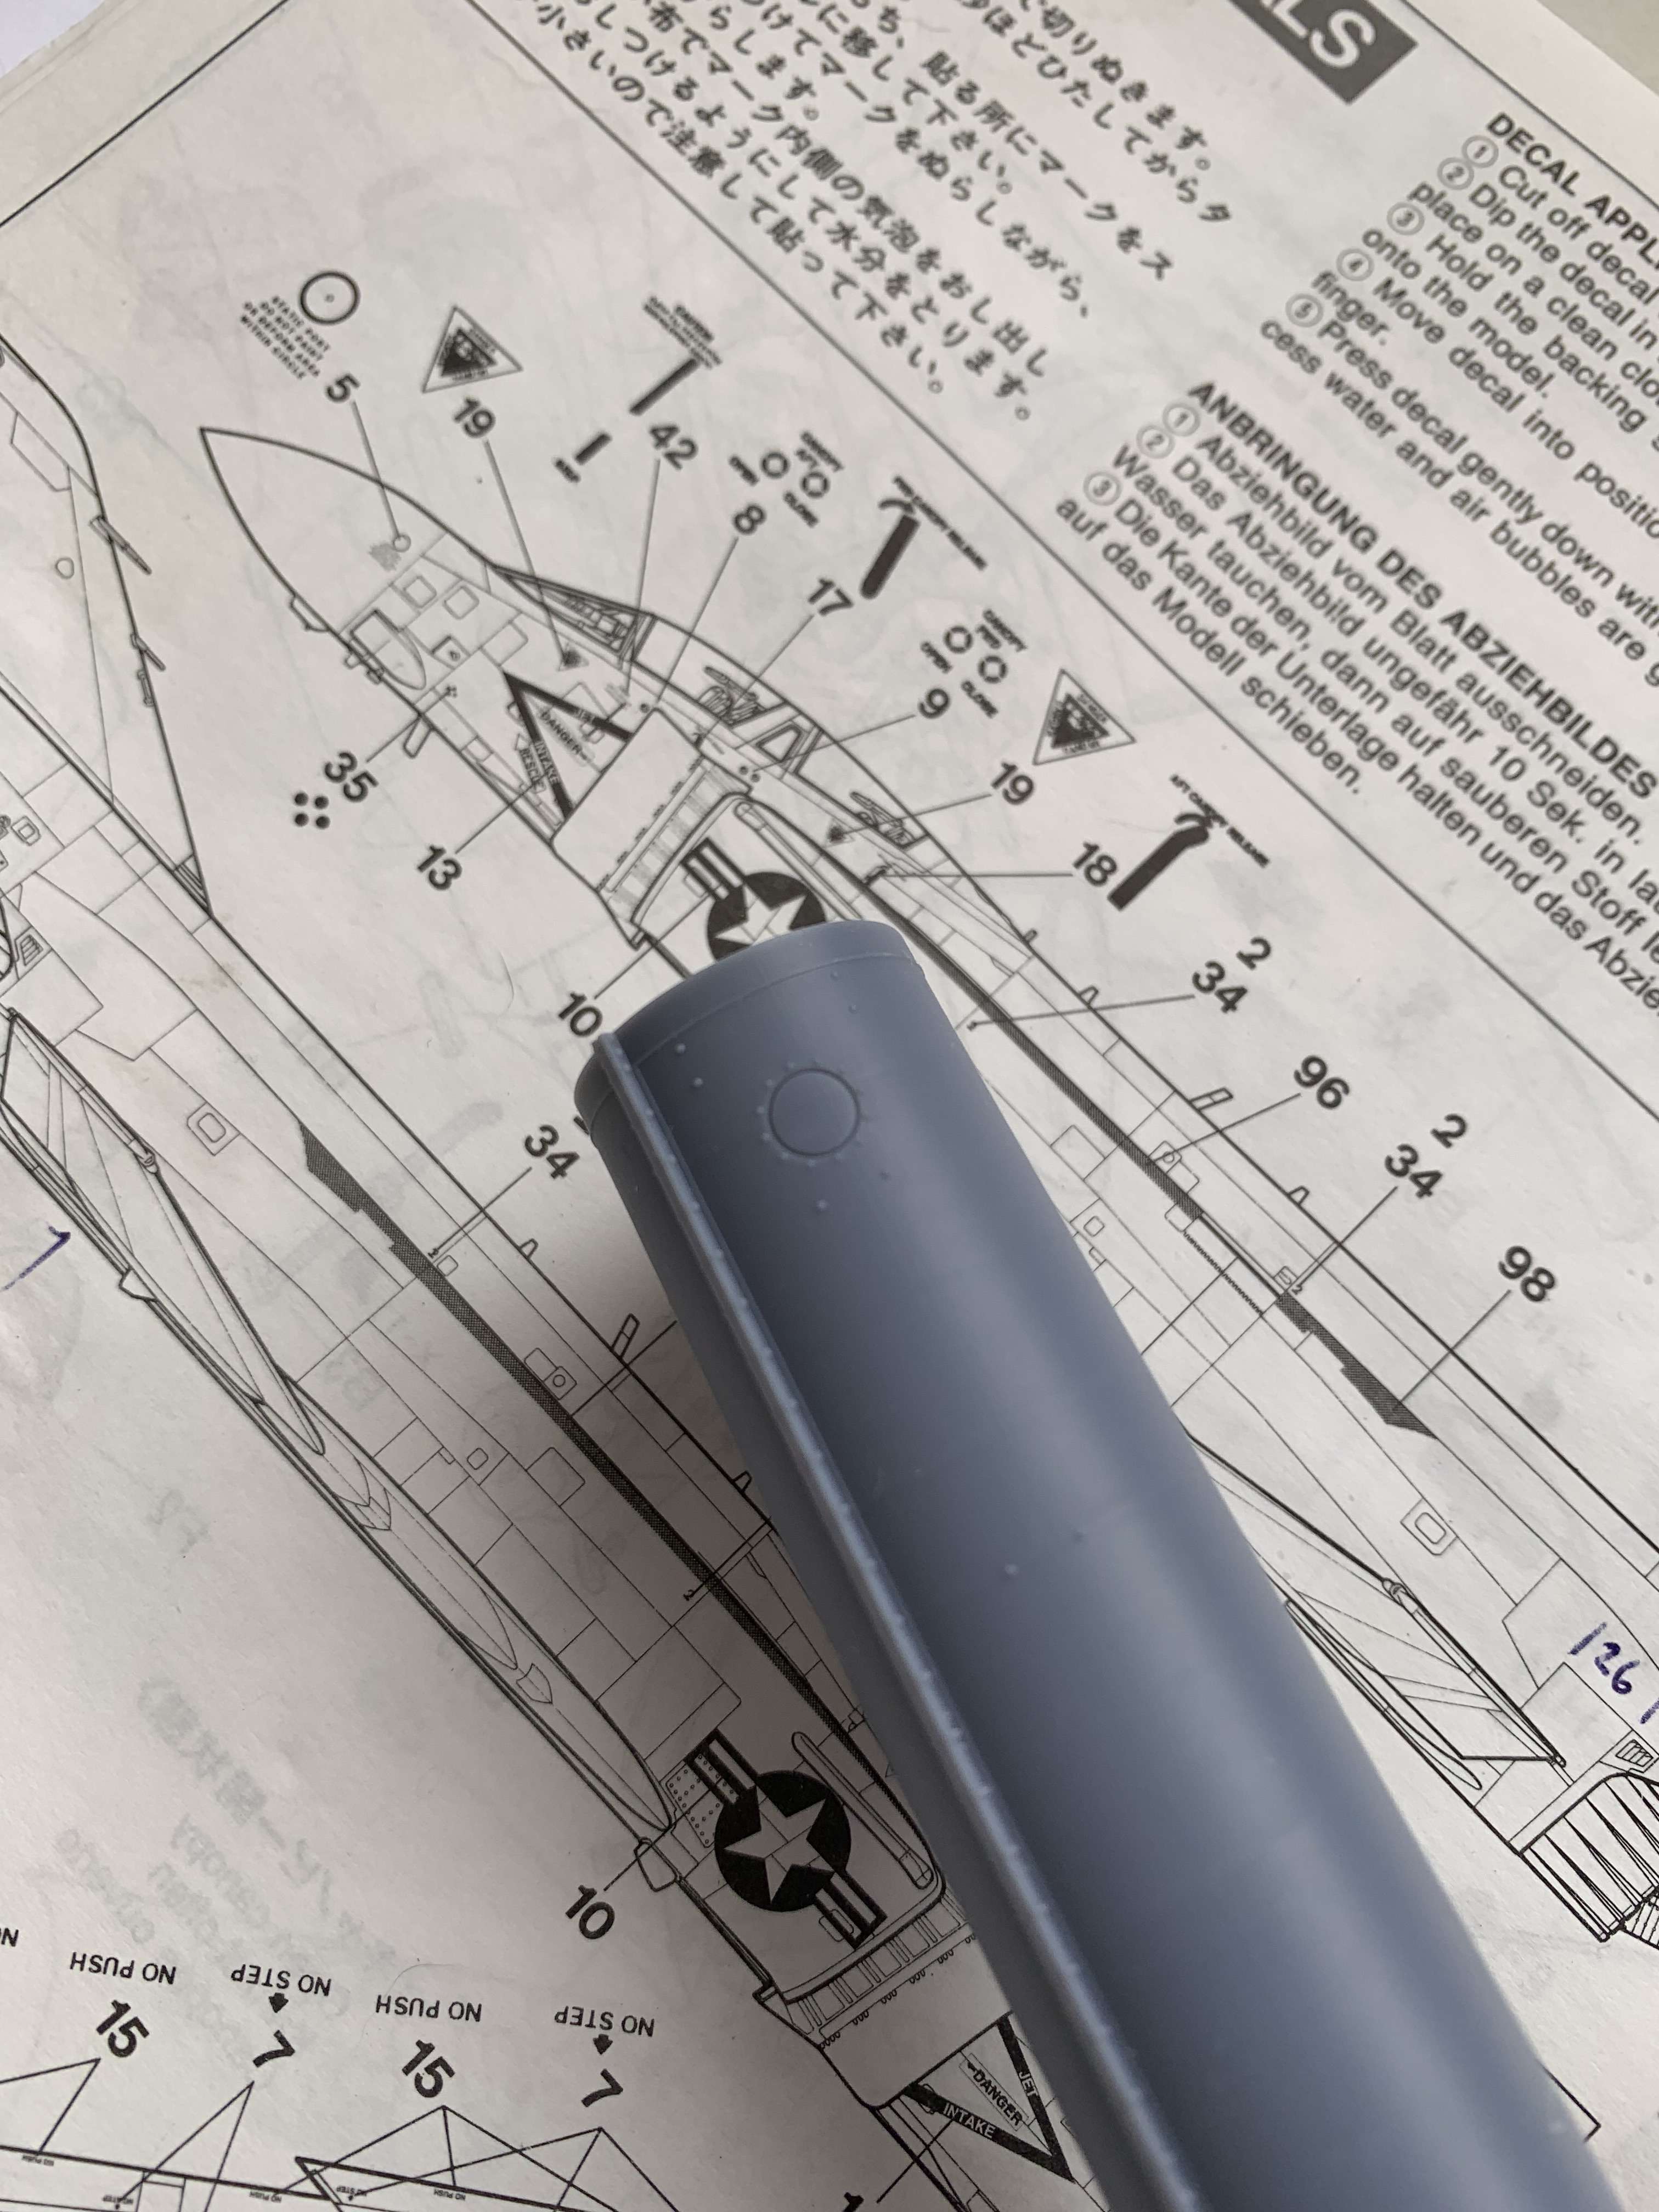
Main gear doors receiving some attention and details now...more to still go
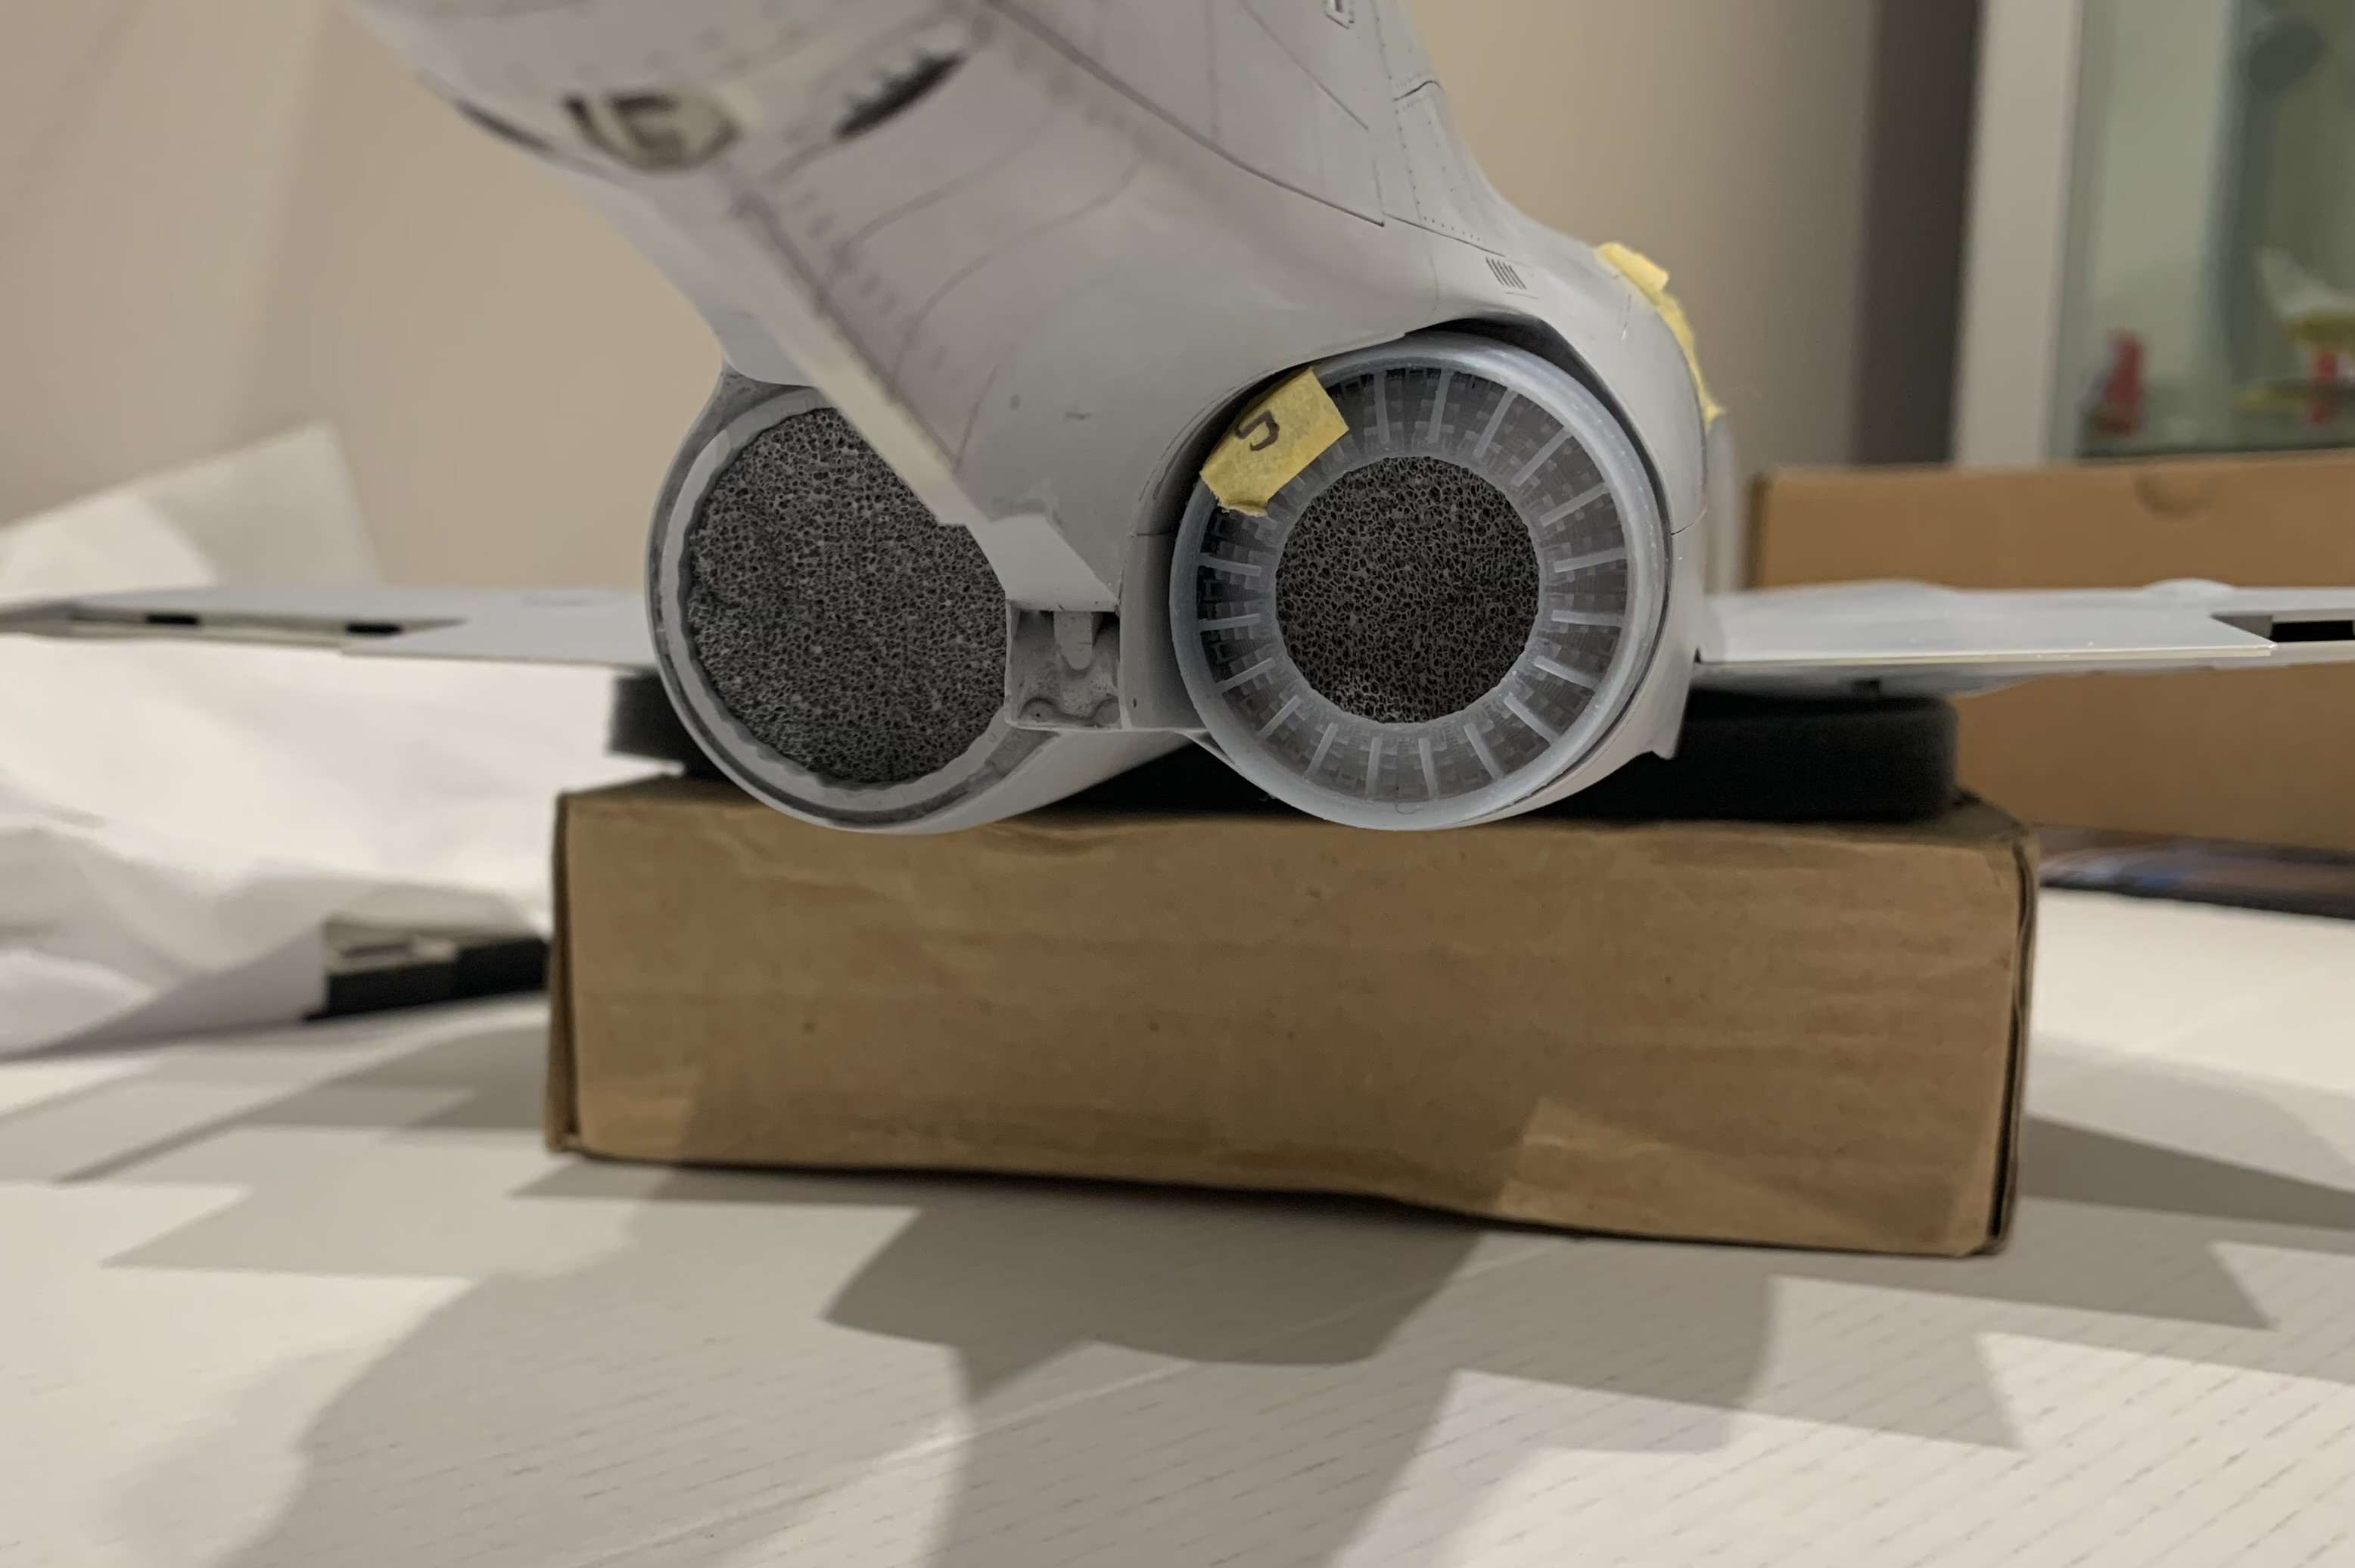
3D Chutes landing gear now getting a tidy up before paint. I was a little concerned about how strong these might be, I have left the Phantom sitting on them for nearly 2 weeks and they havent even started looking loke distorting, which is good as this thing is getting heavy! They will get more structural integrity when the doors are epoxied on. I am not worried anymore

So there we go, I am still working away, these details really are time consuming, but I gotta get them right after all this effort to date. Hinges are being redone slightly bigger and deeper. Kerry has offered to also help with the lower section of nose leg with the double scissor links adapted to the 3D Chutes nose leg. It wasnt as simple as just adding another link! Thank you Kerry... mate I think this is as much your model as it is mine!
Until next time peeps thanks for following along at this glacial pace and heep up the awesome work you guys are doing! I come on most days and see what you're up to, and am constantly encouraged by your projects...thank you!
Cheers Anthony
-
Absolutely 'must have this one! So pleased to see aircraft like this being modelled....actually I will need two LOL
- CRAZY IVAN5, chrish, Out2gtcha and 1 other
-
 4
4
-
Hi team
Well as you know I have been busy (slowly) building my 1/32 RAF Phantom conversion from the Tamiya kit.
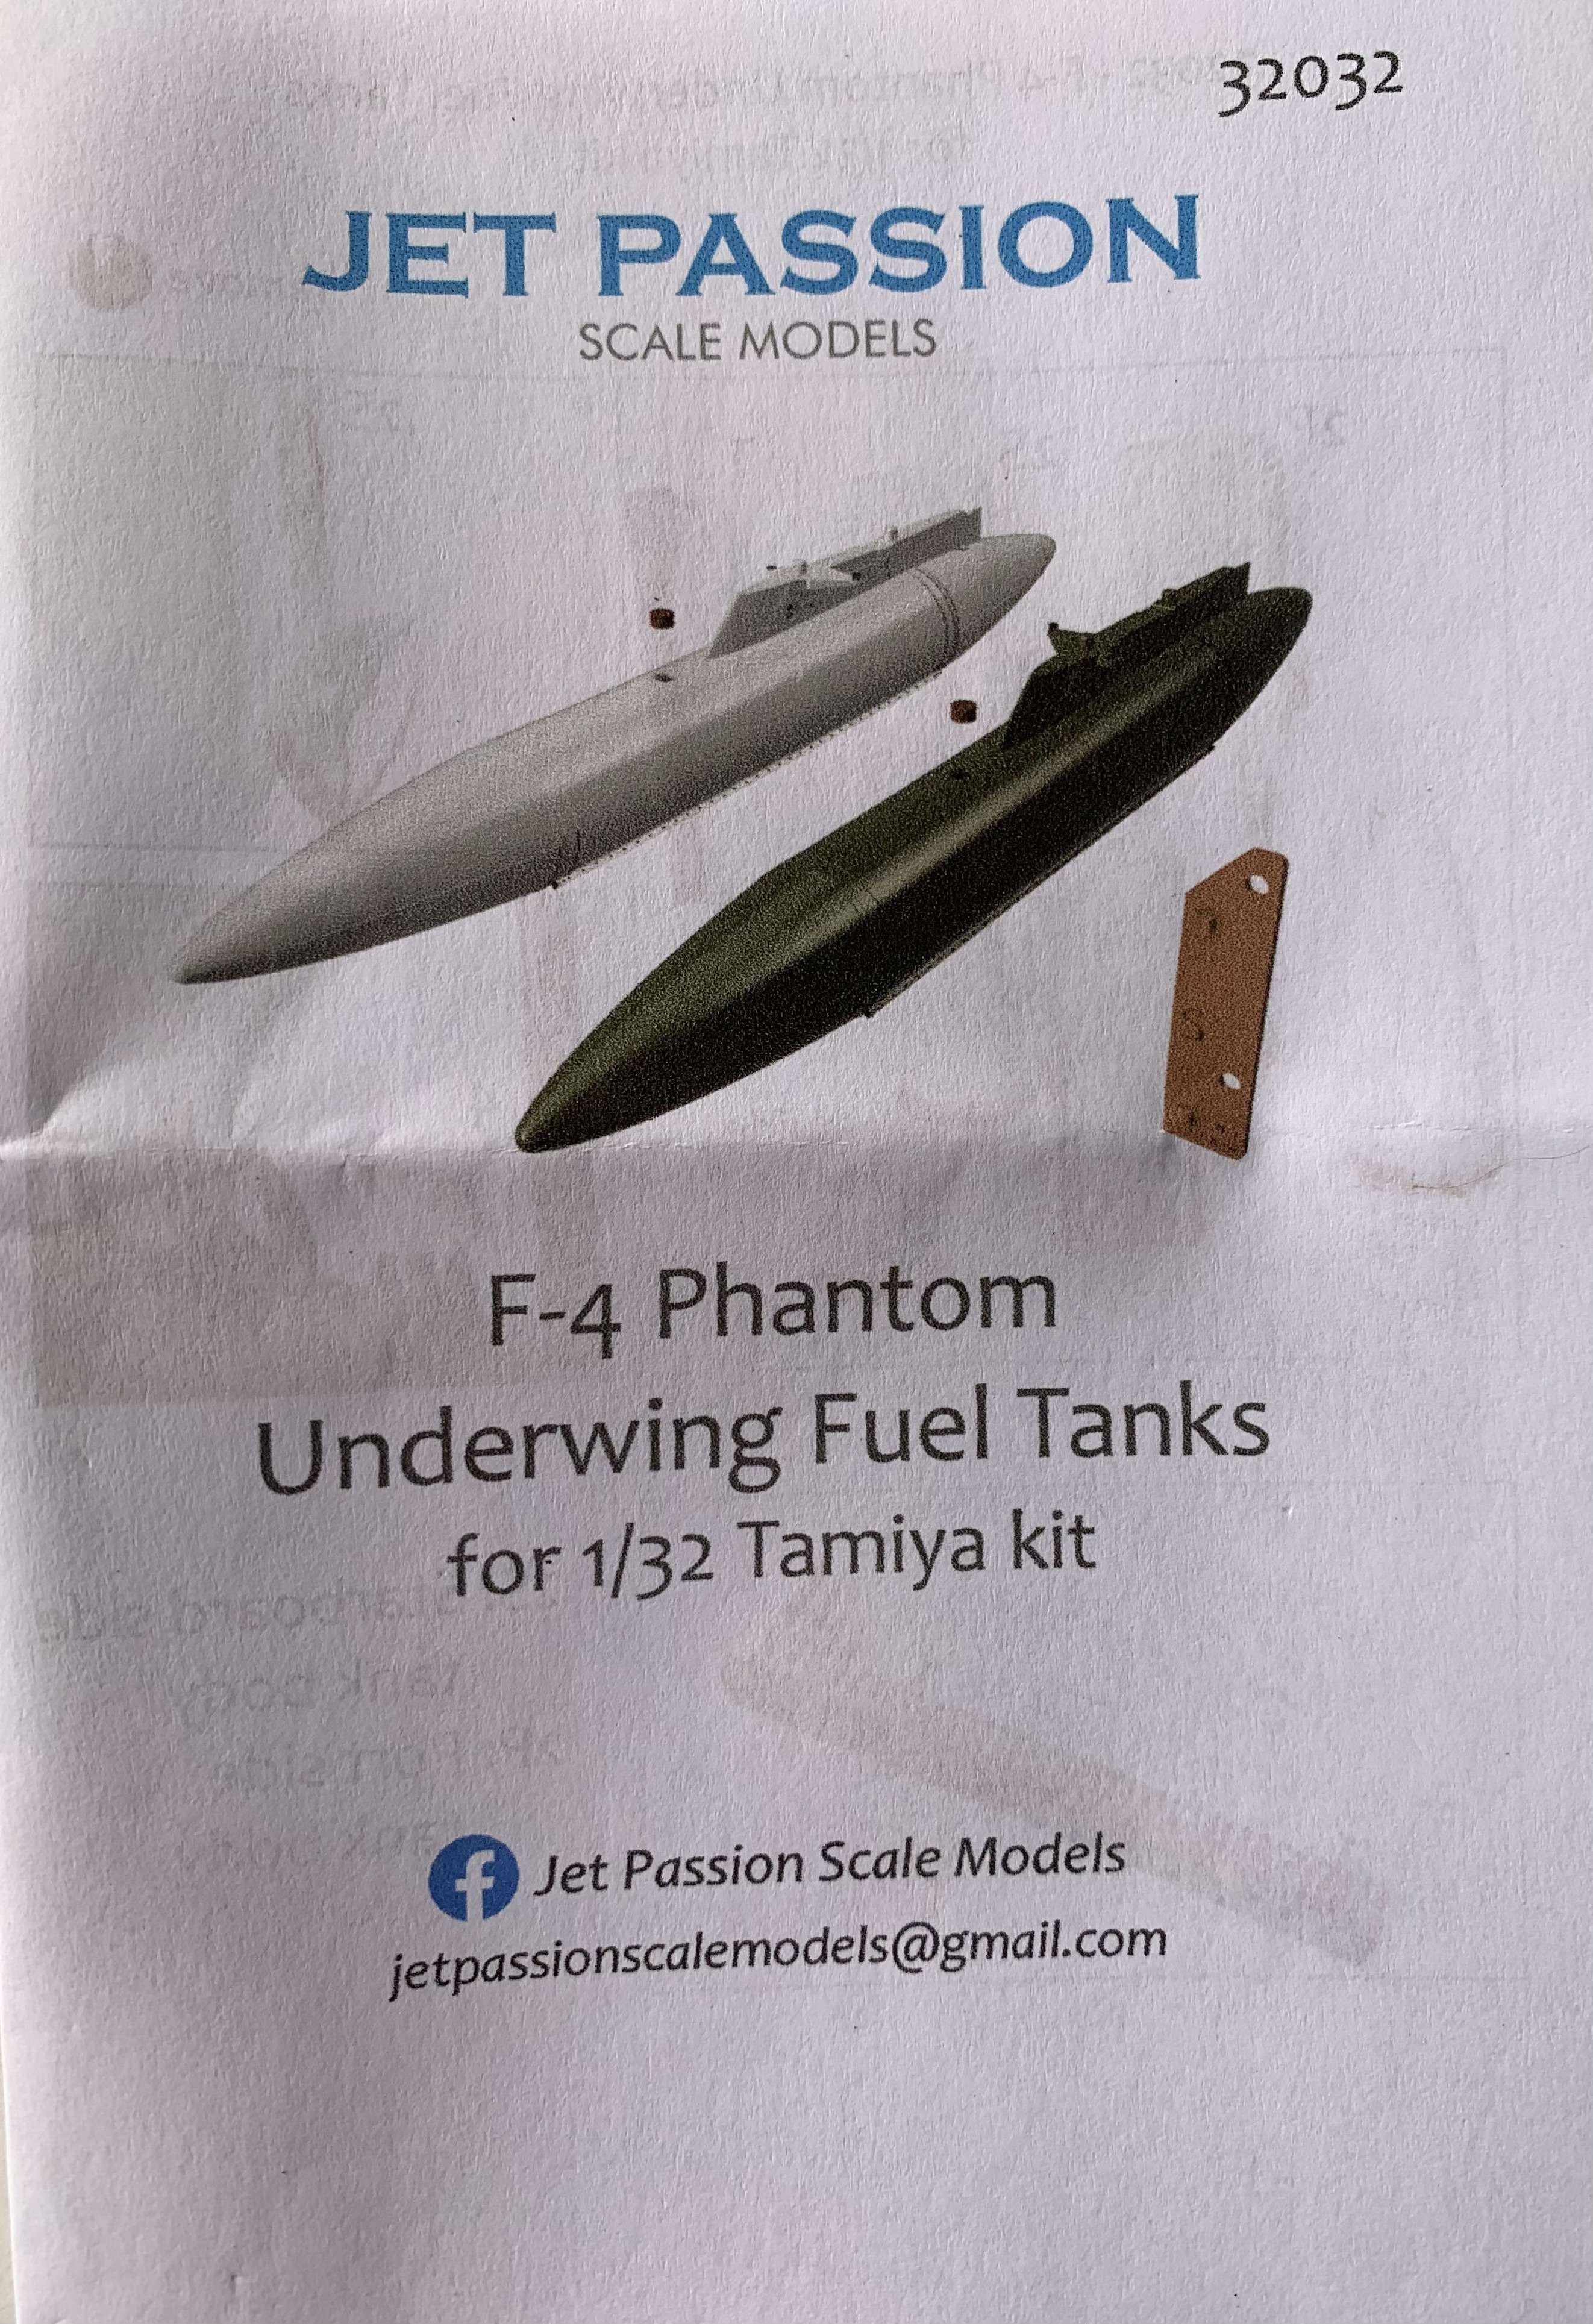
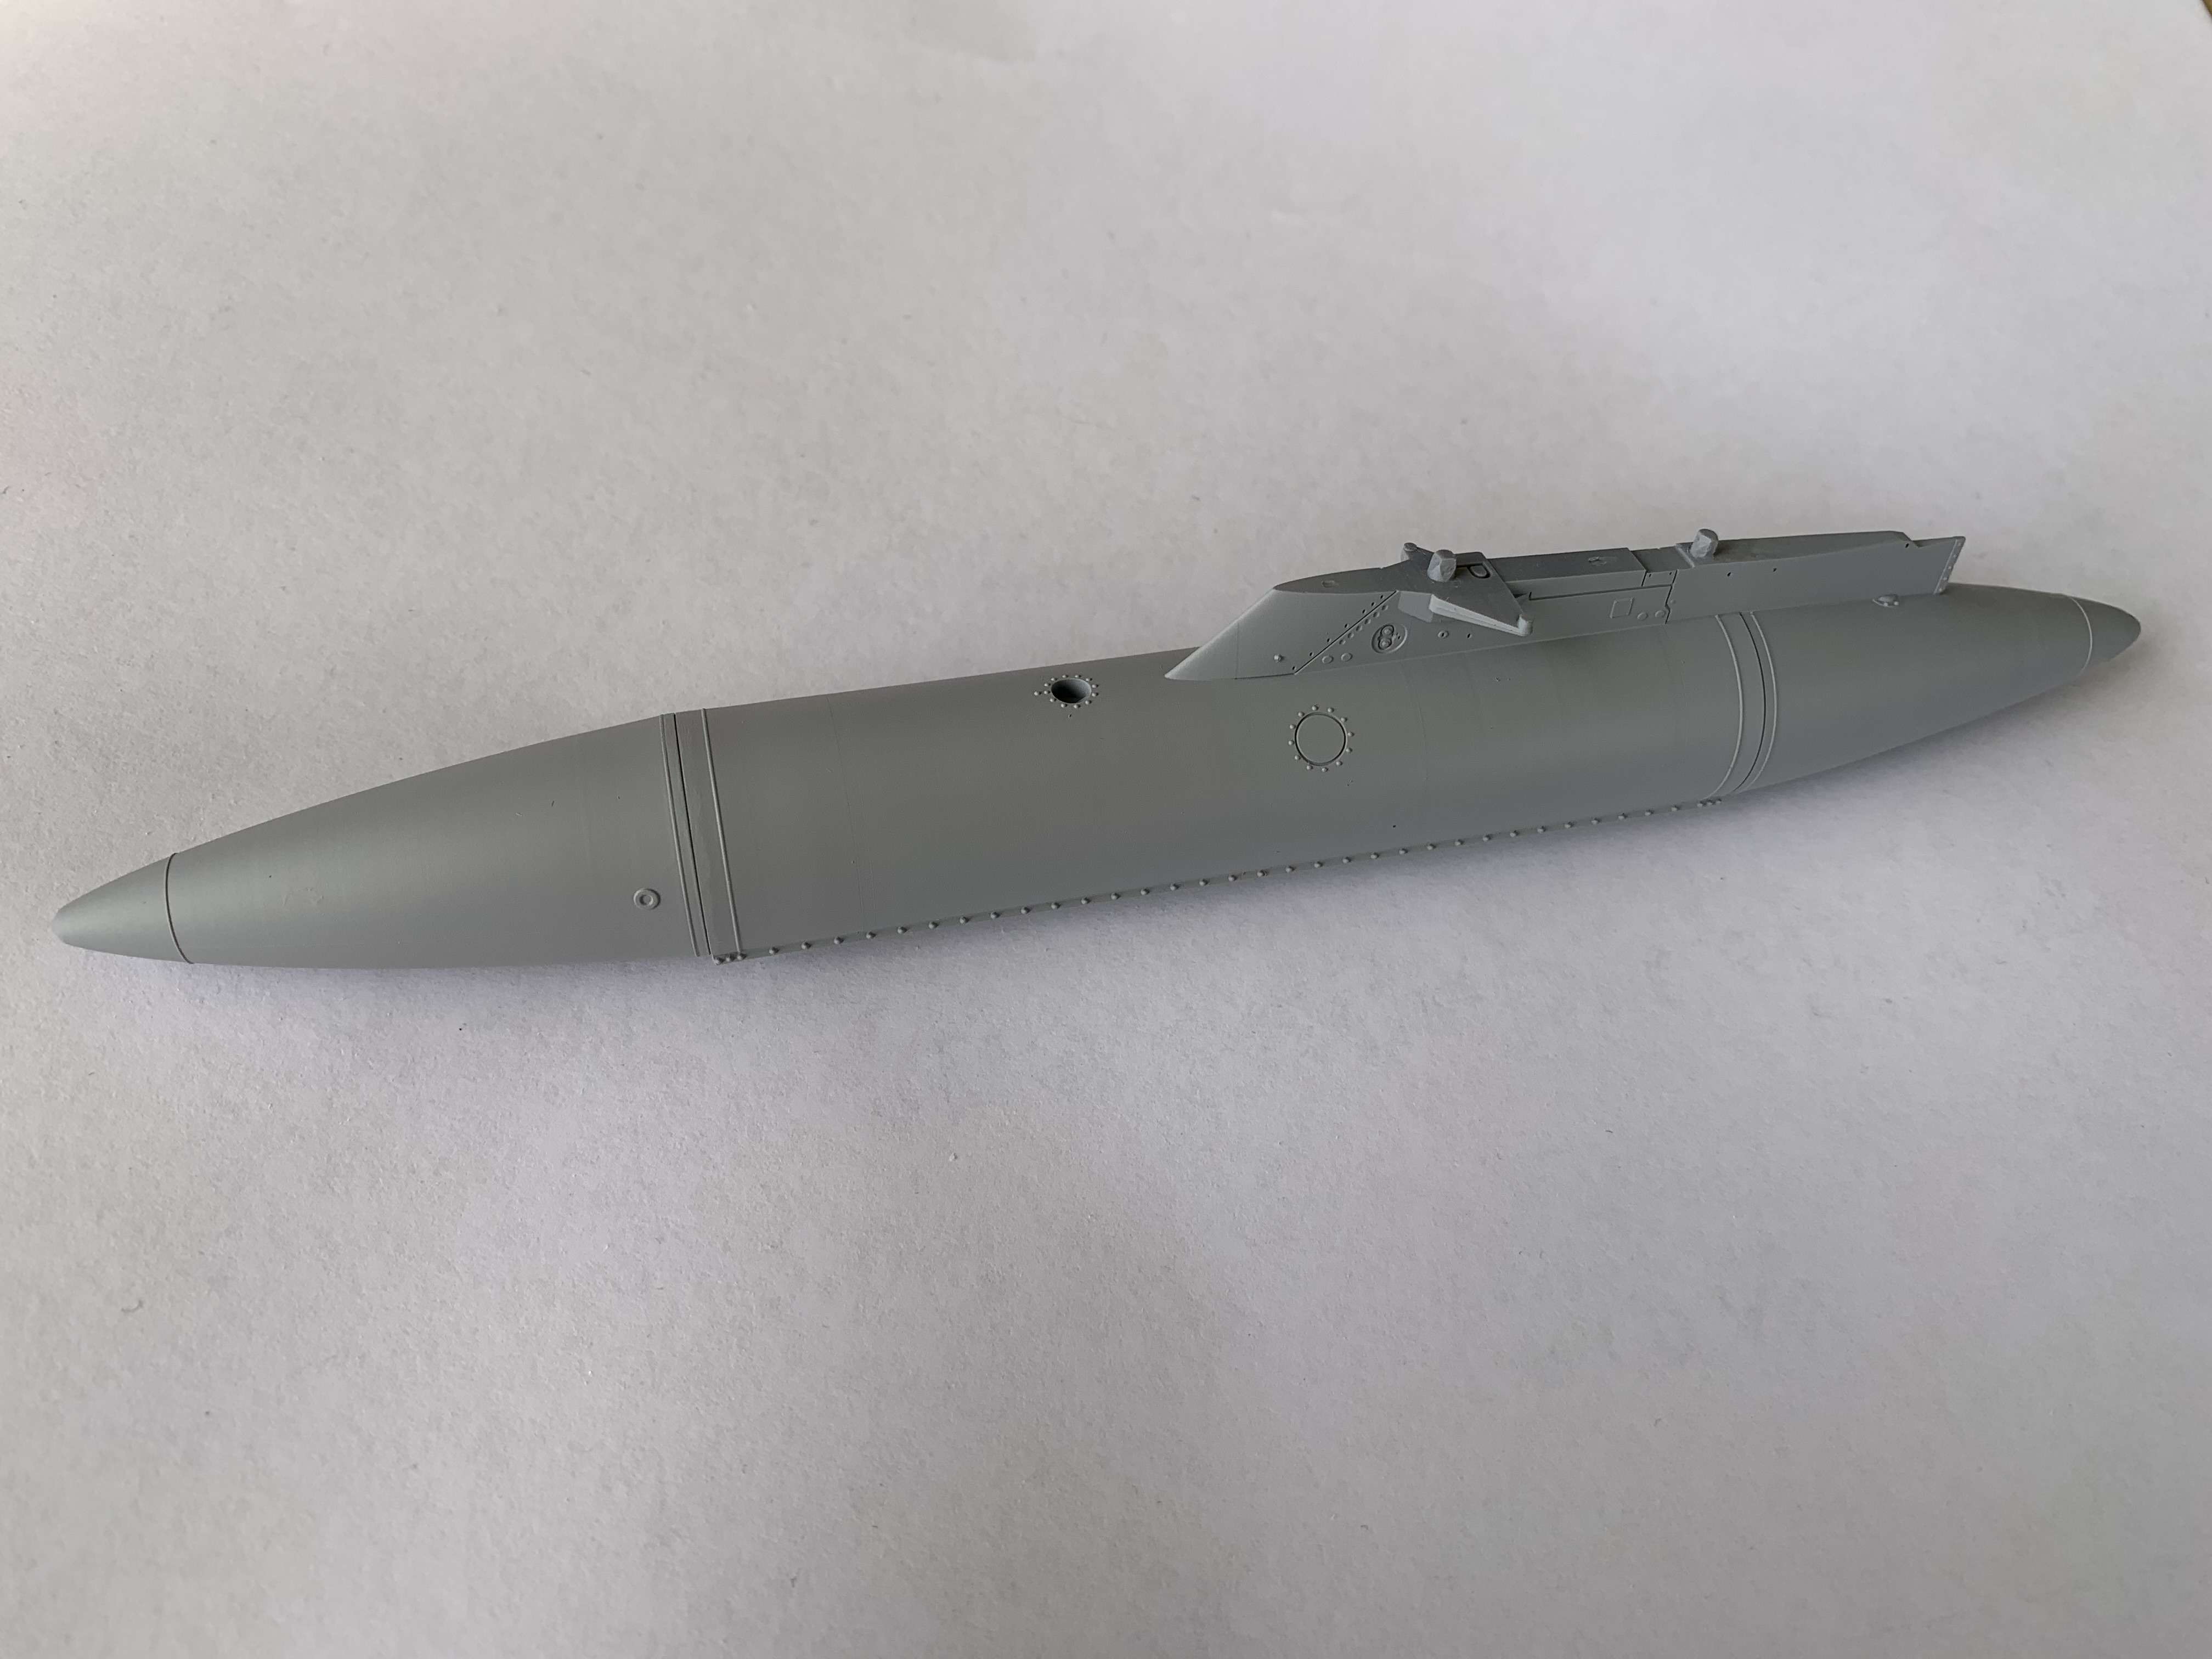
A company pretty new (to me at least) has been quietly releasing a bunch of beautifully designed and printed Parts for 1/32 Jets. Anyway on Friday the postman dropped off a box all the way from beautiful Peru with a gorgeous set of Phantom underwing fuel tanks. Designed as a complete replacement for the Tamiya kit ones. As with new companies you wonder what their quality is like. Well, all I can say are these are just amazing and some of the nicest 3D printed parts on the market presently.
I must say that I have no financial affiliation or anything with Eduardo from JPSM (sorry I had to shorten it as I didnt want to type that long name again lol) just a VERY happy and impressed customer! And I thought I must absolutely post here as I know a lot of you guys have Phantoms in your stashes.
I'll do a quick mini review and there will be more on my next RAF Phantom build update.
So this is the product item
There is the Tamiya part I was about to start detailing....
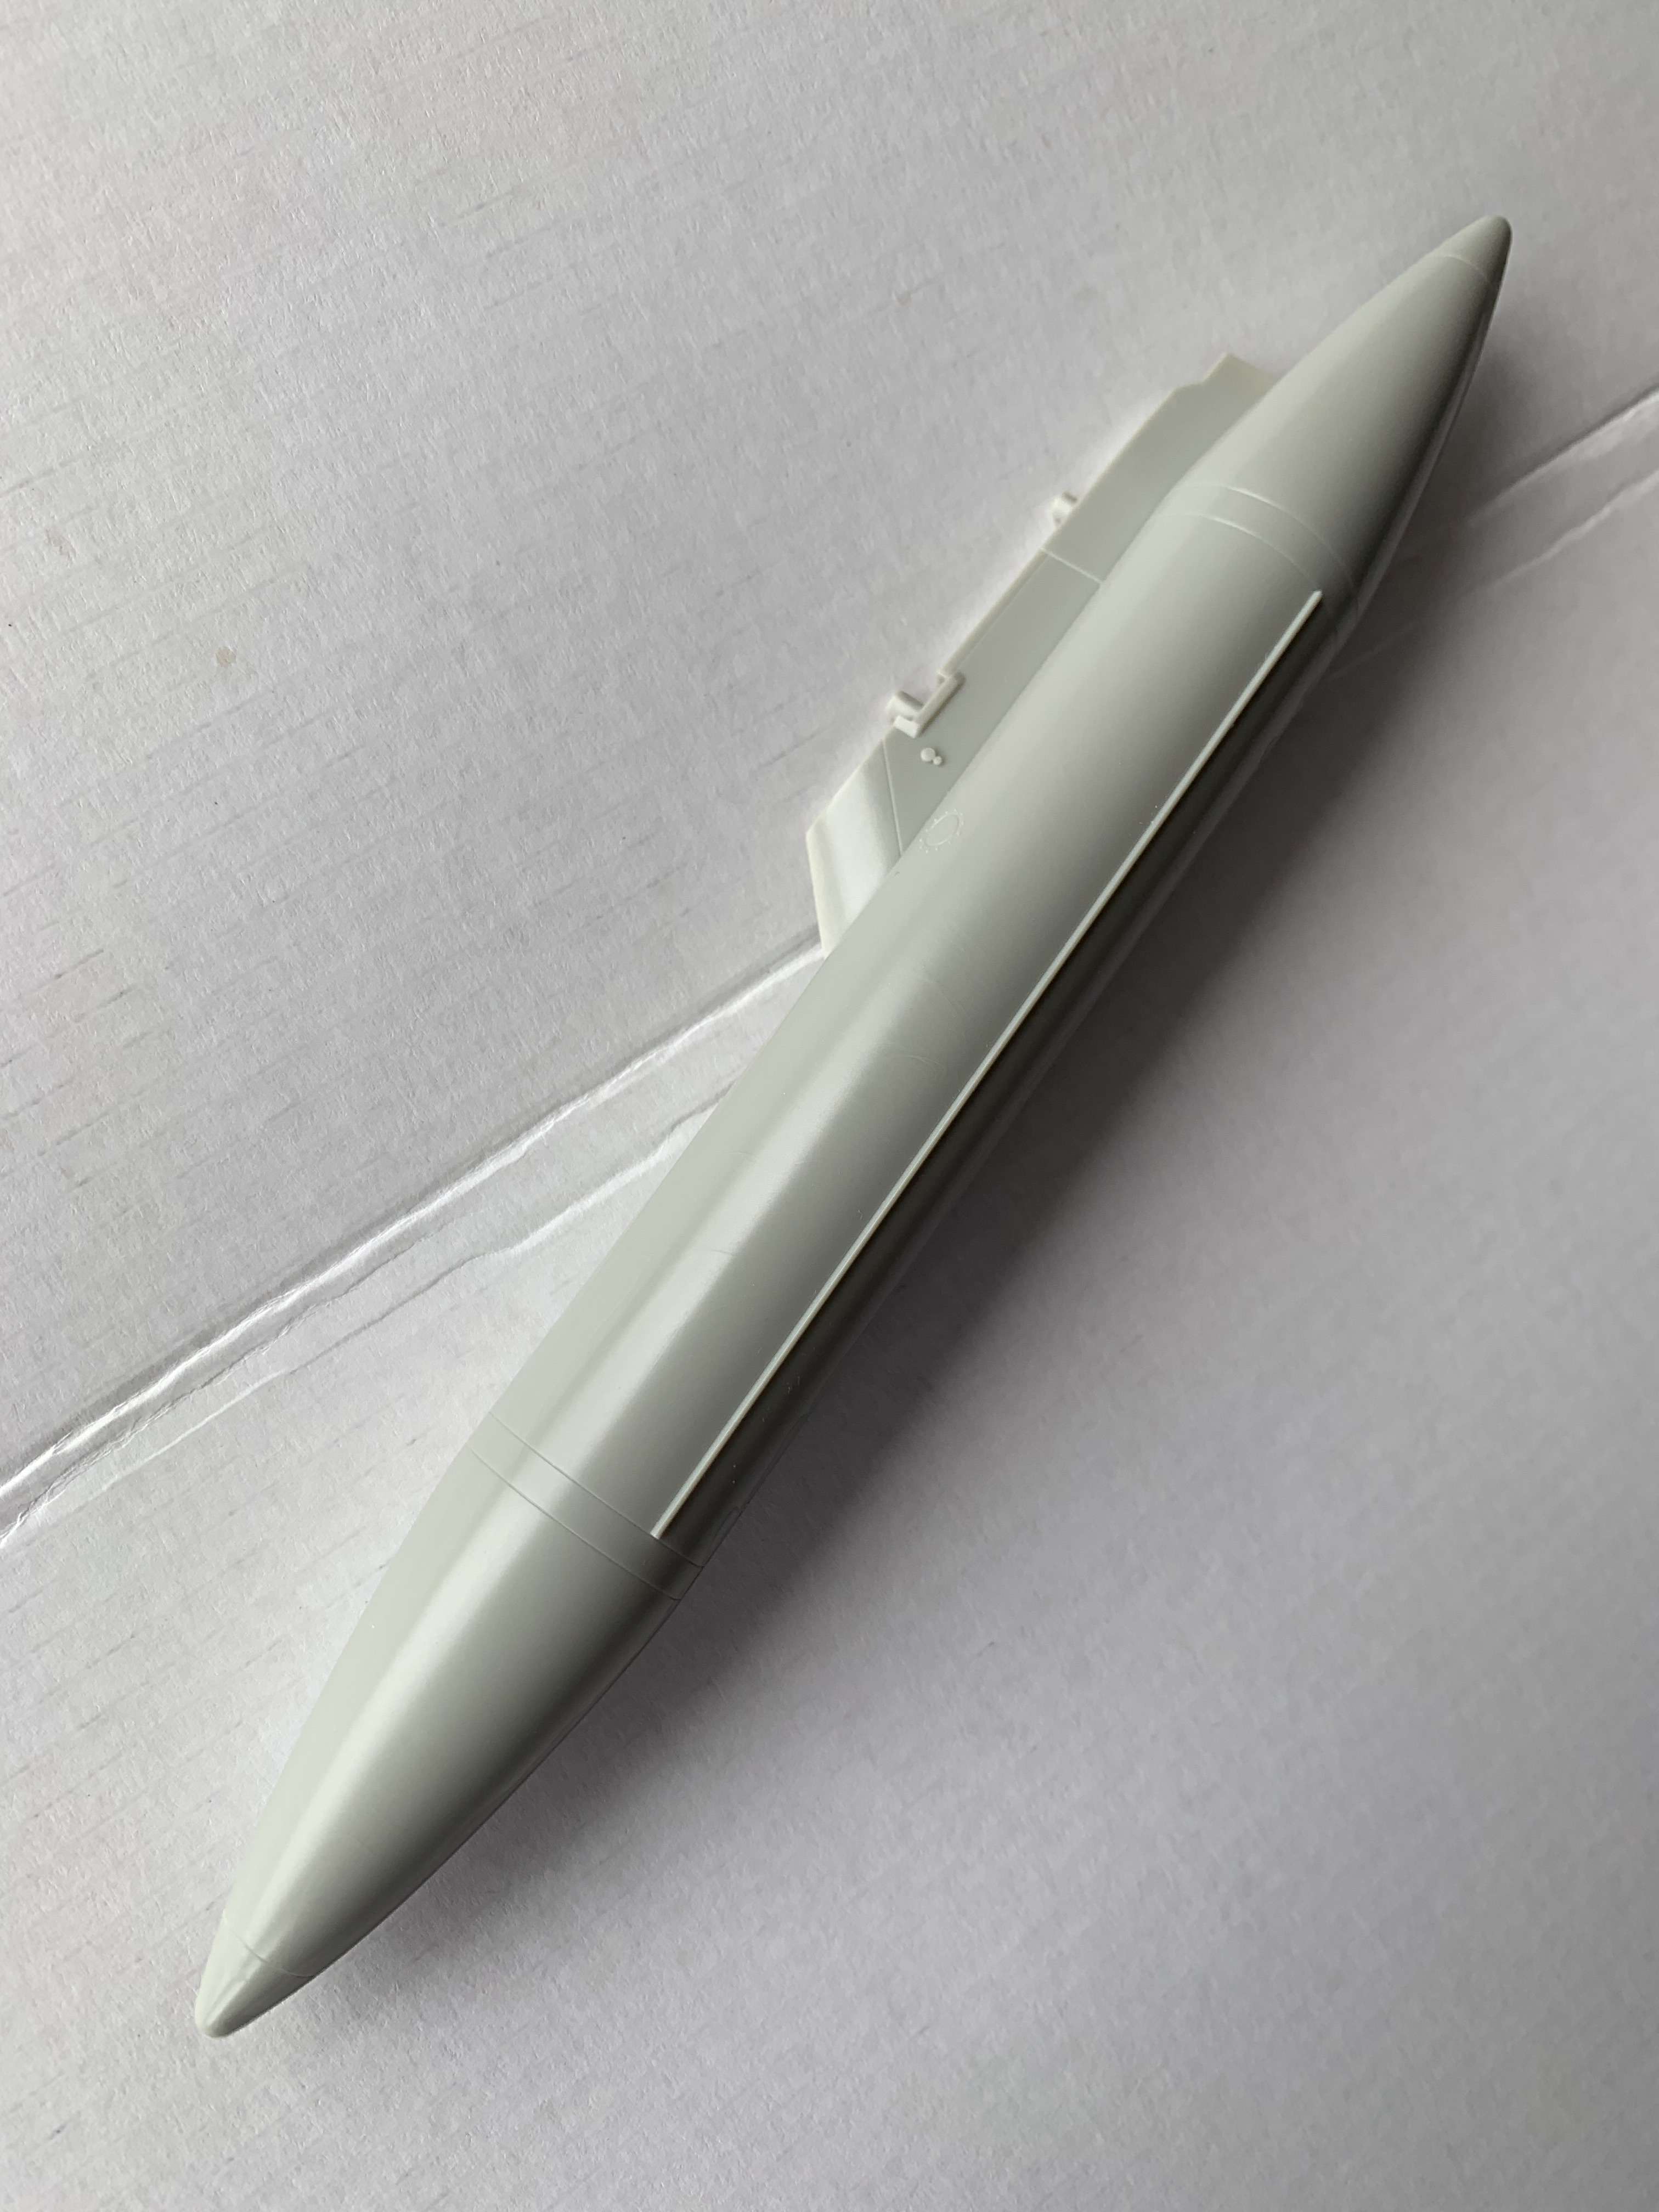
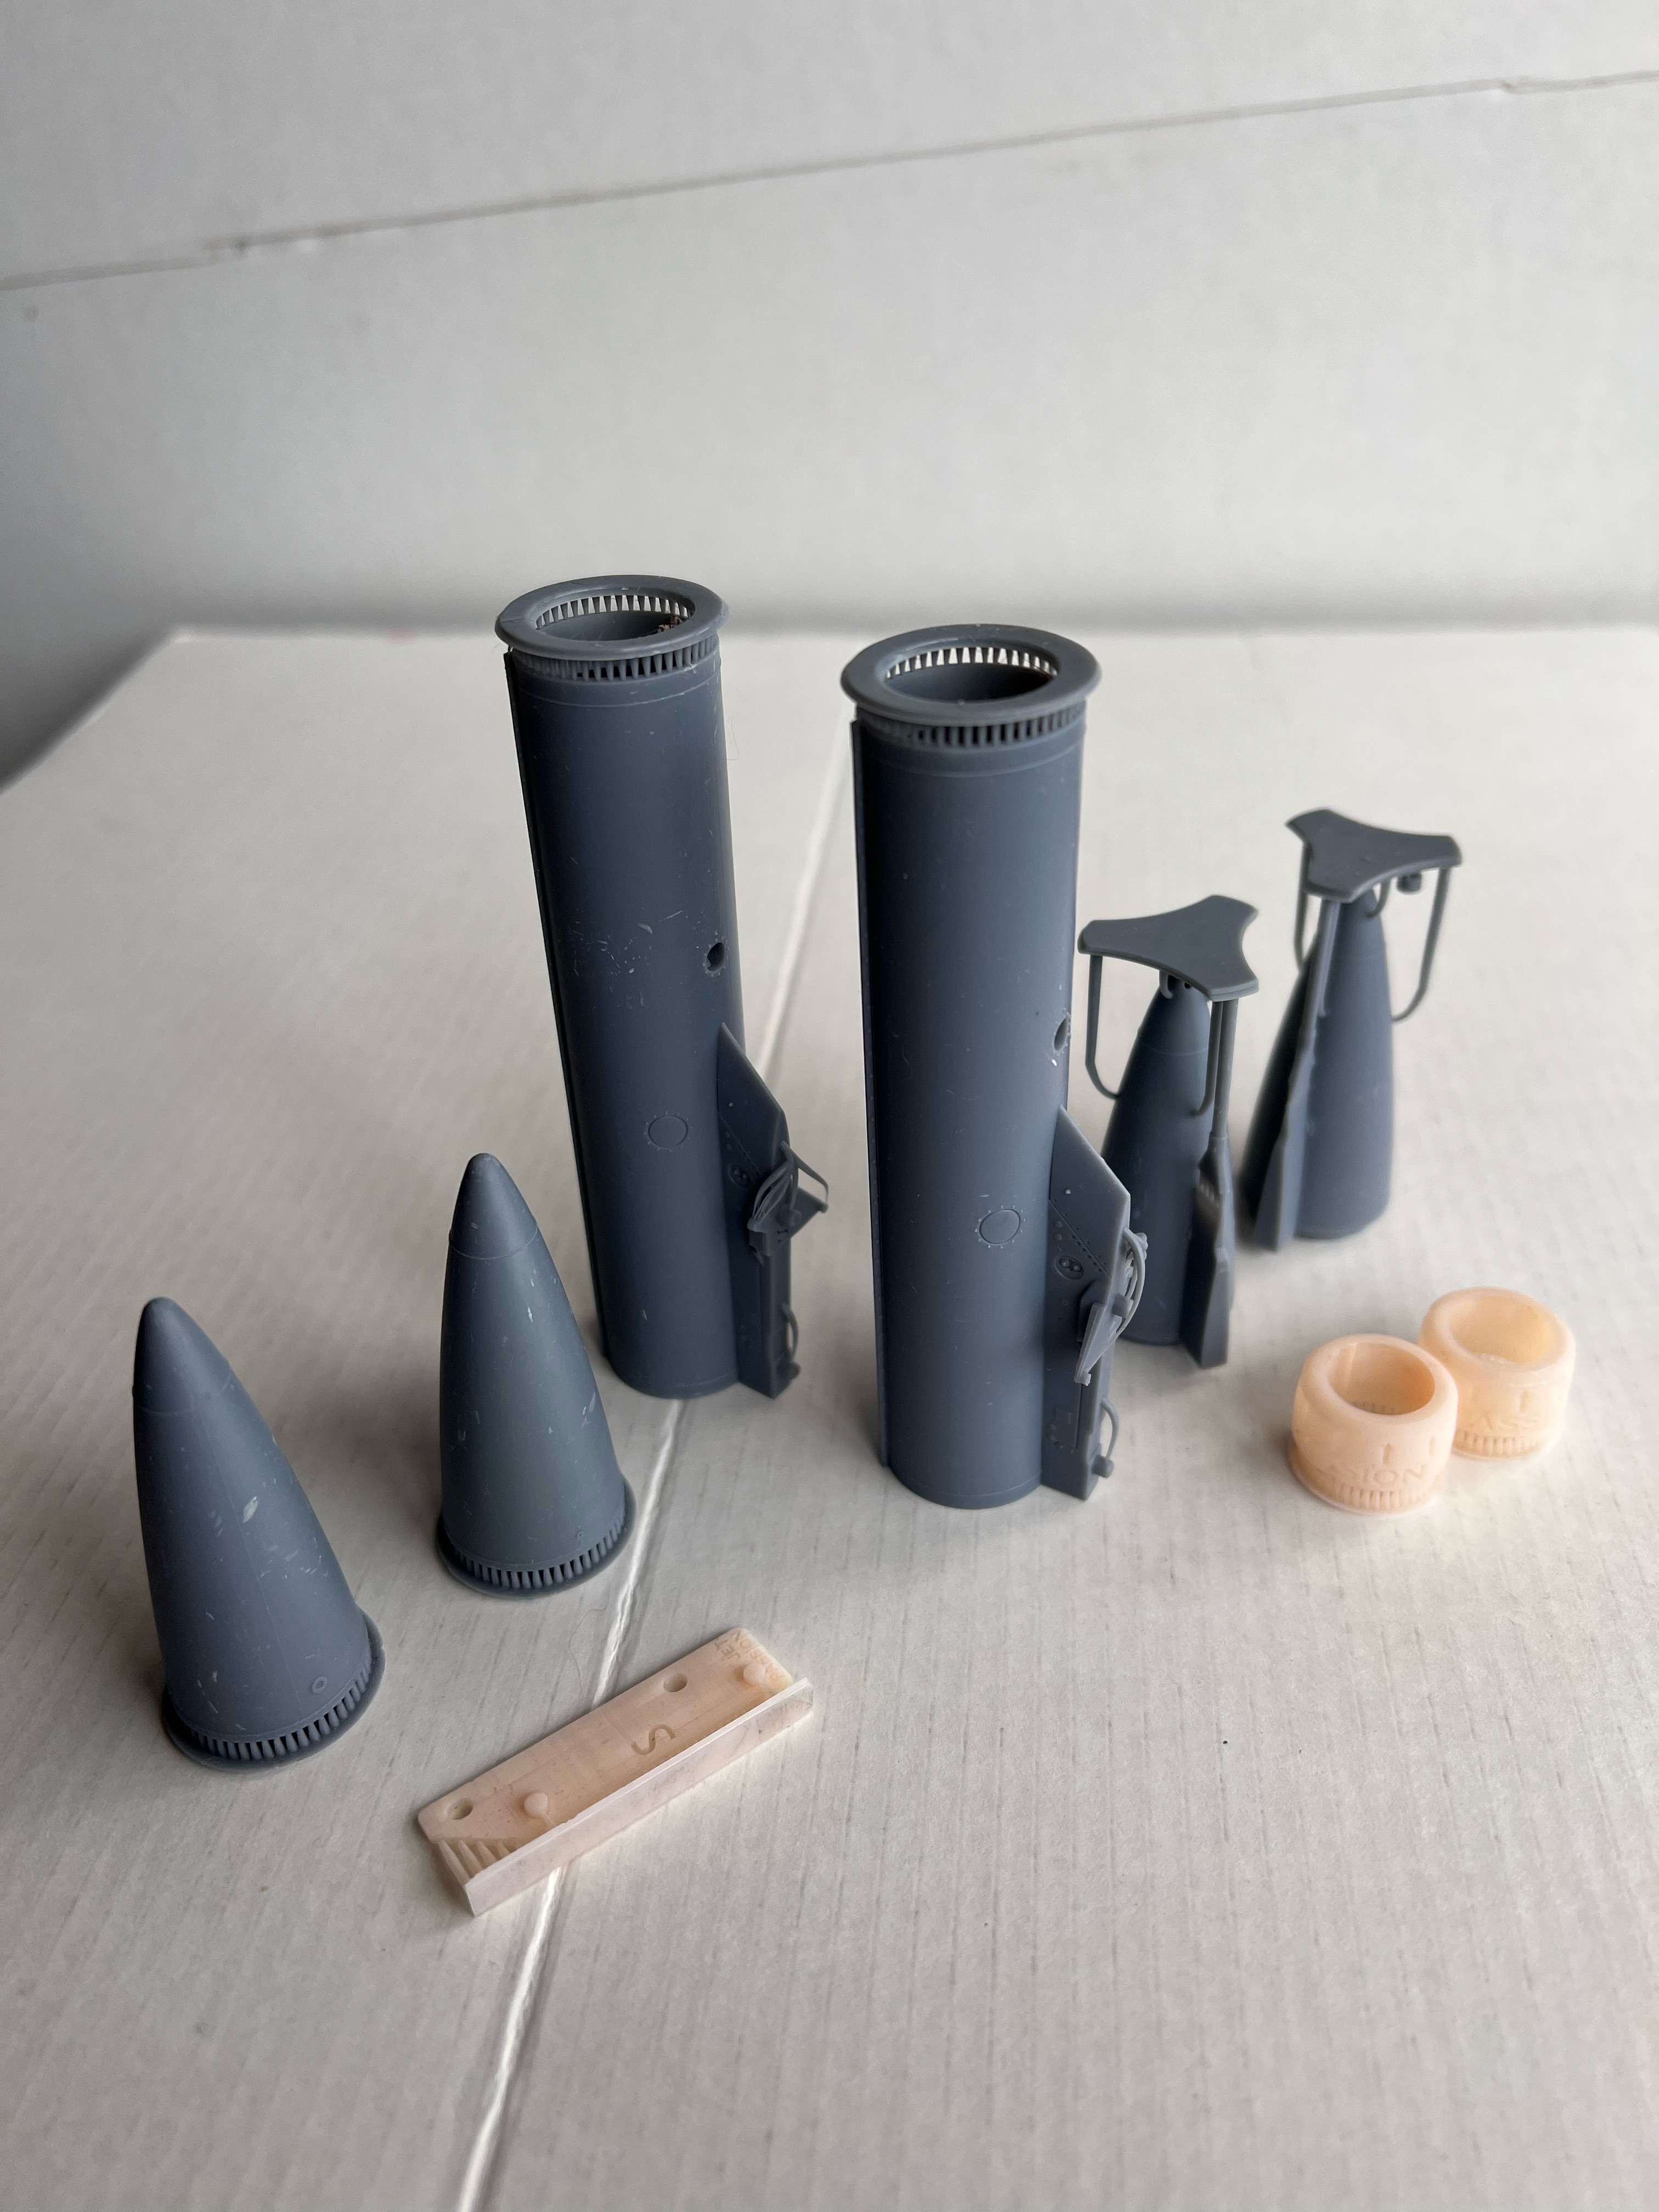
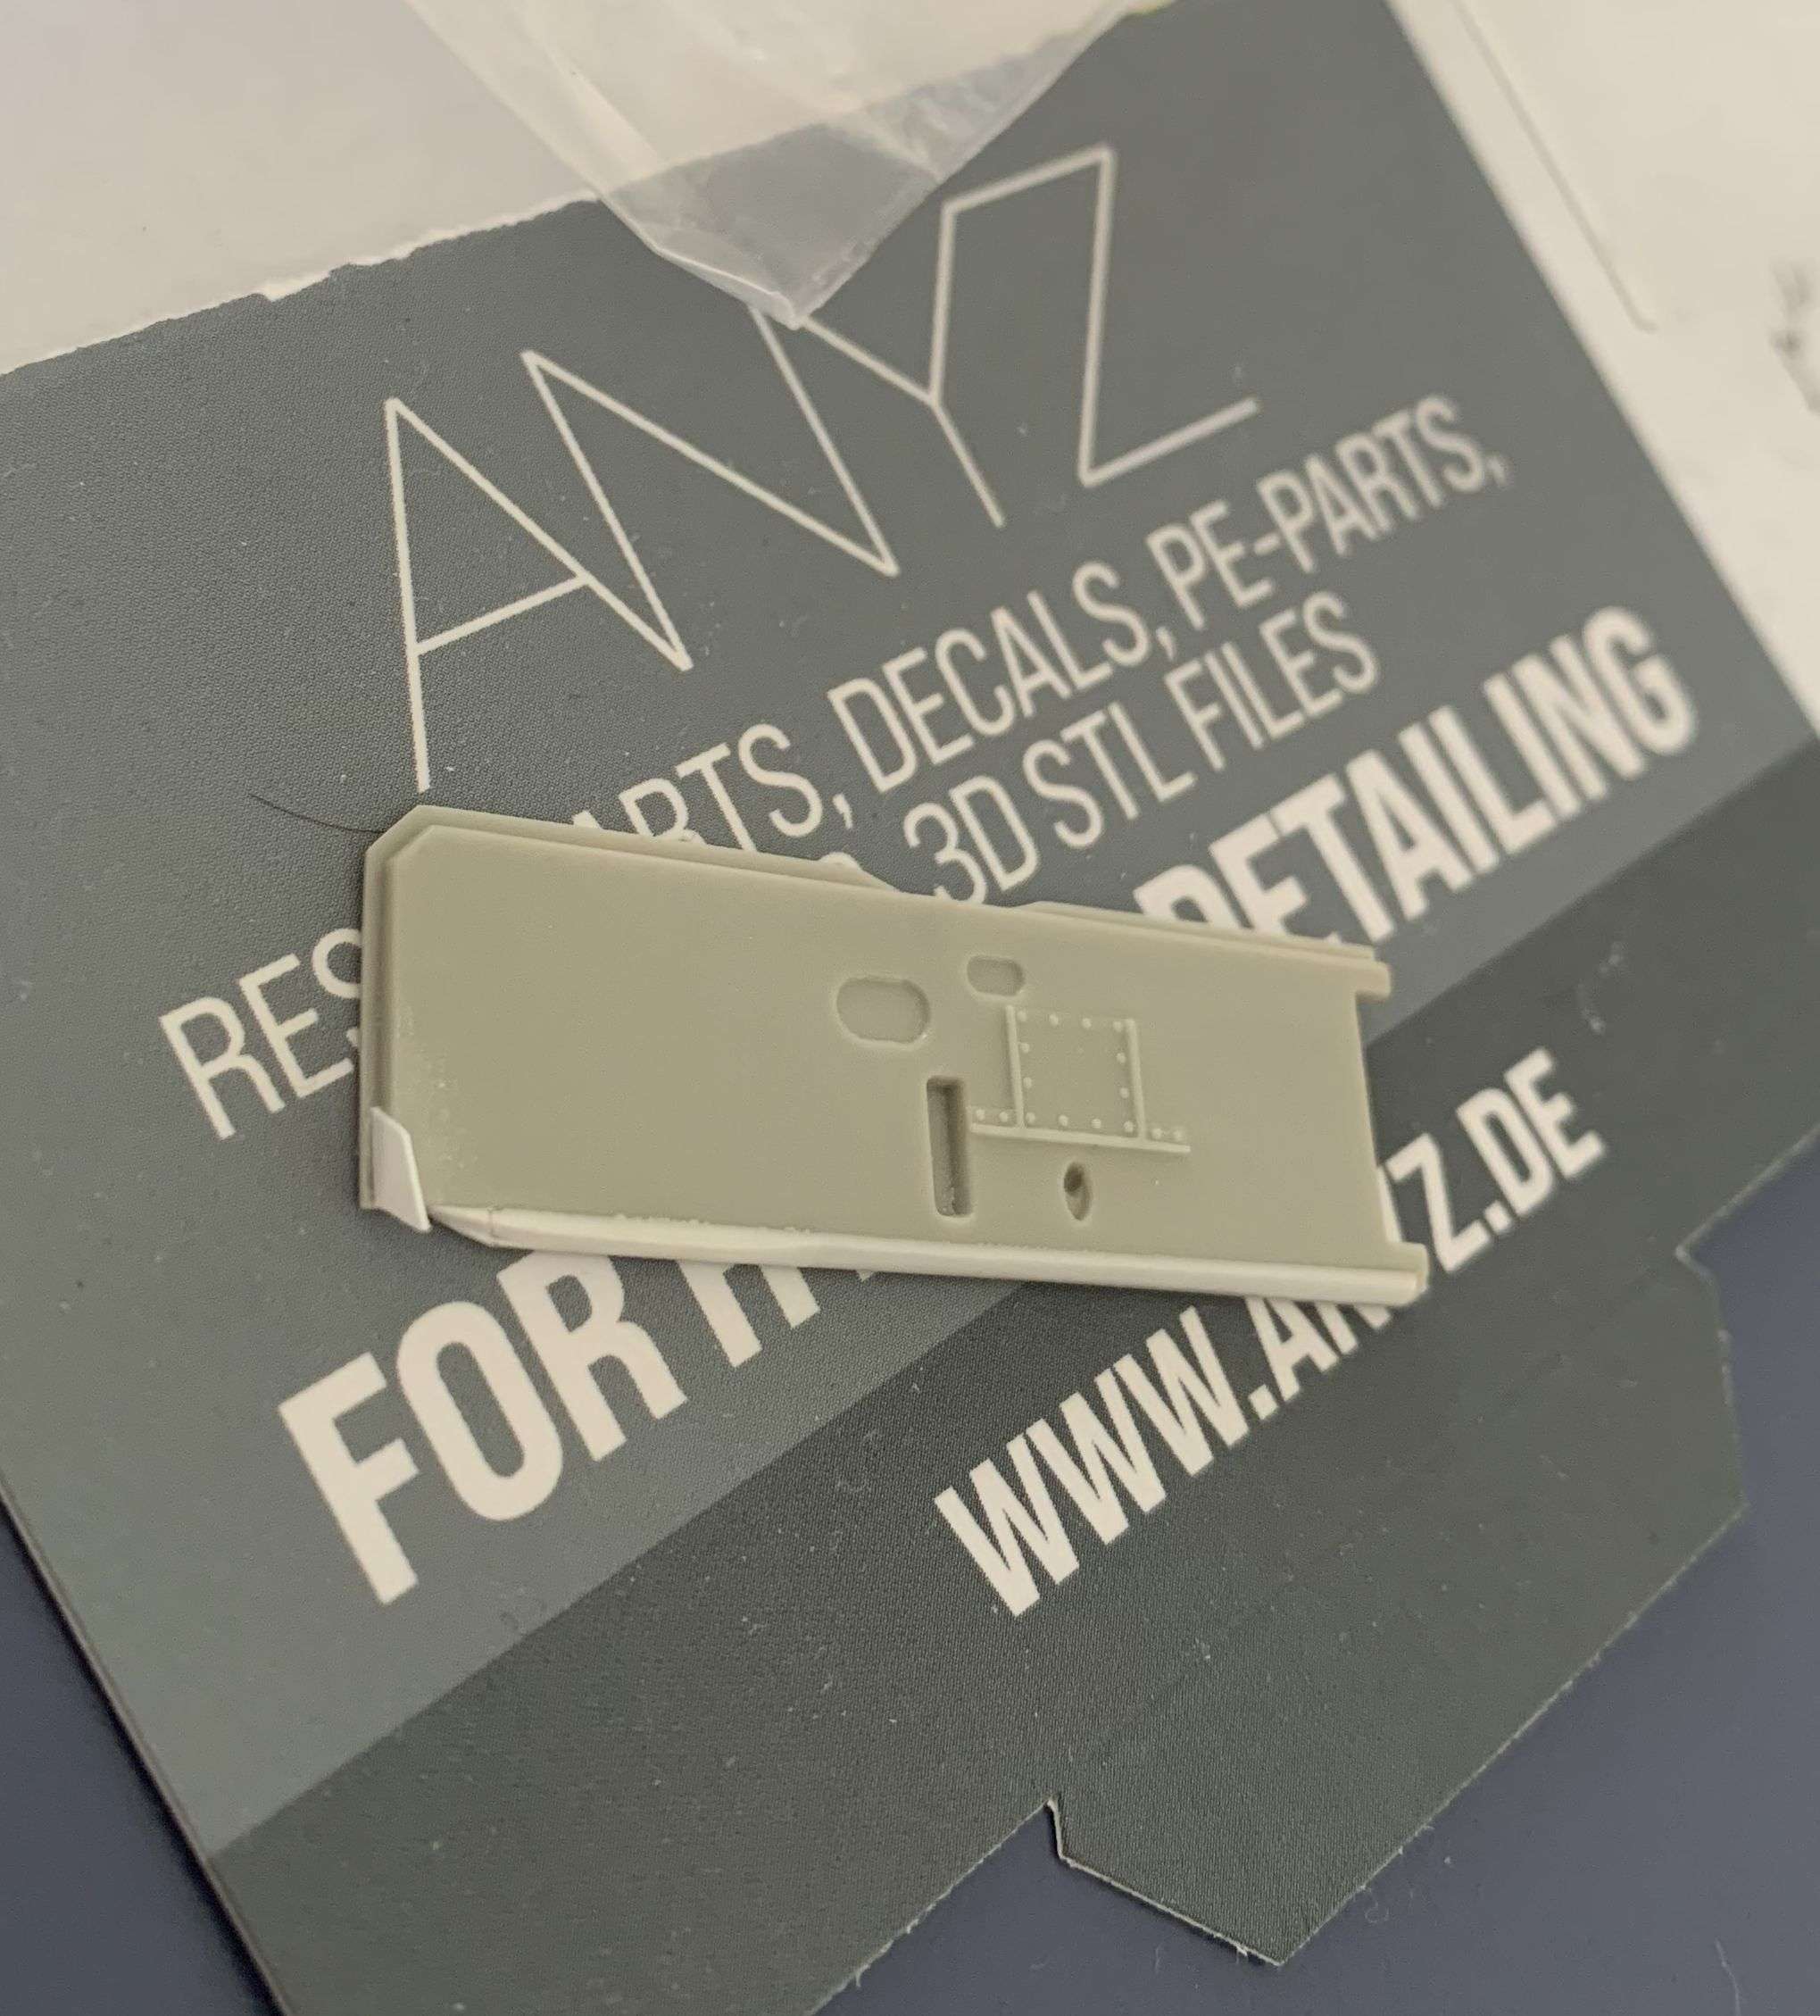
And here are the contents of the box
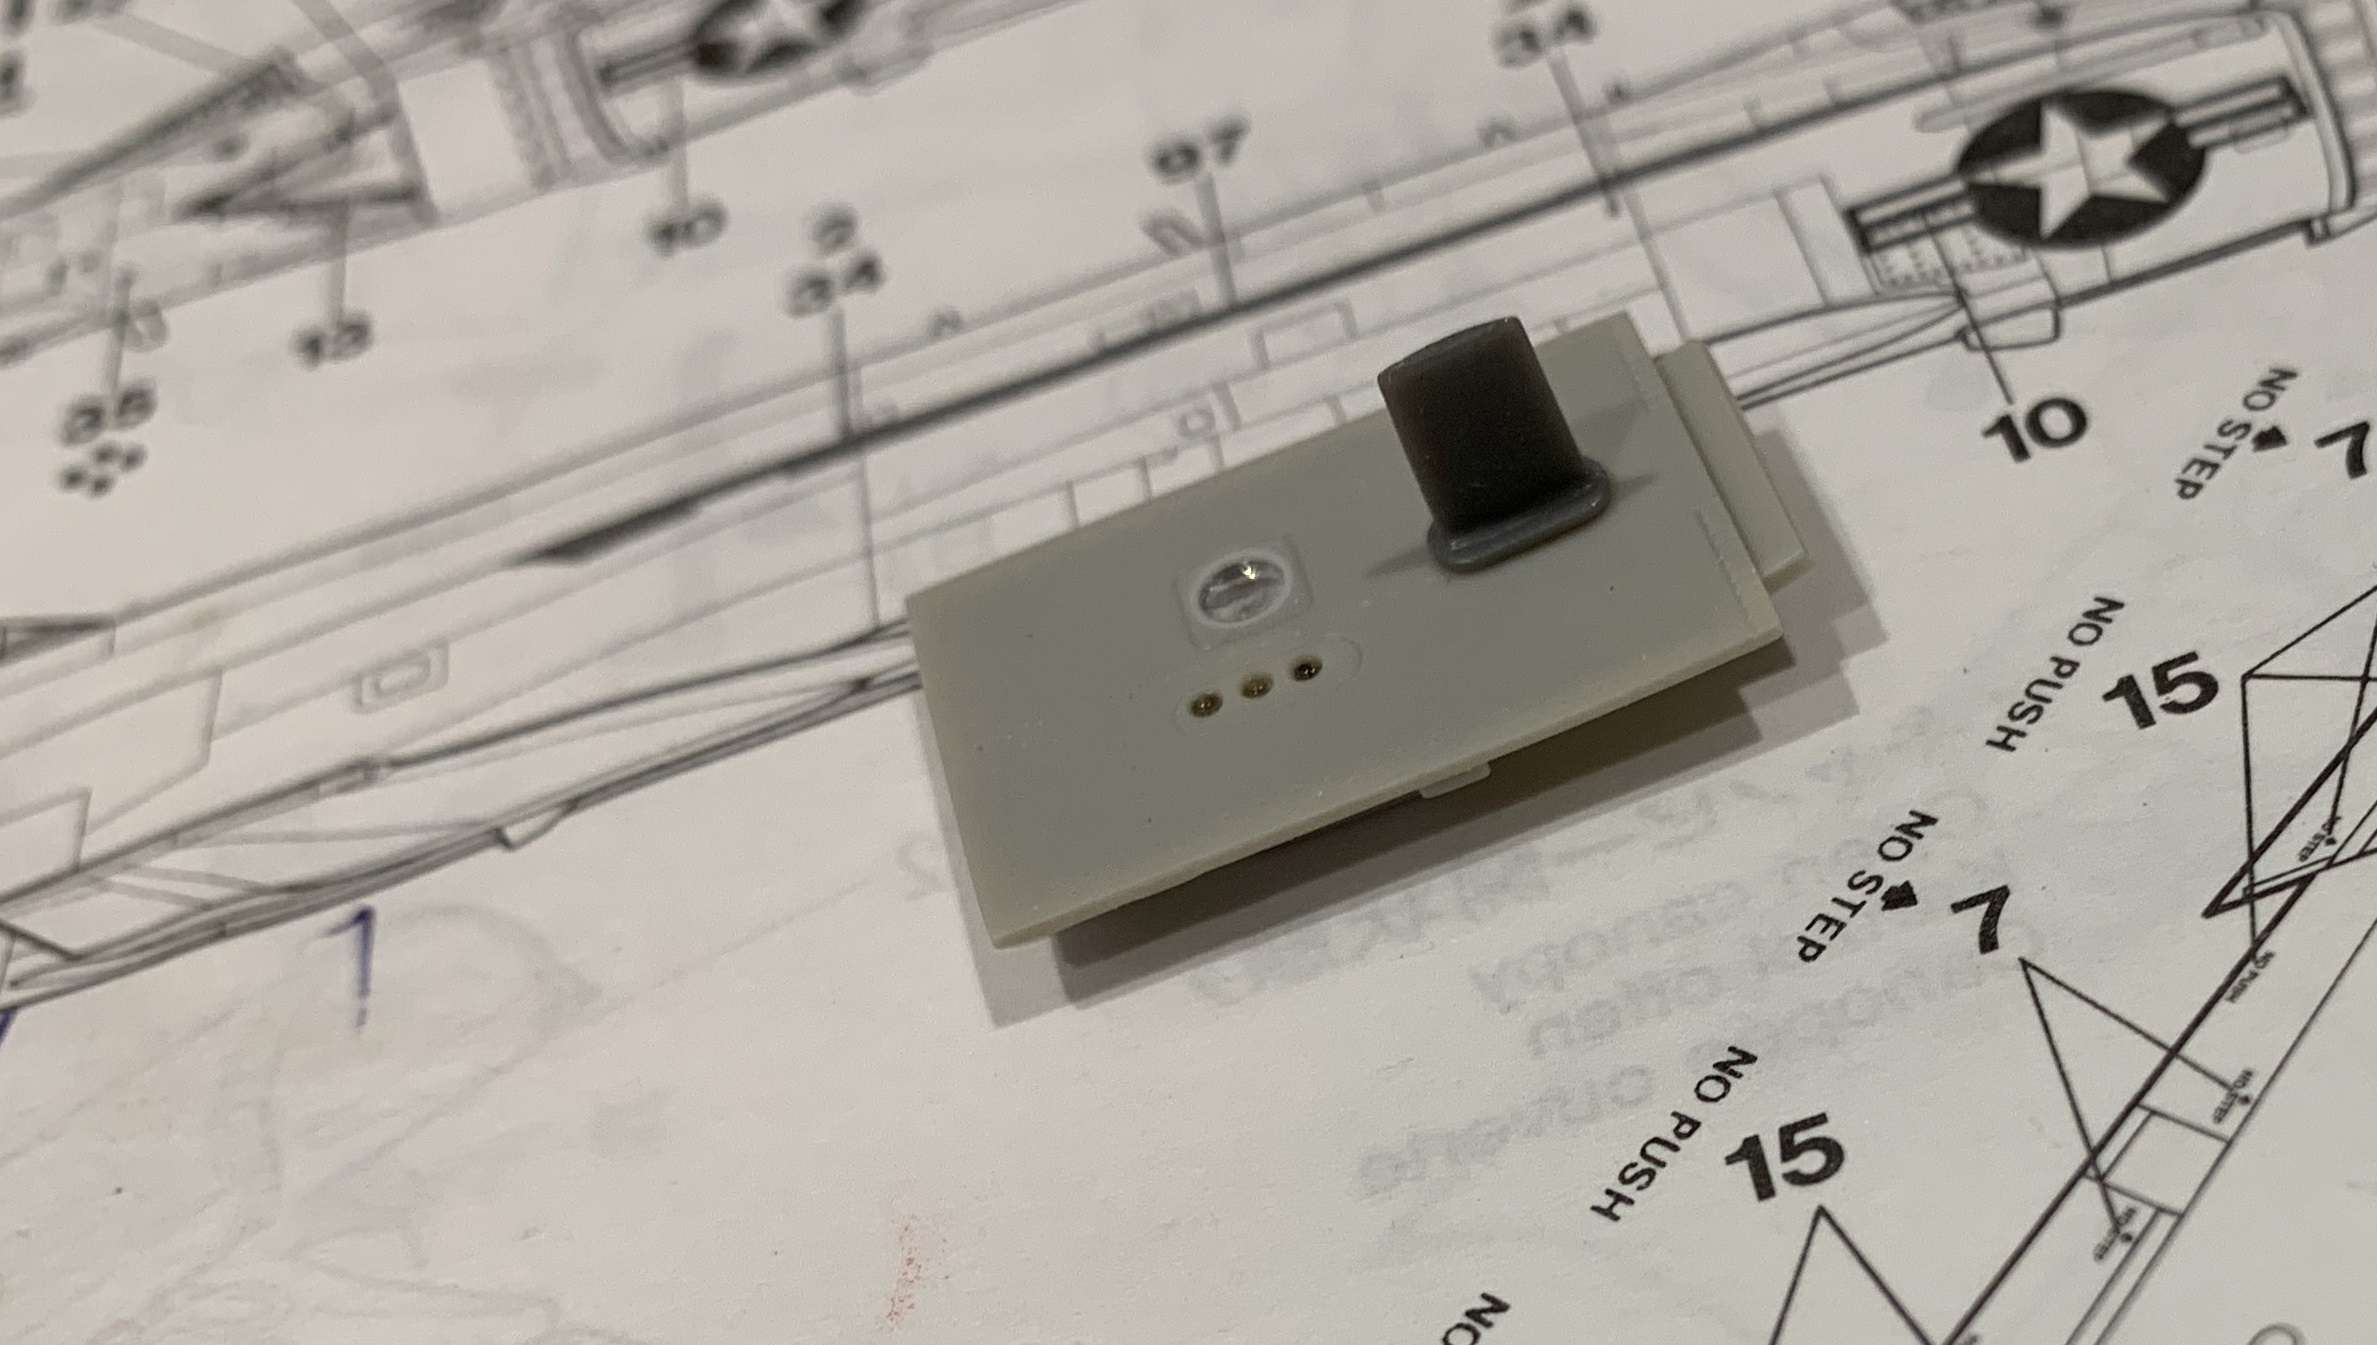
Notice the little jig in the foreground for setting up the correct position for redrilling the holes to mount the tanks in the correct position, and thos pale circular items are apparently to ensure perfect alignment of the end caps.
Look at this detail....excuse my crappy pics
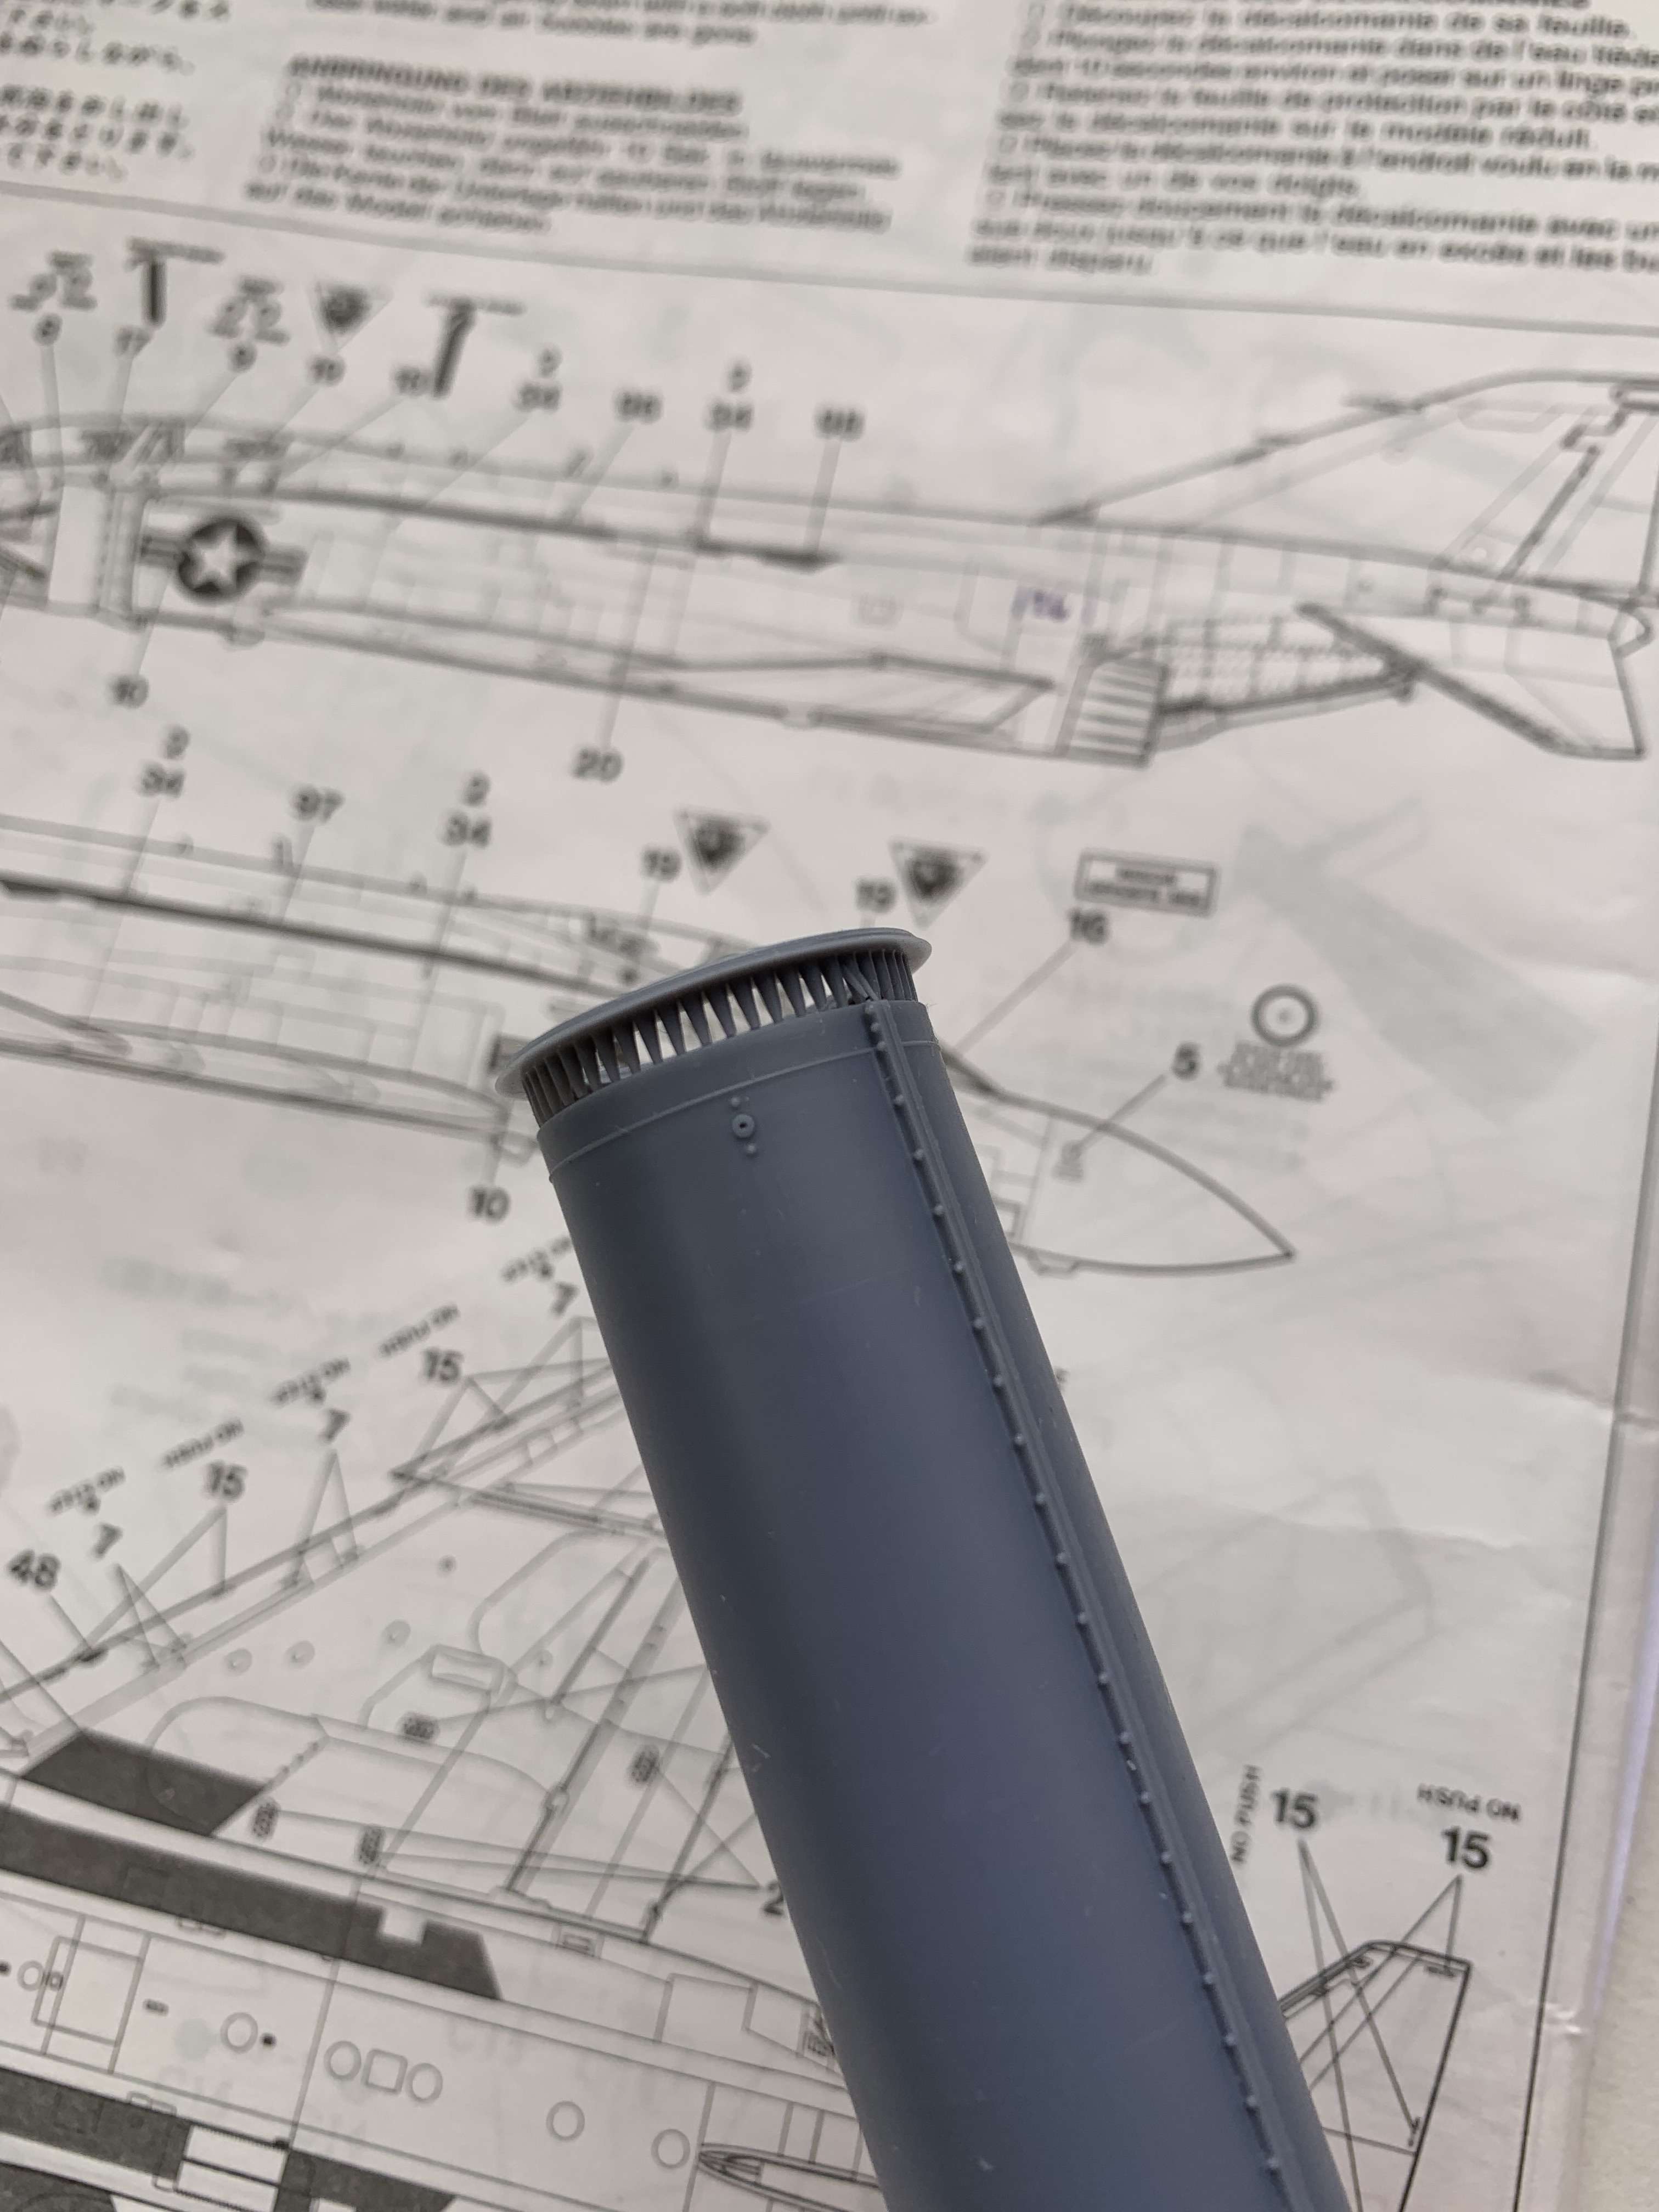
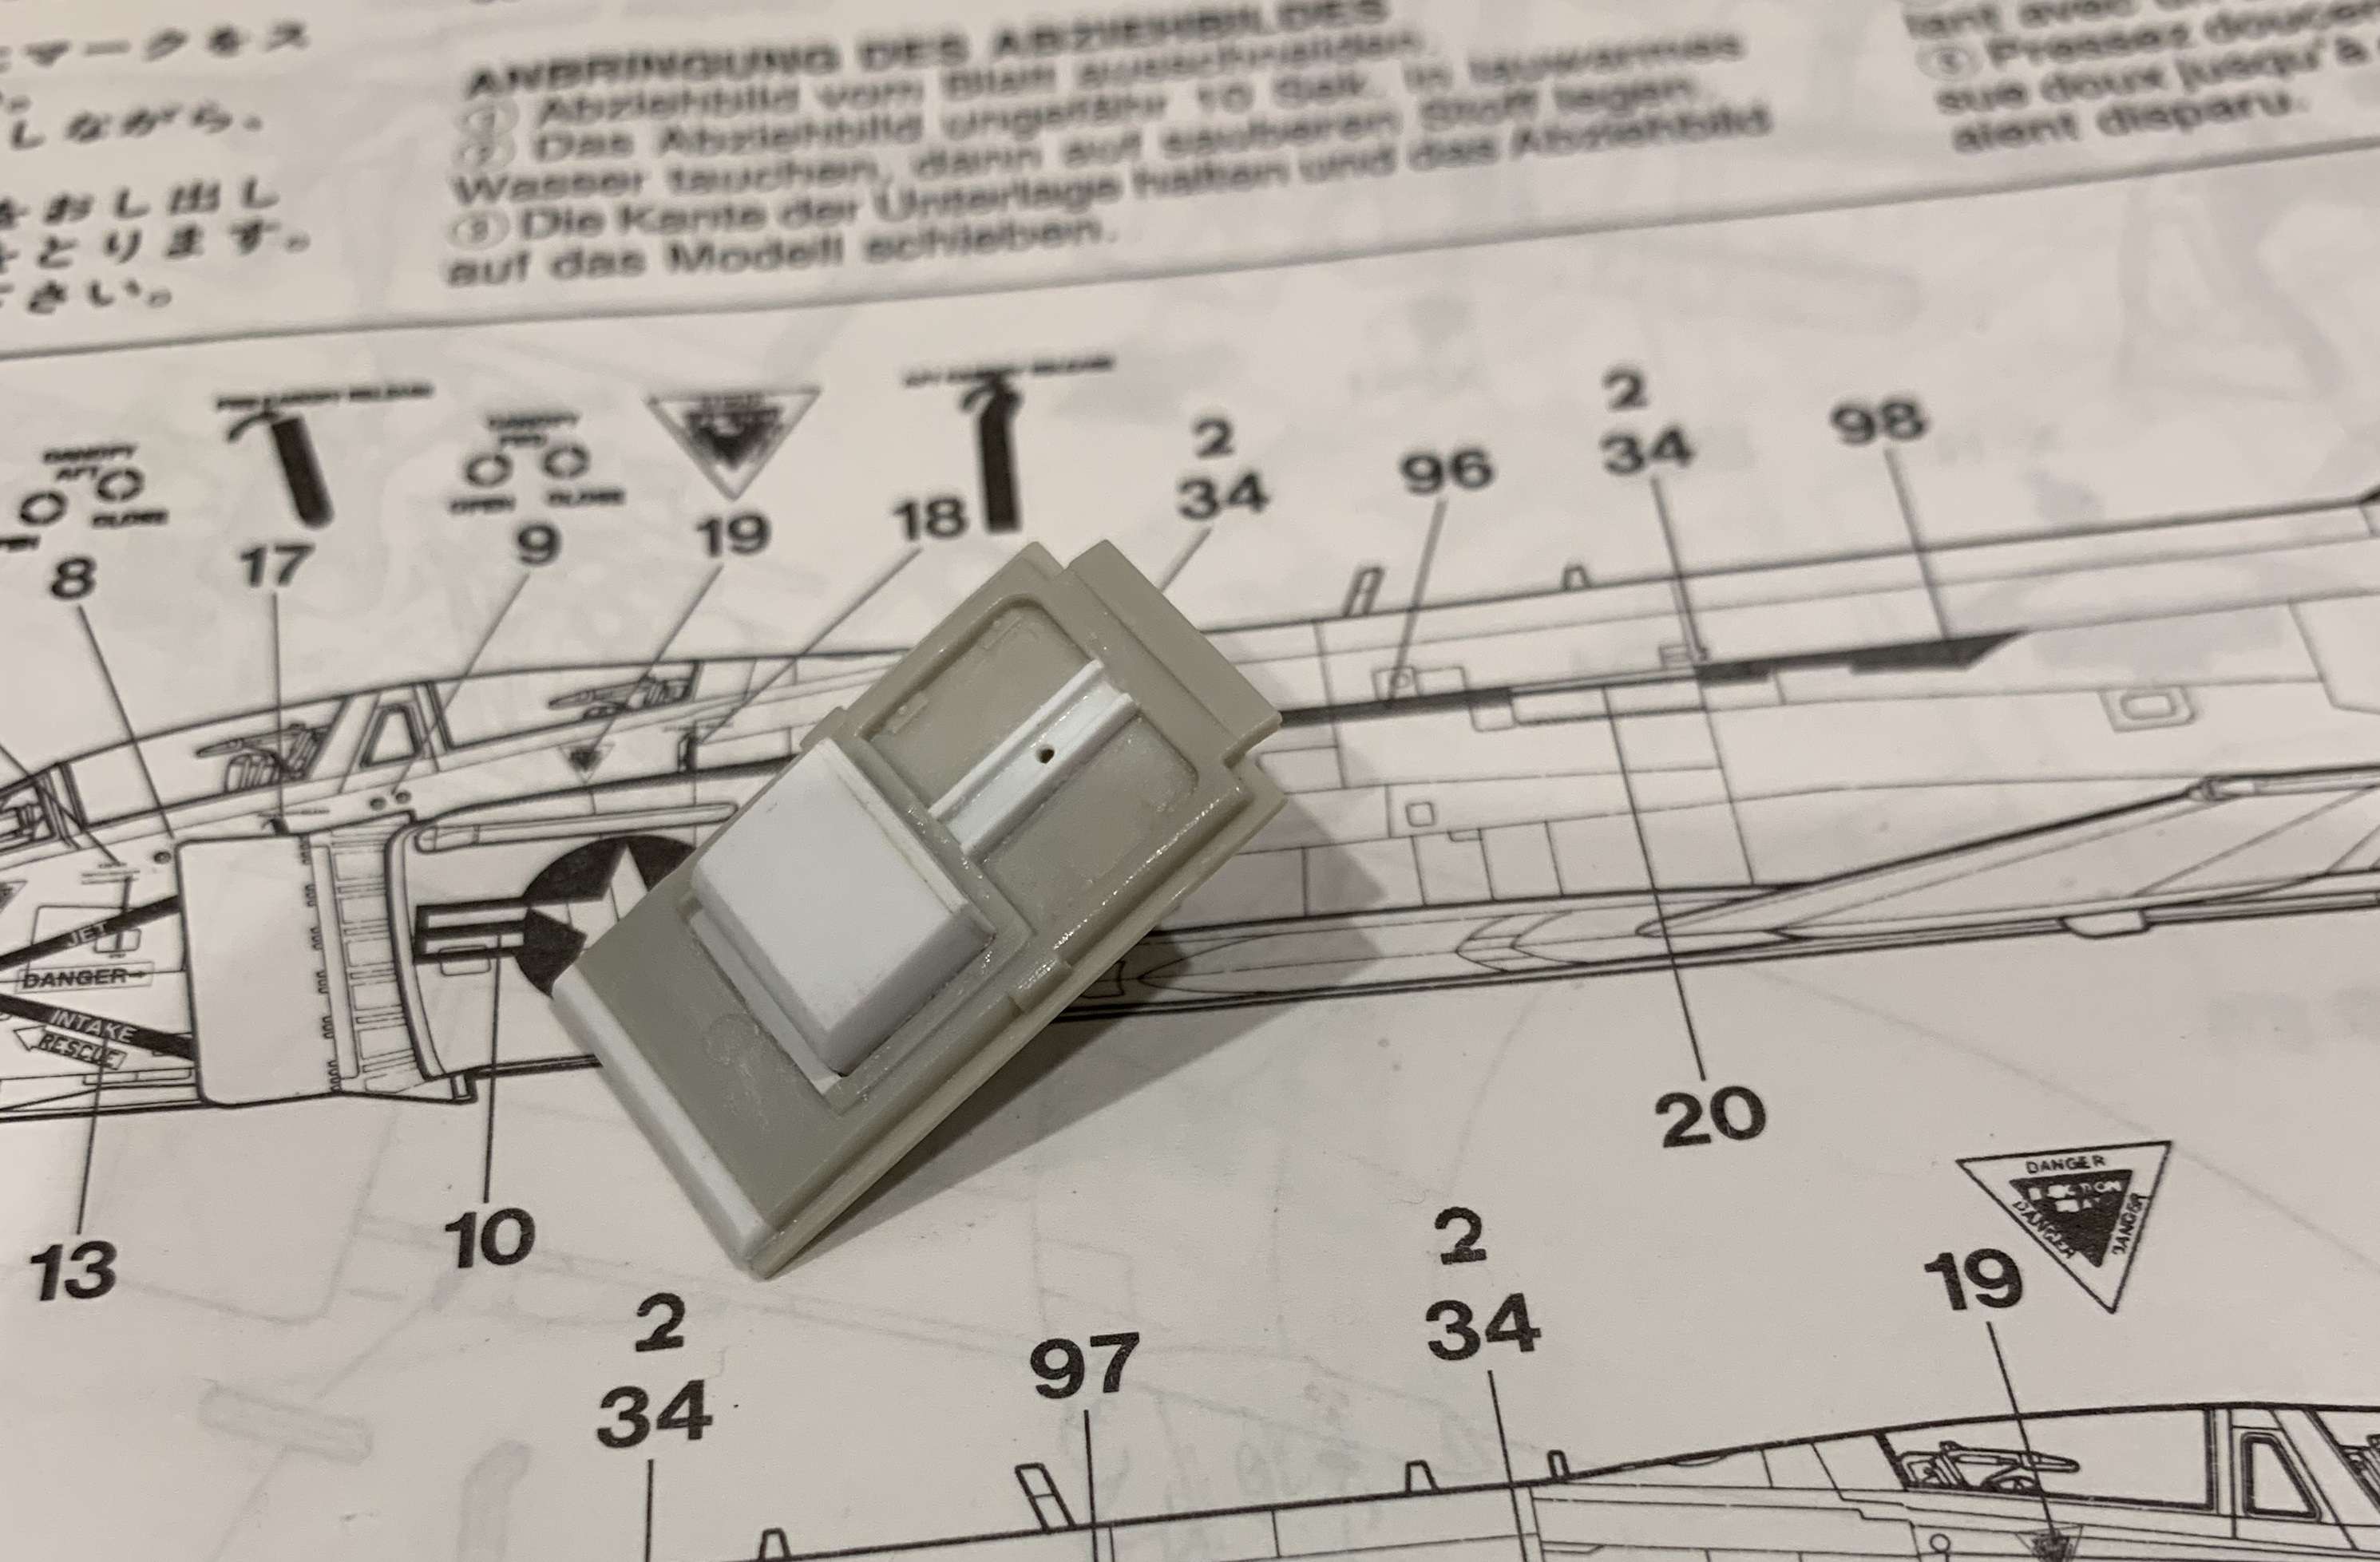
Nose cone (perfect shape and contour......just needs a few dings and dents added LOL)
And finally end caps with rear part of pylon
There is a separate fuel filler cap that drops in as well.
Anyway, I am super impressed and just wanted to post this as a public service announcement. Actually I think whilst I type this Eduardo is a member here...
There we go...found him!
Thanks Eduardo...I hope you sell lots and bring us some more amazing products!
Well look out for them on my RAF Phantom build, I think the tanks are a super iconic and extremely visible on the Phantom, (whatever version) and will really add a lot to the look of your finished build as they are just so prominent
Cheers Anthony
-
Sensational mate!
I love how you have been able to combine so many of the smaller assemblies together with such success! A real testament to your skills. Nice idea with the jig too I must say. You have skills I can only dream of!
Thanks for the update and looking forward to seeing one on my bench sometime


Cheers Anthony
-
-
-
-
I plan on building mine as this one. RNZAF VIP, I somehow will have to build a VIP interior as the kit comes with a troop/transport type interior.
I really like the kit (except the wheels....yuk) but I am under no illusion I have a lot of work ahead of me.
- LSP_Ray and thierry laurent
-
2
-
-
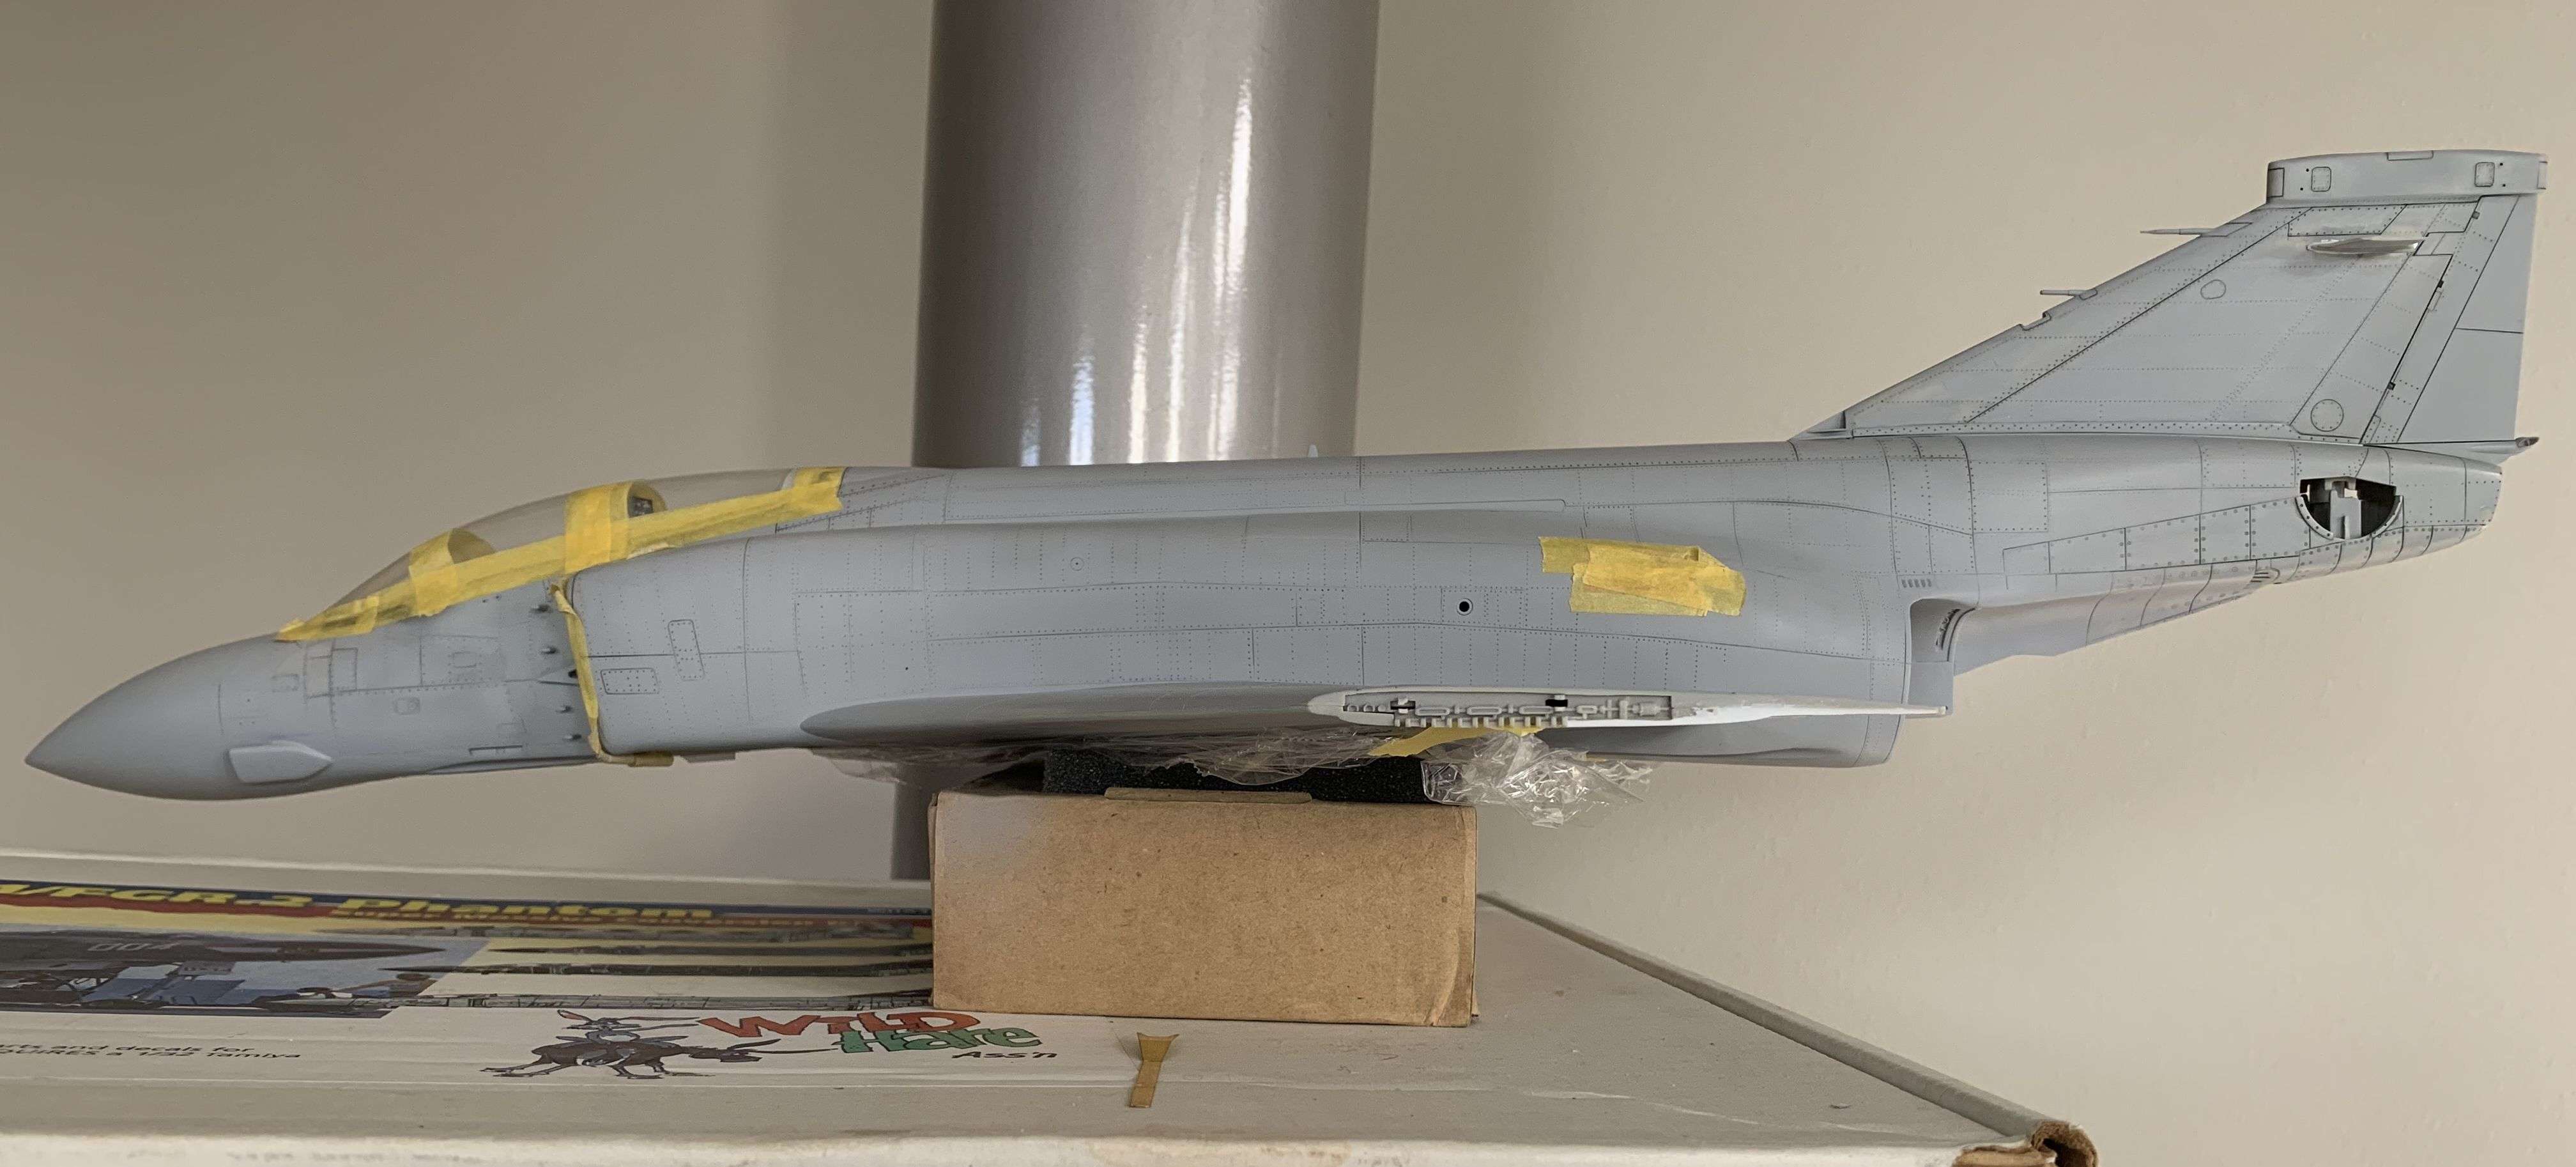
OK, so where was I?
I seem to have been constantly revising and fine tuning the back end underneath, contours on the sides and the area immediately behind the cans on the 'hot area
I think we were re contouring the sides when we last spoke
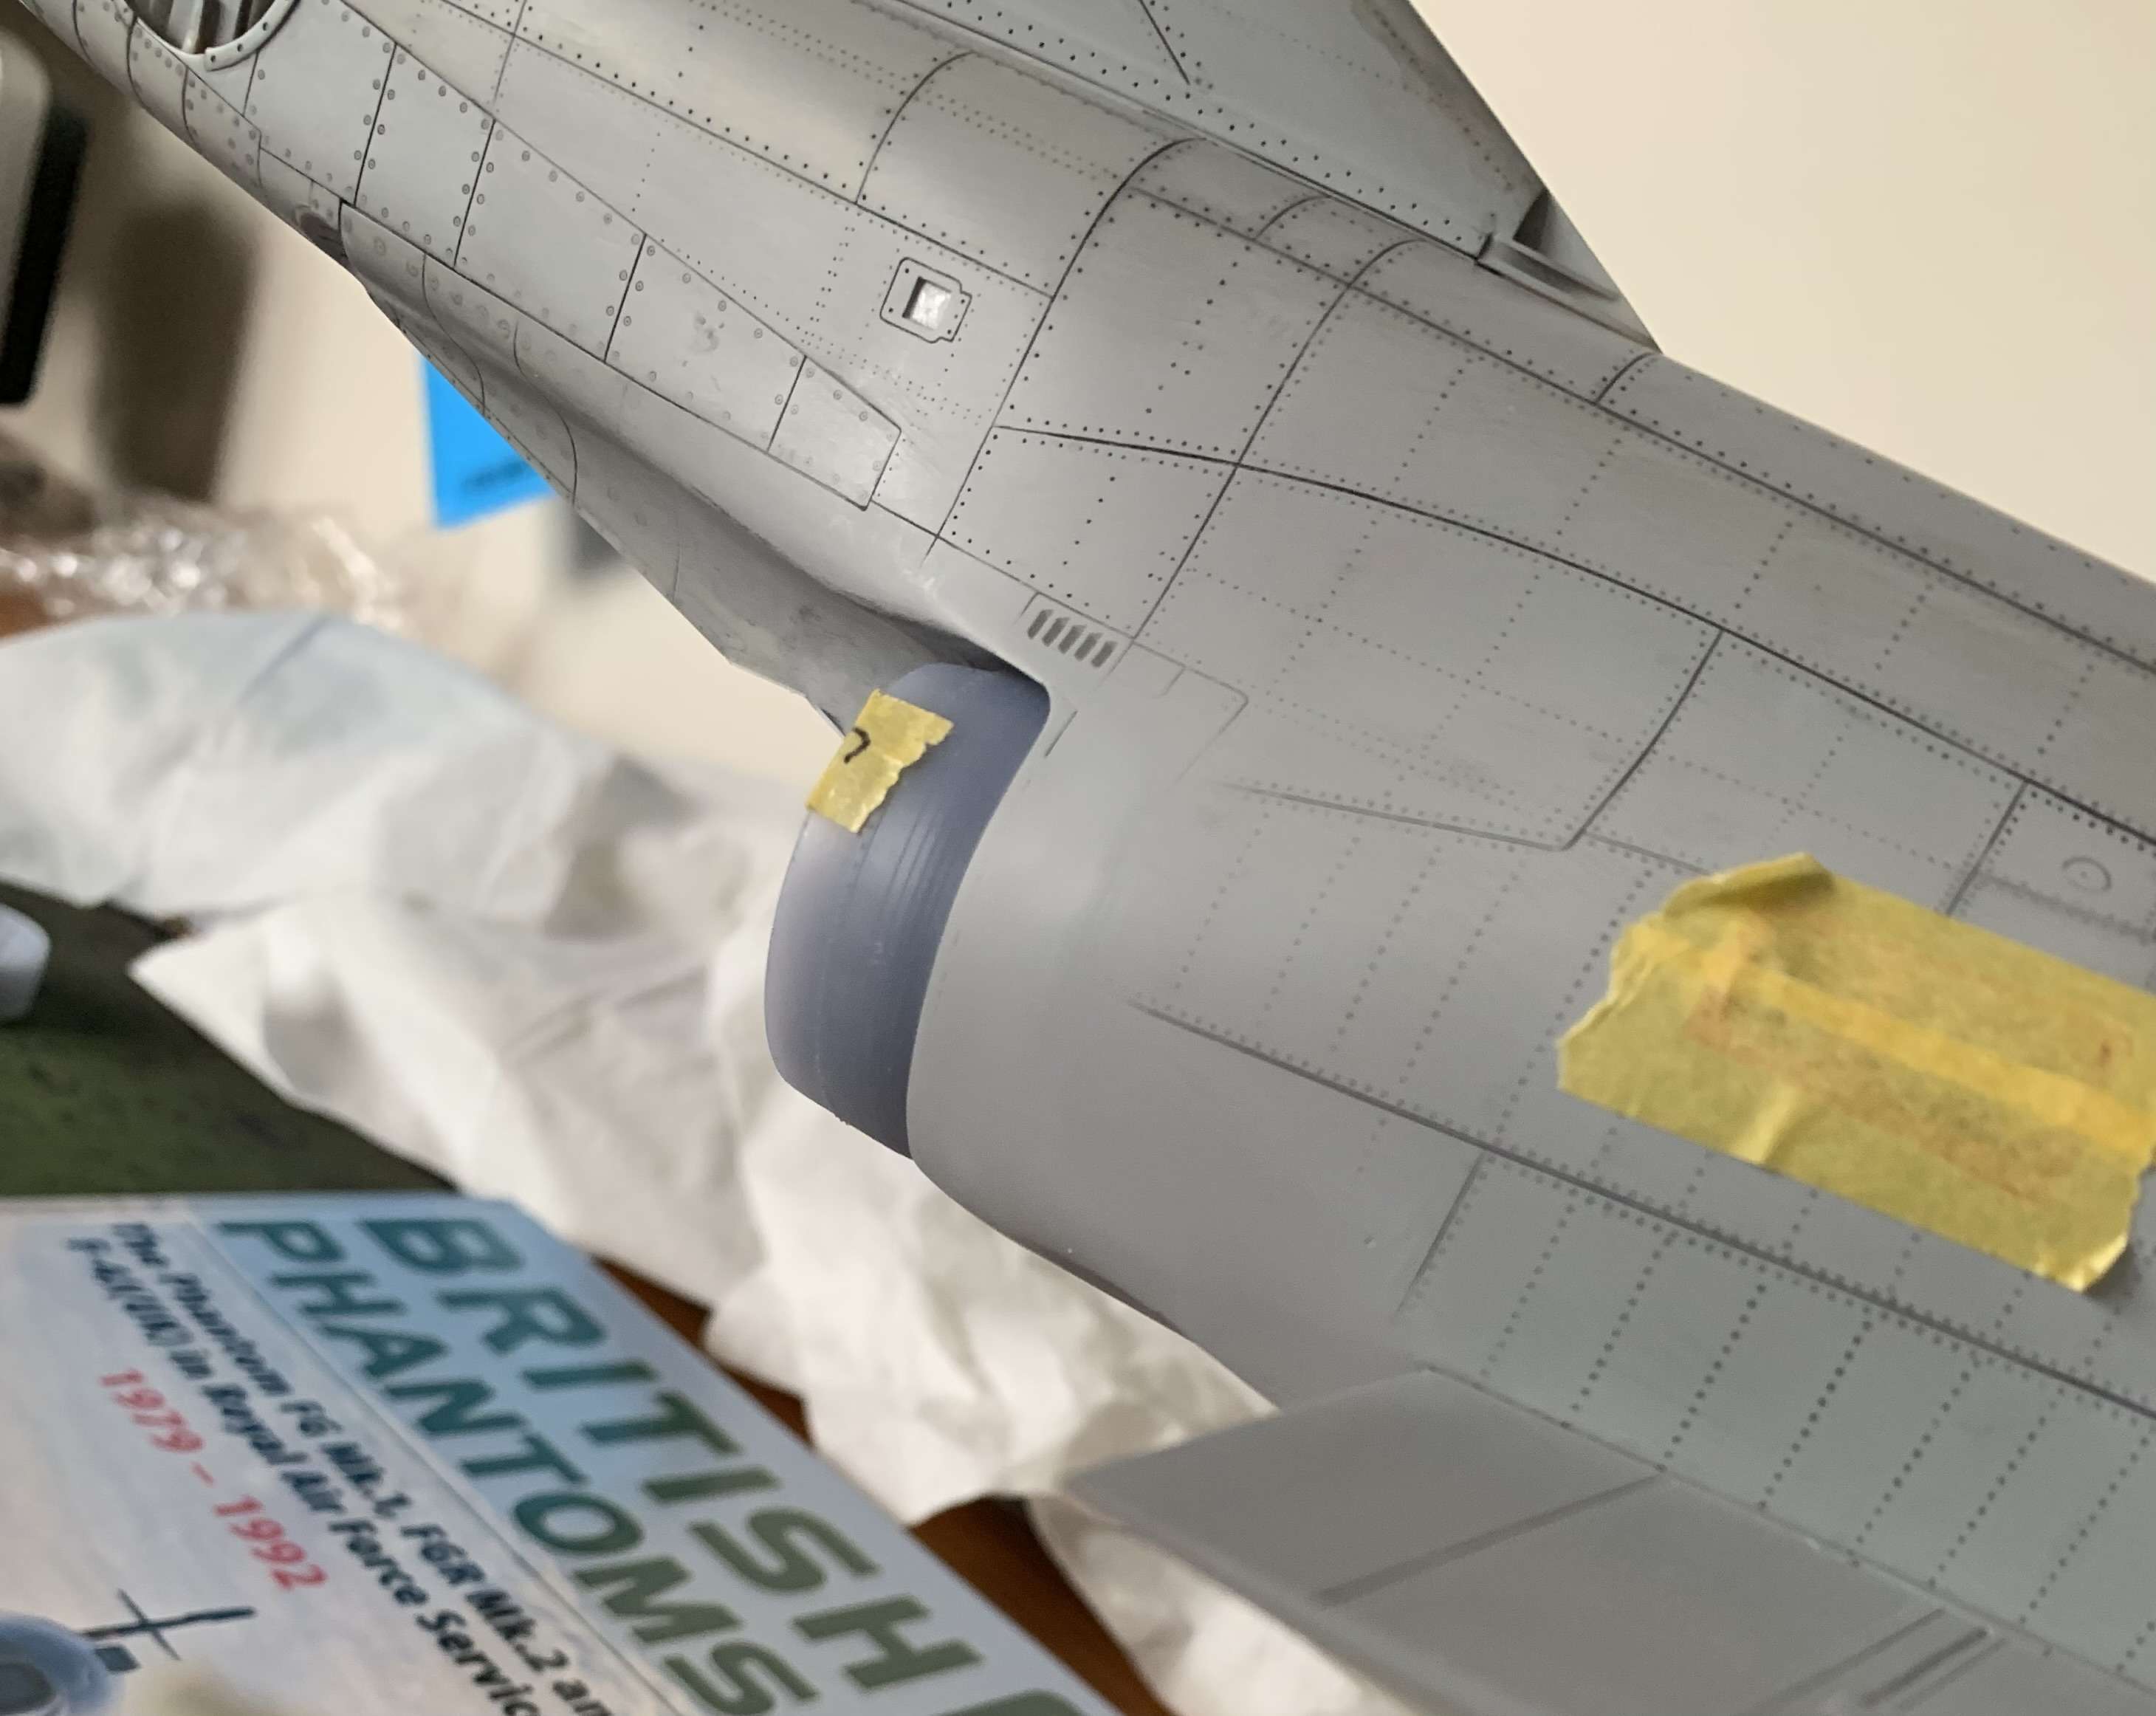
Trying to get all the gaps perfect
Underneath proved quite a challenge with all the odd curves, and there was a lot of templating to ensure both sides are the same. Actually I started adding the new surface details around the fuse in front of the cans and found (I am unsure how I let this get past me) I was 2.5mm longer on one lower edge than on the other. I got it all sorted after much muttering about how I missed this. I found it because I am using dividers and doing exact measurements. Turns out it was the angle off vertical that was out which led to a longer lower edge on one side.
Anyhoo all fixed
Just waiting on Kerrys 3D printed hinge sections to arrive in the mail now so I can graft them all in
Here is a bunch of different hinges ready at Kerrys place, hopefully they will be here tomorrow.
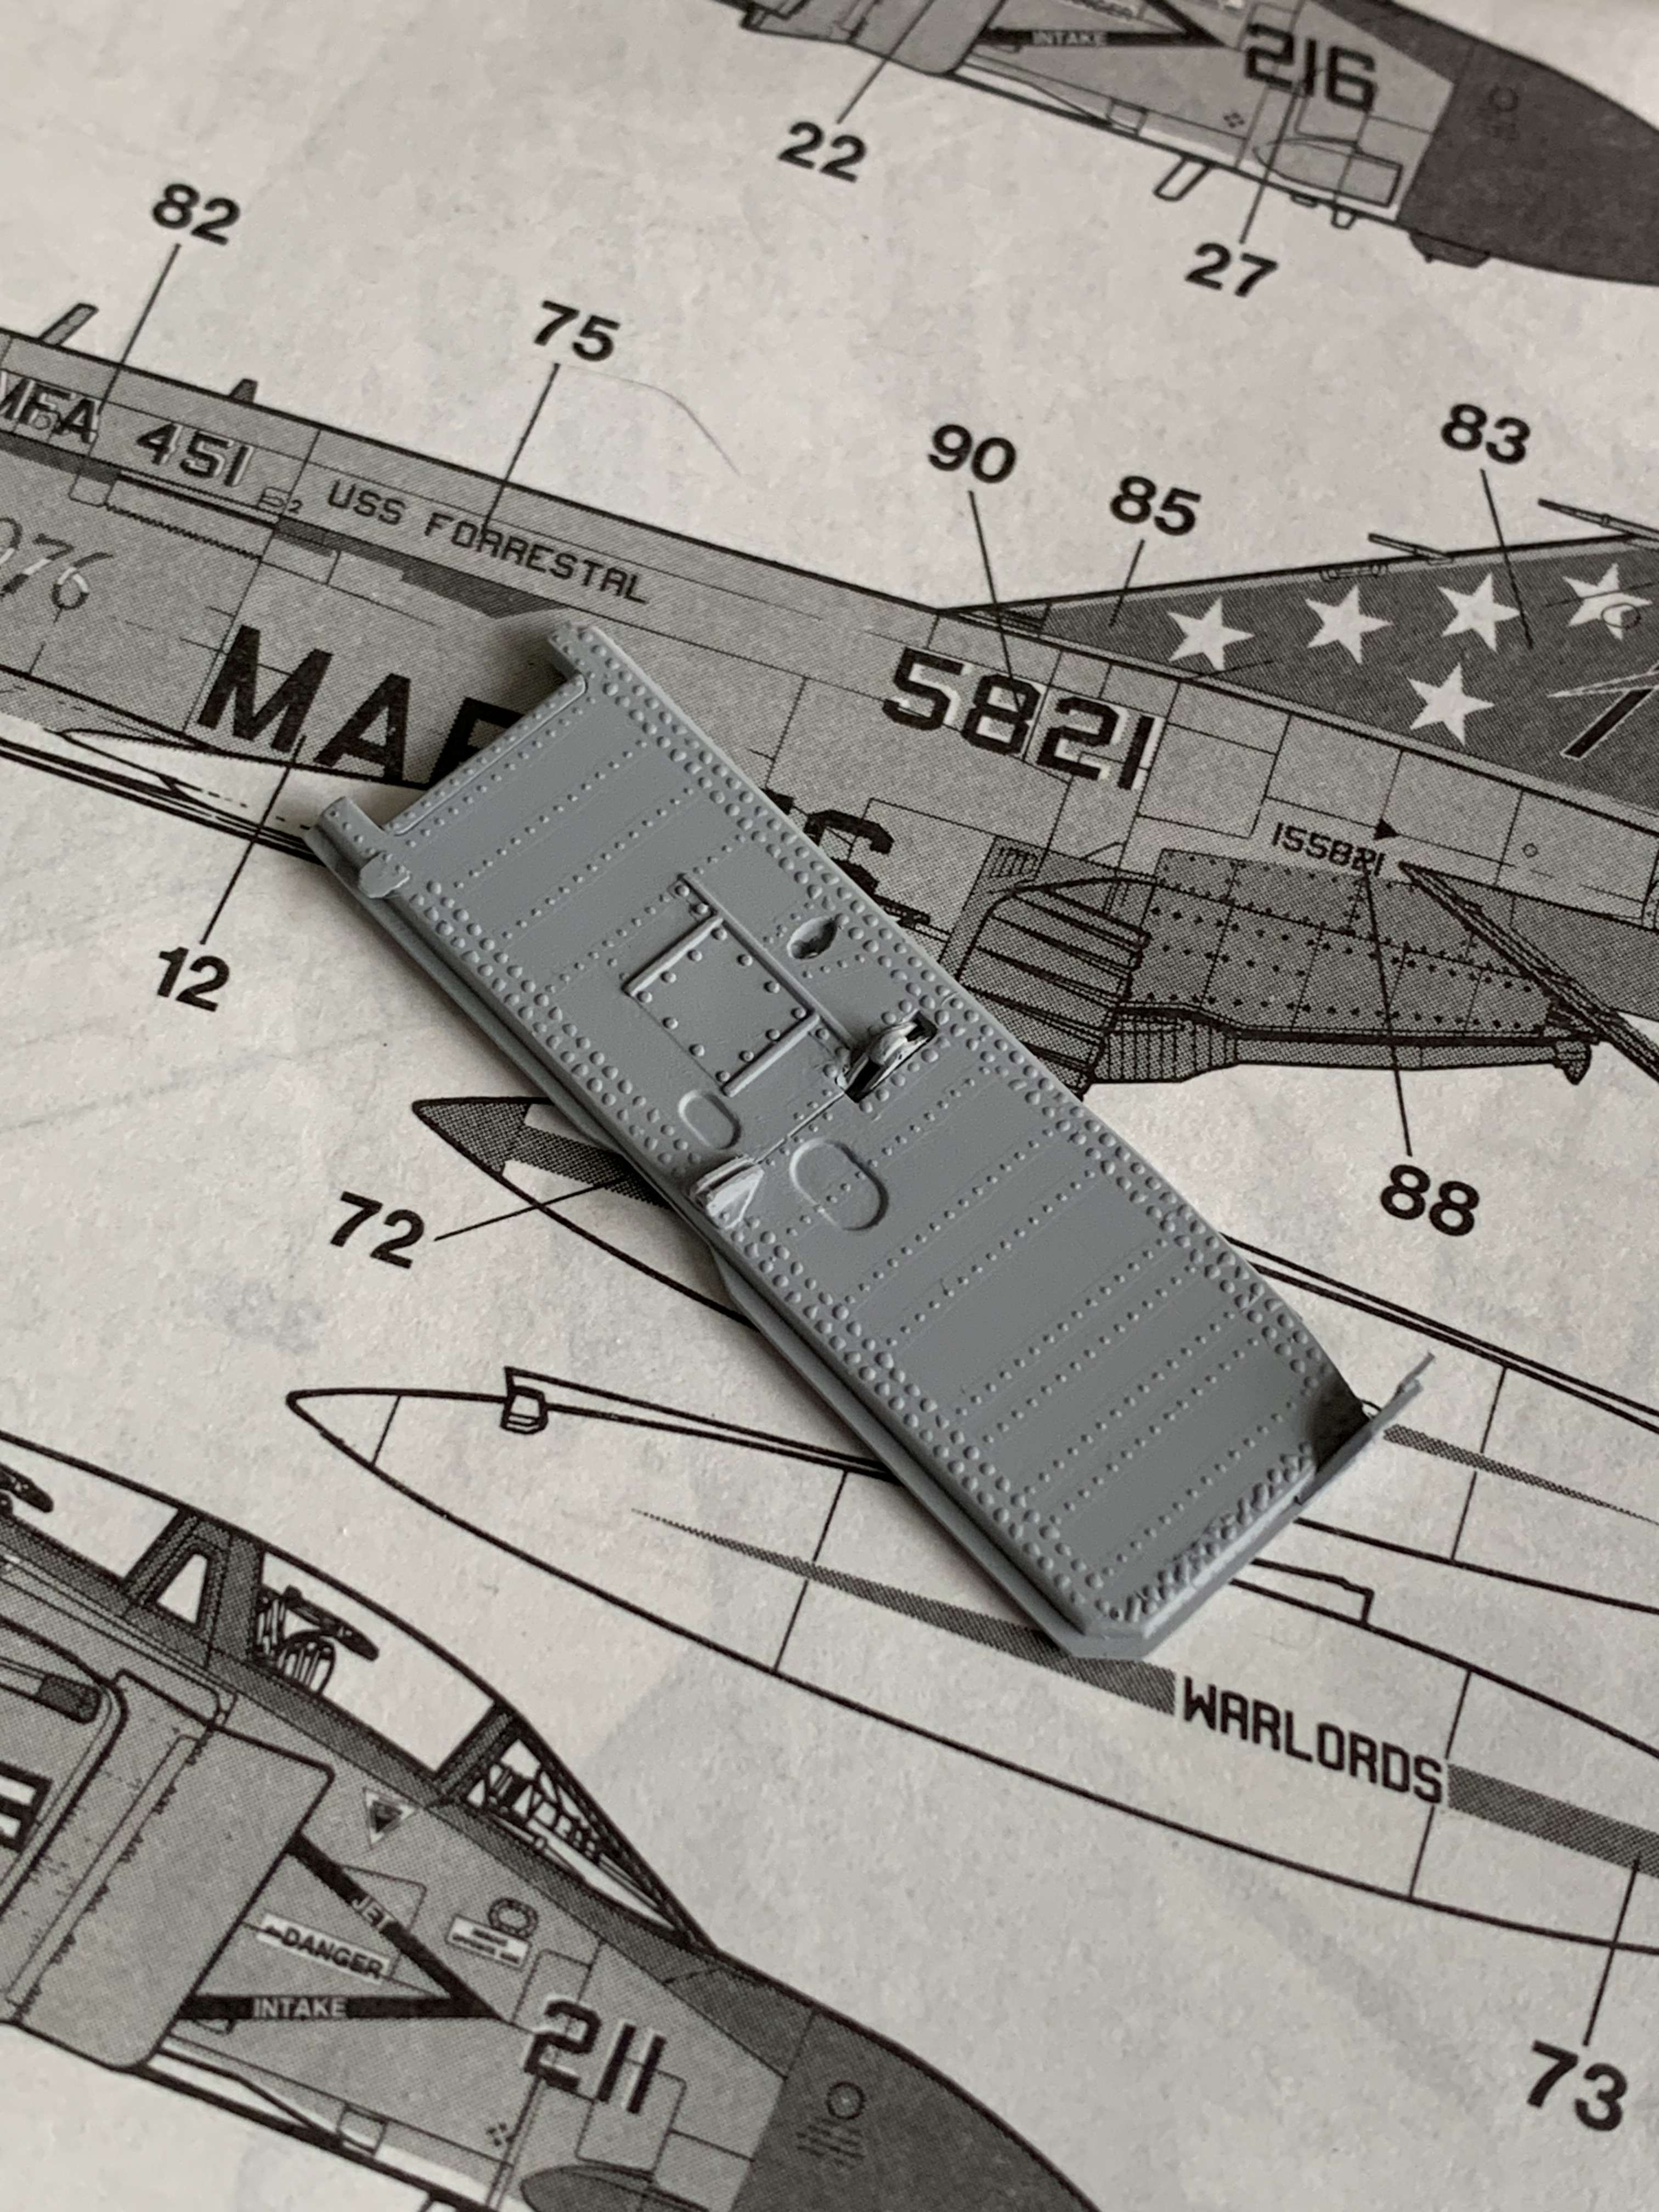
In the meantime I decided while I wait I should get to work detailing the u/c doors. Here is the nose front door with a few mods (ribs shape tweak on the lower edge etc) I have to flick some Mr Surfacer on it next and add Archer rivets
And the front is all riveted but you cant see it at this angle and with no wash in them. I had a 'wonky hole'for the main lamp so I filled it with plastic rod and reamed it out to the correct position then found a lens in my spares which fitted perfectly. But of foil on the back and the new antenna came from some spare bits off a Tamiya F-15E I picked up at a swap meed several years ago.
Still a little refining to do once I get Mr Surfacer sprayed on
So here she sits......getting ready to put paint on as soon as I get those hinges grafted in....
Oh well, I guess there was something to report after all.....
Cheers guys
Anthony
-
On 6/26/2023 at 12:51 AM, easixpedro said:
Glad to have you back at her. Hopefully all's well on the home front!
Thanks mate, yes all is well on the home front.
I have been actually working on this albeit slowly and I didnt think I had much to show. So I will do an update now....I just got prodded on Britmodeller LOL
Cheers Anthony
-
1 hour ago, Pete Fleischmann said:
Always liked the Ventura. I’ll probably buy that-
P
Me too
")
-
On 8/16/2023 at 4:38 AM, Woogey said:
I have not seen it mentioned, but it appears that the Trumpy nose is more pointy than the Hasegawa version. Can anyone confirm which is more accurately shaped fwd of the windscreen? (I am leaning towards the Hasegawa)
I agree, I’m probably going to use a combination of both. To me the Trumpy nose looks a little pinched. Whereas to me Hasegawa nailed it especially on the T Bird. But once I’m done with my RAF Phantom conversion I’ll be studying the Skyhawk next.
Im probably going to graft my TA nose onto my Trumpy kitcheers Anthony
-
I'm a sucker I have just ordered the Skyhawk nose set. I'm interested in the radar and scanner they have put in there
-
5 hours ago, Mark P said:
Calling the 3D guys (or anyone else for that mater)....
One of the glaring oversights of the Airfix 1/24th scale Mosquito is that they failed to provide a spinner backplate (x2) for the kit. This makes for an incorrect shape to the propeller blade opening and rear surface to the spinner.
Anyone out there want to supply them???
Mark Proulx
Mark I totally agree mate!
I did a full master for Roy for the 24th Mosquito propeller as the kit one is a bit of a joke. Included backplate with corrected cutouts, correct profile of spinner to take the bulbous shape out rivet details and tip bung (I think from memory) etc but that was in the days befor 3D printing and it has never seen the light of day. I might have to speed up learning CAD so I cam make some....but that is not going to be any time soon unfortunately
-
-
-
On 6/6/2023 at 10:34 PM, Derek B said:
Great work Anthony (and Kerry - I like the hinge insert idea). For the thin sections around your jet pipe cans; if you have to apply rivet detail on them, fine drills will represent them with a much greater margin of safety than attempting to impress them with a tool.
Cheers
Derek
Thanks mate, yes I agree. Also there are several raised rivets around there as well which I will use Archer/Micro Mark decals for.
On 6/7/2023 at 11:36 AM, jimbo59 said:Happy to hear your son is doing better! Truly great news!
Thank you, yes great news indeed. His recovery looks like it is going to be a long one, but better than the alternative!
On 6/7/2023 at 3:47 PM, amurray said:No one could have said it any better on behalf of all of us!
Thank you sooooo much!
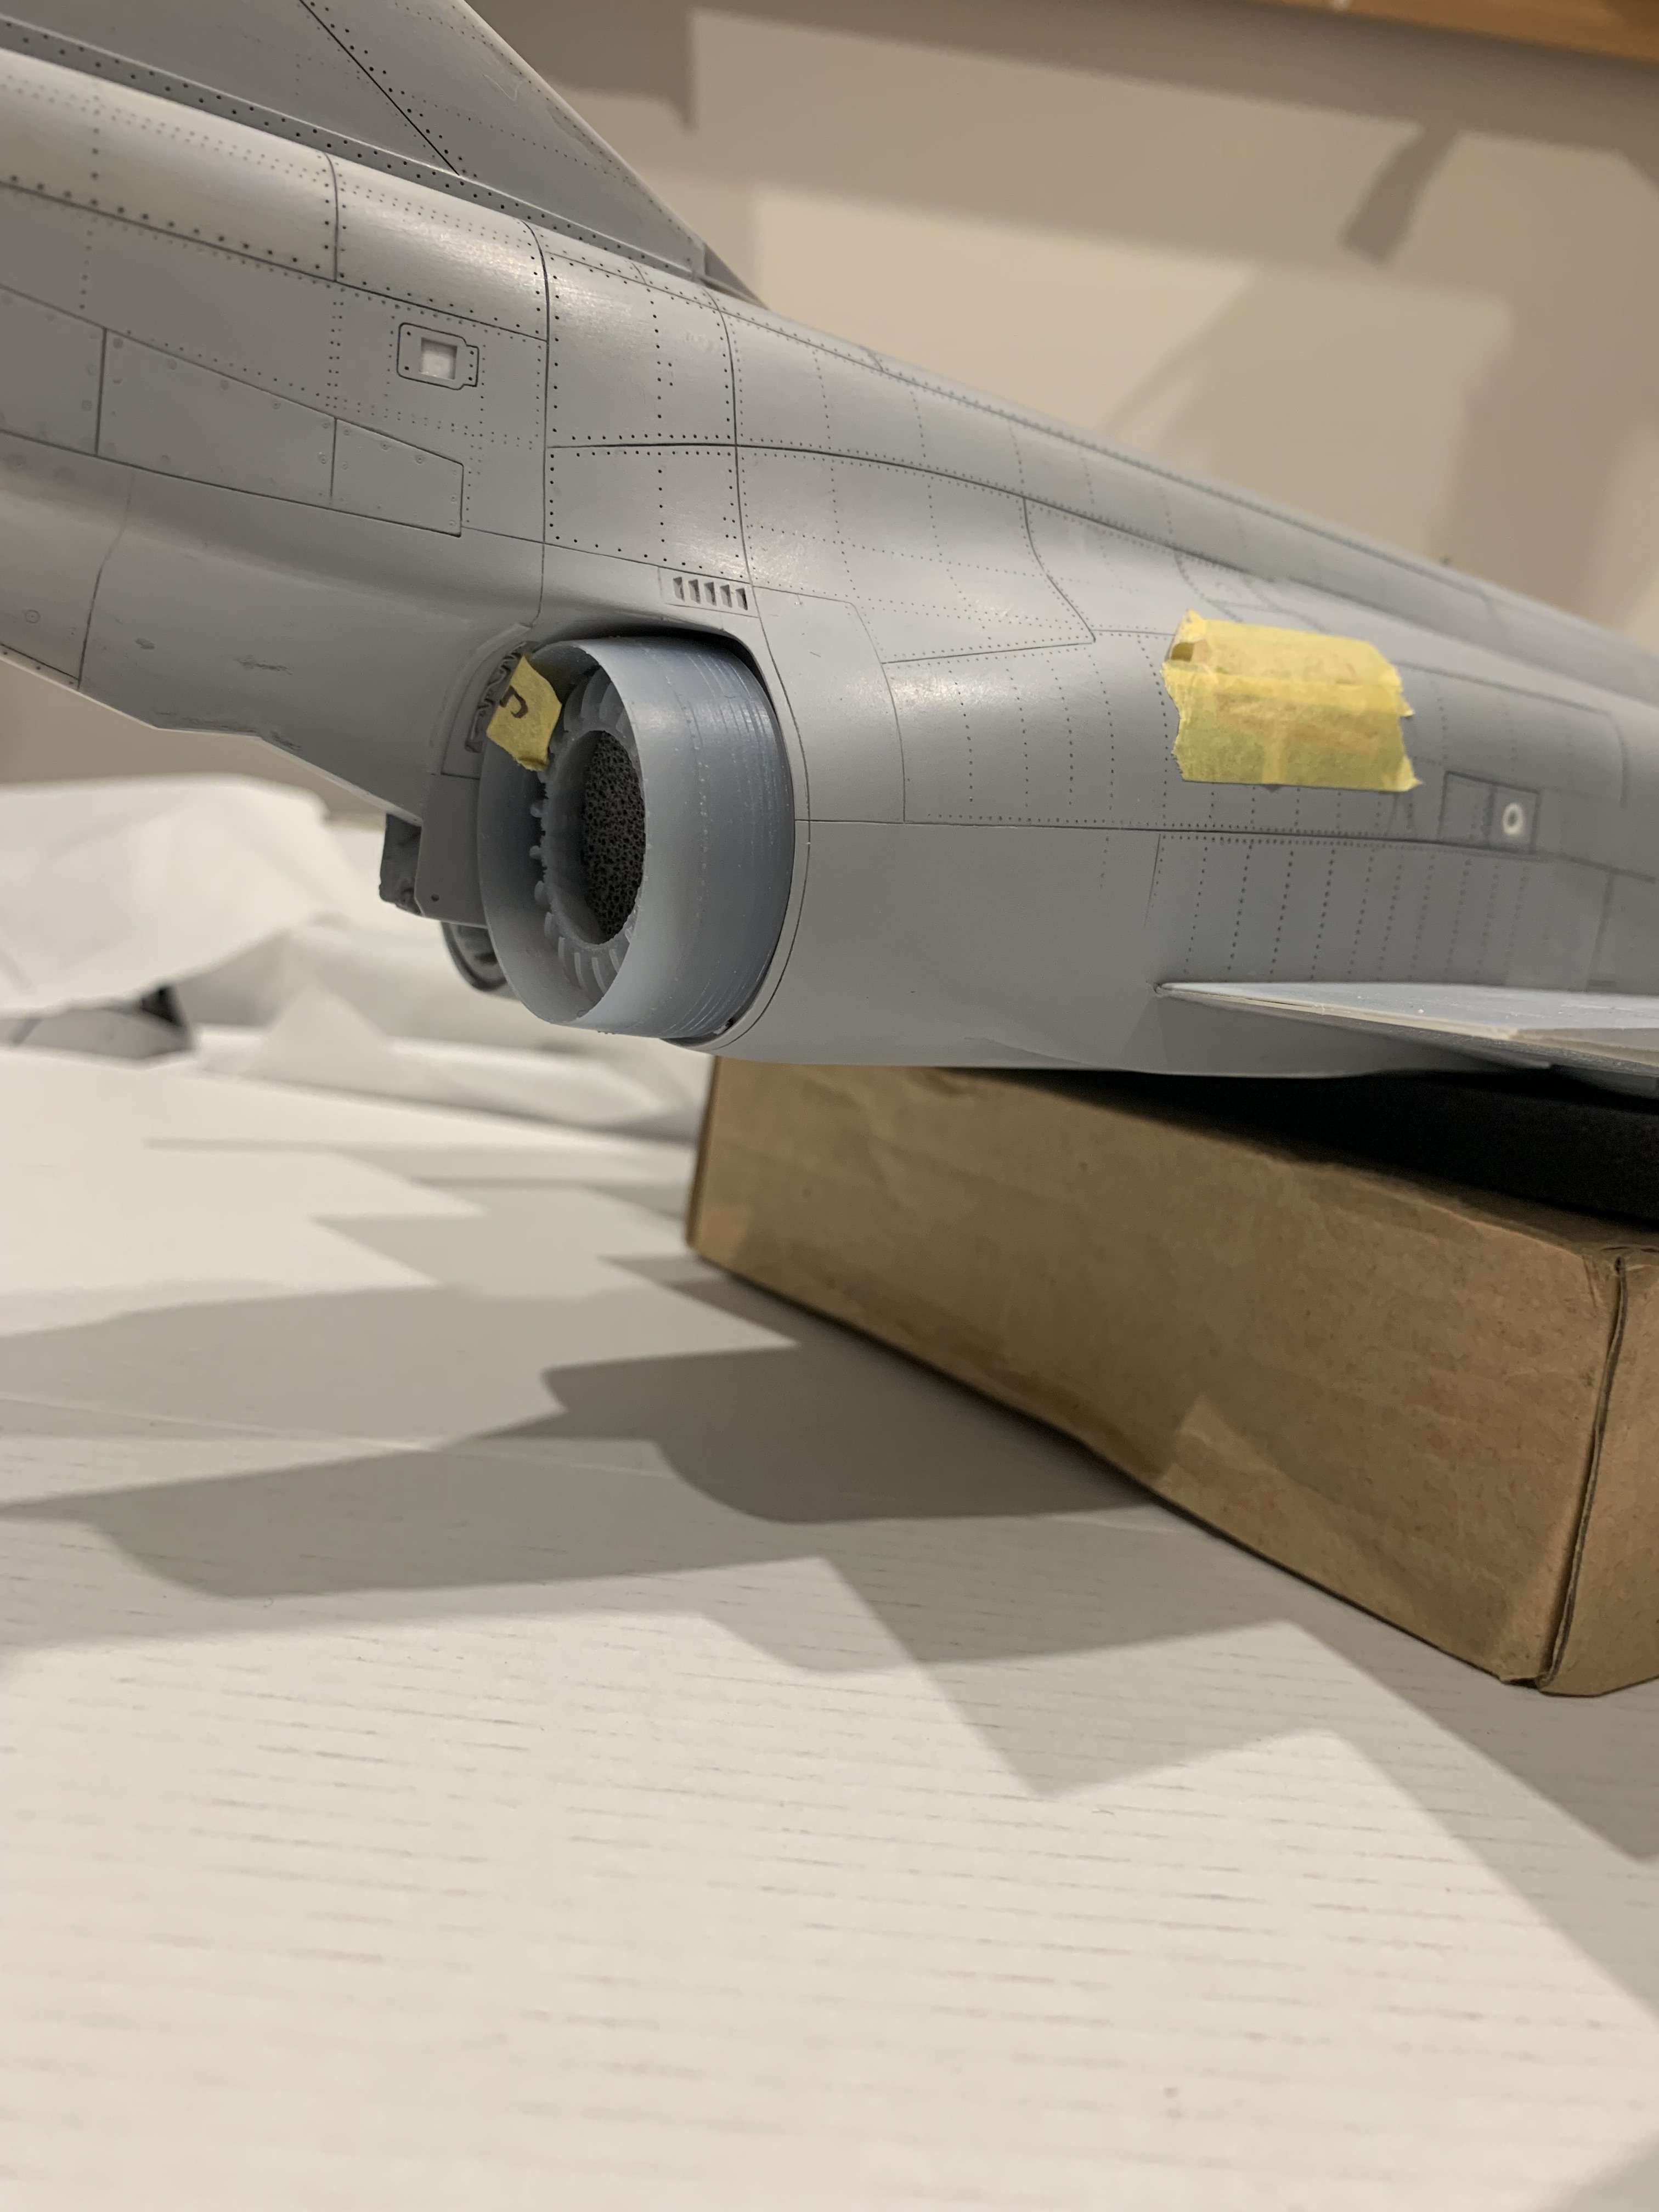
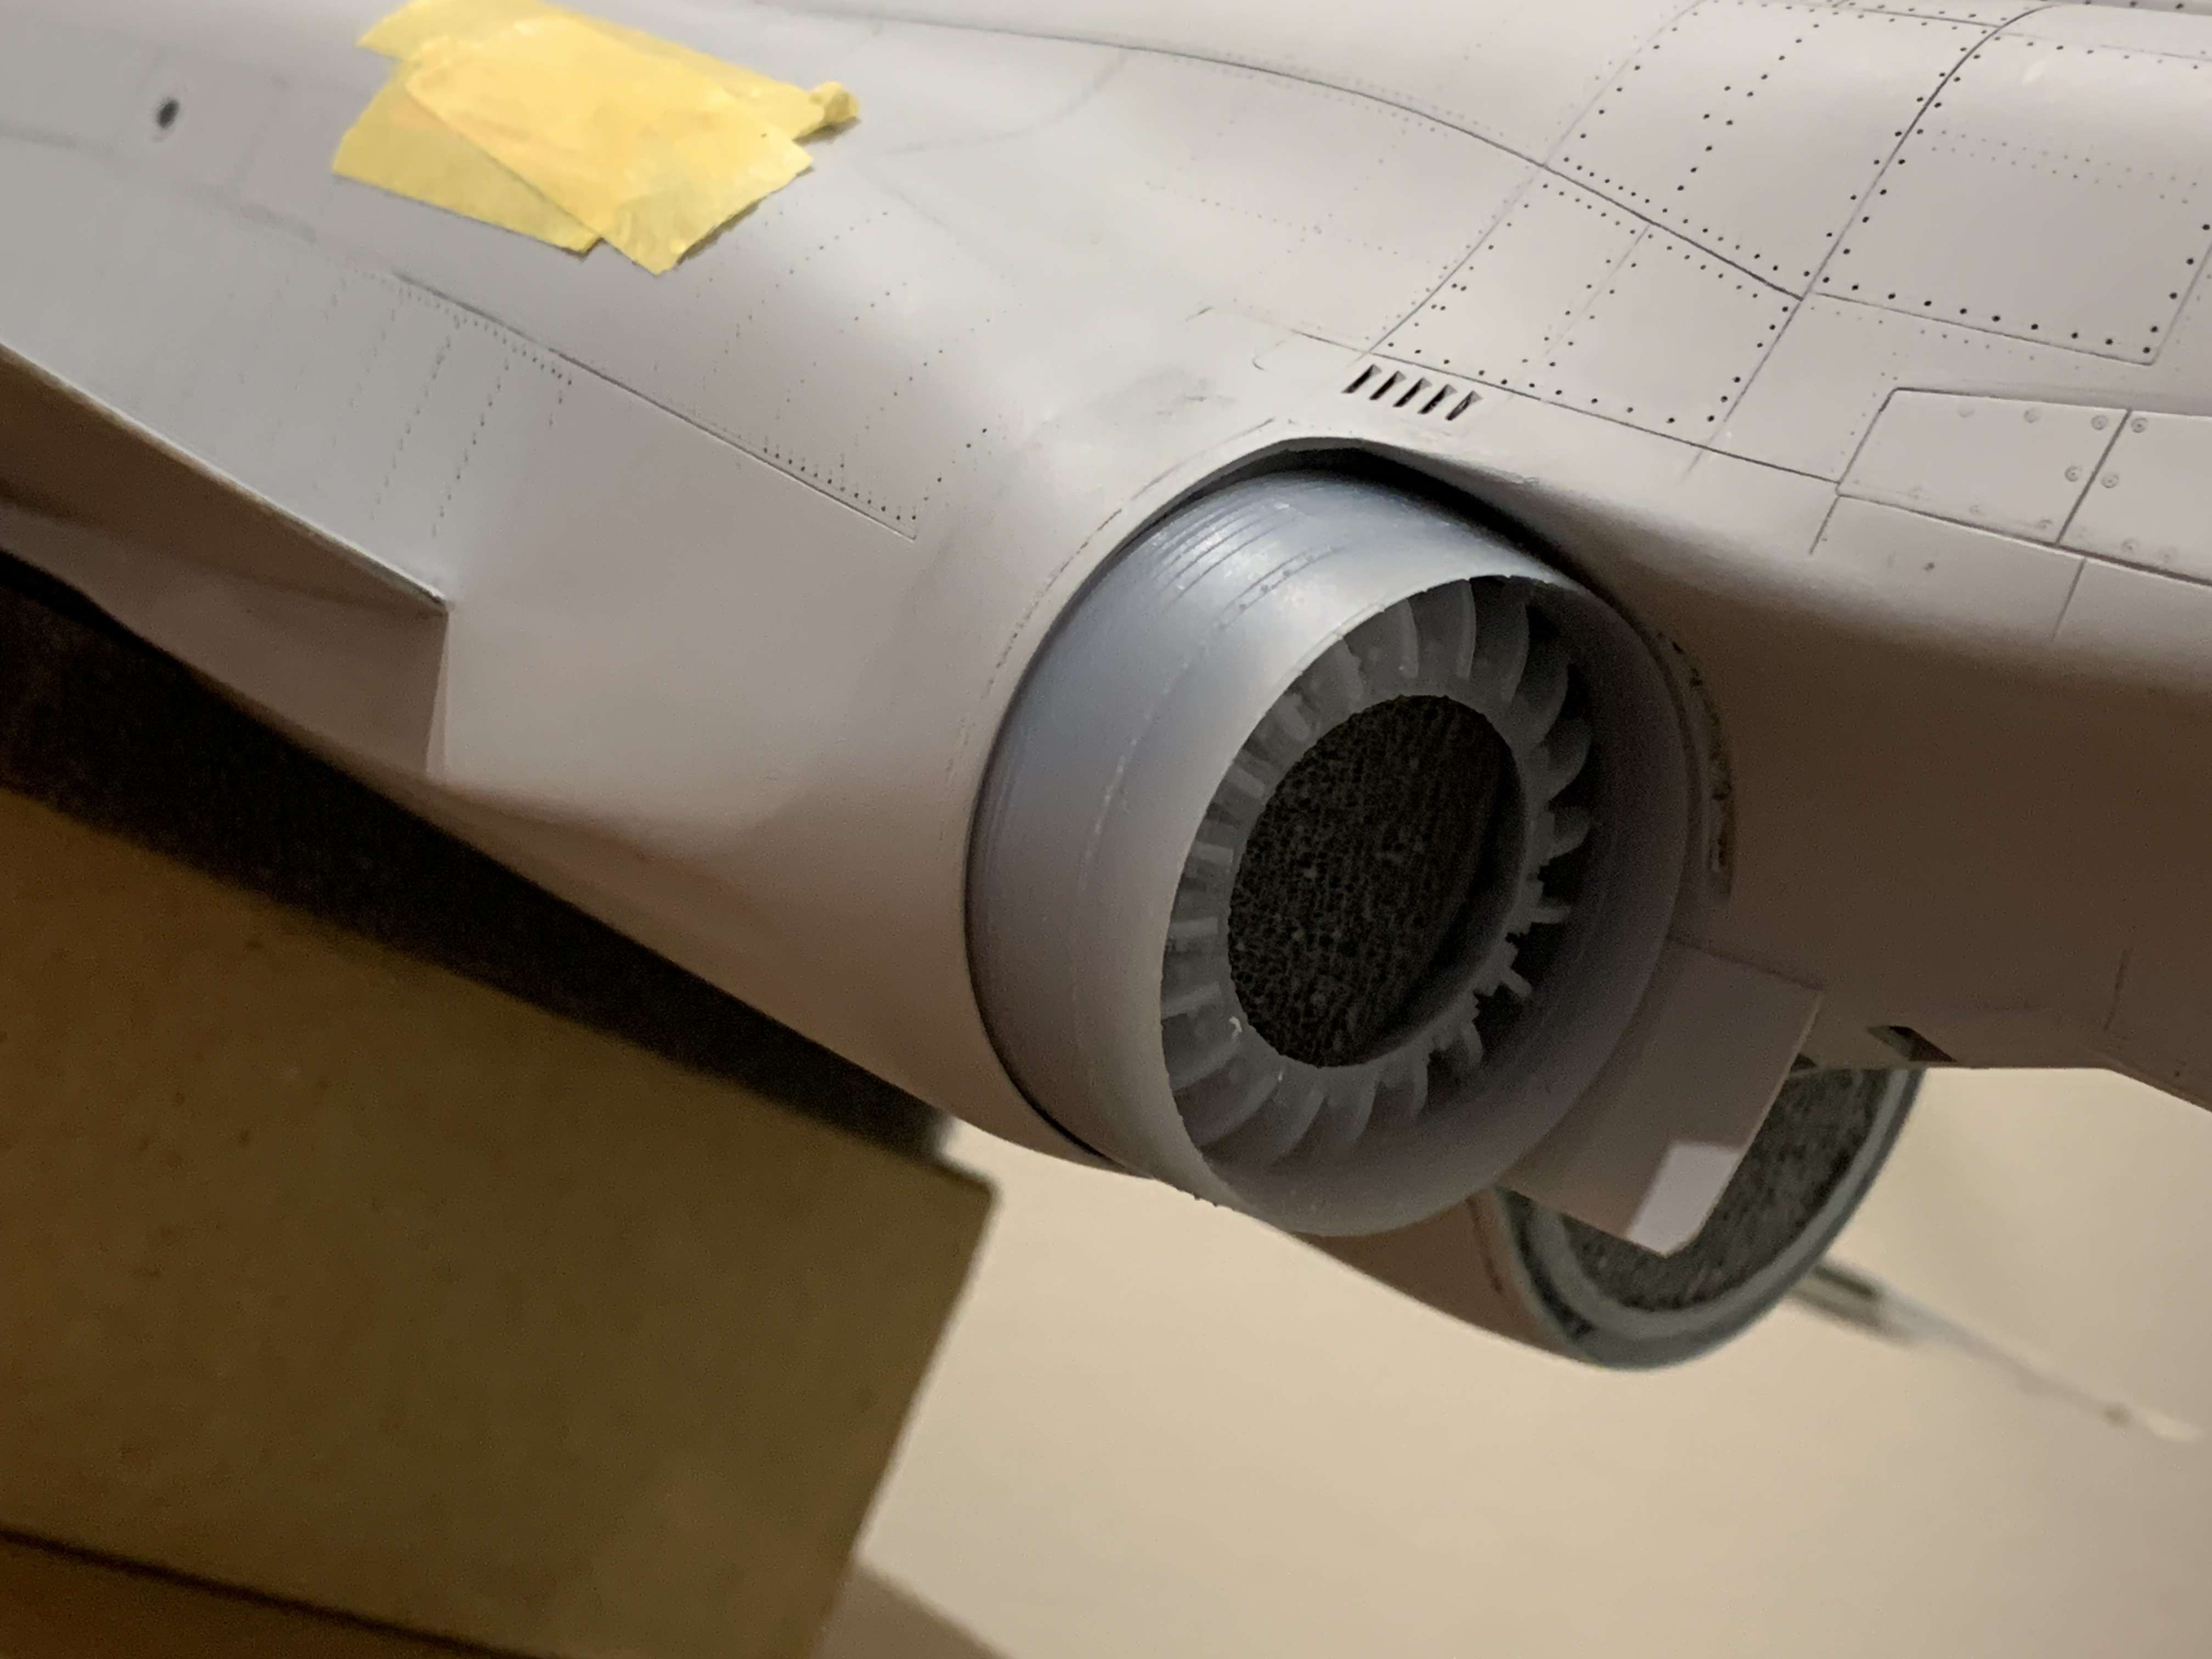
Bit of a photo montage of progress as I seem to be stuck in 'Groundhog Day'with this area. I am constantly reshaping, refining, building up and trimming LOL.
Anyhoo I am ever so slowly making progress. This area between the cans is almost spot on in shape just needs cleaning up and then I can start rescribing all the details. I'd say pretty much all the bulk of the conversion is finished, I am dying to finish the surface details so I can paint.
The lip around the cans have been thinned to a more realistic thickness. Look at the thickness of that trailing edge and alignment on the flap....yeeesh need to fix that!
Getting close.....didnt I say that on my last post LOL

Have to extend this part of the hook mount for some reason..... this is the Brassin piece, nicely cast
As always thanks for looking in.....
Cheers guys
Anthony
-
This area has been a little trickier than I first thought. I am álmost' happy with the left side. Some more fine tuning before I rescribe and rivet this area.
As you can see I am also building up the keel area where the hook will attach
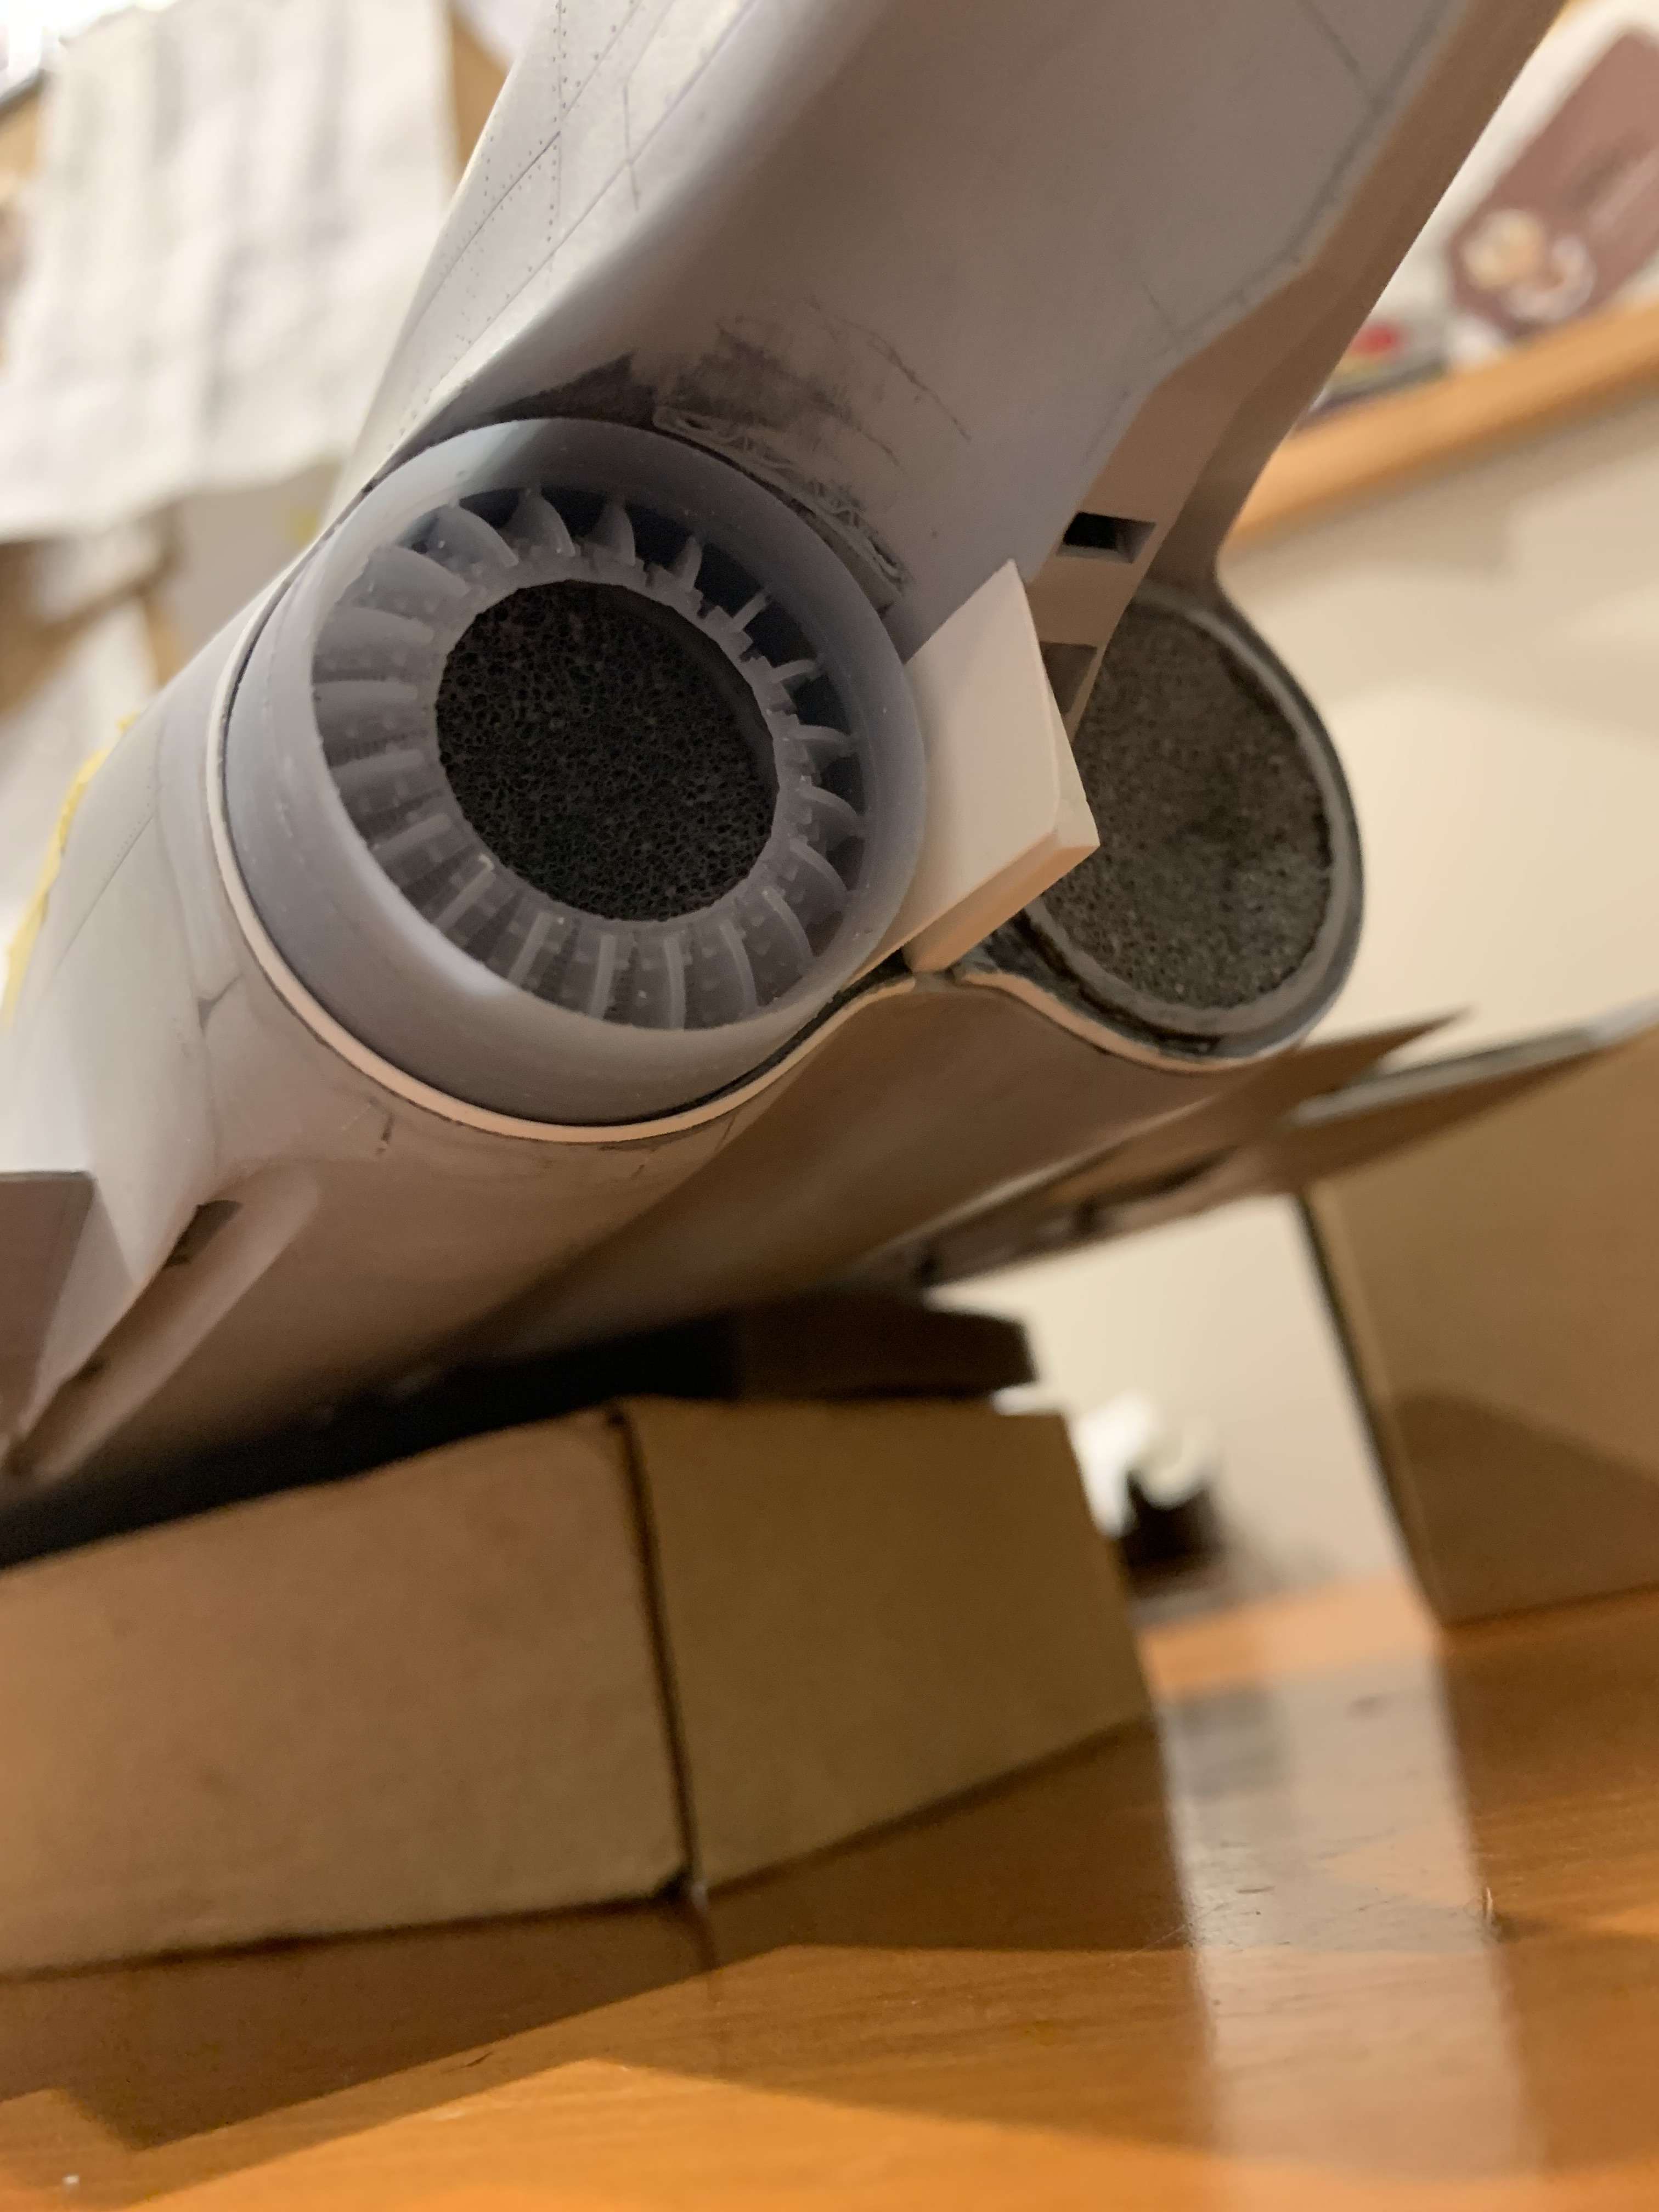
Nice n close...hmmmm, I see more work to do
And in case you were wondering what I am going to do about all those tricky hinges underneath and on the sides around the engine....
Kerry and I came up with an idea....just too tricky to scribe. I have no idea if this will work, but inserting hinge sections just might do it. Will be an interesting experiment with 3 styles, here is two of them

As always, thanks for tuning in!
Cheers Anthony
- Shoggz, patricksparks, Greg W and 15 others
-
18
-
7 hours ago, Hartmann52 said:
Greetings, comrades! I'm alive, but dont at home yet... But sometimes being at home, the sould needs rest. My new level - jets aviation, and pen test -Harrier. The work will be long and slow with your help
")
Look forward to seeing your lovely work!! Keep safe buddy, we're thinking of your situation which will make this build even more special!
- Martinnfb, chrish and Hartmann52
-
2
-
 1
1
-
-
5 hours ago, easixpedro said:
Glad to have you back pal! Excellent news about your son too. I’m happy for you, him, and the family!
Look forward to seeing more of you around here!
-Peter
Thanks buddy! Great to be back. I have been digging deep into the builds etc on LSP and there is some cool stuff going on. So much inspiration and not enough building these past few days LOL
@Derek B thanks for confirming that, I had a feeling that was why the cans seem to be 'resting'on the bottom of the opening
Cheers Anthony
-
Awwww @Derek B that’s some seriously good photos mate! Thanks so very much, you have captured a cot of areas I was struggling to find pics of(I should have just asked you!).
I have noticed the gap around the reheat cans seems to vary too. I’m guessing it depends on how far in or out they are sitting depending on power setting?
Thanks again! I know what today’s job is going to be!
9 hours ago, TheBaron said:Anthony, just to add my good wishes on the fantastic news about your son and congratulations on some primo scratching around those exhaust areas.
Tony
Thanks mate, yes good news indeed.
Cheers Ive still got a bit of fettling to go there but getting closecheers guys
Anthony
-


RAF FG.1 XV571 WILD HARE Phantom Conversion
in Works in Progress
Posted
Hey Kev, Cameron is doing really well...slow progress but getting stronger every day! Looks like he is going to get to start working on helicopter maintenance in the new year!
Thanks for asking
Thanks mate....just wish I could work faster lol
Thanks Iain, I guess that is true. Rome wasnt built in a day, I must remember that
Thanks Buddy....and loving your Lightning!!!