

Hacker
-
Posts
1,899 -
Joined
Content Type
Profiles
Forums
Events
Posts posted by Hacker
-
-
-
6 hours ago, thierry laurent said:
Many years ago Lone Star released a legion Condor 109 1/32 decal set that had many specific markings such as that one but I do not think it was included.
l have that decal sheet and the Cutting edge one and both do not have these markings.
hacker
-
-
-
2 hours ago, Jennings Heilig said:
It “seems to be,” but “seems to be” and “is” are two different things entirely. I’ve checked into this extensively, and gotten samples of the output, and the white is anything but opaque. From what I can tell, pretty much useless for making decals.
Don't know about that as l got some printed decals from this guy
https://www.facebook.com/Philippine-Military-Scale-Models-1548733742048308/
and he gives you the printed decals and the white backing separate and they seem good to go all you have to do is seal them. l have seen them used and they seem pretty good but l have yet to try mine.
hacker
-
l found the company that does the Ghost whites in both laser and ink. From my research the inks only work in Espon printers. Something to do with how their ink cartridges are make and how they print. Some ink printers l did not know use heat which would turn the white ink into goo and bugger the printer. As for Laser at the moment they only have l think two printer manufacturers toner cartridges available. Trust me when l say they are expensive. l have been looking into it for myself but like a lot of you guys l am not loaded with money
https://www.ghost-white-toner.com/find-your-dealer/
here is dealers available world wide
For you USA guys it is US Cutters.
It seems to be pretty straight forward as you only have to change out the black toner, turn your artwork into an black and white image then turn it into a negative image so all those white parts are black to fool the printer.
Unfortunately for me l have a Samsung C410 laser and a Canon ink printer both that does not have these cartridges available. l would have to run the expense of getting a new printer and the cost of the toner/ink
Hacker
-
-
-
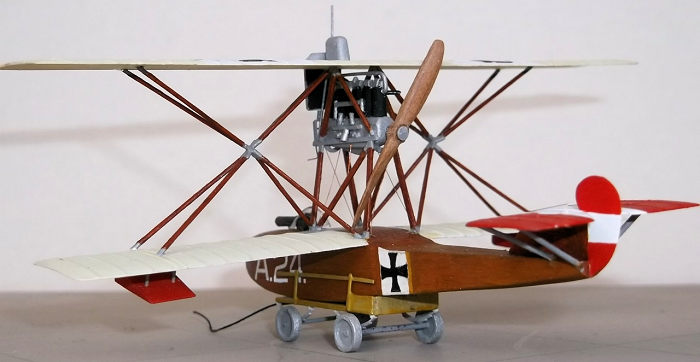
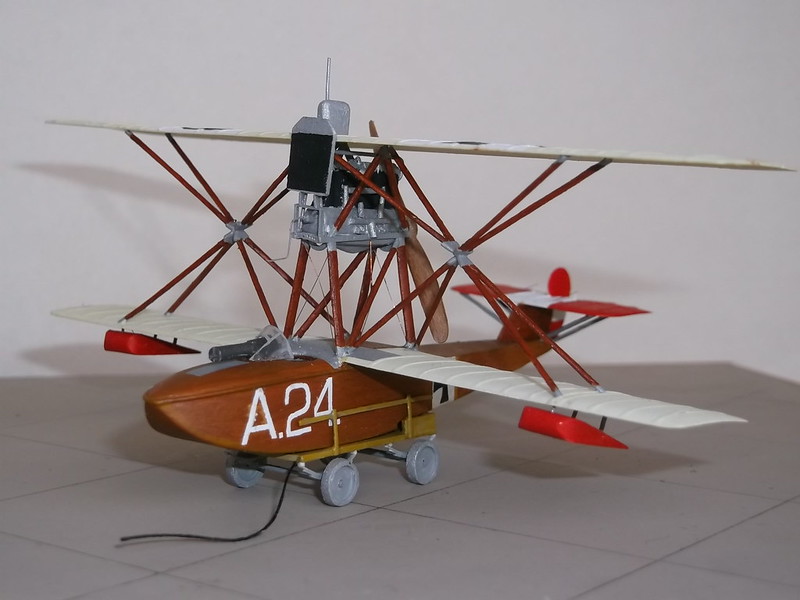
Found it looking through my bucket list of want to builds. Hansa Brandenburg CC Flying-Boat which this particular one was flown by an ace, l do not think WnW has done any Hansa Brandenburg aircraft that l know of . Then again l did not check
hacker
- Pup7309, Tnarg, thierry laurent and 1 other
-
 4
4
-

l would opt for this one too only cause is unique. There is a flying boat fighter l was interested in but at the moment l can't remember . l don't think it is the one above.
hacker
- Gazzas, coogrfan, scvrobeson and 2 others
-
5
-
l see that the Revell version is now out very soon. Will they fit as well?
Hacker
-
looks to me almost bronze green
Hacker
-
On 1/20/2009 at 5:03 PM, junkers88a1 said:
more details from left wheelbay

Two questions. One what colour green is that and two does this also apply to the Sabredog as well?
hacker
-
-
To tell us about the quality of said kit? Inquiring minds want to know
Hacker
- blackbetty and Martinnfb
-
1
-
 1
1
-
-
10 hours ago, Jolly Roger said:
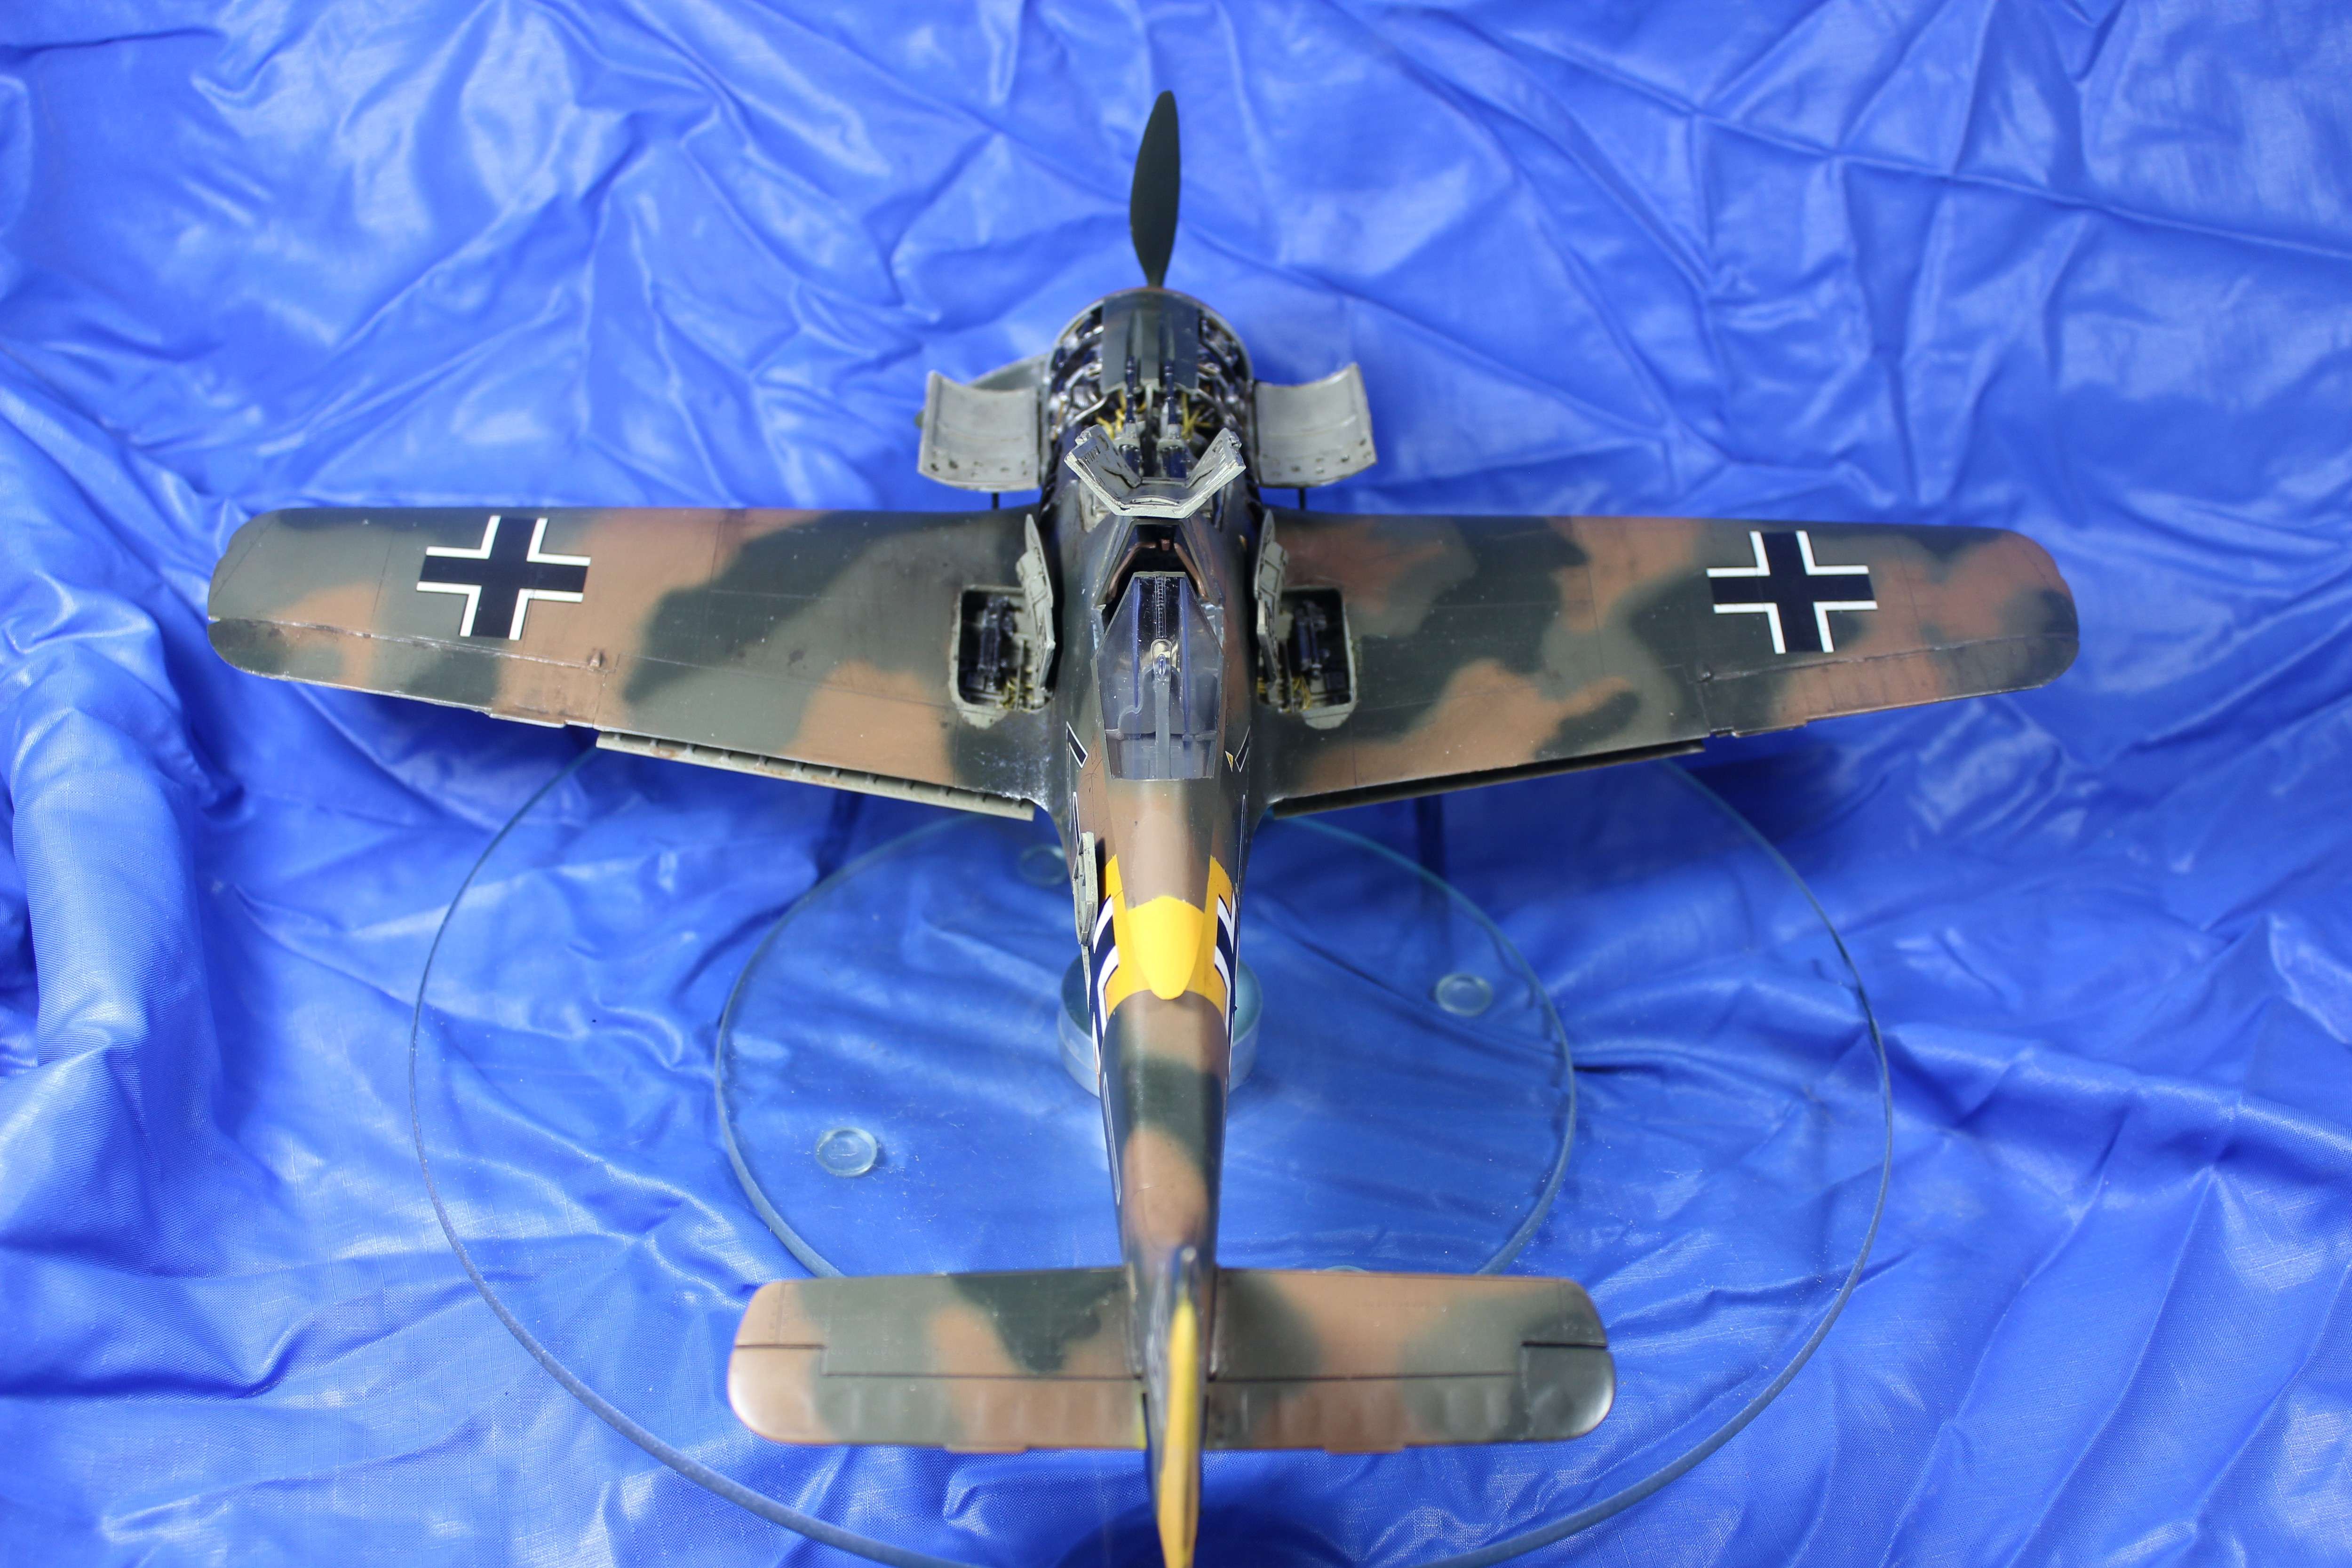
Are the wing root cannon doors on backwards? The paint on the upper wing surfaces which is visible underneath the hatch location suggests they are backwards on the wings.
Bugger did not notice that. l was rushed to finish this . Thanks
-
Interested in the Slovakian Airforce Mig 29 digital scheme . Where do l find it and how much?
Hacker
-
Not often l post a build here anymore. Quite frankly takes me a while these days to finish anything due to general life getting in the way. l managed to get this one done as the renovation industry is slow this time of year hence why l have time . This is the older Pacific Coast Model boxing of the Fw 190A-1/2/3 without the new A-4 conversion. Fortunately l have an old Haseagawa kit in an old Revell rebox version that l took the engine out of and bit and pieces for this build. l did it in the markings of an unknown pilot that flew this aircraft during the Battle of Kursk.
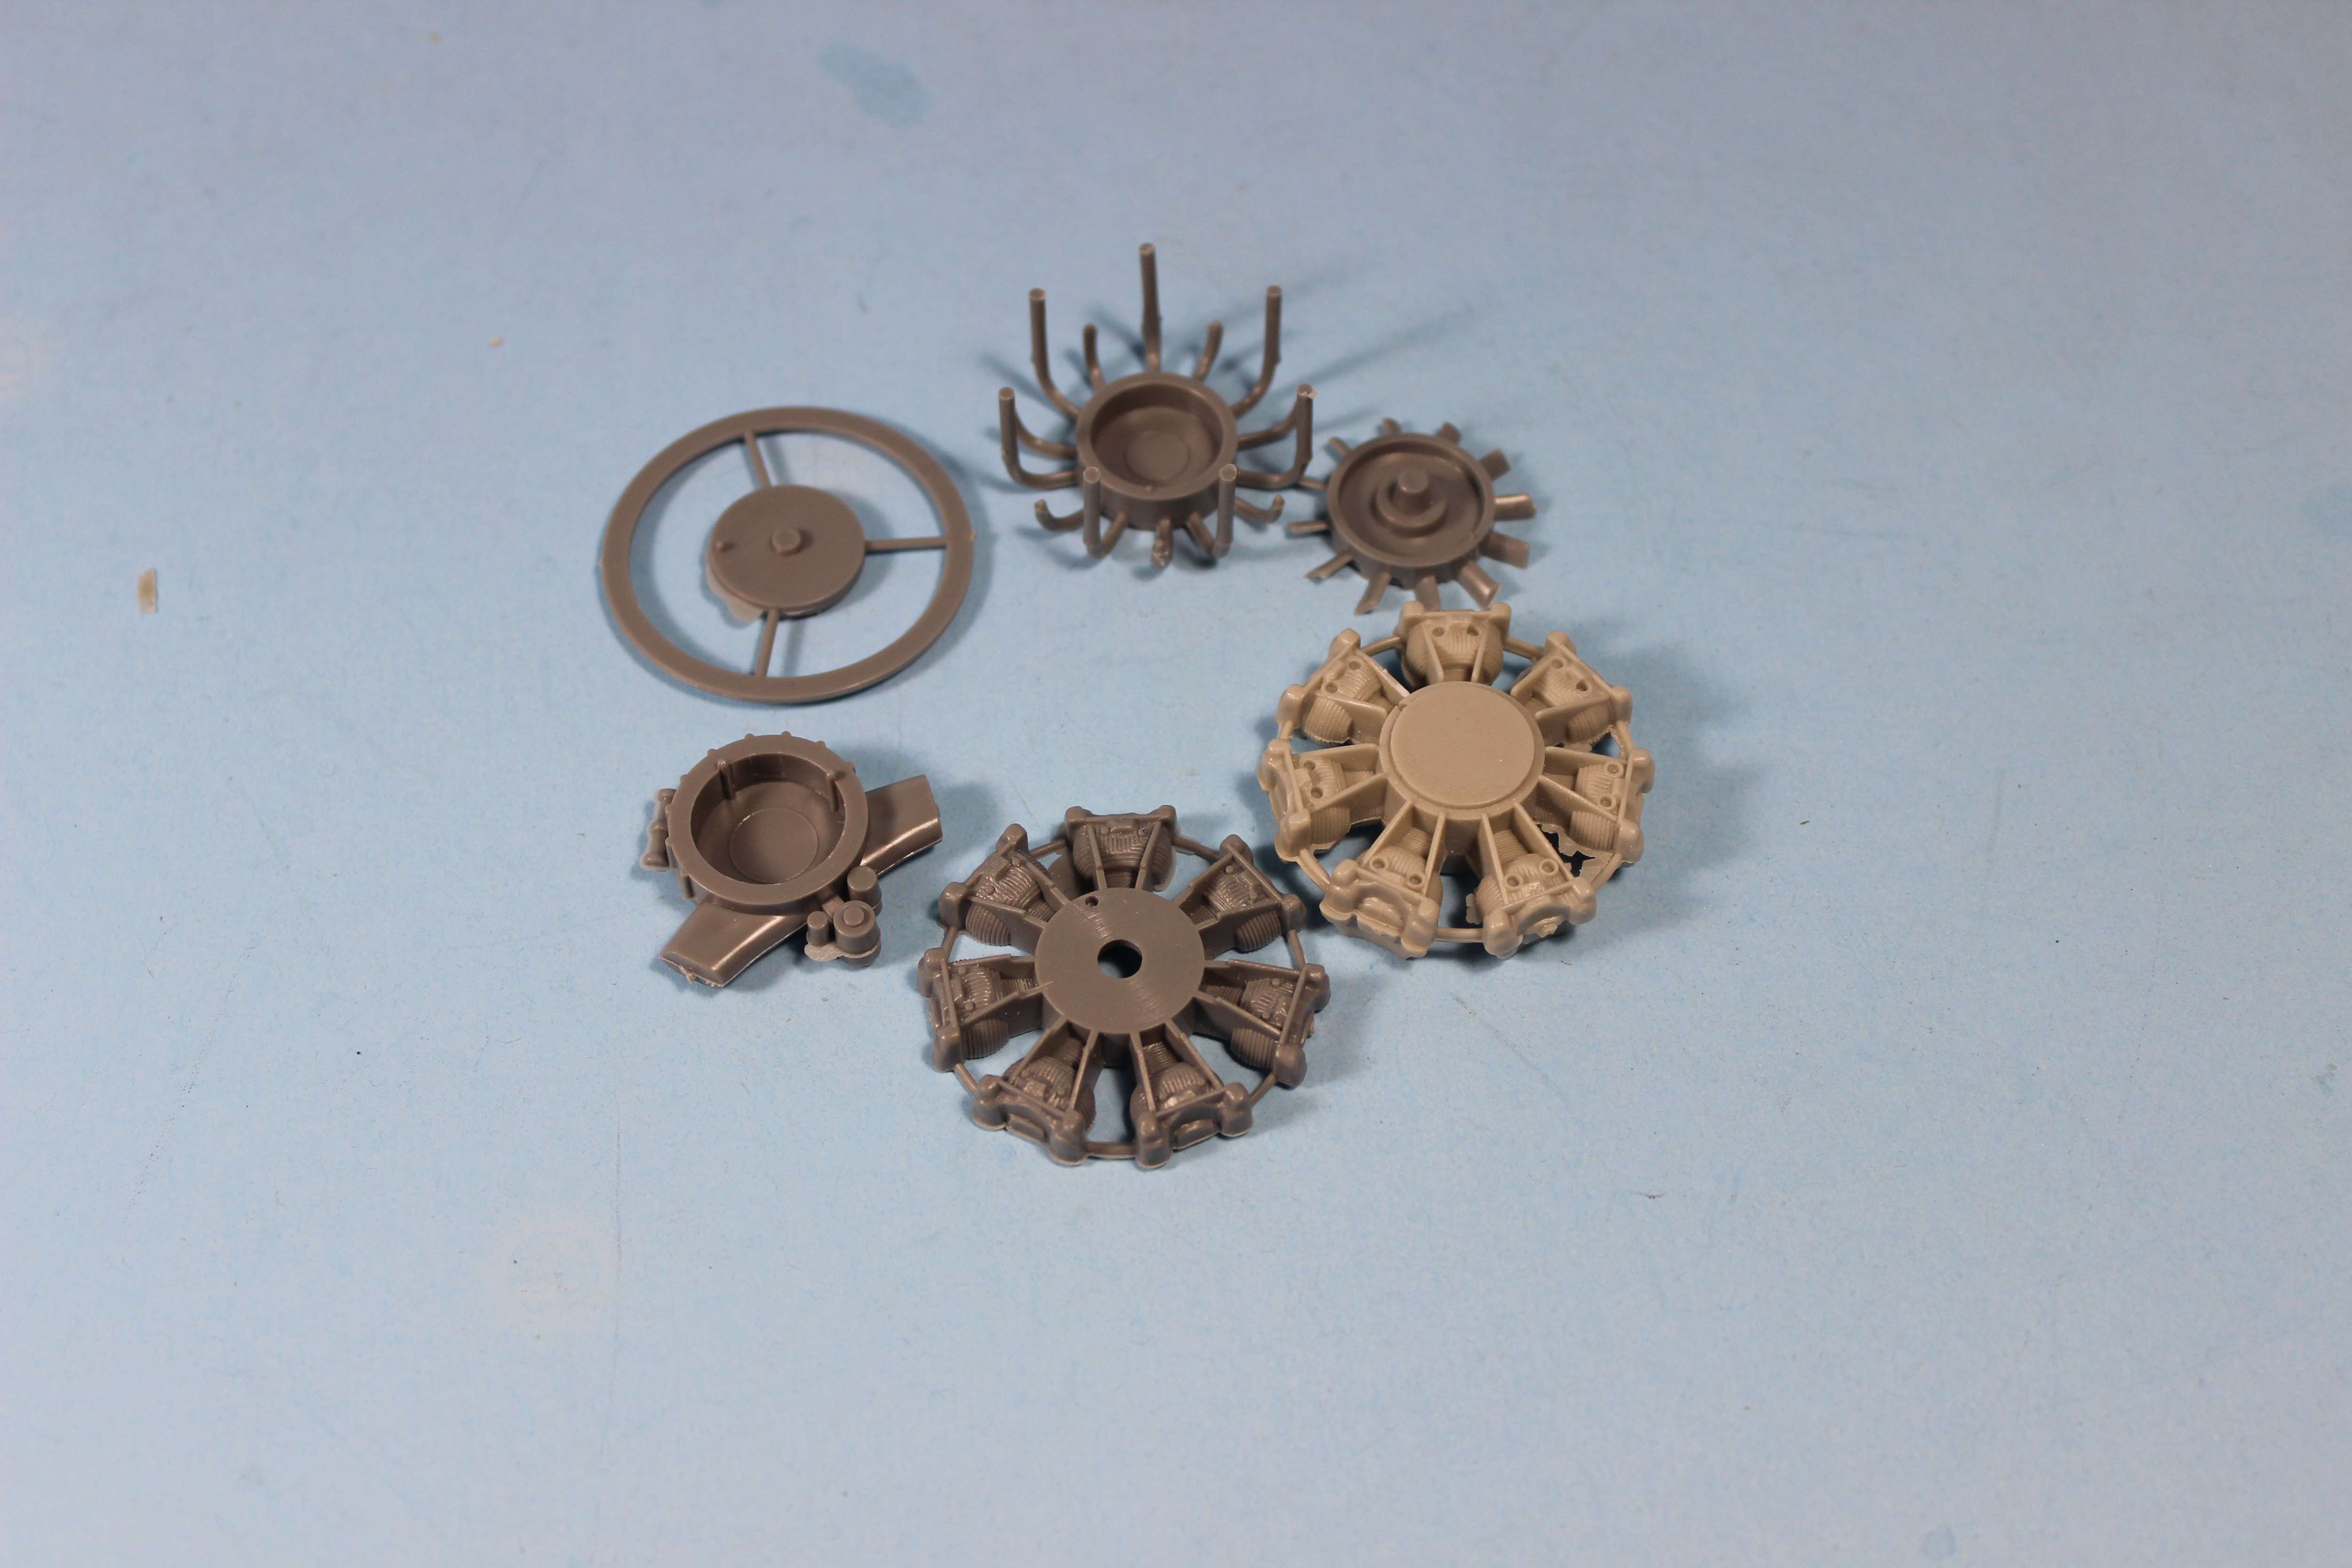
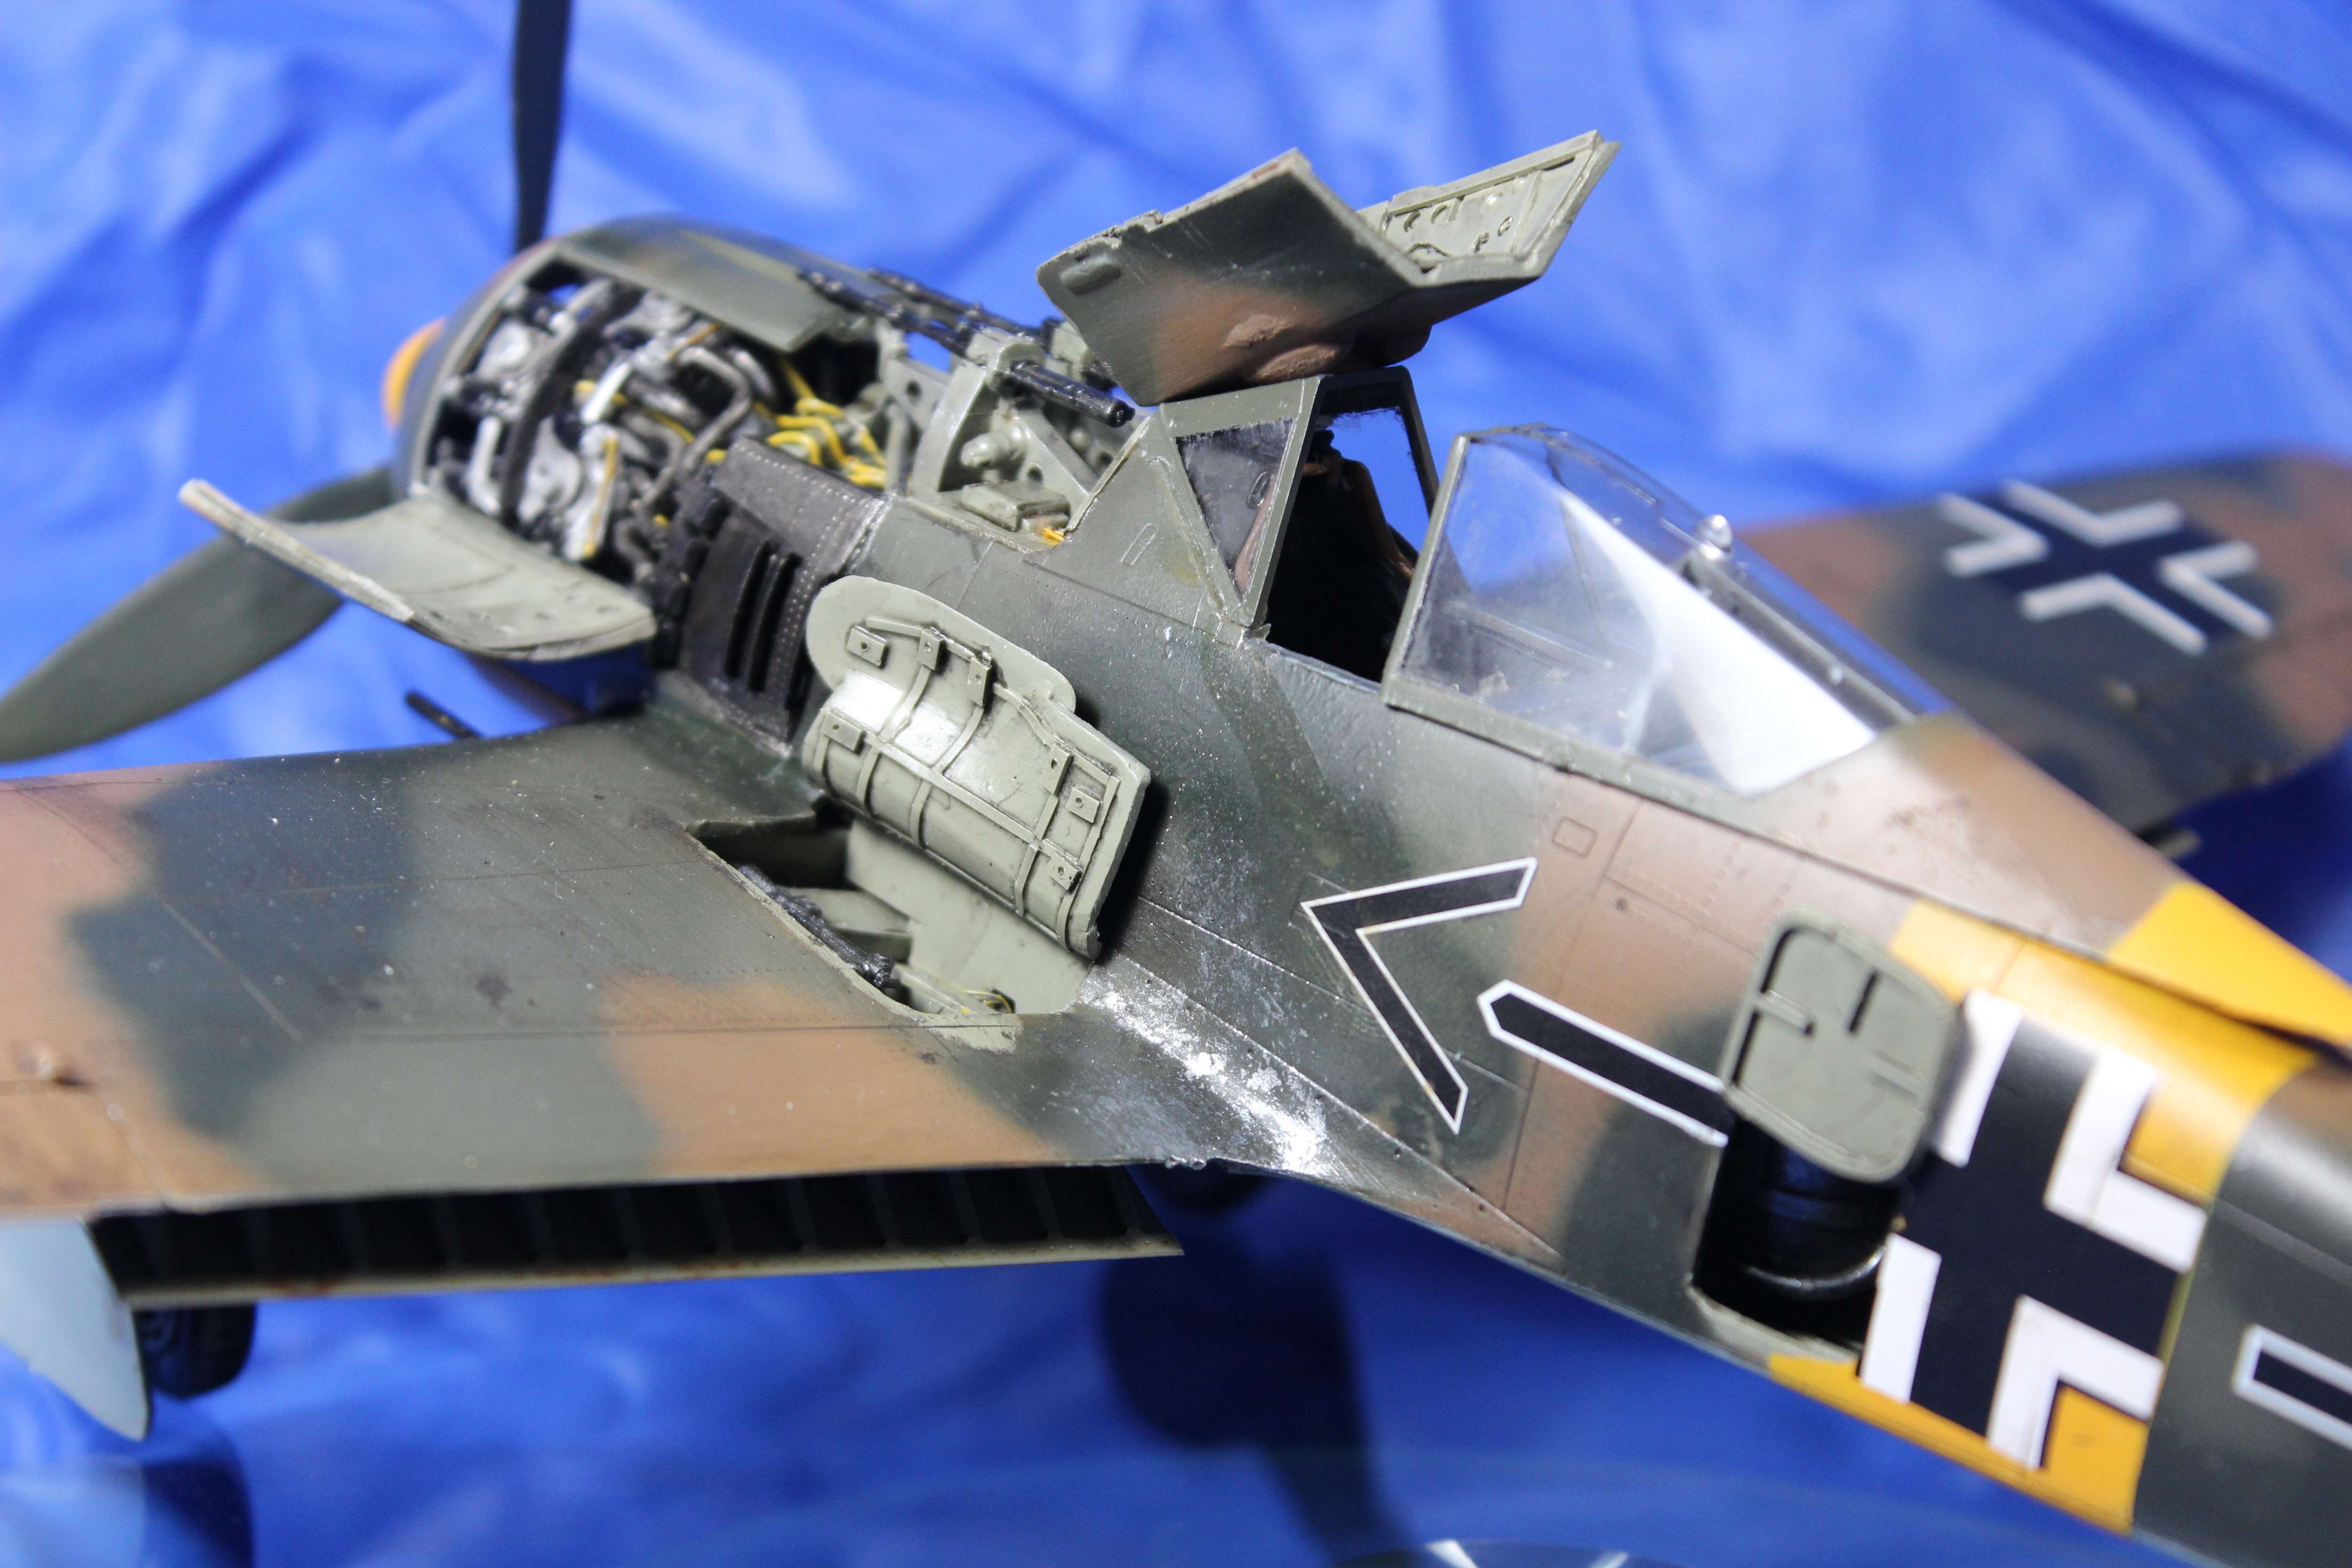
For the BMW 801 engine l started out with this oldie that used to be in the old Hasegawa offering

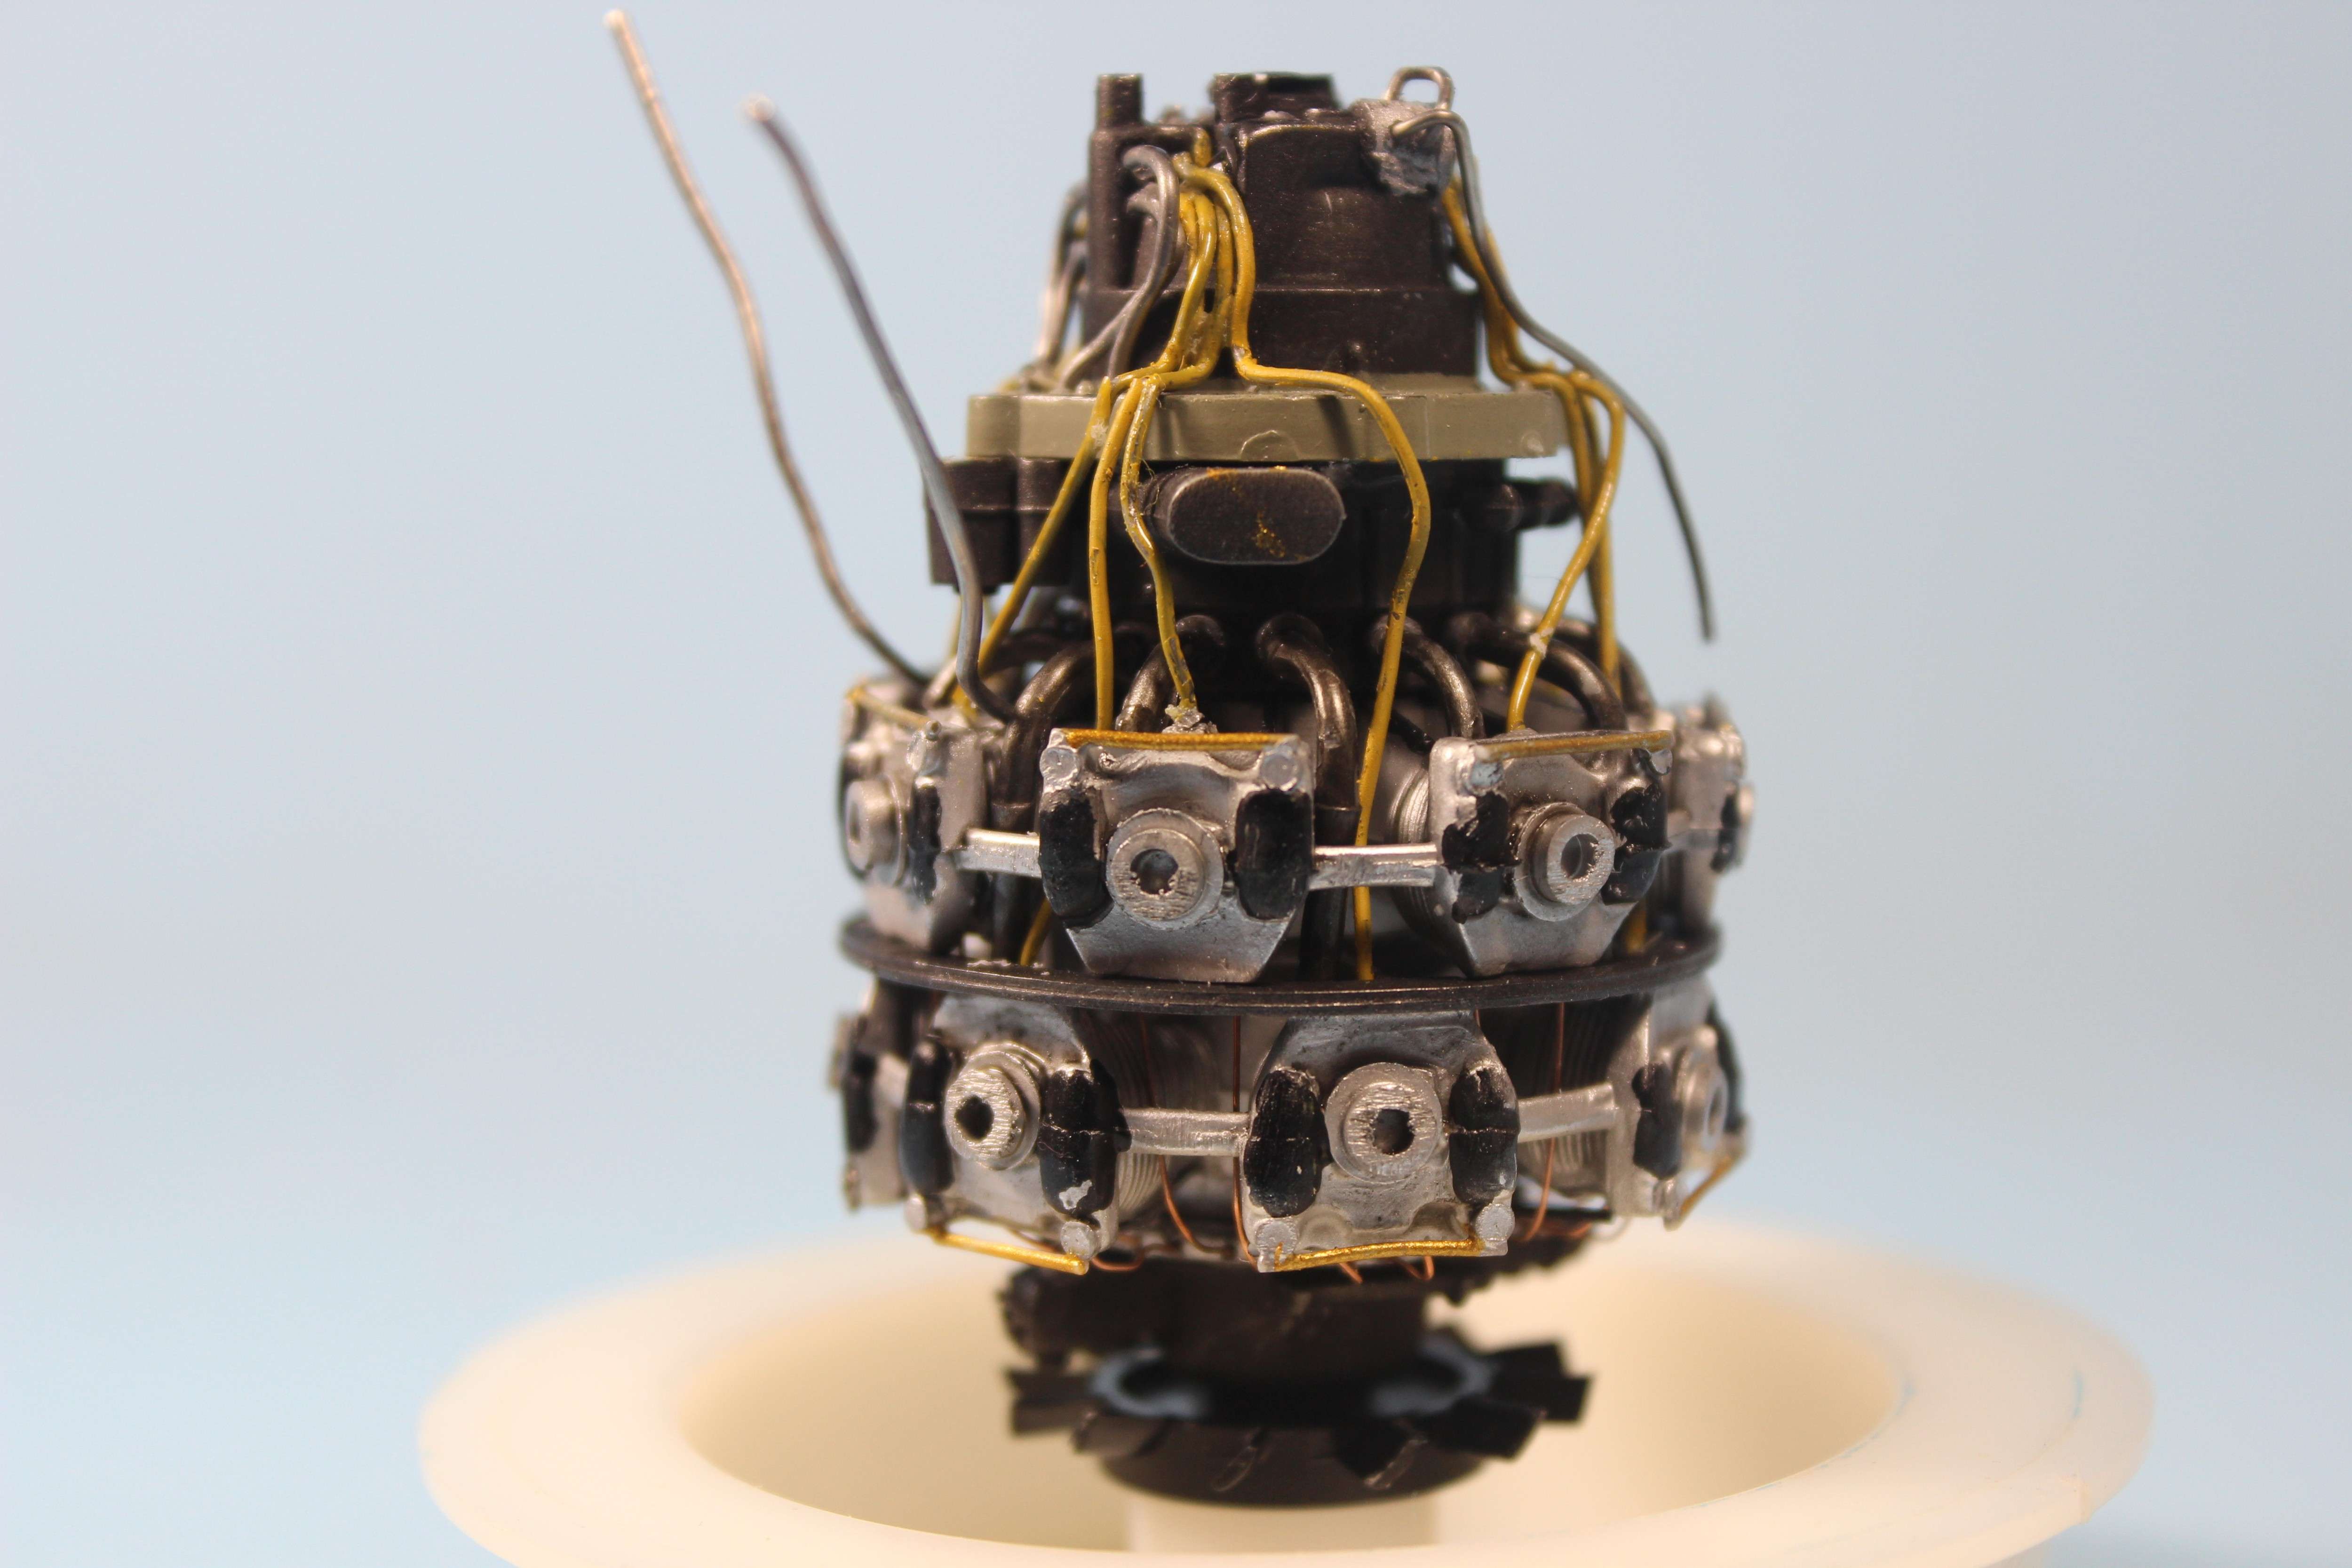
l made this engine with a lot of modifications and bits and pieces of brass, plastic wire and solder

The wing gun bays were also scratch built . l used the MDC 20 mm cannons in th wings

Eduard PE landing flaps that were meant for the Hasegawa A-5 kit which l believe this PCM kit was based on

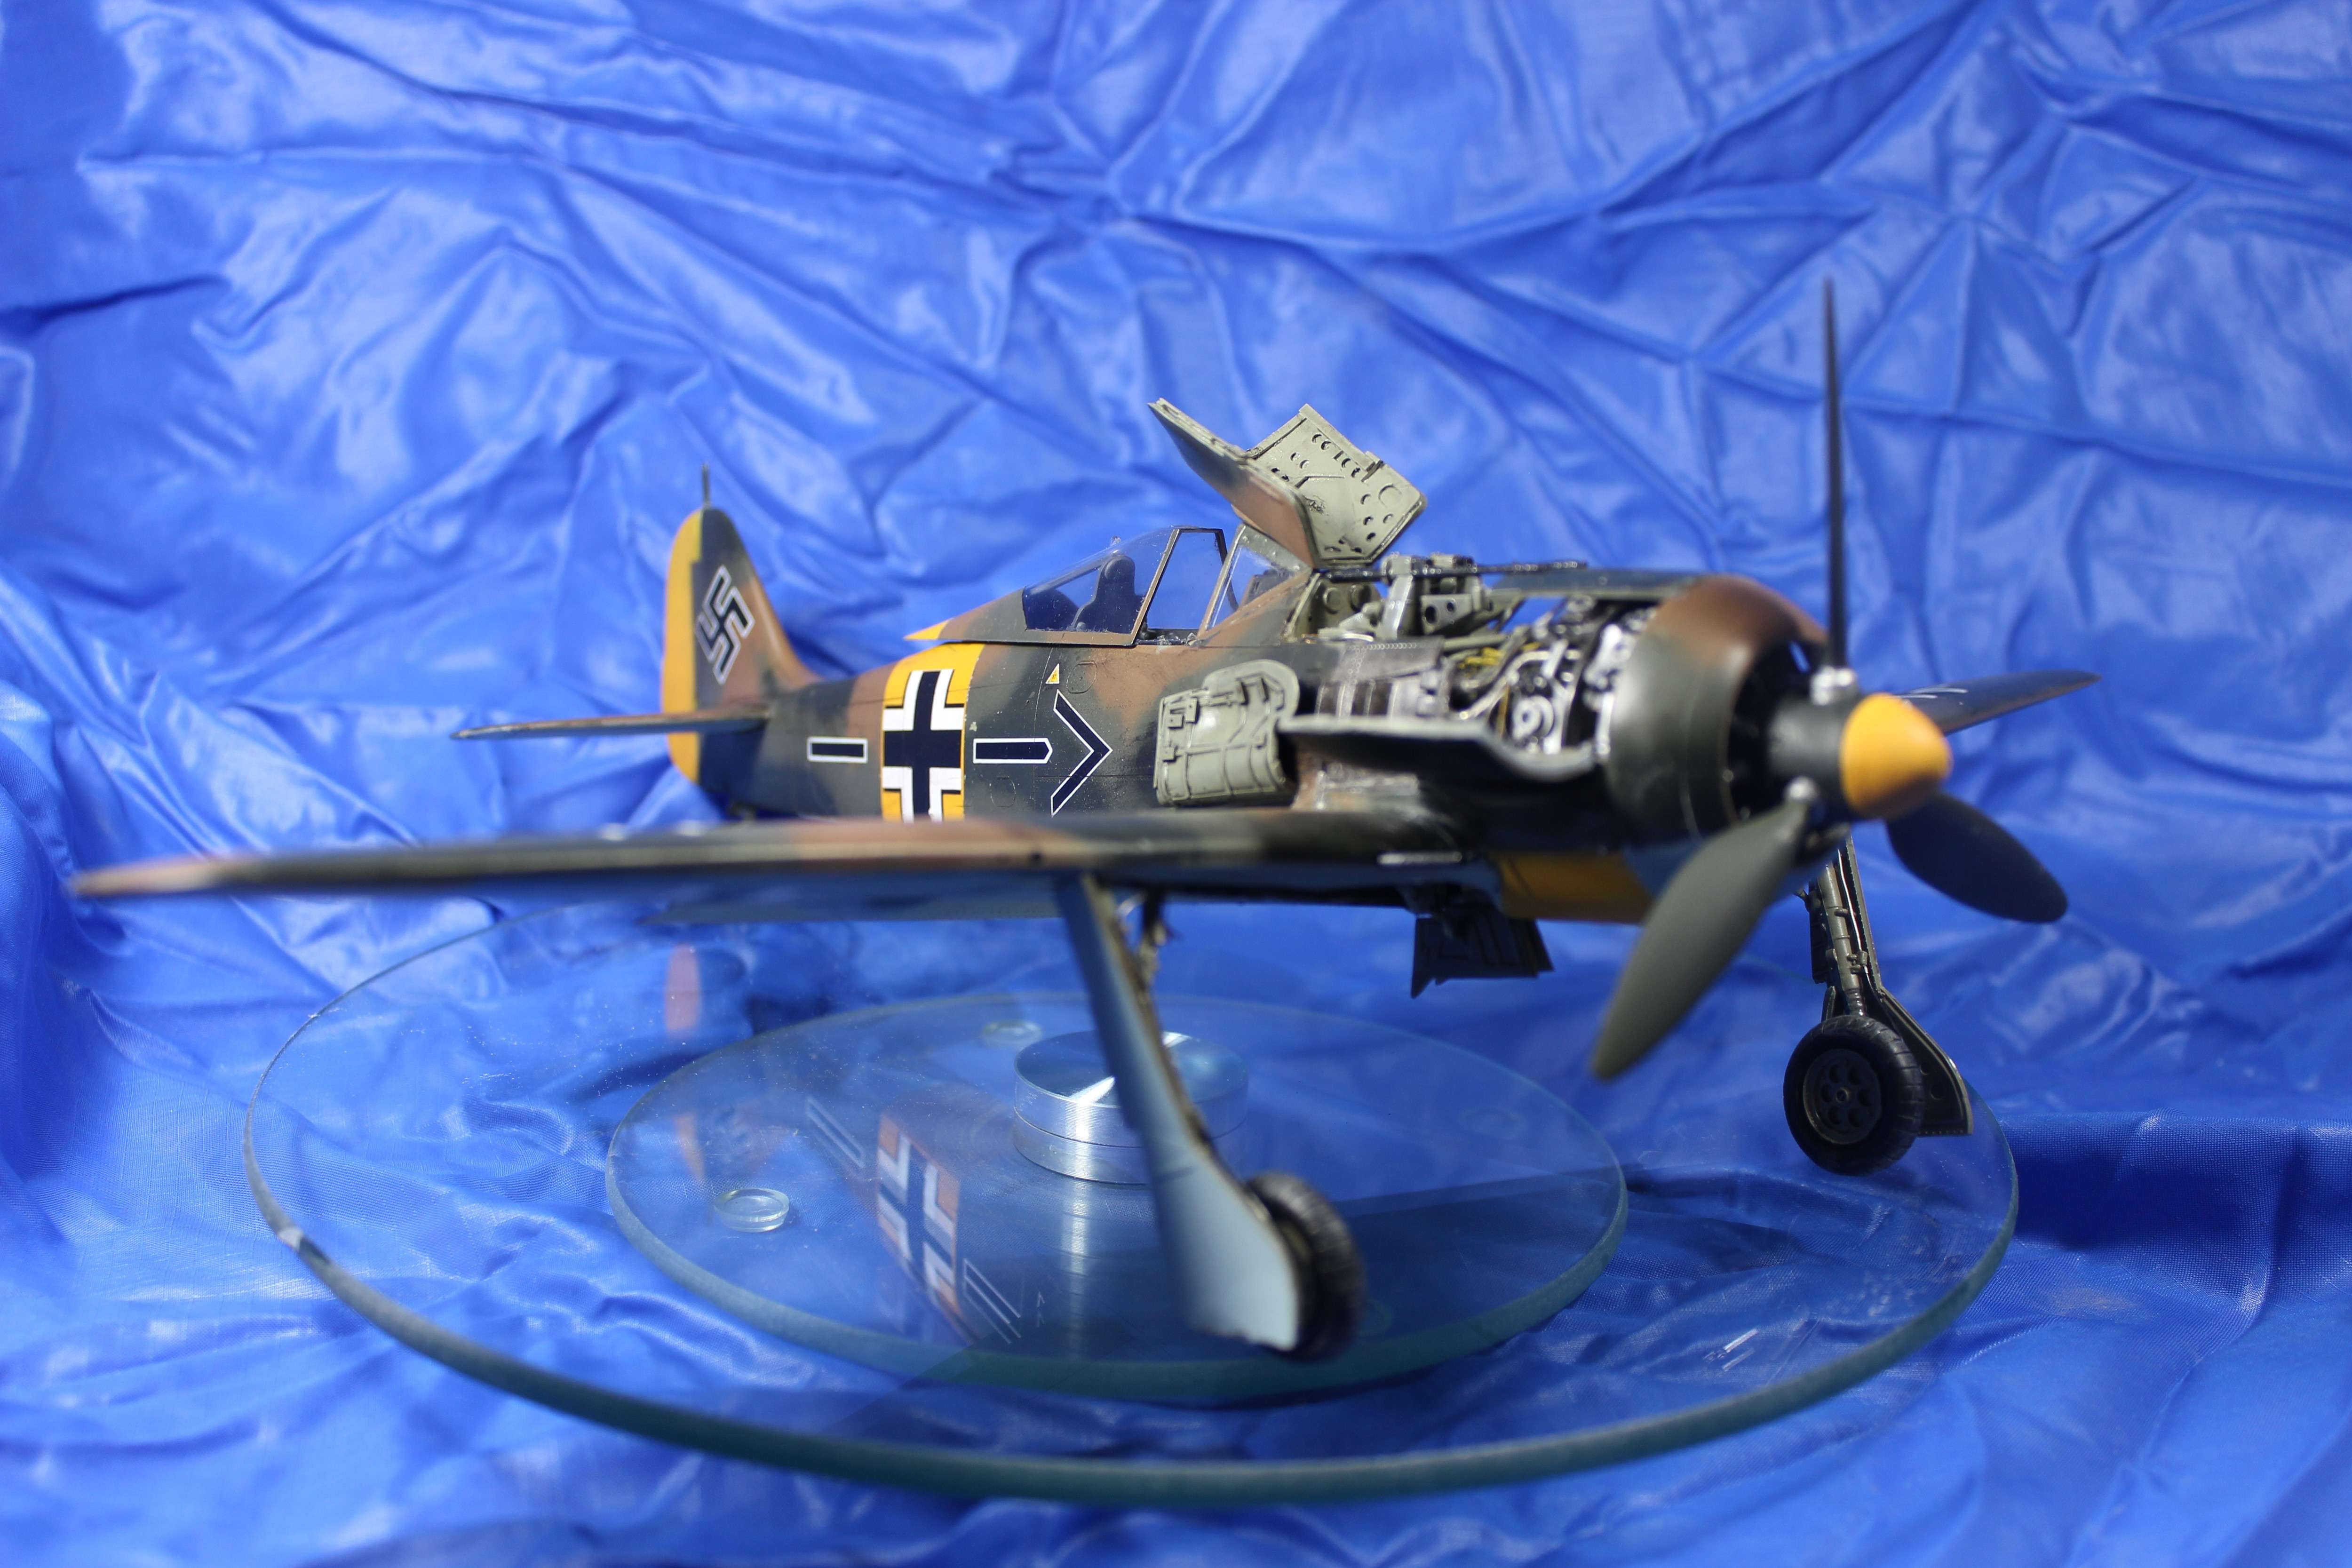
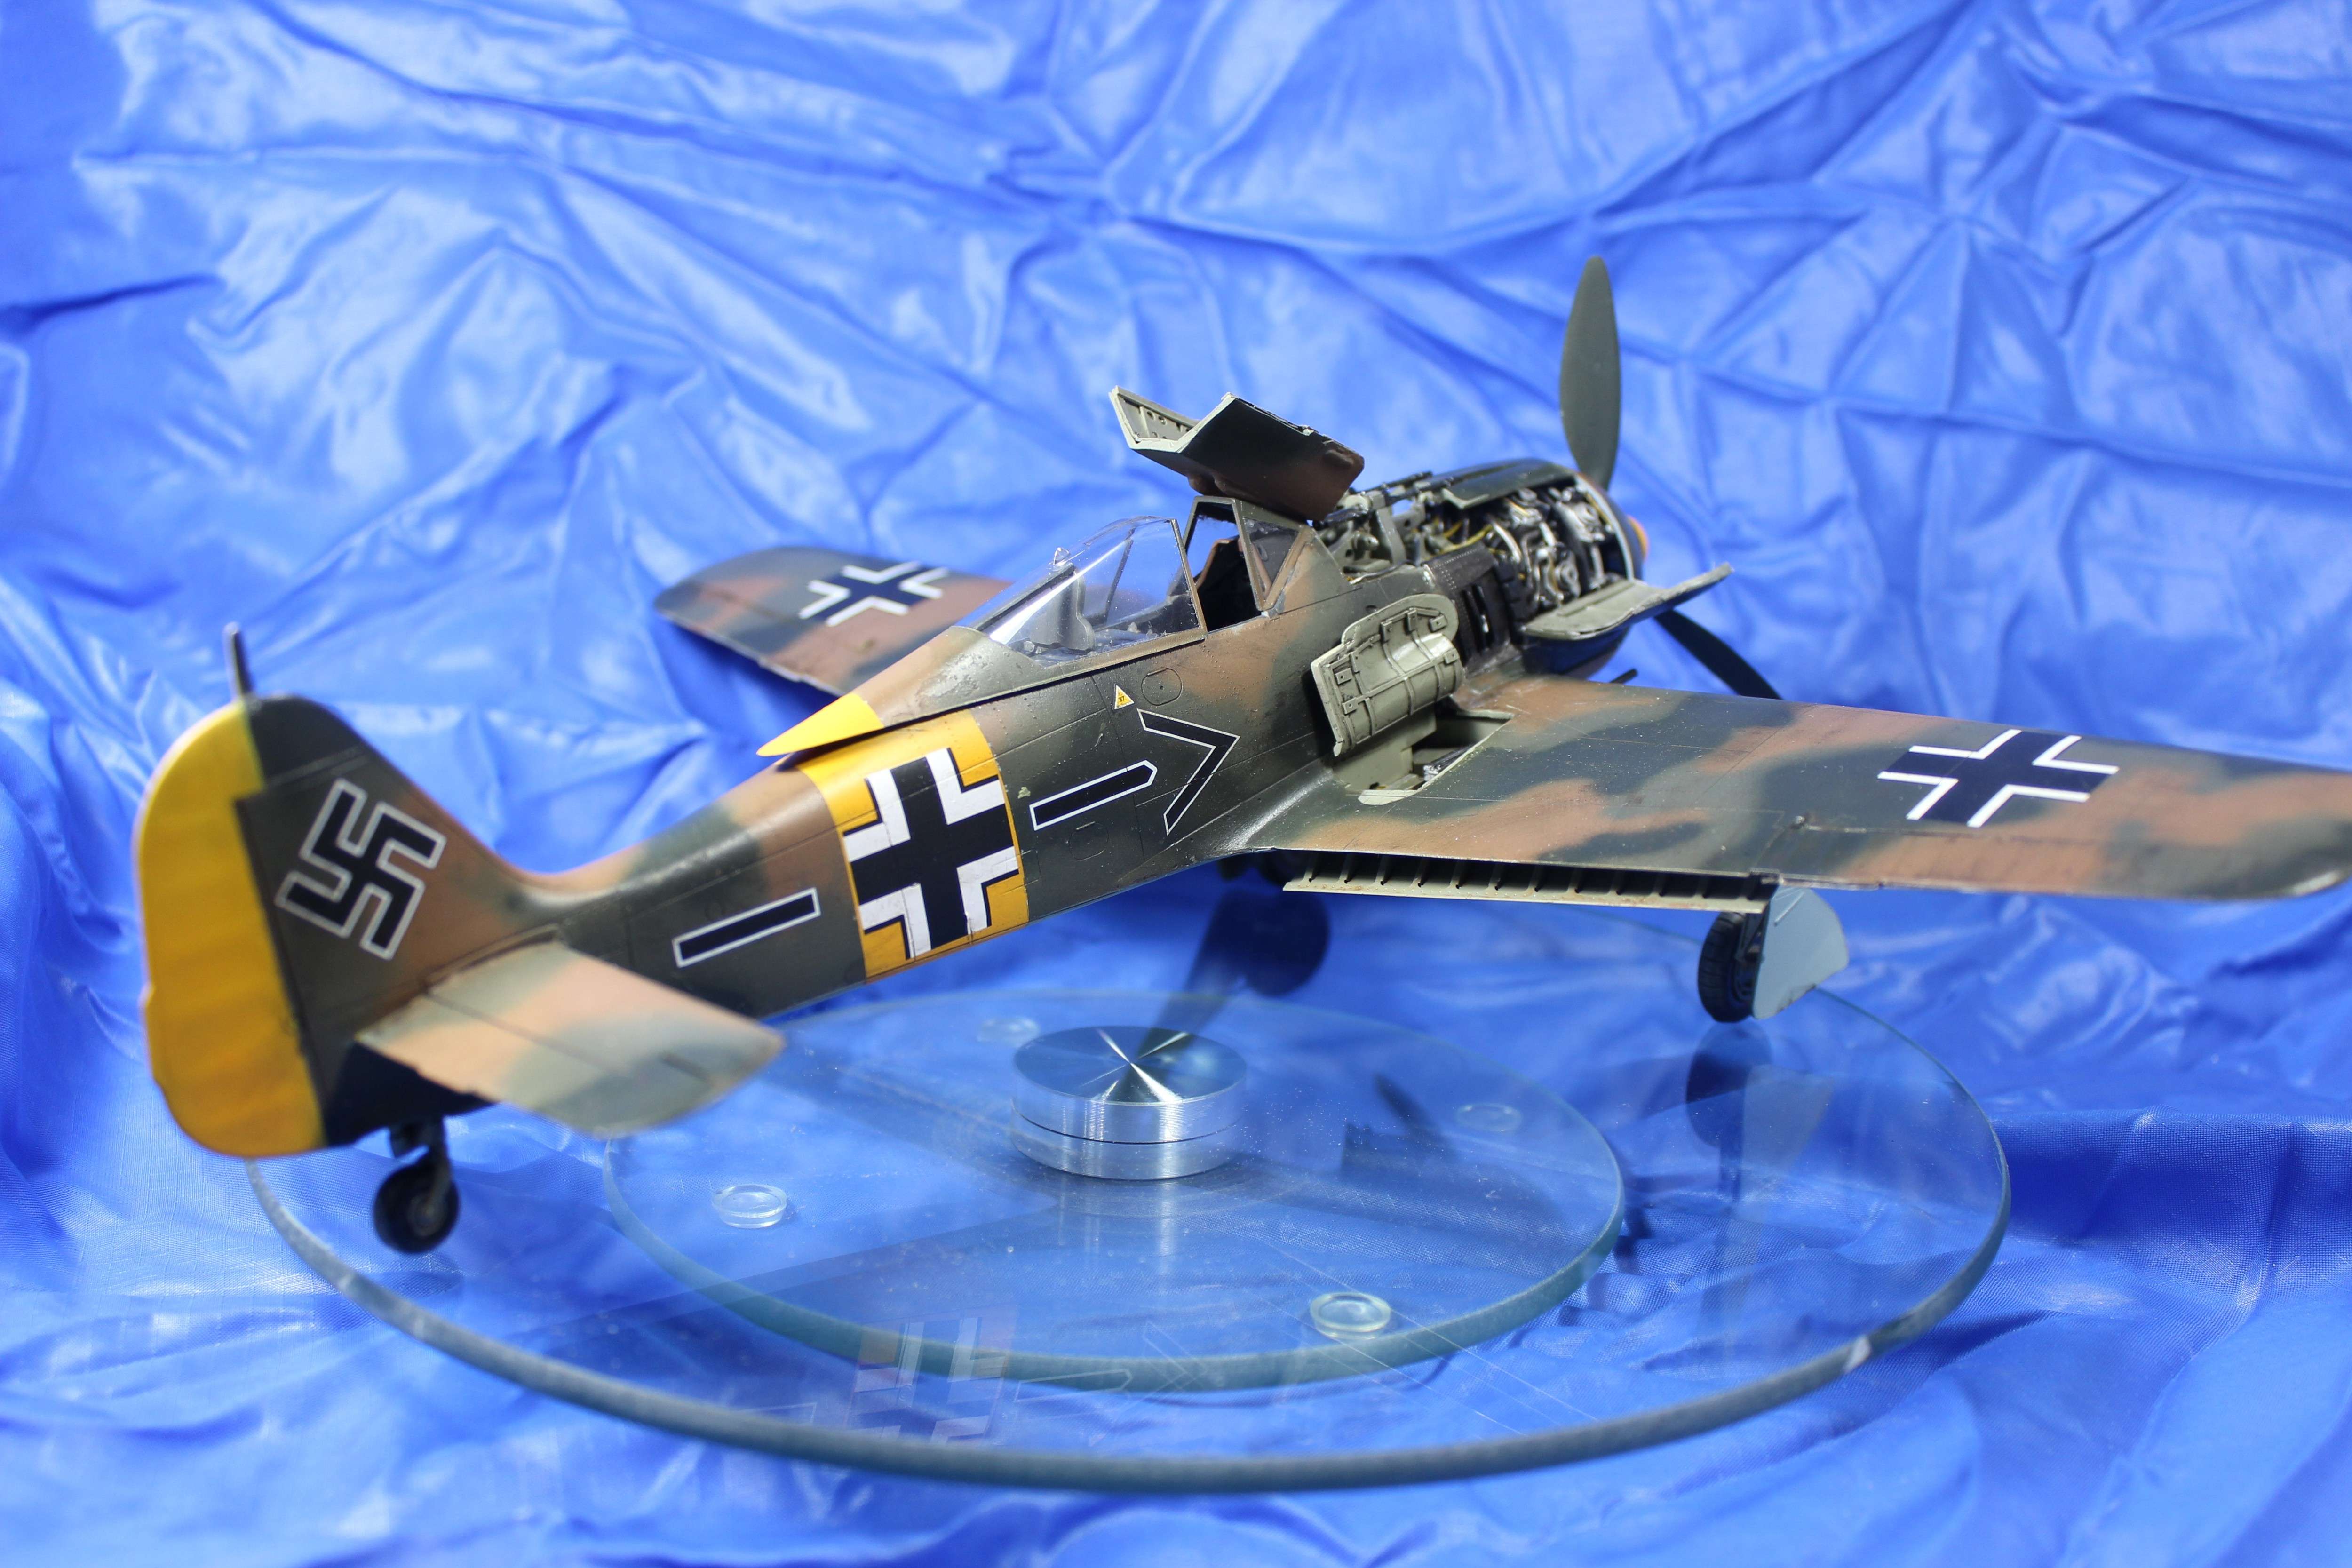


Thus here is the end result. This project was without it's problems with solutions but to be honest if l was to do Another PCM 190A l would just build it straight out of the box with scratchbuilt flaps only. Do not mind the work but l think l will stick to kits with either the engine already there like the new Revell offering. l have done other kits with some scratch built interiors but this one extended the envelop for me a bit.
Hacker.. 190A-4 dusted, bench cleanup in progress, beer in hand *hic*

-
Eventually you will be scribing the gun and ammo bay doors. A question that has plague my mind is the size between the B and the D. Upon visual inspection the bays and the doors seem to be the same size between the two which my luck isn't so. Any clarification on this and is there measurements to go by?
Hacker
-
-
-
-
20 hours ago, Nic C.D. said:
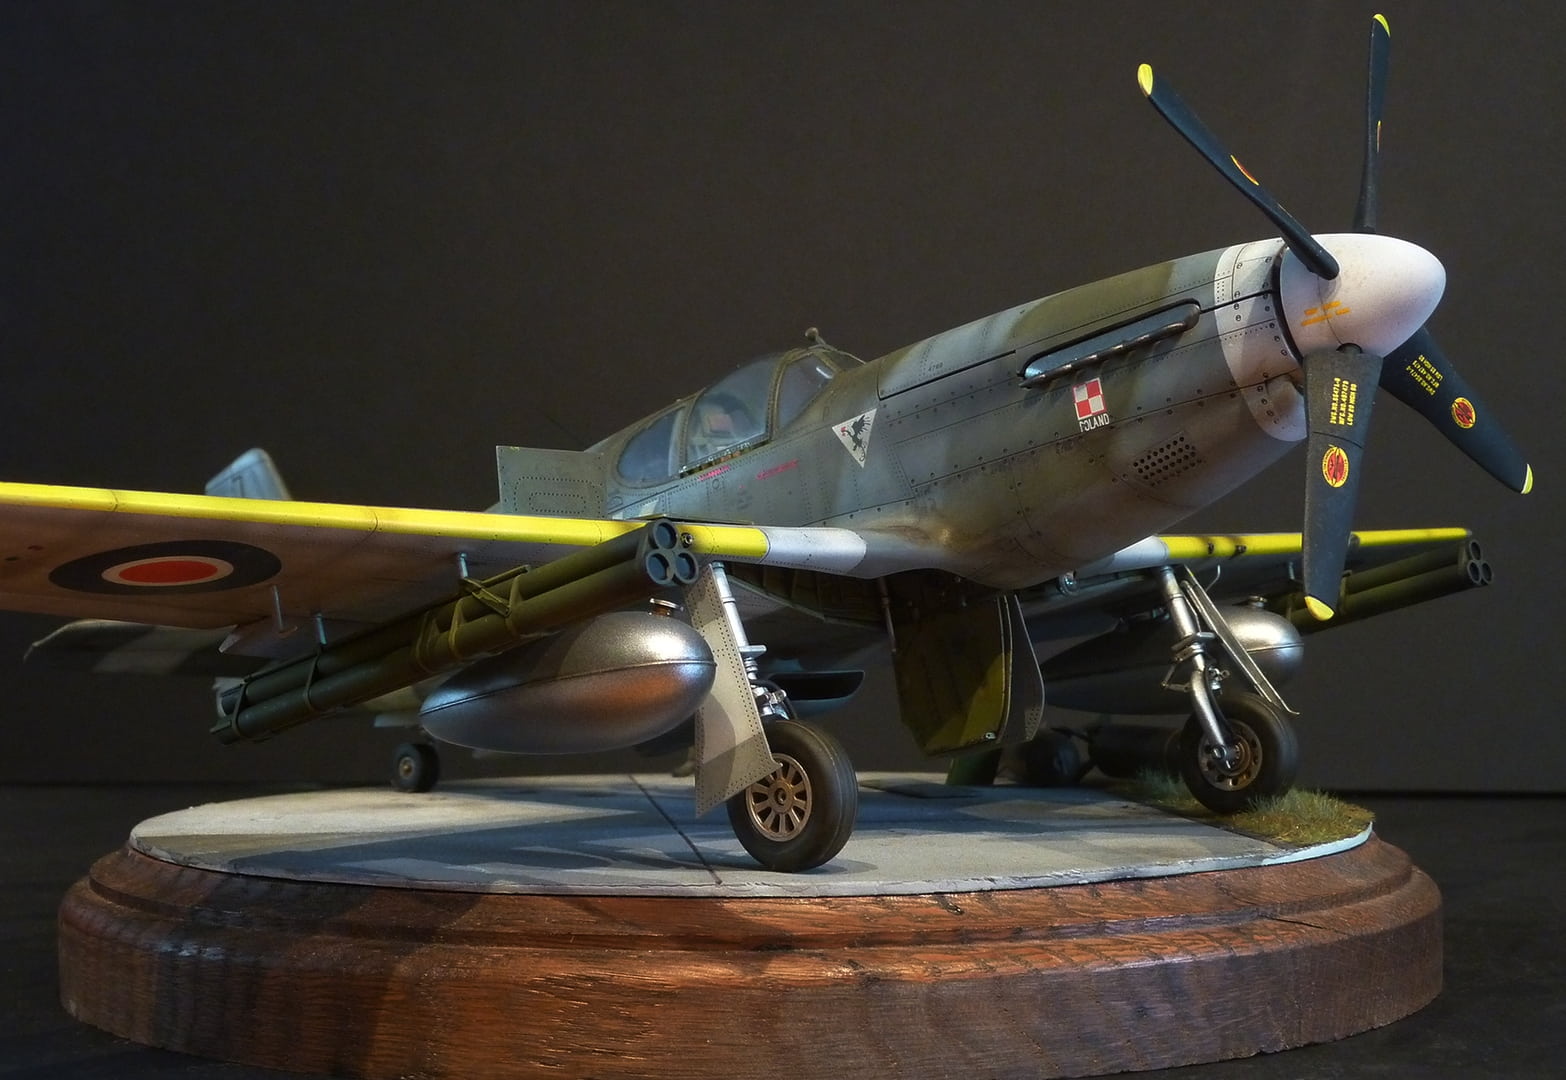
Here are a few photos of my newly built Trumpeter P-51 B Mustang III, built straight out of the box, except for seatbelts. I was wondering how this kit would build (bought for less than 30 euro) after reading so much about it. It built quite easily. Most enjoyable, actually! And in time to take the kit to Telford in 3 weeks time.
I hope you like the result; the pilot seems to be quite happy to pose for a photo next to it...
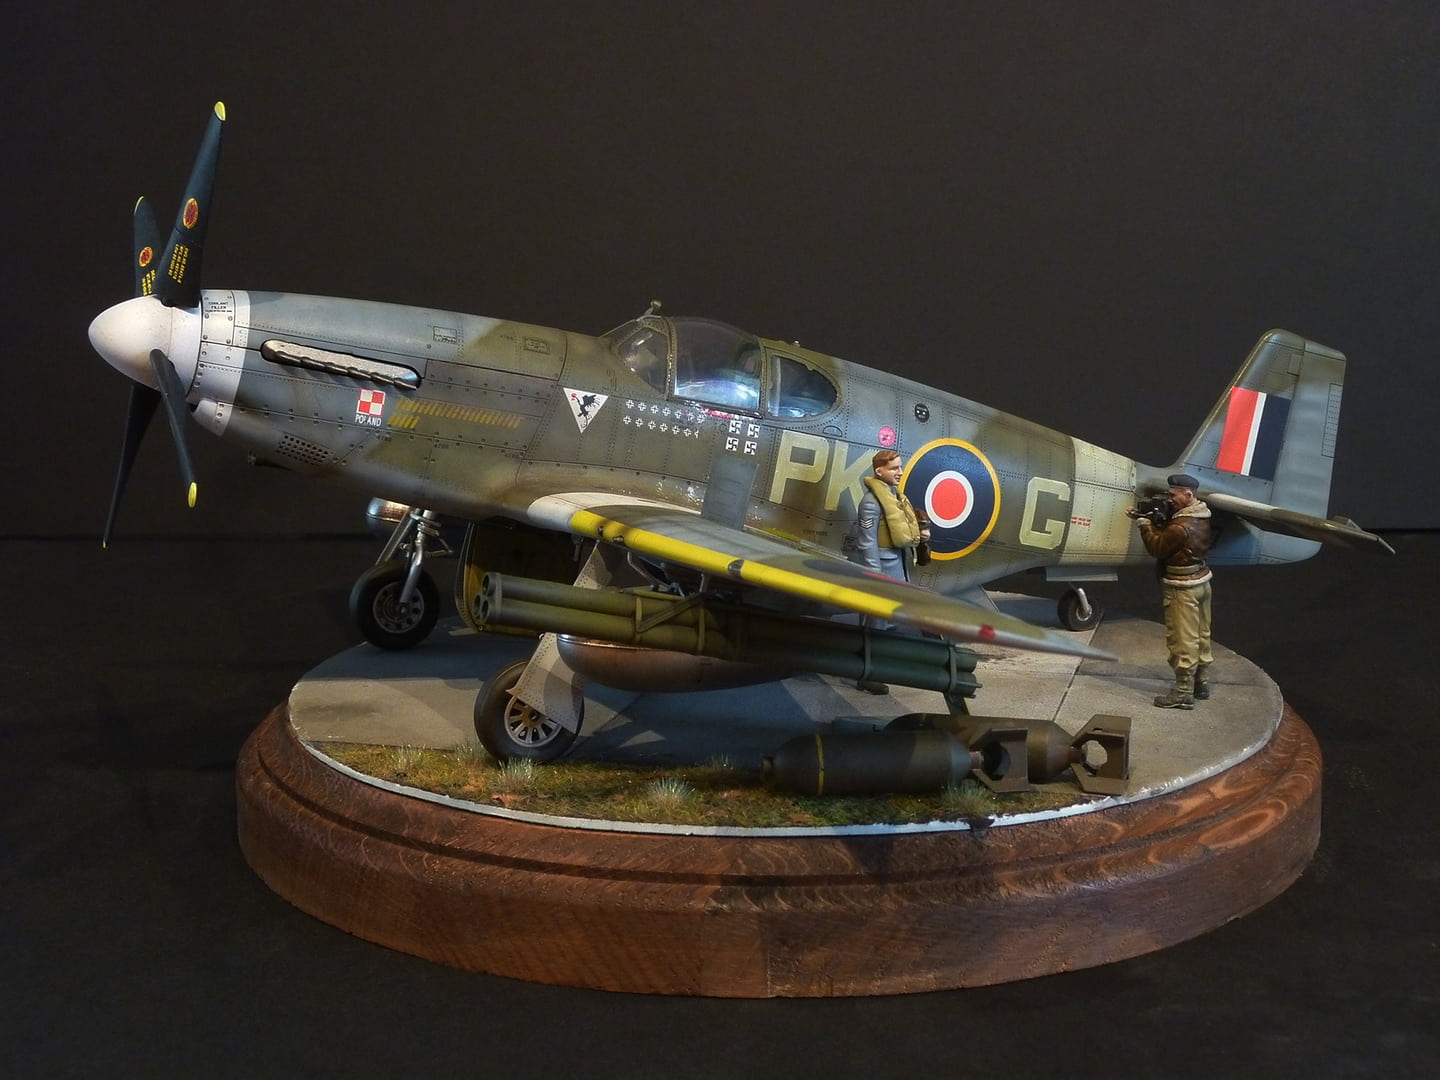
I hope to get another 1/32 kit ready for the deadline, but not sure I will make it...
Thanks for watching !
Nic
I was debating whether to buy this kit or not but it seems to build well for you. l take it you used the engine but sealed it all in and not used the open cowl option? There is just something about a B mustang in RAF colours. I wonder if the RAF did the same practices and their USAAF counterparts and puttied all the seams and rivets in?
Hacker


")


1/18 P51C Mustang "Lopes Hope the 3rd"
in Works in Progress
Posted
so the question is are you going to have another go at that Firefly?
Hacker