

Hawkwrench
-
Posts
1,268 -
Joined
-
Last visited
-
Days Won
1
Content Type
Profiles
Forums
Events
Posts posted by Hawkwrench
-
-
3 minutes ago, chrish said:
Glad to hear you are working....more happy to see you back at this!
always wanted one, will never happen now but I'll live it vicariously through your build
Thank you sir. I love this model, even though it gives me fits sometimes!
Tim
-
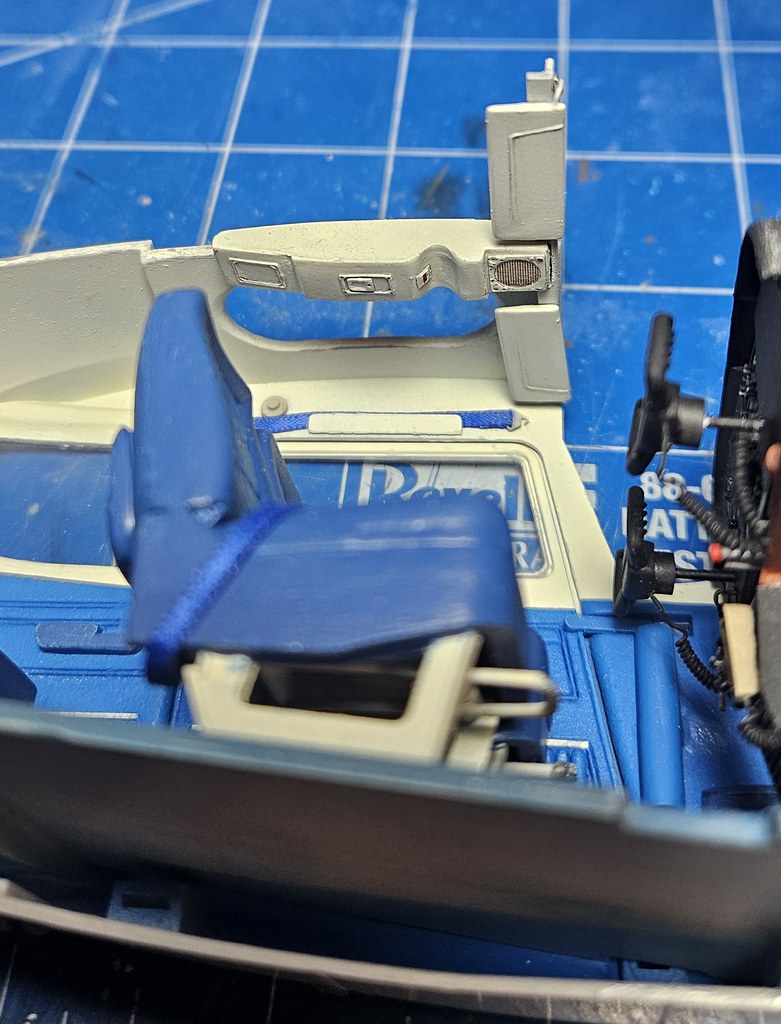
Last night I was able to do a little bit more work on the 172. Nichimo gives you 2 sunvisors, and wants you to just glue them the the top of the fuselage, but I opted for some more detail.
I scratchbuilt an overhead light/map console with the speaker from sheet styrene and PE from my spares box. The speaker grill is a seat cushion decal from a 1/48 F-14.
I also uses some lead wire and L shaped styrene for the sunvisor mounts and finally glued both of them together and onto the cockpit ceiling.
Till next week!
Tim
- patricksparks, rafju, LSP_Kevin and 7 others
-
 10
10
-
-
Probably no chance they redid the kh instructions and fixed all the issues.
Tim
-
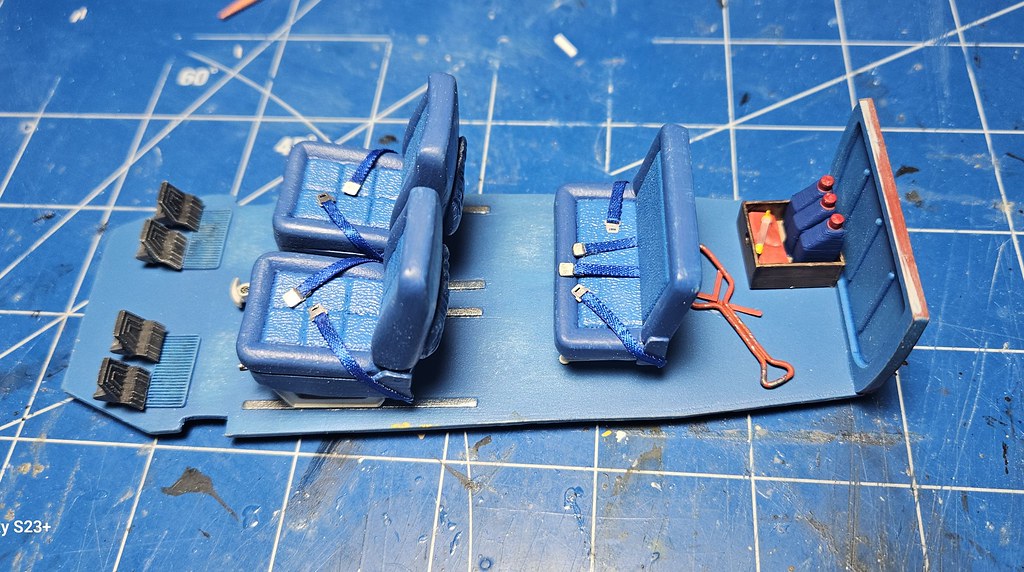
After looking at the baggage compartment more, I decided to add a little more detail to the back of the 172. I scratchbuilt a storage case and painted and weathered it to look like a well used wooden box. I found some 1/24 3d printed prepainted oil quarts on ebay and the shop rags are painted lead foil. I also scratchbuilt the fuel sample tool. Now the back looks alot better!!!

That's all for tonight.
Comments and critiques welcome!
Tim
-
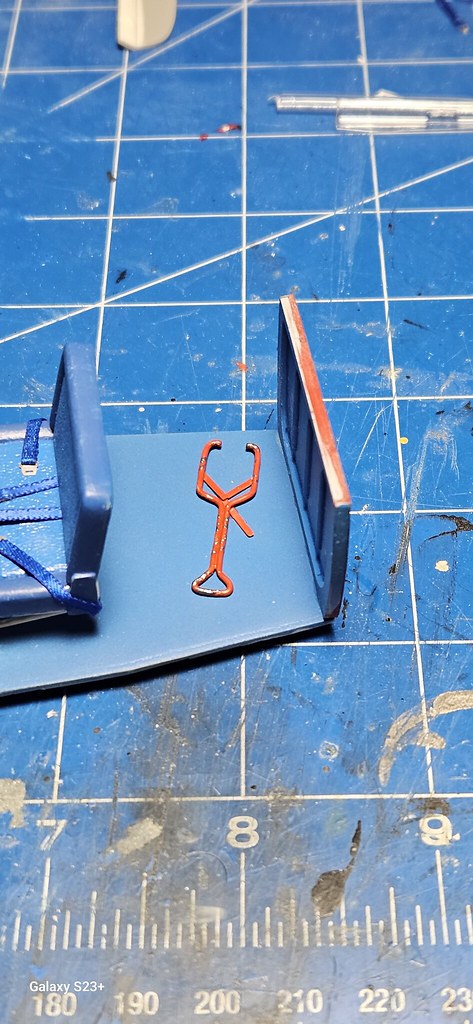
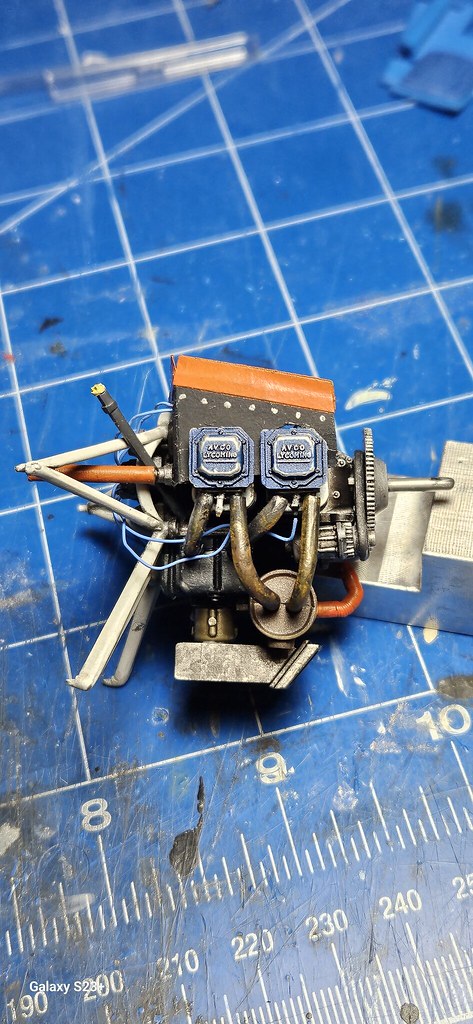
Tonight, I scratchbuilt a tow bar using .035 lead wire bent to shape and painted red and glued it to the baggage compartment floor(where it usually goes). Afterwards, I painted the exhaust headers a hot, rusty look and glued them to the exhaust box. I can finally say the engine assembly is ALMOST done!
Comments and critiques welcome!

Chow till next weekend!
Tim
-
Wow, 5 months since my last post. Sorry, but life and work has gotten in the way. For now, I'm back.
I've been SLOWLY working on the interior of the 172, having to custom mix the interior colors to match the customer's colors.
More updates tomorrow night.
(Tried to post 2 pics, but it won't let me. Is their a new rule???)
Comments and critiques welcome!
Tim
-
16 hours ago, Porkbits said:
Thanks for the info, @Uncarina and @Dave Williams! Appreciate it. I have Tamiya NATO black, so might use that lightened with gray here and there. I ordered the Quinta set from Sprue Bros.
FYI, I have an extra Takom kit that I'm willing to sell at a good discount (U.S. only), if anyone is interested. Never thought I'd have to write this, but I have too many 1/35 Apaches lol.
How much shipping included?
Tim
-
How about going off the airplane path and making a set for the 1/35 Takom AH-64E helicopter!
Tim
-
-
What a bunch of idiot dirt bags. Hopefully cameras can help catch them. If not, sounds like sniper mode with frozen paintballs!!!!
Tim
-
-
They take your money but don't want to give out theirs!!!
Tim
-
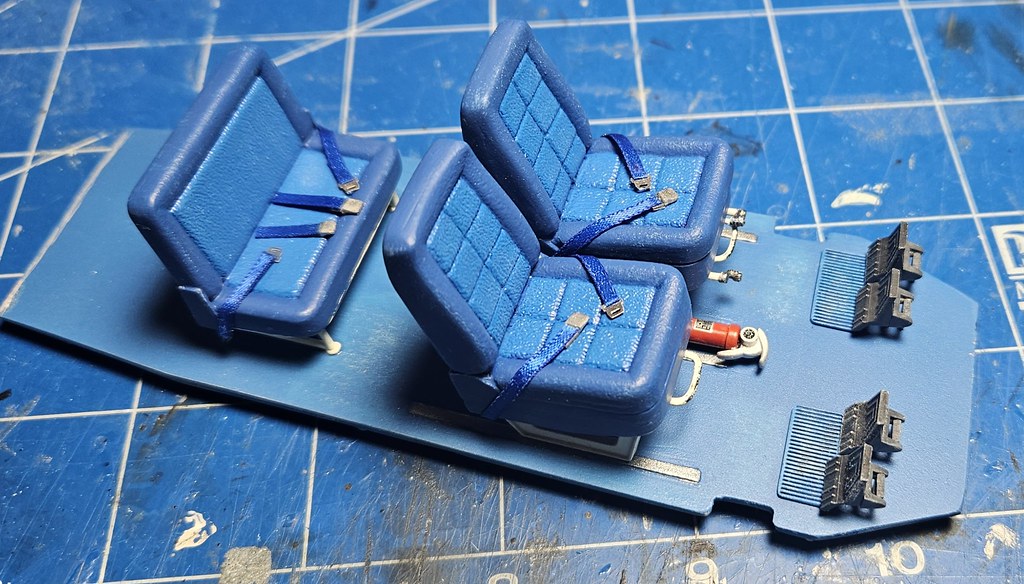
Set the engine aside for a few and decided to tackle the instrument panel and center console. For the instrument gauge glass, i used laminating sheet.
The layout of the panel is different than the kit part and was supplied by a fellow Cessna 172 model builder.
Thanks John!!!
The radio stack was custom 3d printed by Arms Corps Models and his work is amazing!!!

That's all for now!
Tim
- Derek B, LSP_Kevin, scvrobeson and 8 others
-
11
-
-
On 5/30/2023 at 11:46 AM, Oldbaldguy said:
Well, you’re pretty much there with the firewall. Heavy wire from the starter relay to the starter, scat tube from the muffler shroud to the cabin heat box, oil lines from the cooler attach to either the pan or the crank case (I forget), and a fuel line from the sump/strainer to the carb. Three control cables come from the carb and pierce the firewall - throttle, carb heat and mixture - and there’s a piece of scat that goes from the muffler heat shroud to the carb air box. And then the various electric lines from the lights and engine instrumentation and a hard line for the oil pressure gauge. Wires run from the voltage regulator to the alternator. And hoses from the vacuum pump to fittings on the firewall to run the gyros. Oh! And you forgot to safety wire your oil filter.
Well crap, guess I gotta start over then!!! The scat tubes are going on this weekend along with a few more wires and fuel hoses.
Tim
- Oldbaldguy and themongoose
-
 2
2
-
Finally rounding third and heading for home on the engine.
I finished wiring the spark plugs and wires and made the engine baffles from construction paper and tamiya tape.
It looks rough, but all baffles are like that from the cowlings being taken on and off repeatedly.
I also scratchbuilt a oil dipstick tube from spare parts and glued a Anyz 1/32 WW2 knob onto a punched disk to make the oil cap.
Just a few more hoses and wires and she'll be done.

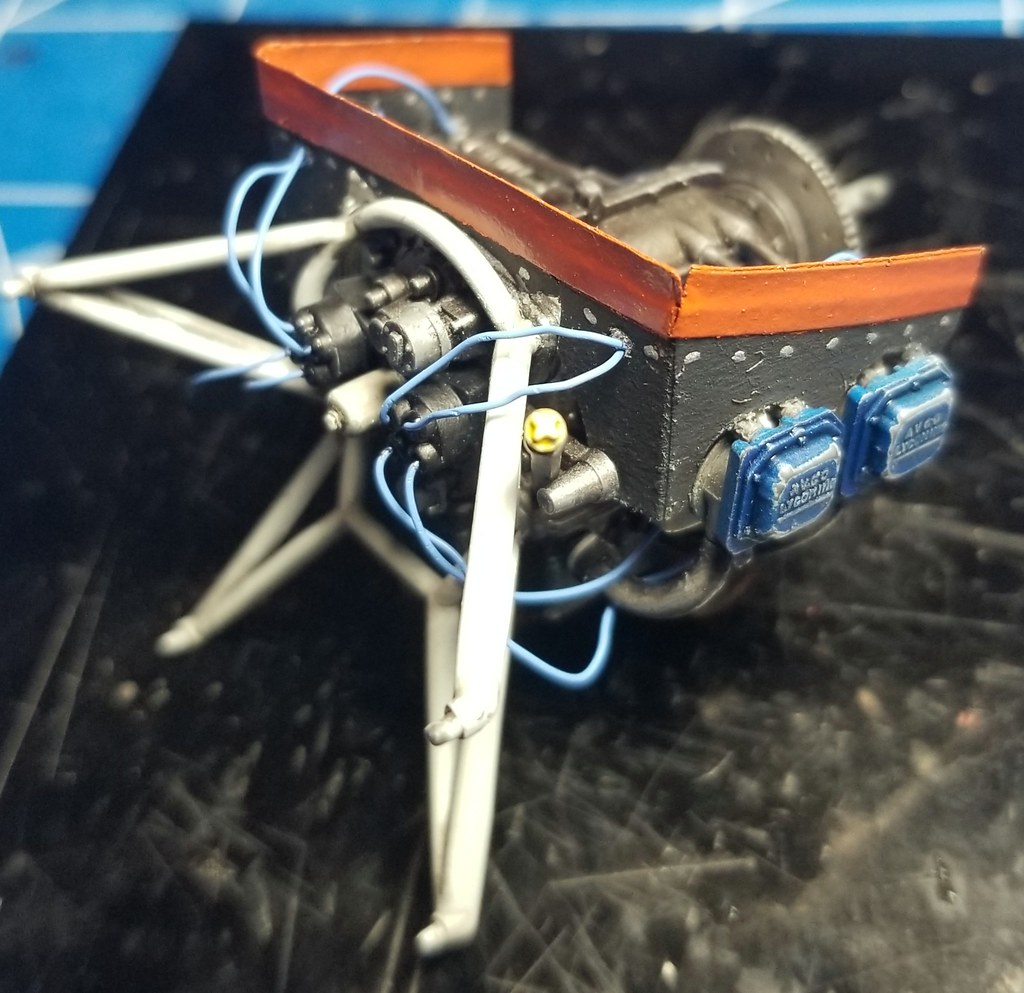
The firewall is about done as well. I just have to figure out from actual pics where the hoses go.

That's all for now!
Tim
-
They go on pretty good. I've come across a couple that were a little thick and so I just thinned it down a little.
Tim
-
Tonight I worked on painting alot of the accessories to the engine like the alternator, belt, starter and the cylinder covers.
That was followed up by a dirty wash using Tamiya black panel accent color.
The cylinder covers were painted using the new Vallejo Game Color Blue.

Comments and critiques welcome.
Tim
-
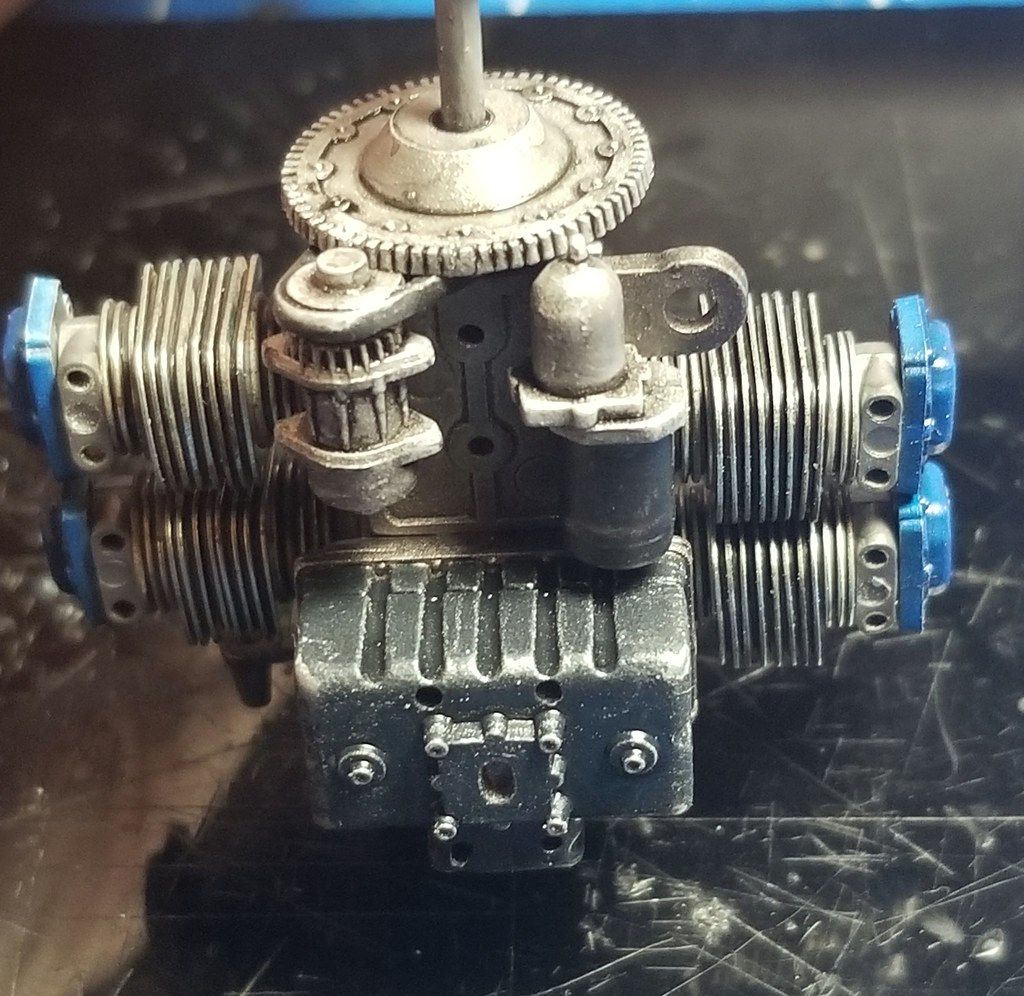
I did a little bit more work on the engine accessory section.
I painted the oil pan gunmetal followed by a weathering using a AK aluminum pencil and white pastel chalk.
The oil filter was a big oversized cylinder, so I scratchbuilt one from my spares along with a generic decal and then glued on a resin bolthead. Waiting for my plug wires to come in to start wiring it up.
That's all for now!

Tim
-
Thanks guys. I'll look into them.
Tim
-
19 minutes ago, Pete Fleischmann said:
Pave Low
Man, you wanna talk about big!!!
Tim
-
We need a 1/35 scale Bell Jetranger/OH-58 Kiowa!!!
And not the OH-58D!
Tim
-
While painting a firewall aluminum, it hit me. What color do you use to highlight something painted aluminum???
Tim


R2 Miniatures - 1/35 AH-64 Apache pilots and more..
in LSP Discussion
Posted
Gotta have some. Maybe they'll roll out some UH-60 pilots too!!!
Tim