

Stokey Pete
-
Posts
1,530 -
Joined
-
Last visited
-
Days Won
7
Content Type
Profiles
Forums
Events
Posts posted by Stokey Pete
-
-
As I wait for some parts to arrive for the Stuka, I thought I’d make a start with the Zero.
I’ve done some base paint work in the cockpit, the seat, and will be getting to work on the pilot later on today.
First job, is putting down some Mitsubishi interior green. AK Real Colour 306.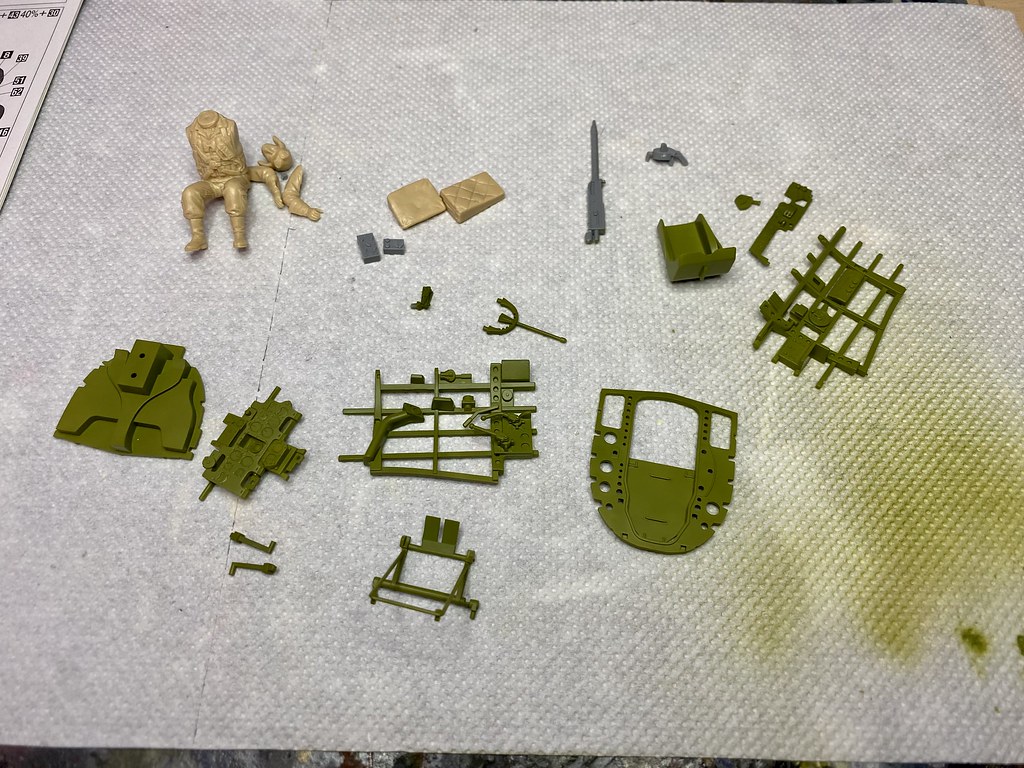
For both of these builds, I’ll be departing from my usual route of MRP paints. For a couple of reasons, finances have taken a bit of a hit recently so I’m not in a position to source a whole heap of Luftwaffe RLM’s and IJN paints.I do however, have a stack of those colours from the AK Real Colour range, so I’ll be using what I’ve got. I don’t really know how accurate these are, but they’re what I have available without buying.
-
Take a look at these. I used them for a HAF jet, but they’re good for FS36118 painted jets too. My only criticism was that the colours are a tad vivid and you’d probably wanna knock that back a bit after application.
https://www.procaldecals.gr/en/1-32/70-f-16-viper-stencils-data-132-decal.html
They’re the only stencil only set that I’m aware of.
I have a sheet of Speedhunter Graphics decals and that has full stencil data too.
https://www.reidairpublishing.com/speed-hunter-graphics-132-decals/big-scale-vipers-part-ii -
53 minutes ago, BradG said:
Nice choices there. I did the night attack Stuka in 1/48, doing the paint was fun stuff. I've been on the lookout for it in 1/32 to take another crack at it.
I was originally looking at Hase’ jets, but figured I have more than enough Vipers and Hornets. The old Skyhawk, F-5, or Starfighter kits didn’t really appeal.
The ‘spaghetti’ paint is what appealed with the Stuka. It’s a totally new challenge for me to attempt. -
It’s been my intention to take part in all of 2023’s group builds, I’ve found that my output has increased. And in turn, helping to reduce my stash.
I did have to acquire the Stuka, but the Zero was already in the to do pile.
I plan to build both alongside each other, with the option to switch to just the Stuka if I reach the point I’m not completing two.
As with my other WWII subjects, I will be building blind, and ignorant to any accuracy issues, apart from trying to achieve relative accuracy in the exterior paint finish.
With that all said, here’s what I got to play with.
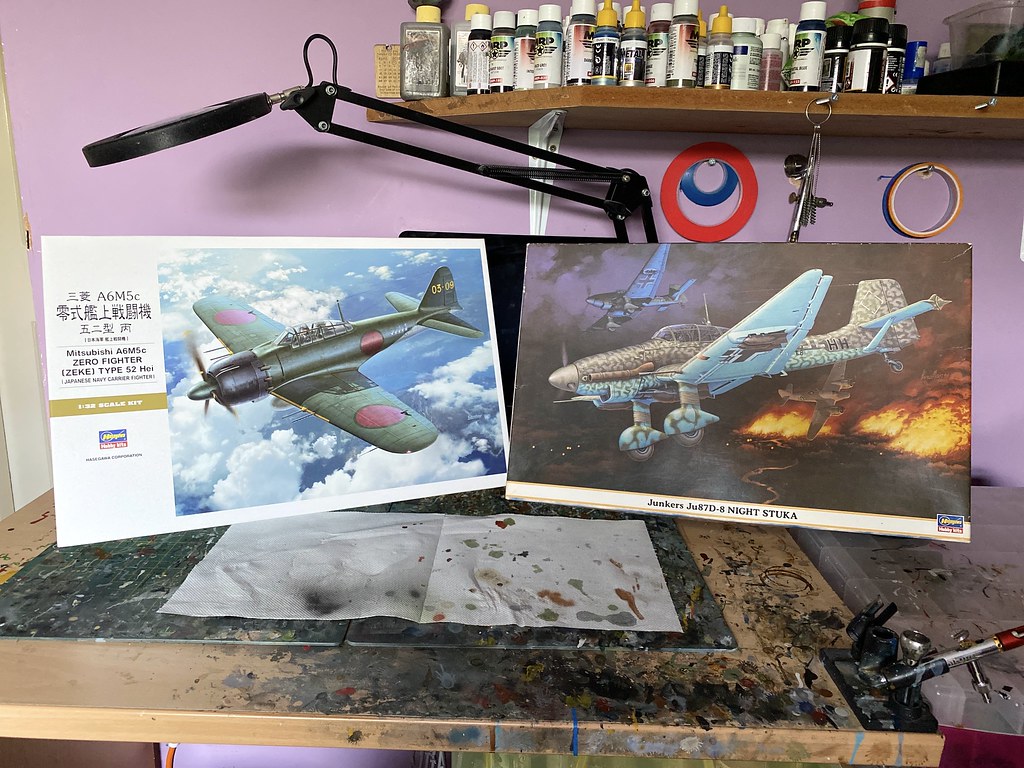
The Stuka has some aftermarket prop, and exhaust parts. I’ll be using stencils for the insignia, the decal ones have yellowed a fair amount.The Zero has a few more goodies for me to play with.
A HGW rivet set, which includes seat belts and masking. On top of that are some Master gun barrels.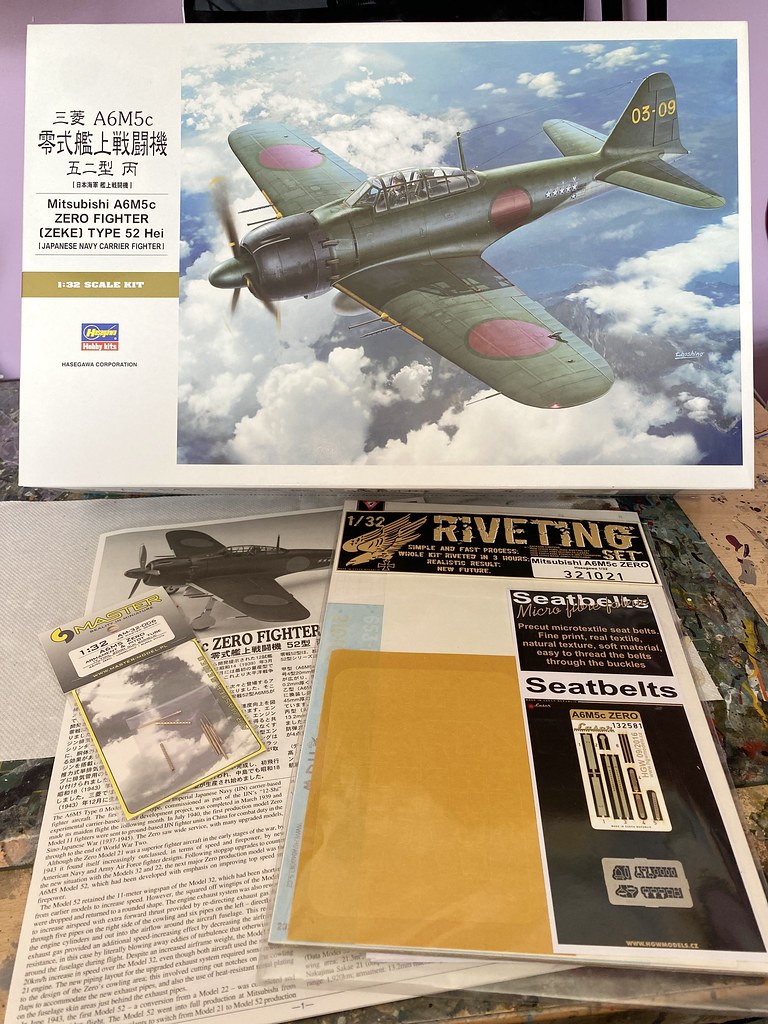
-
You already know my feelings Chris.
It’s an astonishing accomplishment. -
That’s pretty awesome.
Now all you need, is a 2nd seat……and the Phantom to put it into.
")
- Cicciuzzo and Alain Gadbois
-
 2
2
-
D’ya know something Chris….that is astonishing.
My wife has said the same thing herself. Must be a pretty flowers thing.
I’ve loved following this, and seeing it finished, I’m even more convinced at how good that scheme looks. The only slight downer is that I’ll not be able to see it in person to appreciate it fully.
Well done sir. -
4 minutes ago, Zola25 said:
Awesome progress Pete - those engines look sweet. Brave man to build all 4
")
/Niels
Taking breaks in between each one has been my secret to staying sane while I’ve been building them. Only 2 are fully painted so far. Trying to do different things to each one to ensure they look unique.
Different chipping, exhaust staining, oil leaks, and general grime. Even pipe works being painted in differing variations of a colour.
I originally wanted to just button the nacelles up with dummy engines, but figured that’s nearly 25% or the kit heading towards the bin/donated out, if I didn’t build them. -
I’ve got a bit of filling and sanding to do around the inner engine mount. The parts that make up the nacelle need a little care when fitting. I don’t think I made any mistakes building the wing so I can only assume that the parts are a challenging fit.
That done, I finished up engine 2, and couldn’t resist a little dry fit of both motors to the completed wing assembly.

There’s still plenty to do yet. The gaps need dealing with. The main wheel needs some more work before I flat coat the contact patch. I need to add some grease and grime around the flap mechanicals.
-
So close to the finish line, and it’s looking pretty awesome. Great stuff Chris.
-
-
Well, it seems my little departure from the instructions sequence worked out nicely. I managed to build the wheel bay separate from the wing, attach the landing gear to the bay, and cement the whole sub-assembly to the upper wing half.
I’m now working on getting the two wing sections together.
Some dry fitting work to see where I have to pay attention…..
I’m aware that the green looks a little vivid thanks to iPhones interpretation of the colour. It’s not that bright in reality.I’m also certain that I’ve got detail colours wrong too, but I’m working to my own preference of enjoyment over accuracy. A few steps to build gear door areas, and I’ll be onto the finishing of engine #2.
Good evening.- patricksparks, denders, Zola25 and 19 others
-
 22
22
-
Very nice indeed.
I’ve been considering a nose kit to display in two halves, showing the detail that you won’t be able to see in my full Lanc’ build.
- Zola25 and monthebiff
-
2
-
I want one!

- Zola25, KUROK, Pete Fleischmann and 1 other
-
4
-
Think I’d agree with the shout for a Hawk. A popular subject with Airfix in the other scales. Small enough to do in 1/24. Lots of attractive schemes.
-
6 minutes ago, Tissue and Dope said:
A 1/24 Lancaster - the HKM and Border offerings are far too small ……………
that would extend my modelling life. I’d be able to work on parts I can still see.- BiggTim, themongoose, John Stambaugh and 3 others
-
3
-
3
-
A nice and shiny new Stuka would
go down rather well with me.
-
Brilliant stuff, I’ve been looking for these kind of experiments, having not attempted my own. It gives me some confidence
to have a go at trying it out using my go to MRP paints.
-
Thanks chaps.
I think I’ve figured how I’m gonna wall mount it now. Thicker clear acrylic rods, selectively bent into a ‘cradle’ shaped to hold it at the wing root and the horizontal stabiliser root. I’ll be able to angle it away from the wall to give a bit of dynamism to the pose.I tested the theory with my daughters old revell kit and it seems to hold steady enough for my needs.
-
-
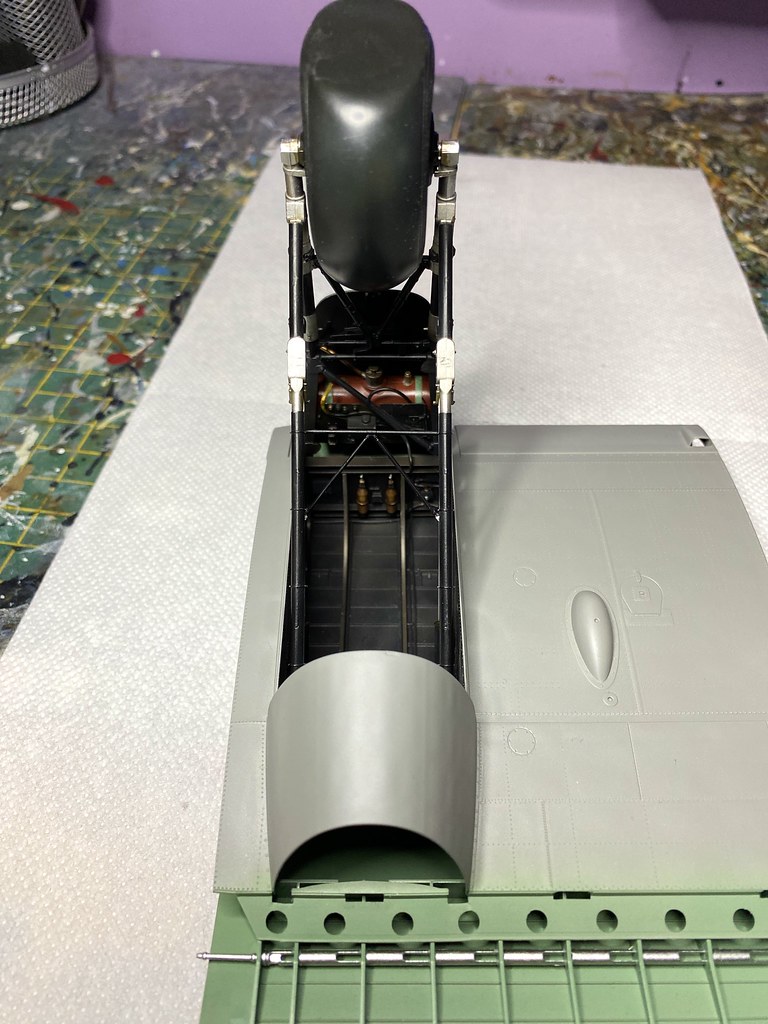
I’ve picked this up again for a short while, I’m between group builds. If you believe in luck/good fortune, then go and grab yourself a lottery ticket. I managed to drop two of the trays that had engine parts in. I feared the worst when I saw the carpet monster rear its head. But would you know it…..I retrieved every last part dropped. Including some of those ridiculously tiny parts that make up the superchargers, and the exhausts.
- geedubelyer, KiwiZac, Uncarina and 4 others
-
7
-
-
8 hours ago, themongoose said:
Have you come up with a way to suspend it in flite? Maybe i missed that?
I’ve not approached that problem yet. I don’t want it flat against the wall, would rather it was almost flying away from the wall if that makes sense.
It’s probably something I should have approached before I put paint on it
-
I’m calling it done!

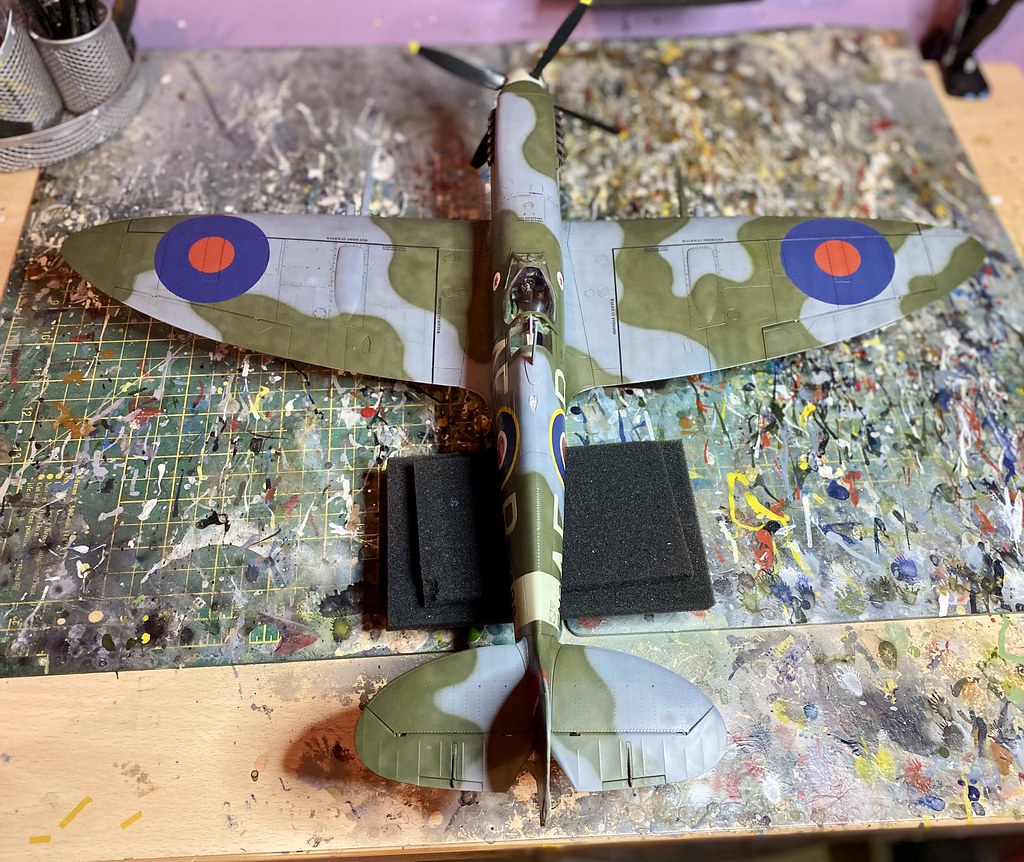
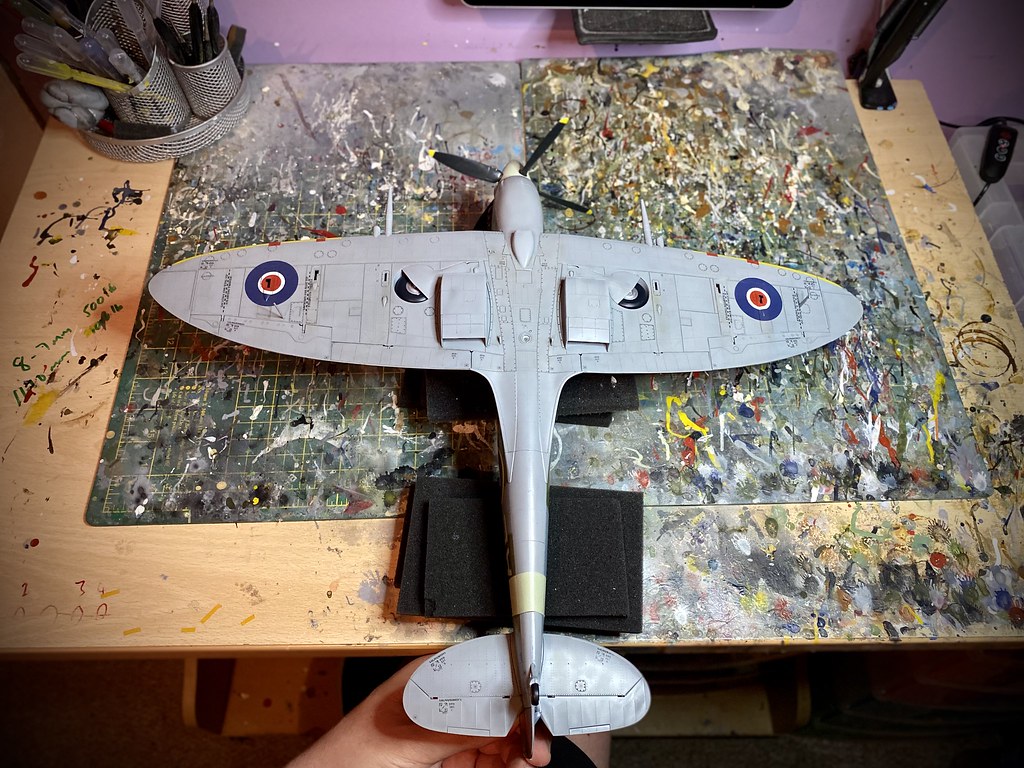


A short wrap up from me.I’ve built this fairly clean, with relatively little done in the way of weathering beyond tonal variations in paint, and a dark(ish) brown wash.
The Airfix kit is wonderful to build. My only minor gripe is the exhausts. I don’t really see why they needed to be in pieces, and those massive cavities underneath them………
1 man army stencil masks are incredible.
This is not my best work by any stretch of the imagination. There’s minor flaws aplenty, but I can live with them rather than try to fix. It’s by no means historically correct/accurate. Again, I can live with it. I’ve essentially built it to the instructions, following their colour call-outs.
I’ve yet to work out how I’m going to display it, apart from knowing that it’ll be a wall mounted display, in the ‘Spitfire Corner’ of my office. It’ll be joining this framed print that I’ve had for a few years.

I see a Kotare kit, and a Hawk in my immediate future, to build, display, and compliment this work of art.- Trak-Tor, LSP_Kevin, Archimedes and 13 others
-
16

1/32 SJU-17 Ejection Seat decals?
in LSP Discussion
Posted
The only thing I can think of, is perhaps someone has used a Quinta cockpit set, but not used the ejection seat details. I believe they’re in that set.