

johncrow
-
Posts
265 -
Joined
-
Last visited
-
Days Won
2
Content Type
Profiles
Forums
Events
Posts posted by johncrow
-
-
Another....
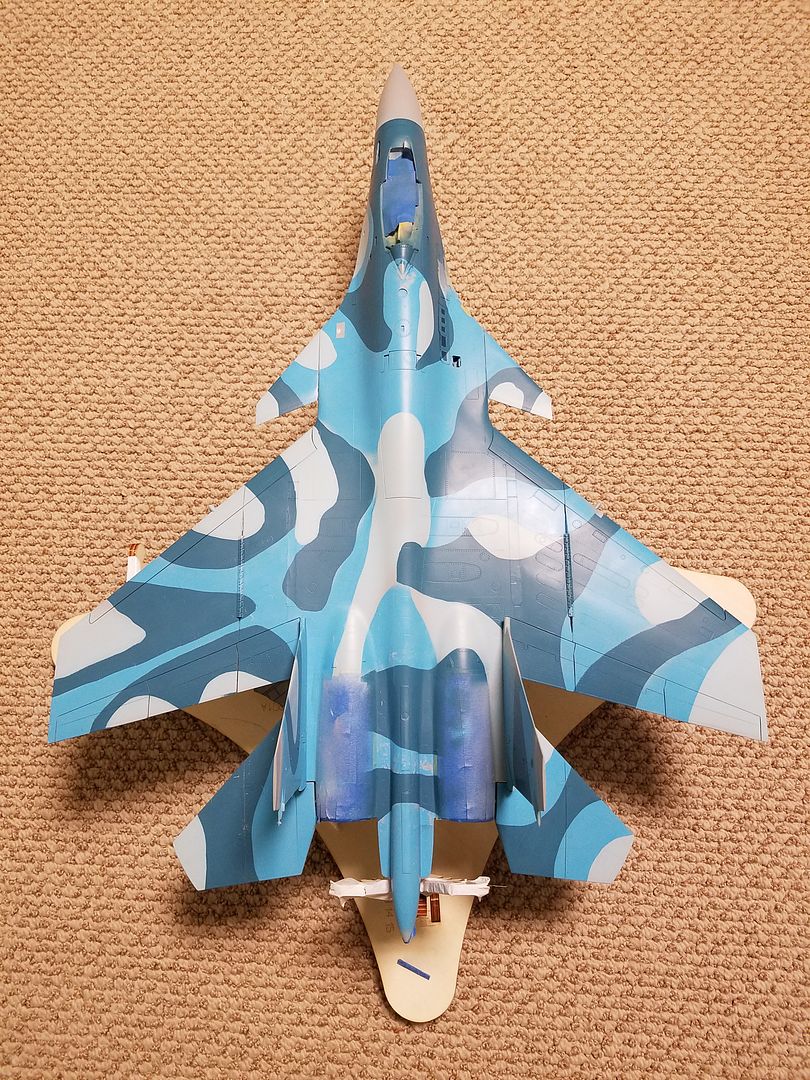
So I dig Imageshack. It took me 60 seconds to set up an account, and 5 minutes to figure out how to post a pic. We'll see how things go long-term.These pictures show the limited progress on this build. I painted most of the white radomes/dielectrics/antennas. (I missed a couple, done now...will post a newer pic or two in the near future.)
I still need to touch up a few spots of the white. These pics are basically Imageshack testbeds. I also am using a new phone for the pictures....(work phone, sorry boss!) No more smudges in every picture.
Thanks for playing guinea pig,
jp
-
-
I feel your pain. I started my Flanker in 2006. I shelved it after running into some issues with the Zacto Nose and picked it up again this past year. The construction is good now, I'm nearly finished, and decided to use Akan Ukrainian colors on a splinter type camouflage. I have used Akan before on a 1/48th Mig-29 SMT and had good results. This time around it does not seem as though the adhesion is working as well. I have tried thinning with Testor's acrylic thinner (one of the recommended thinners) and I tried Mr. Leveling thinner in small amounts. A couple of the colors worked ok, but one of them is a pain to keep from lifting. Like you said in an earlier post, it seems to not do well being handled and chips if you look at it sideways. Very frustrating, and I think from now on, I will buy Mr. Paint or mix others for the needed colors. I might add that I primed with Mr. Surfacer 1200 and that did very well on all of the resin and plastic.
Those are exactly the issues I was having. I like the colors, but the time I spent fixing dings, scratches etc. could be spent fooling with Tamiya paints to get the right color. And I'd still probably come out ahead. I primed with Tamiya gray primer from the rattle can, and seemed to have the fewest problems when I used Tamiya acrylic thinner.
Put up some pics of your Flanker!
Cheers,
jp
-
That's some mighty impressive conversion and skill! Love the paint job as well!
Thanks very much Ohm-men. I appreciate it. It's been two years so far, but I'm getting there.
Regards,
jp
-
Whats the plan for the weathering John?
Thanks for stopping by, Breaker.
I initially favored one of the heavily weathered and faded jets, but after spending so much time thus far with the painting, I think it'll be somewhat closer to a 'like new' example. But I will do a bit of post-shading, I think. Plus a panel line wash, and a little bit of an over-all spray down with some heavily thinned light gray. I did that on the last Flanker I did...6 or 7 years ago already...and liked the effect it had. That's the plan right now, anyhow.
Regards,
jp
-
I'm just about done with the camo....I'm at the point now where just handling it while I touch up scratches etc. is only causing more scratches etc. That paint can't handle being looked at sideways. I spent a lot of time correcting the errors from the first mask job. I used something for the first time that made the touch-ups much easier, I think. Maybe you have mistakenly masked one of the colors with a soft edge rather than a hard edge. Maybe the masks you made were basically one-time use, and were no good for any re-masking that needed to be done. Maybe you didn't spend quite the time you should've on the first masking try. Maybe you should've taken it easy with the cheap cold medicine. Or, if you are like me, you did 'em all. At the same time.
I imagine I'm one of the last to hear about this stuff, but it helped me out a lot. I wish I would have used it from the get-go. It's Tamiya skinny masking tape...it's about 2mm wide and made of vinyl or something similar so it is easy to mask around curves, as long as they are not too sharp.
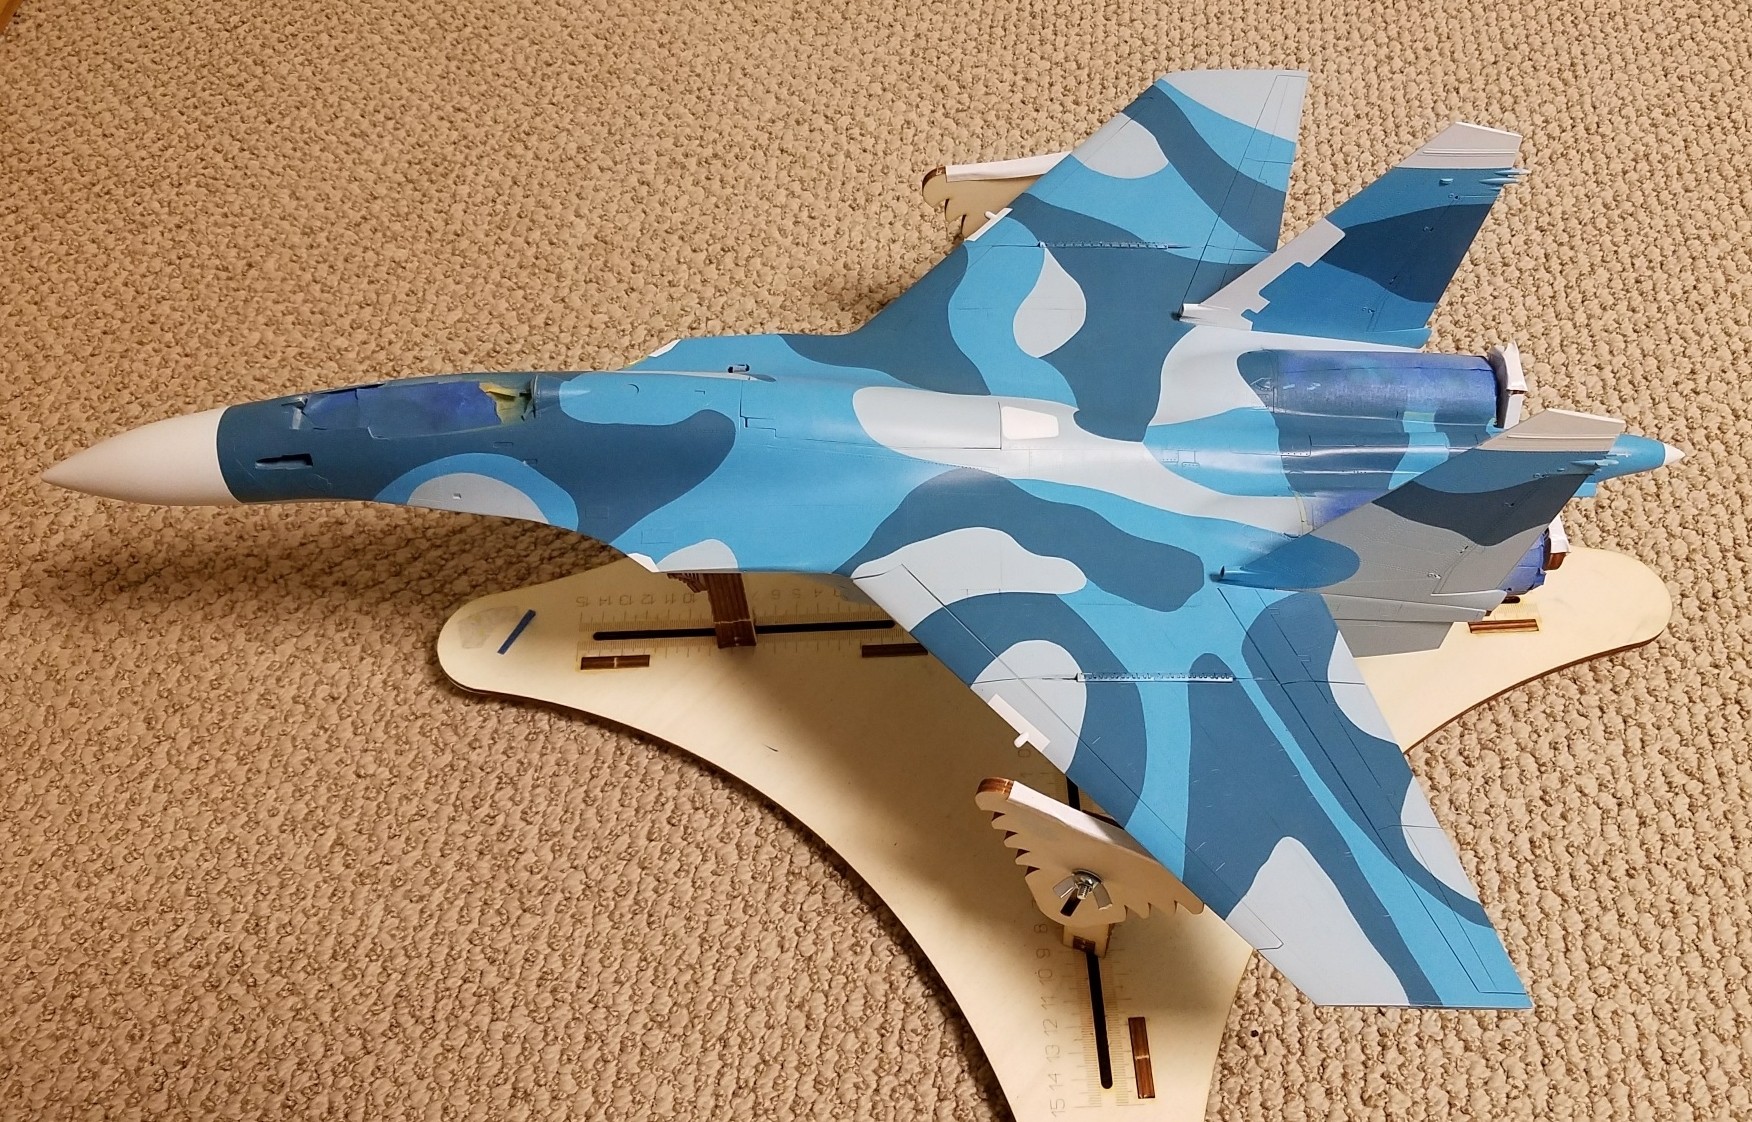
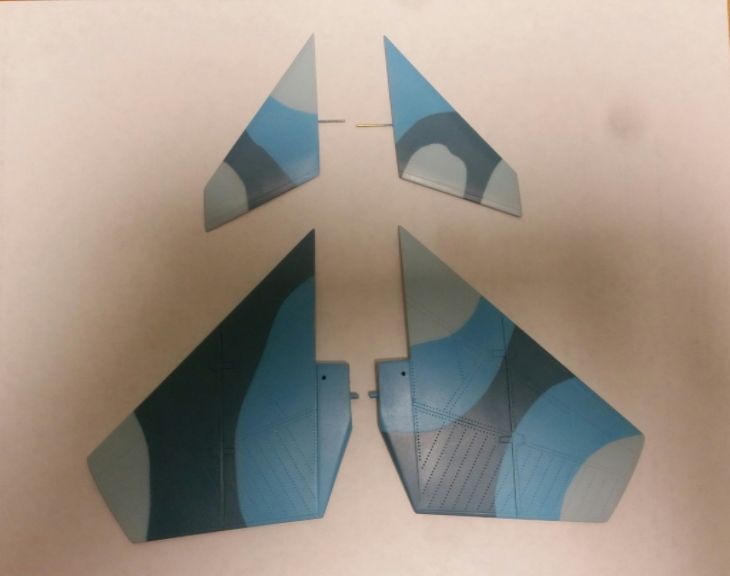
This is where I'm at. Still not perfect, but it will have to do. I did manage to damage the fuselage on the left side of the cockpit, but I should be able to get that smoothed and repainted. In looking at reference pics, there's a lot of variation in the colors of these jets. From bright and new, to old and faded. I'm a little less concerned about the brightness of the colors, though I still plan to tone things down a bit. FYI, the canards and horizontal stabs are not glued in place yet, just stuck there for the picture.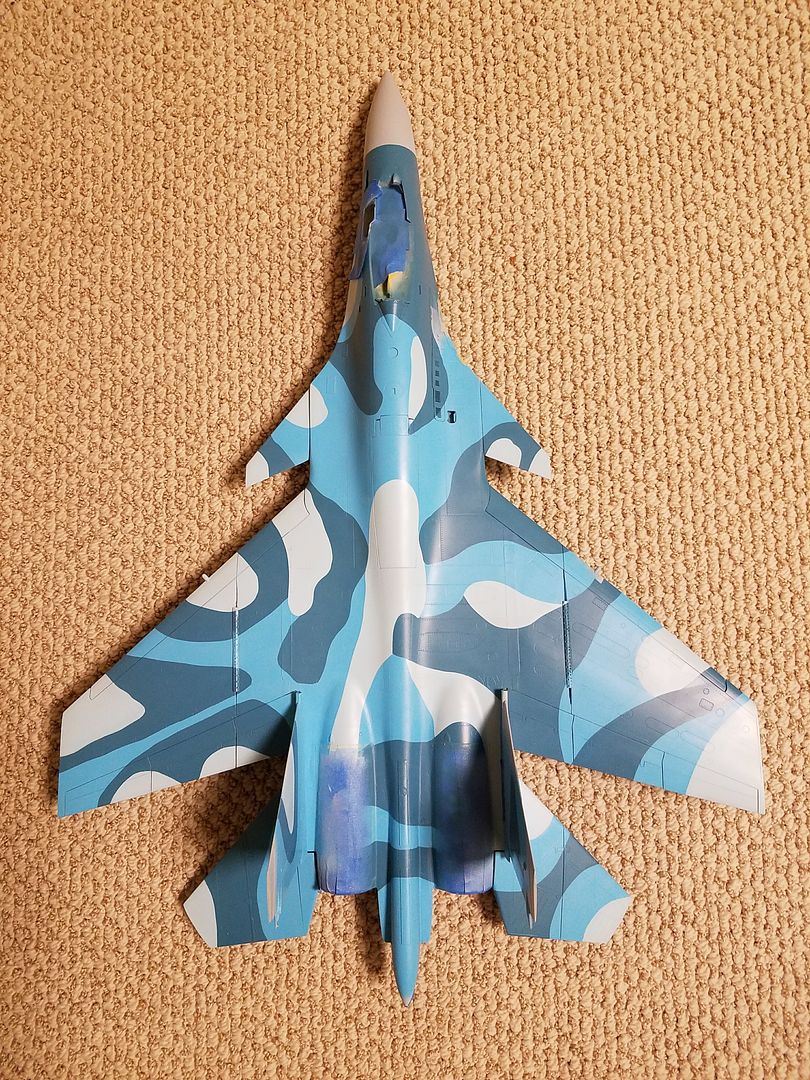
Next up is masking and painting the radome, tailcone, and antenna panels...that should be pretty straight-forward. Right?
Thanks for stopping by,
jp
- Rdrunner, Vandy 1 VX 4, LSP_Kevin and 2 others
-
 5
5
-
I'd be in for a set...can complete my gaggle of the various T-bird jets....that come to think of I haven't even started yet...but as we all know, that ain't the point.
I'd love a set.
jp
-
Some very serious modelling going in here, but things are looking really beautiful with paint on. Your comments on the AKAN paints are interesting, I would consider them for a planned Mig-29 build but the last thing I need are finnicky paints.
The vacuformd windscreen look really good, congrats on that bit of ingenuity!
Cheers,
Marcel
Thanks, Marcel. Your encouraging words mean a lot. It is certainly possible any issues I had with the AKAN paints were my fault. But I find Tamiya paint close to foolproof. I'm already looking forward to your MiG-29! And I must confess that I've not yet completely licked the windscreen issue yet. Or more accurately, fixing the windscreen to the fuselage....when it's no longer avoidable, I'll have to come up with something!
I like it! Those Russki blue camoflages look really cool.
Ambitious project John, I like it a lot. Thanks for sharing.
Cheers
Martin
Thanks much, Gazzas, Martin. That paintjob is still a bit garish, but I think I've got a plan for that.
Regards,
jp
-
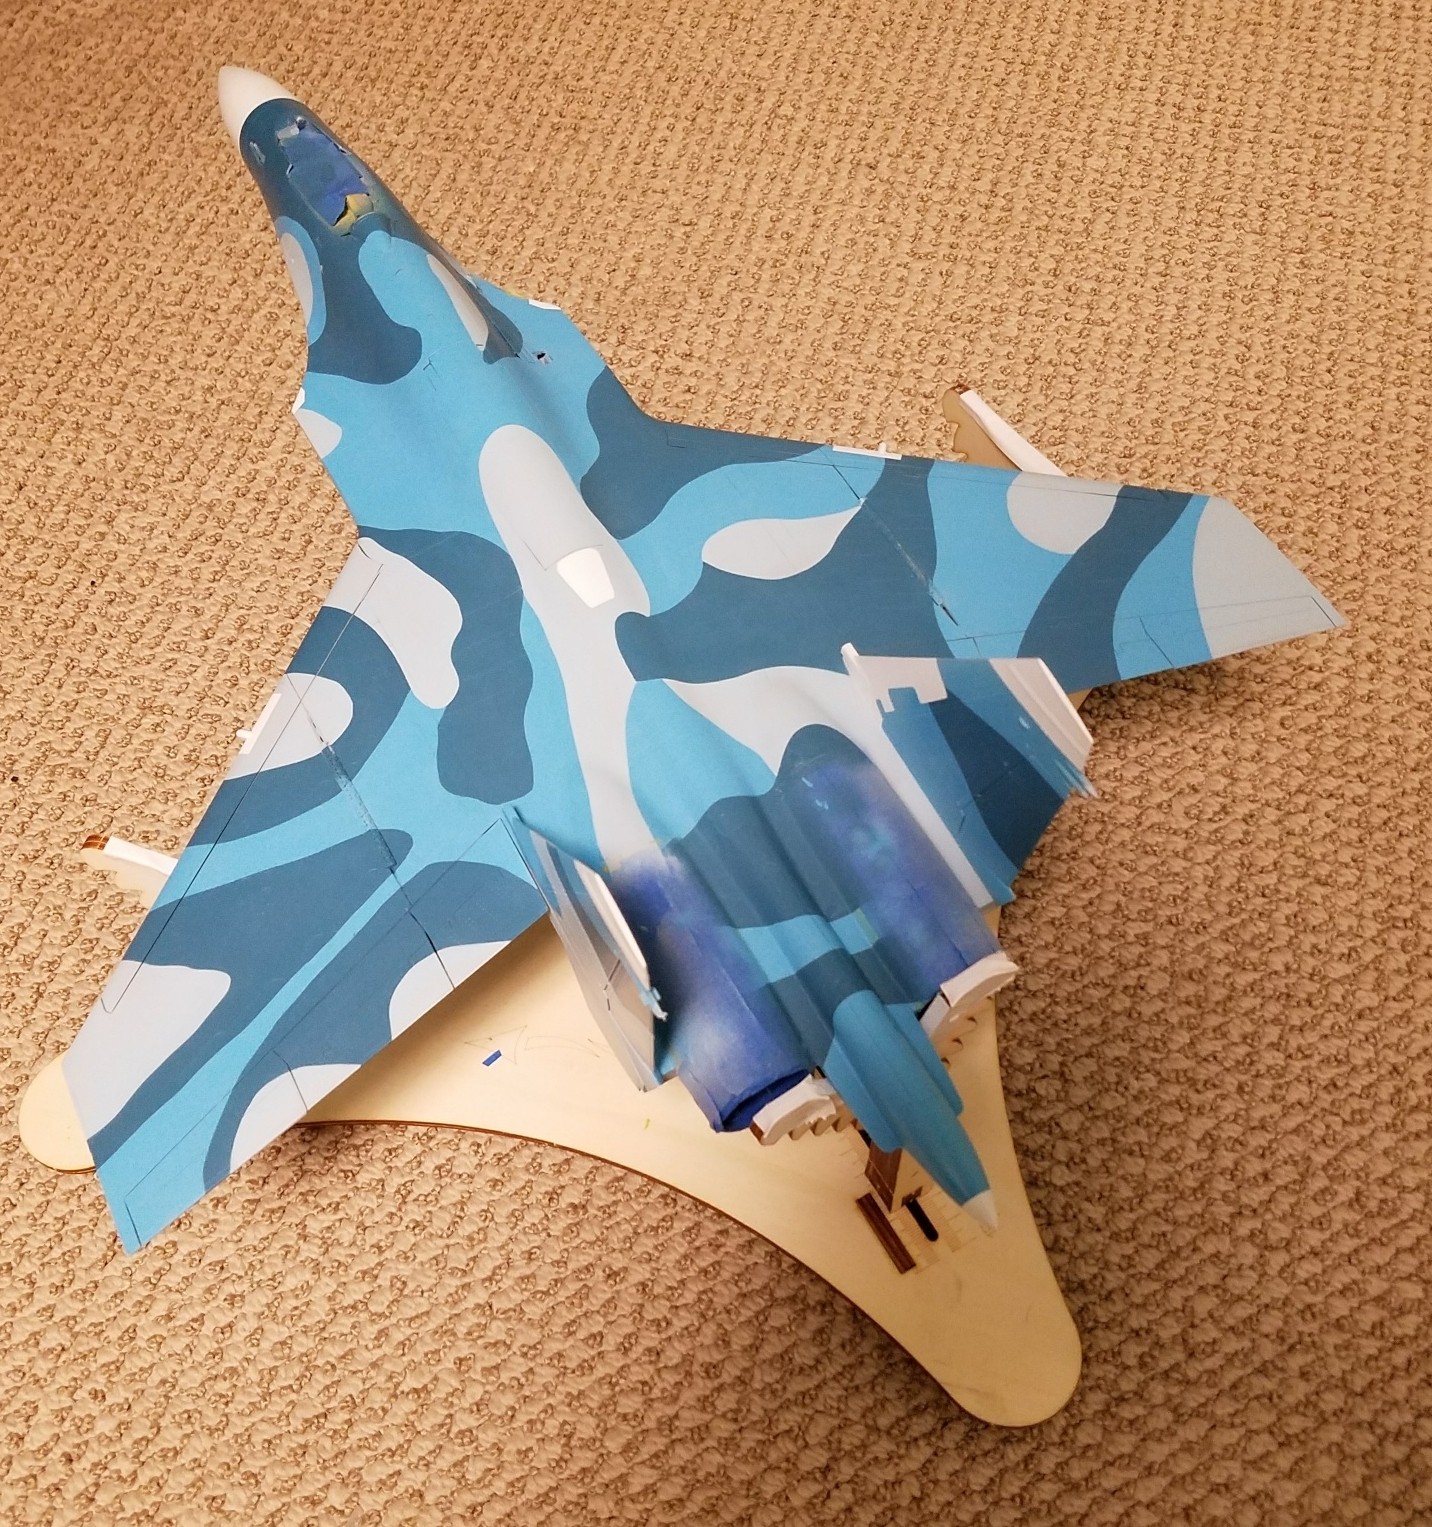
I've gotten more paint put down. I'm not thrilled with it. A lot of overspray, underspray, and lifted paint. But I think I can make it work with some touch-ups and a few areas getting some respray action. It still appears very bright in the picture, but the real deal looks somewhat better.
The worst offender is the middle blue. The light gray/blue and the dark gray/blue did quite well, but that medium blue didn't handle masking very well at all. Two out of three ain't bad, I've heard. I think next time I'm sticking with Tamiya paints. They are very much easier to lay down than the AKAN paints, at least for me. The only issue with Tamiya I have is getting colors mixed properly. The AKAN paint was supposed to be pretty close color-wise out of the bottle, but I found that I had to lighten up each color quite a bit, so I had to mix colors anyway, and it took more effort to get a nice finish.
Thanks for coming by,
jp
-
-
I've put down some more paint. I'm using AKAN paints, and though they seem a bit finicky, I can get decent results. I'm not entirely happy with the way these look right now, but I think after touching up a few spots where the masks lifted a bit, and one or two spots where the paint lifted, it'll be OK. The colors are a bit bright, I think, but after a bit of a gray filter I think they'll do. Pictures of the real deal show a lot of variation anyhow. Masking the rest of the thing is work...I've got all of one color and part of another down, but still a long way to go.
Thanks for stopping by,
jp- jgrease, Breaker, blackbetty and 2 others
-
5
-
JohnCrow, stupendous job on the Sea Flanker!
And, as much as I love this airplane and wanted a Sea Flanker, I, Sir, am forever in your debt.

Thanks, Clunkmeister, and you're welcome! I feel the same way!
John, MRP do a full set of Su-33 paints if you don't like the AKAN ones. I couldn't get along with them at all myself, found them to suffer from tip dry way too soon.
Good to know, Breaker. I'll probably give them a try on the Su-33 kit when it is released.
-
Wow time flies...not much to show for it but there has been a bit of progress.
I got the intakes re-installed. Here's hoping my clumsiness allows them to stay that way. I got a coat of primer down, and spent an awful lot of time addressing some seams and restoring some panel lines and rivet detail. I also got the lightest camo color put down. I'm trying Akan paints for the first time, and I'm not yet sure how I feel about them. I also think this color may be a bit bright, but I can always tone it down a bit later. As I mentioned earlier, I'm cutting some (more) corners with this build as I really want it done.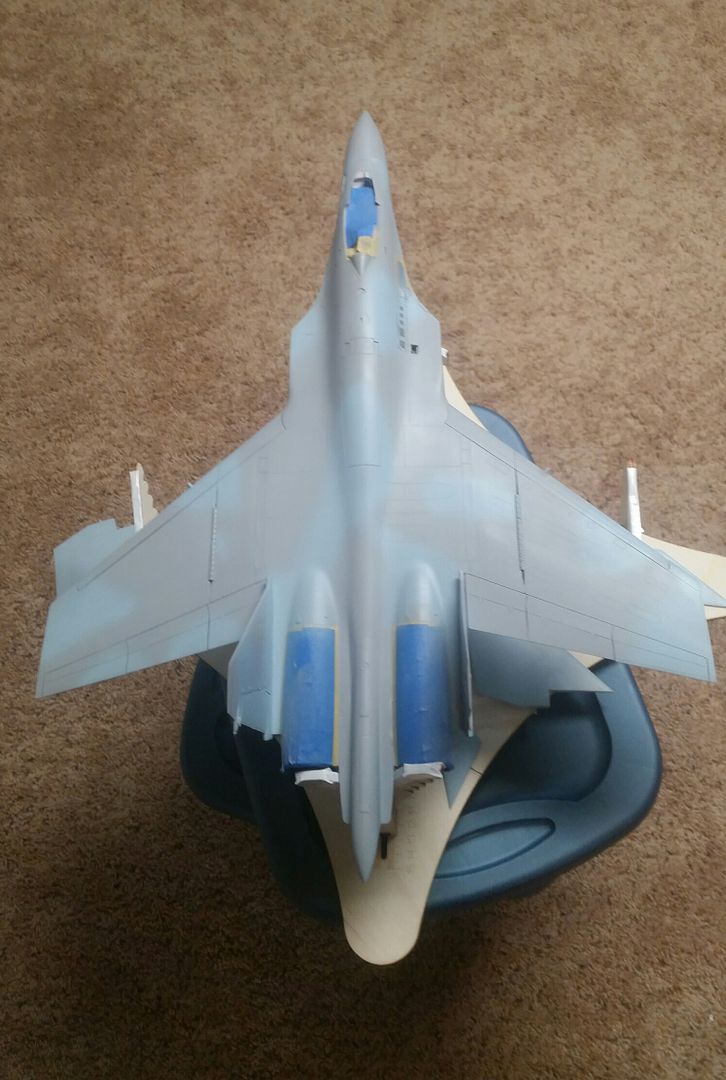
I just noticed that it appears I wasn't holding the 'ol cellphone square to the model...looks sort of skewed.
Still hoping to beat the Tan kit!
Thanks for stopping by,
jp
- dutik, Starfighter, Rdrunner and 4 others
-
7
-
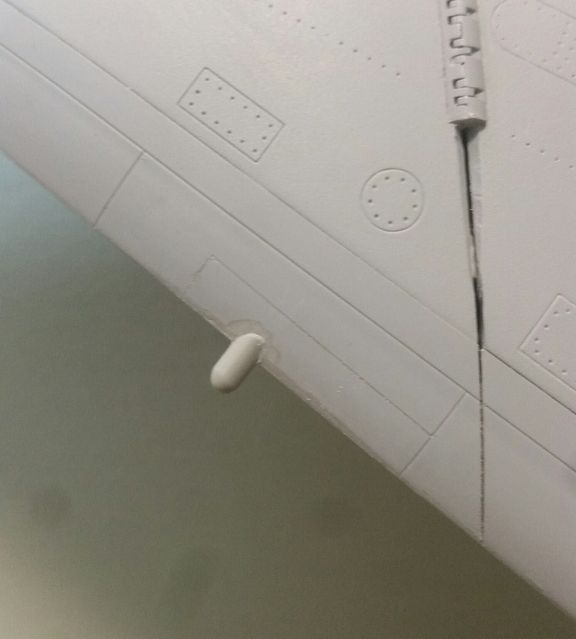
Here's my tiny update for the month. I thought it would be no big deal to make the little antenna doo-dads that are on the slat leading edge. And it wasn't, if you subtract all the time I wasted looking for the ones I lost, and the time it took to make multiple replacements.
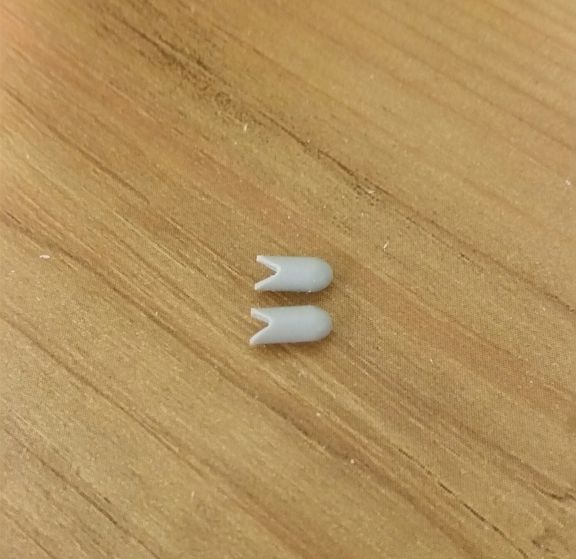
Certainly not 100% accurate, but nothing on this build is. So were I to spend all kinds of time striving for total accuracy with these little guys, they would look out of place. Right?? Anyhow I think they'll look the part.
And for the other news...
A tiny step forward, and a leap back. While fooling with these things, I managed to basically tear off both intakes. That's a story for some other time! Quite a mess. I've put them back on...but I've seen stories of people who have had limbs sewn back on, and though things may look right to a casual observer, they're really not. So needless to say, this thing will certainly and definitely without question be on the bottom shelf. That being the case, I'm not going to spend a lot of time prettying things up down under this thing.
Still on track to beat the Tan Models kit!
Thanks for coming by,
jp
- blackbetty, Vandy 1 VX 4, Rdrunner and 1 other
-
4
-
I'm in for two...one all folded up, one loaded up...maybe 3...old paint job....new paint job....maybe even a Chinese one...maybe 4...
- Darren Howie, David66, mpk and 2 others
-
5
-
Thanks, all
I'm not gong to give up. In fact, it has sort of renewed my vigor. I reeealy want to get it done before the Tanmodels kit is released. I hope to have something to update soon.
Cheers,
jp
-
Ha! I knew it! My nearly two-year odyssey will be at an end soon! Thank you Tan Model! I'm slappin' my FrankenFlanker together, gonna call it good, stick on the bottom shelf way in the back, and get in line for at least 2 of the IM kits. Too much time invested to quit on mine, but the new kit will be far and away better than what I've come up with.
I'll update here and there....but be forewarned, my already low standards will now be even lower. I'm changing my motto, temporarily, to "It's not about the journey, it's about the destination".
jp
Now...I wonder.....the only thing I've wanted more than a 32nd 33 is a 32nd F-106. Maybe I'll start to scratch one.
- dutik, Rainer Hoffmann, The Dude and 1 other
-
4
-
-
I'm for a USAF version.
jp
-
OK, so I've got very little to show for an awful lot of work...one could argue the project has regressed.
Upon closer inspection, my windscreen mock-up was not going to cut it. The fit was not at all close enough. Though this project spent a fair amount of time on the Shelf Of Unwanted Things, I have spent some time on it. For starters, my vac windscreen was too wide. I narrowed the resin vac master some, and tried again. As an aside, I quickly learned that the vac master must be perfectly, as in ready for NMF, smooth. If it is not, tiniest of flaws in the master will end up being visible in the vac part. Then, too, at least for me, the PETG plastic doesn't take a polishing anywhere near as nice as styrene. The new windscreen's width was just about right, but the fuselage required some re-work. This is the third iteration of styrene pieces that build up the fuselage sides under the windscreen, and I had to take a sanding stick to the resin so that the windscreen would sit flush. I think I'm there. I'm leaving the tape on the windscreen as long as I can, with the hope that its clarity will be preserved. Of the major changes I wanted to make to the vanilla Flanker (stinger, wing chord/wingfold, landing gear, canards, and windscreen) I figured this windsreen would be the easiest to handle. It turned out to be the toughest.
Here's the sausage so far:
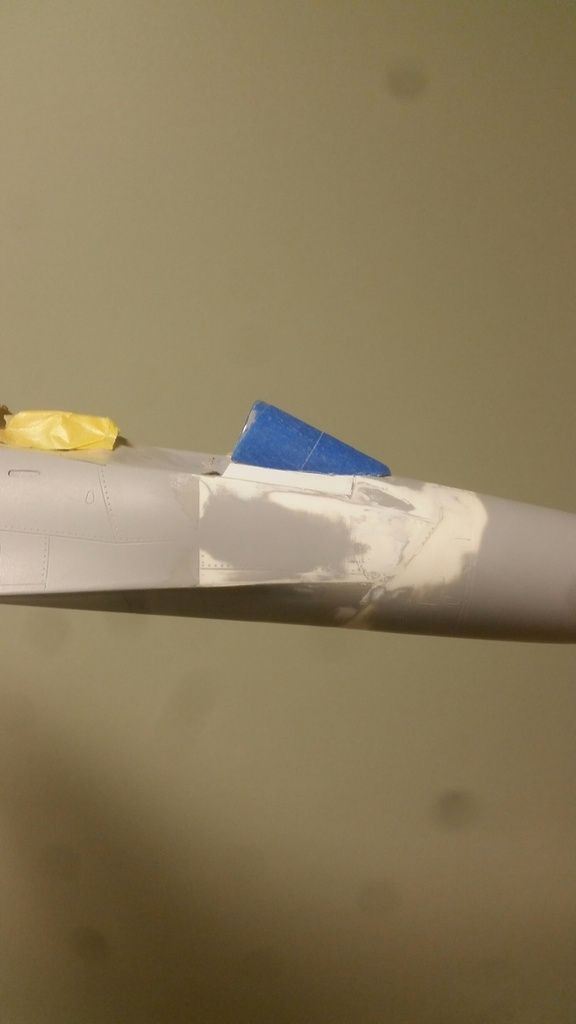
I'm hoping progress will pick up as I think I've cleared the last major hurdle.
Thanks for stopping by,
jp
-
-
I'm in, for sure. No matter the variant(s) released.
-
-
I finally finished something. It's been over two years...but I'm calling it done. This is my newly-completed Shelf Of Doom. Actually, Shelves Of Doom. My half-finished projects were starting to litter the house; I found started kits in the laundry room, in my office, and one under a bed. Now, they all have a place of their own to reside. Home Depot had an end-of-the-year sale on storage stuff, so I picked up a plastic shelving unit, and put in in the corner of the stash room. There's an adversary Tomcat, some sort of tank, a Prowler, an F-104, an X-15, and an eventual Su-33. Missing when the picture was taken was a 144th A90 Ekranoplan.
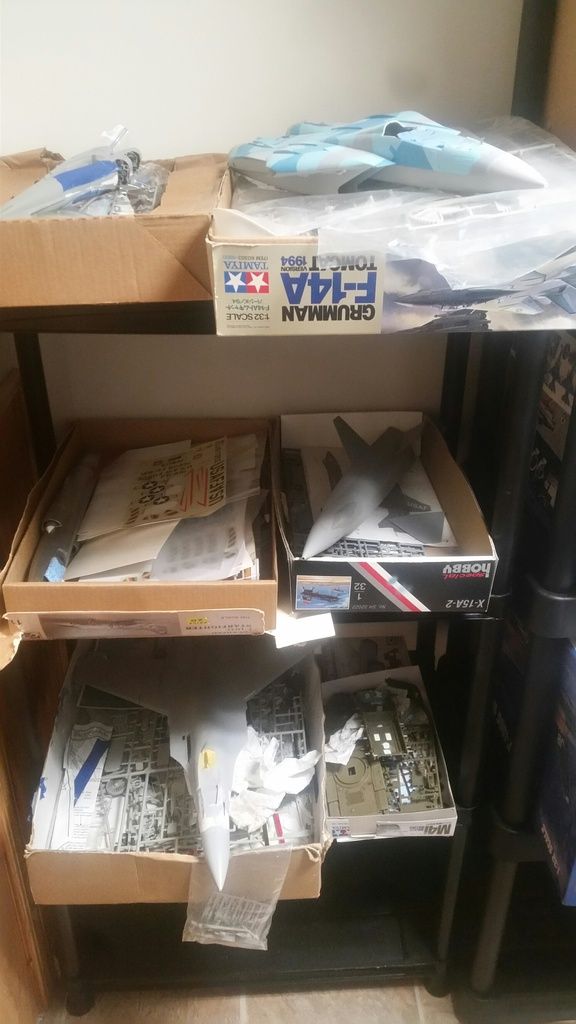
Hope you find it inspirational,
jp- BiggTim, Lothar, D.B. Andrus and 7 others
-
10


Su-33 Sea Flanker
in Works in Progress
Posted
OK, I'm essentially done with the white, and I painted the leading edge of the wings, stabs, and canards. Hopefully it won't be too long before I have to figure out how to display this thing. The canards and horizontal stabs are still not glued, thus the droopiness.
Until next time,
jp