

tomaszhajzler
-
Posts
145 -
Joined
-
Last visited
-
Days Won
4
Content Type
Profiles
Forums
Events
Posts posted by tomaszhajzler
-
-
-
Congratulations Peter!
Superb work and amazing effect.
Regards
Tomasz
-
Tomasz, thanks for the update, it is a stunning model.
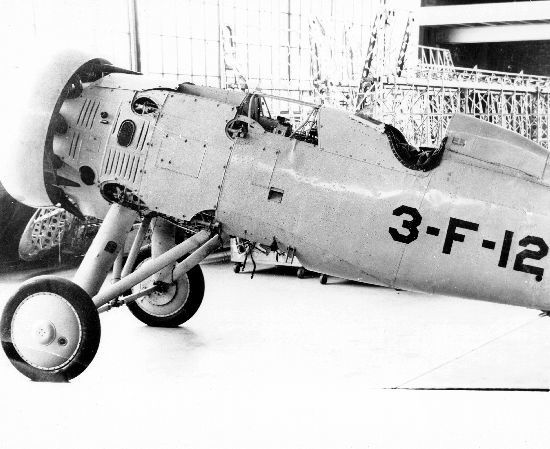
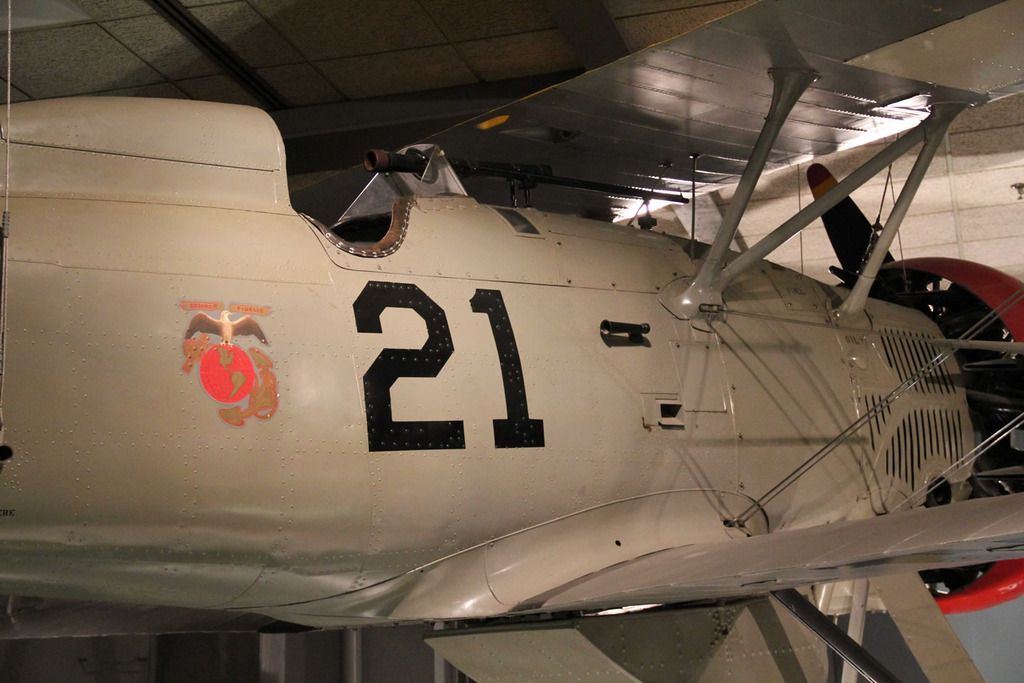
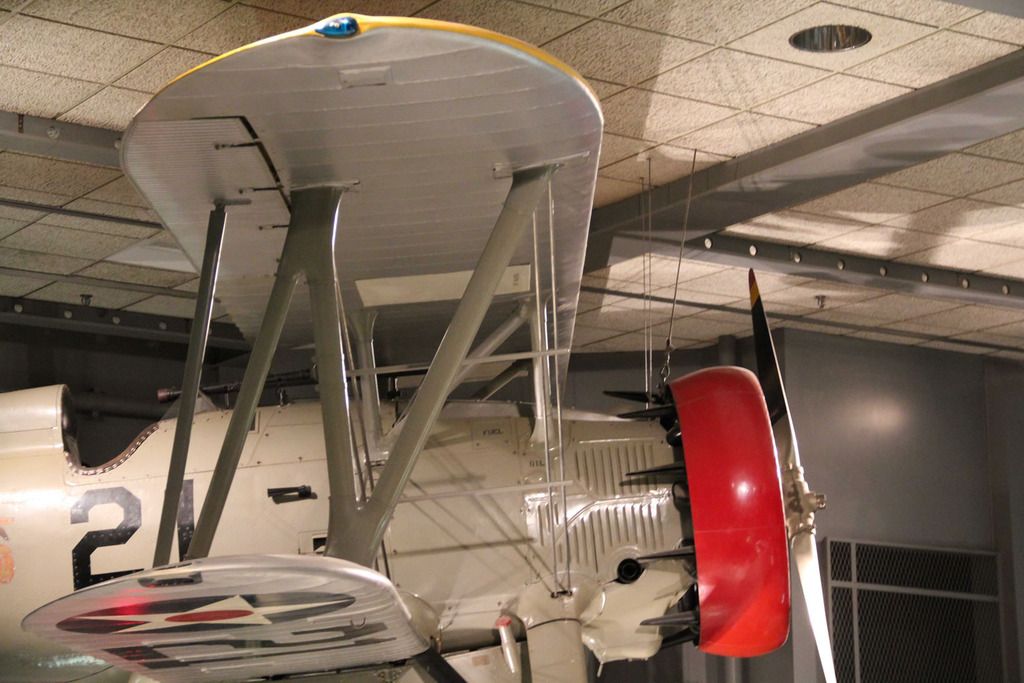
As for the wing ribs, I really do not want to insult your work or your research as it is top notch, but, I truly believe they are wood, as can be seen in the reconstruction (three F4FBs) being built here: Roy Rehm Workshop
the construction, like I said in my original post is similar to the PT-17 Stearman (which I am building in 1:16 scale)... wood wing ribs and spar with metal ailerons.
Why wouldn't the construction be similar? Same factory designed and built both planes about the same time, and looking at your build, and the images on the website I linked above I can see a lot of comparable design features.

Hi Bil
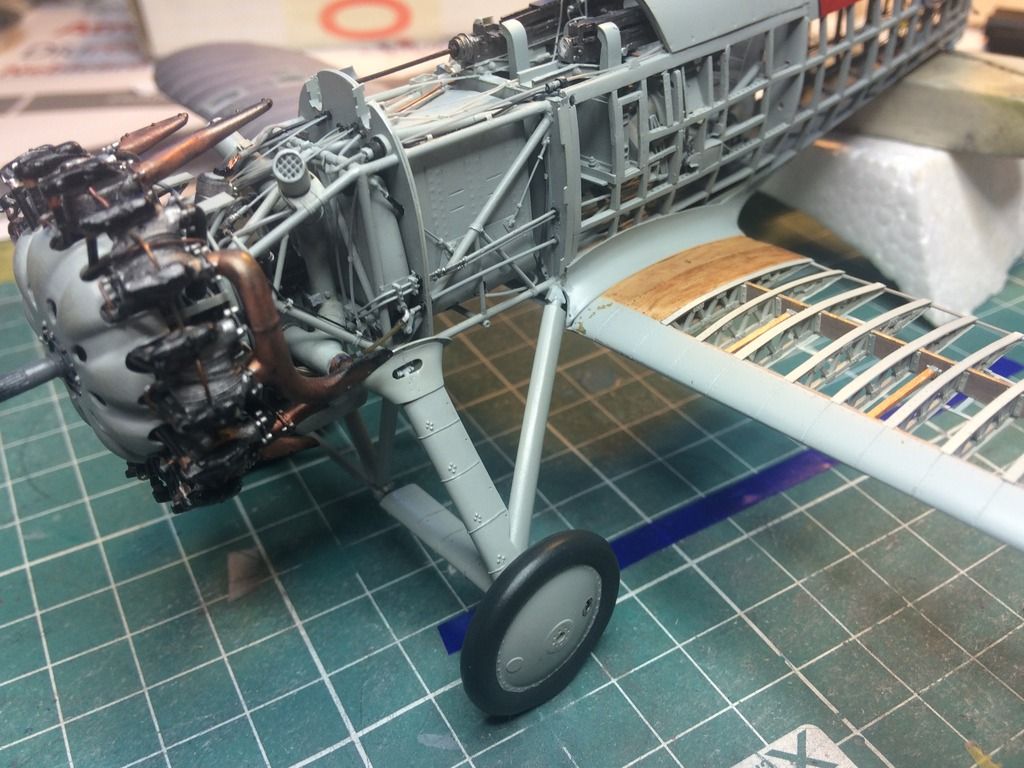
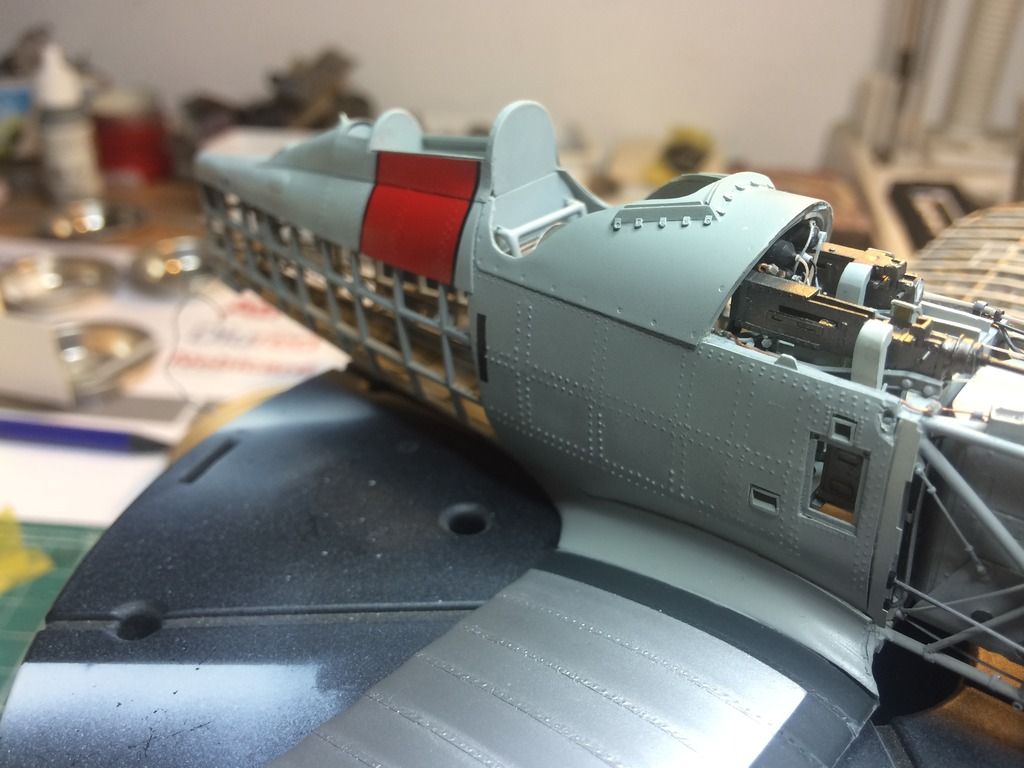
Thank you for your post. Your comment was very important. Do you know what I'm doing? I started repainting today. It will not be a piece of cake, specially center section of top wing but I have no choice. It can take me week maybe two but it's nothing compare to more than five years of work.
This man, Roy Rehm, has made awesome restoration of e few Boeings. Here link to film on youtube from his kingdom:
Regards
Tomasz
-
-
Tomasz, thanks for the update, it is a stunning model.
As for the wing ribs, I really do not want to insult your work or your research as it is top notch, but, I truly believe they are wood, as can be seen in the reconstruction (three F4FBs) being built here: Roy Rehm Workshop
the construction, like I said in my original post is similar to the PT-17 Stearman (which I am building in 1:16 scale)... wood wing ribs and spar with metal ailerons.
Why wouldn't the construction be similar? Same factory designed and built both planes about the same time, and looking at your build, and the images on the website I linked above I can see a lot of comparable design features.
Bill, why didn't you register on forum few years earlier, I think my build could be easier. I have never found this restoration link, what's a pity. They are restoring earlier models of this plane (no one is f4b4 as on caption) but construction must be similar.
Regards
Tomasz
-
Hi all!
I thought my thread is forgotten, because I didn't make any update so long. But I see my friends you took me to the blackboard.
I had many problems with f...bucket. I had to pay to save my thread and I will move my photos on private server. I don't want to justify my absence on forum but as always I had no time to make updates. This stollen time was assigned on building model.
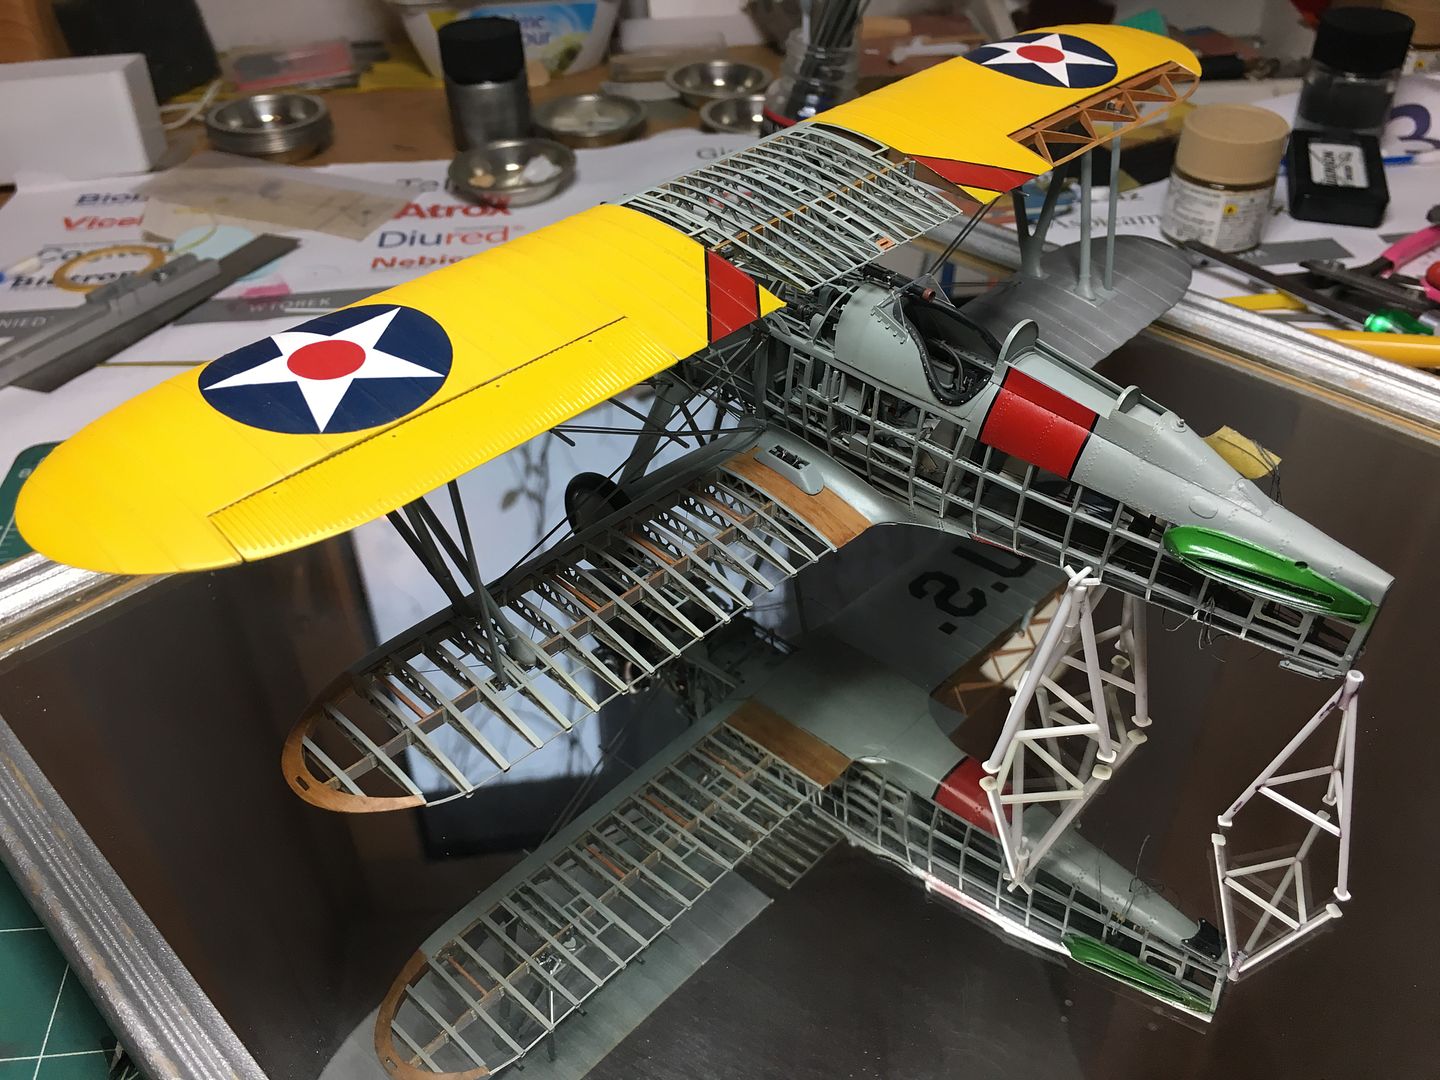
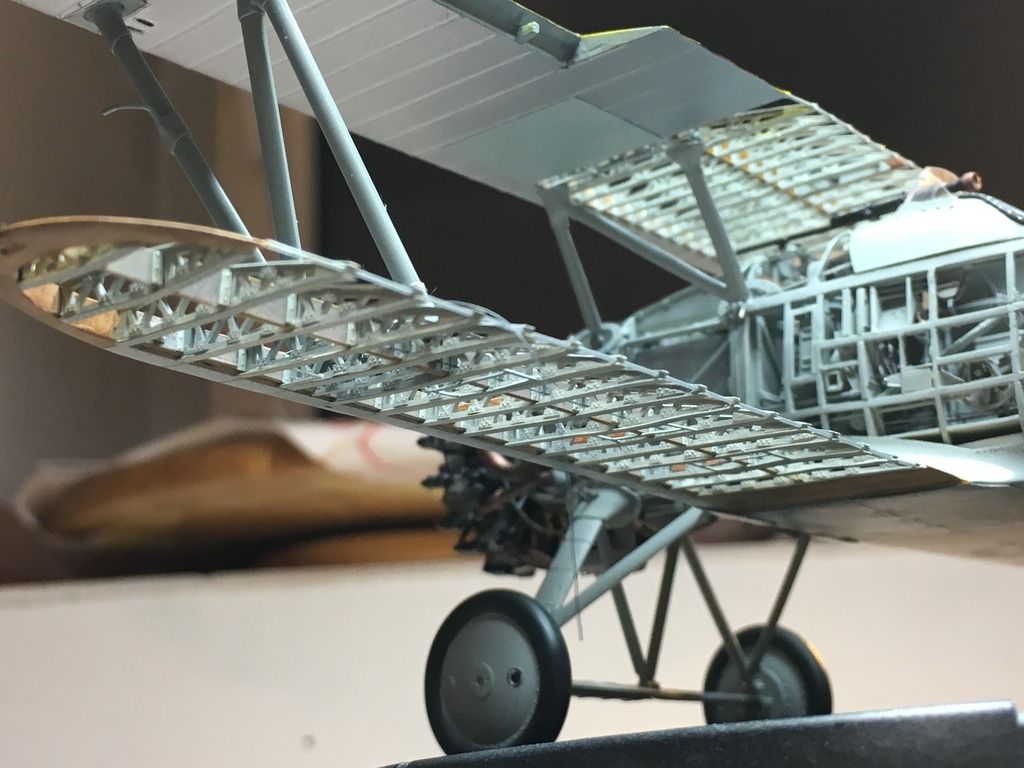
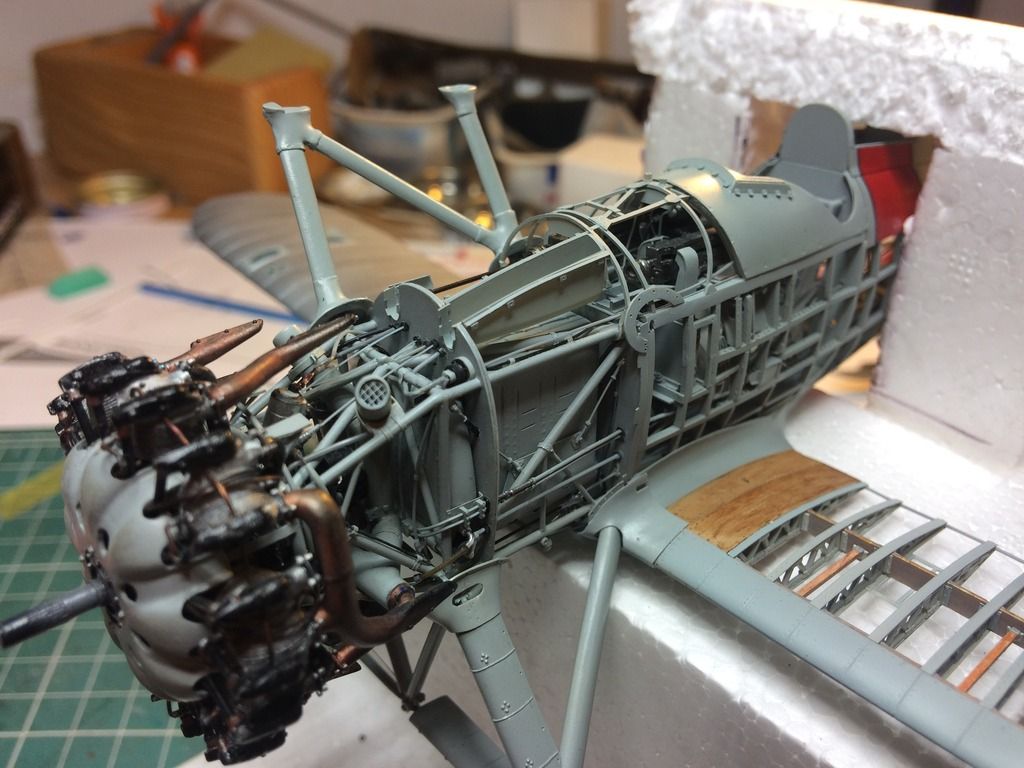
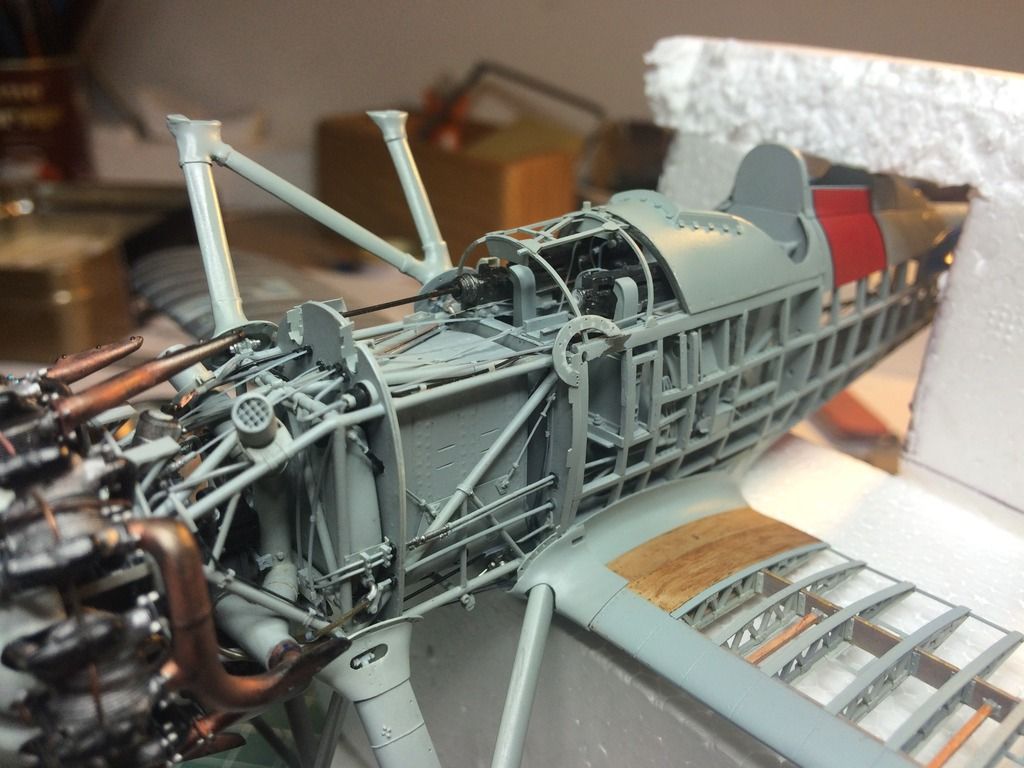
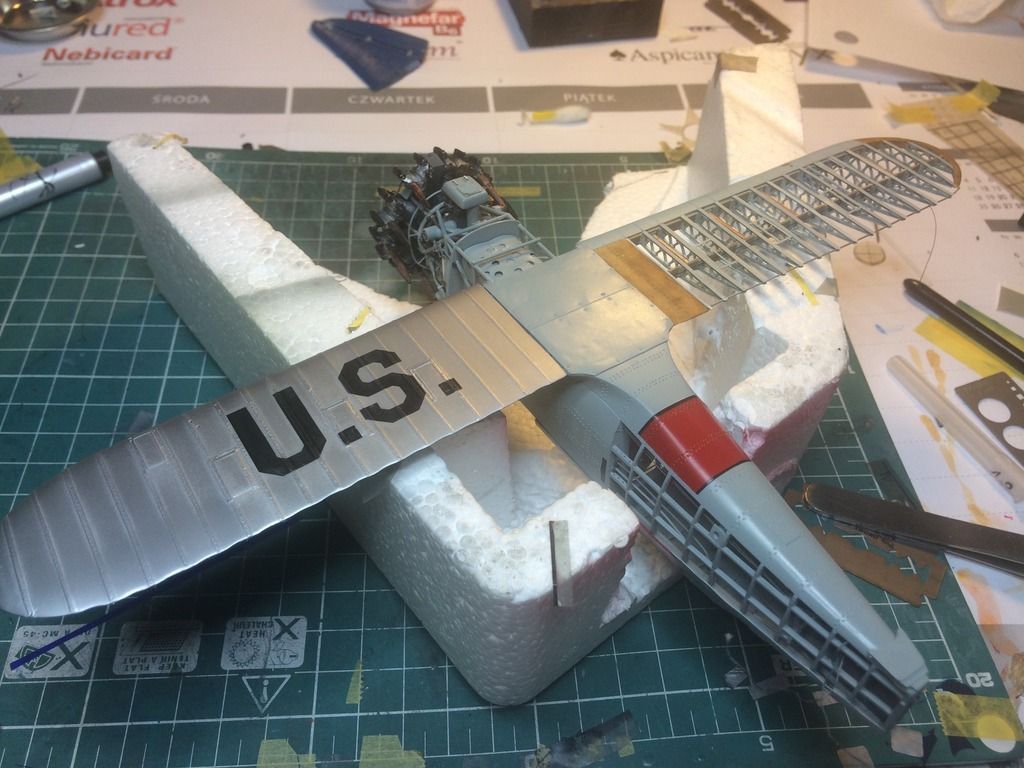
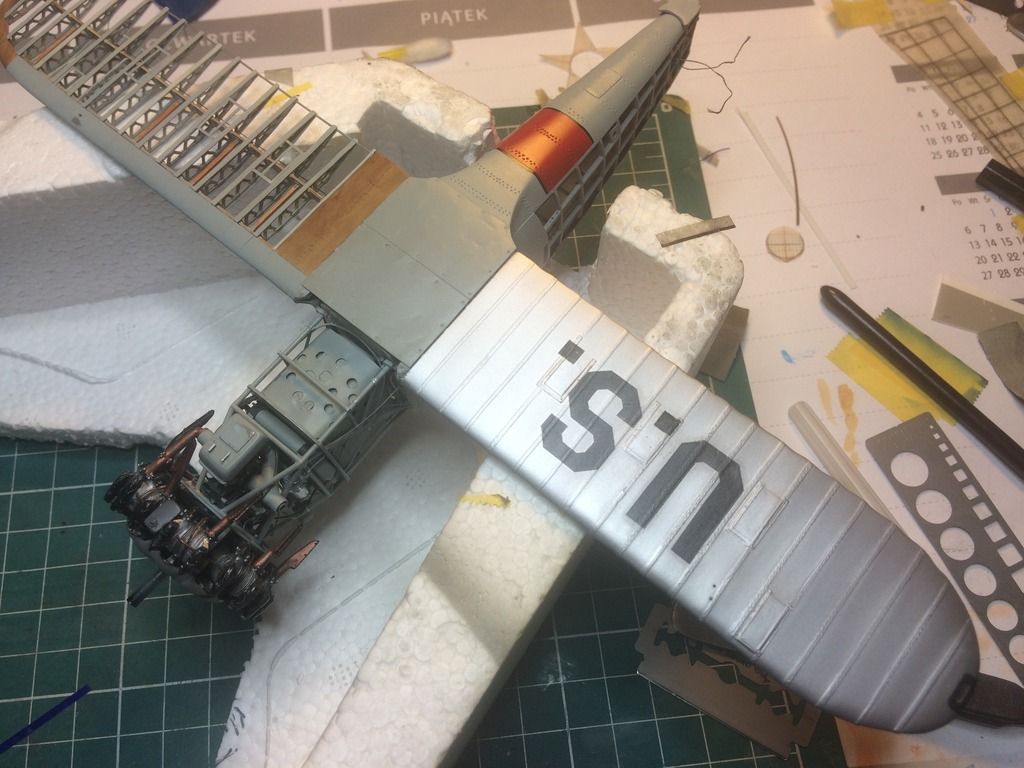
Thank you for your kind comments I send one photo of my model. You can see some progress, ailerons, wires, stars on wings and many small parts which I can't remember . I think about base and exposition of my model slowly.
I reserved my first post in this forum (hello fellas) for this thread, because it was reading through this thread that made me want to register. This is an absolutely beautiful model, any chance we can get more photos of the entire plane?
Only issue I can see is that I believe those wing ribs were wood in the real aircraft, not metal as painted. The construction is very similar to the PT-17 (which I am building) According to the NASM website:
Still, your model is marvelous and I love it!!
Best, Bil
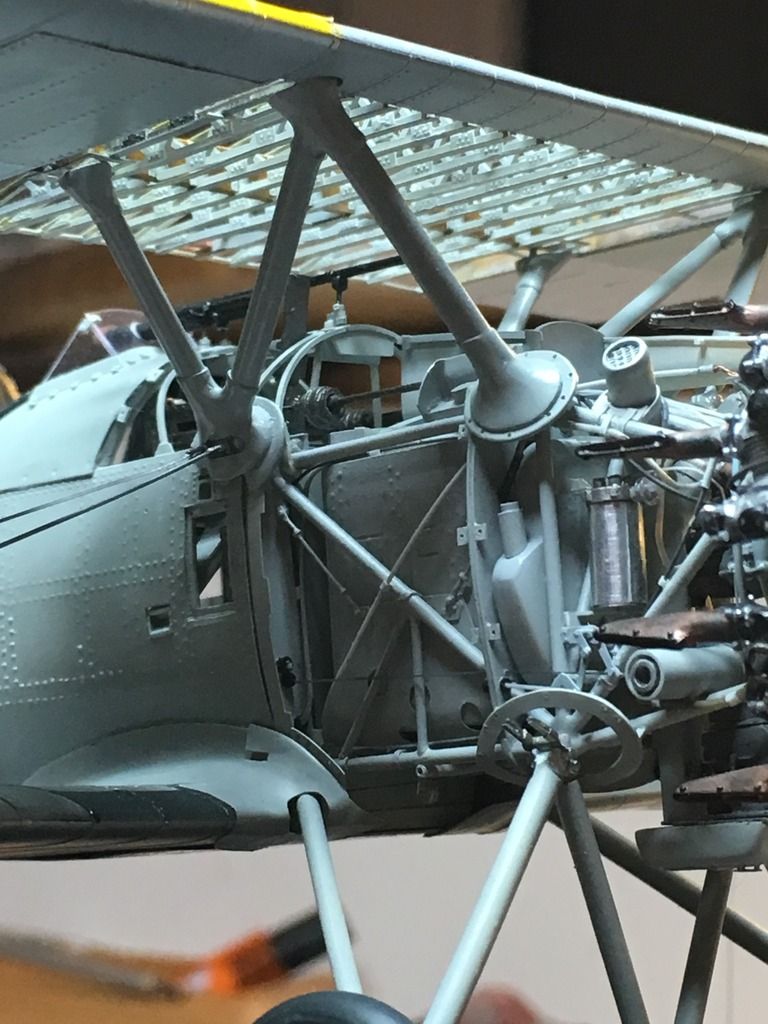
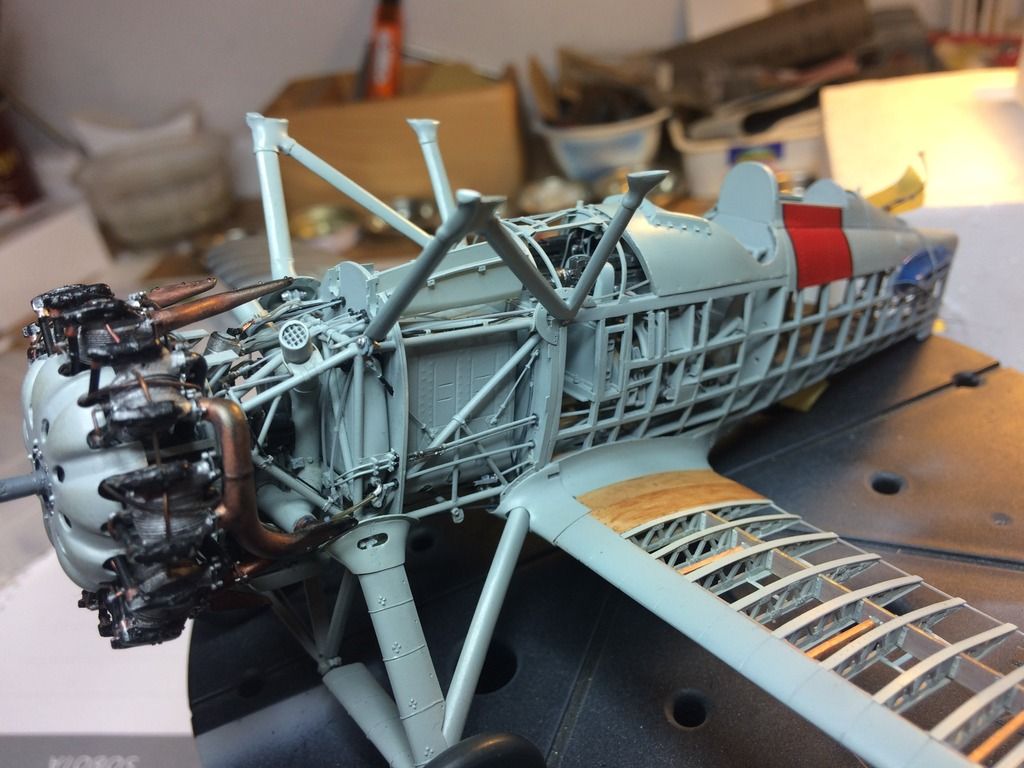
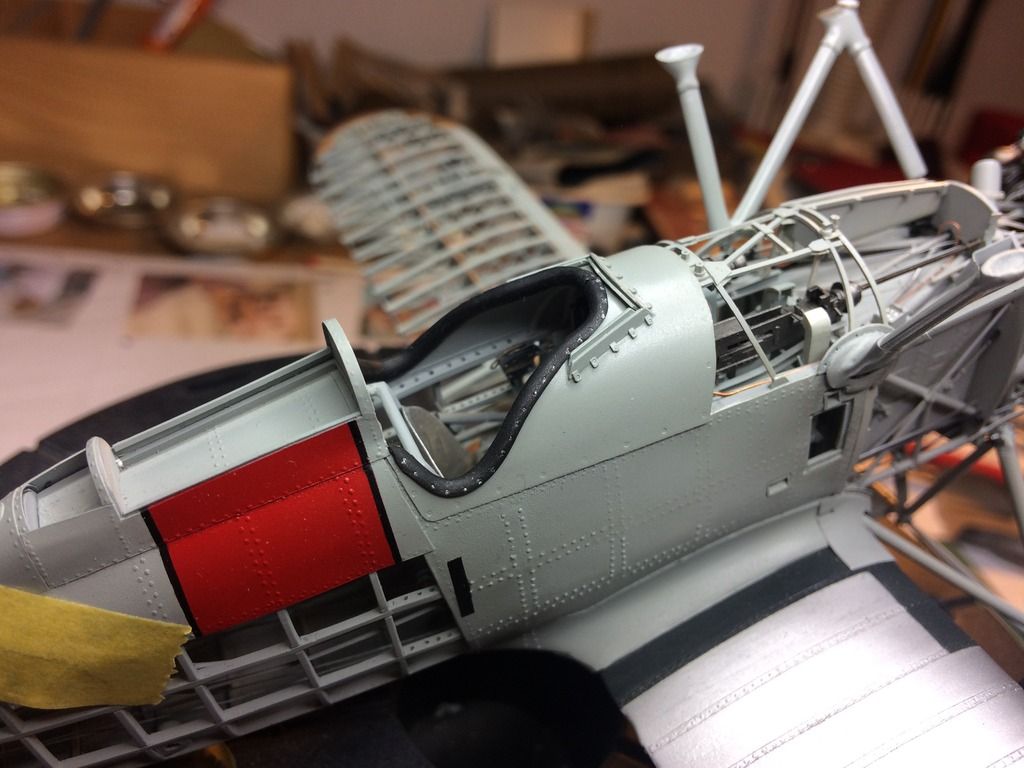
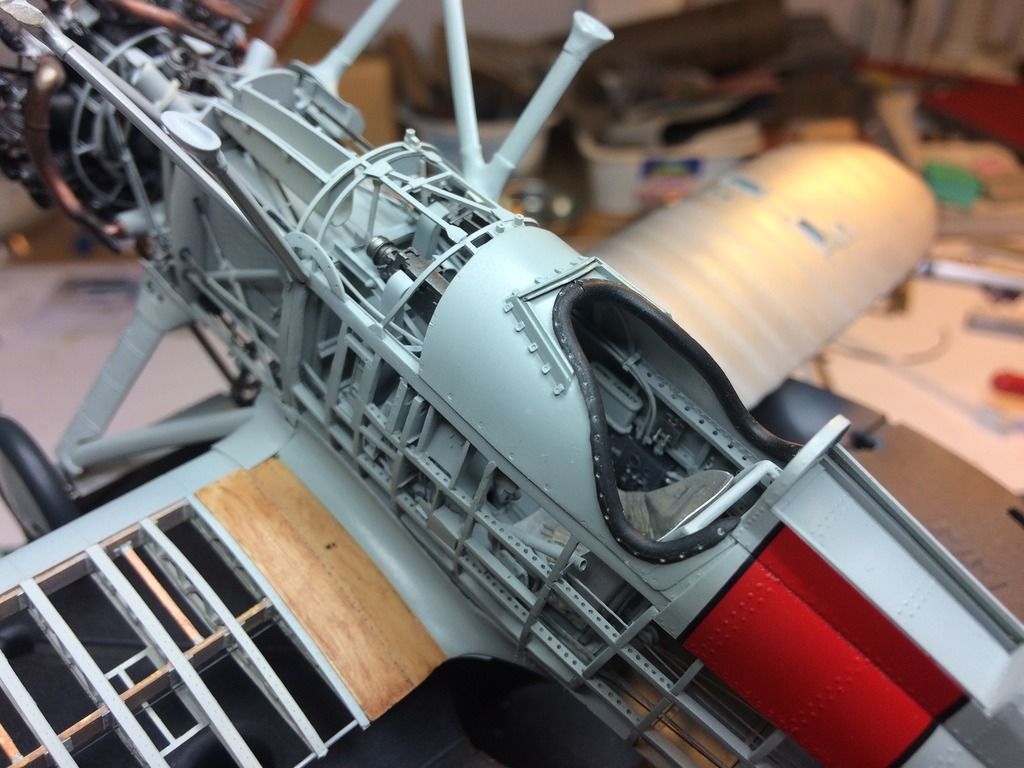
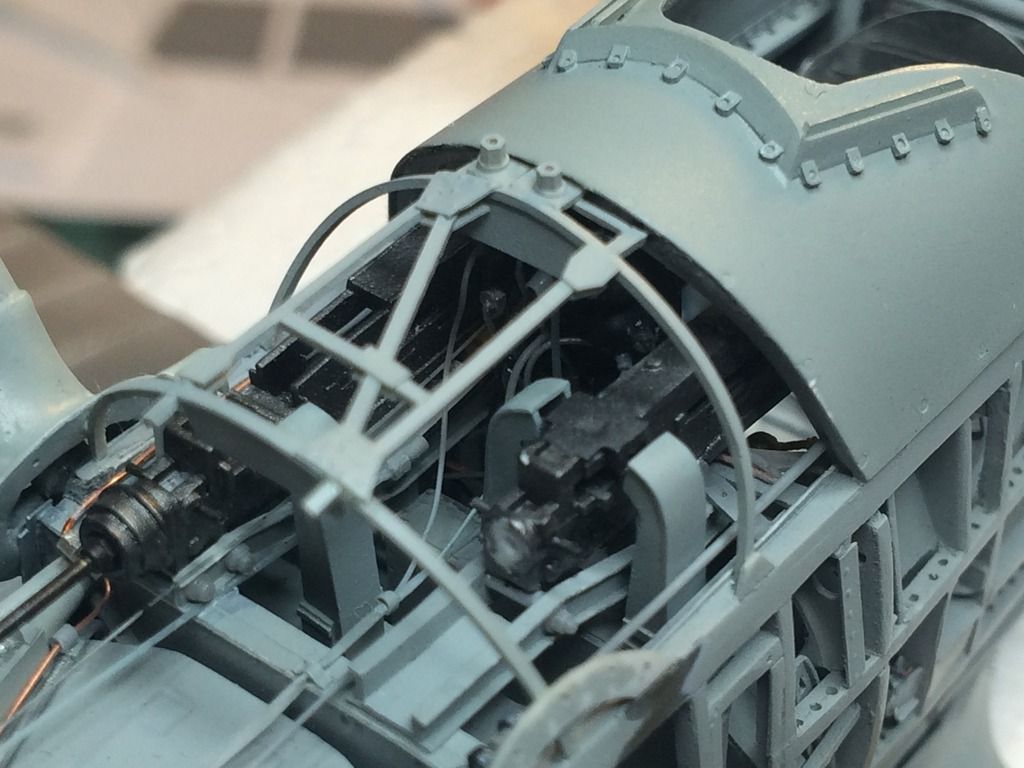
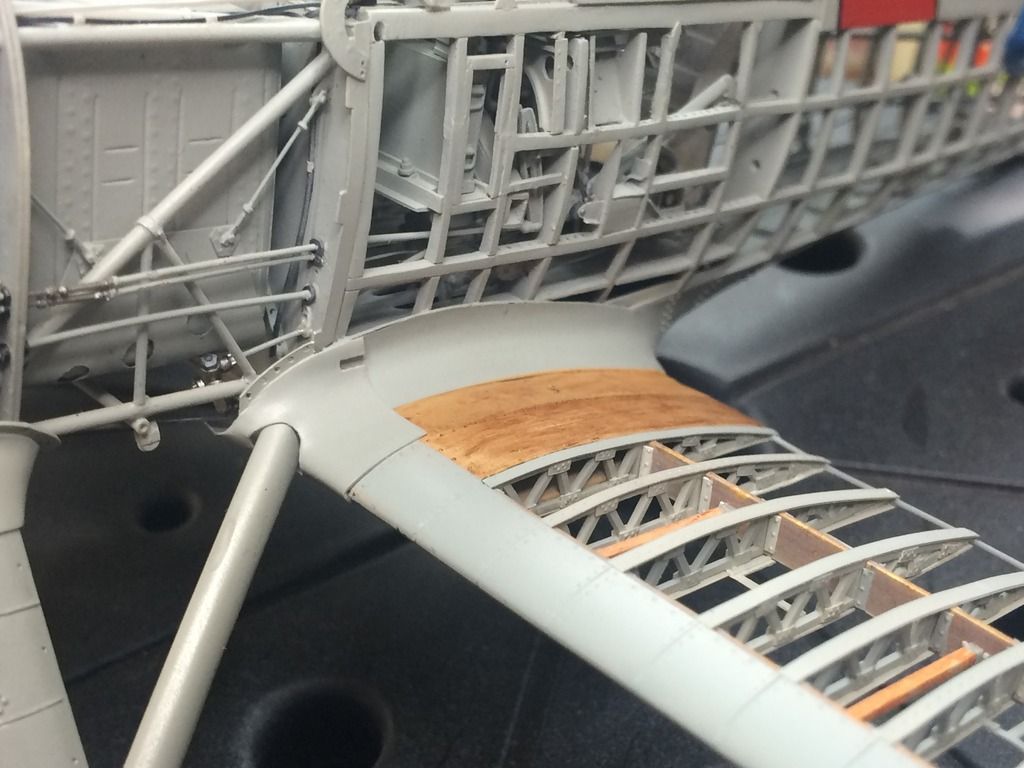
Thank you Bill for comment and I'm glad that my thread made you to register on this awesome forum. Returning to the wings I supposed that someone named this Boeing wooden-winged because of it's mahogany spars. I examined many photos and I think that there are metal ribs. You can see construction of the wing on the background this photo.
Regards
Tomasz
-
Hi All
Thank you for comments, I'm glad you like it.
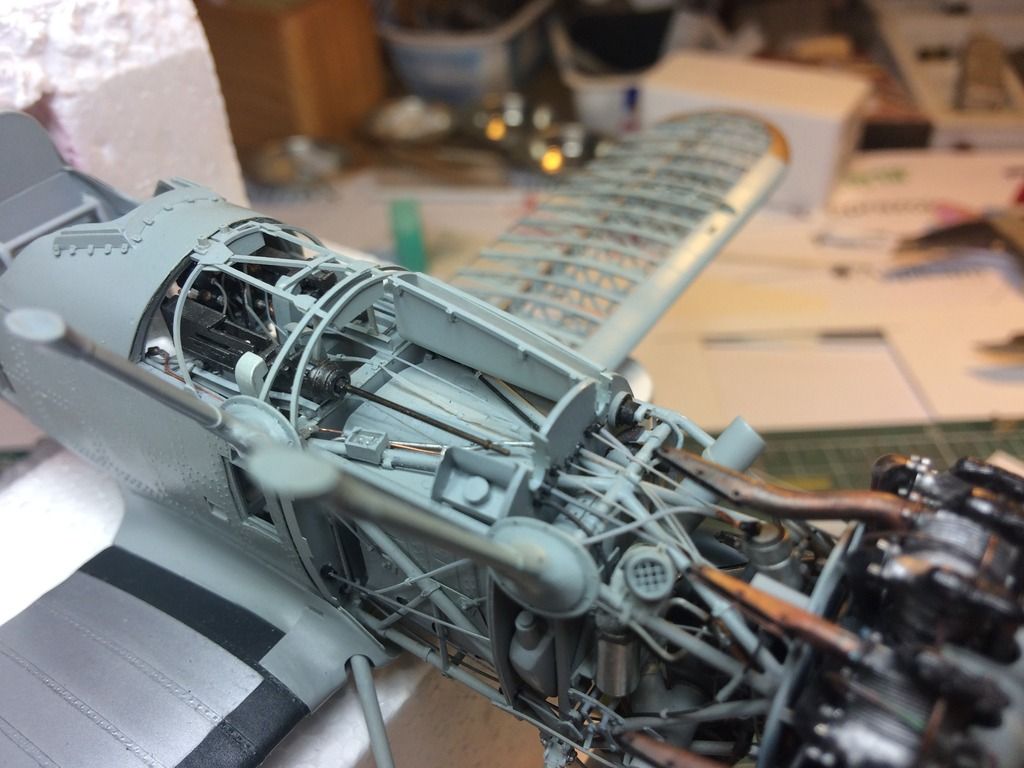
It's happy moment, because I fixed upper wing successfully. I was afraid this operation but everything is very well. Main problem was to correct locate fuselage struts. Many ideas,dry fittings, big stress but with happy end.
 [/url]
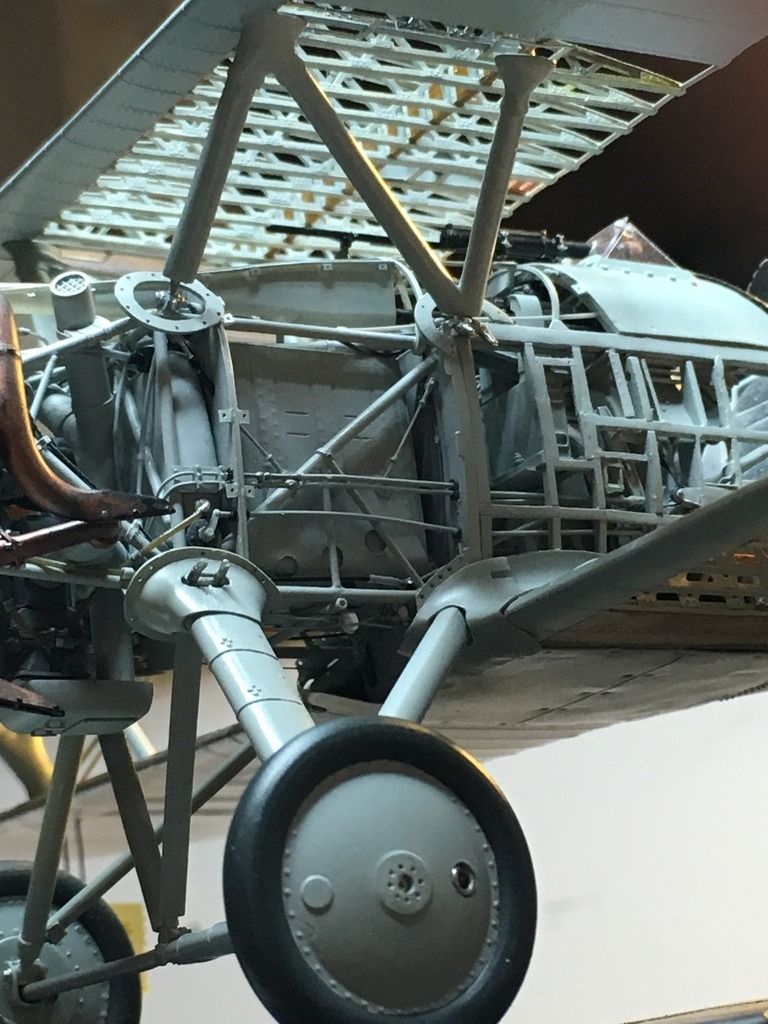
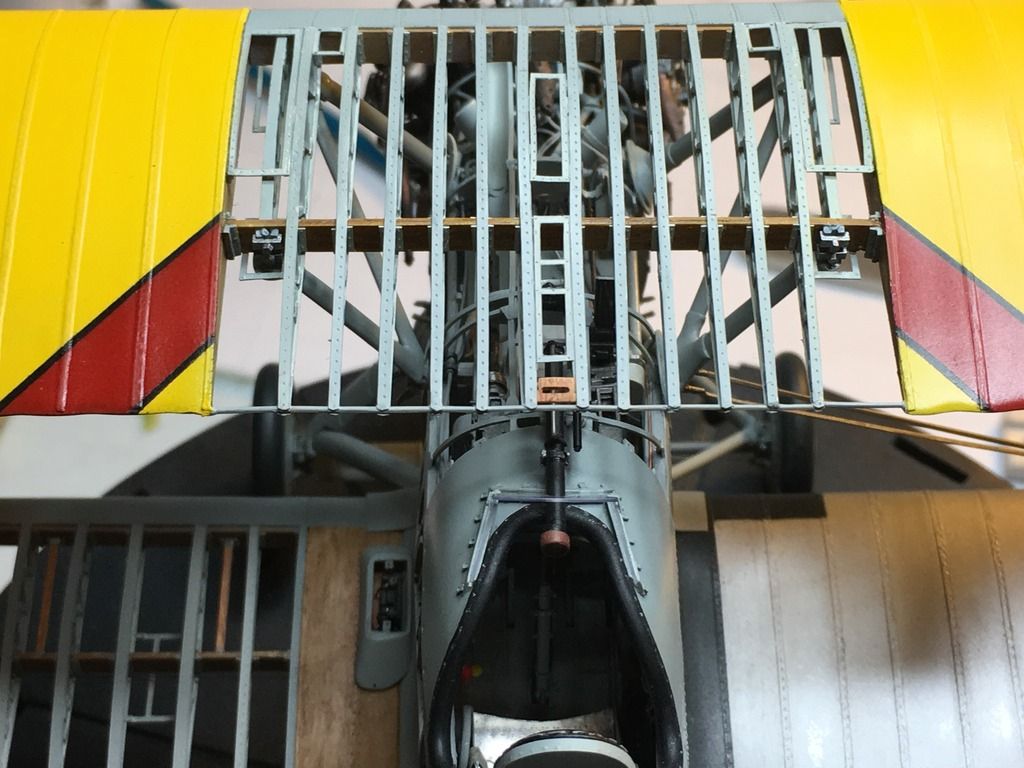
Regards
Tomasz
-
-
Hi
I'd like to thank all of you for your numerous very kind comments during this year. It's very helpful to accomplish such long and difficult for me project.
Some small details for the end of the year.
Battery and it's box.
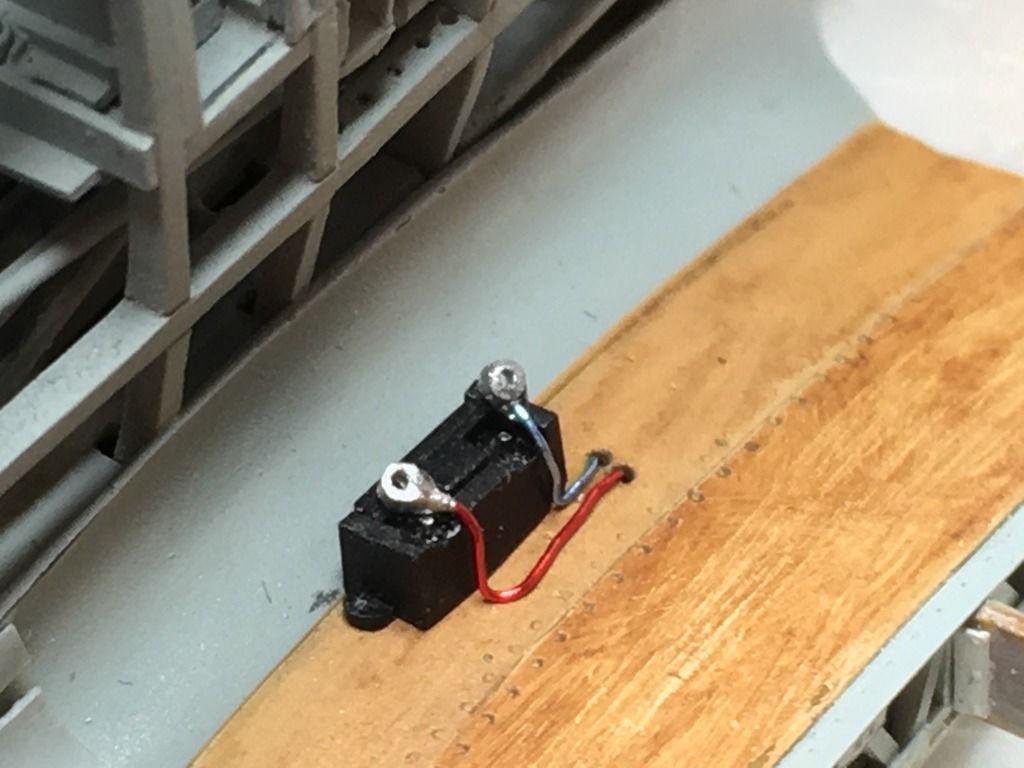
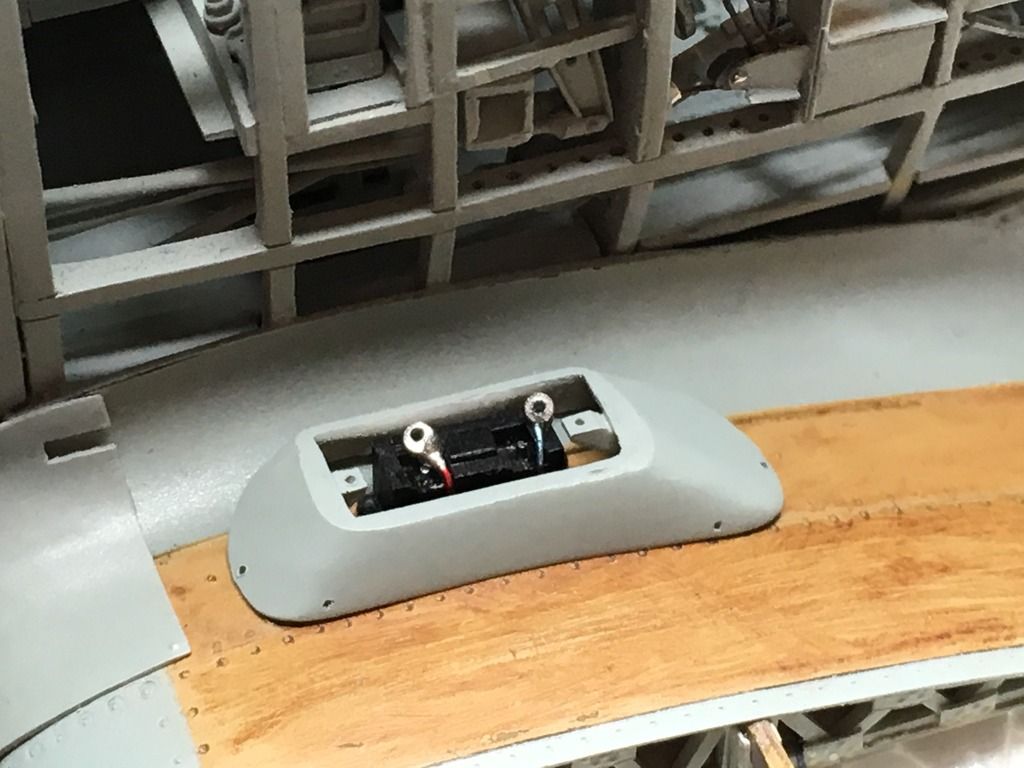
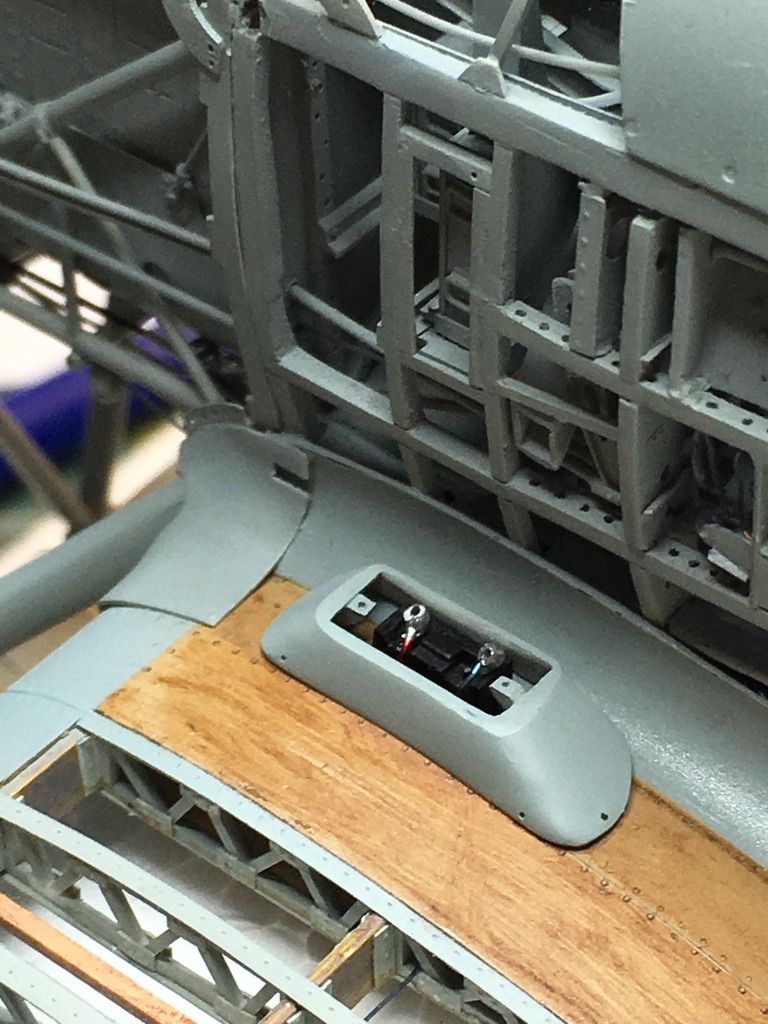
Venturi jet.. Scratch as usually.
I wish you Happy New 2017 Year, many awesome modeling projects.
I invite all of you to visit my thread next year.
Regards
Tomasz
-
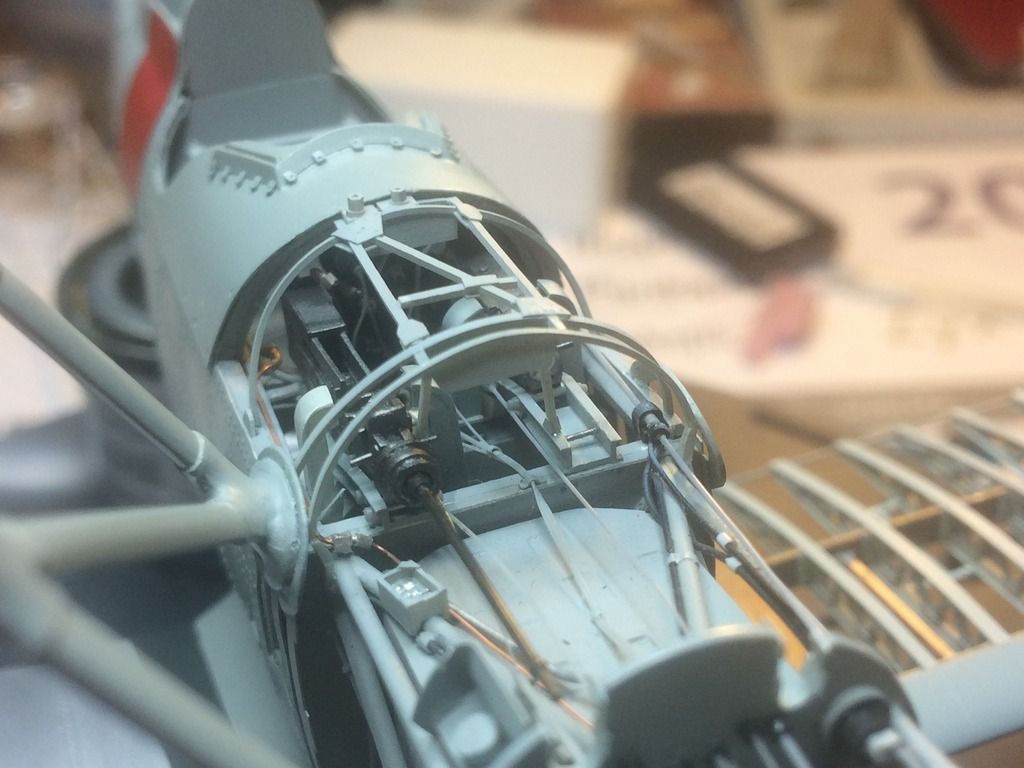
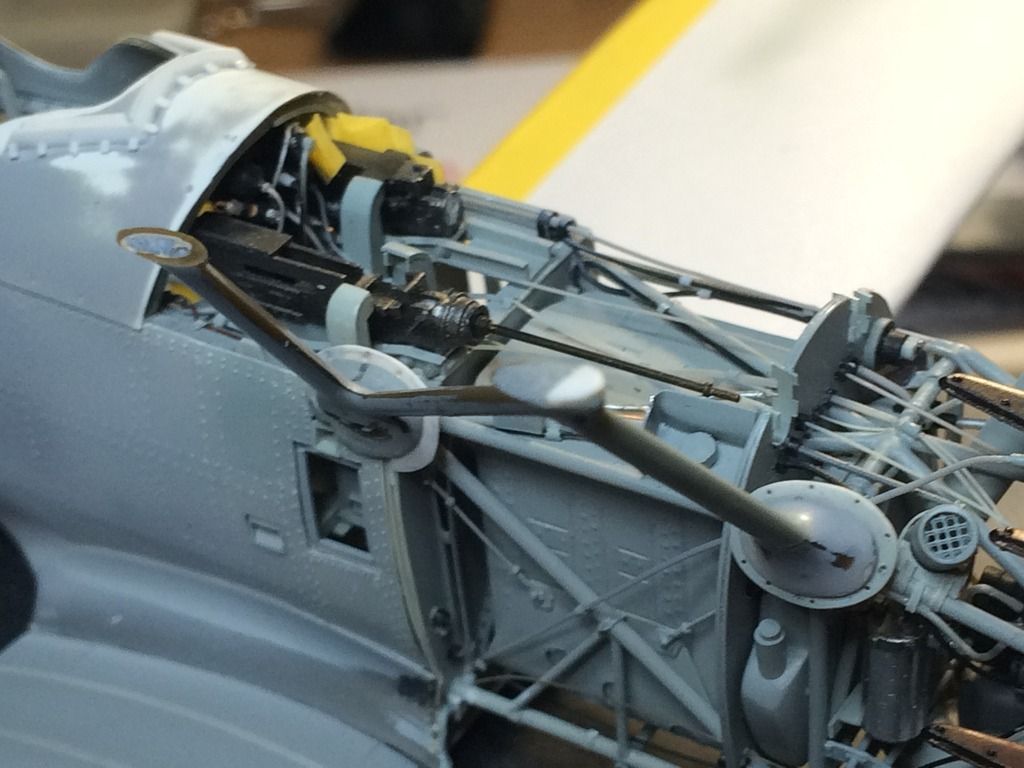
Hi All
Thank you for watching and nice comments.
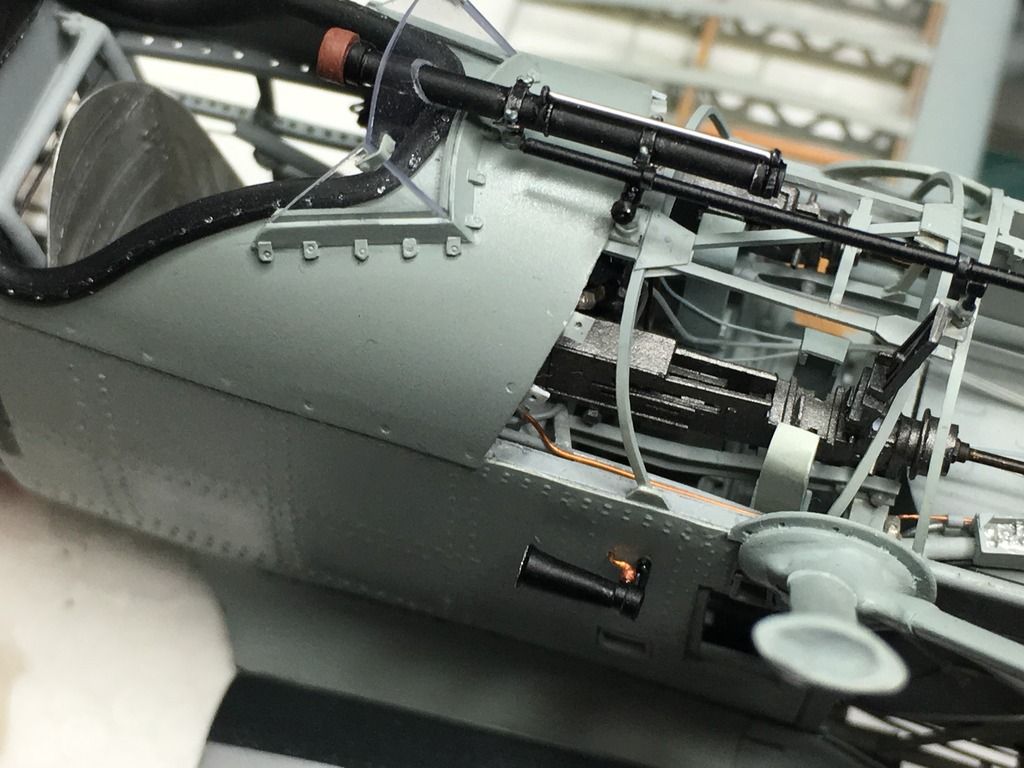
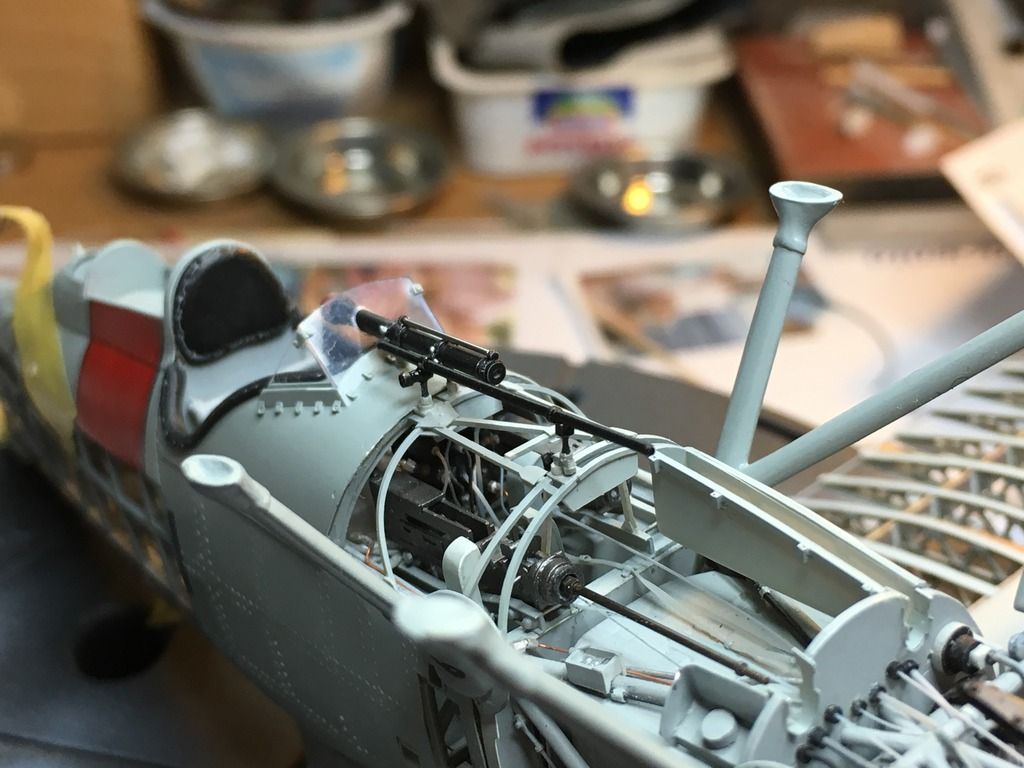
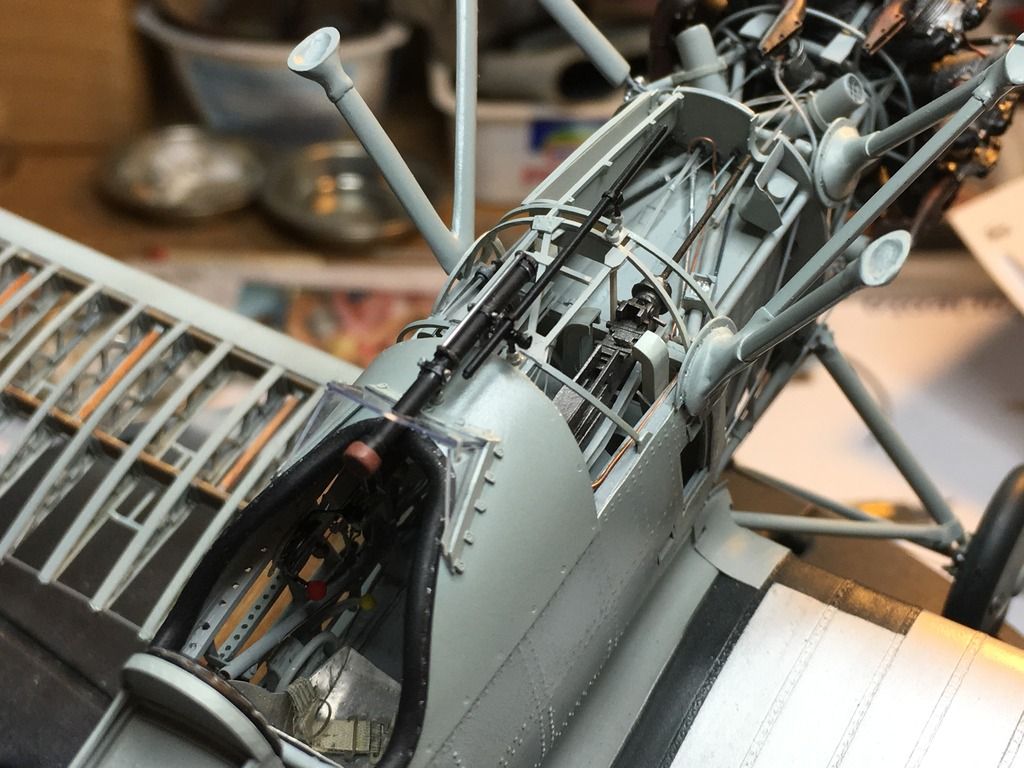
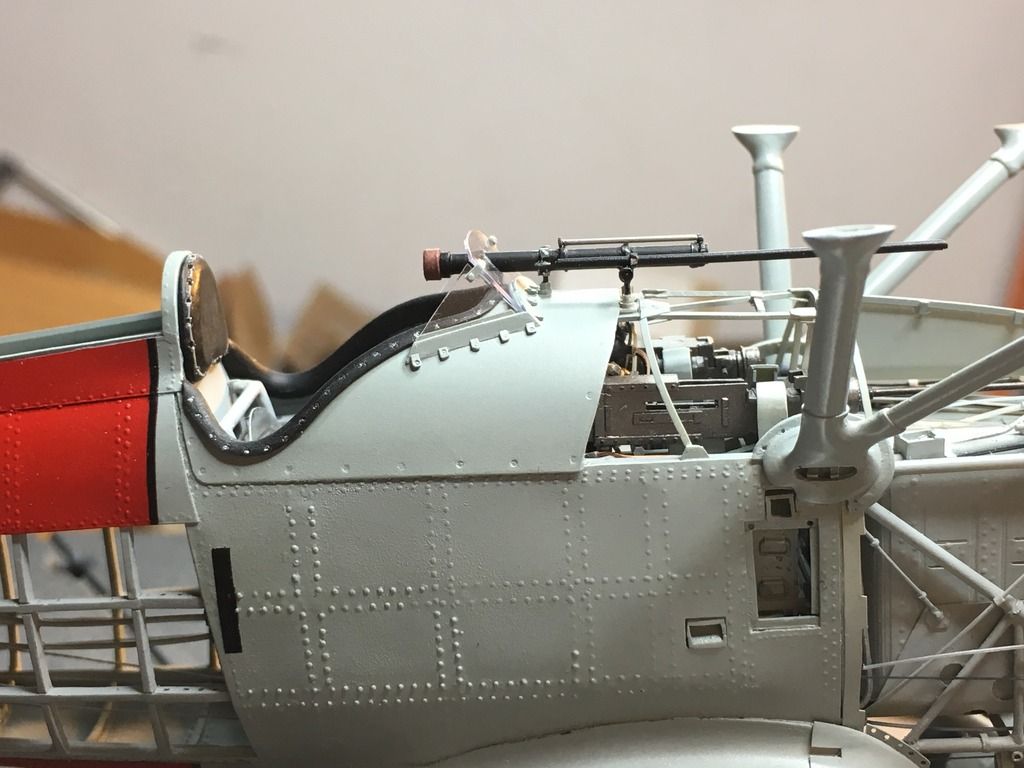
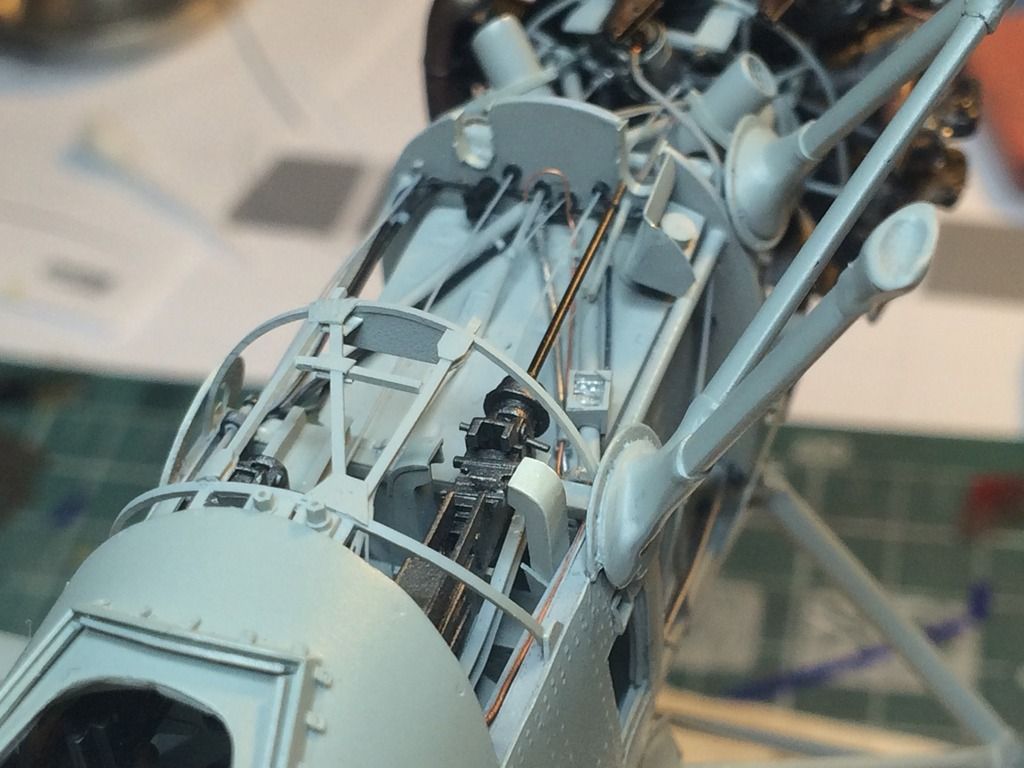
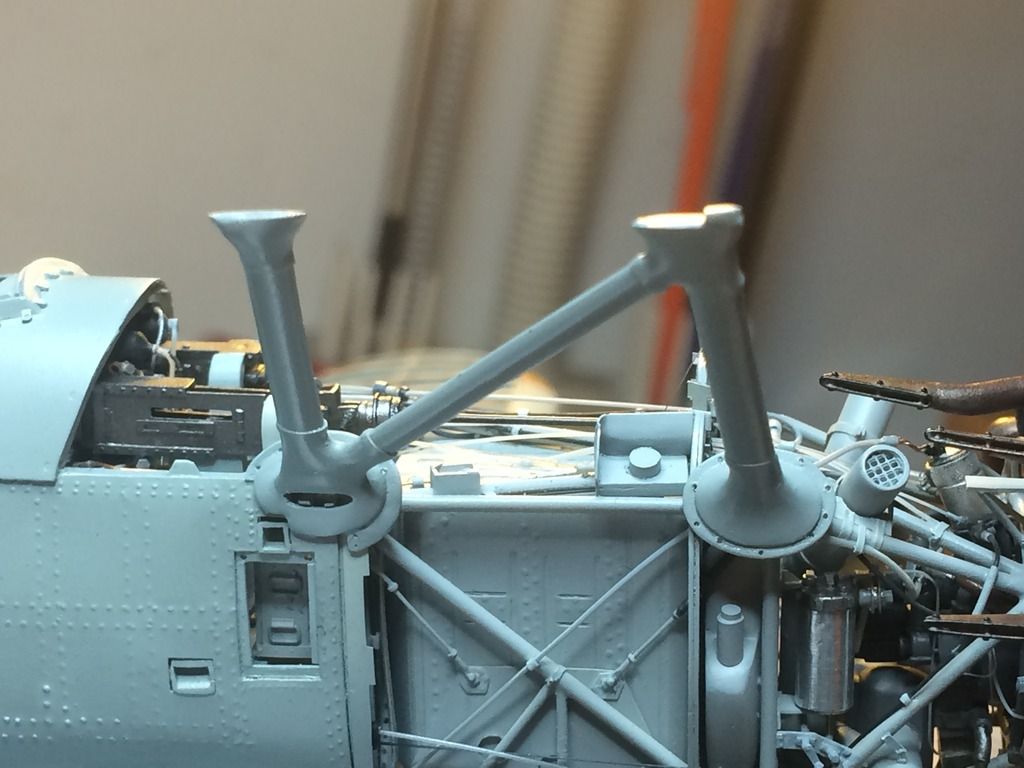
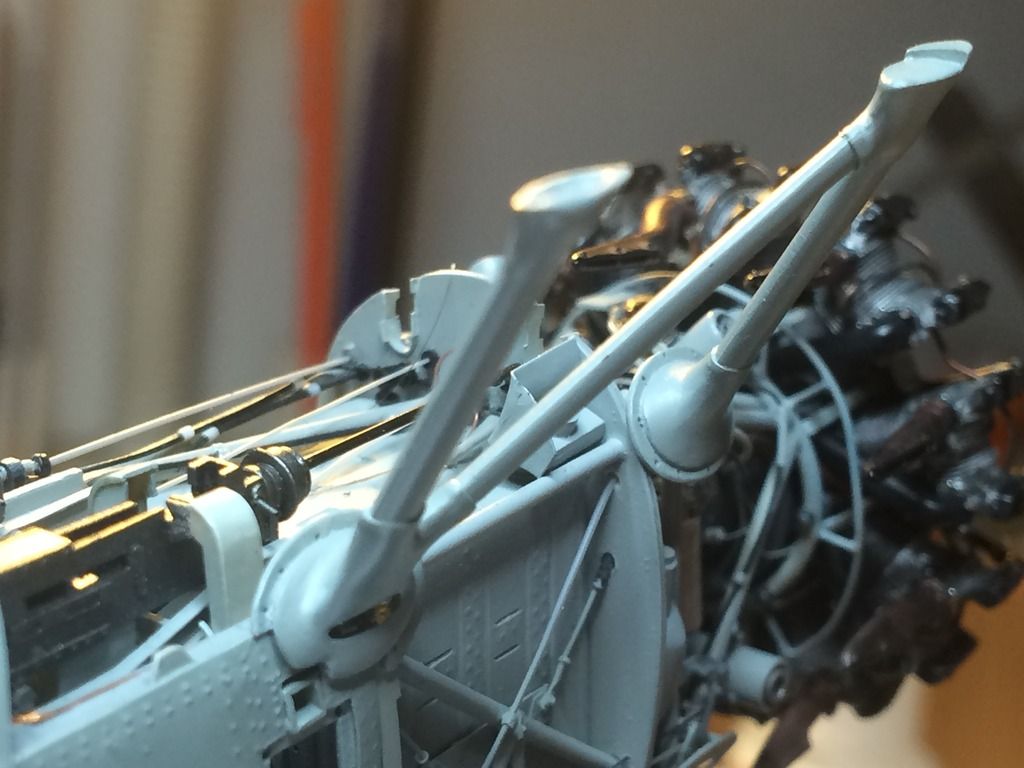
I prepared telescopic sight and gunsight for today update.
Telescopic gun sight was installed first. Legs were made from broken 0.3 mm drills. There isn't rear part of sight, this element was fixed later.

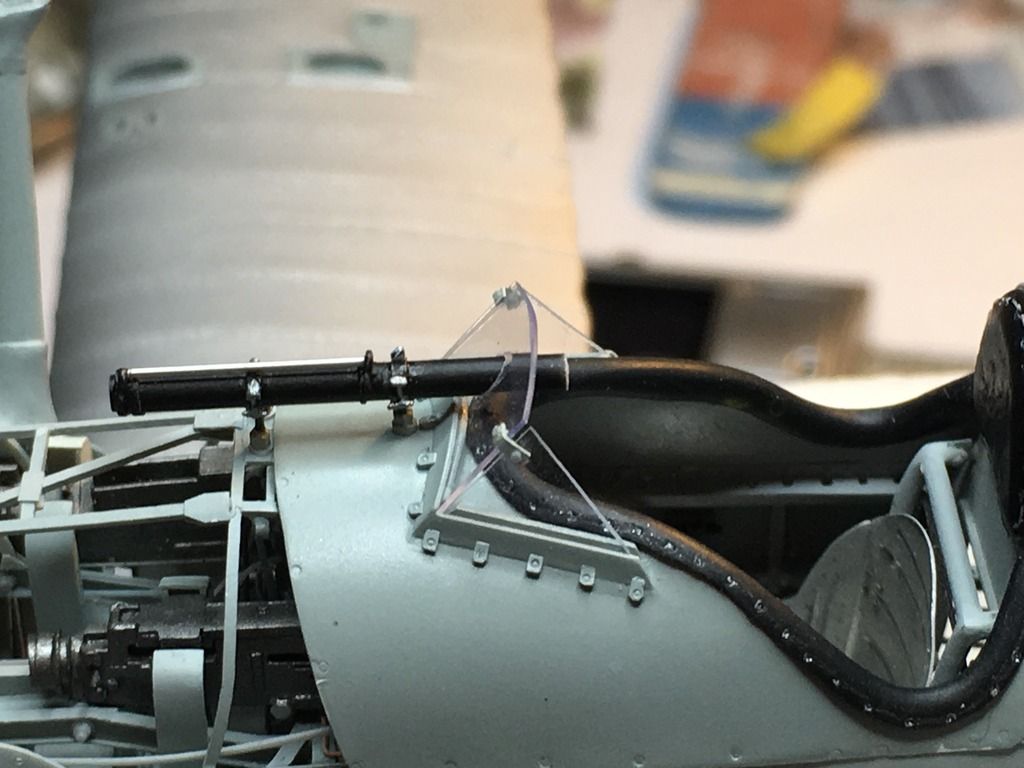
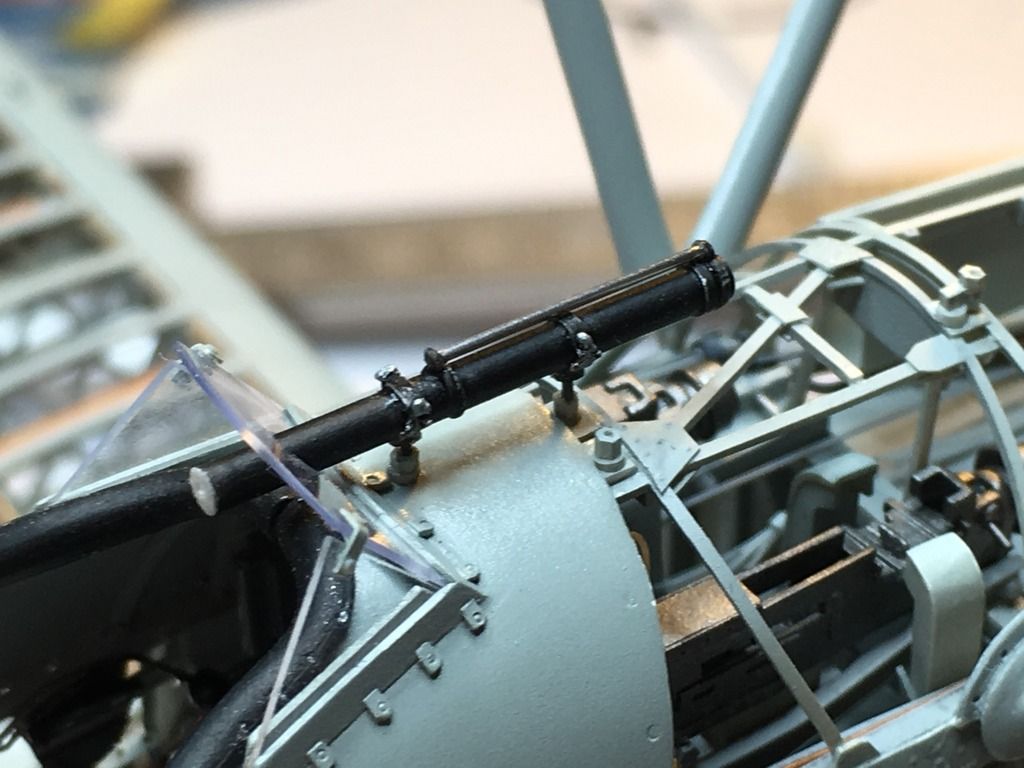
Next was gunsight, longer and thin. I also added end part of telescope.
-
-
-
Hi
Next update
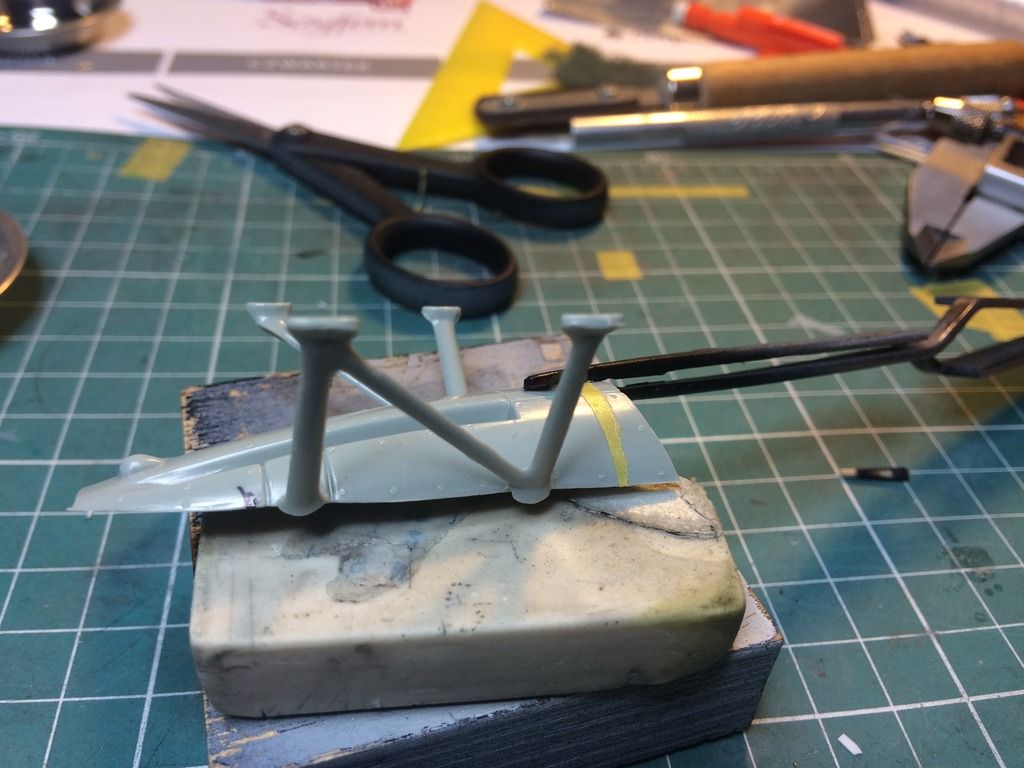
Second strut of center section. This one will be without fairings.
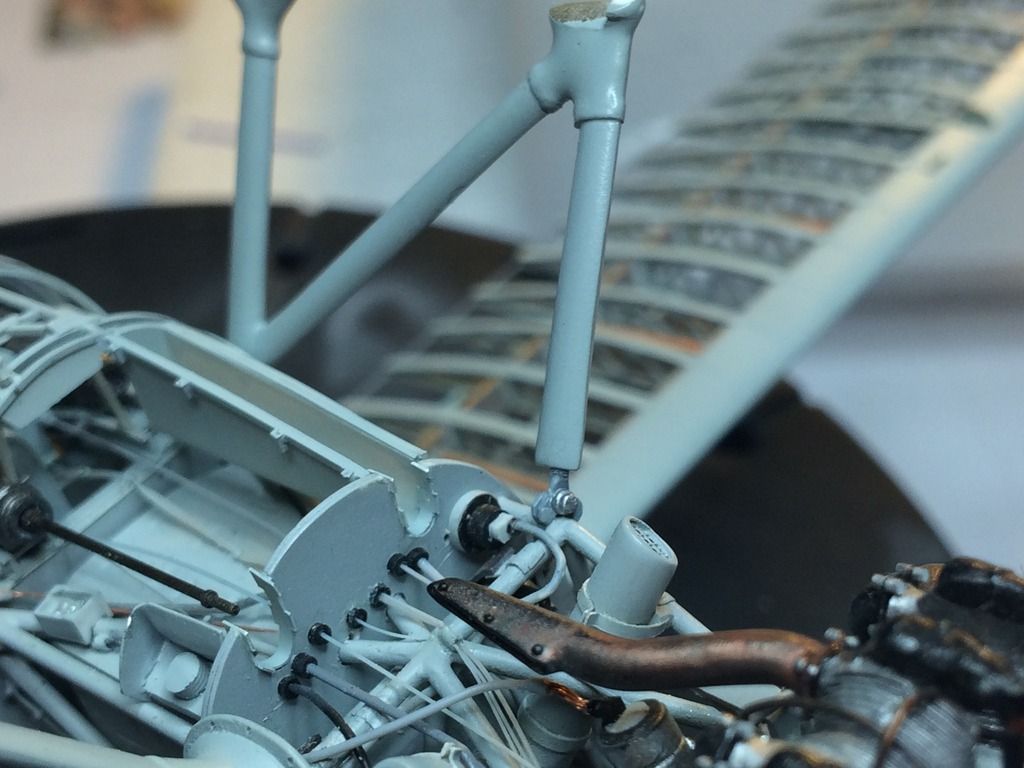
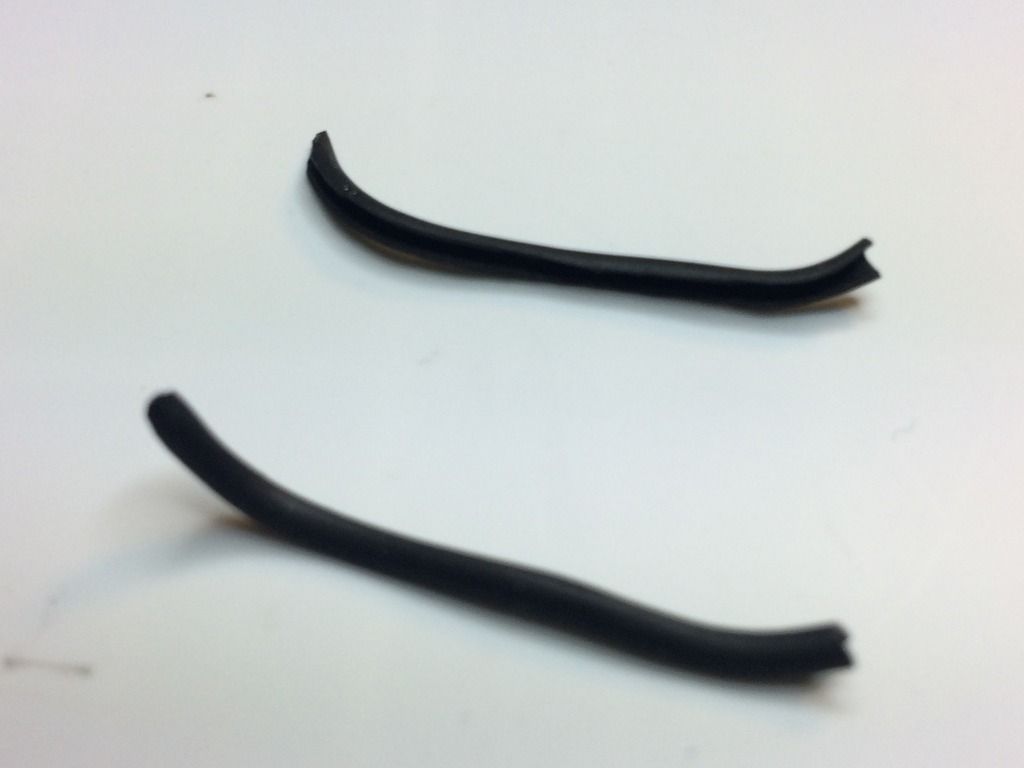
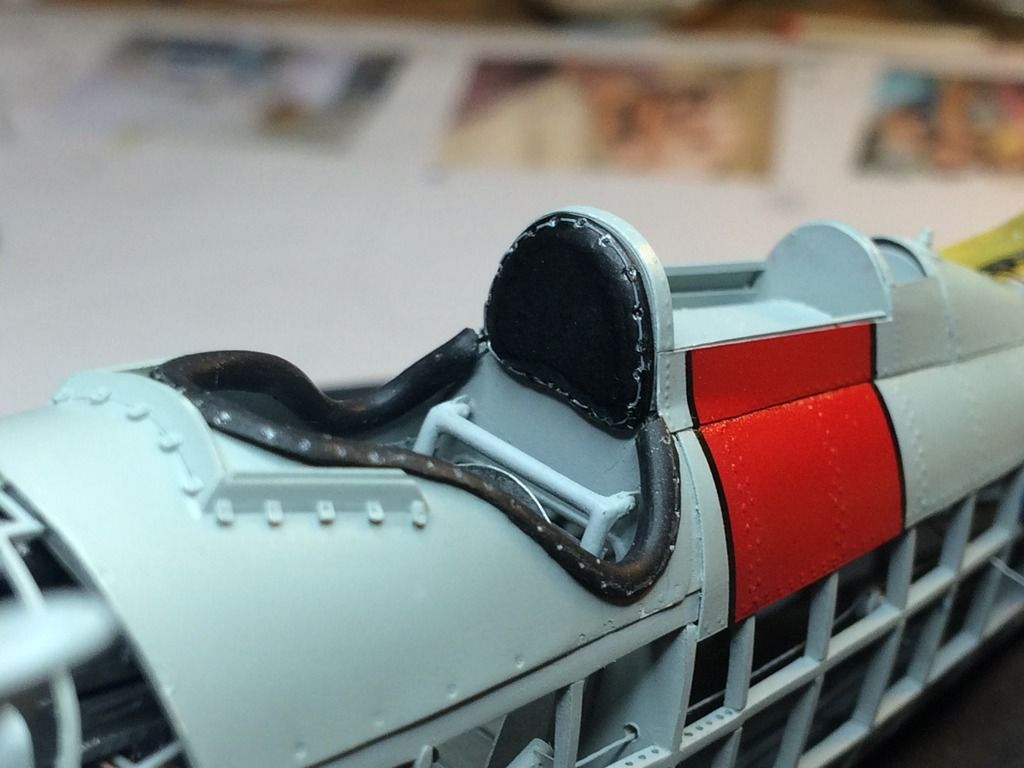
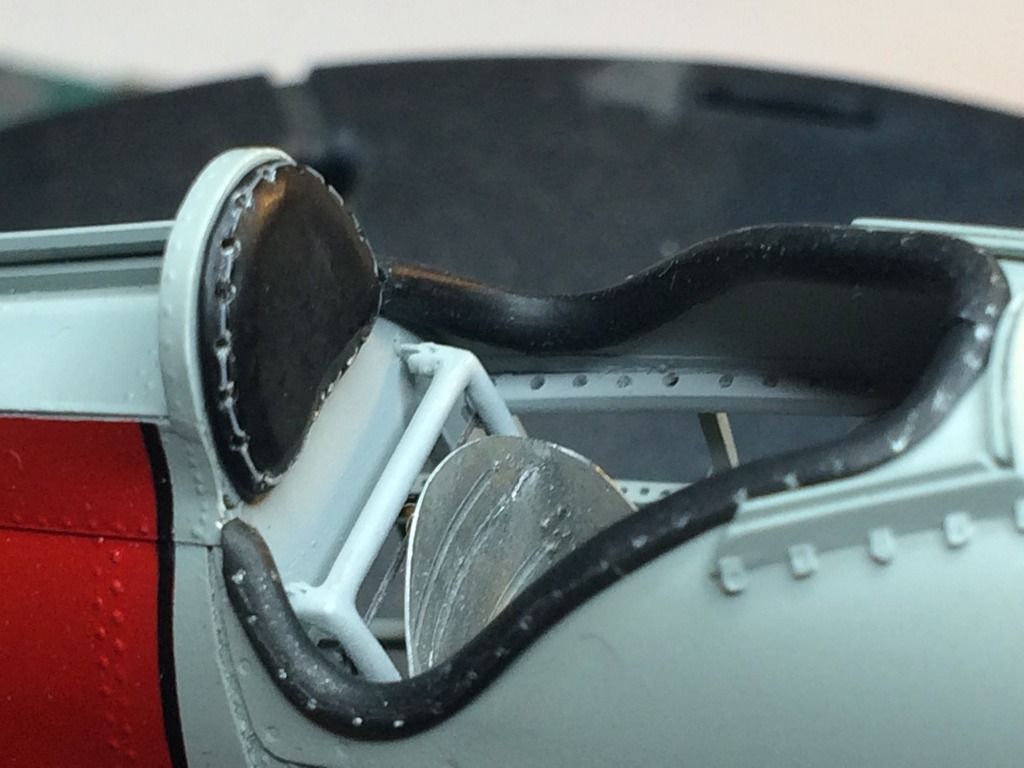
I also made leather finish of the cockpit's edge. I used insulation from electrical wire. I tried different kinds of them and after many attempts I chose one. Proper cutting was necessary.
After installation, as glue was used CA gel.
I "sewed" headrest also, on place.
Regards
Tomasz
- mpk, ghatherly, Hubert Boillot and 7 others
-
 10
10
-
Hi All
Thank's for your kind opinion. I didn't expected so many comments.
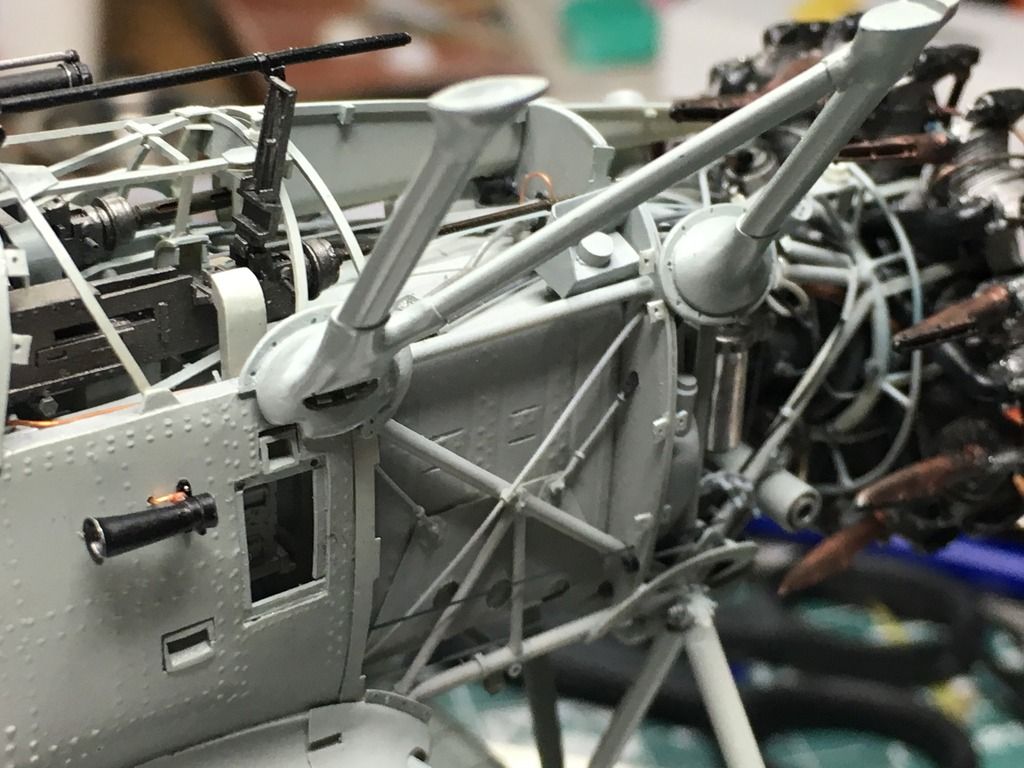
Work on the same area. I added element of gun firing channel, but first I made front hoop to which this element was assembled.
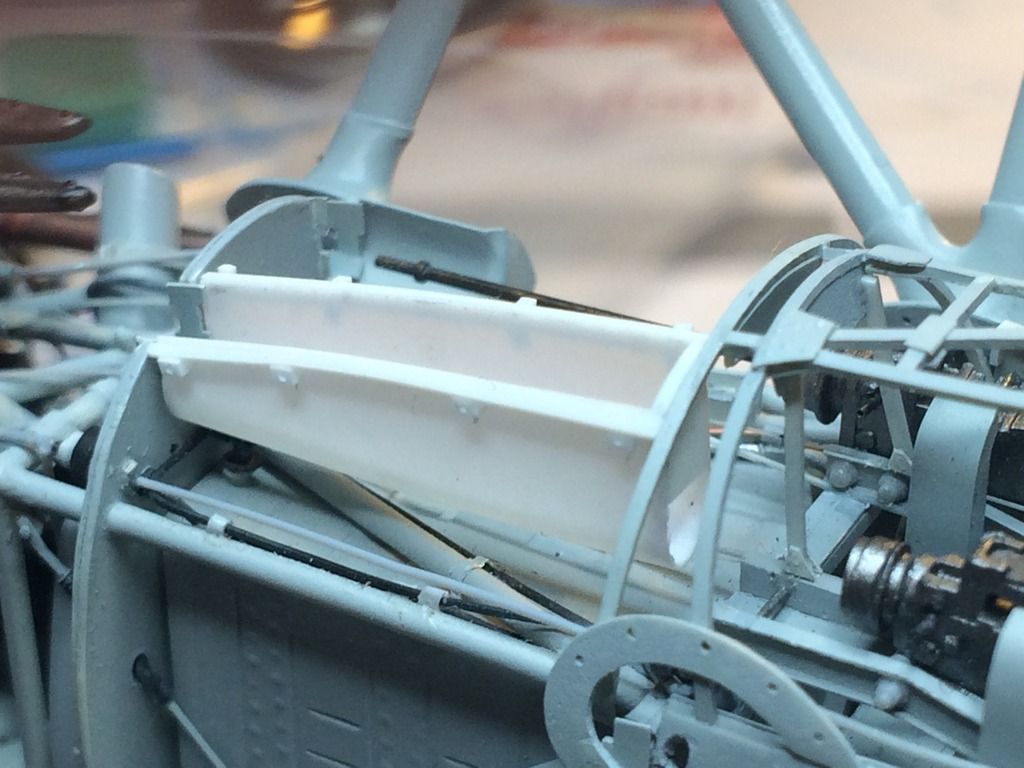
And after painting
Regards
Tomasz
- BiggTim, Lars Befring, Jan_G and 4 others
-
7
-
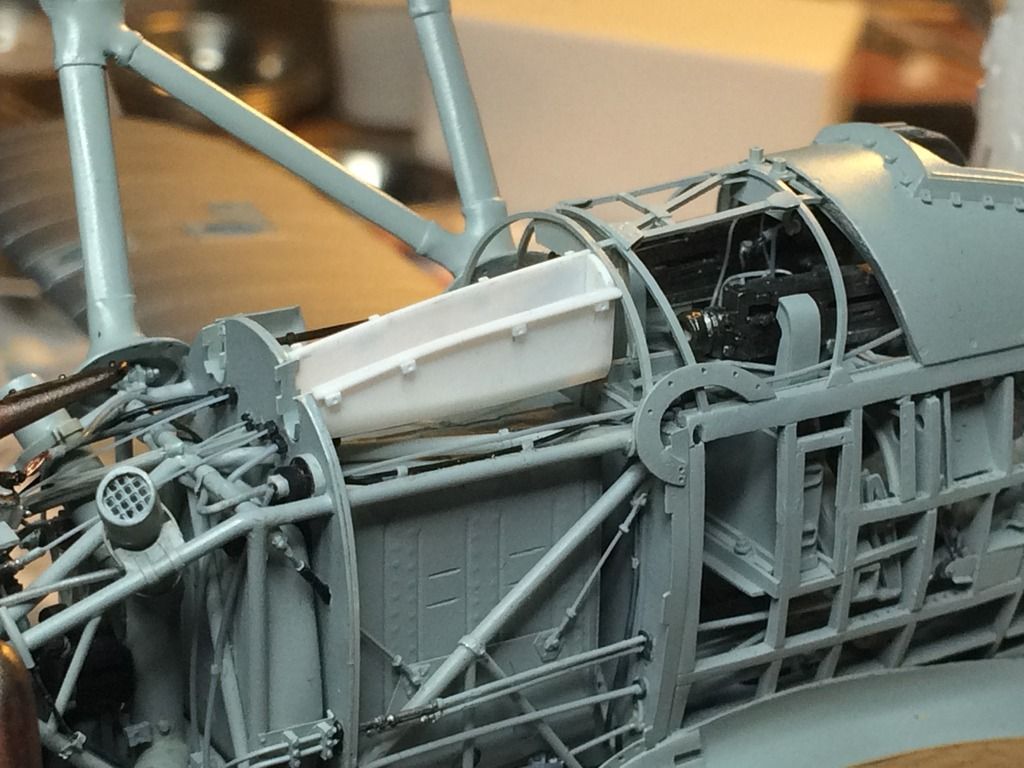
Hi Guys!
Nice to meet you again after long holiday break.
That was break in sending posts but not at work. Intensity was lower, but it was summer time. I hope you don't forget my thread.
So few photos with some progress. I finished and installed this crispy construction above brownings.
Nice watching and see you next time, I hope soon
Tomasz
- BiggTim, Chris Wimmer, Uilleann and 5 others
-
8
-
-
Hi All!
Thank you for your kind posts once again, but I think to kind. This is 1/32 scale, if it was 1/72 it could be a big thing. 1/32 scale is for almost blind people, someone said.
I prepared two crispy elements for today, two fairings of undercarriage rear strut attachment. I made them using vacuform technique as I wrote early.
Nice watching
Tomasz
- Hubert Boillot, red baron, Uilleann and 5 others
-
8
-
Hi Kev
When I copied these photos to the post I didn't realize that some of them are so big.
Tomasz
-
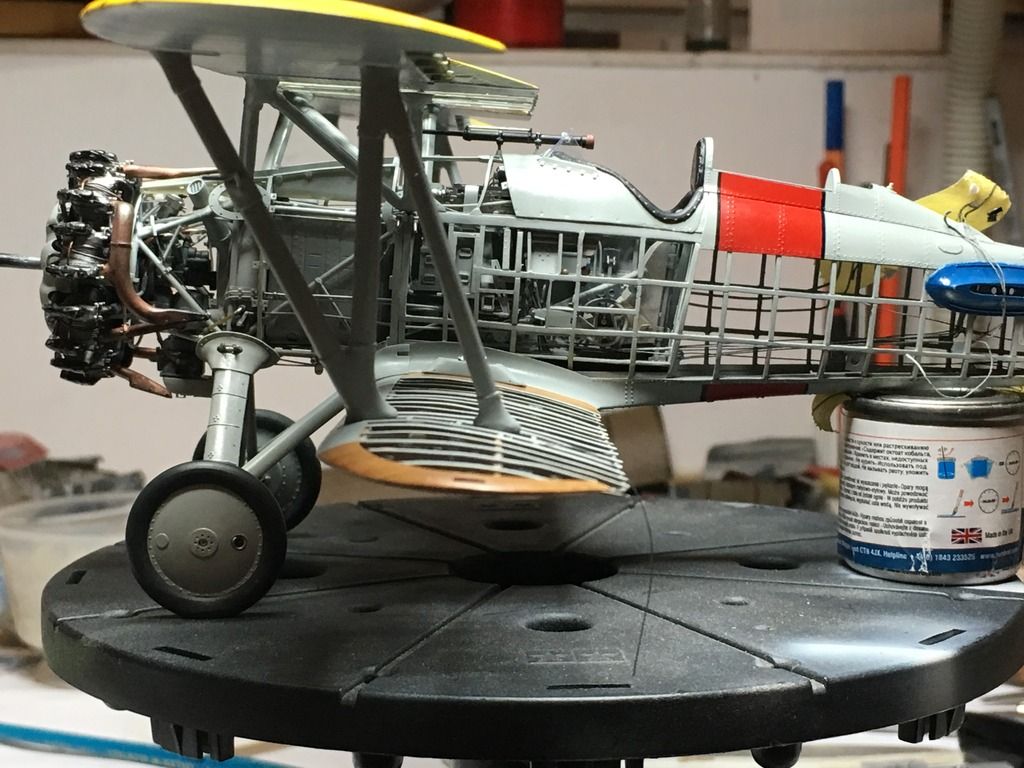
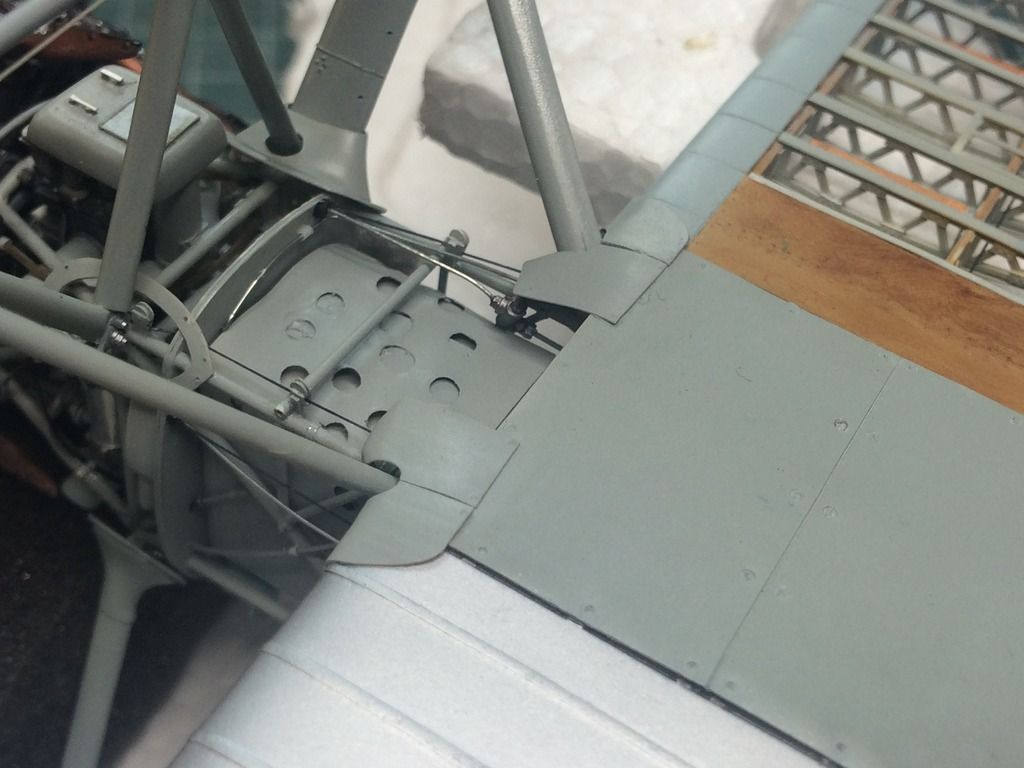
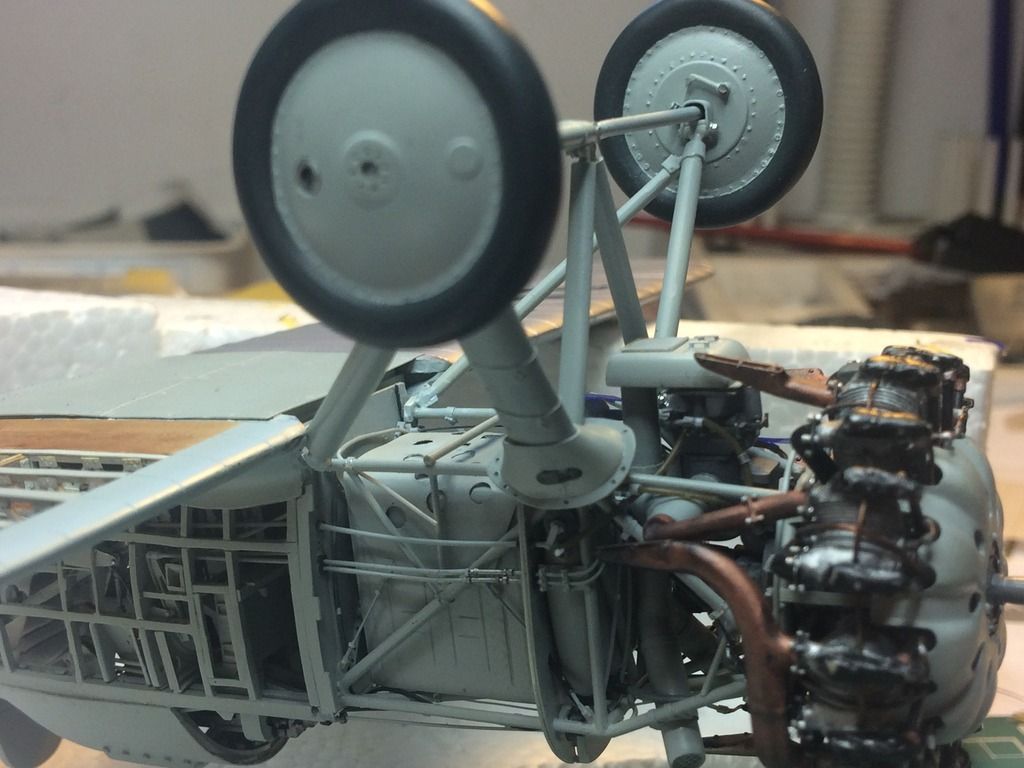
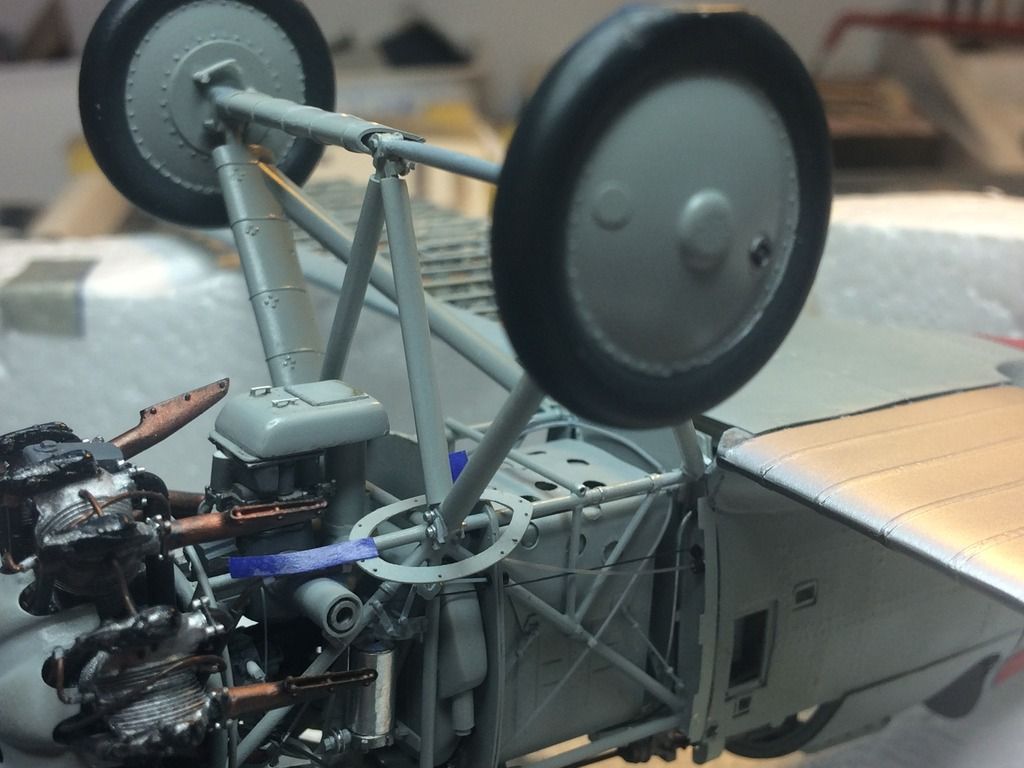
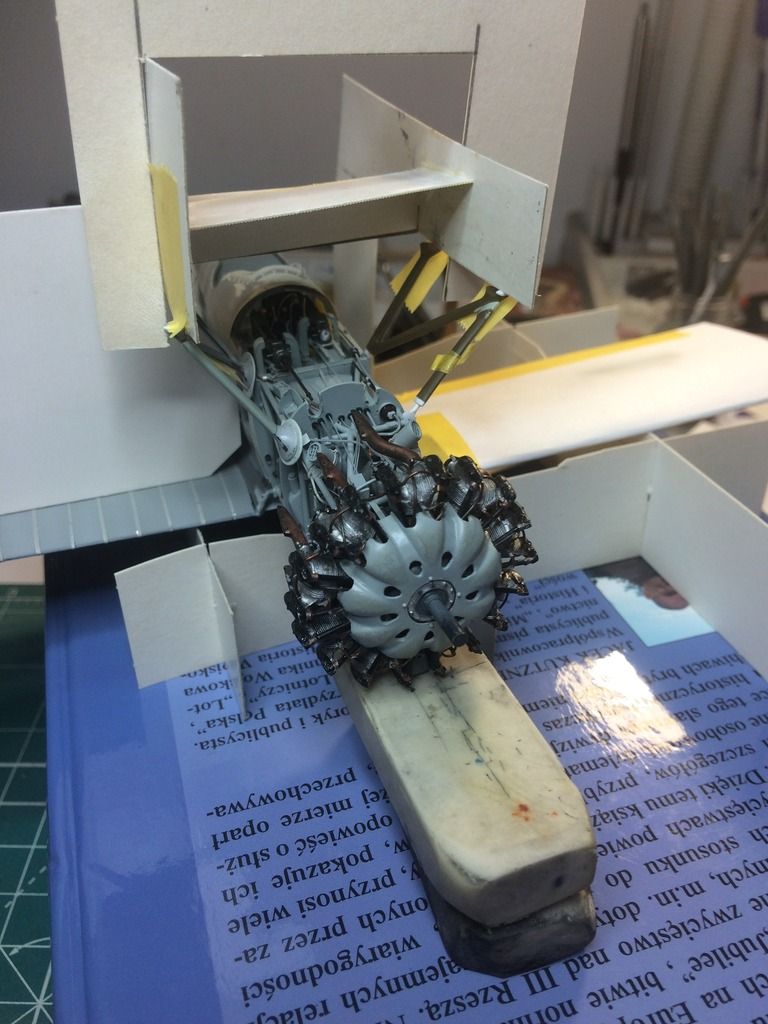
Good evening (in my time zone)
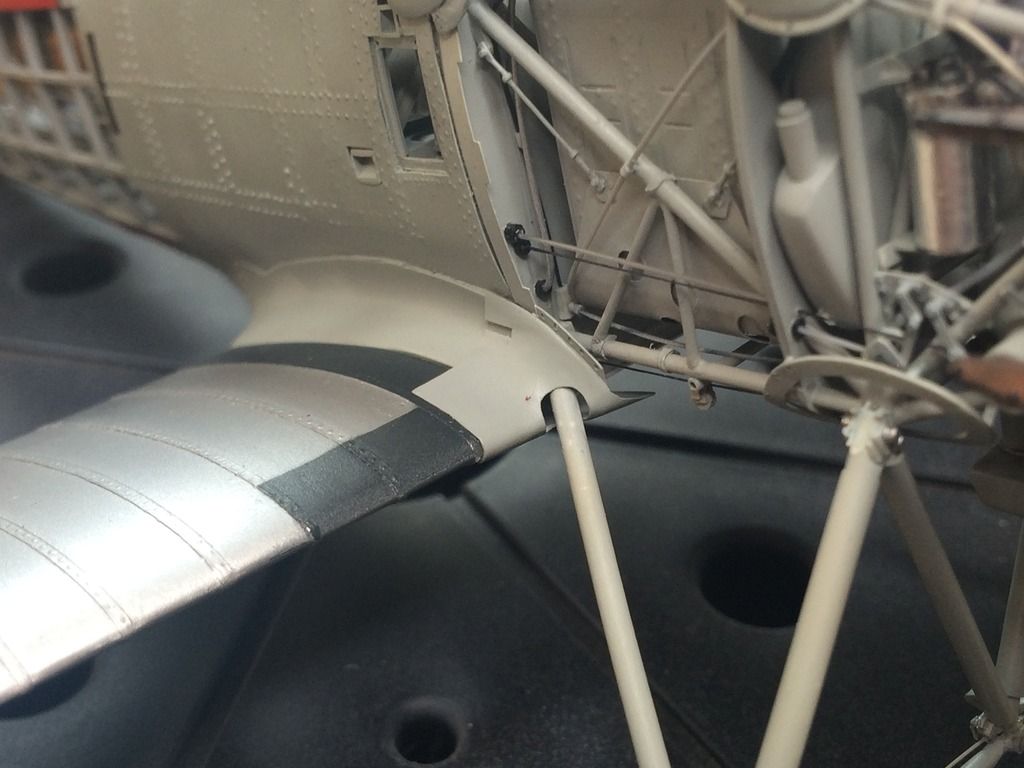
When I fixed landing gear, I didn't glue fairing on the top of left main strut and strut attachment on the other side (you can see blue tape on earlier photos) because I had to do it in right position. I also added small brackets to each other.
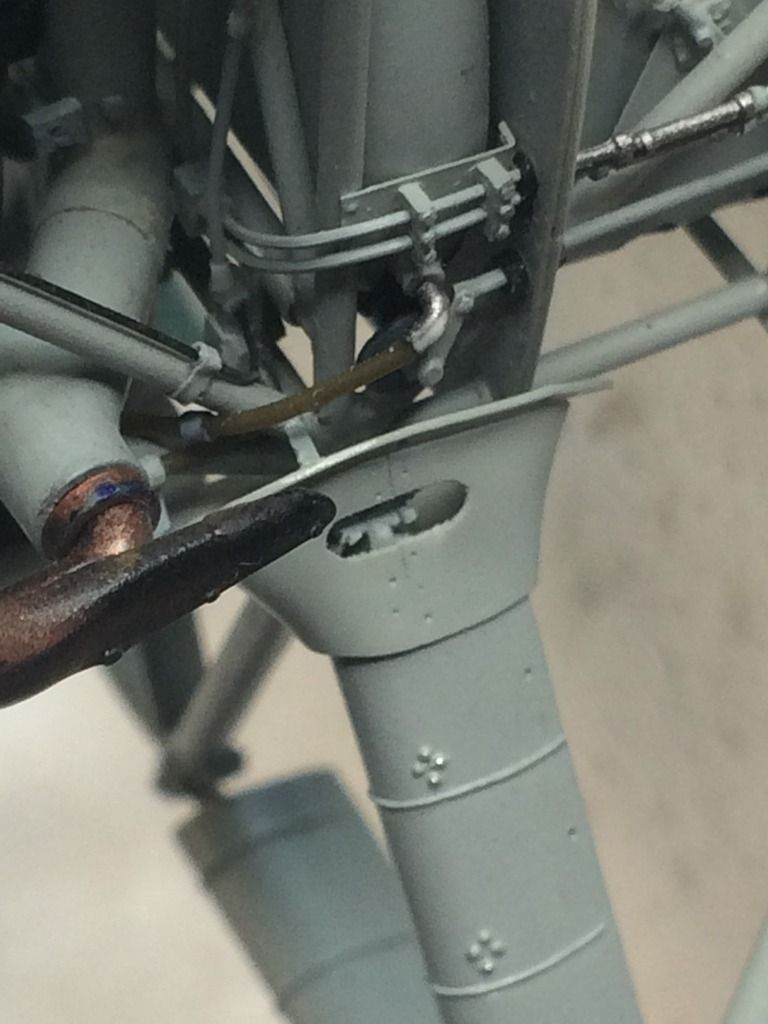
I added small wheels with break lines.
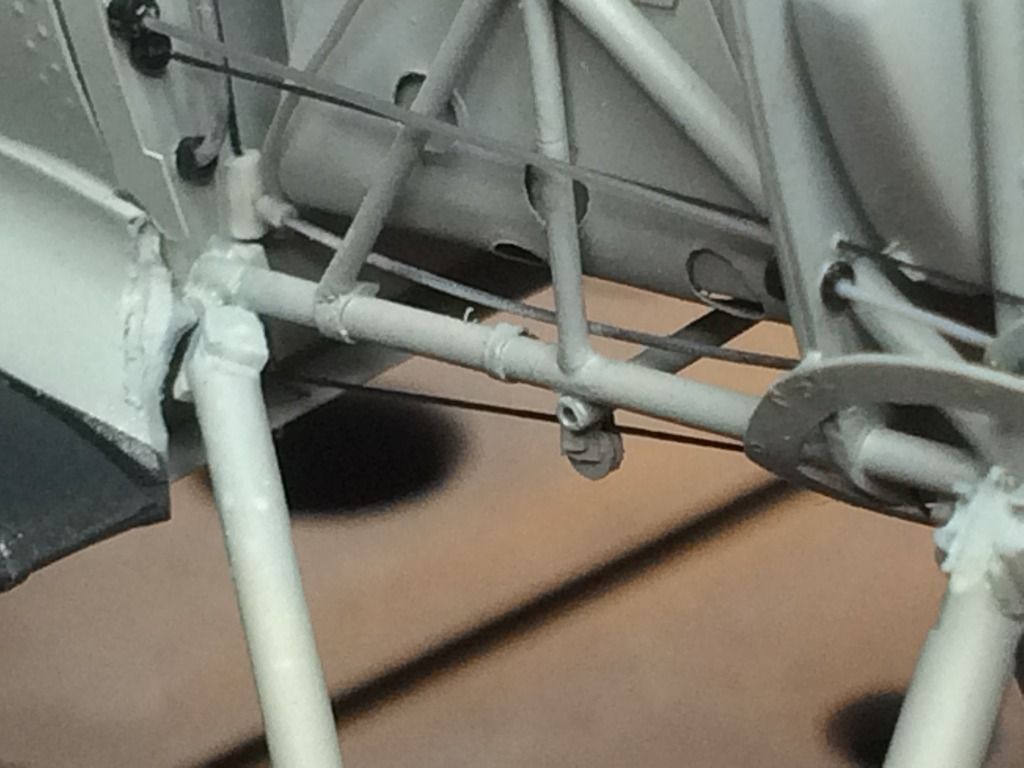

Centre-section right struts appeared on the end.
And that's all for this moment.
Regards
Tomasz
-
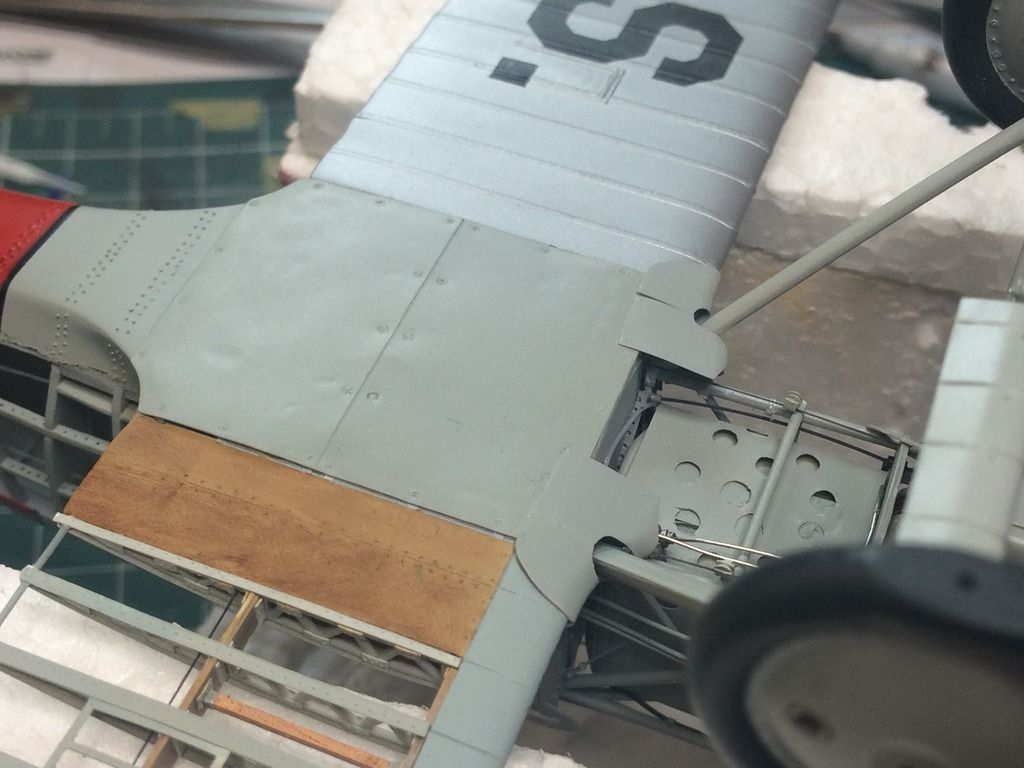
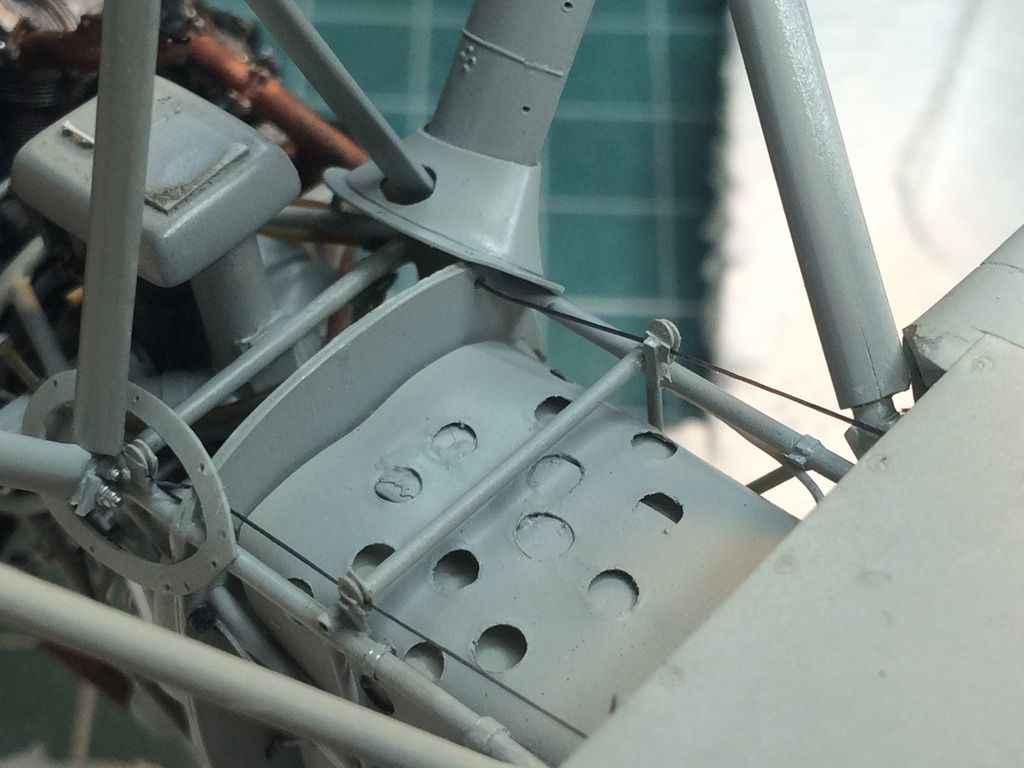
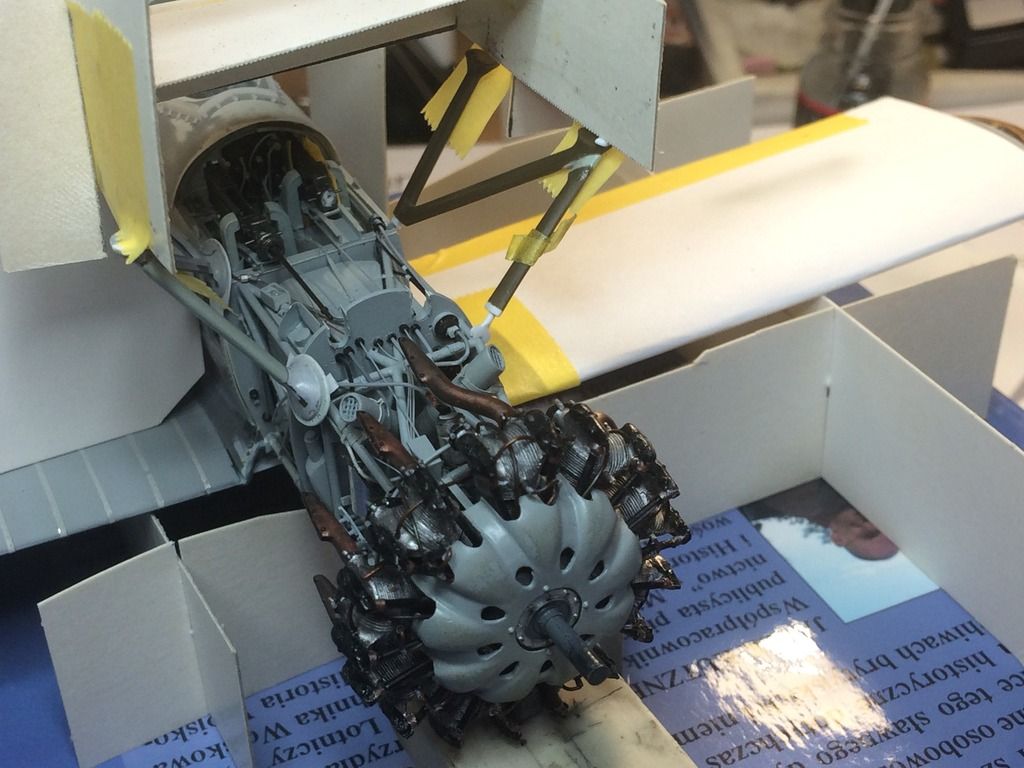
Hi Gents
I could say, long, long time ago, when I started my project ... Yes, it was five years ago, long time. Next anniversary.
So I had to do something special. I fixed landing gear to the fuselage. I decided that one half will be completed but the other with fairings removed. All undecarriage expect wheels were scratchbuilding. I was affraid about geometry of this construction but everything went perfect. Nice watching.
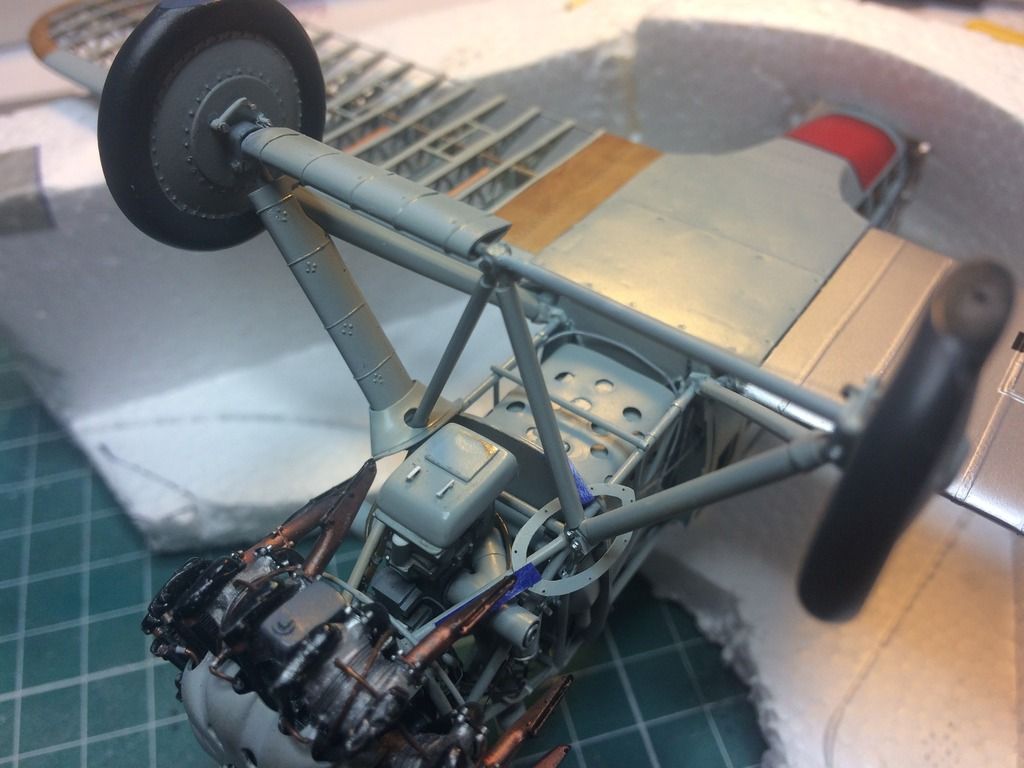

See you in sixth year of my build, may be the last.
Tomasz
- red baron, BiggTim, Hubert Boillot and 2 others
-
5
-
-
-
Hi!
Thank you for watching and kind comments.
Painting for today. Generaly I love Gunze paints. They are easy to use. So light grey is mix of four diffrent paints using template of FS paints. Red, black and silver there are also Gunze, only true blue this is Model Master enamel. Tamiya clear on the top.


Regards
Tomasz
-
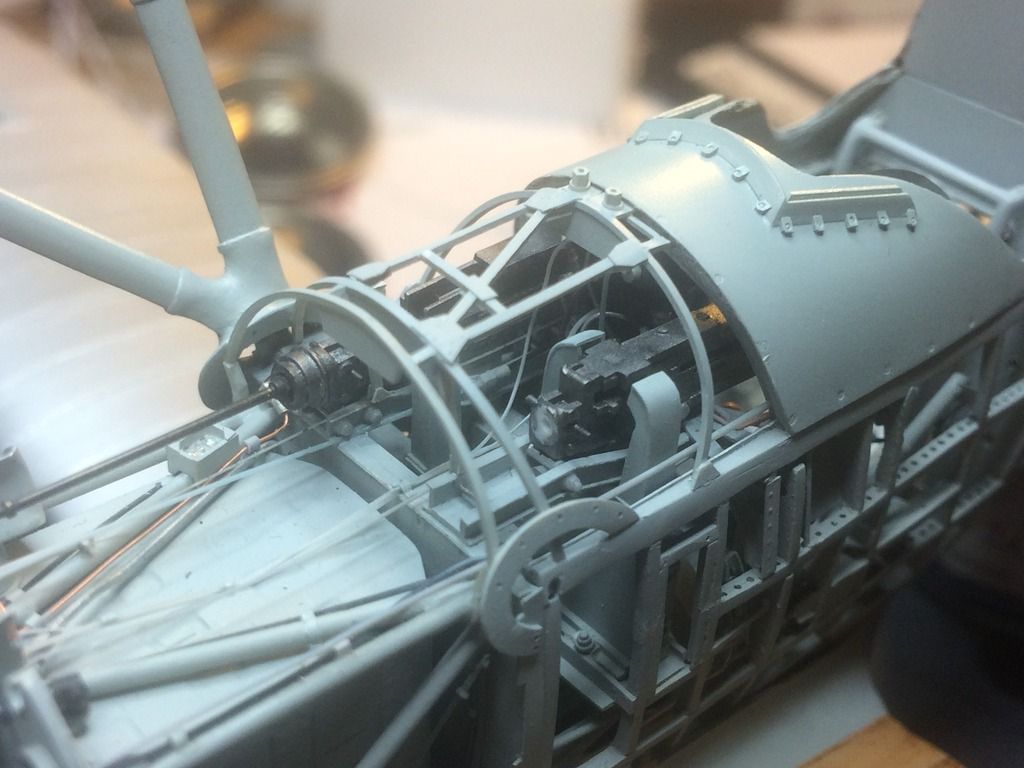
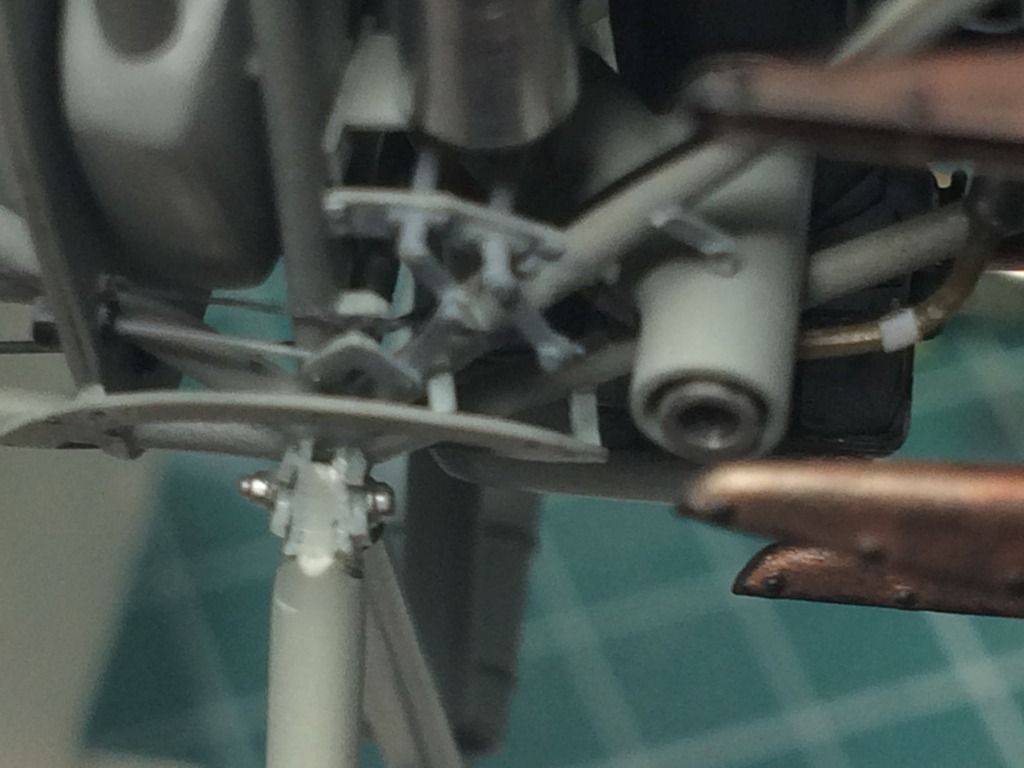
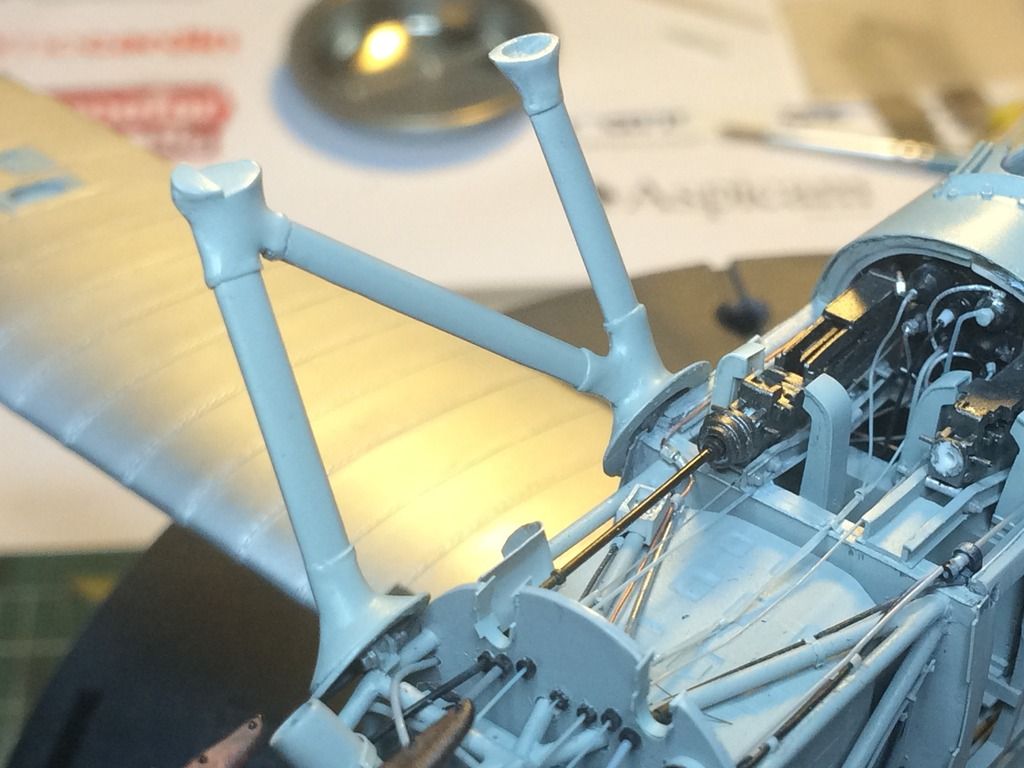
Hi everybody,
Struts are the main subject for today.
I had to reworked them due to construction of my model and many gaps.
Fuselage struts were conected with upper cover in the model.
I had to separate struts and i will have to fix them with fuselage in correct places. First I had to establish lenght of vertical arms. In this case I used fuselage and struts of standard model to create template with correct angels and dimensions.
Front arm was to short, so I had to increase It's lenght.
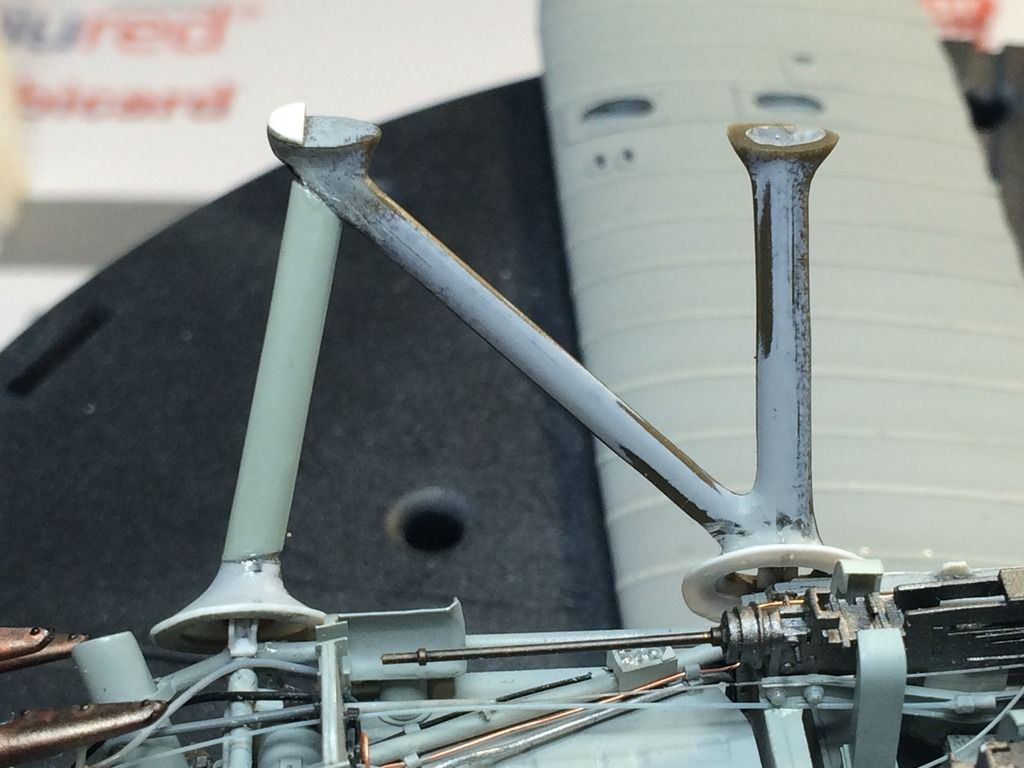
Walkaround of my plane on LSP is very usefull in my project. I modified struts according photos from that place. Many thanks for Gran Moulton once again.
Struts of the model. I created new mounts to the fuselage and added body on ends of struts to show these covers, Bondic glue was very usefull in this operation. I made place to mount wires in rear arm of the fuselage strut.
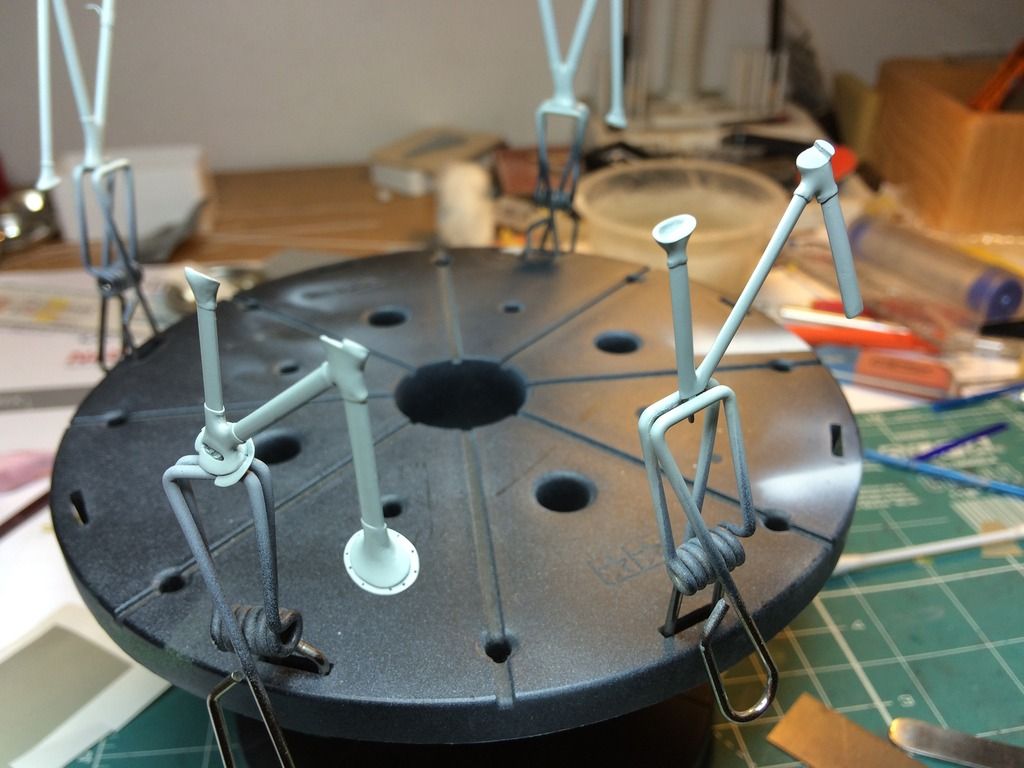
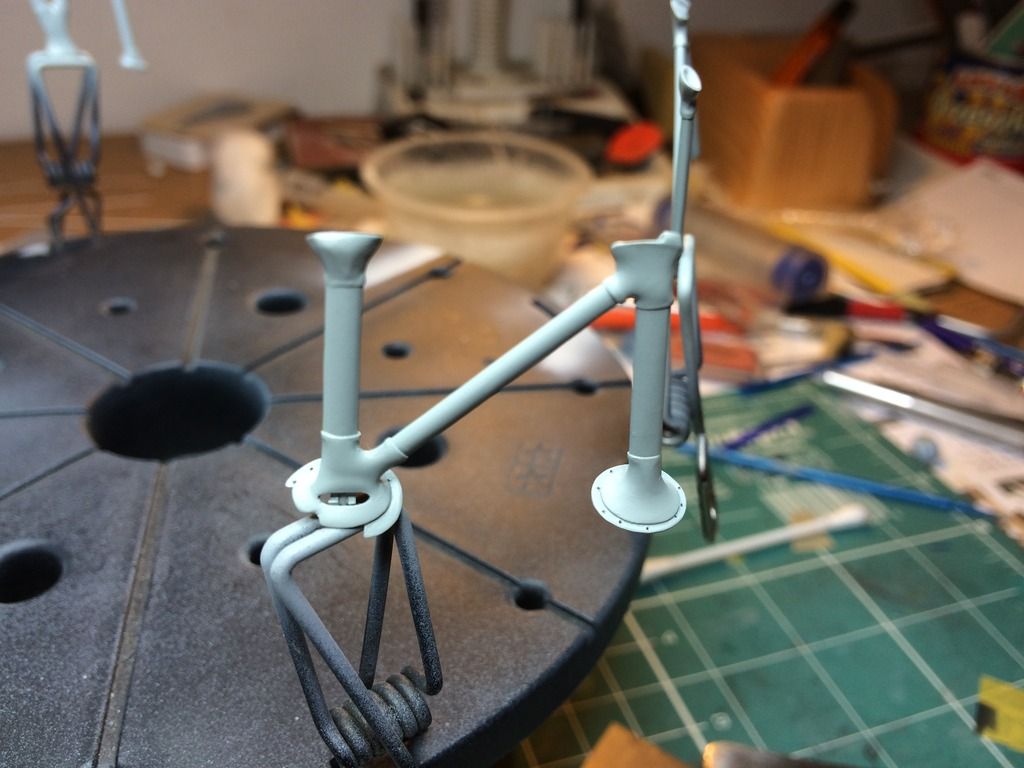
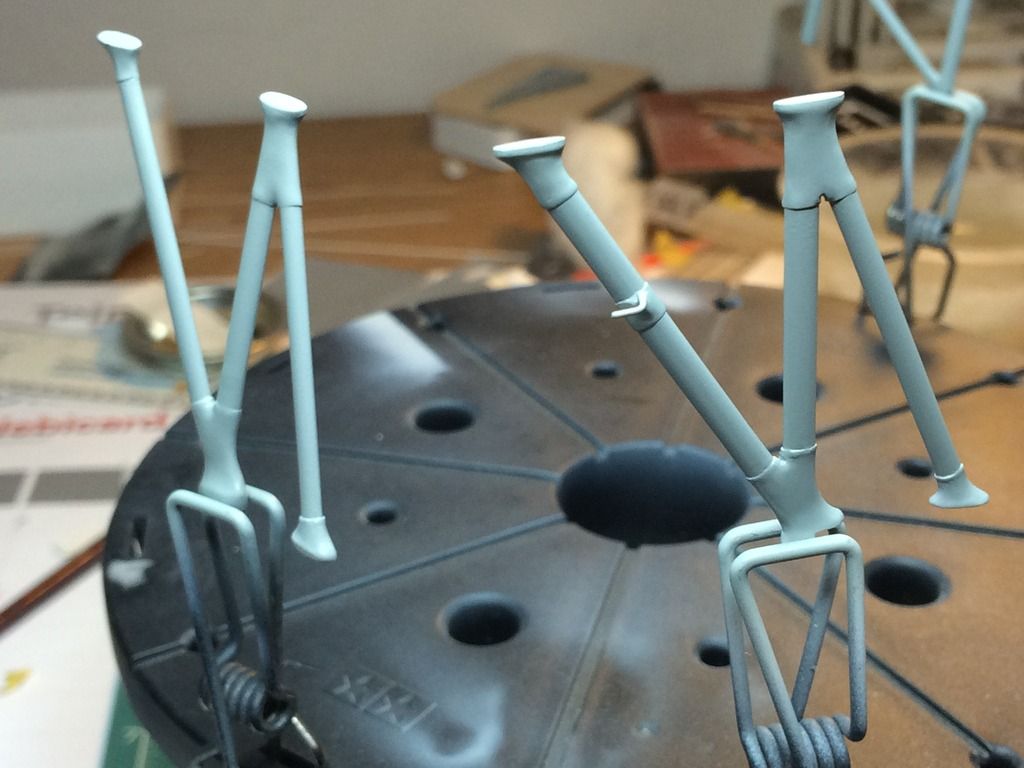
Making fuselage struts was very complex operation and I was affraid about the result, but now I'm satisfied.
Regards
Tomasz


1/32 Boeing F4b4 - almost naked
in Works in Progress
Posted · Edited by tomaszhajzler
Hi Gents!
This is test post, so very short, because I changed place with my pictures.
Repainting is finished. Thanks Bil again.
What do you think about her new look?
Regards
Tomasz