ClumsyDude Posted July 11, 2016 Posted July 11, 2016 Yep, some serious modelling skills on display here. Wow! Jim
Starfighter Posted July 12, 2016 Posted July 12, 2016 Great work! I wish you had scanned the stringers you've made for the rear section - anyway, your thread will be a great help for everybody (including me!) who wants to build an A-7! Derek B 1
zaxos345 Posted July 12, 2016 Author Posted July 12, 2016 Thanks for the good words guys. Much appreciated! John
brahman104 Posted July 12, 2016 Posted July 12, 2016 Hi John, Only just came across this and there's some incredible work you're doing here. I have one of these in the stash and I like the beaten up look of the greek corsairs so as I know pretty much nothing about them I'll be following along on this one Cheers, Craig
TorbenD Posted July 12, 2016 Posted July 12, 2016 Some hugely inspiring scratchbuilding work on display here - really well documented too, I'm learning loads. Cheers, Torben
ColinR Posted July 12, 2016 Posted July 12, 2016 superb work on a pretty mediocre kit - Looking forward to seeing this build develop colinr
Deadpool Posted July 12, 2016 Posted July 12, 2016 John, You're a crazy ******* and I love it. Hacks like myself can only look on and drool at your skills. Bravo.
Kagemusha Posted August 31, 2016 Posted August 31, 2016 Stellar work John, any more progress? Derek B 1
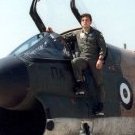
zaxos345 Posted March 1, 2019 Author Posted March 1, 2019 (edited) Good morning lads, after a very long time i managed to start with this project again and it is time to ''wake up'' this thread also. A lot of things kept me out, but hey, this is the ''SLUF'' i used to fly with, no way i wouldn't start it again!!! First of all, i glued the avionics panels in place and the resin wheel wells. For some reason in my case, the wells are about 2 mm shorter so some plastic needed to cover the gaps. There is more work to be done here but later and after i close the fuselage. I also glued the panel where the turbine section is going to be placed and i also added the chaff and flares boxes. not much to be seen when it is done but....they were there!!!! After that i started dealling with the cockpit tube. As you can see from the previous pages, i have changed some things on the resin one in order to be as close as it coulb be with the real thing. I added all the small things inside and i also glued the tiny things on the survival kit. Time to put some color.... Edited March 1, 2019 by zaxos345 LSP_Kevin, Alain Gadbois, Wackyracer and 2 others 5
zaxos345 Posted March 1, 2019 Author Posted March 1, 2019 (edited) Started from the cockpit... The seat.... Edited March 1, 2019 by zaxos345 Greg W, chuck540z3, Alain Gadbois and 6 others 9
zaxos345 Posted March 1, 2019 Author Posted March 1, 2019 (edited) The instrument panel.... Edited March 1, 2019 by zaxos345 Starfighter, Derek B, chuck540z3 and 5 others 8
Recommended Posts
Create an account or sign in to comment
You need to be a member in order to leave a comment
Create an account
Sign up for a new account in our community. It's easy!
Register a new accountSign in
Already have an account? Sign in here.
Sign In Now