

dmthamade
-
Posts
2,002 -
Joined
-
Last visited
-
Days Won
6
Content Type
Profiles
Forums
Events
Posts posted by dmthamade
-
-
On 3/12/2022 at 3:59 PM, dmthamade said:
When i bought the Tamiya Mossie, i opened it up, looked at the instructions, the sprues and realized about a third of the kit would be spares. I have no desire to do open panels, etc, so all that fine detail stuff is wasted on me. Others may think, it's not enough(!!!) but that's personal preferences. Does seem like Superkits are becoming the norm, but Revell for one seems to have a balance. I've always liked the way Hasgawa did their kits, simple for hack builders like me, a great base for the builders that choose to go all out. Plenty of kits out there to satisfy everyone, prices...yeah, that's a sticking point.
Don
On 3/12/2022 at 3:59 PM, dmthamade said:When i bought the Tamiya Mossie, i opened it up, looked at the instructions, the sprues and realized about a third of the kit would be spares. I have no desire to do open panels, etc, so all that fine detail stuff is wasted on me. Others may think, it's not enough(!!!) but that's personal preferences. Does seem like Superkits are becoming the norm, but Revell for one seems to have a balance. I've always liked the way Hasgawa did their kits, simple for hack builders like me, a great base for the builders that choose to go all out. Plenty of kits out there to satisfy everyone, prices...yeah, that's a sticking point.
Don
2 hours ago, John1 said:@dmthamade and TonyT - have either of you guys actually built the Tamiya Mosquito? I have and your comments about being way too complex and having way too many open panels are totally off base. Assembling the Mossie is as easy as it gets. Just follow the instructions and everything clicks into place. Compare to lower end kits, with a lower parts count but nothing fits without filling, sanding and forcing parts together. Also - if you don’t like the open panels on the Mossie, simply glue them in the closed position. Those parts actually fit perfectly, unlike other lower end kits that force you to leave the panels open since it’s nearly impossible to get them properly glued in place.
Had to go back and read my post, don't think i complained about complexity or too many open panels. My build style has always been closed up. " I have no desire to do open panels, etc, so all that fine detail stuff is wasted on me". When i do build the Mossie, i "if you don't like the open panels on the Mossie, simply glue them in the closed position" is what i am going to do, so "about a third of the kit would be spares" Done many Tamiya kits, aircraft, armor, cars..so i do have an idea of the lego like quality of the kits. I have also built a few "lower end kits, with a lower parts count but nothing fits without filling, sanding and forcing parts together". My last line was "plenty of kits out there to satisfy everyone, prices...yeah, that's a sticking point"
Don
- John1, Rick Griewski, MikeMaben and 1 other
-
 4
4
-
6 minutes ago, Dpgsbody55 said:
Thankfully, the market at present provides both simple and complex kits to chose from.
See where I'm going with this??
Cheers,
Michael

-
When i bought the Tamiya Mossie, i opened it up, looked at the instructions, the sprues and realized about a third of the kit would be spares. I have no desire to do open panels, etc, so all that fine detail stuff is wasted on me. Others may think, it's not enough(!!!) but that's personal preferences. Does seem like Superkits are becoming the norm, but Revell for one seems to have a balance. I've always liked the way Hasgawa did their kits, simple for hack builders like me, a great base for the builders that choose to go all out. Plenty of kits out there to satisfy everyone, prices...yeah, that's a sticking point.
Don
-
-
It figures, getting away from the hobby and a lot of great stuff coming out. Might buy this one while the molds are new, thinking long term maybe far into future, cause i really like the looks of these.
Don
-
Calling Mike Grant!!!
Don
- Martinnfb, Jeff T and Rick Griewski
-
1
-
 2
2
-
Fantastic builds!! Have to ask, how many do you have on the go at once?
Don
-
Ha!! sounds like one of these.
Don
-
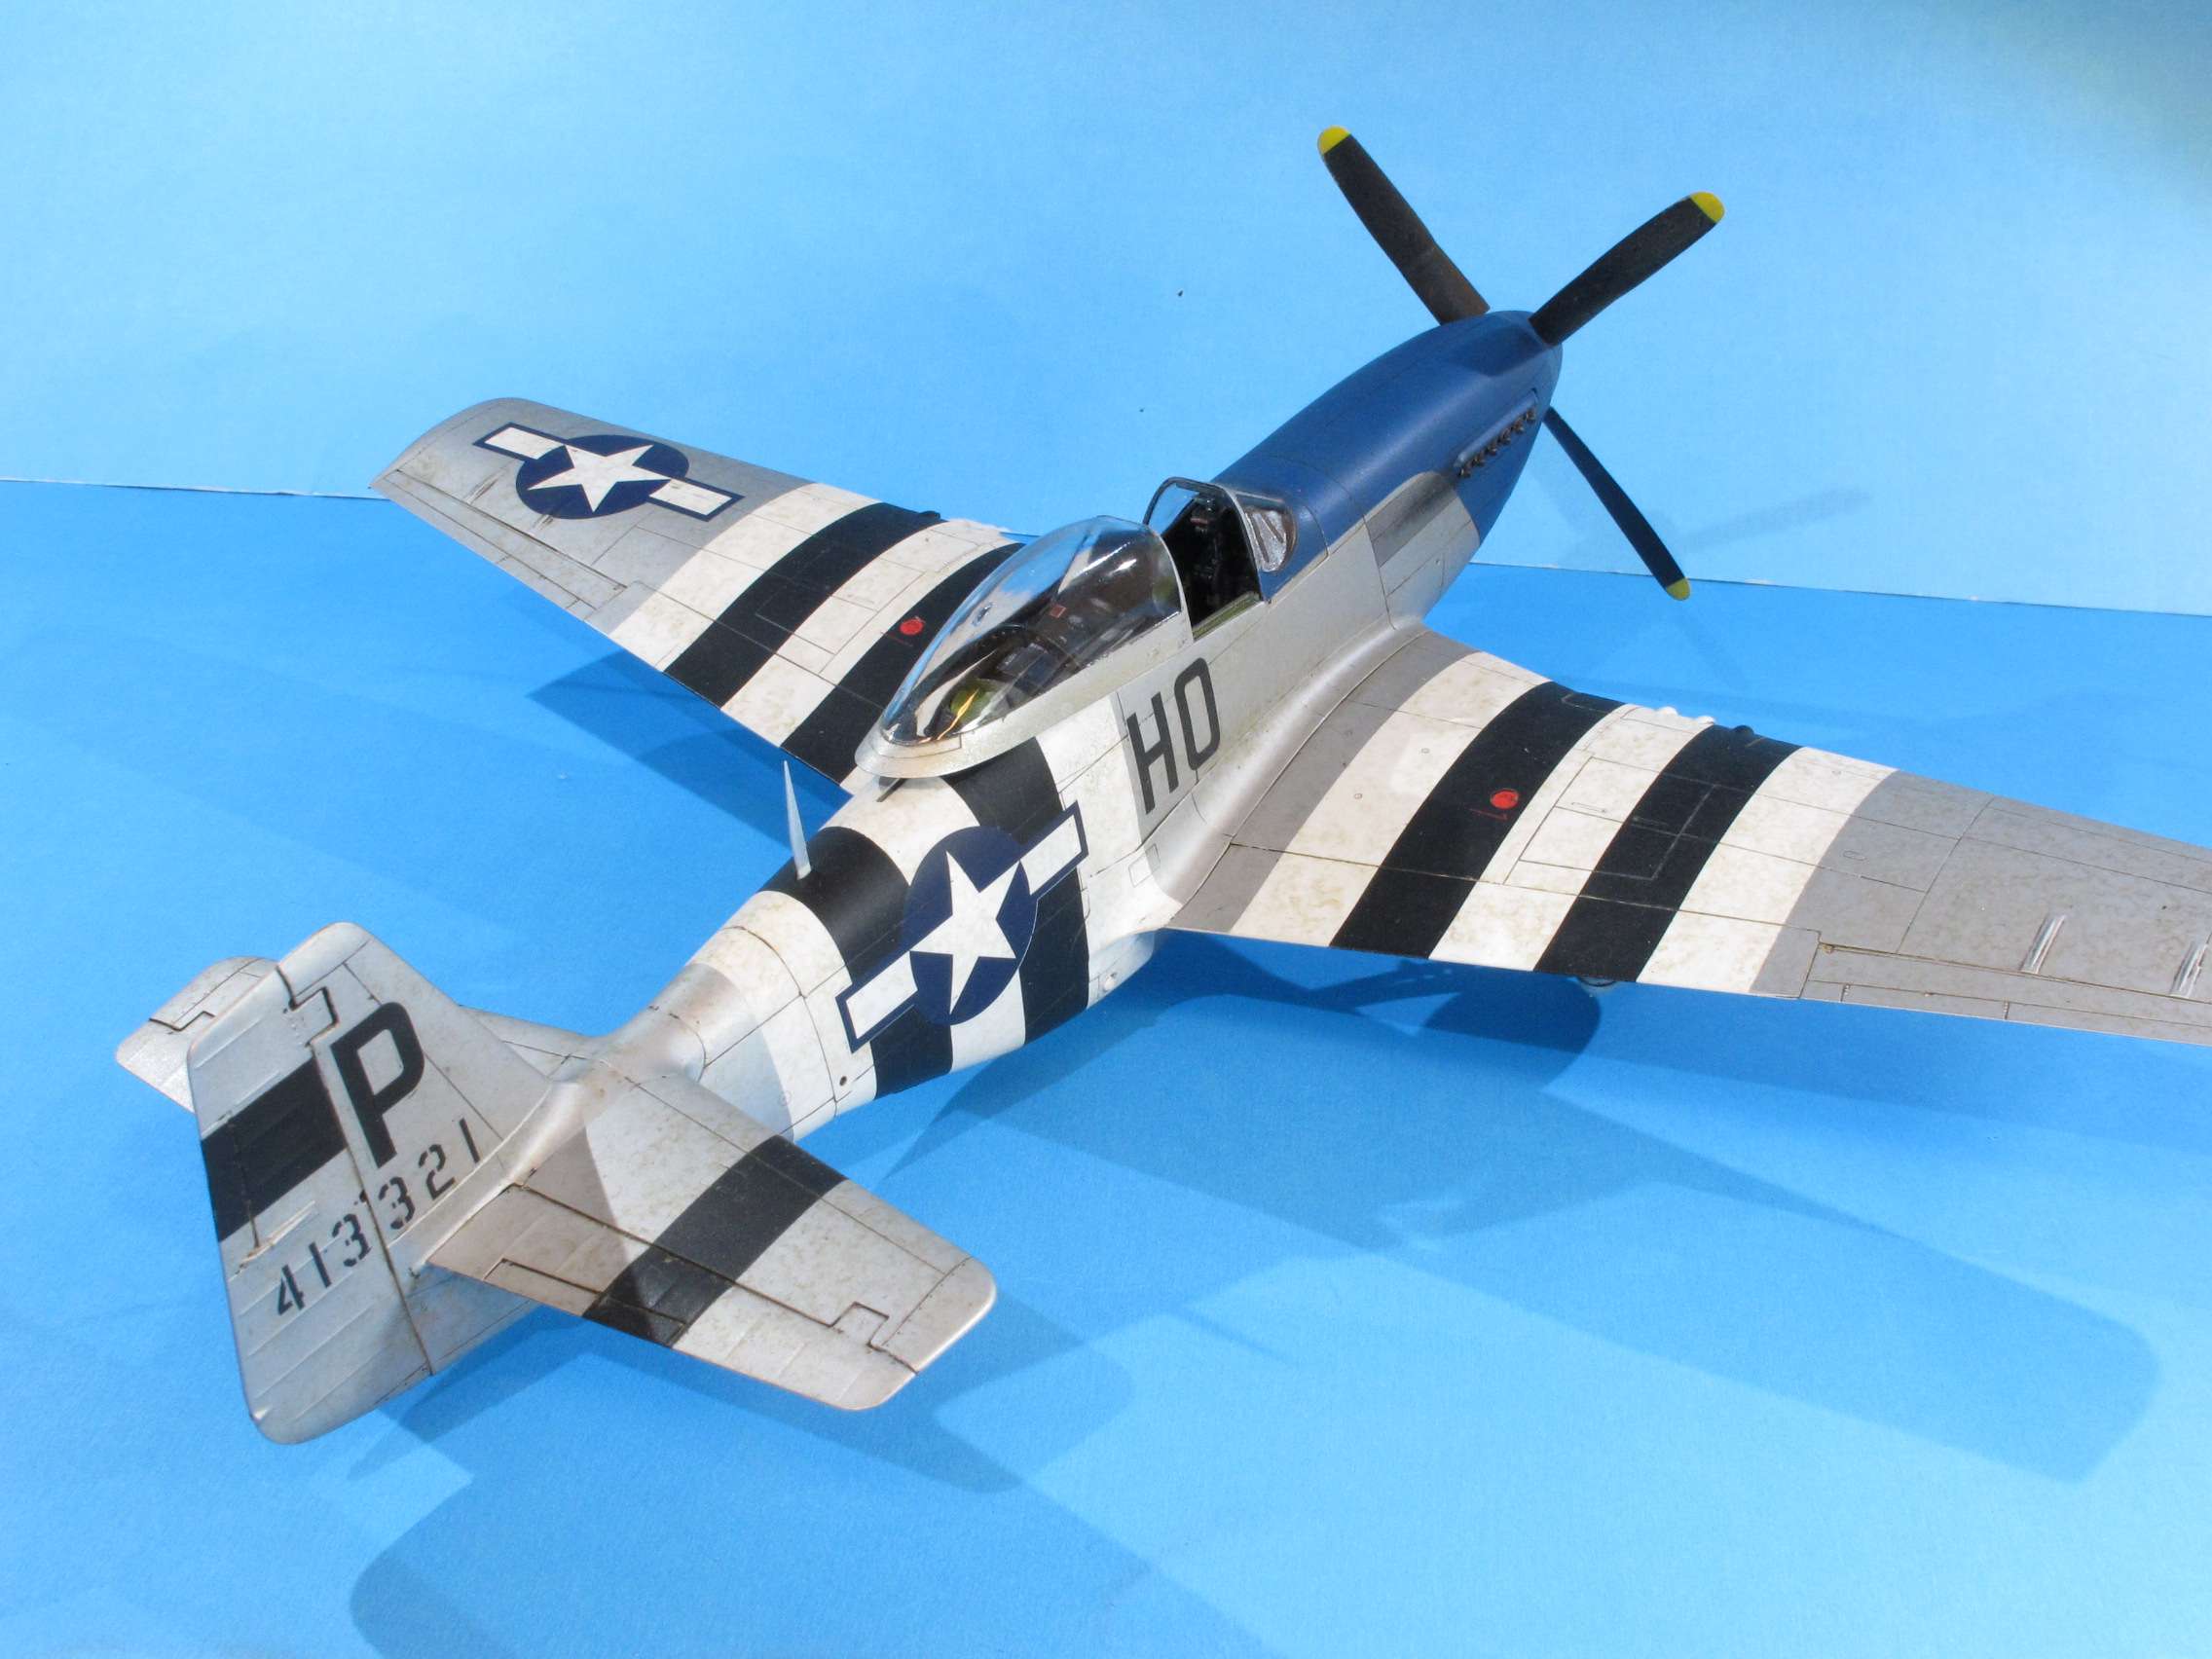
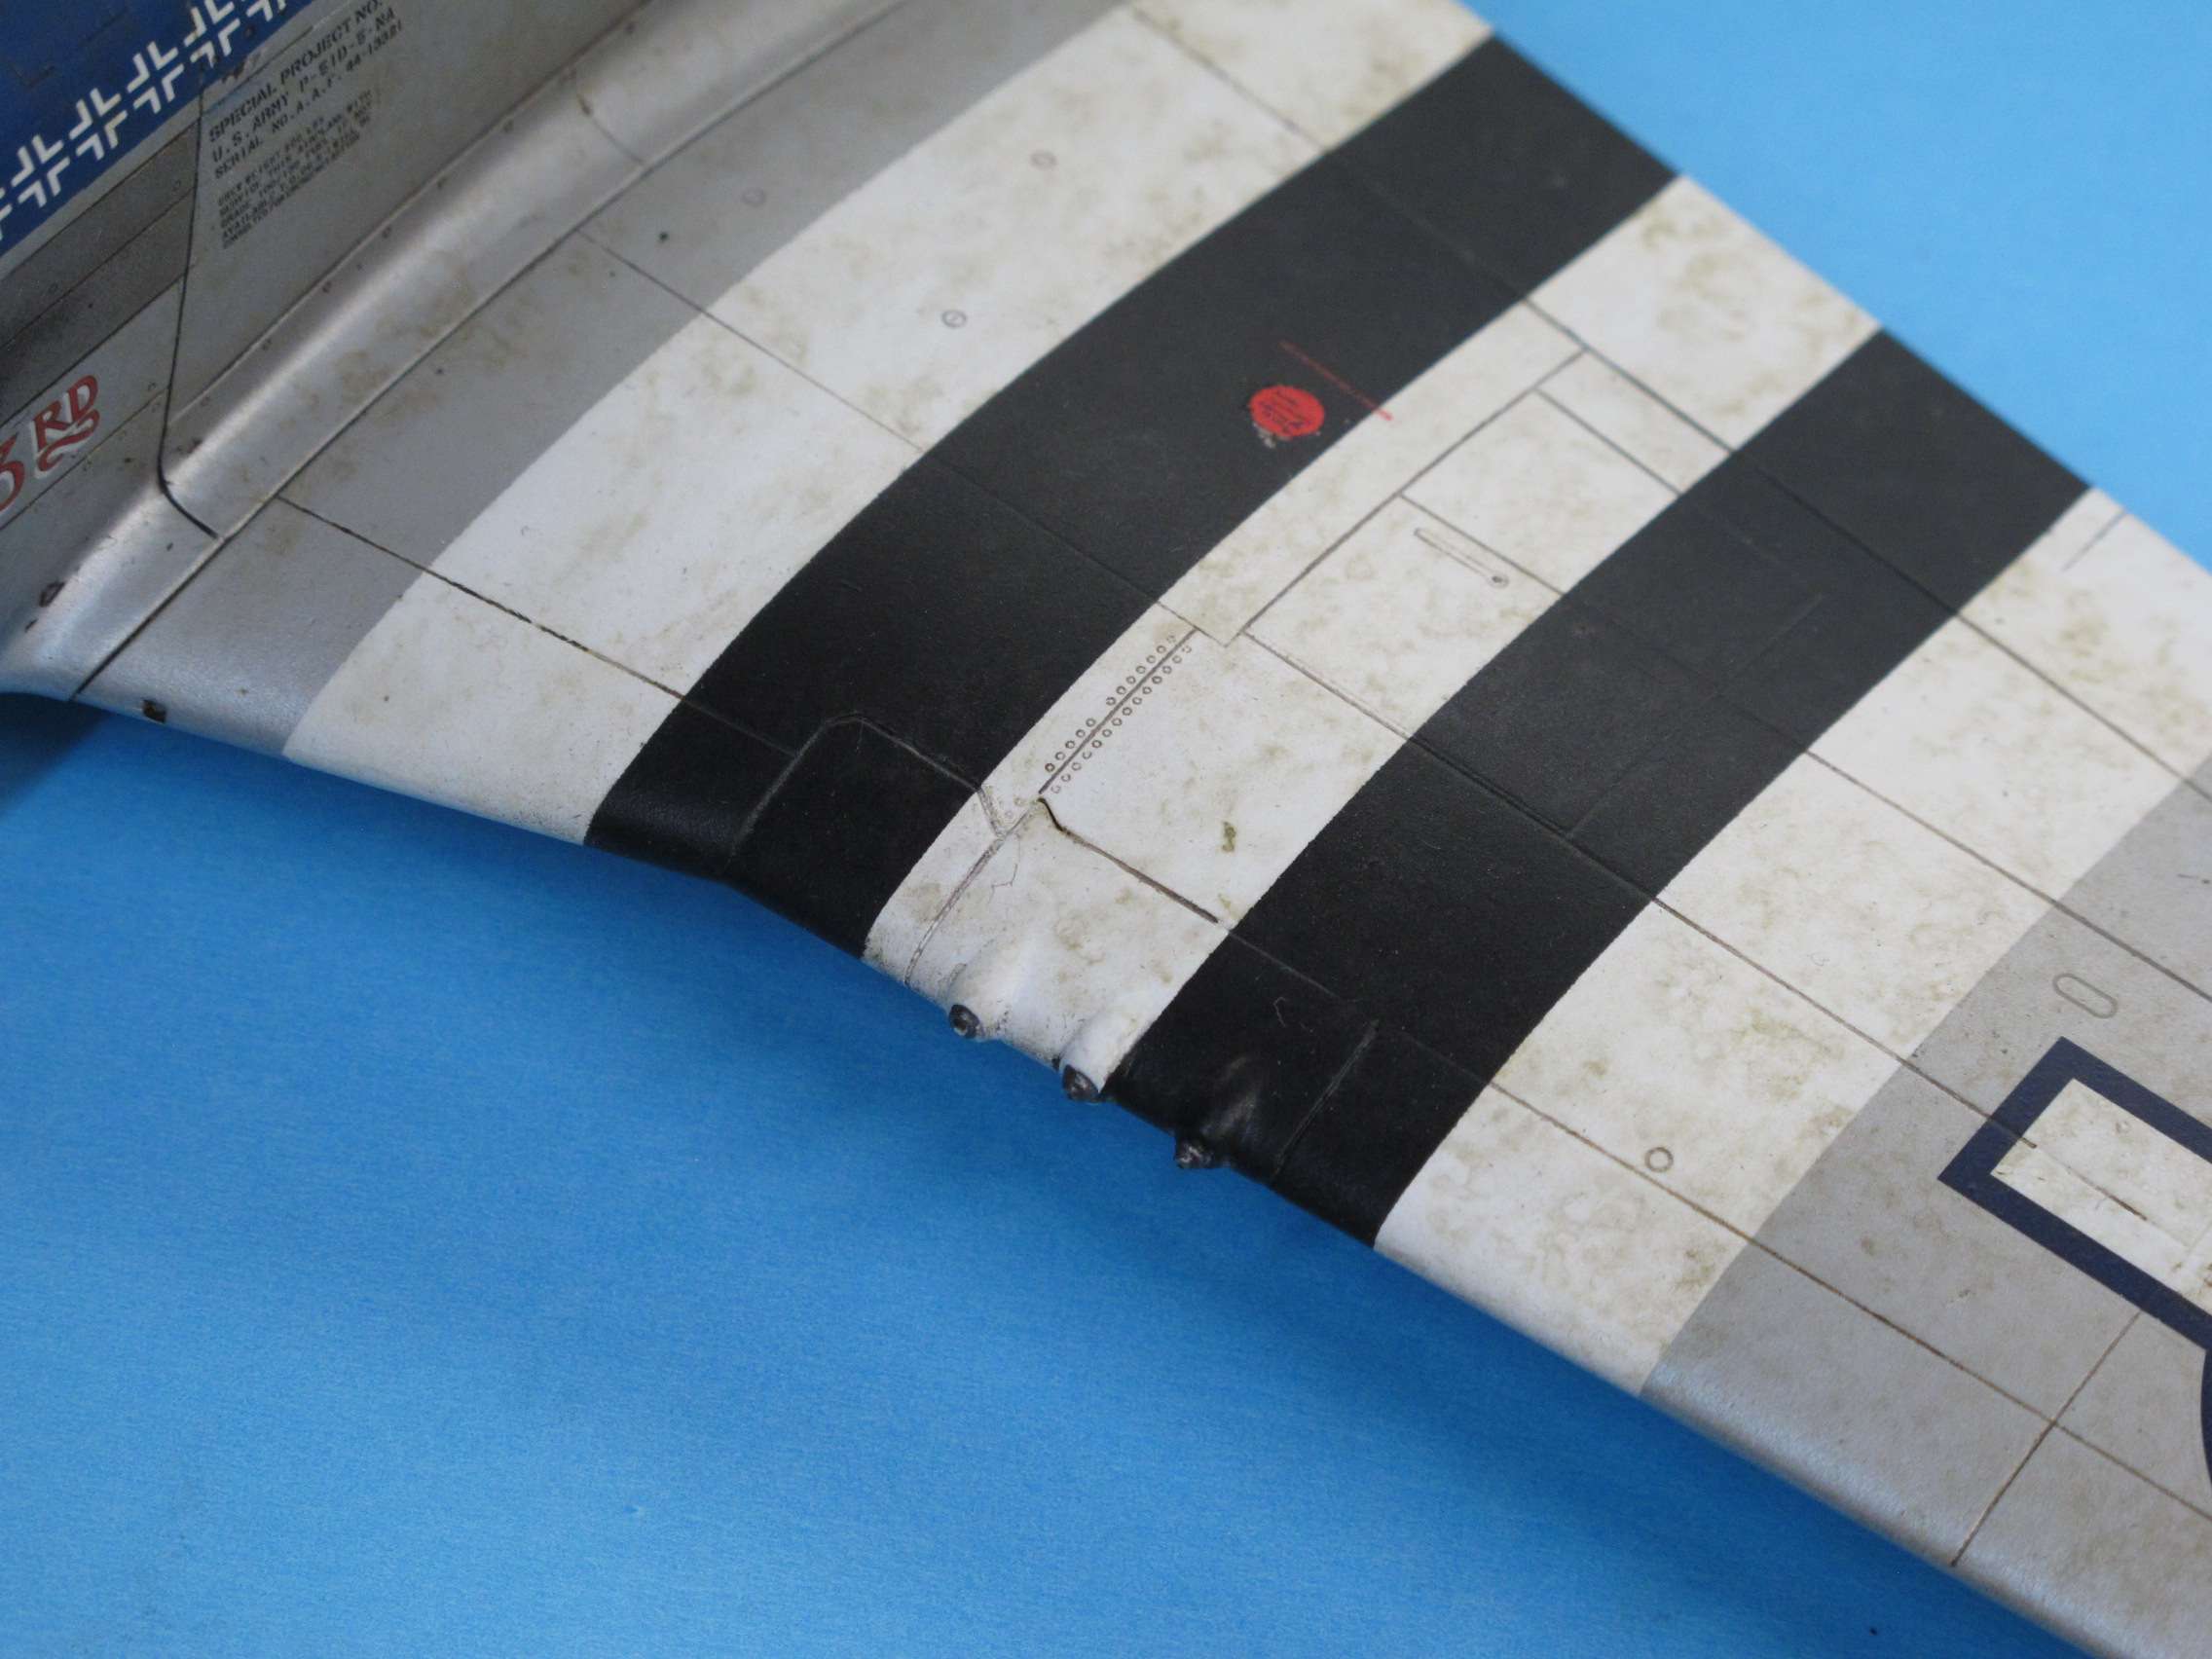
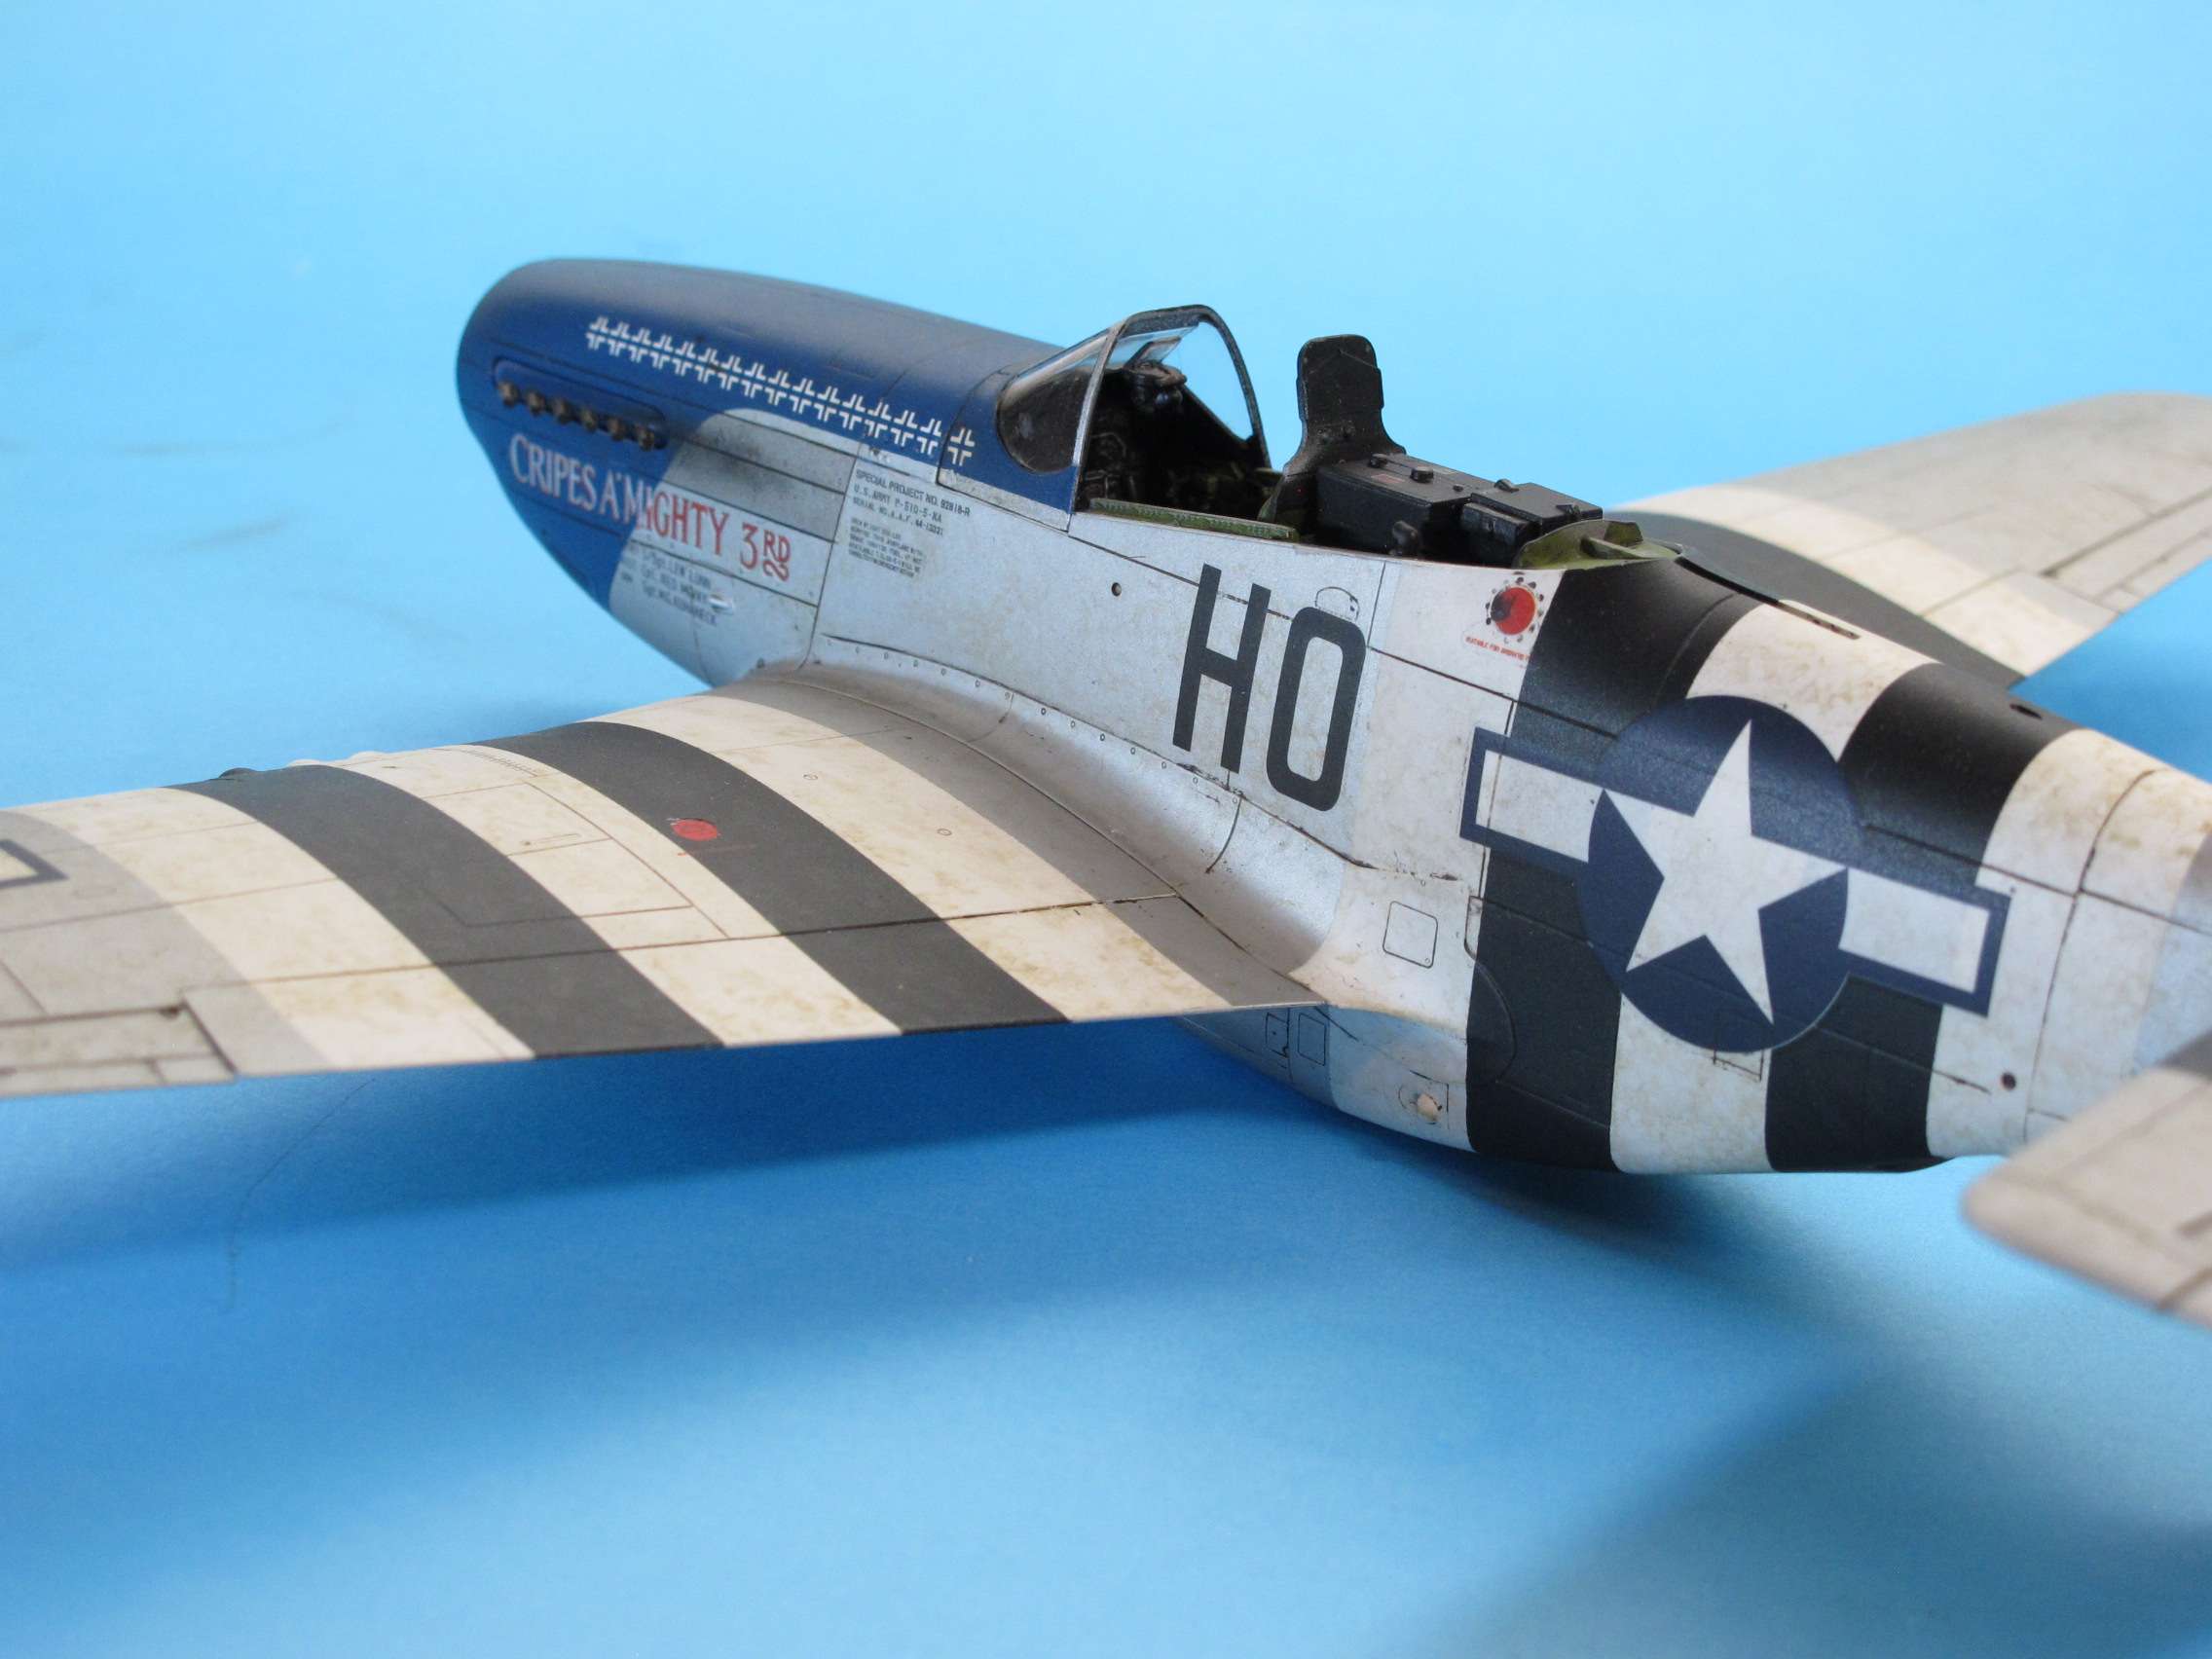
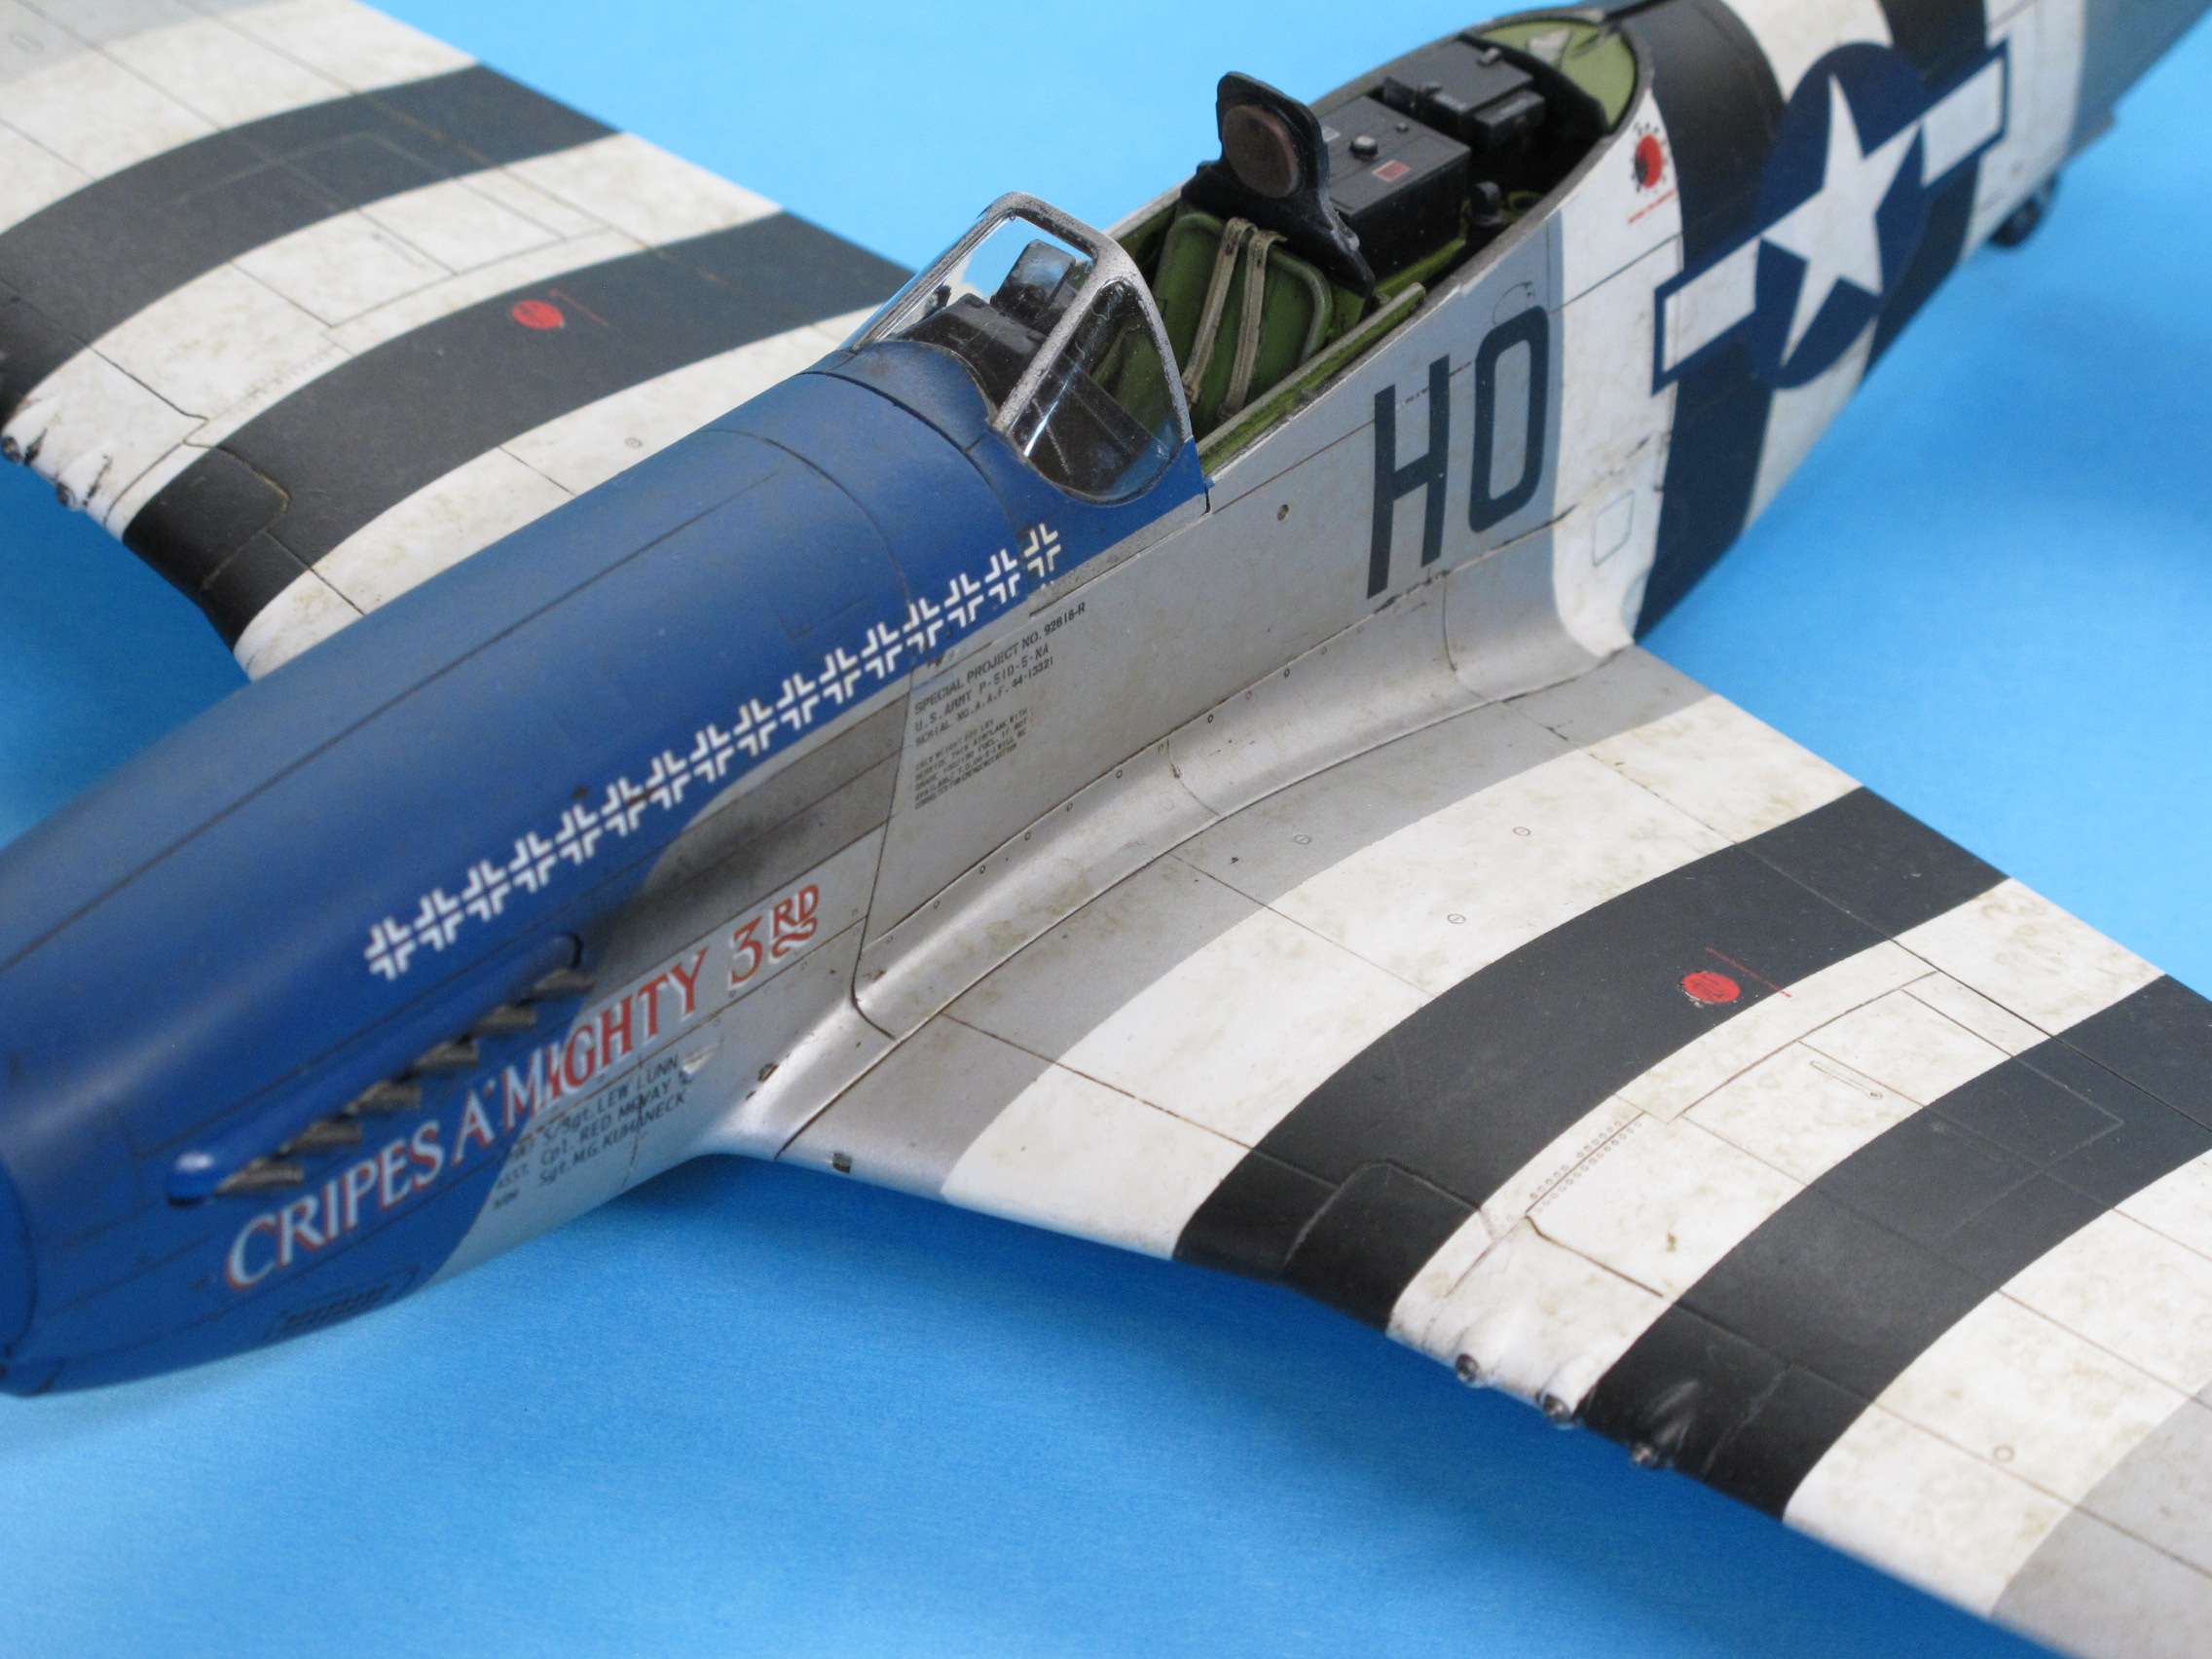
Thank you for the positive feedback, guys!! The weathering is on the conservative side, too easy for me to overdo it. Prop is supposed to have blue overspray on it, have to say, it's easy for me to mess up accidentally, to do so on purpose, not so. No overspray on the prop. The look i was going for was like a dirty car, dusty, spotted from rain, very little to no sheen. The Messerschmitt wing looks almost identical to what i got, mark, looks like a used not abused aircraft.
Don
-
Have to say, can't put a gloss coat or shiny NMF on an operational warbird, just doesn't look right to me. I think if i were to do this as a restored warbird, the gloss would be appropriate. Did manage to complete this one, happy with the results.

Don
-
Lots of work to make an accurate build. I remember buying/building this kit back in the day. Looked fine to my eyes, then. I just read the news the Boeing Super Bug is out of the running for the next Canadian Fighter jet, leaving the F-35 and Gripen the choices left. Decision still far away, but maybe the kit will be popular again?.....
Don
-
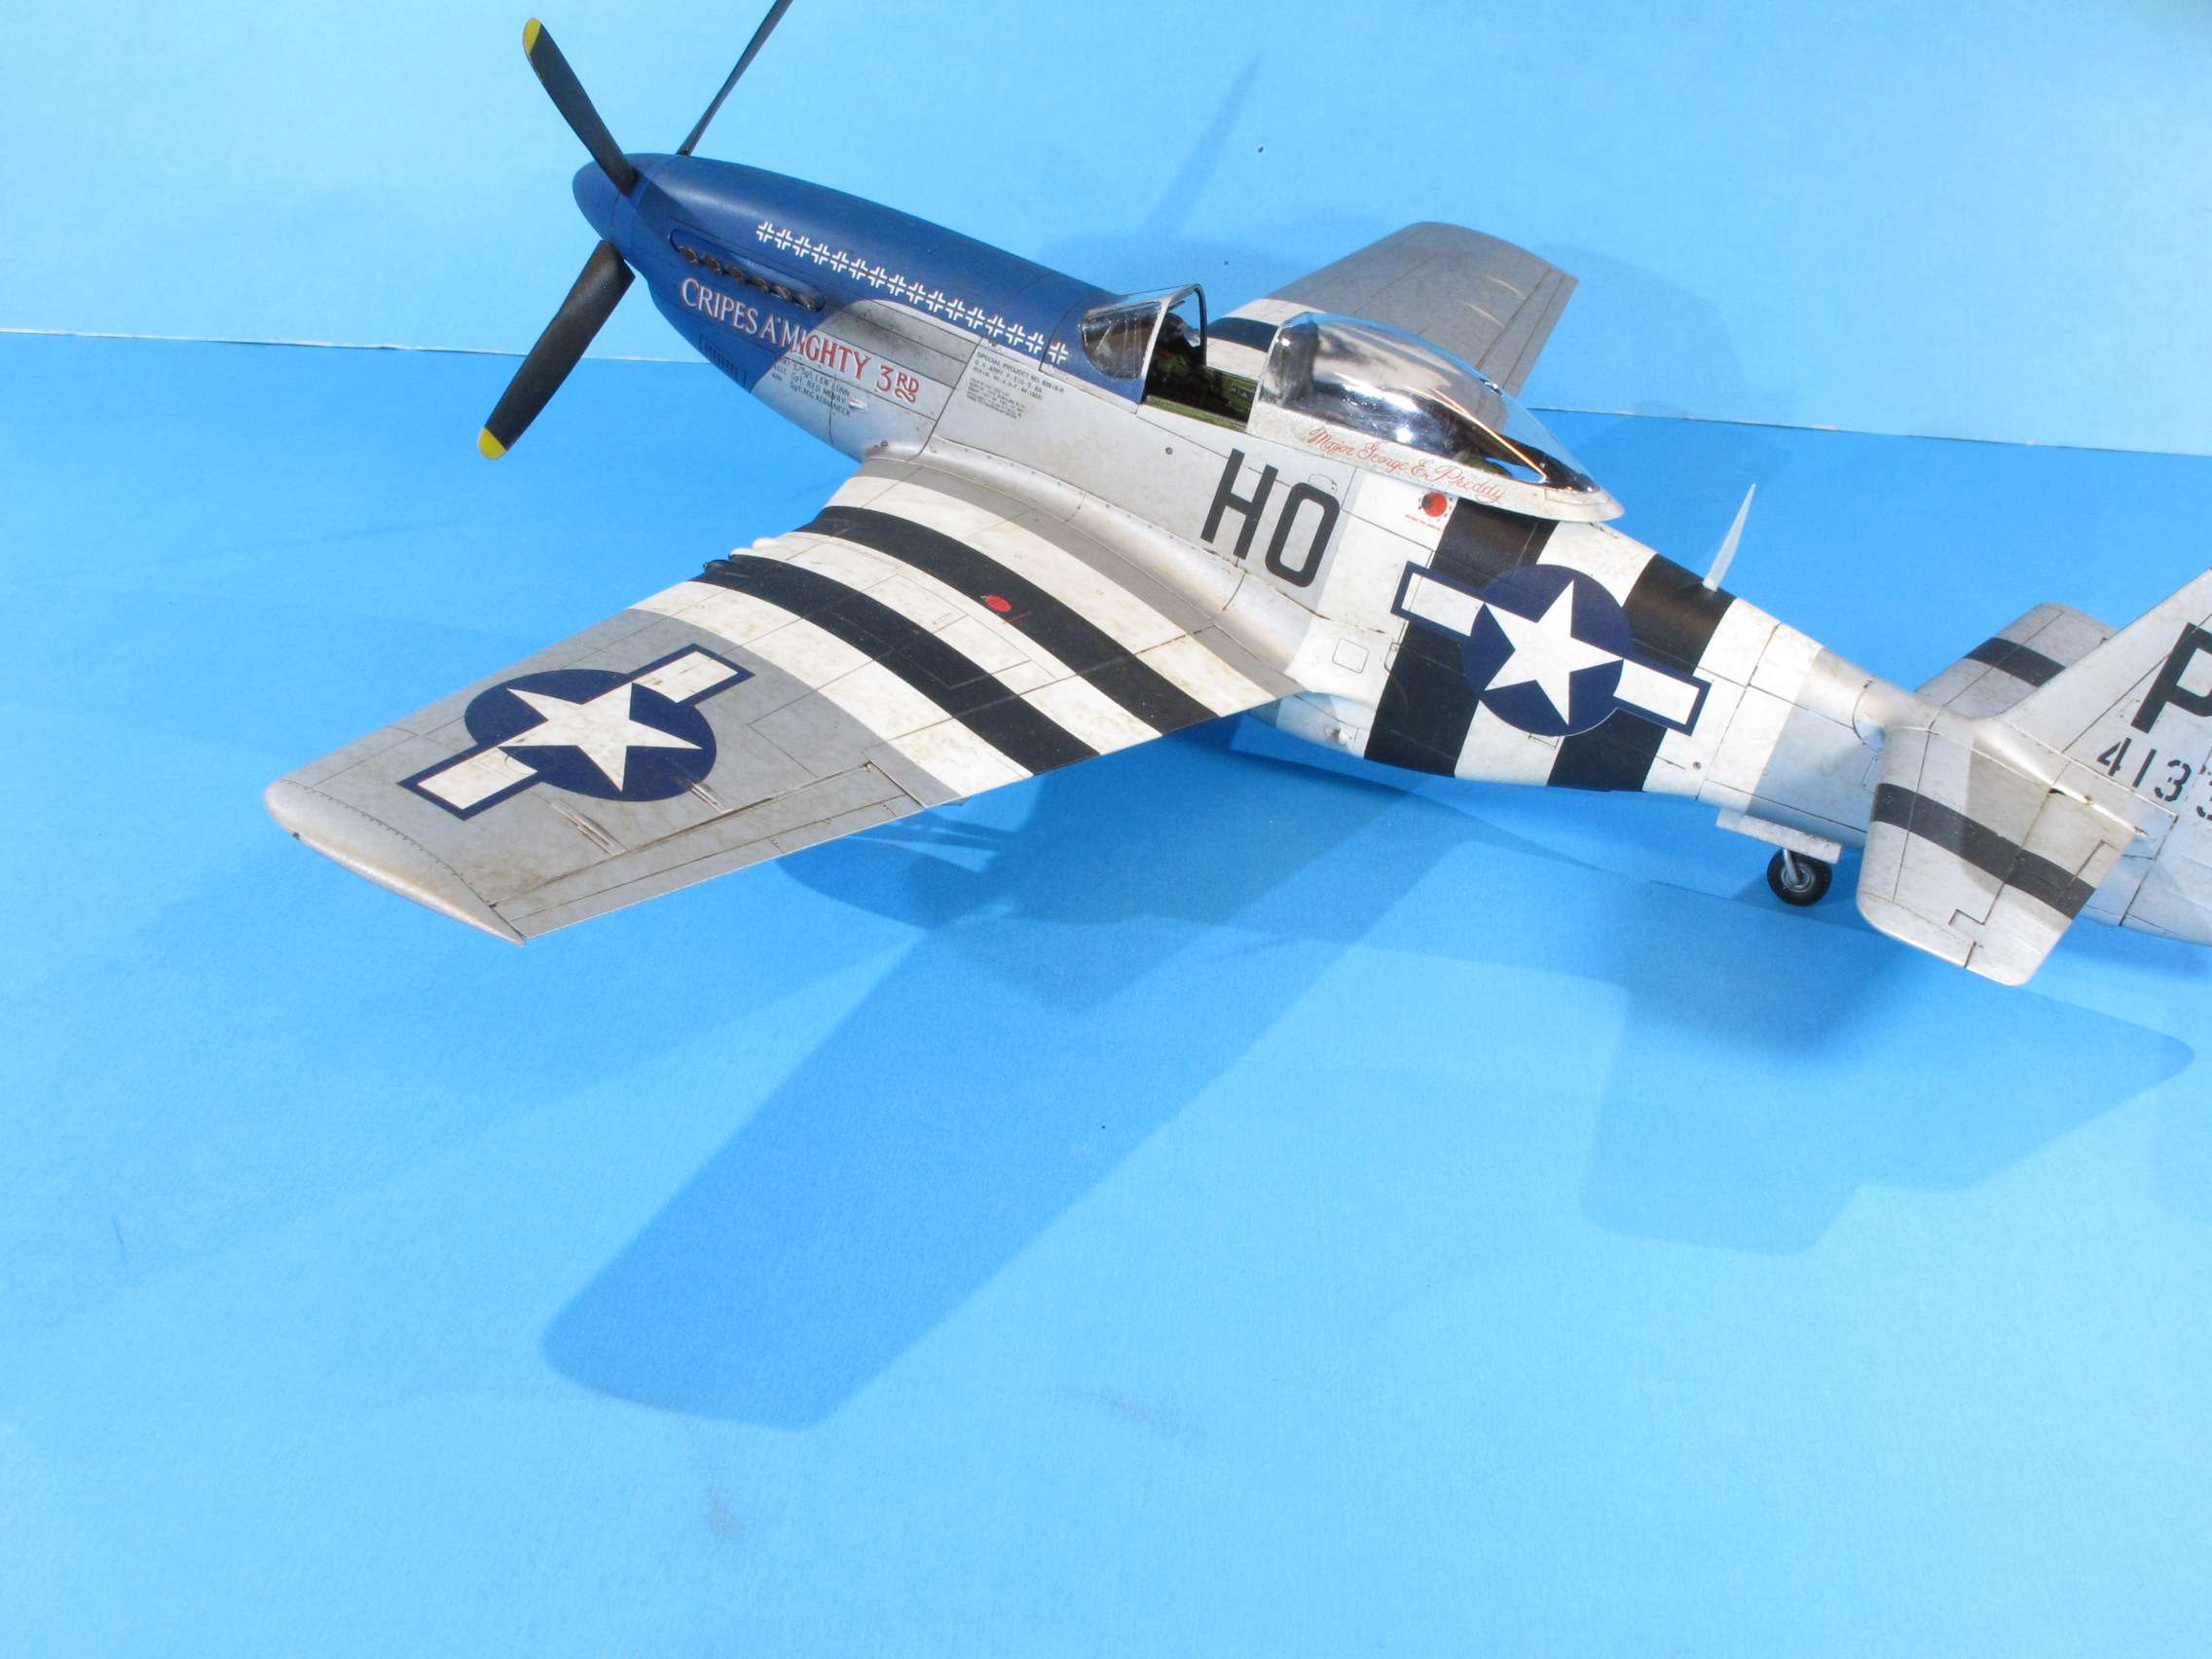
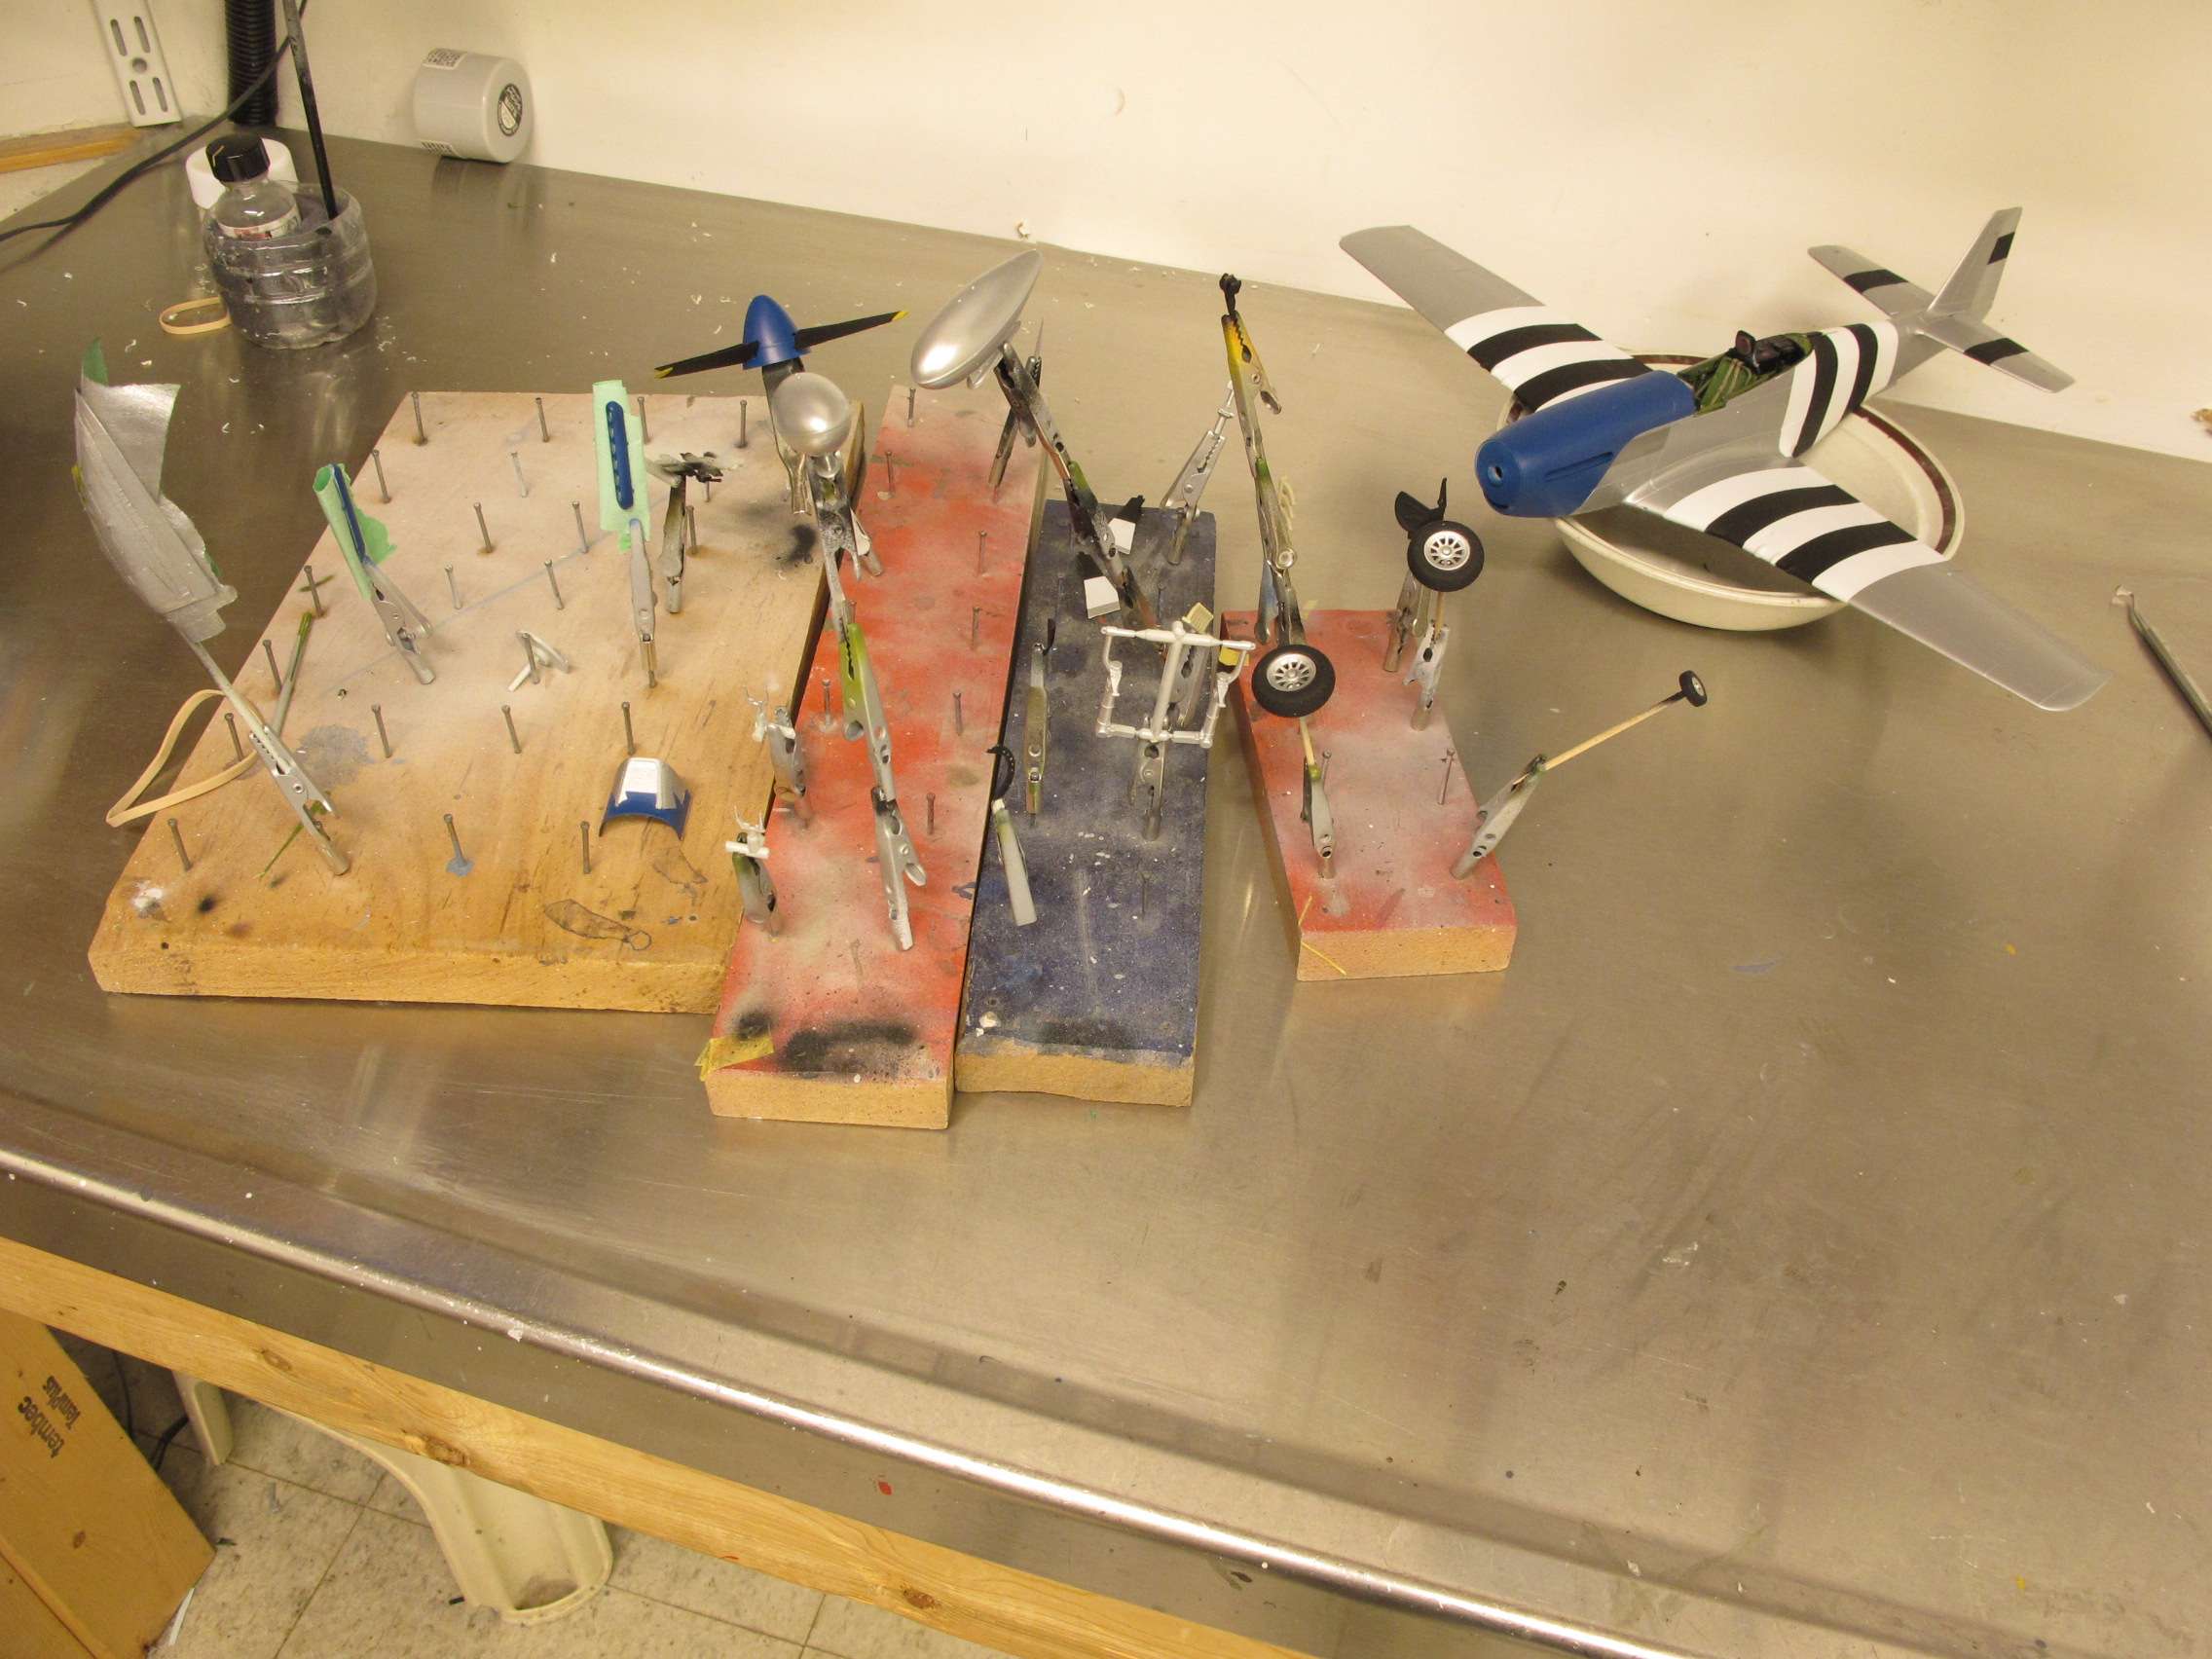
Had some spare time, was able to apply a panel line wash. I usually use Promodeller wash, but for some reason, it didn't work well. Didn't settle into panel lines, was a little grainy. This is an old bottle, may have been reason. I used a homebrew wash instead. Solution of Tamiya XF-1 Flat Black, Tamiya XF-10 Flat Brown, water, and dish soap. I've used this mix a lot before, still worked flawlessly. Everything sealed with Vallejo Matt Varnish, much closer to dead flat than other matts i've used. Running out of parts, may have this done tonight/tomorrow.
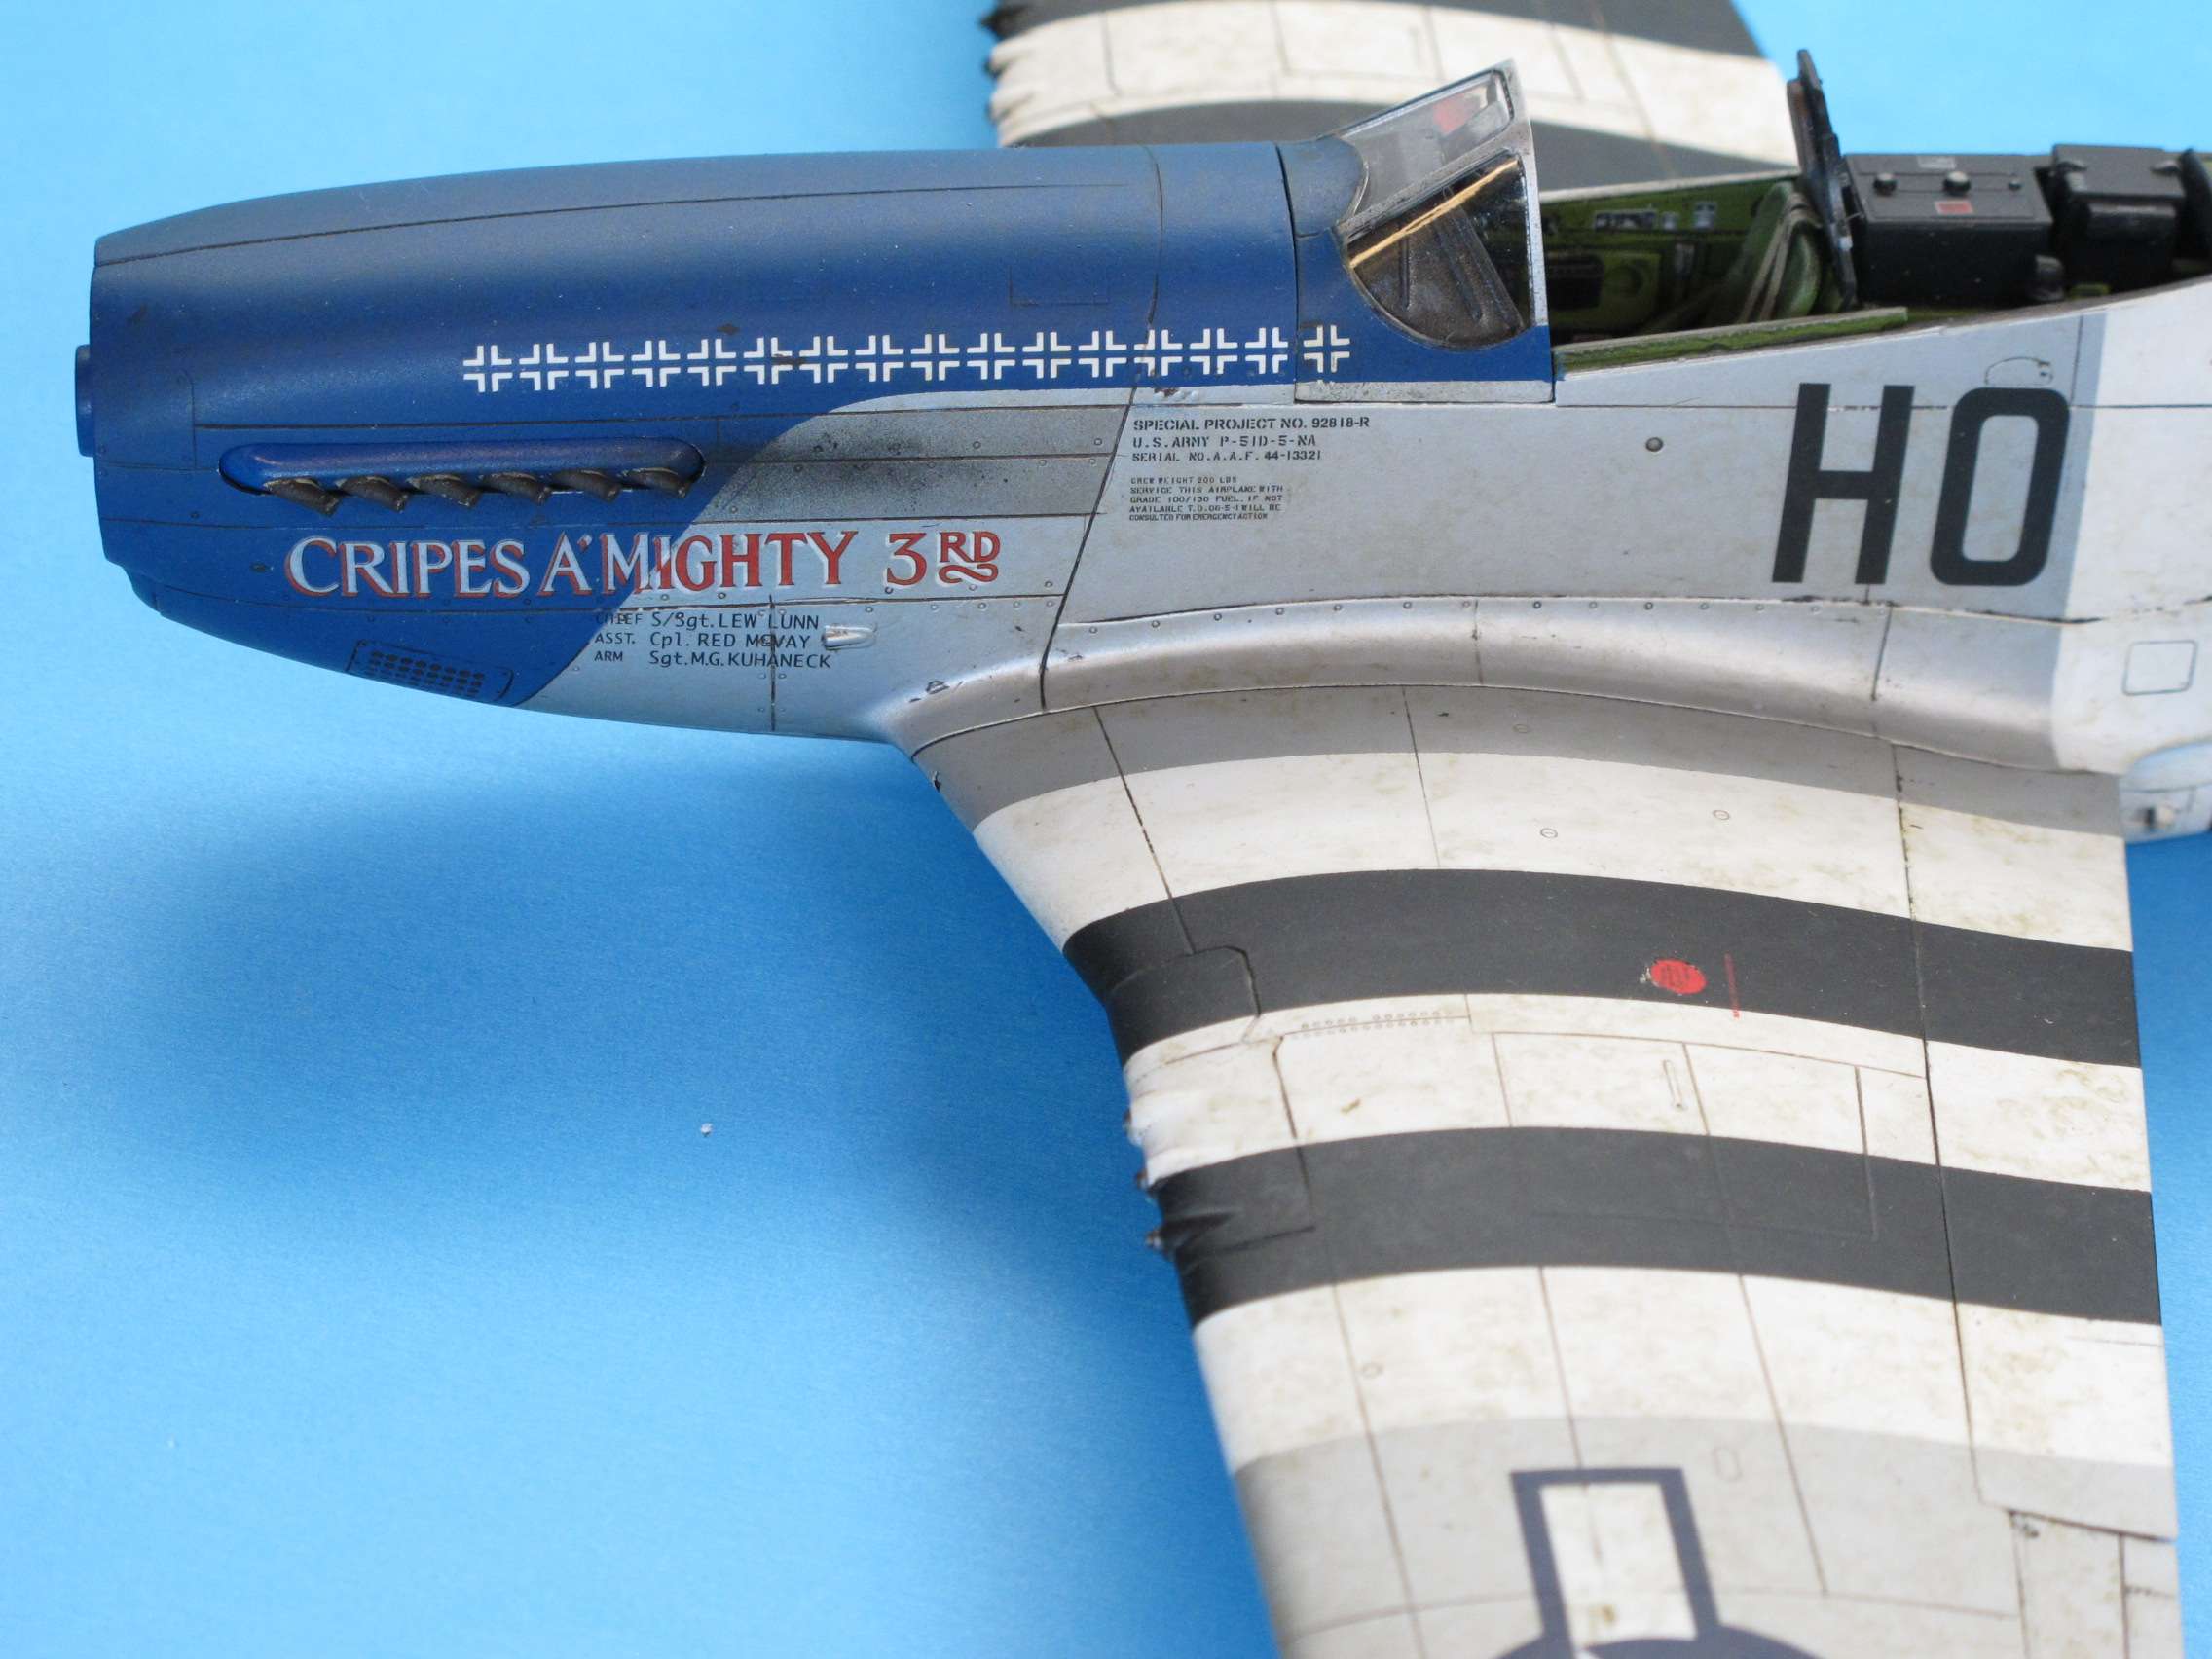
Don
- KiwiZac, Troy Molitor, MikeMaben and 12 others
-
15
-
-
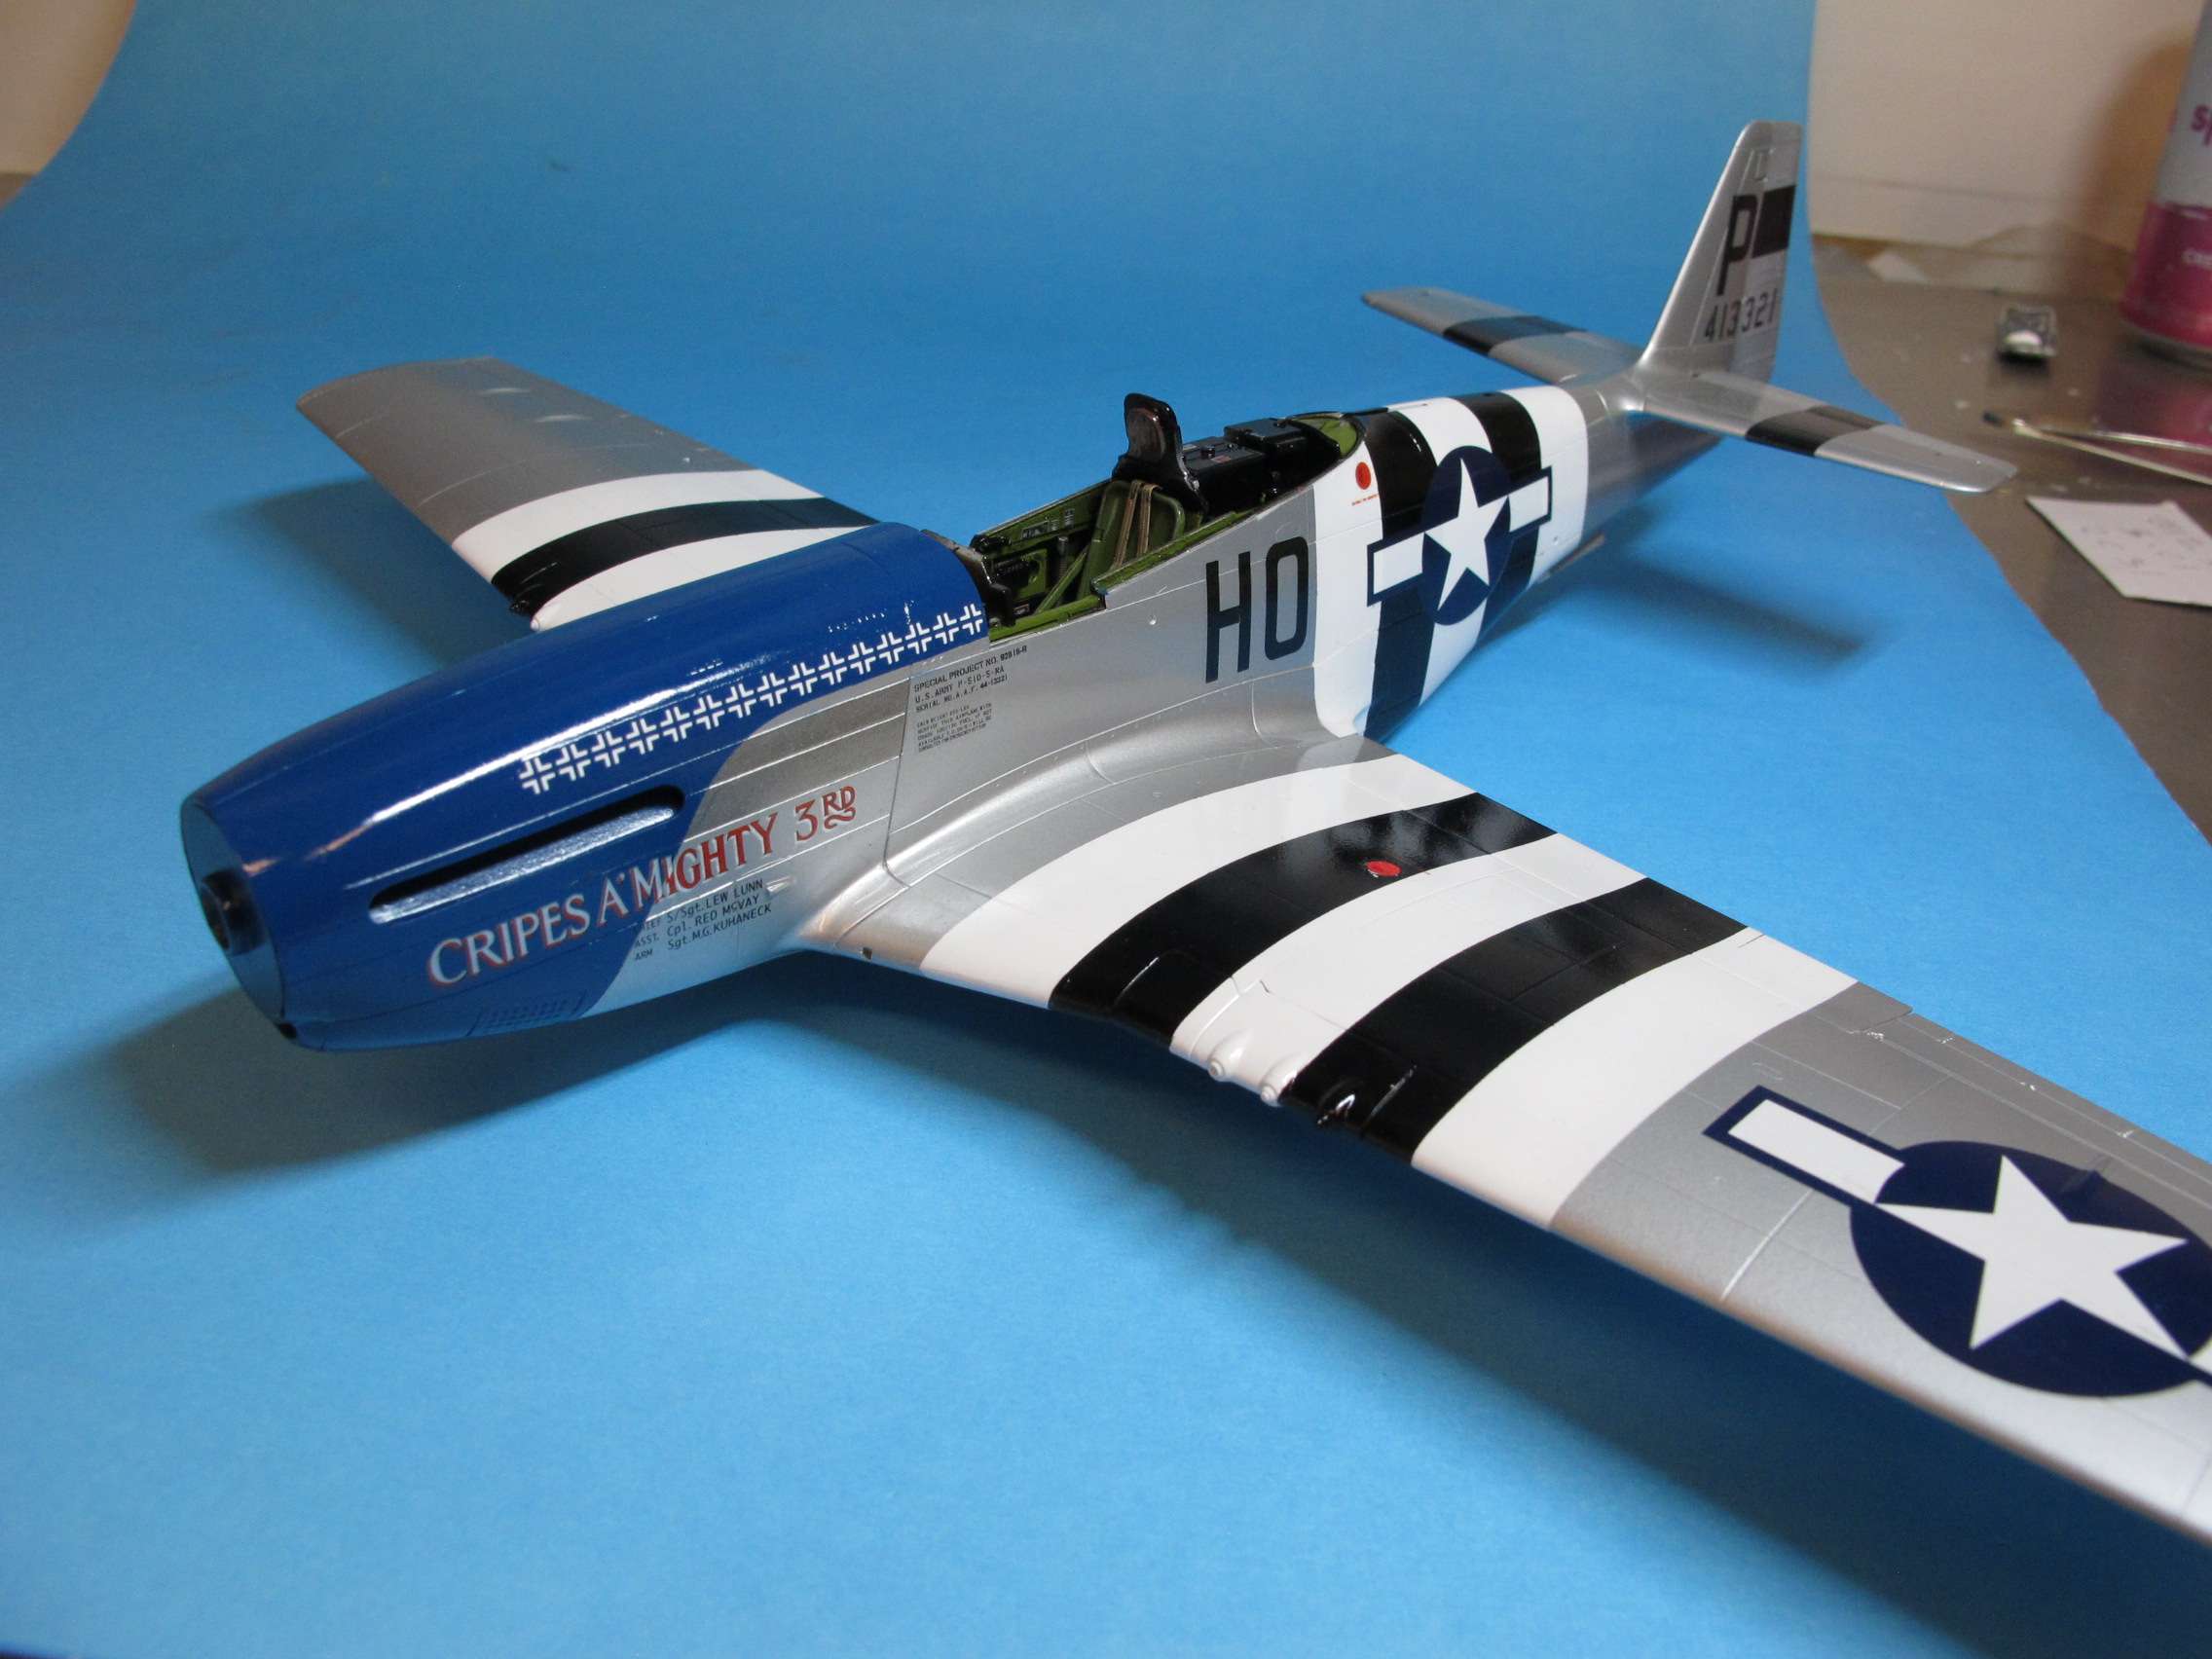
Hello all!! Have to confess, been doing a terrible job of participating, life been getting in the way. Did manage to glosscoat and apply the decals. They did silver a bit, are a little thick but the white in the stars/bar is translucent and off register, and did a so so job of settling in. In other words, use aftermarket or masks!!! Managed to get overspray on the instrument panel. I think the canopy got hit, too...yippee...
- Alain Gadbois, LSP_Kevin, RLWP and 10 others
-
13
-
It's been a while since an update, busy time at work so usually to beat to do anything but eat/recuperate/sleep. Did manage to get everything painted!! I was hoping to get everything glosscoated today, but dealing with side effects from the plague vaccine dose #3. R&R for the rest of the day, maybe tomorrow...
-
On 11/9/2021 at 8:03 AM, James Rademaker said:
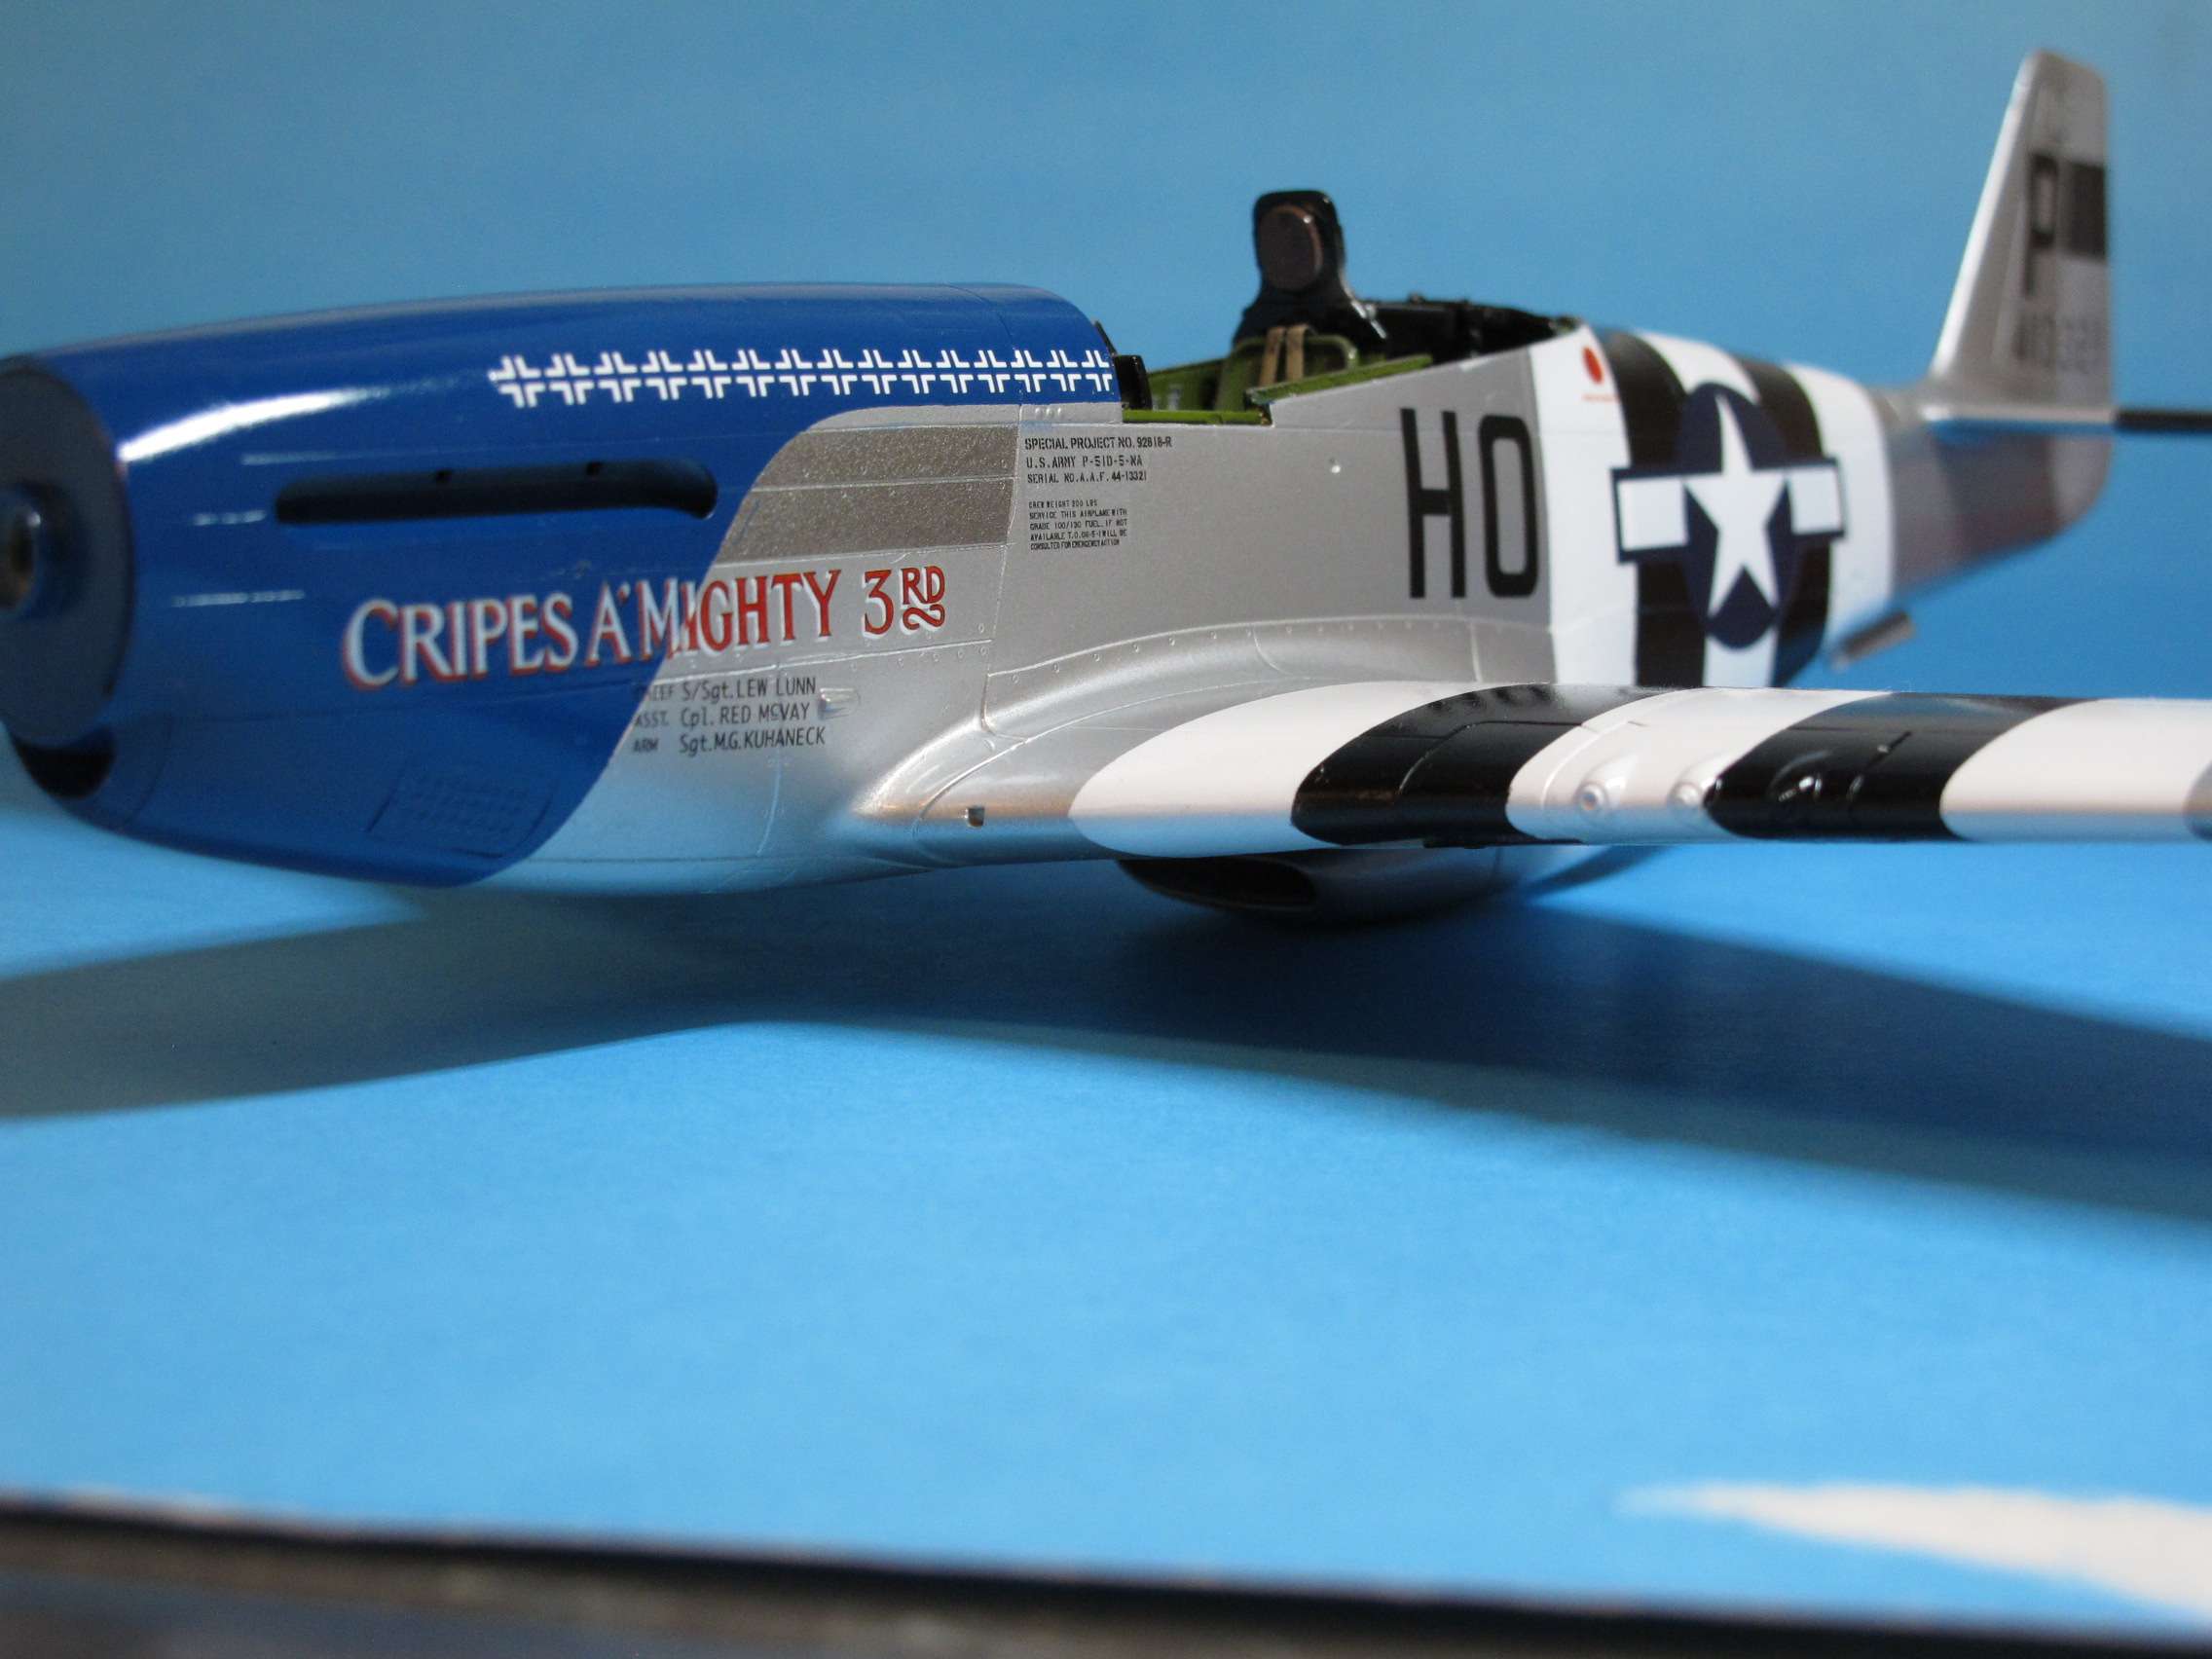
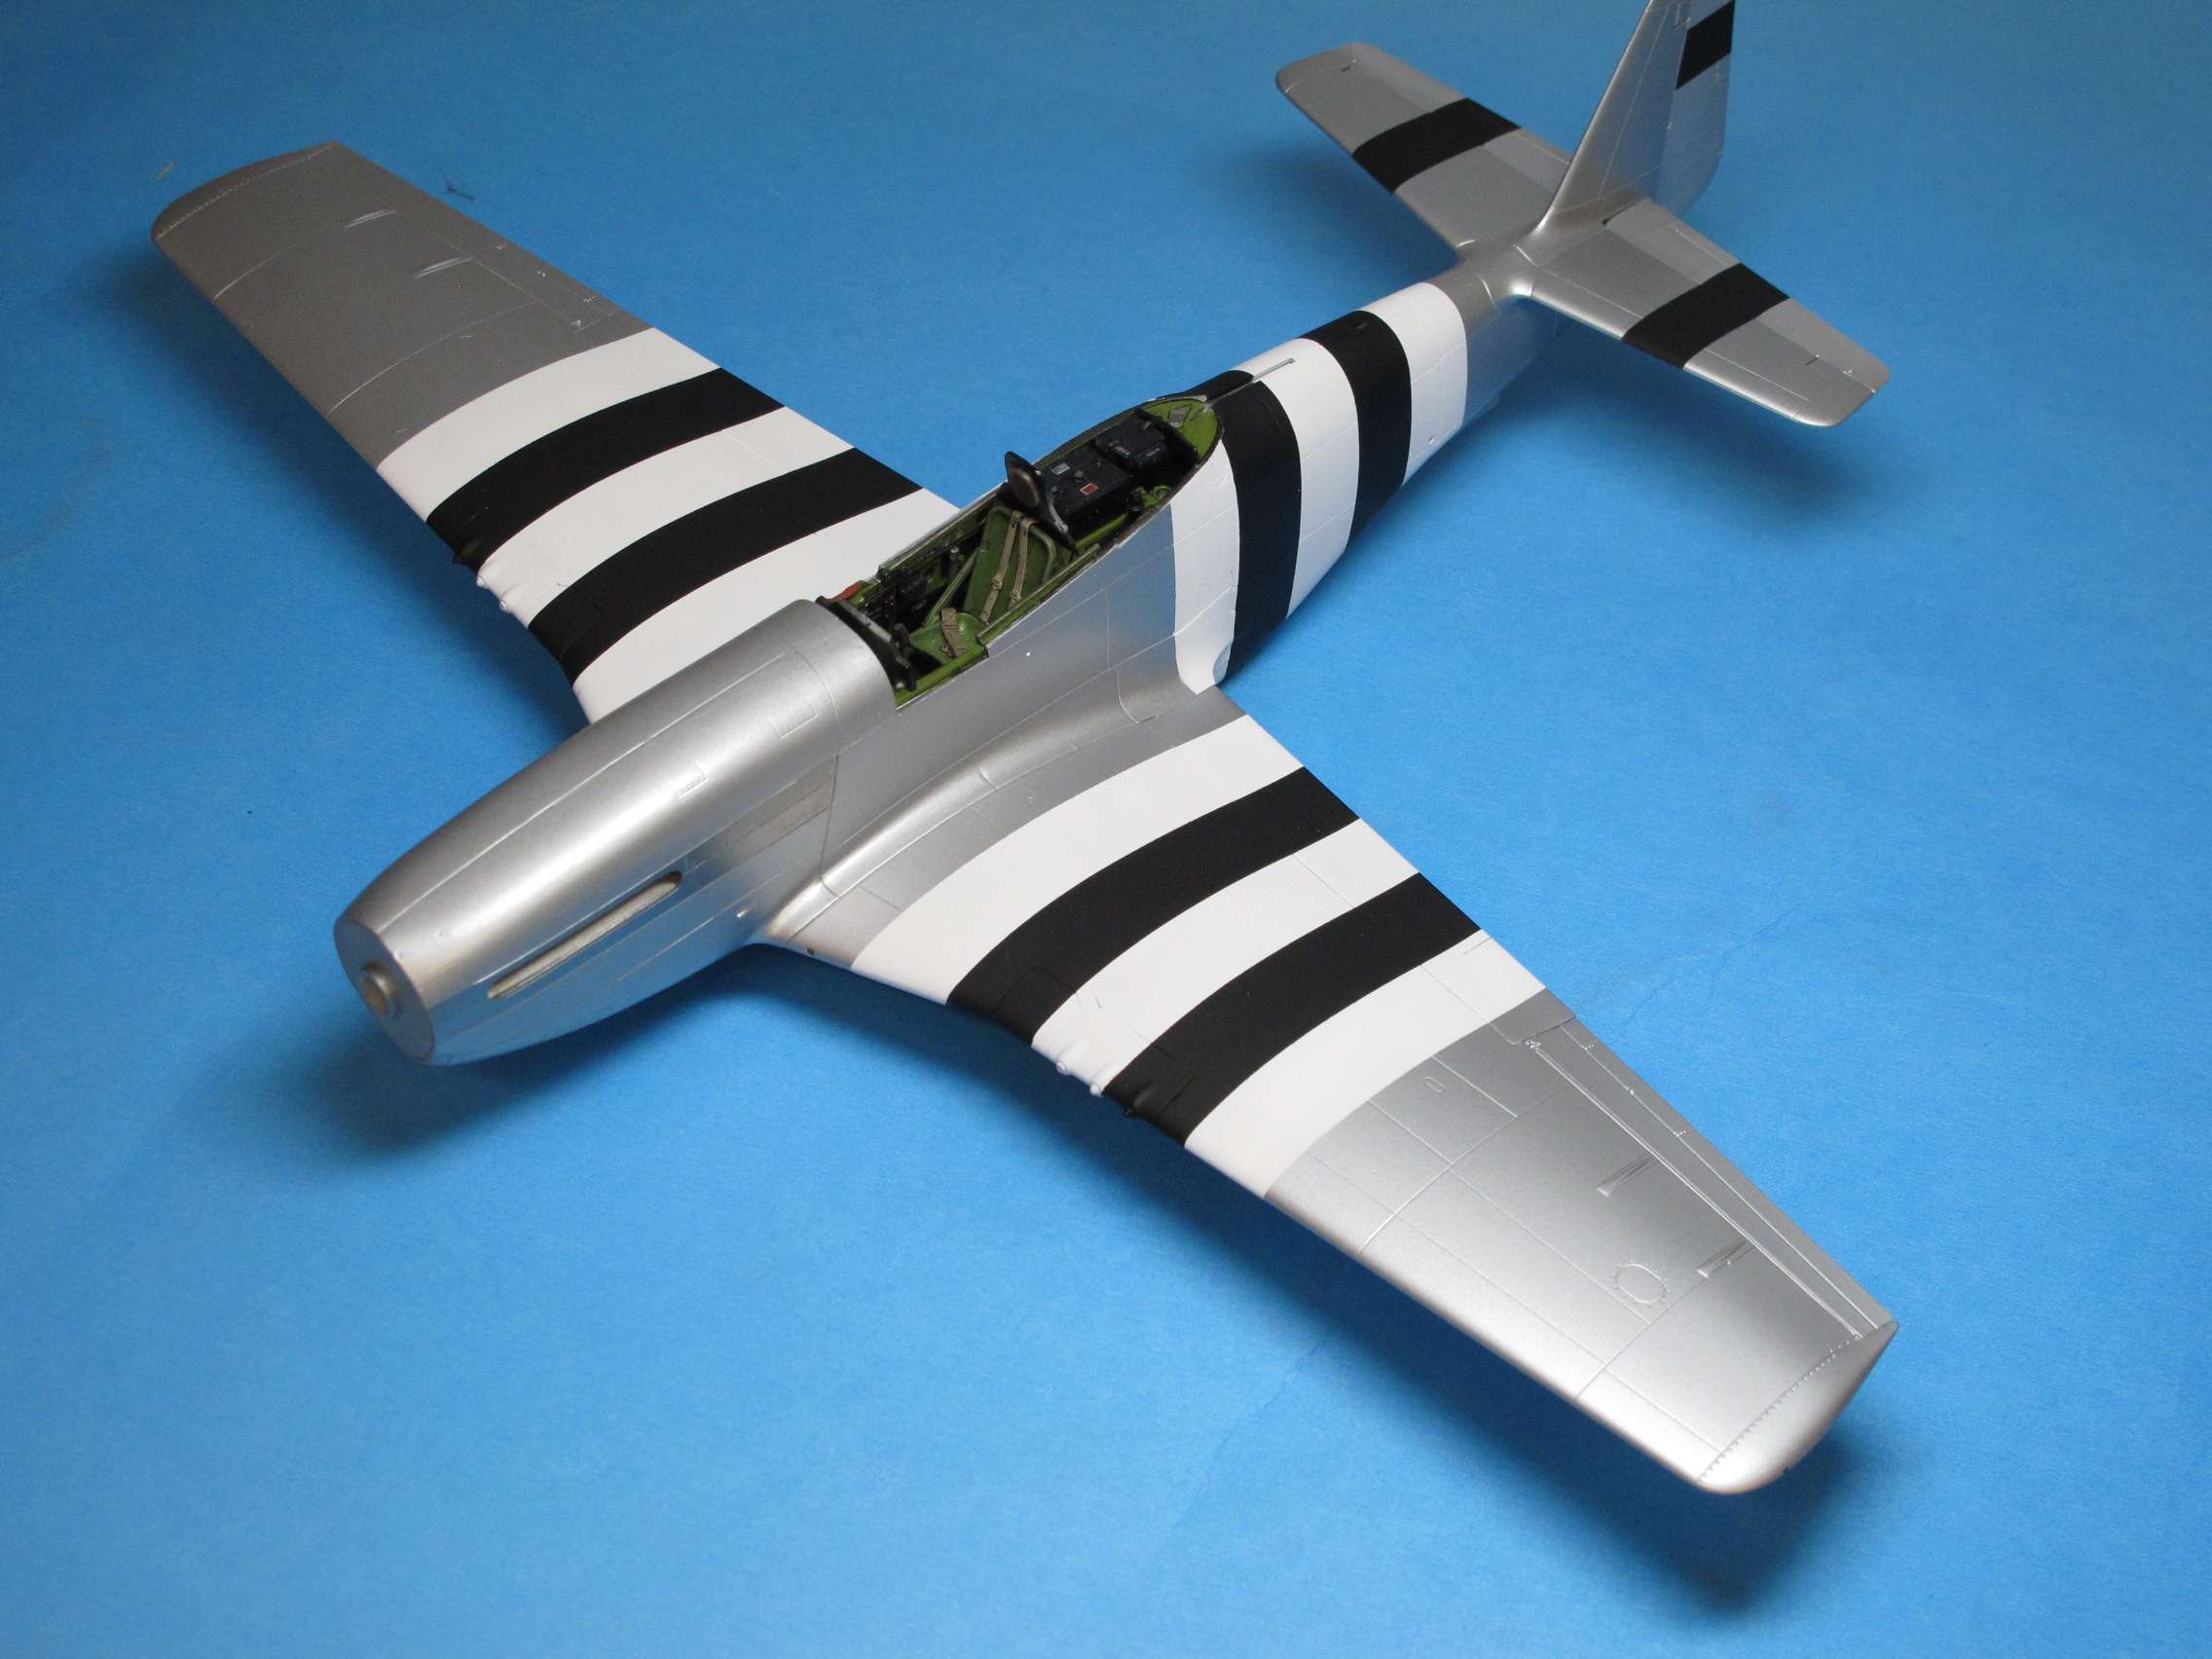
Don, it’s interesting how you attached the front windscreen after applying the overall aluminum color for the aircraft. Does the Aerocraft windscreen fit perfectly with out any sanding on the fuselage? I usually attach the windscreen before painting so I can make sure it sits without any edge on the port or starboard sides.
Nice job , well done with the invasion stripes.Jim
Yeah, about that windscreen...it's just sitting in place. This is the kit part, fit is better than the first one i tried. I know results are better when you glue clears in before paint, have tried a few times on past builds with poor results.
Don
-
On 11/7/2021 at 6:02 PM, LSP_Kevin said:
Looks great, Don! Invasion stripes can be deceptively hard to pull off.
Kev
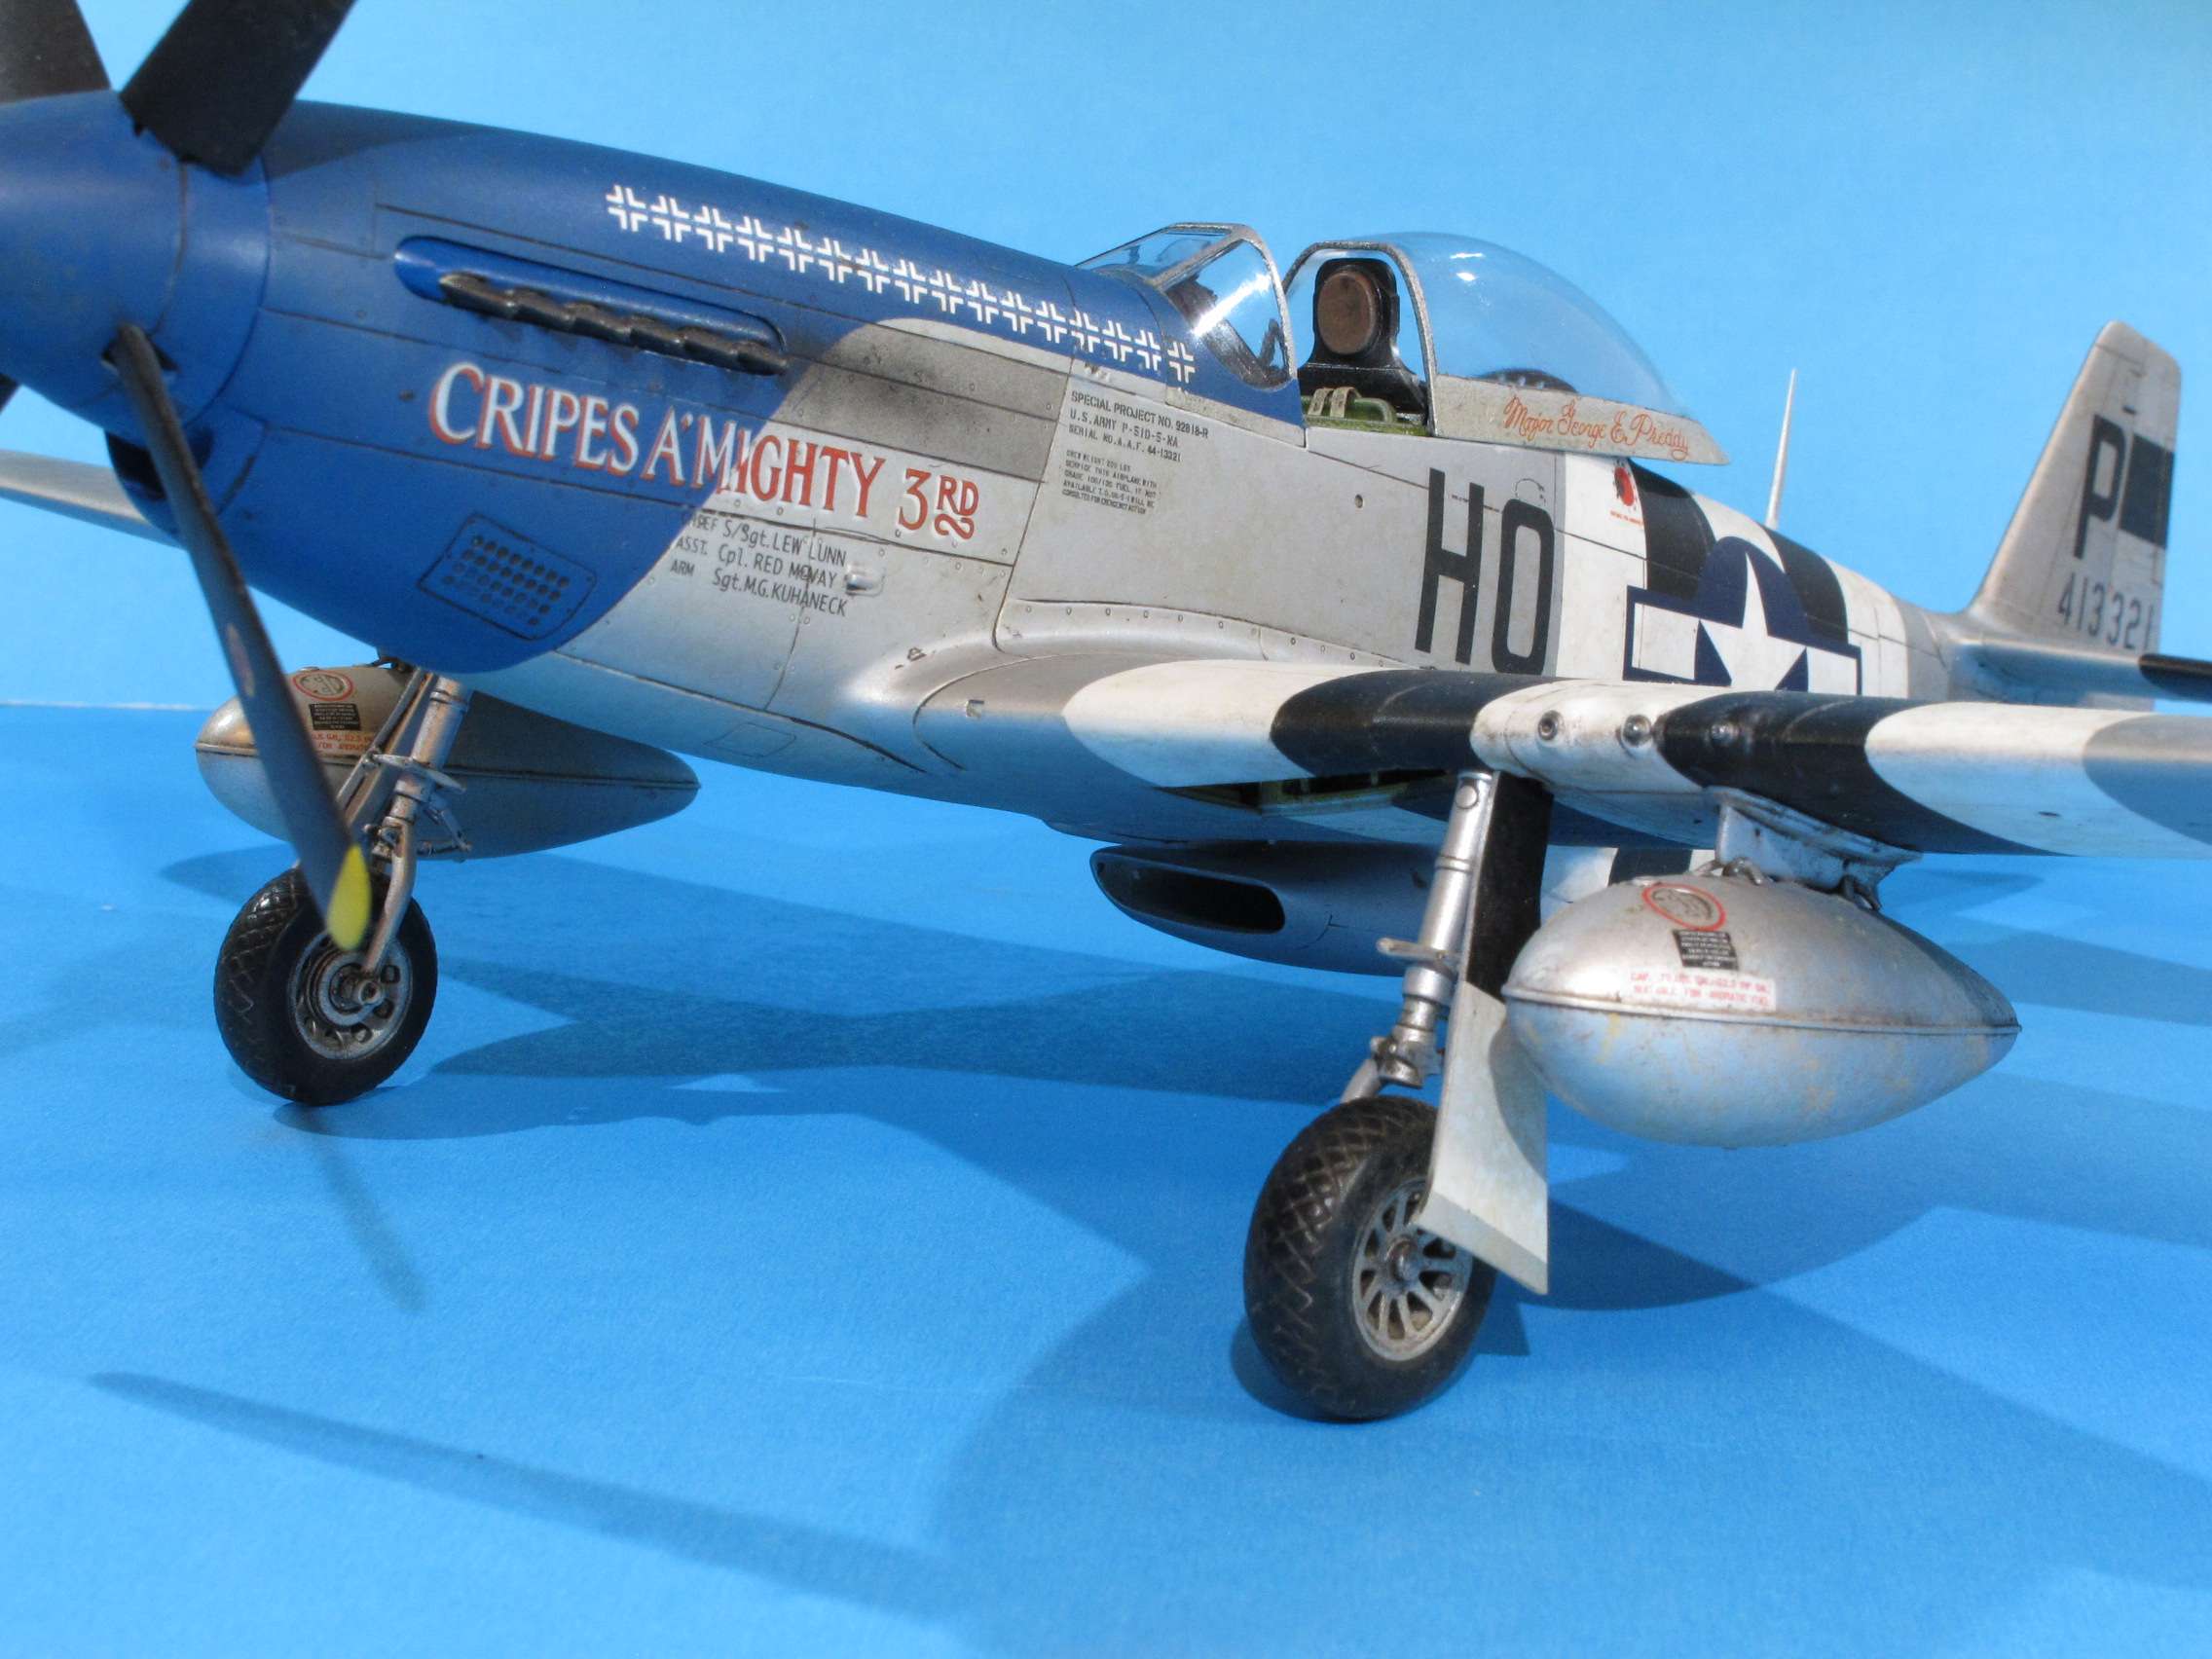
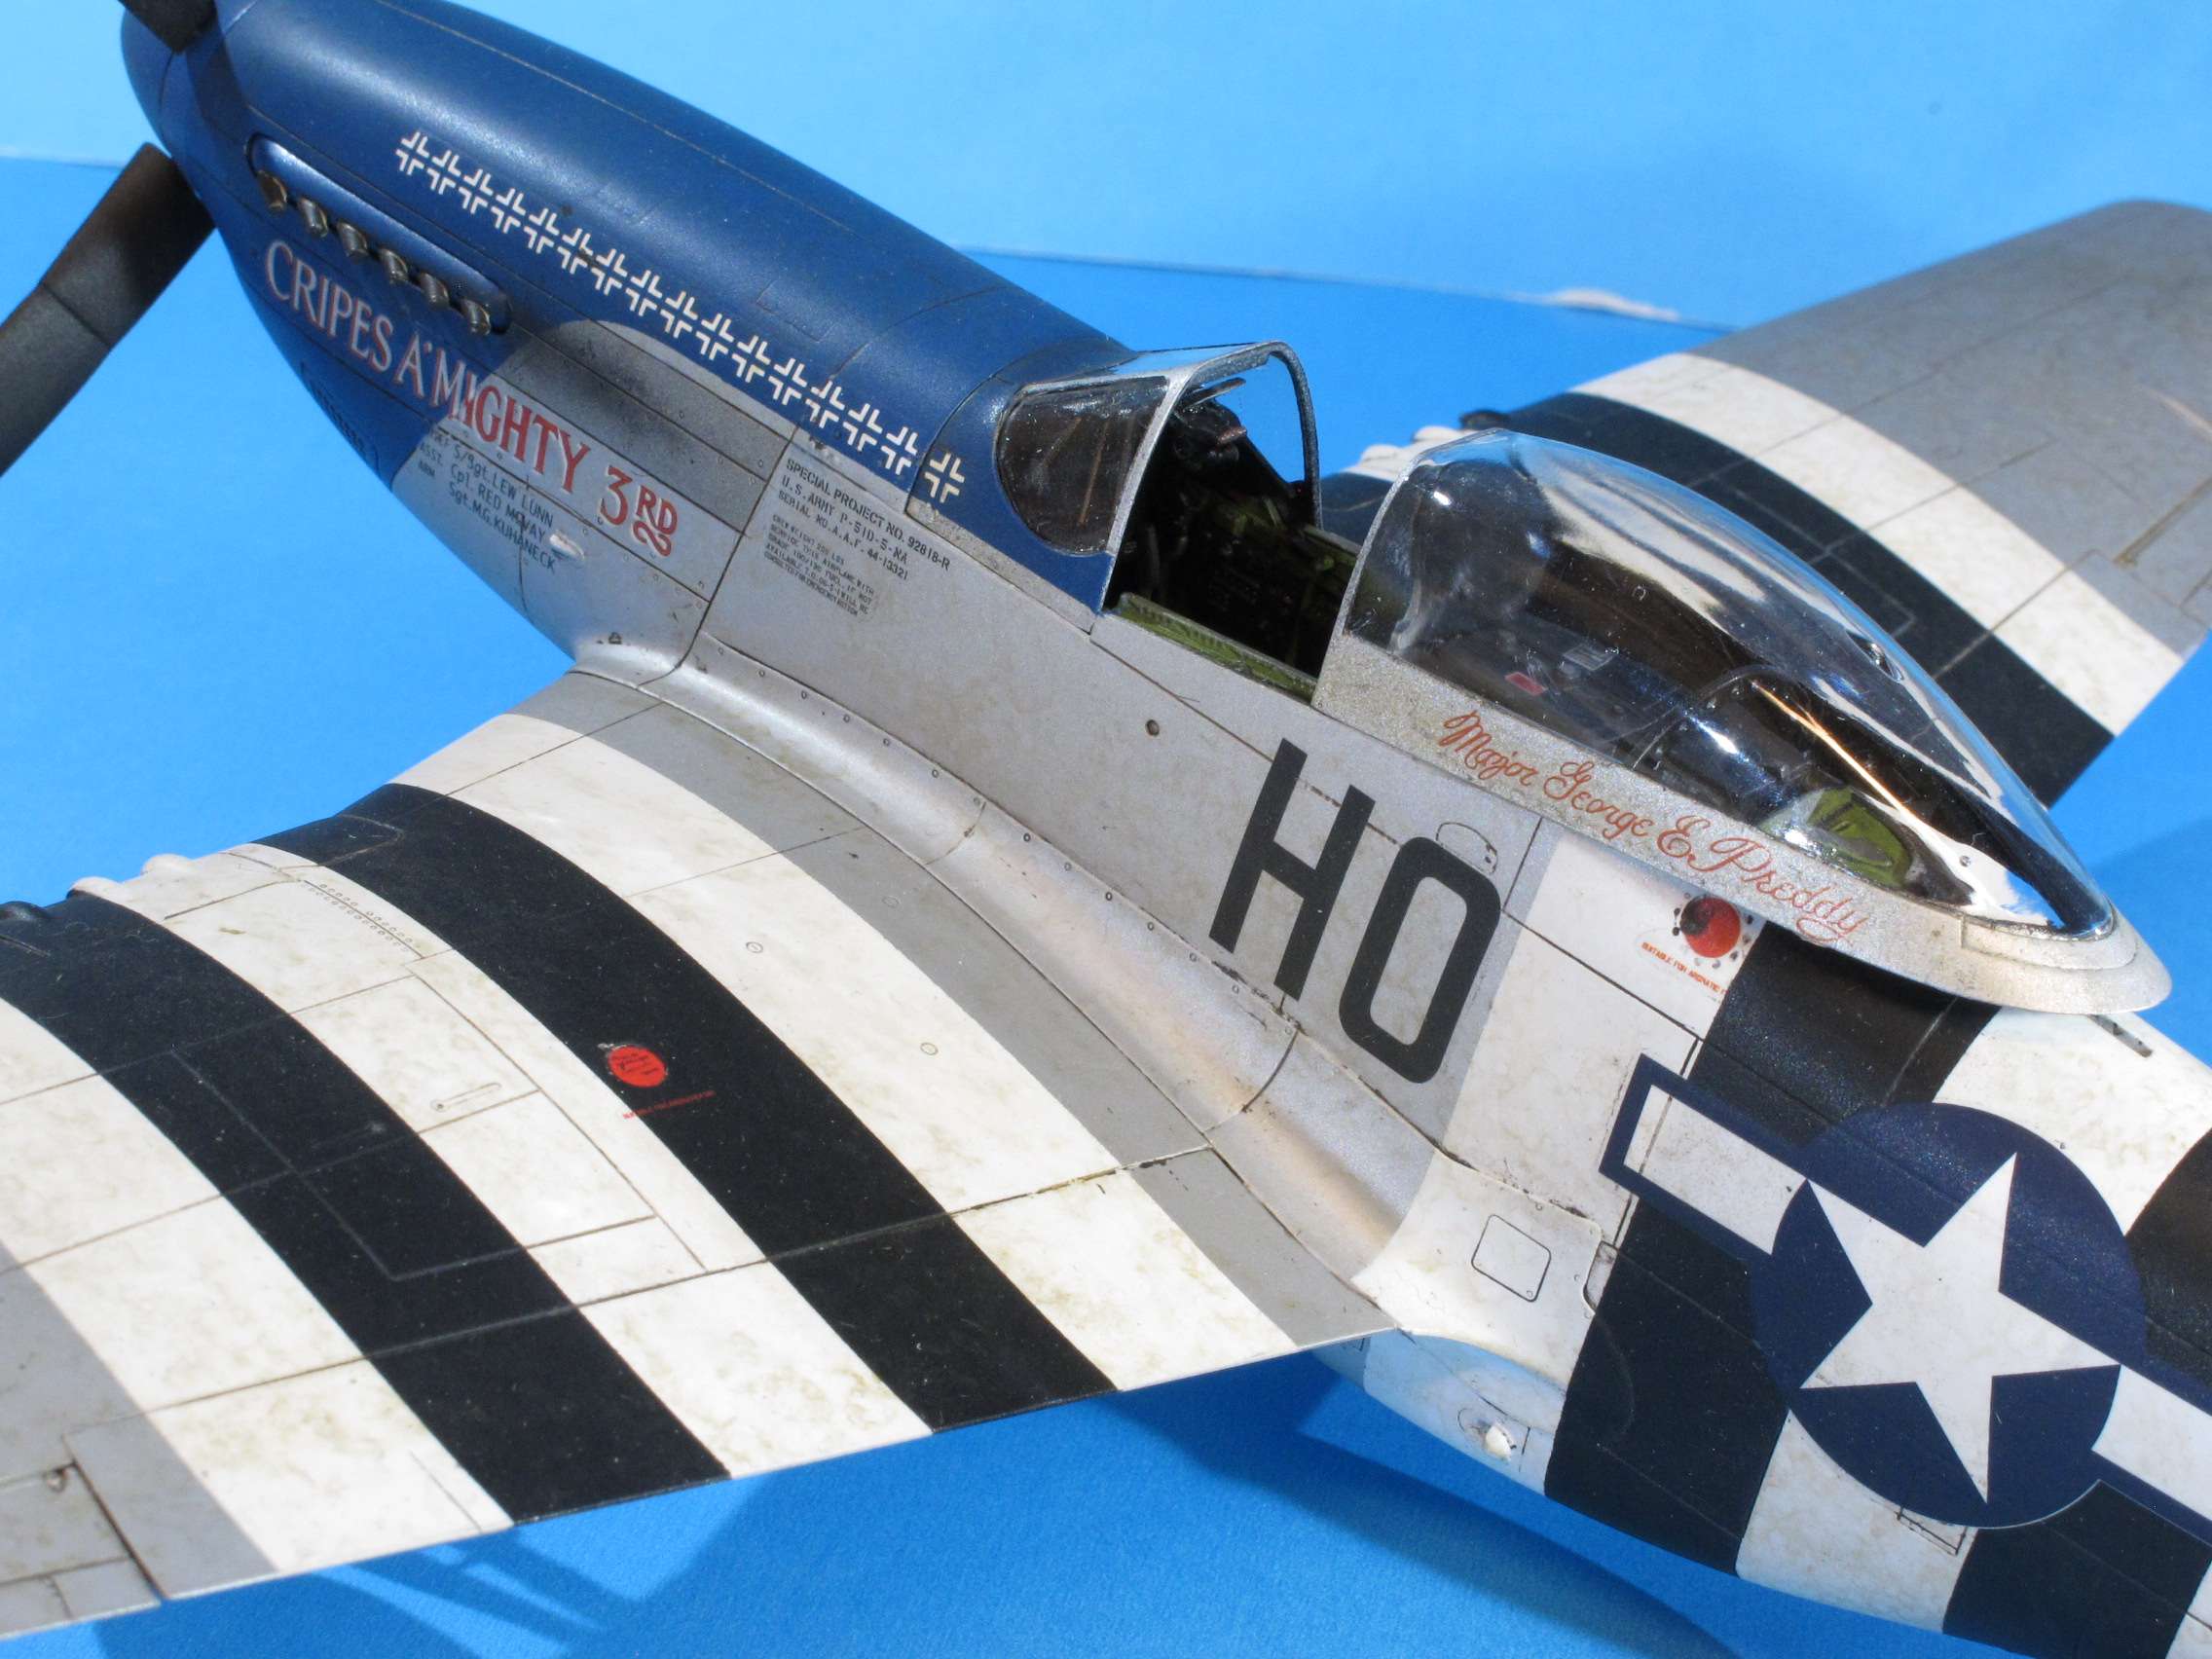
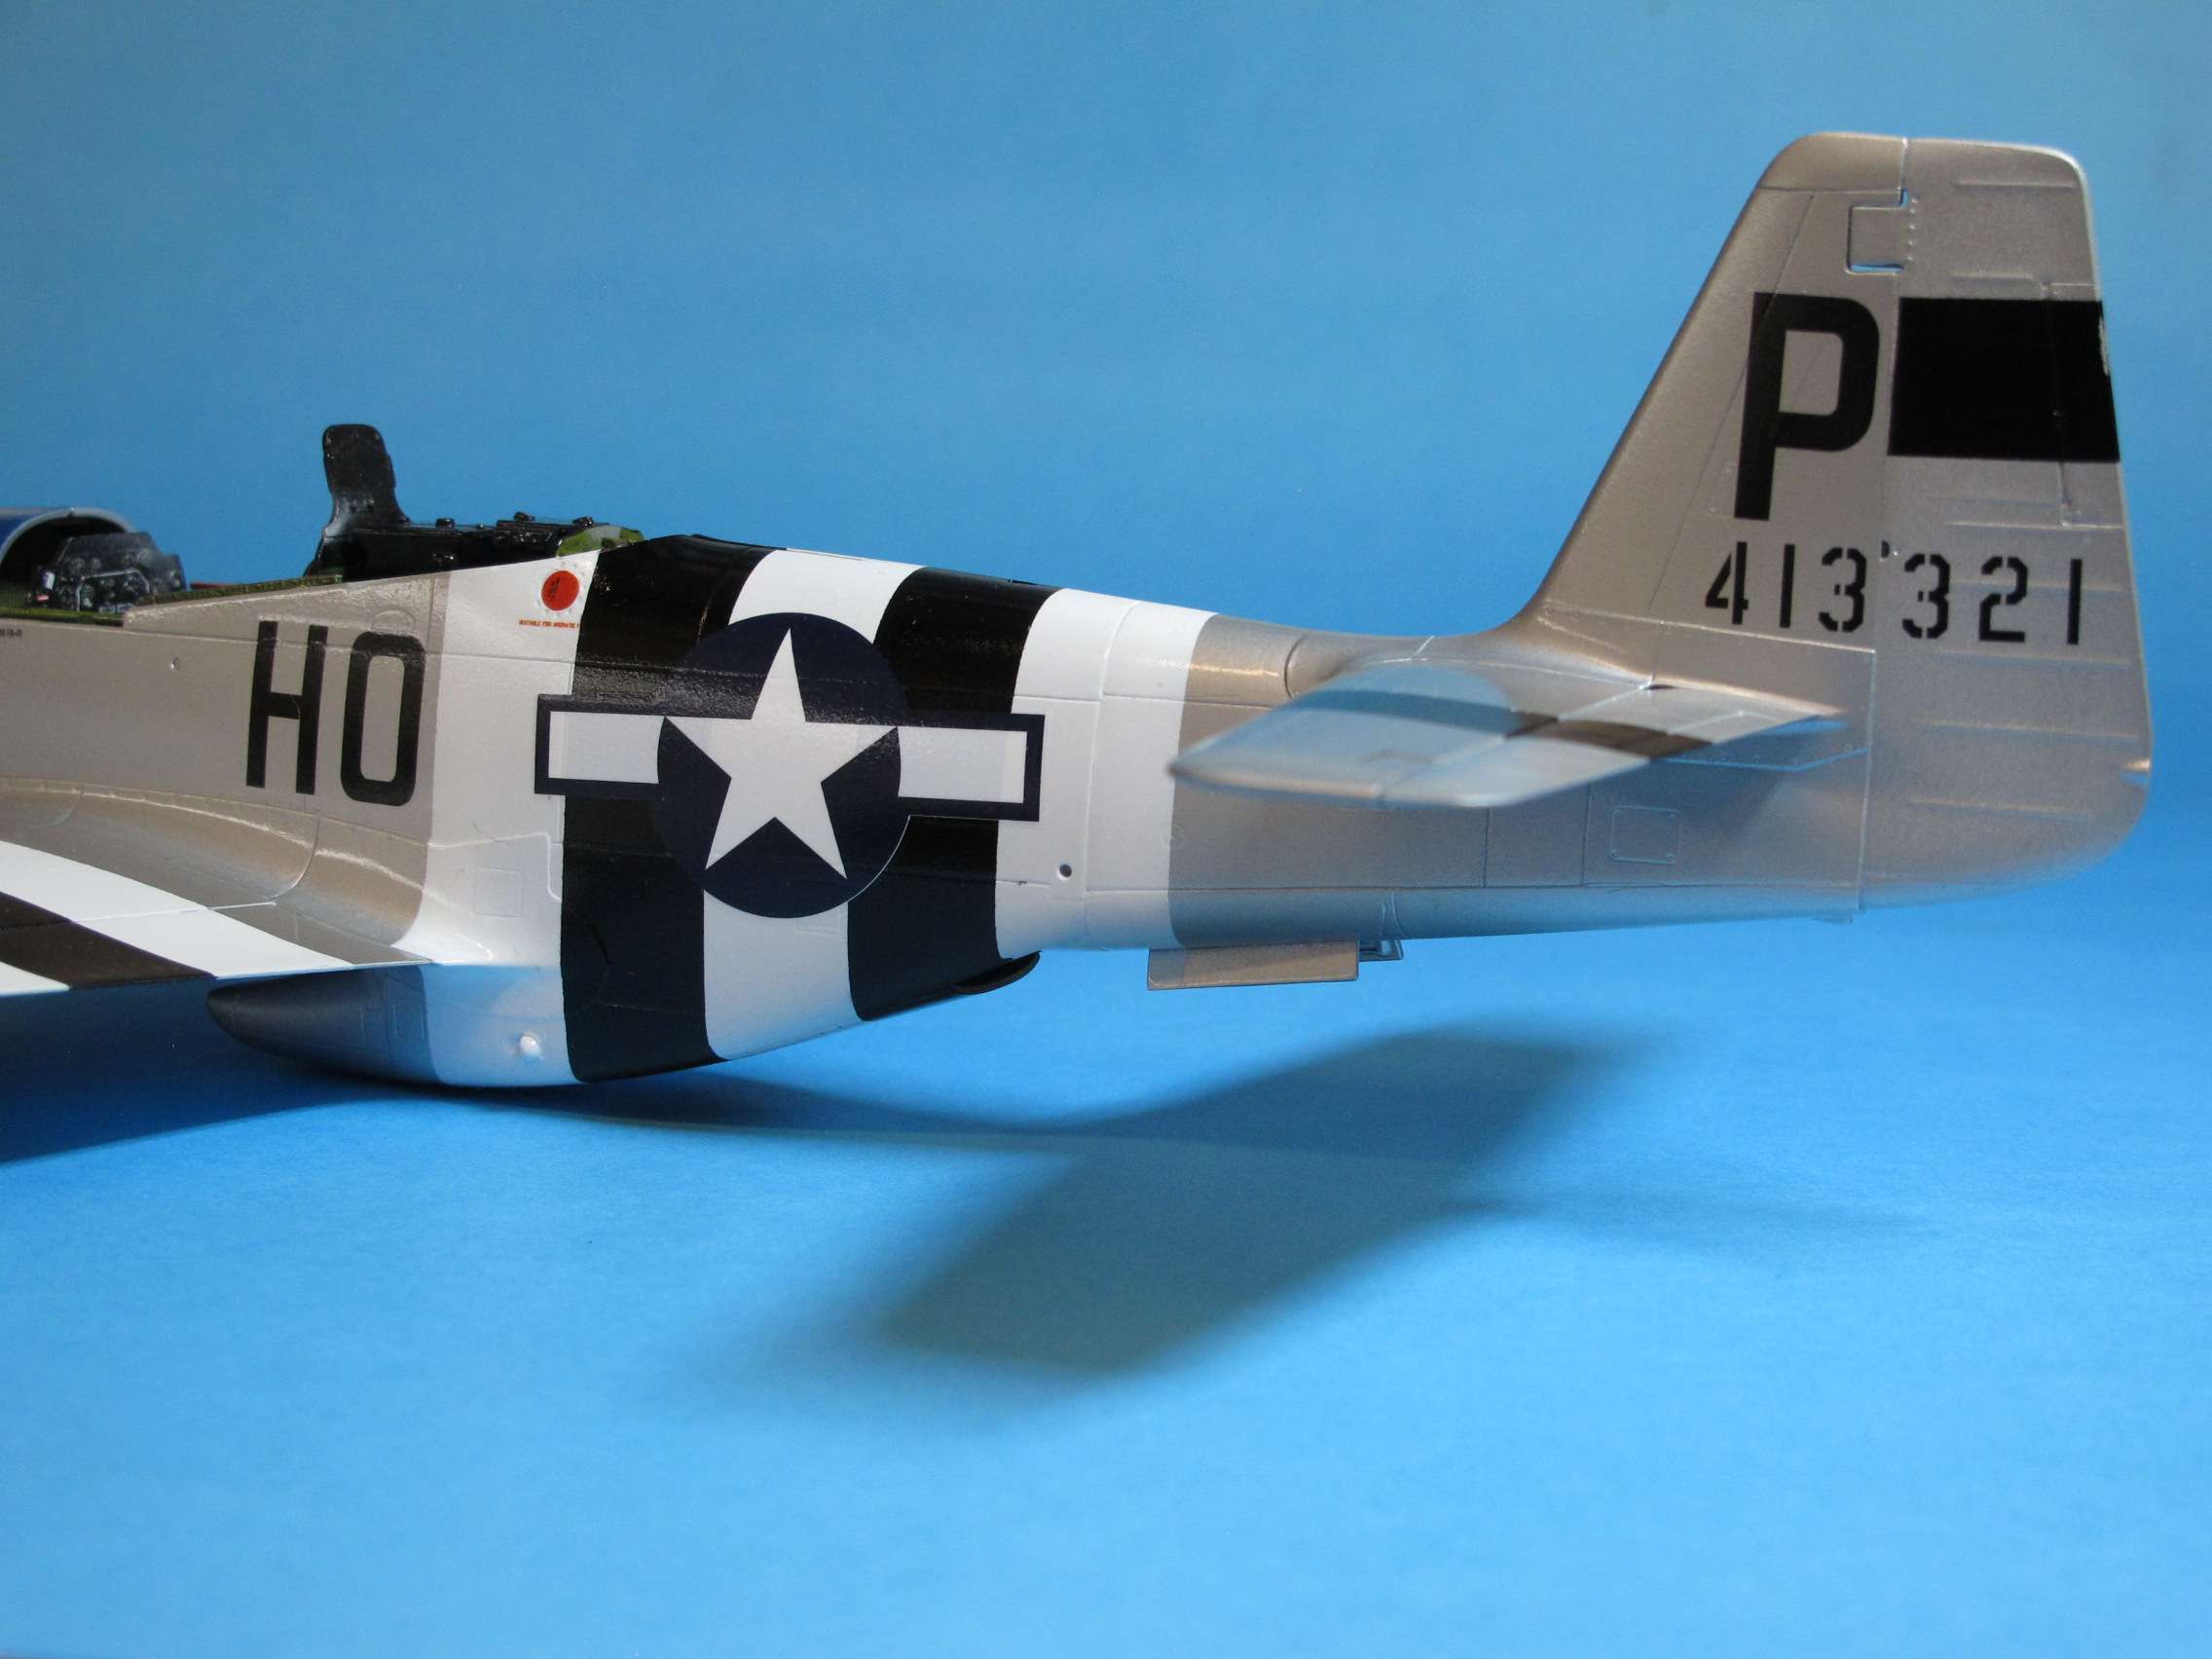
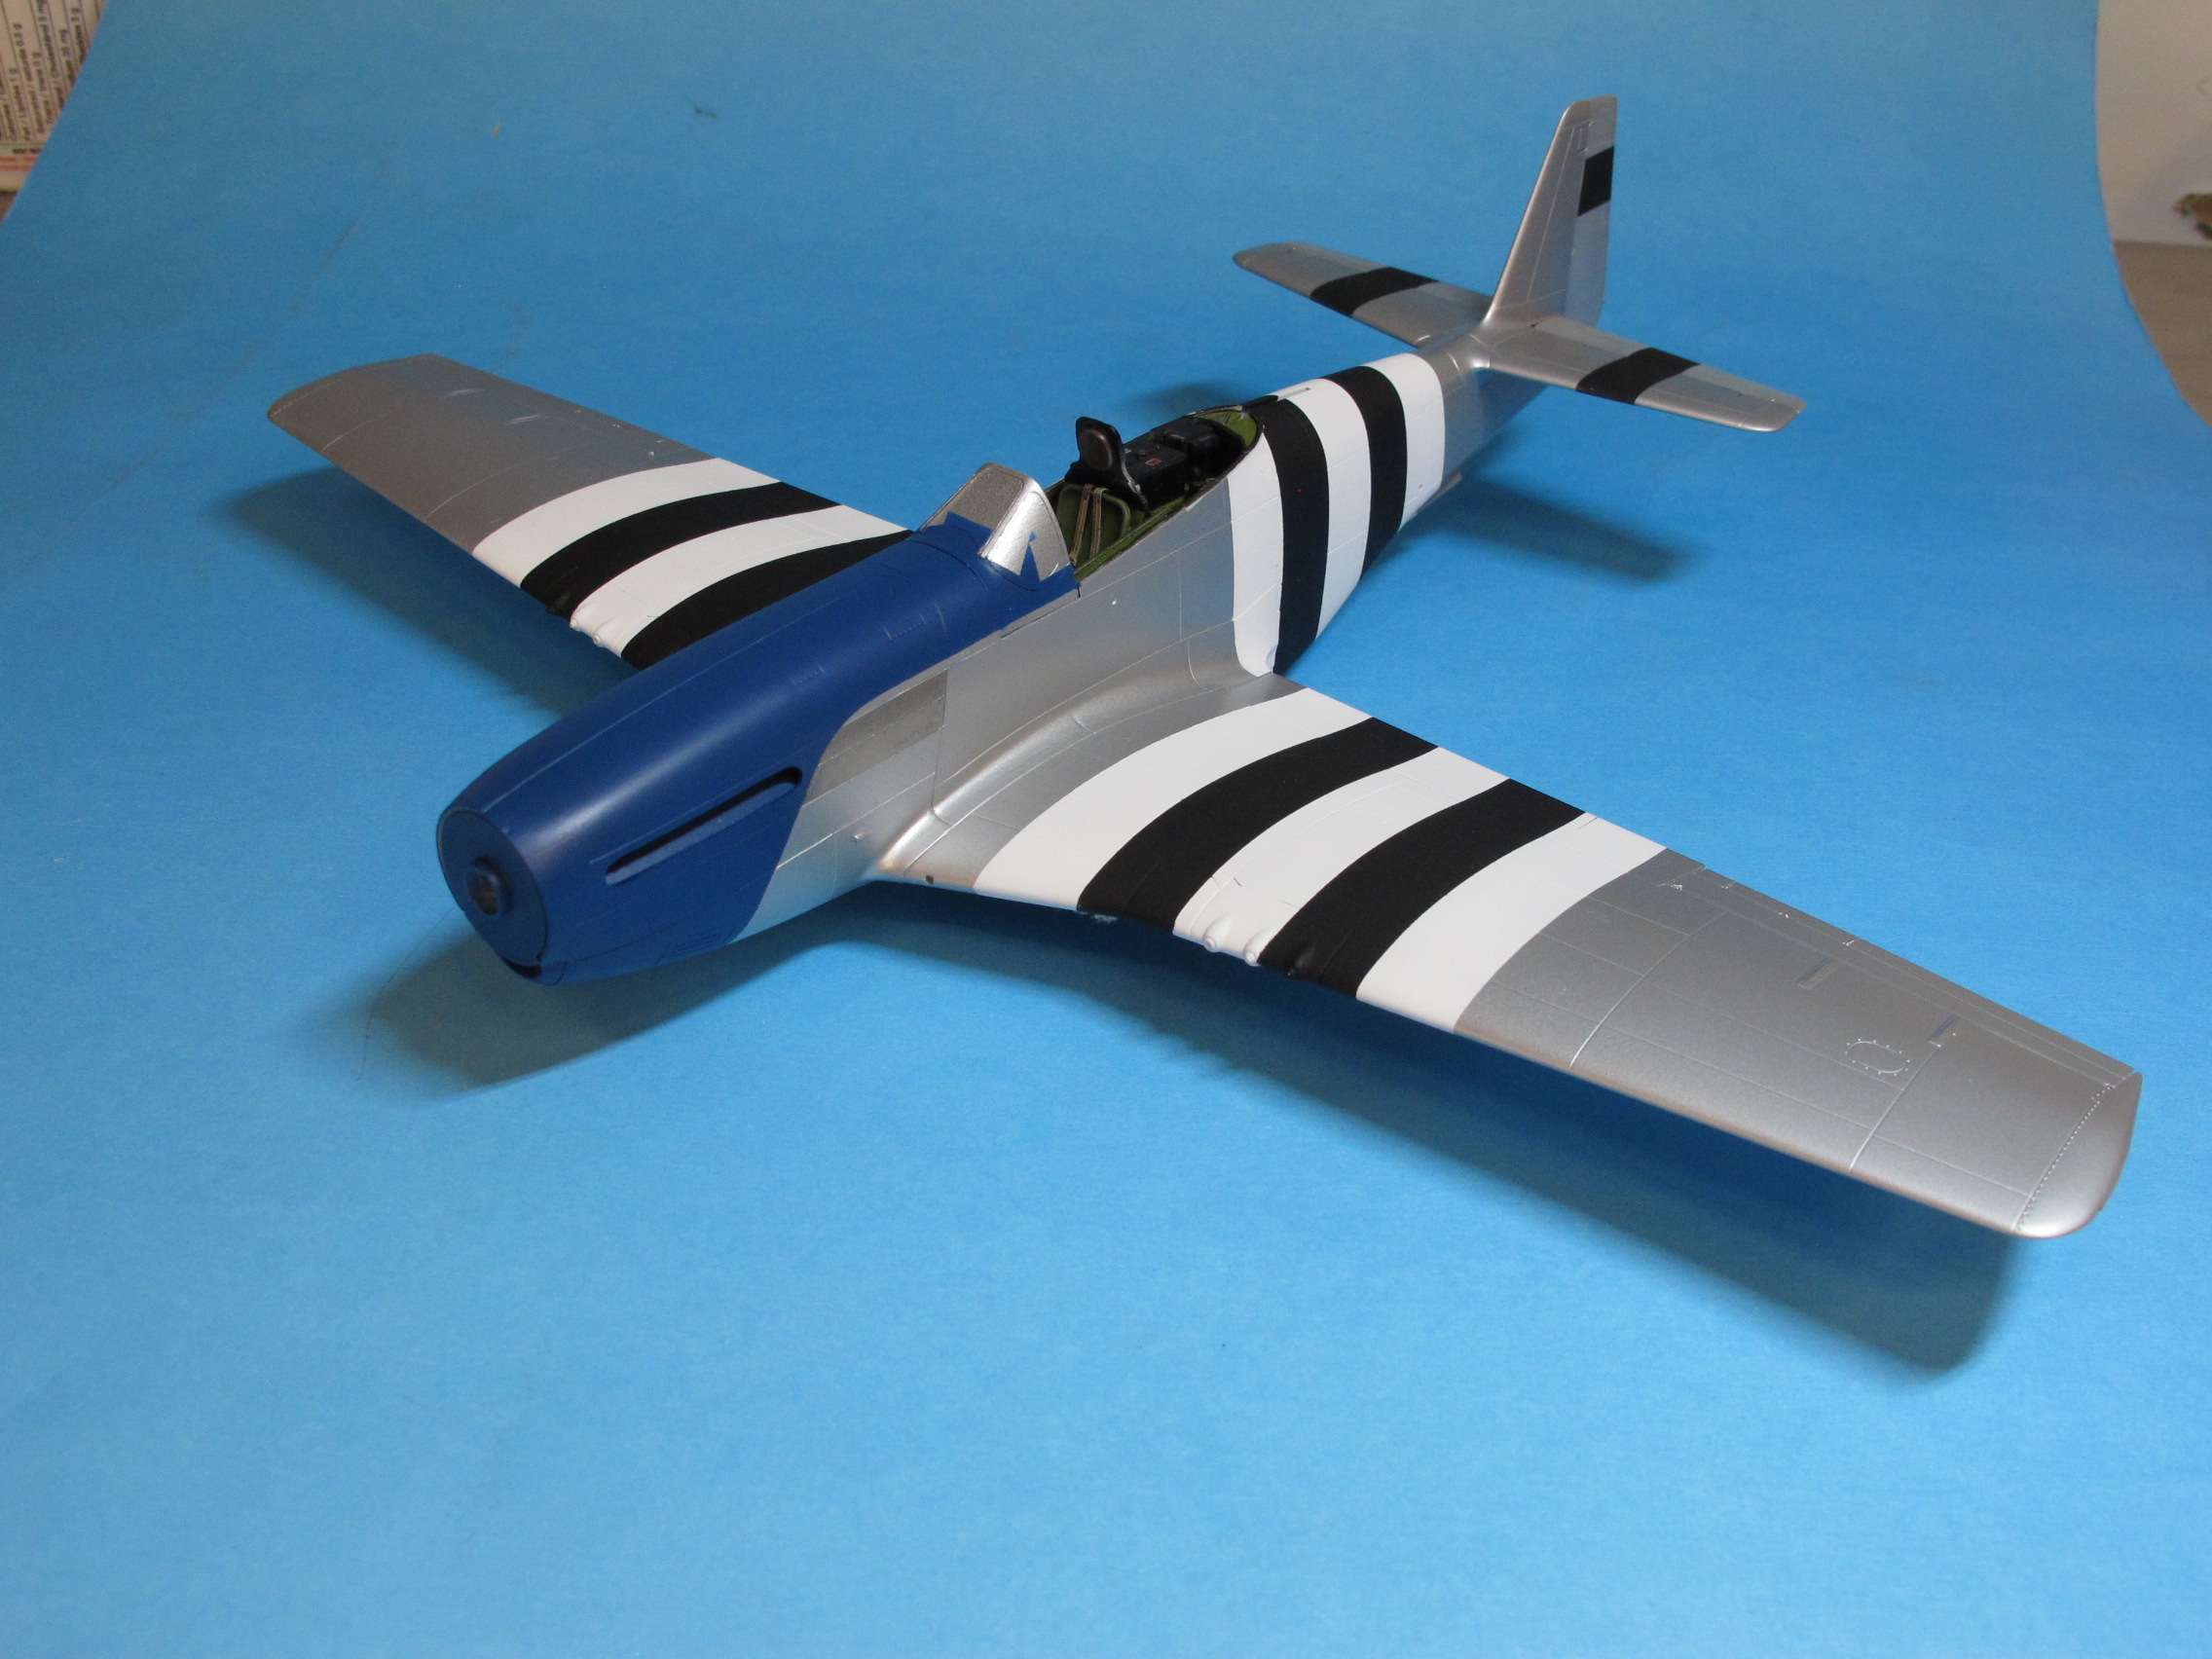
Yup!! They're stripes, how hard can they be?......Can't imagine doing a P-38 with the rads on the tailbooms...Managed to get the blue down late yesterday. This is Testors Model Master Acryl Midship Blue, 4206. This was in the Marine paint line, might not be available, now. Have to say, the Tamiya mix given in the Mustang kit is a great match as well.
-
On 11/6/2021 at 7:06 AM, DonH said:
Use them, don't use them, your choice.
-
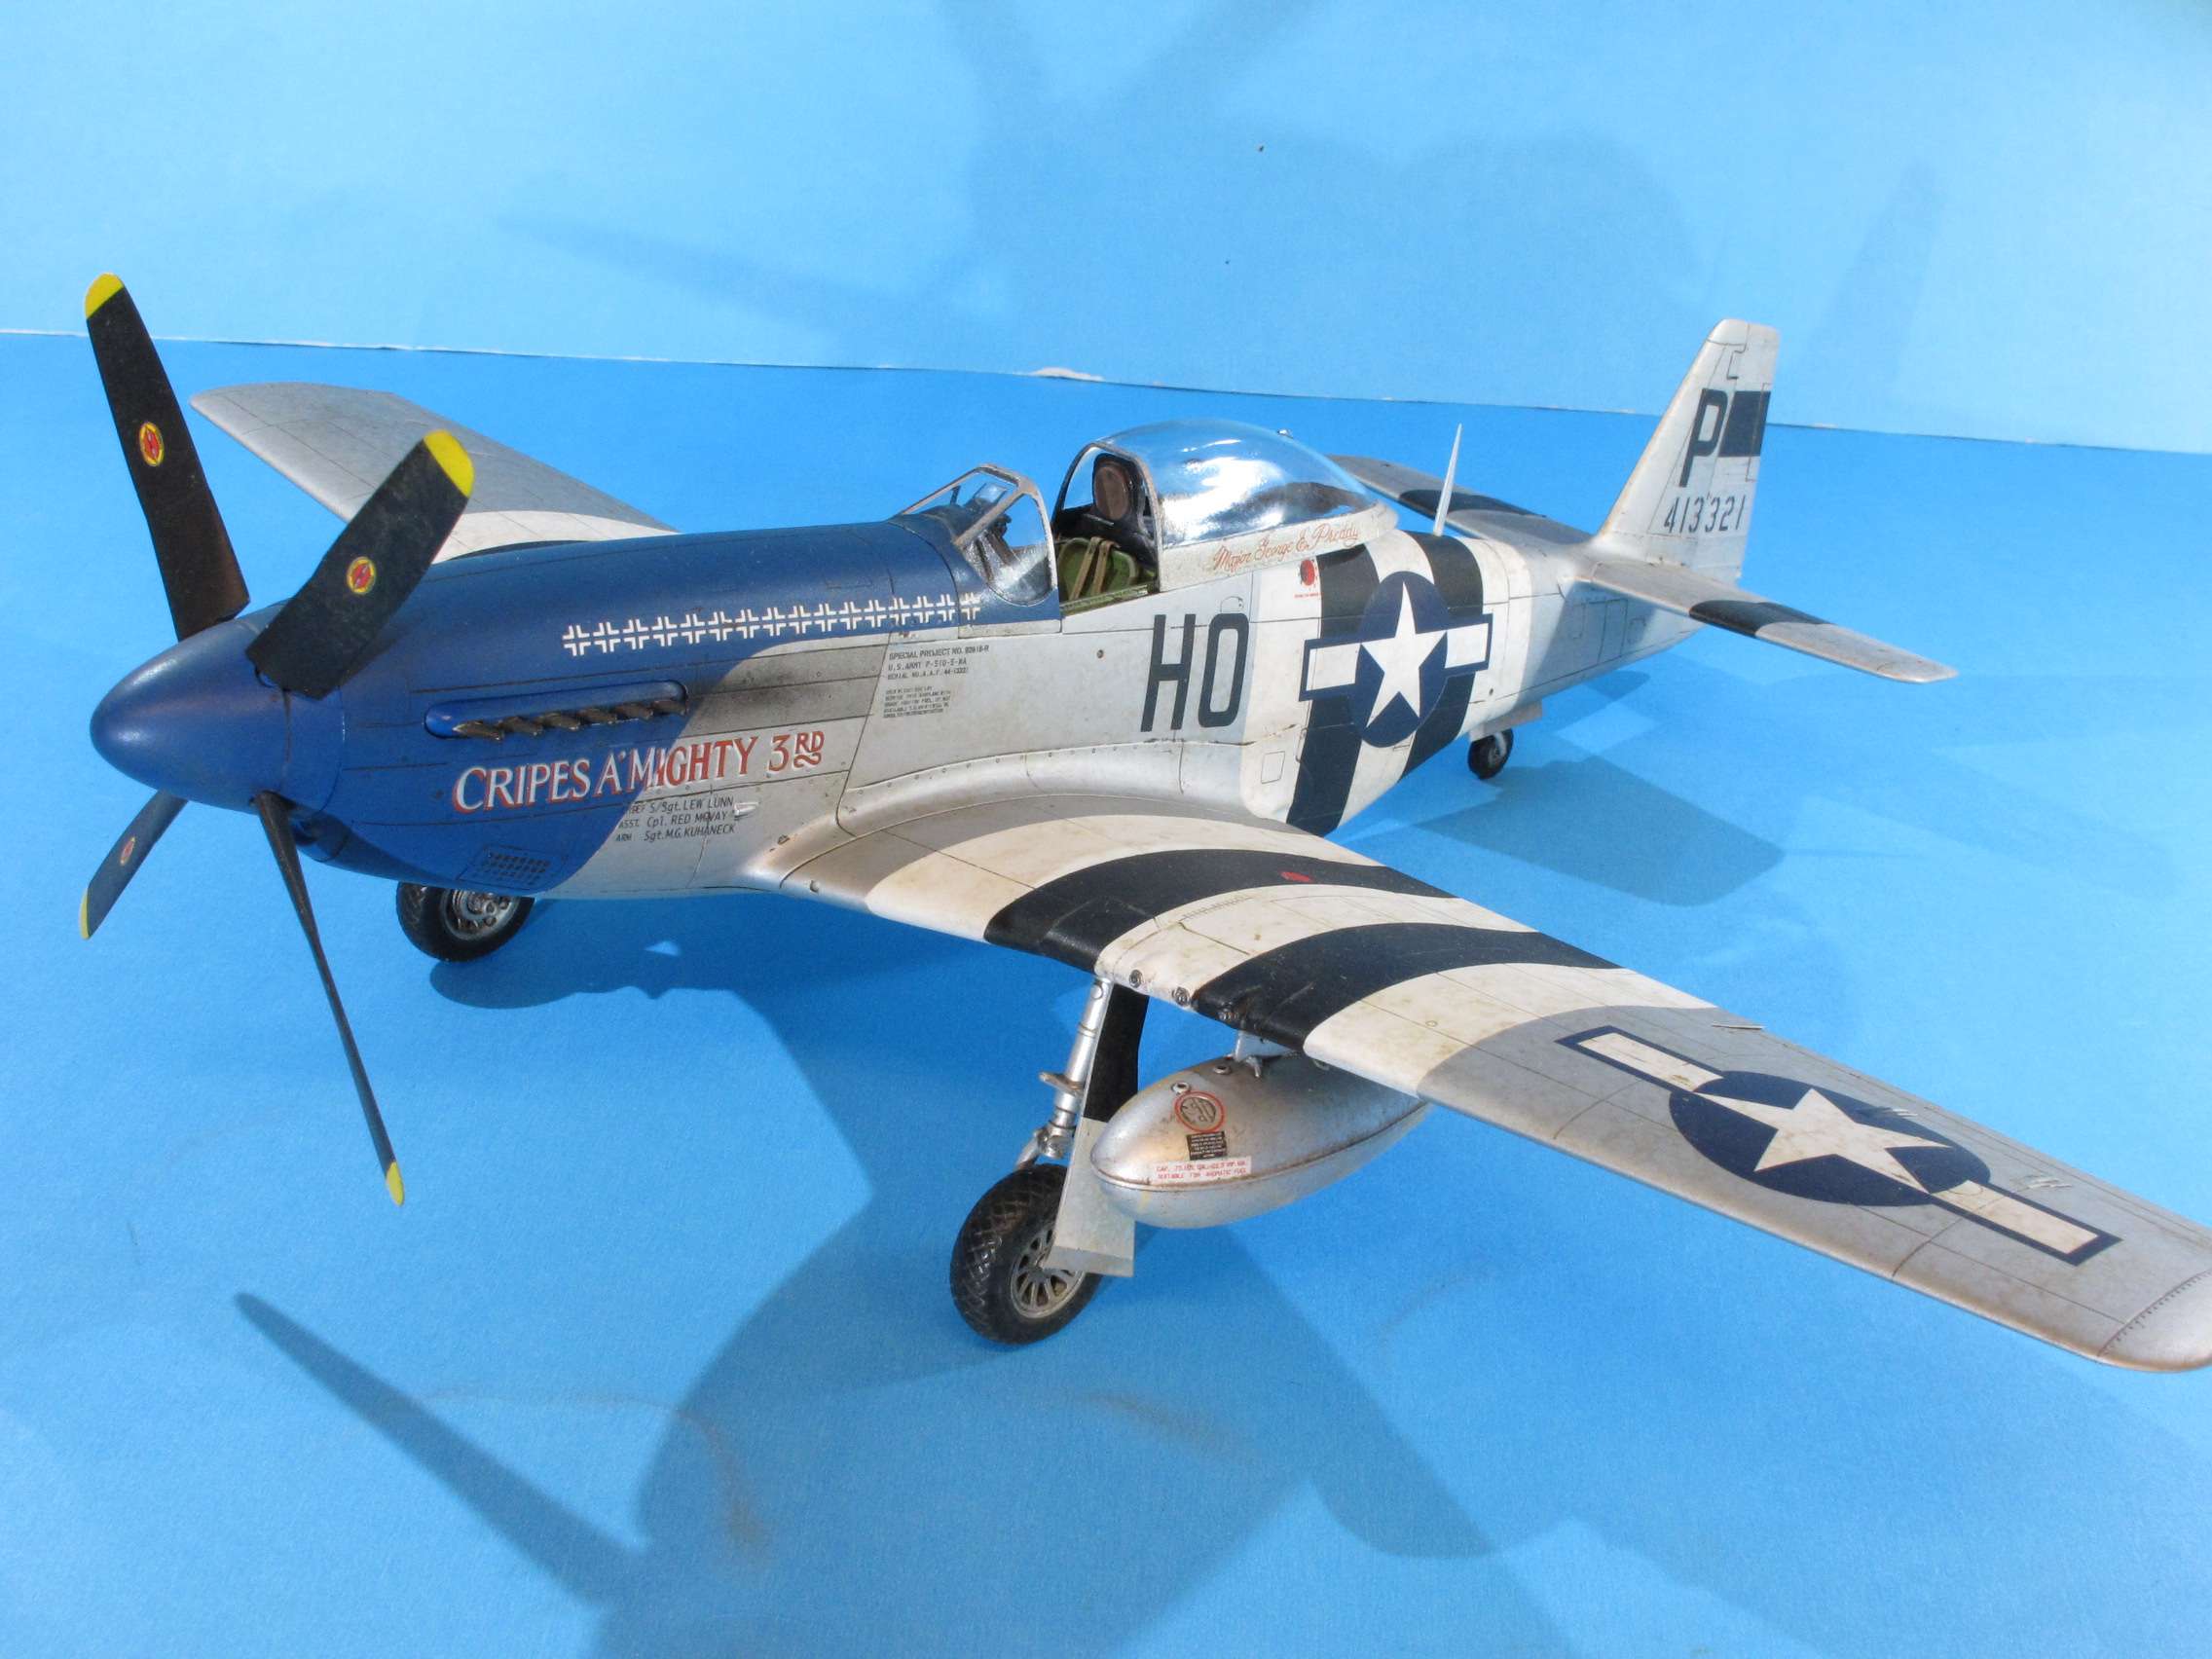
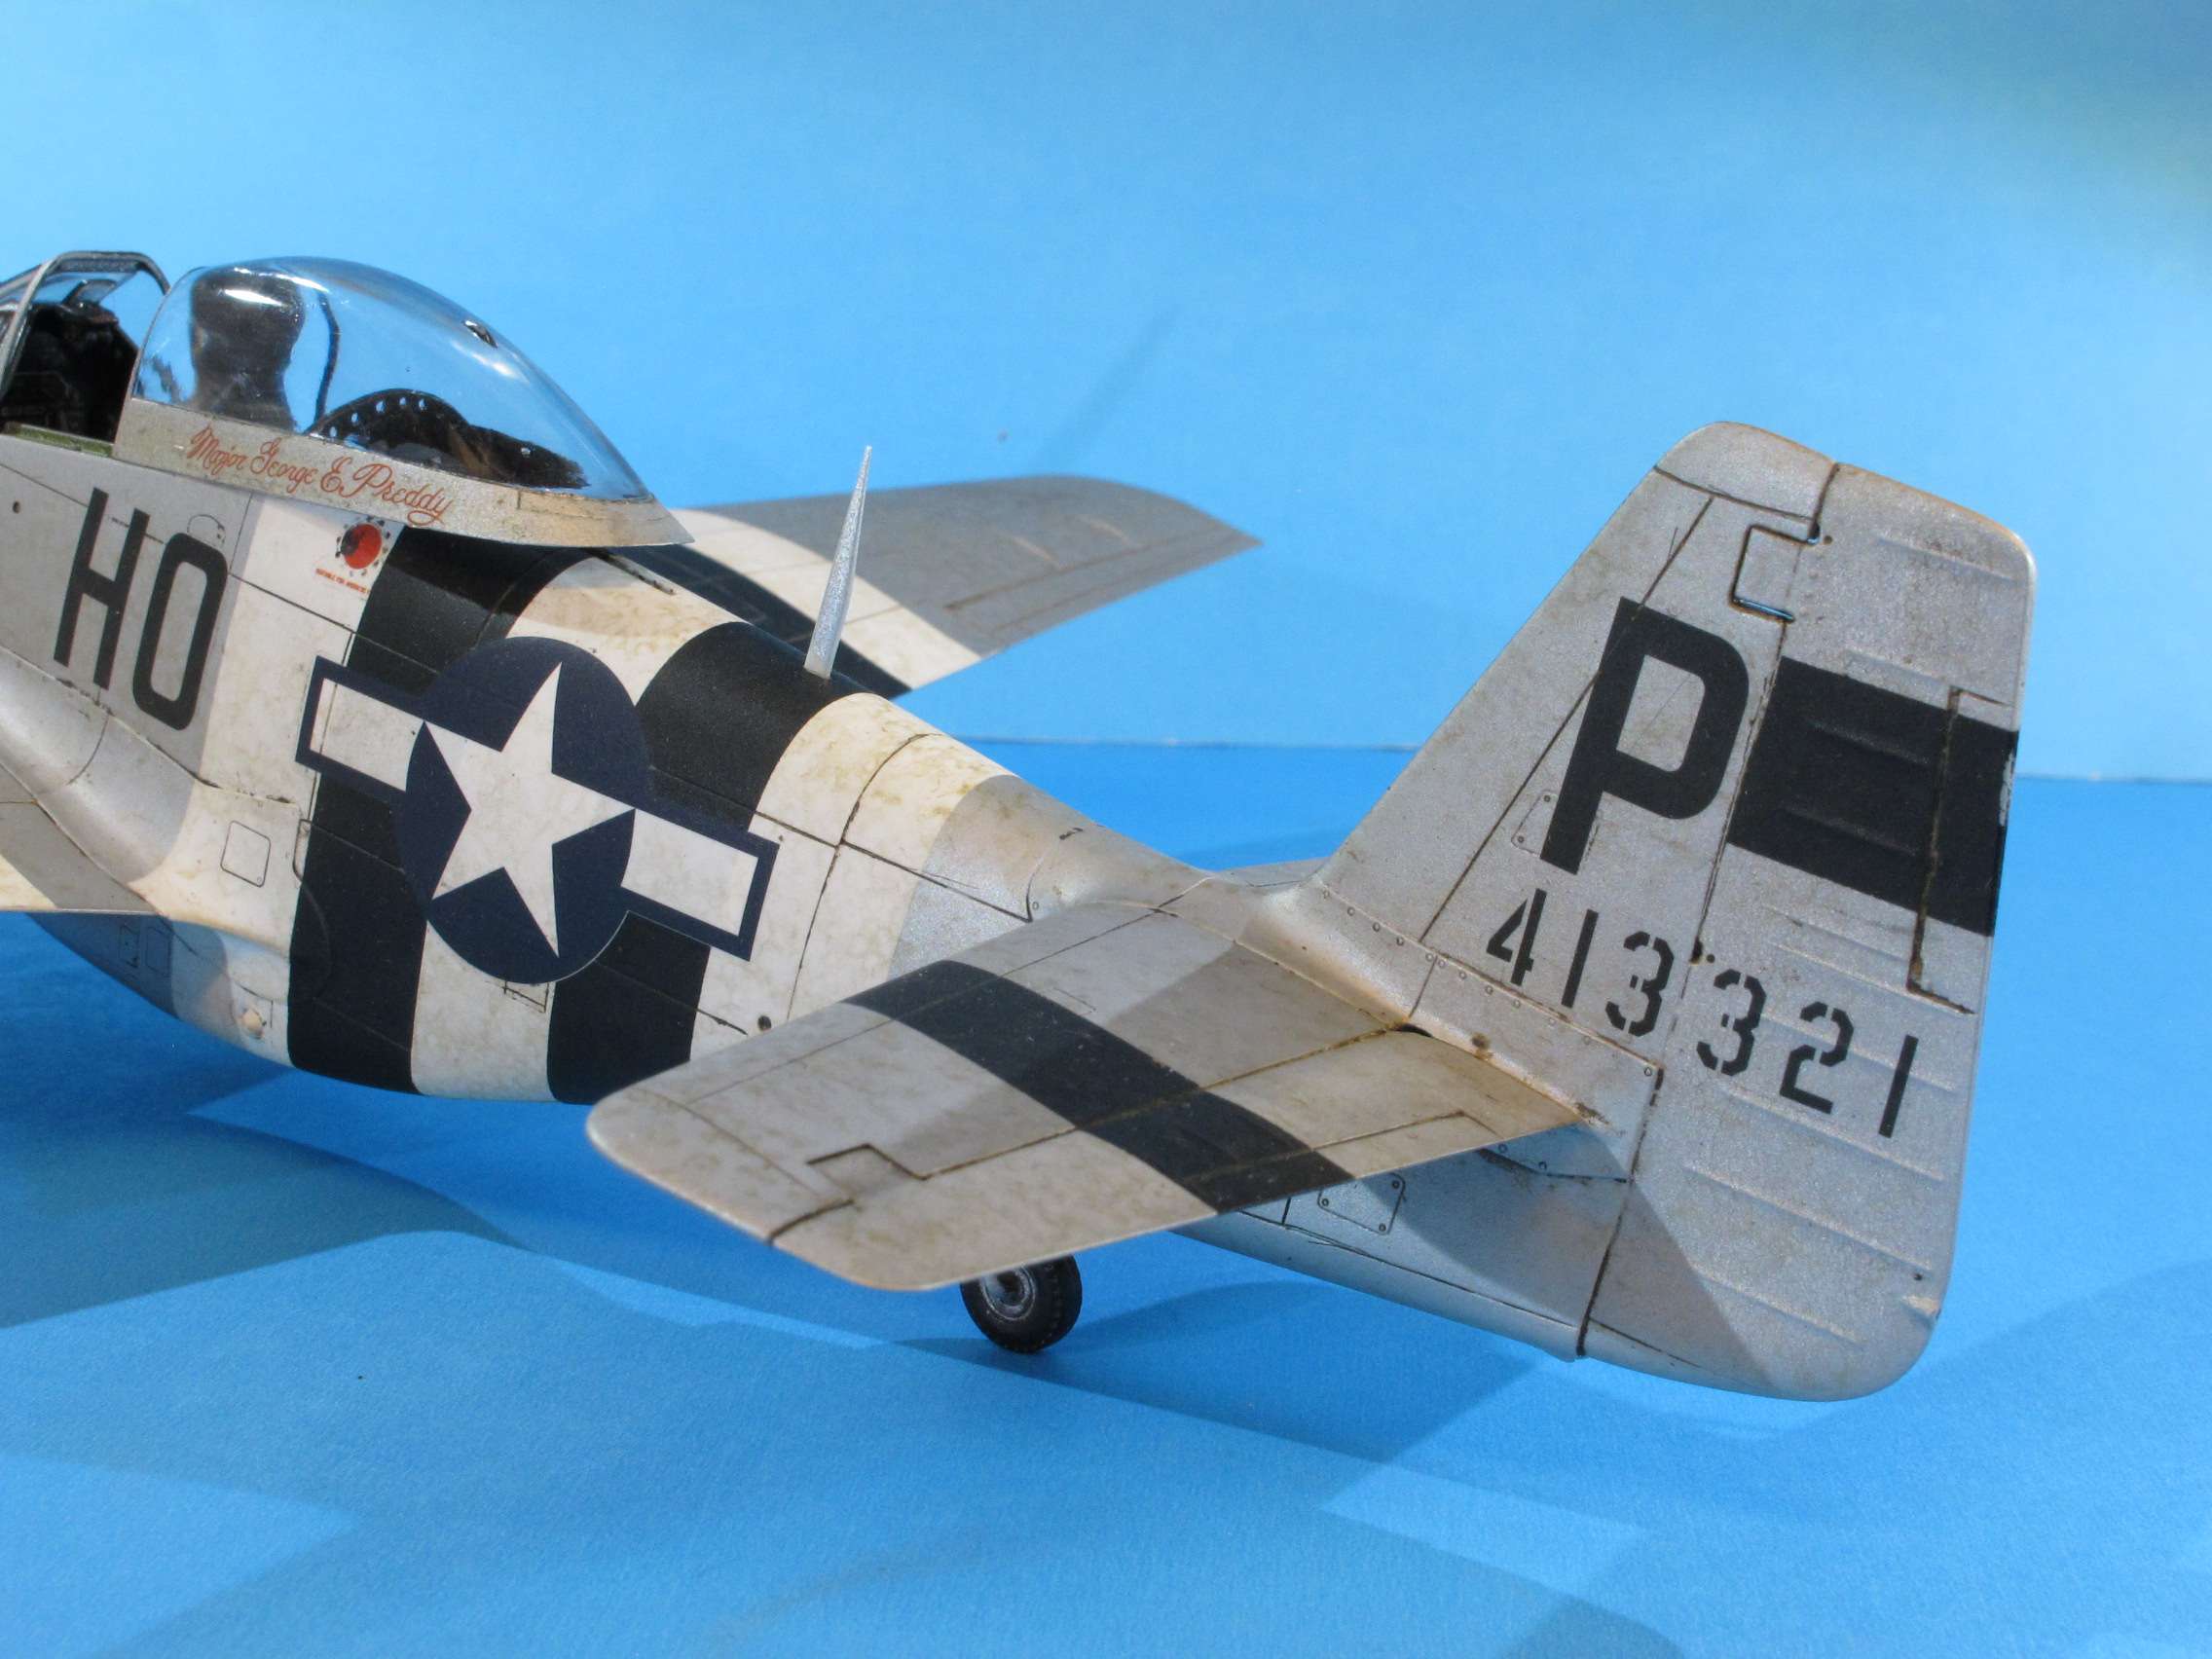
So "Cripes a mighty 3rd" it is. First time doing invasion stripes, looked real simple to do, but they took about 3.5-4.0 hours to lay up and paint!! Moving on to the blue, now. There are a LOT of these builds on line plus pics of warbirds in these markings and there is a great variance in the blue used!! The Tamiya kit gives a mix for the blue to use on Petie 3rd. Looks good to my eye!! Found an exact match to the mix in a Testors Model Master Acryl colors 4206 Midship Blue 1/2, will decide which to use. I'll lay down a primer of white first, then apply the blue.
Don
-
Looong time since i've updated!! In the months time, i managed to build the major assembly. Straightforward stuff, usual dryfit/scrape/sand/repeat...most of the work was in the cockpit area where the pit was a little too wide. Stabilizer to fuselage fit needed work as well, nothing out of the ordinary. I like my builds with closed hatches, etc., so the flaps and the panels were closed as well. On my kit, the panel lines seemed a little soft and shallow, i used a scriber to deepen them, the fuselage ones especially on the side of the nose were the worst. Last weekend i primed it with Tamiya rattlecan then sprayed with Tamiya AS-12 Bare Metal Silver. This weekend i'm hoping to pick out panels withe various Vallejo Metal Color shades. Still haven't picked out the scheme i'll be doing, shoud decide by tonight.
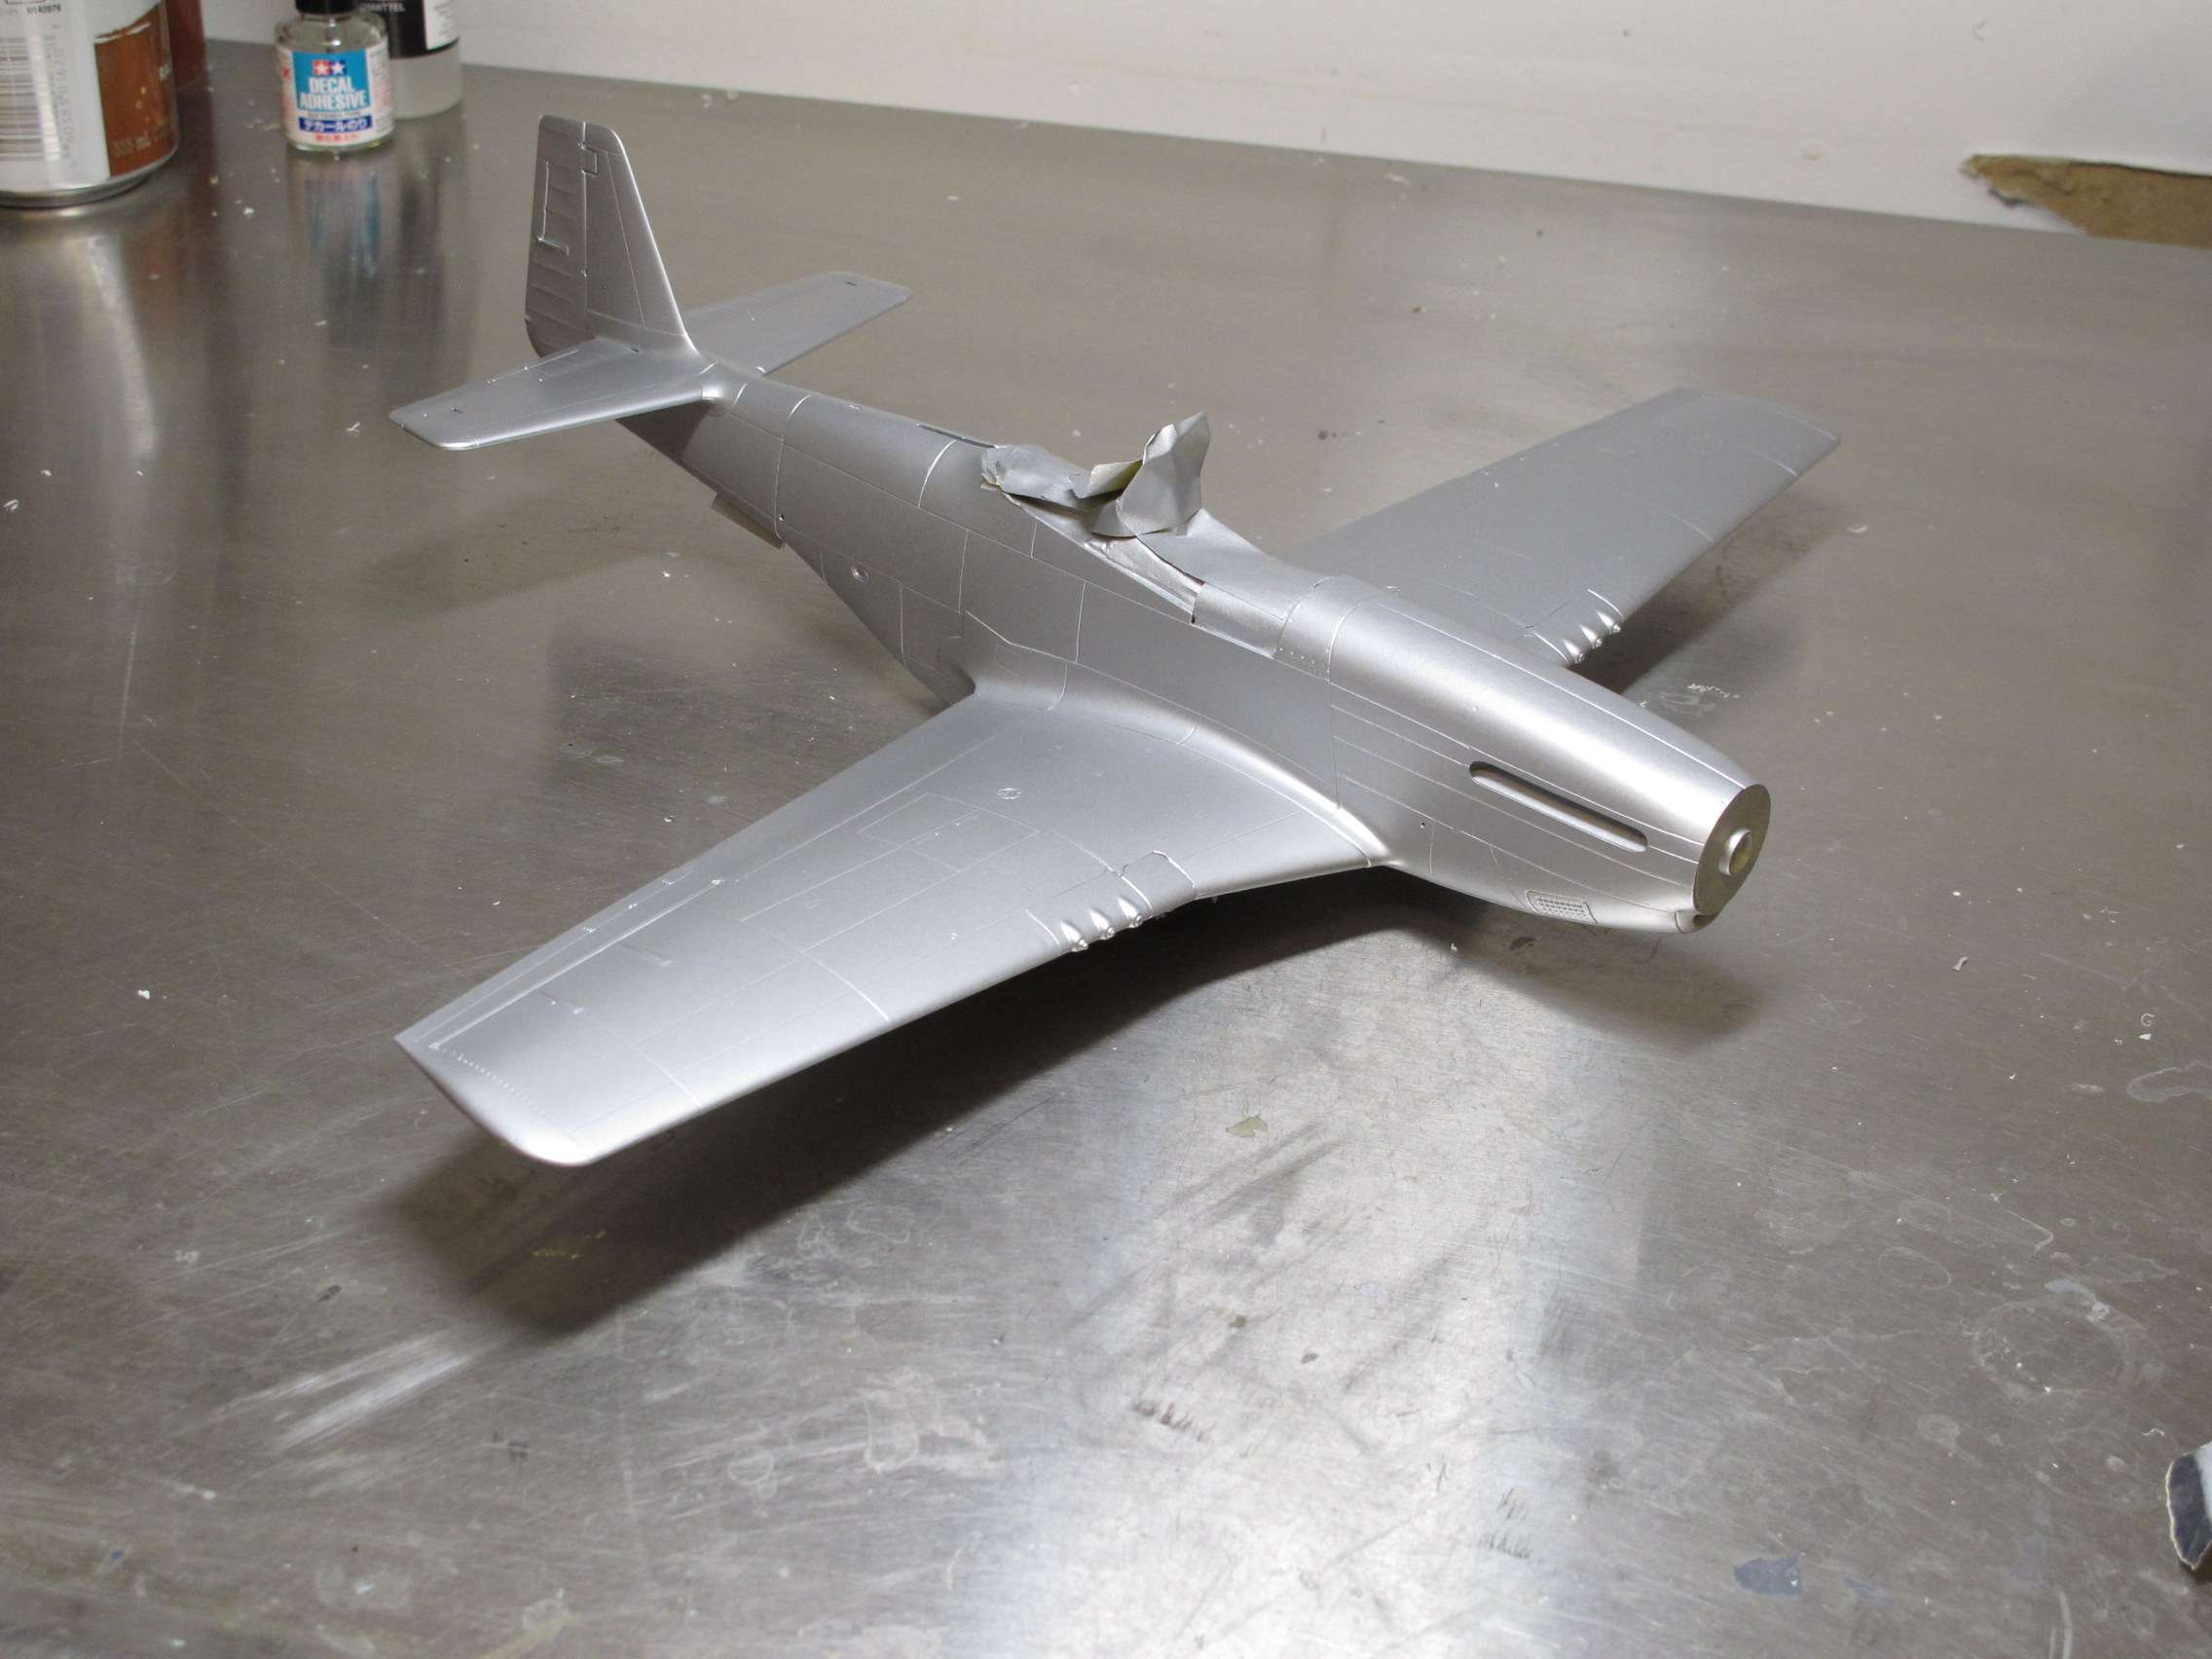

Time to paint.
Don
- coogrfan, Alain Gadbois, MikeC and 8 others
-
11
-
On 10/4/2021 at 3:10 AM, MikeMaben said:
Too wide right ? (trying to remember). I glued on side and let it dry, then pulled the other side out flush and glued that.
May need a chunk of sprue or something to spread the cockpit edges until it dries.
...as if you need advise from me
")
Yeah, too wide. Took a fair bit of sanding before things were good. Looking at it now, i think i could have cut a lot of the side detail out completly behind the seat bulkhead, none of it is seen after the fuselage is closed up. I don't adhere to the "i'll know it's there " school of thought, so i wouldn't have any problem doing this.
Don
-
Have to say, the sanding work really improves the look of the panel lines. Done this a few times on trench work lines, made me really hate sanding.
Don
-
On 10/2/2021 at 5:05 PM, MikeC said:
And there I'm going to have to pause it: just got a commission of a Valiant for a magazine on a short deadline. Who said 1/72 was small? That thing is huge!
But the Comet will be back asap. Thanks for staying with me so far.
Cockpit work looks great!! I really like the Barracuda seat with the backpack.
Don
-
12 hours ago, MikeMaben said:
Hey Don , looking good. If you have any trouble getting the fuselage halves to fit together,
you may need to flat sand the sides of the cockpit cage assembly.

Yup!! Had to do that, otherwise there would have been gaps, wing fit would have been off as well. In spite of this, i think the windshield may be off a bit....
Don

How much would you sell your built kits for?
in General Discussion
Posted
Brother is getting his house ready to sell, Painter saw my builds and told my brother he would buy them for his dad. I'm just an average-ish builder, nothing super detailed, mostly close to OOB, flaws etc. I have no idea how much to price these out at. Truthfully i was just going to trash them, maybe i'll just give them to him.
Don