
radial
-
Posts
190 -
Joined
-
Last visited
-
Days Won
1
Reputation Activity
-

 radial reacted to LSP_Kevin in J&L 1/72 Vac J-29 Tunnan
OK folks, here are the glamour shots!
Thanks everyone for following along, and for all your words of help, encouragement and praise!
Kev
-
radial reacted to csavaglio in 1/32 U-2 Dragon Lady
Well, finally got home at a decent hour and I decided to get some work done on the spy plane before the season premier Archer episode comes on.
I'm taking this one problem at a time and I'm still awaiting my Amazon order of books to get here. Tonight's problem was the wing locations and spars.
My original thought was to mount carbon fiber spares in the fuselage to plug into brass box tubes in the wings. I figured this would make the wings unnecessarily heavy, so I went the other way. There's 2 sizes of spars here. The smaller ones lay flat and plug into a piece of brass box tube that will be mouned in the fuselage supported by heavy styrene stock. It's just in there supported by the fuselage halves and not glued. The CF strip is CA'ed to the lower wing half and boxed in with some styrene. I didn't bother making it neat, since it doesn't need to be. I just used some scrap. I also added some extra styrene to beef up the area where the pogo gears will plug in.
The larger piece sits vertical, mounted into the fuselage (again, not glued yet). This was sanded to a taper using my trusty Dremel belt sander (yes, the carbon fiber makes a huge, dirty mess). I used some big square styrene stock to go on either side as guides for the spar. I tapered it so that it should be pretty close to the top wing, so there's not much need to completely box it in.
I did manage to mis-located the holes for the spars on the second fuselage half, so there's some back filling that will have to be done. I'll back these areas up with some styrene so that it's easier later. I guess that was bound to happen since there isn't even a hint of where the wings locate.
I'm pretty happy with the solution. It's not real pretty, but it's light and strong, even without the parts all being glued yet.
The tail was a bit easier. I'm just using a piece of .060" strip styrene as a simple spar. It'll go from one horizontal tail plane to the other through a slot in the fuselage.
The last pic is just to give a sense of scale since this is the first time I've mocked up the thing. It's sitting next to my Tamiya 1/32 F-4C........
Chris
-
radial reacted to Bryan in Strega Air Racer
I thought it was time to post an update on this, to prove (to myself at least) that I had not given up.
I have most of the cockpit done. The instrument panel on Strega is completely different from a stock P-51. Wherever possible I am trying to make use of the parts from the Tamiya kit (modified) so I can take advantage of the fantastic engineering Tamiya designed into the kit. That was how I proceeded with the panel....most of it is changed but the mounting system to the rest of the cockpit remains.
Thanks to some photos that Harvey pointed me to, the instrument panel is pretty accurate...at least when viewed from a reasonable distance. The seat is in the ballpark also, based on it's appearance in some recent online photos. The floor and side panels I imagineered partially, from photos of Voodoo's cockpit that Mark126804 sent me. Voodoo and Strega are fairly similar in some ways, and since I was completely unable to dig up photos of the lower parts of Strega's cockpit (I even tried to contact the owners...no response)...this was the best I could do.
Beyond the cockpit, I started on the wings. I "clipped" them and have begun "demilitarizing" them and smoothing them. On Strega the wings are completely smooth...no rivets or panel lines visible. I am not sure yet how far I want to go in that direction. While it would be most realistic to fill all the rivets and panel lines, I am not sure yet that I will. Completely smooth, featureless surfaces don't always model too well IMHO. We will see.
Thanks for looking.
-
radial reacted to airscale in Hobbycraft Sea Fury Hawker Company demonstrator G-AKRY
thank you chaps
thought I was overdue an update..
..still faffing about with the wheels (I have got more in the u/c bay completed though) so after finishing the master I thought I had better try casting a copy. I started thinking I could just cast two halves as open pour moulds as making a two part mould is a bit of ballache to be honest..
so laid the master up and poured over the mould material - here is one half with the other and the backplate of the hub cooling off...
after a couple of days (it takes 24hrs to go off) I had the parts needed...
..after a lot of sanding to get the two halves the right thickess I glued the halves together and found the tread lines were not equal or level which was a real problem when trying to rescribe them. I couldn't scribe them properly on the master as the old moulded tread and CA filler produced a jageddy edge so I intended to make them deeper on the resin copies.
In the end I gave up and had to make a two part mould after all - heter it is laid out with the flow channels to carry the resin around the mould...
...eventually had both halves...
...the exciting (and scary) bit is making the first one to see if the mould is ok...
...hmmm....fail.... the hub bolt heads didn't come out - you might just be able to see the marker lines for the tread... the rest looked ok though so try again...
..after a few tries I ended up dropping the resin into the hub part of the mould to make sure it was covered and then rushing to get the mould together to inject the rest - all in about 45 seconds before the resin starts to go off - eventually had two passable wheels...
..and cleaned up... still not happy with the treads, the mould seam line crossed them here and there and the masters were not really deep or straight enough to give clear guidance for re-scribing - still my excuse is they must have got nicked and scraped in real life so will have to do...
..it takes time using resin and I am learning all the time, but it is a good way to make parts you need more than once..
until next time folks..
Peter
-
radial reacted to Silver Wings in New ideas
Thanks Guys !
So this year might bring new box-arts maybe but of course the most important thing is to keep upgrading the content of the box.
More news soon!
-
radial reacted to Iain in Boeing P-26/Model 281 Peashooter - Canton Air Force
Light grey on - clear glossed - must be almost ready for my favourite stage - decals and weathering!
Oh - and the prop looks like it needs more paint - I can see yellow showing through!
Iain
-
radial reacted to ericg in Aerotech Supermarine S4 Finished!
The completed radiator units... 9 beers and 3 hours of messing around and they are done. Will be interesting to see how they look under a coat of primer.
-
radial reacted to LSP_Kevin in 1/32 F-84F Thunderstreak Hobby Boss?
Jeez Brian, I thought your photo was of an RC model at first! Where are the panel lines, the pre-shading, the rivets? C'mon...it's a fake!
Kev
-
radial reacted to topper71 in new built AVIA B 135
Hi guy 's here the next step of my AVIA B135 conversion
here the new prop I took the pacific coast hurricane and modified it
and I I have made a new interlining behind the cockpit
regards topper71
-
radial reacted to tomprobert in 1/32nd scale ID Models Boeing B-29 - FINISHED
Part two...
With the major sanding and filling now over it was time to repair the detail lost during the filling process.
The wings got rescribed and micromeshed:
And here we are now... something that resembles a B-29:
I can't help but feel she looks a bit like the original Kee Bird did when laying on her belly, with the rudder missing on the ice-cap... I just hope this model doesn't suffer the same fate!
As mentioned in part 1 I really feel like I've broken the back of this build now, and to celebrate:
Lots still to do though, and my next objective is the undercarriage
Until my next installment...
Tom
-
radial reacted to richdlc in 1/32 recovered B-17 - UPDATE 12/10/13 - FINISHED - YAY!
last three shots showing what will be visible once the fuselage halves are joined - this will decrease further according to how much the damaged skin panels cover up that big hole. I will show them blown outwards like the petals of a flower....but more on that when I get to it - Don't forget also that the ball turret will be in there, along with some other stuff so it will be even busier........here's the pics:
overall view - nearly done on the interior...
That's it for now folks! I plan to add a few more details and then hopefully get the fuselage halves joined. I've decided to remove the nose & work on that seperately as that will make it easier to work with....
I'll be back with more updates in the New Year - until then, have a good one!
Rich
-
radial reacted to Shawn M in 1/20 Fujimi Williams FW14b
Nice to see another car builder!
I've got my first F1 car on its way to me as we speak.
I usually dable in ol american Iron or WRC cars.
Here's my last one:
-
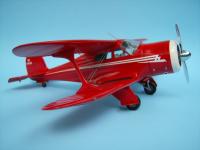
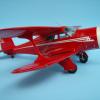
radial reacted to Royboy in Silver Wings Planned Releases for 2013/2014/2015
All good stuff, but the most exciting one for me is the Boeing Stearman.
Long, long overdue, and in my opinion would sell even more as an IM kit!
I'll buy one or two regardless, so well done to the SW Team for listening to all the modelers.
If it gets produced in 2014 it'll give my wallet a bit of a well needed break for once!!
Got a flight scheduled in one for next year so it'll be made in those markings.
Happy days.
Roy.
-
radial reacted to Shawn M in WnW Pfalz D.IIIa Finished.
wow, the model looks stunning and that base mat is wonderful!
-
radial reacted to xmh53wrench in "Precious Metal" Race38 Reno 2012
Well, I have several other builds going on, but I kinda have to strike while the iron is hot on this one.
My subject...
The gorgeous Reno Air Racer, "Precious Metal" The hot iron is that the pilot/owner has allowed me a bit of his time to answer questions, and has posted a 20 minute slideshow on Youtube with a bunch of photos of the aircraft since he has owned it.
I am fairly new to modeling aircraft by most standards here, and even newer to the Reno air race scene. This aircraft has a bunch of history, and is what I consider one of the most highly modified aircraft to fly there. As I go, and as my research develops I will share some of the things that make this aircraft significant.
The aircraft has been through a make-over in the past 2 years, and has had made huge strides in its propellor design (which were done by the owner) that has made it a real contender at Reno. (They say an extra 64 MPH gain on the Reno race course, with no other remarkable alterations or modifications, except the propellor)
This racer is in fact a custom designed and scratch fabricated fuselage, mated to a P-51D wing, P-51 tall tail empanage, with a custom fabricated engine mount to accomodate a Griffon powerplant and an highly modified Shackleton counter rotating propellor.
This is one gorgeous aircraft. I plan to do it as it appeared this year (2012) at the Reno Air Races.
I have a feeling this will test my every skill....
Here is....."Precious Metal"
Keith Breazeal photo
Oh ya......."Go big or go home"......thats what I always say.
......the kit
I have managed to collect some extra props, and am trying to gather a few extra 1/32 canopy back halves, and in the process of planning out the mods to the fuselage. As well as trying to come up with a few extra pics of a Griffon to make the kits Merlin look a bit more like a Griffon.
Wish me luck...
-
radial reacted to KOTR in WNW Hannover CL.II - Say it isn't so!
Good thing is, WWI barely interests me...
...so I sit down and watch the whole rigmarole from a safe distance, amused and sometimes shaking my head in disbelief...
-
radial reacted to xmh53wrench in My flotilla....
And this is a boat of my own design. Its a bit of a copy of a Glen-L boat, but my own take on it. Its a 16' cabin cruiser and I would love to have a boat like this someday.
INPROGRESS
COMPLETED
-
radial reacted to ericg in 1/32 3D Printed V-1 Flying bomb. Major update.
I have started adding some of the details to the V-1, namely an inspection panel and the conduit that ran most of the length of the fuselage.
-
radial reacted to elric in "Fuhrungsmachine" Junkers Ju88-H4 / Fw190A8 Mistel
My last two mistels :
Bob.
-
radial reacted to Lee White in 3D vinyl models?
Hi Radders,
Carving Balsa can be a rather therapeutic hobby in and of itself- If you'd like some practice at it, go to solidmodelmemories.net and print out an old plan, with "snap gauges", and try your hand at it..... not difficult, and once you get the hang of it, you'll be making masters of lots of things. And the load of balsa you could buy, for the price of having something printed in 3D, would likely be sizable. Dr Frank Mitchell had a scratchbuilding tutorial over on Hyperscale a while back, but I'm not sure if it is still there. If not, maybe he could send you a copy- He's helpful with things like that, and he can be found here on LSP (fmitche). HTH!
-
radial reacted to miamiangler in Special Hobby 1/48th Lloyd C.V
I finished my contest build at Swanny`s Models .Com and here are a few photo`s .
Thanks ,Willi
-
radial reacted to HerculesPA_2 in MiG-21 Full scratchbuild in aluminium
Hey friends, more photos of my project MiG-21. Fuselage side and gear compartment plus wings.
And so... thats all dears
Hercules de Araujo
scratcher from Brasil
-
radial reacted to Out2gtcha in DeHavilland CHC II Beaver N888BH
Next up, I cut out the exact outline of all of the windows in frisket film, and since the window decals are also on clear paper, I cut these first out in white decal paper, then applied and let set, then hit them with some Micro Sol -
Some windows required a 2nd or even 3rd coat of Micro Sol as the came out with some minute wrinkles from the process. This was my fault, as I didnt gloss these properly, and you can see the rear window that was glossed properly came our wrinkle free and smooth -
I got them out as best I could by smoothing and popping areas, then re-applying Micro sol.
Then I moved on to the actual window decals themselves. These I cut out by overlaying the previously applied white decals on them and cutting the proper shape out. I did it this way since I knew my cuts and windows were not 100% accurate to each other or alike, so I cut out each pattern individually.
I made these in the hopes they would help add interest to an otherwise "let down" area of the model, and at the same time I was hoping they would ad some of that desktop scale type appearance to it as well.
I like the way these turned out and while way far from perfect, they are a big improvement over just a solid color or overlays of solid colors, and will look even better IMHO, once under a nice coat of gloss clear.
For now though, I applied them, trimmed any uneven areas and gave them a coat of Micro sol as well -
Thats as far as I get. I have really run out of even decal things to do at this point. I could assemble bits onto the floats, but this would just make them harder to handle so Im going to stick to the plan, and add them after joining airframe and floats. Im not sure, but I might do some experimenting with the blue decals to see if I can back them with anything or not. I shall see.
Cheers for now lads,
-
-
radial reacted to Out2gtcha in DeHavilland CHC II Beaver N888BH
I will definitely do some tesing first, but the MM clears that Phil speaks of, and the MM thinner I personally use with them are some of the coolest (temp wise) lacquers ive ever used..............so hopefully will have no issues, but will definitely test first.
Cheers,