

Neo
-
Posts
2,343 -
Joined
-
Last visited
-
Days Won
1
Content Type
Profiles
Forums
Events
Posts posted by Neo
-
-
-
-
I just got a intllab vortex mixer and its life changing. Especially for mrp paint
INTLLAB Lab Vortex Mixer, Touch Function Lab Vortexer, Tattoo Ink, Gel Polish, Eyelash Adhesives, Acylic Paints, Test Tubes and Centrifuge Tubes, 2800 RPM https://www.amazon.ca/dp/B08CR43XR3/ref=cm_sw_r_apan_i_3ZGRCBZ3VBSYZAGTEM45
Was hesitant about price but so worth it
Alternative that i almost got in the new DSPIA mixer
https://trinityhobby.com/products/dspiae-magnetic-paint-mixer
But was anoyed that you need a piece of metal in the bottle to work
-
On 3/25/2022 at 1:53 PM, Citadelgrad said:
OFFICIAL UPDATE!!!
I got a package of IJAAF colors from SB this morning. No fewer than 7 bottles (although inexplicably, I got 2 bottles of Japanese marking yellow, I will NEVER use that much...).
They were shipped via UPS surepost, in a box with crumpled up butcher paper as padding, all bottles in the same ziplock bag.
Leakage.............................................................0.0%

Anyone need some Japanese Marking Yellow?
PS I did manually check the bottle tops. The bag smelled of lacquer, but none is visible. One of the yellow bottles rewarded me with about 1/8 turn, the rest were all firmly in place.
Good luck out there, lads.
I could use some Japanese yellow got a ki44 in the stash
-
On 5/31/2022 at 6:18 PM, Timmy! said:
Finally an update. This project is about to get moving again. After months of on and off work I finally learned enough code to get my app to talk to my micro controller. As of now I have one switch and the throttles successfully sending data to the micro controller, and turning on a neopixel multi-color LED. Several more neopixels and a sound board will added and I still need to write up some animations to make the lights and sounds all function properly. I predict this to be much easier task. Then I'll hard wire everything up and get the model going again. BTW there is no sound in the video except for the TV in the background.
Thanks for watching.
Timmy!
Very cool project, are you doing this open source? I would love to contribute to the app or services code
-
-
-
Looks amazing. Great work
-
-
1 hour ago, NewtonK said:
Mmm, I've one in my stash that I found after digging for hours on the net... At a reasonable price, no less. They're out there, keep looking!
Is that an offer ?
-
-
4 hours ago, jwest21 said:
I've added food coloring to Future and dipped them. Worked pretty well but you need to add a LOT of food coloring for it to be noticeable.
I tried the Future with the liquid from an unstirred jar of Tamiya Gold leaf and it wasn't too bad, either. You just want to make sure all the pigment has settled to the bottom
Will be hard to get a finish like this

I know hasegawa makes a film for hud, wonder if its doable for canopy
-
Shame about the tint on the canopy, AVF made some AM ones that were so good, wonder why none are like that OOB
speaking of those tinted canopy's id love to find a A-10 one

-
11 hours ago, BloorwestSiR said:
Here's the Rhino intakes I used on my Tiger Meet CF-18.

I installed them first before I put either side on


This seemed to give me the cleanest fit when I did it.


Carl
I did it the same way, just with less skills

-
Im building the kinetic boxing as a D right now, that boxing is modelers dream, well at least for me, when it came out i grabbed it since indisnt have to think about what version i really wanted... Its all there. Hopefully they make another run, got mine for luckymkdel with discount codes was about 95$ shipped to my door. Cant beat that
- Rick Griewski, LSP_K2 and Mr.T
-
 3
3
-
-
Take care John
-
5 hours ago, quang said:
I don’t think thinner is the issue.
I’m using mostly hardware store generic lacquer thinner and never have problem with the paints I use : Mr Surfacer 1200, Gunze Mr Color, Tamiya LP, AK Real Color, Hataka Orange line.I also have Gunze Mr Color Levelling thinner I bought years ago that I use from time to time just out of curiosity. I don’t see any difference with the generic variety.
Of course like always YMMV.
")
Looking back at your original post, I’d wonder why the crazing always happens at the very same spot.
One other thing is that it appears from the first photo that the paints (and primer) were applied in rather thick coats.
Maybe you should try with thinner, more diluted coats and leaving more time (15 minutes?) between coats.
Hope this helps.Cheers,
Quang
Thanks for the feedback,
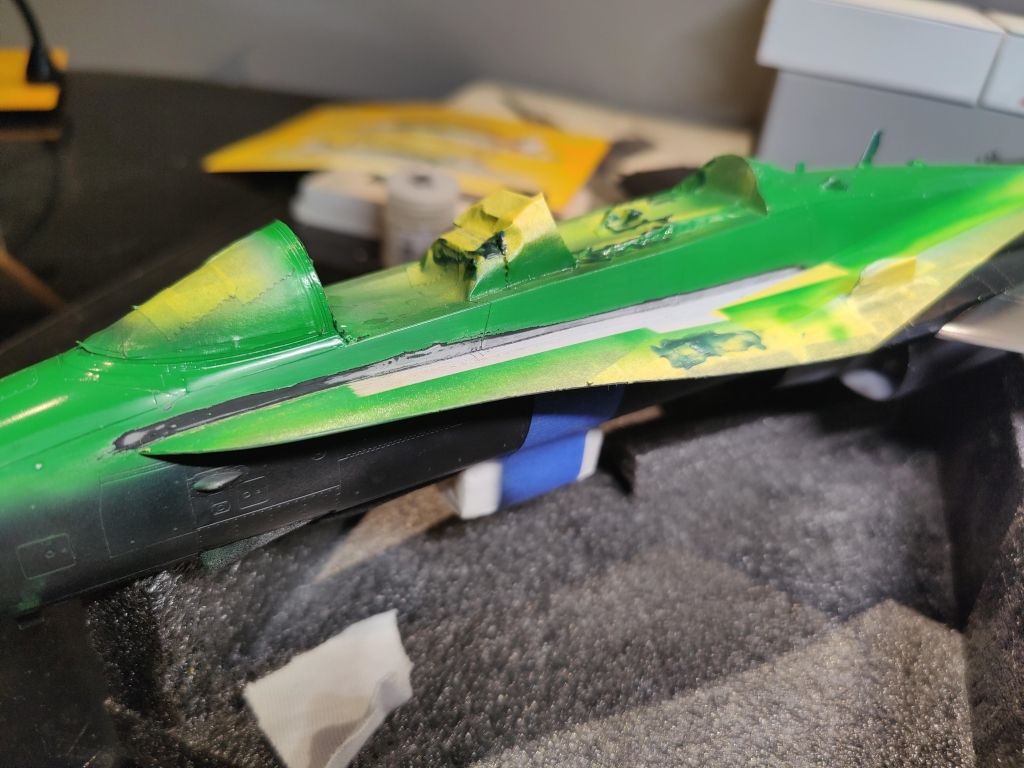
the primer was applied days before, then the grey, using the black basing technique. there was probably a day between the gray and the green.
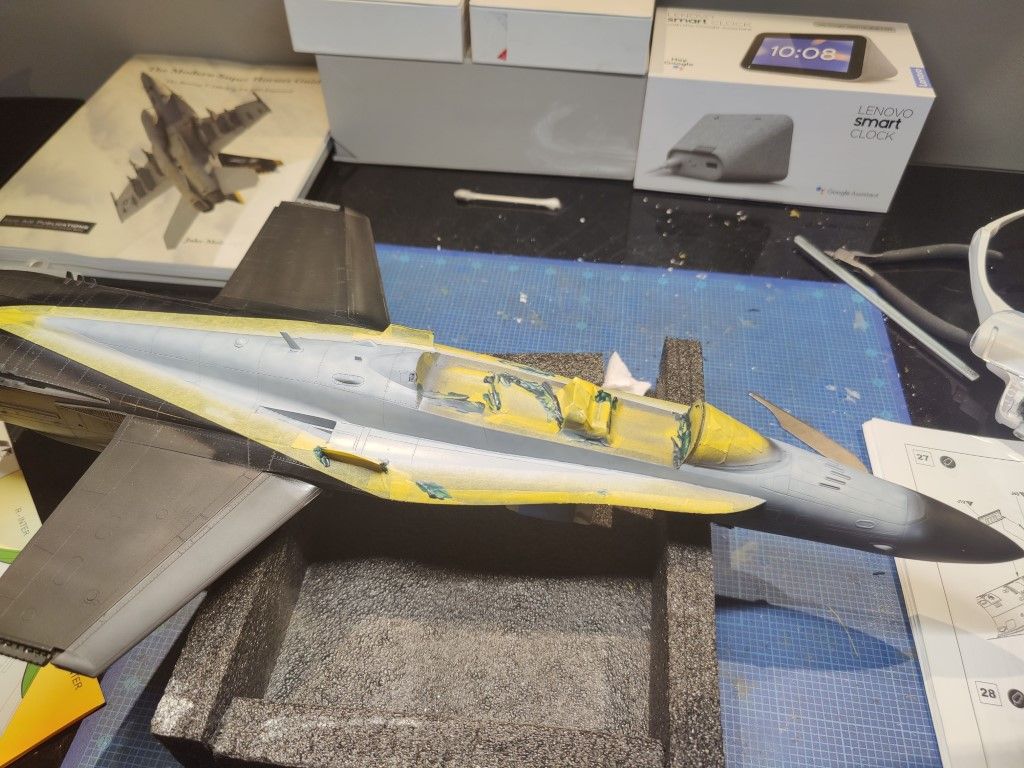
this pic was after i had done 4000 & 6000 sanding to remove small flaws in the paint, this pass was done with more then usual thinner, since i just wanted to lightly cover the sand marks.
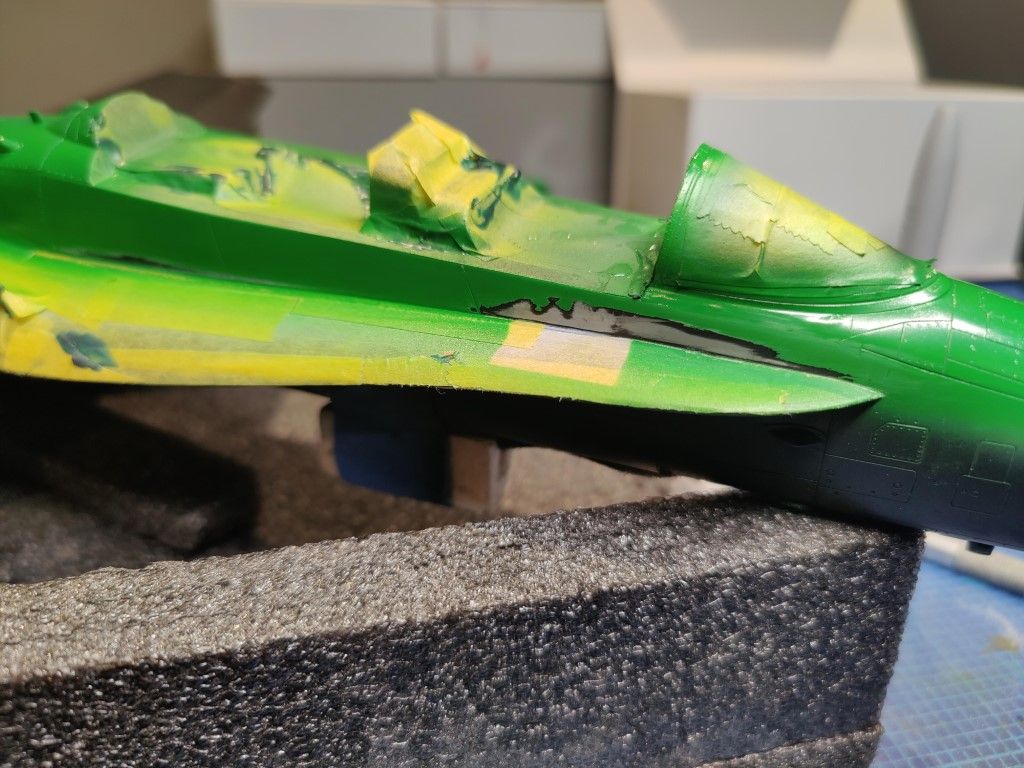
From all the comments i think 3 things are in my mind,
1 there was finger grease, and since there is a similar mark on the other side it kinda fits my pinch hold,
2 i think i went with too thinned paint that cause excess of thinner on the underlying coats.
3 i think my PSI is to high when im hitting the bottom joint (tape to green) that's causing subpar finish on the edge (hence sanding all the way back to the rear cockpit)
Ive prep the surfaces and going to reapply prime, grey green and see it i succeed this time.
thank you all for the help and comments its really appreciated.
Ill post my results soon!
-
10 hours ago, Archer Fine Transfers said:
That’s strange. Crazing like that is commonly found when painting lacquer over enamel but you used all lacquer.
What thinner are you using? Generic lacquer thinner is a lot “hotter” than thinner designed for models.
Other than that I got nothing.Using mr color leveling thinner
-
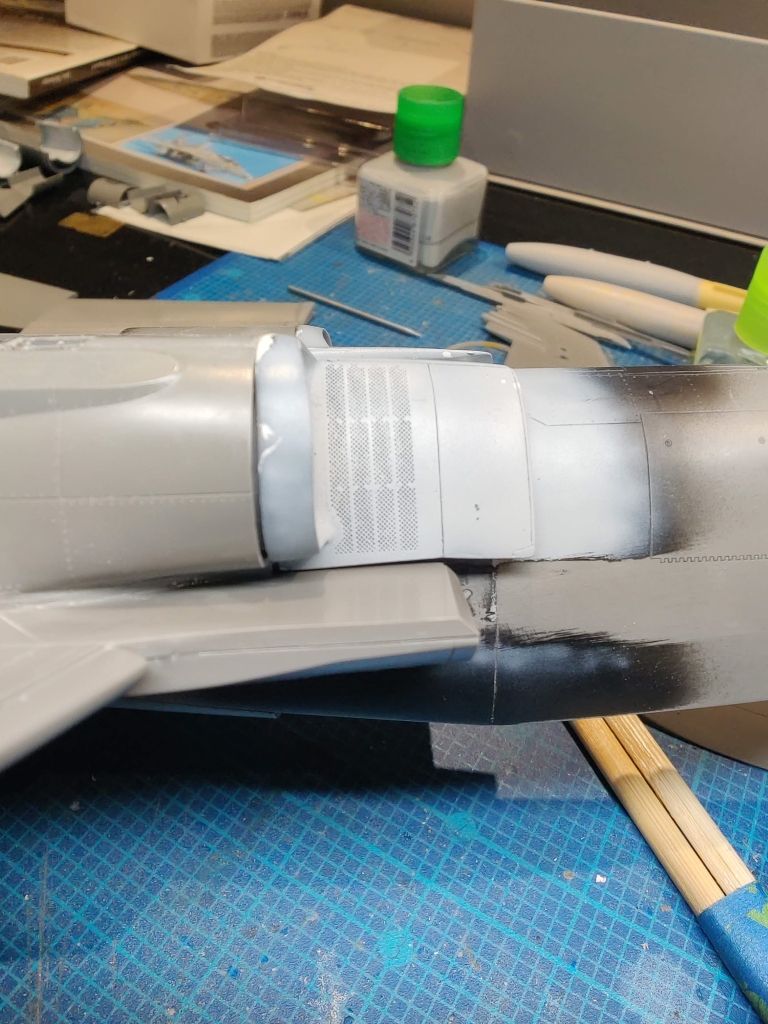
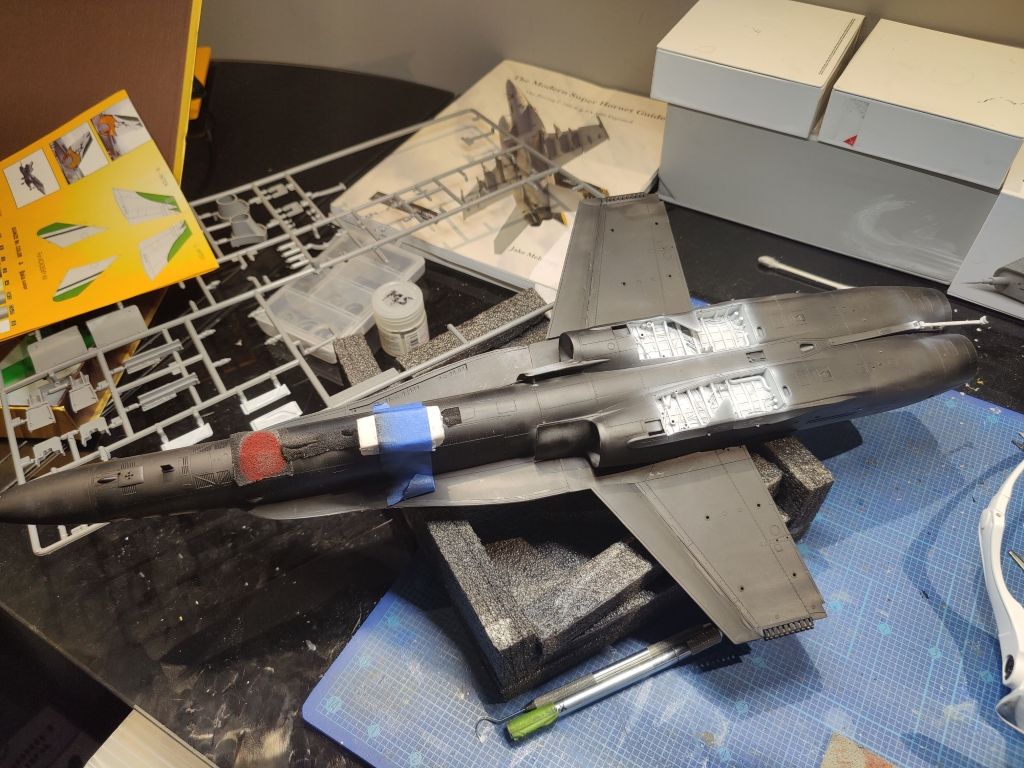
So here is the result I got, bear in mind its my first time using seamless intakes in 1/32 (did a 1/48 A-7 years ago) and only my second Jet in 1/32 first being a T1 hawk so a more skilled modeler probably could have gotten these to fit well
I based the position of the intakes on the fit from the back of the intake to the fuselage, and glued them in before the wings and the side panel. having the winf in place i would have noticed the it needed to come up more to be snug with the wing.
- LSP_K2, VintageEagle and Starfighter
-
3
-
Thanks guys for the comments guys
8 hours ago, Scale32 said:Probably a reaction with the fresh paint edge and a little heavy handed. The fresh solvent will lift it.
Hth cheers Bevan
this is what i was thinking, if it was more of a technical issue while airbrushing, since its in the corner, will try with lower psi net time
so i sanded down all the imperfection , ill wash to remove any greases then try again i guess.
- scvrobeson, chukw and themongoose
-
3
-
I just used the Sierra hotel model ones on my hornet. Really beautiful casting mesh is sharp, but i ran into some fit issue but it could be 100% my fault. I think i should have trimmed the back end where it touches the gear bay.
I ended up with a large gap between the intake lip and the model.
They are one piece, painted the lip then dipped to get a good line pretty easy to paint.
-
Wow looks great, shark mouth is amazing, love the old sanded off roundels
- shadowmare and Martinnfb
-
2
-
i thought about that but the same spot twice even after wet sanding. i did omit cleaning with alcohol before painting


Just for fun - what plane would you chose to arrive in at Oshkosh?
in General Discussion
Posted
F-14 tomcat any day