
zaxos345
-
Posts
696 -
Joined
-
Last visited
-
Days Won
3
Reputation Activity
-

 zaxos345 got a reaction from quang in Italeri Macchi C.202 Folgore. FINISHED… well almost!
Amazing work Quang!!!
John
-
 zaxos345 got a reaction from themongoose in 1/32 Tamiya P-51D-5 "Little Eva III"
Good morning gents,
New project on the bench, this time a large one, tamiya's P-51D!!!
It is not going to be an OOB build... i bought some aftermarkets before i make my mind on the profile i wanted to depict, so some stuff are not going to be used, for examlpe the excellent barracuda IP, it is not suitable for a D-5 model (that is why I bought the early quinda set), more discuss on that as well as on the details or differences for a D-5 later.
At this point i want to thank Christian Alamy aka ''tourist'' for his valuable help on gathering all the required info regarding my build!!!
The profile I want to depict is "Little Eva III", Capt. James "Sully" Varnell, 52nd Fighter Group, 2nd Fighter Squadron, Italy, 1944.
James "Sully" Varnell was the MTO's third-ranking ace with 17 victories and ranked as number 10 among Mustang aces. This little-known ace scored all of his 17 victories within 67 days, making him one of the fastest-scoring aces ever. Tour expired, he's rotated home to train other pilots while Dalebroux & Jones became Lt. Hans Zachmann's men. Killed in a Flying Accident 9 April, 1945, near Pinellas Field, Florida. Varnell is the 10th ranked Mustang Ace of WW2.
Opening the box and reviewing the sprues one thing that really got my attention (i have read a lot on this) was the large number of pin or sink marks especially in the wheel wells and on the inner side of the engine cowlings!! I dont know how tamiya managed to do it!! Anyway I will find a way with the wheel wells and i am not going to leave the engine exposed so i dont mind the cowlings!!!!
Another one were the big screw fasteners on the cowlings which were raised (out of scale in my opinion) and not flush....
So i started the build with this correction. I used...
....first to mark down the fasteners and later I sanded them flush. Working my way with the fasteners i also corrected some other details not suitable for a D-5!!
- There was no oil radiator drain added until P-51D-10-NA production, so along the bottom of the lower cowling panel, there is no oil drain access door. There was also yet to be a fuel strainer access door added to the lower cowling panel, until late D-model production. So only a single door (on the left) for the ground heater duct, Midway through the bottom cowling...
this....
instead of this..
I filled them all with ca glue, sanded them and scribed the the ground heater duct acces door!!
Next correction was on the upper cowling...
- On early P-51D's, the oil filler access door on the rear top left cowling should have the same size as the aftercoolant door just in front of it. The oil access door would not be enlarged until P-51D-20-NA production, when a dip stick was provided, requiring additional room to be accessed.
So before working on the fasteners, I resozed oil filler access door...
And as i was dealling with the cowling i decided to replace the tamiya's carburettor intakes with the barracuda ones!!
Thank you very much for watching, any extra info is very much welcome!!!
More on her tommorow as i have already made some progress...
John
-
 zaxos345 got a reaction from Martinnfb in Trumpeter A-7E
Nice start Chrish!!!
I would wait for the reskit items...They seem to really upgrade the kit!! I really love the way they try to deal with the main wheel wells!! You see with the Aires parts your main concern will be the alighnment of the landing gear. Take into concidaration that it is a big airplane with a big wingspan, even the slightest missaligment will really affect the alighnment of the wingtips!!!
Anyway it is up to you!!
Wish you luck!!
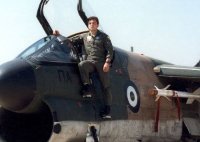
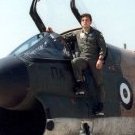
This was my ''home'' (the A-7H Corsair, the Hellenic ones) for 15 years!!
Feel free to ask me anything you want!!!
And, reskit produse an echellent set of landing gear wheels, for all the variants and they are really accurate to the last inch!!!
John
P.S. Here is my build, it is an A-7H but you find it usefull!
-
 zaxos345 got a reaction from Derek B in Trumpeter A-7E
Nice start Chrish!!!
I would wait for the reskit items...They seem to really upgrade the kit!! I really love the way they try to deal with the main wheel wells!! You see with the Aires parts your main concern will be the alighnment of the landing gear. Take into concidaration that it is a big airplane with a big wingspan, even the slightest missaligment will really affect the alighnment of the wingtips!!!
Anyway it is up to you!!
Wish you luck!!
This was my ''home'' (the A-7H Corsair, the Hellenic ones) for 15 years!!
Feel free to ask me anything you want!!!
And, reskit produse an echellent set of landing gear wheels, for all the variants and they are really accurate to the last inch!!!
John
P.S. Here is my build, it is an A-7H but you find it usefull!
-
 zaxos345 got a reaction from Uncarina in 1/32 Tamiya P-51D-5 "Little Eva III"
Good morning gents,
A bit of progress on the lady...
I closed the fuselage and managed to get a perfect fit of the cowling covers!
They are very thin and i read somewhere that some modellers did not manage to get a nice fit when they chose to present them closed.
I made a lot of dry fits and used even thin strips of plastic to get it as best as i could!!
those photoes are on a later state of the build as i forgot to take pictures
Next stage the painting and upgrade of the wheel wells!! A lot of pin marks to deal with but at the end nothing too difficullt to accomplish!!
Regarding the painting pattern, I followed the suggestion of my friend Christian (which happened to be in line with the Eduard's one if you see the pics on their brassin p-51d wheel wells page set.)
And sarted to dress her up....here you see the final stages...
After that i placed them on their position and glued the wings together. I also glued the machine guns parts and puttied them, you see no panels lines there also!!!
I have also started to deal with the rivets and panel lines where they should be covered. I am following John Terrell's schematics for th job!! I have some more work ahead...
And i finally glued the fuselage with thw wings...started to look as a P-51...love the shape!!!!!!
I also dealt with the gear legs...regarding the leg sissors i followed the Chuckw's way, i took the metal ones that tamiya provided and glued some small strips of plastic on the inner side. Think the filan outcome is more than acceptable!! Thanks Chuck!!!
Finnaly I painted the external wing tanks, i wanted to test the new metallic line from Mig Ammo, Astand paints, identical to Alclads and specifically a new color, but more on that later, i have some more tests to do...but as a first comment i really like it!!!
Thats all for now, hope you like it
John
-
 zaxos345 got a reaction from CODY in 1/32 Tamiya P-51D-5 "Little Eva III"
Good morning gents,
A bit of progress on the lady...
I closed the fuselage and managed to get a perfect fit of the cowling covers!
They are very thin and i read somewhere that some modellers did not manage to get a nice fit when they chose to present them closed.
I made a lot of dry fits and used even thin strips of plastic to get it as best as i could!!
those photoes are on a later state of the build as i forgot to take pictures
Next stage the painting and upgrade of the wheel wells!! A lot of pin marks to deal with but at the end nothing too difficullt to accomplish!!
Regarding the painting pattern, I followed the suggestion of my friend Christian (which happened to be in line with the Eduard's one if you see the pics on their brassin p-51d wheel wells page set.)
And sarted to dress her up....here you see the final stages...
After that i placed them on their position and glued the wings together. I also glued the machine guns parts and puttied them, you see no panels lines there also!!!
I have also started to deal with the rivets and panel lines where they should be covered. I am following John Terrell's schematics for th job!! I have some more work ahead...
And i finally glued the fuselage with thw wings...started to look as a P-51...love the shape!!!!!!
I also dealt with the gear legs...regarding the leg sissors i followed the Chuckw's way, i took the metal ones that tamiya provided and glued some small strips of plastic on the inner side. Think the filan outcome is more than acceptable!! Thanks Chuck!!!
Finnaly I painted the external wing tanks, i wanted to test the new metallic line from Mig Ammo, Astand paints, identical to Alclads and specifically a new color, but more on that later, i have some more tests to do...but as a first comment i really like it!!!
Thats all for now, hope you like it
John
-
 zaxos345 reacted to Antonio Argudo in 1/32 Tamiya P-51D-5 "Little Eva III"
no problem, maybe using some spare decal cut can work instead of painting ,cheers
-
 zaxos345 got a reaction from HB252 in 1/32 Tamiya P-51D-5 "Little Eva III"
Thanks a lot Antonio, really appreciate your help!! I dont think i can do a clean work to paint those green and yellow bands on the struts, i did paint the different colors on the high pressure pipes on the wheel wells, dont know if it can be seen!!!
As for the red ring....done
John
-
 zaxos345 got a reaction from scvrobeson in 1/32 Tamiya P-51D-5 "Little Eva III"
Good morning gents,
A bit of progress on the lady...
I closed the fuselage and managed to get a perfect fit of the cowling covers!
They are very thin and i read somewhere that some modellers did not manage to get a nice fit when they chose to present them closed.
I made a lot of dry fits and used even thin strips of plastic to get it as best as i could!!
those photoes are on a later state of the build as i forgot to take pictures
Next stage the painting and upgrade of the wheel wells!! A lot of pin marks to deal with but at the end nothing too difficullt to accomplish!!
Regarding the painting pattern, I followed the suggestion of my friend Christian (which happened to be in line with the Eduard's one if you see the pics on their brassin p-51d wheel wells page set.)
And sarted to dress her up....here you see the final stages...
After that i placed them on their position and glued the wings together. I also glued the machine guns parts and puttied them, you see no panels lines there also!!!
I have also started to deal with the rivets and panel lines where they should be covered. I am following John Terrell's schematics for th job!! I have some more work ahead...
And i finally glued the fuselage with thw wings...started to look as a P-51...love the shape!!!!!!
I also dealt with the gear legs...regarding the leg sissors i followed the Chuckw's way, i took the metal ones that tamiya provided and glued some small strips of plastic on the inner side. Think the filan outcome is more than acceptable!! Thanks Chuck!!!
Finnaly I painted the external wing tanks, i wanted to test the new metallic line from Mig Ammo, Astand paints, identical to Alclads and specifically a new color, but more on that later, i have some more tests to do...but as a first comment i really like it!!!
Thats all for now, hope you like it
John
-
 zaxos345 got a reaction from TAG in 1/32 Tamiya P-51D-5 "Little Eva III"
Good morning gents,
A bit of progress on the lady...
I closed the fuselage and managed to get a perfect fit of the cowling covers!
They are very thin and i read somewhere that some modellers did not manage to get a nice fit when they chose to present them closed.
I made a lot of dry fits and used even thin strips of plastic to get it as best as i could!!
those photoes are on a later state of the build as i forgot to take pictures
Next stage the painting and upgrade of the wheel wells!! A lot of pin marks to deal with but at the end nothing too difficullt to accomplish!!
Regarding the painting pattern, I followed the suggestion of my friend Christian (which happened to be in line with the Eduard's one if you see the pics on their brassin p-51d wheel wells page set.)
And sarted to dress her up....here you see the final stages...
After that i placed them on their position and glued the wings together. I also glued the machine guns parts and puttied them, you see no panels lines there also!!!
I have also started to deal with the rivets and panel lines where they should be covered. I am following John Terrell's schematics for th job!! I have some more work ahead...
And i finally glued the fuselage with thw wings...started to look as a P-51...love the shape!!!!!!
I also dealt with the gear legs...regarding the leg sissors i followed the Chuckw's way, i took the metal ones that tamiya provided and glued some small strips of plastic on the inner side. Think the filan outcome is more than acceptable!! Thanks Chuck!!!
Finnaly I painted the external wing tanks, i wanted to test the new metallic line from Mig Ammo, Astand paints, identical to Alclads and specifically a new color, but more on that later, i have some more tests to do...but as a first comment i really like it!!!
Thats all for now, hope you like it
John
-
.thumb.png.84c5d3a464f2dd83f0ac37a5aac81ec8.png) zaxos345 got a reaction from Antonio Argudo in 1/32 Tamiya P-51D-5 "Little Eva III"
zaxos345 got a reaction from Antonio Argudo in 1/32 Tamiya P-51D-5 "Little Eva III"
Good morning gents,
A bit of progress on the lady...
I closed the fuselage and managed to get a perfect fit of the cowling covers!
They are very thin and i read somewhere that some modellers did not manage to get a nice fit when they chose to present them closed.
I made a lot of dry fits and used even thin strips of plastic to get it as best as i could!!
those photoes are on a later state of the build as i forgot to take pictures
Next stage the painting and upgrade of the wheel wells!! A lot of pin marks to deal with but at the end nothing too difficullt to accomplish!!
Regarding the painting pattern, I followed the suggestion of my friend Christian (which happened to be in line with the Eduard's one if you see the pics on their brassin p-51d wheel wells page set.)
And sarted to dress her up....here you see the final stages...
After that i placed them on their position and glued the wings together. I also glued the machine guns parts and puttied them, you see no panels lines there also!!!
I have also started to deal with the rivets and panel lines where they should be covered. I am following John Terrell's schematics for th job!! I have some more work ahead...
And i finally glued the fuselage with thw wings...started to look as a P-51...love the shape!!!!!!
I also dealt with the gear legs...regarding the leg sissors i followed the Chuckw's way, i took the metal ones that tamiya provided and glued some small strips of plastic on the inner side. Think the filan outcome is more than acceptable!! Thanks Chuck!!!
Finnaly I painted the external wing tanks, i wanted to test the new metallic line from Mig Ammo, Astand paints, identical to Alclads and specifically a new color, but more on that later, i have some more tests to do...but as a first comment i really like it!!!
Thats all for now, hope you like it
John
-
 zaxos345 got a reaction from patricksparks in 1/32 Tamiya P-51D-5 "Little Eva III"
Good morning gents,
A bit of progress on the lady...
I closed the fuselage and managed to get a perfect fit of the cowling covers!
They are very thin and i read somewhere that some modellers did not manage to get a nice fit when they chose to present them closed.
I made a lot of dry fits and used even thin strips of plastic to get it as best as i could!!
those photoes are on a later state of the build as i forgot to take pictures
Next stage the painting and upgrade of the wheel wells!! A lot of pin marks to deal with but at the end nothing too difficullt to accomplish!!
Regarding the painting pattern, I followed the suggestion of my friend Christian (which happened to be in line with the Eduard's one if you see the pics on their brassin p-51d wheel wells page set.)
And sarted to dress her up....here you see the final stages...
After that i placed them on their position and glued the wings together. I also glued the machine guns parts and puttied them, you see no panels lines there also!!!
I have also started to deal with the rivets and panel lines where they should be covered. I am following John Terrell's schematics for th job!! I have some more work ahead...
And i finally glued the fuselage with thw wings...started to look as a P-51...love the shape!!!!!!
I also dealt with the gear legs...regarding the leg sissors i followed the Chuckw's way, i took the metal ones that tamiya provided and glued some small strips of plastic on the inner side. Think the filan outcome is more than acceptable!! Thanks Chuck!!!
Finnaly I painted the external wing tanks, i wanted to test the new metallic line from Mig Ammo, Astand paints, identical to Alclads and specifically a new color, but more on that later, i have some more tests to do...but as a first comment i really like it!!!
Thats all for now, hope you like it
John
-
 zaxos345 got a reaction from denders in 1/32 Tamiya P-51D-5 "Little Eva III"
Good morning gents,
A bit of progress on the lady...
I closed the fuselage and managed to get a perfect fit of the cowling covers!
They are very thin and i read somewhere that some modellers did not manage to get a nice fit when they chose to present them closed.
I made a lot of dry fits and used even thin strips of plastic to get it as best as i could!!
those photoes are on a later state of the build as i forgot to take pictures
Next stage the painting and upgrade of the wheel wells!! A lot of pin marks to deal with but at the end nothing too difficullt to accomplish!!
Regarding the painting pattern, I followed the suggestion of my friend Christian (which happened to be in line with the Eduard's one if you see the pics on their brassin p-51d wheel wells page set.)
And sarted to dress her up....here you see the final stages...
After that i placed them on their position and glued the wings together. I also glued the machine guns parts and puttied them, you see no panels lines there also!!!
I have also started to deal with the rivets and panel lines where they should be covered. I am following John Terrell's schematics for th job!! I have some more work ahead...
And i finally glued the fuselage with thw wings...started to look as a P-51...love the shape!!!!!!
I also dealt with the gear legs...regarding the leg sissors i followed the Chuckw's way, i took the metal ones that tamiya provided and glued some small strips of plastic on the inner side. Think the filan outcome is more than acceptable!! Thanks Chuck!!!
Finnaly I painted the external wing tanks, i wanted to test the new metallic line from Mig Ammo, Astand paints, identical to Alclads and specifically a new color, but more on that later, i have some more tests to do...but as a first comment i really like it!!!
Thats all for now, hope you like it
John
-
 zaxos345 got a reaction from mc65 in 1/32 Tamiya P-51D-5 "Little Eva III"
Good morning gents,
A bit of progress on the lady...
I closed the fuselage and managed to get a perfect fit of the cowling covers!
They are very thin and i read somewhere that some modellers did not manage to get a nice fit when they chose to present them closed.
I made a lot of dry fits and used even thin strips of plastic to get it as best as i could!!
those photoes are on a later state of the build as i forgot to take pictures
Next stage the painting and upgrade of the wheel wells!! A lot of pin marks to deal with but at the end nothing too difficullt to accomplish!!
Regarding the painting pattern, I followed the suggestion of my friend Christian (which happened to be in line with the Eduard's one if you see the pics on their brassin p-51d wheel wells page set.)
And sarted to dress her up....here you see the final stages...
After that i placed them on their position and glued the wings together. I also glued the machine guns parts and puttied them, you see no panels lines there also!!!
I have also started to deal with the rivets and panel lines where they should be covered. I am following John Terrell's schematics for th job!! I have some more work ahead...
And i finally glued the fuselage with thw wings...started to look as a P-51...love the shape!!!!!!
I also dealt with the gear legs...regarding the leg sissors i followed the Chuckw's way, i took the metal ones that tamiya provided and glued some small strips of plastic on the inner side. Think the filan outcome is more than acceptable!! Thanks Chuck!!!
Finnaly I painted the external wing tanks, i wanted to test the new metallic line from Mig Ammo, Astand paints, identical to Alclads and specifically a new color, but more on that later, i have some more tests to do...but as a first comment i really like it!!!
Thats all for now, hope you like it
John
-
 zaxos345 got a reaction from Landrotten Highlander in 1/32 Tamiya P-51D-5 "Little Eva III"
Good morning gents,
A bit of progress on the lady...
I closed the fuselage and managed to get a perfect fit of the cowling covers!
They are very thin and i read somewhere that some modellers did not manage to get a nice fit when they chose to present them closed.
I made a lot of dry fits and used even thin strips of plastic to get it as best as i could!!
those photoes are on a later state of the build as i forgot to take pictures
Next stage the painting and upgrade of the wheel wells!! A lot of pin marks to deal with but at the end nothing too difficullt to accomplish!!
Regarding the painting pattern, I followed the suggestion of my friend Christian (which happened to be in line with the Eduard's one if you see the pics on their brassin p-51d wheel wells page set.)
And sarted to dress her up....here you see the final stages...
After that i placed them on their position and glued the wings together. I also glued the machine guns parts and puttied them, you see no panels lines there also!!!
I have also started to deal with the rivets and panel lines where they should be covered. I am following John Terrell's schematics for th job!! I have some more work ahead...
And i finally glued the fuselage with thw wings...started to look as a P-51...love the shape!!!!!!
I also dealt with the gear legs...regarding the leg sissors i followed the Chuckw's way, i took the metal ones that tamiya provided and glued some small strips of plastic on the inner side. Think the filan outcome is more than acceptable!! Thanks Chuck!!!
Finnaly I painted the external wing tanks, i wanted to test the new metallic line from Mig Ammo, Astand paints, identical to Alclads and specifically a new color, but more on that later, i have some more tests to do...but as a first comment i really like it!!!
Thats all for now, hope you like it
John
-
 zaxos345 got a reaction from Fanes in 1/32 Tamiya P-51D-5 "Little Eva III"
Good morning gents,
A bit of progress on the lady...
I closed the fuselage and managed to get a perfect fit of the cowling covers!
They are very thin and i read somewhere that some modellers did not manage to get a nice fit when they chose to present them closed.
I made a lot of dry fits and used even thin strips of plastic to get it as best as i could!!
those photoes are on a later state of the build as i forgot to take pictures
Next stage the painting and upgrade of the wheel wells!! A lot of pin marks to deal with but at the end nothing too difficullt to accomplish!!
Regarding the painting pattern, I followed the suggestion of my friend Christian (which happened to be in line with the Eduard's one if you see the pics on their brassin p-51d wheel wells page set.)
And sarted to dress her up....here you see the final stages...
After that i placed them on their position and glued the wings together. I also glued the machine guns parts and puttied them, you see no panels lines there also!!!
I have also started to deal with the rivets and panel lines where they should be covered. I am following John Terrell's schematics for th job!! I have some more work ahead...
And i finally glued the fuselage with thw wings...started to look as a P-51...love the shape!!!!!!
I also dealt with the gear legs...regarding the leg sissors i followed the Chuckw's way, i took the metal ones that tamiya provided and glued some small strips of plastic on the inner side. Think the filan outcome is more than acceptable!! Thanks Chuck!!!
Finnaly I painted the external wing tanks, i wanted to test the new metallic line from Mig Ammo, Astand paints, identical to Alclads and specifically a new color, but more on that later, i have some more tests to do...but as a first comment i really like it!!!
Thats all for now, hope you like it
John
-
 zaxos345 got a reaction from Shoggz in 1/32 Tamiya P-51D-5 "Little Eva III"
Good morning gents,
A bit of progress on the lady...
I closed the fuselage and managed to get a perfect fit of the cowling covers!
They are very thin and i read somewhere that some modellers did not manage to get a nice fit when they chose to present them closed.
I made a lot of dry fits and used even thin strips of plastic to get it as best as i could!!
those photoes are on a later state of the build as i forgot to take pictures
Next stage the painting and upgrade of the wheel wells!! A lot of pin marks to deal with but at the end nothing too difficullt to accomplish!!
Regarding the painting pattern, I followed the suggestion of my friend Christian (which happened to be in line with the Eduard's one if you see the pics on their brassin p-51d wheel wells page set.)
And sarted to dress her up....here you see the final stages...
After that i placed them on their position and glued the wings together. I also glued the machine guns parts and puttied them, you see no panels lines there also!!!
I have also started to deal with the rivets and panel lines where they should be covered. I am following John Terrell's schematics for th job!! I have some more work ahead...
And i finally glued the fuselage with thw wings...started to look as a P-51...love the shape!!!!!!
I also dealt with the gear legs...regarding the leg sissors i followed the Chuckw's way, i took the metal ones that tamiya provided and glued some small strips of plastic on the inner side. Think the filan outcome is more than acceptable!! Thanks Chuck!!!
Finnaly I painted the external wing tanks, i wanted to test the new metallic line from Mig Ammo, Astand paints, identical to Alclads and specifically a new color, but more on that later, i have some more tests to do...but as a first comment i really like it!!!
Thats all for now, hope you like it
John
-
 zaxos345 got a reaction from Thunnus in Border 1/35 Fw 190A-6 Nowotny Double Chevron
Simply amazing!!!!!!!
John
-
zaxos345 reacted to quang in Italeri Macchi C.202 Folgore. FINISHED… well almost!
It’s also what I thought from the moment I opened the box.
Even the front hole -which Mr. T. found ‘really oversized’- looks correct.
All that’s needed is an interior shaft (?) which can be easily replicated by a styrene tubing.
Thank you folks for your comments.
Cheers,
Quang
-
zaxos345 reacted to Thunnus in Border 1/35 Fw 190A-6 Nowotny Double Chevron
The camo has been restored around the chevron location.
Electing to start with the white again, the mask outline is placed and the white is applied.
Next the black areas need to be painted so I position the interior sections. I only need the thin border but it is MUCH easier to place with the components together than to try and place just the skinny border alone.
The central portions of the mask are removed, leaving only the borders. Take lots of time to make sure the border part is seated flush against the painted surface. If you look closely, you'll see that the lowest edge of the chevron is not.
After the black is sprayed, you can remove the masks and see the effect of not seating the border completely flush.
So the necessary paint touch-ups are applied.
The little "13" below the cockpit is sprayed and the painted markings are complete. Here's the model in the lightbox after the painting stage.
-

 zaxos345 got a reaction from easixpedro in Infinity SB2C Helldiver (26 Nov: Finis)
Amazing work!!!!
John
-
zaxos345 reacted to Thunnus in Border 1/35 Fw 190A-6 Nowotny Double Chevron
Thanks to Tom, I was able to get my Silhouette Portrait working again. So it is time to paint some markings. The underwing crosses are first. When using multi-color masks, my default painting order is outside to inside. This is helps prevent seepage of unwanted colors on the outside of the markings. There are exceptions of course but this is a good general rule to follow. One tip that greatly eases the placement of these masks is to pre-apply strips of paper (in this case, Post-Its) to the edges of the mask. This "frame" allows you to slide the mask into position much easier than just the mask itself. And it gives you additional, adhesive-free masking. Try it!
Once the outline mask is put into position, all of the paint edges of the mask are burnished down with a wood toothpick and the white is sprayed. To get a smooth edge, the paint layers should be thin but "dry". Avoid pooling of paint, especially at the mask edges as this will cause the paint to crack upon mask removal.
The remaining internal mask components are taped to help hold them together. The idea is to place these components, connected as one piece into the painted area. The mask was pre-marked with a Sharpie for orientation purposes. Although the shape is symmetric, there may be very slight variations in how the mask was cut so keeping the orientation will ensure a better interlocking fit of the mask components.
I use a sharp knife to help lift the pieces off the backing paper that want to separate.
The internal mask components are then carefully placed back onto the mask outline. Make sure you give ample time for the paint to dry before putting a mask over it.
Once the internal components are in position, the tape is removed, along with the internal cross shape that will be painted black.
To ensure the black paint doesn't seep where it is not supposed to, I like to use liquid mask to seal those joints.
The black is sprayed next.
After the paint is dry, you can remove the masks. The liquid mask is not strong enough to keep the mask components together so you'll have to pull off the individual mask pieces one by one.
If all goes well, you should have your completed markings. The used mask parts are kept handy in case any paint repairs need to be done but I don't think I'll need them for the bottom crosses.
-
zaxos345 got a reaction from Thunnus in Border 1/35 Fw 190A-6 Nowotny Double Chevron
Amazing as always John!!!!
John
-
zaxos345 reacted to Thunnus in Border 1/35 Fw 190A-6 Nowotny Double Chevron
Thanks everyone! I'm happy with how the doors turned out. Although the brass-only version of the inner doors was in-scale in terms of thickness, the main gear doors were not. I wanted the two sets of doors to match and hopefully, they look like a matched set. I've painted the landing gear covers... light hairspray chipping on both sides.
The landing gear component are just about finished. I added some springs to the retracting rod links. I'll do some post-shading to the exterior surfaces of the covers especially at the base of the inner doors since they are in the path of the engine exhausts.
Tony... the settings that I used on my Silhouette Portrait 2 to cut the inner gear door shapes from 0.010" sheet styrene were:
Blade: 7
Passes: 2
Force: 20
Speed: 2
I've also added some salt fading effects on the prop blades.
In preparation for the upcoming camo painting, I've filled the wheel wells with wet tissue paper.
I'm planning on doing some light painting chipping via hairspray at the wing roots so this area has been given a base coat of Tamiya Silver AS-12.
Next comes my customary pre-shading of the panel lines.
I like to give the camo finish some tonal variation and to do this, I employ an inverse of black basing which is essentially a random mottle pattern of black on grey plastic. I use a piece of plastic scrubbing pad that is thinned to allow paint to be sprayed through it.
Using this as a mask, I apply the mottle pattern over the entire model, except the chipping area, which I want to restrict to as few layers of paint as possible to better enable the hairspray chipping.
Next will be Light Blue RLM 76.
-
zaxos345 reacted to easixpedro in Infinity SB2C Helldiver (26 Nov: Finis)
Quick update as I do some research on the “Bomb Displacement Mechanism.” That’s the gigantic contraption that swings the bomb/bombs down to clear the prop during a dive.
Every kit manufacturer has this wrong. I finally found a pic of it in action though, so think I have enough of an understanding to make it. Here’s the pic, and essentially the look I’m going for, (but a moment before with the bomb still attached).
Hope to get some time at the bench this weekend to get after it. Till then…
-Peter