Search the Community
Showing results for tags 'trumpeter'.
-
Hello everyone, my name is Woody and I’m a rivet counter. Before we get started, a little more about myself. I started building models “seriously” in the late 80s, but building a business doesn’t leave time for much else so the last time I actually finished one was back in 1996. Keeping in mind that I’m now 72 with cataracts developing (surgery is scheduled) and hands that are slowly turning into boxing gloves - onto the build. The Wildcat would never have been something I would choose to build, but in the course of developing our line of aircraft rivet sets I figured it would be a good choice for no other reason than it’s small. My opinion of the F4F was probably typical of what most people who know little about them thought, but after I started researching the plane my opinion changed considerably. That fighter, and the pilots who flew them during the darkest days of WWII proved to be up to the task of holding the line until the Corsairs and Hellcats became operational. The Wildcat’s contribution to victory in the Pacific may be a footnote but it’s a BIG footnote. I always start with the engine and promptly screwed up my first attempt so bad I had to buy another kit, which is usually the case for me - for that very reason. Regardless, I got that together without any major disasters and even wired it with .010” lead wire used for wrapping fishing lures and stuck one of our generic placards (not visible in this picture) on the case. Exhaust is Ammo Track Wash over AK Extreme Metal Steel. Not sure about the gloss black…. things like this happen when you use “restored” aircraft pictures for reference. Having survived that, it was on to the cockpit and wheel well. Since I had already gone off my original intent of building OOTB by wiring the engine I decided to make a set of cockpit placards and instruments which we now sell. I guess it turned out okay especially since almost none of this is visible once installed, but I developed a serious dislike of acrylics in the process. I’ve always used enamels and found out the hard way that my technique for chipping and weathering simply doesn’t work with acrylics. Okay, lesson learned and more on that later. Ignore that "interior green" on the instruction sheet, the correct color is bronze green. Then it was on to riveting the fuselage. First order of business was filling the recessed kit rivets which slowed down my progress considerably. At first my plan was to use diluted Tamiya putty. Thinking this would be quick and easy I thinned it out and filled every rivet hole. I was feeling pretty sure of myself until I started sanding and realized no one in their right mind could ever suffer through this mind numbing process. I had to find a better way so it was back to the “lab” where I came up with a way to fill the kit rivets with minimal to no sanding. For the sake of brevity, I’m not going to go into details on the process of making the filler or the actual process of filling the kit rivets here - it’s all outlined in our manual which you can download HERE. You have to break eggs if you want to make an omelette. Some tests. With the kit rivets filled in I highlighted the panel lines with a #2 pencil sharpened to a chisel point. This is a great help getting the rivets on straight and an even distance from the panel lines. Once that was done I shot a coat of Aqua Gloss over the parts, but I’m not sure this is entirely necessary. Kit rivets filled and panel lines highlighted. At this point I figured that it would be a lot easier to rivet the kit parts prior to assembly leaving off the ones where I would be sanding. As of this writing I don’t know if this is a good idea or not, but I can honestly tell you that during the entire process the rivets never gave any hint of coming off. I also learned about Gunze Mr. Mark Setter… this stuff is outstanding because it has adhesive properties. To avoid having to keep it mixed by shaking it frequently I just put some in a paint palette. You don’t need much; I use a micro brush to put a series of small drops along where the rivets will go to keep it from puddling and running. As for setting solutions, I use MicroSol, Solvaset and Mr. Mark Softer and can see no obvious difference between them. Don’t be stingy with the setting solution - slather it on. I started at the bottom of the fuselage halves to get the feel of working with the rivets figuring these would least likely to be seen and by the time I got to the more visible areas my skills would have improved, which they did. Frankly, applying the rivets is surprisingly easy - much easier than working with PE. Yea, it’s tedious as hell but other than that it’s just a matter of time. Call it therapy. Again, for the sake of brevity here, detailed rivet application instructions are in the manual which you can download HERE. Starting to apply rivets Both sides finished. (Ignore the turn lock fasteners on the cowling for now, we’ll get to those in the next installment.) I started with the longest continuous runs and I think that works best. After I had all those laid in I filled in the gaps with individual pieces rather than long pieces over the others which would result in rivets on top of rivets and irregular spacings at the intersections. I also ignored much of the kit rivet placement for several reasons too technical to get into here. Let’s just say that my four years in the USAF as an Airframe Repairman is a curse. We can stop here for now so if you have comments or questions we can deal with those before proceeding.
- 78 replies
-
- 24
-

-

-
Hi all! Hope everyone is doing well! With the JASDF F-4EJ done, I will now be moving on to my next project. This time, I have decided to build Trumpeter's 1/32 MiG-21UM in the Czech Stress Team's rather eye catching livery. Aftermarket sets for this kit are limited but I will be using the following: CAM KM-1 resin seats Quickboost FOD covers HAD resin wheels Master Model metal pitot tubes Some scratchbuilding in the cockpit and wheel wells will also be required. I'm aware of the kit's shape and dimension issues, however, I'm not sure if I'll be able to fix any of them. But what I find to be the worst part of the kit are the decals. The Czech Air Force insignia colours are in the wrong order and the provided decals for the wings' "wooden" sections aren't even close to my reference photos! I ordered the Tiger Wings decals for the same livery but although the insignia colours are correct the wood effect is still atrocious... Should have done better research before buying these... I came across Ricardo Dacoba's wonderful build of the same model in the FSM Oct 2010 issue and have placed an order for this magazine in hopes of getting more info on how he did the painting on the wings. In the meantime, if anyone can provide more info or advice on the kit I would be most grateful! And a bit of history. In 1955, the then state of Czechoslovakia became a founding member of the Warsaw Pact. Soon after, the MiG-21 entered service with the Czechoslovak Air Force. In 1993, the state was succeeded by the Czech Republic and the MiG-21s were passed on to the newly formed Czech Air Force. Sadly, the livery of choice was short lived as the aircraft crashed in 1998 over the town of České Budějovice due to bad weather. Luckily, there was no loss of life (https://www.key.aero/forum/modern-military-aviation/72459-czech-stress-team). The MiG-21s were eventually replaced by the Swedish SAAB Gripen in 2005 after 43 years of service.
- 42 replies
-
- 15
-
-
I'm also working on the Trumpeter 1/16 Panther G. I am building a late war (Feb 45) version with the early version kit, since the late version only comes with the steel wheels. To do this, I am adding the following from the late version kit: —crew heater (added after Oct 44) —flame dampener exhausts —late idlers (only the Daimler Benz Panthers kept the early idlers late war) —one set of steel wheels Fortunately the early version includes the chin mantlet option (introduced Sept 44) already. Now, I did mess up when I contacted Trumpeter's customer service by ordering only one sprue of the late idlers, so I have only one! I'm hoping that I can order another from them, but if not I will get two of the Heng Long version on E-bay. For references I have "Achtung Panzer 4" which has some really nice drawings, and various web sources. My emphasis will be the exterior, but I won't completely ignore the inside, so I've purchased some Archer stencils and Tamiya Fine Red Primer. Late war there are some really eye-catching (at least for me) schemes to choose from: the brown diagonal bands with dunkelbelb stripes over a green base painted on some MNH Panthers, the brown splotches over a green base painted on some MAN Panthers, or the tight elaborate brown and dunkelgelb splotches over a green base on some MAN and Daimler Benz Panthers. The latter is what I am selecting, a last steel wheel version built by the MAN factory: (shown for reference purposes only) So far I have built the suspension, the transmission, and the engine. The detail is amazing, and so far I've only added the shield that protects the radio operator from the shock absorber. Note that for late war Panthers the rear two shock absorbers were removed, and the hole left in the bulkhead on the right side is replaced by a steel plate. Since I am building a Feb 45 version, the interior hull will be painted with red primer only (starting October 44 the complete interior was painted this color until February 45 when the turret interior was again white, allegedly due to complaints from crew members about visibility). Here's where I'm at so far: Cheers, Tom
- 81 replies
-
- 3
-
-
- 1/16
- late war panzer
- (and 2 more)
-
 Hello, everyone. This is my completed vignette that I’m calling, “The Avengers of Guadalcanal.” During the long, grueling campaign for the Solomon Islands, Allied and Japanese forces threw themselves at each other for months. Pitched night naval battles, furious aerial melees, and bitter ground combat were the brutal hallmarks of what I feel was truly the turning point in the Pacific War. By November 1942, American forces were desperately holding on to Henderson Field on Guadalcanal in an effort to keep the Cactus Air Force flying. One of the many units fed into the grinder was Marine Scout Bombing Squadron 131 (VMSB-131) whose men, along with countless others, flew and fought to the point of exhaustion. In their new TBF-1 Avenger torpedo bombers, they attacked Japanese supply vessels and warships (the vaunted “Tokyo Express”) and helped turn the tide of the Guadalcanal campaign in the Allies’ favor. This vignette is a small tribute to all those who fought and paid the price for freedom in those dark days of 1942. It is my first real attempt at a diorama in any scale or subject and I learned a lot valuable lessons for the next time. I also worked to push the limits of my skills, adding a few things that I’d never done before. The Materials This is Trumpeter’s TBF-1C kit (02233) that I backdated to represent a very early TBF-1. While the changes are subtle, they are numerous. To accomplish this, I had to · Cut the trough in the cowl and cowl flap to accommodate the forward-firing .30cal machine gun · Fill the holes for the .50s in the leading edges of both wings · Fill the access panels in the wings for the .50s · Fill the ammo panels in the wings for the .50s. · Scratch build a radio antenna mast that was raked aft at an angle · Remove the pads for the rocket rails on the underwings · Fill the holes for the rocket rails on the underwings · Scratchbuild many (now invisible) interior parts that were only found on TBF-1s I used the Eduard interior detail kit and a set of resin wheels that came with the kit when I bought it from a fellow LSP forum member years ago. Sadly, as this kit had been passed around a few times, many of the parts had been broken in shipping, so I had to spend some time repairing them or scratch building replacements. The base is polystyrene board framed with stained pine strips. The text plate is from PlaqueMakers.com. The Figures The figures are from several sources. · The two standing figures are from Black Dog Resin. They’re a little large and come out to about 6’5” in 1/32 scale. · The kneeling crewman inspecting the tail gear assembly is a 3D printed figure from Reedoak (highly recommended). · The ground crewman in the cockpit is the Aires tow truck driver. He had some fairly major surgery to fit the Avenger’s cockpit. His clipboard and checklist are scratch built of plastic stock and spare PE. The Finish Paints are a mix of MRP, Tamiya, and Vallejo with most weathering done by oils, Mig washes, and pastels. Chipping was kept to a bare minimum, because I figure in November 1942, there was no such thing as an "old" TBF-1 Avenger. Dirt, grime, and wear were applied... erm... liberally. The Surprise Just wait and see. The Build A few months ago, I came across this picture and fell in love: The oil staining on the cowl, goofy “6” digit on the under cowl, muck on the belly and landing gear, stained prop, 2-tone prop tips, and bald tires all cried out to be built. Unfortunately, no one makes a 1/32 TBF-1, so I sucked it up and decided to take on the task of scratch-back dating it. In my many references that I acquired for this build, I came across this picture as well, where the flight crews prepared for the mission while ground crewman warmed the engine. … and thus the idea of the vignette was born. And finally… On to the show: And now the surprise: "CLEAR PROP!" The kit is hand-wired with 9 lights and an electric motor to spin the propeller. Each wing has a pair of position lights in addition to another in the rudder. There's a formation light on the top of the spine aft of the turret, and three interior cockpit lights. The motor is a brushless drone motor and all are wired in parallel through the side-mounted switch to a 4.5v battery pack glued to the bottom of the foam board. Having never done electronics before, this was a big challenge for me. If I do it again, I'll find a different motor as this one builds up too much heat and therefore limits the run time. Live and learn. It's nearly impossible to see now, but the interior is extensively detailed throughout. Scratchbuilding plus the Eduard detail kit went a long way to make the interior look like a TBF-1. The oil staining here was done with Abteilung 502 "Engine Grease" oil paints and Migs "Fuel stains" weathering "wash." I am convinced it is actually used motor oil. I've been around enough airplane and car engine in my life to know the smell. The trough for the forward-firing .30 cal found on TBF-1s was the most challenging part of the backdate process. I took some spare photoetch sheet and bent it into a U shape. After cutting out the panel and studying reference pictures, I shaped and test fit the piece about a thousand times until it looked about right. The turret was extensively detailed through reference photos. Electrical cabling, placards, seatbelts, and other scratch pieces were added to enhance the increased detail from the Eduard kit. Insignia and numerical stencils were done on my Silhouette Cameo cutter. Smaller stencils are kit decals.
- 19 replies
-
- 31
-
-
-
I know I'm kinda late to the party here, but there's still plenty of time left. I just went and ordered myself some intake covers for this kit because I've read that there's a nasty seam in the engine/air intakes so those should be nice and covered now. I did mean to start this a couple of months ago, but I came down with the flu, then my gallbladder issues, then I had a penicillin allergy when I came home (broke out in itchy hives) and after all that, I got a sinus infection. On the up side I did win $2 on a scratchy lotto ticket, so hey things are looking better! Here she is. I picked it up second hand a couple of months ago and thought it would be good for this Group Build. Not sure which camo I'll do yet.
-
Hello all, I hope everyone is keeping safe in these crazy times. While I have been off due to this enforced lockdown I started the Trumpeter ME262 A-1a heavy armament kit and wanted to do it in the colours of yellow 3 from KG(J)54. The kit decals seemed a big 'off' so I invested in Eagalcals #95-32 sheet and the colours seemed much better than the kit originals. I have been my best to get the scheme right, but even I will admit that its not quite right, but I think it looks pretty good, certainly a good learning session for sure. Painted with Gunze Sanyo (best paints EVER in my opinion) and weathered with oils. I'd like to add that the markings aren't symmetrical as that's the way they are on the original aircraft (very odd that) All comments welcome
-
 I feel I’m on a roll at the moment so the above kit has come down from the high shelf stash. I’ve no shelf of doom builds or almost finished builds to get done. It was a coin flip between the Harrier, or an A-10. Both come with fairly poor rep’s, but I’m ready to give them a fair crack of the whip to create a couple of good lookers. To the Harrier first, I’m utilising some Wolfpack-D Extras. Cockpit, external parts, and using the model alliance decal sheets for ZD433 of No1 Squadron. I’ll be adding some AM weaponry too, later down the line. I know about the poor shapes of the nose, and won’t be correcting them. I’m simply not that good a modeller. I tend to make do with what I have at hand in terms of plastic. If it looks like a Harrier at the end, is good enough for me. All that said, I’ve made a start on trimming and dry fitting the office into the nose section. That’s nearly done. So I set about the canopy, polishing the seam from the outside, and sanding polishing the dry’ cord from inside. I’ve had a go at making my own from wire, using a drawn template. Not bad for a first go, but improvements needed for subsequent attempts. The only problem now is that during the lengthy polishing session, I’ve cracked the canopy a little. I’m gonna see if a dip in future and adding the new det’ cord will distract the eyes from the crack. If not, I’ll source another from somewhere.
- 5 replies
-
- 3
-
-
- trumpeter
- 1 squadron
- (and 2 more)
-
Hello, This is my first finished job on this resource. The model was built for a long time, with long interruptions and many improvements that he did on his own, without resorting to an aftermarket. He deepened the lining and added riveting on the wings. Modified the interior of the cabin. Modified screw and screw sleeve. Chassis racks are made 80% anew. I eased the creepy and ugly mounds to simulate the canvas on the steering surfaces. He painted with Mr.Color paints, two satin finish varnishes (made himself from Future + Tamiya Flat Base) and a dull matte from Testors. Regards, upload png
-
Waiting for some parts for F-16, I decided to reanimate project which was started some time ago. Actually I was suprised when I checked tho initial photo dates: December 2013. I've put this model to box for a while and almost 7 years passed, so I think it would be nice to finish it. First some photos takes in other era: . . . . Mostly out of the box with only Aires cockpit and some bombs/missiles. But first thing first - engine. Nice, but won't be visible at all, so it was time to play with some Alclads: . . And fitted: Next adding more parts: . . . I can't recall why I did all the bombs, missiles and everything what was in the box but there is a lot of this. Harrier has take only few of them, but it would be pity not to have so more option then simple fuel tanks, Mavericks and Sidewinders. I decided to do much more: 2x AIM-9L Sidewinder 2x Mk.117 2x AGM-65E Maverick (Eduard) 3x Mk.83 regular fin 2x Mk.82 Snakeye 6x BSU-49 + 2x TER 2x GBU-12 2x Mk.77 (Aerobonus) + 1xTER (Eduard) 2x Fuel Tanks 1x AN/AAQ-25 Thank you for watching. New update soon...
-
Wow! The 1/32 Trumpeter F-100F looks set for release this summer! http://www.trumpeter-china.com/index.php?g=home&m=article&a=show&id=183&l=en Wanted to build a Connecticut Air Guard camo'd example since 1979. So, there's still hope for the Devastator then! (Though frankly, I hope enthusiasm for Century Series might give us a Six and Deuce) Tony
-
after long time not building a plane i will start this one The Su-25UB from trumpeter i didnt founduch online builds off the twin seater What ihave to start with I still note sure what paint job i will give here but im thinking the grey digital camo Just a few things i have to think about is the rivets on the back off the plane that are in real life raisd Will i go for it or not More progress later when i start the beast O and thanks Jack for this kit Mark
- 28 replies
-
- 11
-
-
hello, my last built :
-
I almost never work on two kits at once, especially when they are big. However, I simply could not wait to share the other build I have been working on, the Slovakian MiG-29AS in digital camouflage. I have had the Trumpeter MiG-29A kit for several years now and have collected some aftermarket: Scale-Pro Digital Camouflage Stencils Quickboost Nosecone Quickboost Ejection Seat Eduard Cockpit Set Eduard Canopy Mask Mastermodel Pitot Tube Tamiya "Bird Slicers" IFF antennae I could be mistaken (certainly not the first time), but I believe the aircraft has the following paint: FS 36375 FS 36493 FS 36081 My references are all online, but include Seans epic work: As well as Martins of course: Unfortunately the photos are gone from the latter, but I still have learned a lot! I will be making some corrections, and wanted to start with these so that I haven't invested a lot of time and effort in the build if they do not work out. So far my main areas of focus is on the upper fuselage: --To extend the LERX forward I have scored plastic inside the upper fuselage forward and behind the gun port and bent it out. When fitted to the lower fuselage this creates a gap which I will address with plastic shims, then sand the profile to shape and rescribe --The curved line below the cockpit is a actually two overlapping planes, so I've sanded the upper part to accentuate this and make this section more vertical --The dorsal spine should be rounder in profile, so I've sanded it back with a slight bulge at the APU --The upper bulges for the engines are anemic and too angular. I will be adding Tamiya putty, sand, and scribe. Anyway, here are the photos: My subject aircraft Cheers, Tom
-
A lot of time passed since my last post here, I promise I'll try to be more active. Since my MiG-23, I finished 4 birds, I'll present one of them here, next will post in a few days. My Nighthawk was made almost Out of the box, I've changed only wheels for Eduard ones. Base was inspired by last flight box by Academy. Biggest problem was with exhaust painting, I did some research, but it is so hard to find a decent photos, so it is my vision of exhaust. Watch and comment - and please, be gentle. . . . . . . . . . . . . . . . . .
- 15 replies
-
- 27
-
-
I got this kit last year for a bargain price. It doesn't look too bad in the box, it has a full engine with it too. You can also build it as a PF or standard F, but the down side is that apart from drop tanks, there are no weapons or pylons included. You might also be able to build a PM with some small modifications, but again you need pylons and K-5 missiles. Anyways I'm not sure which I will build yet or what colourscheme, I'll give that some thought this week.
-
Hi guys joining in on this Gb. title says it all really hope to get this one done rapidly not too keen on changing a lot will do a few bits here and there but I hope to get her closed up ASAP and get paint on her while bench time is at its peak ATM the livery which I'm going to build wrote down what Ill need to address before she can be closed up. Looks like a lot, should be al right, mostly its façade adding to make the fuselage pop more in terms of detail and clutter first things first wings moved back 3mm like I've seen done in so many other builds does make a huge difference hence me doing it. next up before I do any other work is the inflight refueling probe I eyeballed this mostly but its looks ok for me I'll be pleased when its done one more sanding session tomorrow and I'm on my way to another big item on the list It was dropping a bit while I was taking this picture but you get the idea still need to add the ball in front end sand to length and add the master refuelling probe to call it really done but this is what makes the look of the lightning IMHO so glad that step is done... on tot he next update guys Cheers Frederick Jacobs
-
Ooooh-hoooo I've somehow ended up with a good bit of aftermarket for this build! That's what brought it to the forefront for my next project. I've just found individual pieces for it cheap over the years and so I decided to go ahead and get the rest that's available for it. Check out the treasure chest I've amassed - From Eduard I've got the self-adhesive placards, slats, air brake, undercarriage, and wheel well sets. For cockpit choice I've got both the Verlinden and the Aires sets to work from. The Aires set I picked up at Nationals a few years ago. last day, last hour and they had the whole table 50% off. Couldn't pass it up. The aires set has canopy and wheel well upgrades in addition to the engine details. It looks pretty good. Honestly I don't know which cockpit tub I'll go with as they both look crisp. Will have to check accuracy for my bird and make a decision. Thats a master Pitot tube in there along with the Zacto nose enhancement for a facelift. Then lastly I was looking at all the Eduard pieces and just didn't like the fuselage PE they had. It all sticks off the surface too much. That's when I remembered seeing an email about Archer Fine Transfers announcing a new sheet. I used their hatches, hinges, and other resin bits on my T-38A and now they have redone the sheet at 1/2 the thickness of the original. This should do perfectly for the access hatches, fuel doors and the like on this AC. I'll post details up on this as soon as possible. I don't think I've seen a review on them yet. There's been alot of these Huns done and I think I have every one of them on a separate tab on my ipad for review as I get going. Given that, I plan to post fewer mid-term updates as most people have seen it all on these. I'll try sticking to the finished assemblies and just post up some details on the new stuff, like the Archer panels and the foiling, especially the Titanium tail and the archetypical bluing and burnt metal look they have!
-
 A question for the Skyhawk Experts: can the Aires Wheel Bay (& Gun Bay) (#2172) be used to improve Trumpy A-4M? Thx in advance for your advice! Happy modelling, Stefano
 -
Hi all! Late as usual, but here´s my build for the twin-einginge GB; It´s slightly started, tough. Here´s what I have done; …and there´s a LOT still left in the box; Hope it´s OK, I´d say around 25% done. To be continued… Cheers! Stefan
-

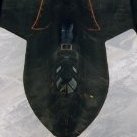
F-117A Nighthawk (channelling my inner scratch builder)
Uilleann posted a topic in Works in Progress
It begins. After a nearly 2 decade search for the right kit, and several attempts in 1/48 with the Tamiya kit, I believe I've finally found the plastic of my dreams. The Trumpeter kit corrects the myriad flaws of the old Testors, and offers a better working scale for what I hope to accomplish in 1/32 than the Tamiya did a step smaller. Life and work force me to be a very part time modeler, but I will post progress here - slow as it may be. As mentioned, the basis for this build is the new-ish Night Hawk kit. Having been to market for a little over a year, there are several nice aftermarket options now available. While I haven't made a final decision on what I would like to include, the cockpit, seat and gear/wheels are about the only real areas of detail on this kit - so I figured they're as good a place as any to get started. Que Quickboot Aces II replacement seat, and an Eduard Brassin wheel set. Both are excellent quality, and offer a substantial improvement in detail to the kit parts. As several of you are aware, I'm working on several aspects of this kit to improve upon the plastic or photo etch options that currently just don't quite cut it. One of these details are the engine intake grids. My hope is to find a willing engineer with access to a micro machining unit that will be able to help create as close to an exact scale replica of the grids as possible. Failing that....well, I'll cross that bridge if/when I get to it. In the mean time, I'll be collecting paints, glue, and all the other sundries I've since parted with over the years since my last attempt at this silly project. Thanks once again to all the help I've received so far in looking for information to help me along. I'll be sure to update as progress is made. Brian~ -
I have been meaning to build this kit for a while and this group build is a great opportunity. Of WWII aircraft, the hurricane is my favourite. I have a few other projects I need to clean up before I can move onto to this, but I figured I would state my intent. Thanks for reading. Gord
- 25 replies
-
- 14
-
-
my last buit , enjoy : voila voila
-
New little sideline project whilst waiting for paint to dry/things to arrive on the Liberator. Spent the afternoon assembling the railway gondola to check the He162 fitted!
- 29 replies
-
- 20
-
-
I am a long time avid viewer, but new member with LSP. This is my first post on any website. Hope I have done this correctly. Currently in the middle of backdating Trumpy P-38 to build Miss Virginia, the plane Barber used to shoot down the Betty carrying Yamamoto. My intention is to show the plane just after landing, with the landing gear high to represent empty fuel cells, spent ammo, etc. The plane used the 2 external tanks to make this long interception. My question is this, wouldn't these tanks have been jettisoned before the engagement, and therefore would not be on the plane upon landing. What do you all think. Thanks for input...Bob.
-
I think it is time to queue up my next LSP project. I want to get out of the 109/190 groove and try something different (for me anyway) and I've settled on a Luftwaffe jet fighter, the Me 262. My subject will be this aircraft... Lots of cool visual features on this aircraft.... the hard mottle on the tail... the blue and white checkers... the yellow numerals... the bold skull badge... so the painting and markings should be fun to do. Here is a profile by Tom Tullis that shows what the entire plane may have looked like... I'll be using the Trumpeter Me 262 A-1a (Heavy Armament) kit. The following aftermarket add-ons have been purchased for this build: Aires Me 262 Resin Cockpit and Wheel Bay set Barracuda 262 Resin Main Wheels and Nose Wheel HGW Seat Belts Montex Super Masks I'm still in the painting stages of the 1/48 Hien build so I'm not sure when this one starts. But before I start cutting sprue, I'd like to take a look at the kit contents and the aftermarket stuff too. Visualizing the build components helps the gears in my head to start turning, identifying potential trouble spots and highlighting options and possibilities.