
zaxos345
-
Posts
693 -
Joined
-
Last visited
-
Days Won
3
Reputation Activity
-

 zaxos345 reacted to chuck540z3 in Tamiya F-16 Aggressor, Kicked Up a Notch, April 11/24: Lighting Details
March 14/24
This build marches on with quite a few updates. With the main landing gear bay pretty much finished, it was time to finish the front landing gear bay. While a lot smaller with less parts, there are still some important things you need to do in order to get the Aires resin to fit properly. Here’s a few pics of where I was about a year ago. The surface detail on the bottom of the intake needs to be sanded down, but so does the top of the resin part.
The Aires resin doesn’t have a notch for the gear leg to fit into, which tilts it slightly forward like the kit parts.
The fix is to cut a small notch and glue in a styrene block for the front paddle to slide into. The bottom of the metal leg or the diagonal struts need to be trimmed as well.
This provides the correct angle and the ability to remove the gear leg until final assembly, much as I did with the main landing gear.
Although the Aires “instructions” don’t mention it (no big surprise there), the actuator and control arms Part F2 and F3 must be trimmed and cut as shown.
After painting and assembly with the other intake parts in Step 8, here’s how it looks with a little bit of grime added for contrast.
Here’s how F2 and F3 should fit the resin gear bay.
Much like the main landing gear, there are a lot of hydraulic and electrical lines that are attached to the front gear leg. I only added the front 2 hydraulic lines, because they are the most visible from the front. Again, I used blue lines like pics I have of the real deal.
Before gluing the front intake assembly to the rear intake assembly above the main landing gear bay, I painted and glued the front fan Parts P1 and P24 to the rear of kit part B31, because it doesn’t fit the Aires resin at all. As shown earlier, I had to trim down the Aires resin quite a bit in order for this fan to fit at all.
Here is the front intake glued to the rear intake and rear air duct. The big air duct ring Part C34 is not used or needed, but to close up the sides of the rear intake, I used strips of white styrene to close the gap and make it less obvious. You can’t really see this gap from the front unless you use a flashlight and peek inside, so I took the easy route for once and focused on what you can actually see, instead of trying to make this deep assembly seamless.
On the bottom, I needed to sand down the central rib of the Aires gear bay a bit more……
…. so that Part C27 is a drop-in fit at the end of the build, after I install the main landing gear and other bits. This part was a bit too short for some reason, so I added a white styrene spacer to make it fit better. Aires supplies a resin replacement, but it's even shorter, so I don't know why they bothered.
I finally got the Aires cockpit to fit the upper fuselage pretty good, so a revisit of what is involved is shown again below. The back of the kit cockpit wall needs to be cut out, which was a bit crude on my part, so I filled in my mistakes with CA glue and sanded them smooth.
The fit is much better now.
The front area around the coaming/glare shield is another matter, because the Aires parts don’t fit the kit parts at all. To be fair, not even the kit parts fit very well, which leave a very noticeable gap at the front that must somehow be filled. This is a shame, because on the F-16, there is no front windshield to hide all these flaws, so many modifications to this area need to be made if you want something that looks close to accurate.
I closed the gap at the front with some strip styrene, but the sides are still a bit of a mess.
More strip styrene to the rescue, among other tweaks here and there.
Here is the end result after painting from a variety of angles.
The black areas are not “weathered” yet, because I want to mask all of this off for painting, and weathering agents like pastels will reduce the adhesion of the tape.
Even the back area looks pretty good, at least to my eyes.
So how did I fill all those gaps without making a big mess with putty and paint? I finally gave a bottle of black CA glue a try, but it was very risky. I thought that if I applied the glue from the back, it would ooze into the gaps to close them and already be “painted” black, while gluing the cockpit into place solidly. What really made this work was the viscosity of the glue I had on hand, pictured below. It was a bit thick, maybe a touch more than medium viscosity, which allowed me to apply it with a micro-brush from below, working it into the gaps one small segment at a time, then flipping the fuselage over so that gravity wouldn’t let the glue move down too far. After it dried a bit and became relatively solid, maybe 3-4 minutes, I flipped it over and applied more glue to the gaps on either side in a sequential fashion, never letting wet glue move to the surface of the cockpit for very long- maybe less than 5 seconds. If this glue was super thin like the CA glues I usually use, it would have made a big mess and ruined everything. If it was too thick, it wouldn’t have filled the gaps very well and would have been lumpy when it dried. For once one of my little experiments worked, and I will always glue resin cockpits this way from now on.
Since I’m using the Thunderbirds kit which is primarily a Block 32, it doesn’t come with a gun like the Block 50 kit. It even has a plug, Part Q5, which is supposed to be painted white. Since all Viper Aggressors have a gun and are battle ready, I just painted the inside of the gun area flat black, so that all you can see is something dark and maybe not notice the lack of gun barrels.
Gun panels glued into place, since they will never come off.
This kit calls for a side vent, Part C4 in Step 19, like this Block 32 Ghost scheme Viper, 86-299. All pics are mine at Nellis AFB.
My subject, however, is 84-220, a Block 25 Viper with no vent on this side, amongst other small differences. I’m not really sure, but it looks like the rear window is clear and not tinted? Tinting variability of Viper canopy glass is all over the place and there are few hard and fast rules, which is why the kit comes with both clear and tinted glass parts. Still, I'd rather make my subject as "correct" as possible, so does anybody have a good pic of what this rear glass should look like? The front canopy is tinted for sure.
As a result, I’m not drilling a hole or installing the vent as instructed.
When I get to the rear vertical stabilizer, I won’t be added any vents either, as Pete Fleischmann so kindly guided me way back in December 2022, a few months after I started this build.
86-299 again (Block 32)
84-220 (Block 25)
So that’s about it for now. With all the heavy lifting over, the rest of this build should go fairly smoothly from now on, right? Famous Last Words for sure!
Cheers,
Chuck
-
zaxos345 reacted to LSP_K2 in Hasegawa P-40N
"Pit parts now given a nice Vallejo dark olive wash. Once clear coated, I'll add some other colors. Pretty subtle, but I like that.
-
 zaxos345 got a reaction from airscale in 1/18 Supermarine S6B - S1595
Out of this planet work!!!!!!
Peter, jaw dropping built!!!! Totally speechless!!!!
John
-
zaxos345 reacted to airscale in 1/18 Supermarine S6B - S1595
thank you chaps, you are all so very kind
Well Jay, having just done the wings I do have pains from RSI - it will pass, but yes sometimes I just have to push through the pain
Exactly Chuck, it is an adjustable trimming tab, but only on the ground - suits me, as it makes it easier to build
So, lots has gone on the last few weeks...
..the propeller was made as a 3D print which I found very hard to do as it's a complex shape which has oblong roots and quite a twist.. - the spinner cap is machined from solid aluminium so it can be polished like the original..
..I started the wings by filling the plastic frame with foam & filler - this was then refined many times and note they are complete with the ailerons in place so they can be cut out later...
..after a lot of finishing, the ailerons were removed...
..and so to the skinning... I drew out the plans that copied the layout of all the fastners that cover the entire surface.. by the time I finished I selected all objects in the drawing and for the four wing surfaces there were 8,962 rivets... that is bordering on the ridiculous and likely as many as I have done on entire airframes before..
,,nothing to do but get started, so here is a typical panel - the small dots are one rivet depression, the big dots two, which was even more demoralising..
..also seen is a template to score out a hatch with a pin in a pin vise..
..after 3 days and a very sore set of muscles they were done...
..no time to rest though, and the ailerons were completed..
..the wings were added using JB weld and given a day to set, then I could start the fillets - I have not done the front ones as they need to also cover the forward strut mount..
..with the wings on, I could add the belly oil cooler assembly - as with the fuselage sides this was a 3D printed buck over which the metal sheet was fomed..
..in two parts, it stretches all along the lower fuselage..
..with so much skinning going on, I fancied a change and so started on the beaching trolley - well at least the wire wheels of the trolley..
I 3D printed a hub, a rim and a jig..
..and then bent a lot of piano wire spokes and started to populate them
..and the finished wheels, along with some Pratts petrol cans I have seen in pictures with the airframe..
..and so before the painting starts next week, some final shots in all her nakedness...
..time to start thinking about the finish...
until next time
TTFN
Peter
-
zaxos345 reacted to monthebiff in 1/32 Kotare Spitfire Mk.I (Early) K9795 19 Squadron October 1938
Managed to get an undercoat on yesterday followed by a pre shade this evening
Went quite heavy on the underside around the usual areas of heavy grime. Under a coat of paint it's incredible what Kotare have done with the panels/ rivet detail etc. Looking forward to getting some colour on now.
Regards. Andy
-
 zaxos345 got a reaction from monthebiff in 1/32 Kotare Spitfire Mk.I (Early) K9795 19 Squadron October 1938
Really nice and impressive work there Andy!!!!
John
-
 zaxos345 got a reaction from Starfighter Jock in 1/32 Tamiya P-51D-5 "Little Eva III"
Good morning gents,
I finished weathering the ''lady'', put on her shoes, the external tanks, wrapped up all the details and bits and i am presenting her to you!!
Hope you like it!!
I really loved my journey with her!!!
More here...
Thanks a lot,
really appreciate any comment!!
John
-
zaxos345 got a reaction from Starfighter Jock in 1/32 Tamiya P-51D-5 "Little Eva III"
And finally, time to paint the metallic colors....
For the silver dope wings, there were 2 candidates, tamiya's LP-11 or AS-12,I chose the tamiya's LP-11, to my eyes a bit greyer ...
For the bare metal i chose the new A-Stand, High Shine plus aluminium color from Mig. I made a lot of tests and i thing it is one of the best bare metal colors.
I think you should give it a try!!!
I sprayed it over a shiny black primer, not gloss...i also tested it over a shiny plain grey plastic...the outcome was perfect for me!!!!
I sprayed the fuselage and tail codes, gloss varnish (i sprayed tamiya x-22, i did not notice any loss on the bare finish, please comment if you have any remarks) placed the decals and wet transfers from HGW...
I glued the exhausts (they are from Rexx, soft thin metal, already burned). It took me some time as i had to line them up perfectly...and i also whethered them with tamiya and mig pastels.
Next a light gloss varnish and pastel wash (i stole the idea from John a.k.a. Thunnus). I was afraid to use oil wash even if i had sprayied the x-22!!!
I was really amazed how the wash picked up all the details!!!!!
Finally i glued the resin flaps from Amur....really amazing how real they seem but a PITA to glue them!!!
Next and final step...whethering. I am not for the really abused bird....
Hope you like it so far, feel free to comment
John
-
zaxos345 got a reaction from Starfighter Jock in 1/32 Tamiya P-51D-5 "Little Eva III"
Good morning gents,
Took me some time to update the topic, my work was a bit slow but here I am!!!
First, i had to decide how to deal with the landing gear legs! The fit of the small part covering them was not so good, at least on my case, also the way tamiya deals with it is great in order to keep the right angles (i think it is the case with all the kits).
So i decided to screw them in place, glue the cover on it and sand any imperfections. And of course mask them for painting. It was a little PITA as i had to take care not to break them!!
Also the fit of the guns covers was not perfect!!
After solving all those items i masked everything and started dealling with the rivets and panel lines. Painful work, you should check the putty work always after sanding to prevent any ghost sheams to come up. Ok i know, the panel lines were there and sometimes you could see them, anyway....
The best outcome took it with stretch sprue glued inside the panel line, leave it to cure some days and light sand it repeatedly!
I left everything to cure and dealt with the propeller....
I primed her with mrp, ready to spray, grey and black primers (i strongly recommend them, easy work, dry rock hard, sandable), grey where the silver paint will go and black for the bare metal. I lightly sanded them in order to slightly polish them. You see the very thin metal paints show everything every small paint particle, i wanted to avoid it as much as i could!!!
I had decide to paint my own insignia, as a matter of fact i wanted to paint all the markings except the ones i couldn't (names, kill marks, etx)
I found a real deal, here on Greece, on a lightly used Shillouette Portrait 3 machine (80 euros only) and i ''killed'' it on the move!!!!
I spent some time to do the basics on the software and i finally managed to design my own insignia masks with the recommented proportions!!
Here i must thank Jennings (fundekals) for his help with the fuselage and tail codes!!!
Now regarding the painting order. It was my second time trying to paint the insignia... also usually the metal colors, at least the one i chose for the bare metal, are very fragile. I did not want any surprises, so i decided to do a''reverse'' painting, paint all the insighnia, codes, bars etc, (except the fuselage and tail codes) mask them and paint the metals last!
So....
Antiglare....
.....
-
zaxos345 reacted to monthebiff in 1/32 Kotare Spitfire Mk.I (Early) K9795 19 Squadron October 1938
Finally some bench time this weekend and managed to complete the cockpit. First of all I have to say the decals in this kit are super, super thin and a real pleasure to work with and the instrument panel took very little time to complete
Planning on getting the fuselage halves closed up tomorrow and then see how the wing assembly fits.
Regards. Andy
-
 zaxos345 got a reaction from Model_Monkey in 1/32 Tamiya P-51D-5 "Little Eva III"
Good morning,
I finnally finished the Tamiya's 1/32 P-51D as the P-51D-5 "Little Eva III", Capt. James "Sully" Varnell, 52nd Fighter Group, 2nd Fighter Squadron, Italy, 1944.
James "Sully" Varnell was the MTO's third-ranking ace with 17 victories and ranked as number 10 among Mustang aces. This little-known ace scored all of his 17 victories within 67 days, making him one of the fastest-scoring aces ever. Tour expired, he's rotated home to train other pilots while Dalebroux & Jones became Lt. Hans Zachmann's men. Killed in a Flying Accident 9 April, 1945, near Pinellas Field, Florida. Varnell is the 10th ranked Mustang Ace of WW2.
In progress here...
Hope you like it, really appreciate any comments!!!
John
-
 zaxos345 got a reaction from Dany Boy in 1/32 Tamiya P-51D-5 "Little Eva III"
Good morning,
I finnally finished the Tamiya's 1/32 P-51D as the P-51D-5 "Little Eva III", Capt. James "Sully" Varnell, 52nd Fighter Group, 2nd Fighter Squadron, Italy, 1944.
James "Sully" Varnell was the MTO's third-ranking ace with 17 victories and ranked as number 10 among Mustang aces. This little-known ace scored all of his 17 victories within 67 days, making him one of the fastest-scoring aces ever. Tour expired, he's rotated home to train other pilots while Dalebroux & Jones became Lt. Hans Zachmann's men. Killed in a Flying Accident 9 April, 1945, near Pinellas Field, Florida. Varnell is the 10th ranked Mustang Ace of WW2.
In progress here...
Hope you like it, really appreciate any comments!!!
John
-
zaxos345 reacted to Grissom in 1/32 Tamiya P-51D-5 "Little Eva III"
Hi John,
Wow!!! One of the nicest P-51 models I've seen in quite some time. I love the aluminium finish you've obtained - in my opinion, it's way beyond what I/we usually see with NMF aircraft. Lovely attention to detail - lovely finish. Beautiful work, mate!
Cheers,
Wayne
-
 zaxos345 got a reaction from Stefano in 1/32 Tamiya P-51D-5 "Little Eva III"
Good morning,
I finnally finished the Tamiya's 1/32 P-51D as the P-51D-5 "Little Eva III", Capt. James "Sully" Varnell, 52nd Fighter Group, 2nd Fighter Squadron, Italy, 1944.
James "Sully" Varnell was the MTO's third-ranking ace with 17 victories and ranked as number 10 among Mustang aces. This little-known ace scored all of his 17 victories within 67 days, making him one of the fastest-scoring aces ever. Tour expired, he's rotated home to train other pilots while Dalebroux & Jones became Lt. Hans Zachmann's men. Killed in a Flying Accident 9 April, 1945, near Pinellas Field, Florida. Varnell is the 10th ranked Mustang Ace of WW2.
In progress here...
Hope you like it, really appreciate any comments!!!
John
-
 zaxos345 got a reaction from TenSeven in 1/32 Tamiya P-51D-5 "Little Eva III"
Good morning,
I finnally finished the Tamiya's 1/32 P-51D as the P-51D-5 "Little Eva III", Capt. James "Sully" Varnell, 52nd Fighter Group, 2nd Fighter Squadron, Italy, 1944.
James "Sully" Varnell was the MTO's third-ranking ace with 17 victories and ranked as number 10 among Mustang aces. This little-known ace scored all of his 17 victories within 67 days, making him one of the fastest-scoring aces ever. Tour expired, he's rotated home to train other pilots while Dalebroux & Jones became Lt. Hans Zachmann's men. Killed in a Flying Accident 9 April, 1945, near Pinellas Field, Florida. Varnell is the 10th ranked Mustang Ace of WW2.
In progress here...
Hope you like it, really appreciate any comments!!!
John
-
 zaxos345 got a reaction from Phil Smith in Zoukei-Mura’s 1/32 Bf 109G-14 with Swiss markings
Really awesome finish and weathering!!!
Bravo Phil!!!!
John
-
 zaxos345 got a reaction from Trak-Tor in 1/32 Tamiya P-51D-5 "Little Eva III"
Good morning,
I finnally finished the Tamiya's 1/32 P-51D as the P-51D-5 "Little Eva III", Capt. James "Sully" Varnell, 52nd Fighter Group, 2nd Fighter Squadron, Italy, 1944.
James "Sully" Varnell was the MTO's third-ranking ace with 17 victories and ranked as number 10 among Mustang aces. This little-known ace scored all of his 17 victories within 67 days, making him one of the fastest-scoring aces ever. Tour expired, he's rotated home to train other pilots while Dalebroux & Jones became Lt. Hans Zachmann's men. Killed in a Flying Accident 9 April, 1945, near Pinellas Field, Florida. Varnell is the 10th ranked Mustang Ace of WW2.
In progress here...
Hope you like it, really appreciate any comments!!!
John
-

 zaxos345 got a reaction from chaos07 in 1/32 Tamiya P-51D-5 "Little Eva III"
Thanks a lot!!! Really appreciate!!!
John
-
zaxos345 reacted to airscale in 1/18 Supermarine S6B - S1595
Thank you gents, you are all very kind
With the fuselage coming along, it was time to start another major sub assembly in the floats...
the former structure was filled with hard foam to give it a basic profile..
..this was then skim filled with P38 and templates used to get the chines the right shape...
..I would say there were over 30 filling/sand/prime excercises before they were in their final forms..
..then the undersides were skinned...
..there were a few structural features of interest, one is the lapped panels where on the real aeroplane the panels are joggled into an overlap, and the other are these sort of serrated panels which I assume have something to do with disrupting water suction on the step of the float - these were cut one serration at a time so quite tiresome
..on to the top surfaces now and these are covered in spaced fittings & rivets so are going to be a challenge...
TTFN
Peter
-
 zaxos345 got a reaction from mig011 in 1/32 Tamiya P-51D-5 "Little Eva III"
Good morning gents,
I finished weathering the ''lady'', put on her shoes, the external tanks, wrapped up all the details and bits and i am presenting her to you!!
Hope you like it!!
I really loved my journey with her!!!
More here...
Thanks a lot,
really appreciate any comment!!
John
-
 zaxos345 got a reaction from sillymodeler in 1/32 Tamiya P-51D-5 "Little Eva III"
Good morning,
I finnally finished the Tamiya's 1/32 P-51D as the P-51D-5 "Little Eva III", Capt. James "Sully" Varnell, 52nd Fighter Group, 2nd Fighter Squadron, Italy, 1944.
James "Sully" Varnell was the MTO's third-ranking ace with 17 victories and ranked as number 10 among Mustang aces. This little-known ace scored all of his 17 victories within 67 days, making him one of the fastest-scoring aces ever. Tour expired, he's rotated home to train other pilots while Dalebroux & Jones became Lt. Hans Zachmann's men. Killed in a Flying Accident 9 April, 1945, near Pinellas Field, Florida. Varnell is the 10th ranked Mustang Ace of WW2.
In progress here...
Hope you like it, really appreciate any comments!!!
John
-
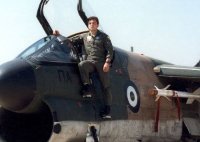
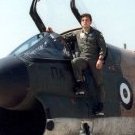
zaxos345 reacted to MikeMaben in Thunderbolt ...
Prior to cracking a rib and right thumb, I said I'd post a pic of what I left out of the fuselage.
Starting to feel 'normal' , should be able to return to my regular programming.
-
.thumb.jpg.f0920d798d5d8600fb58b1d8a906ddff.jpg) zaxos345 got a reaction from shadowmare in 1/32 Tamiya P-51D-5 "Little Eva III"
zaxos345 got a reaction from shadowmare in 1/32 Tamiya P-51D-5 "Little Eva III"
Good morning,
I finnally finished the Tamiya's 1/32 P-51D as the P-51D-5 "Little Eva III", Capt. James "Sully" Varnell, 52nd Fighter Group, 2nd Fighter Squadron, Italy, 1944.
James "Sully" Varnell was the MTO's third-ranking ace with 17 victories and ranked as number 10 among Mustang aces. This little-known ace scored all of his 17 victories within 67 days, making him one of the fastest-scoring aces ever. Tour expired, he's rotated home to train other pilots while Dalebroux & Jones became Lt. Hans Zachmann's men. Killed in a Flying Accident 9 April, 1945, near Pinellas Field, Florida. Varnell is the 10th ranked Mustang Ace of WW2.
In progress here...
Hope you like it, really appreciate any comments!!!
John
-
 zaxos345 got a reaction from MSgt Slim in 1/32 Tamiya P-51D-5 "Little Eva III"
Good morning,
I finnally finished the Tamiya's 1/32 P-51D as the P-51D-5 "Little Eva III", Capt. James "Sully" Varnell, 52nd Fighter Group, 2nd Fighter Squadron, Italy, 1944.
James "Sully" Varnell was the MTO's third-ranking ace with 17 victories and ranked as number 10 among Mustang aces. This little-known ace scored all of his 17 victories within 67 days, making him one of the fastest-scoring aces ever. Tour expired, he's rotated home to train other pilots while Dalebroux & Jones became Lt. Hans Zachmann's men. Killed in a Flying Accident 9 April, 1945, near Pinellas Field, Florida. Varnell is the 10th ranked Mustang Ace of WW2.
In progress here...
Hope you like it, really appreciate any comments!!!
John
-
zaxos345 reacted to quang in Building the Border 1/35 Kate. Got paint!
Thank @spyrosjzmichos @Reuben L. Hernandez for your comments.
Glad you like it. There’s much more to this kit than meets the eye especially details you’re only aware when you start building it.
Anyhow, the beat goes on…THE KATE GOT HER WINGS.
Wing folds and wheel wells are painted with aotake. Basically an anti-corrosion paint, it was a clear varnish tinted with pigment so that it could be checked anywhere it was applied. Colours range from blue to green and anything in between.
For my special brew I used a mix of Tamiya clear LP-9 + LP-81 Mixing Blue and applied it on a Mr Color 8 silver base.
The leading edge is provided as a separate part thus ensuring a correct wing thickness while eliminating the usual unsightly seam.
Fowler flaps (workable) added an inner wing assembled.
The generous wing root is also a separate part and fit the fuselage with a perfect seam.
Ditto with the underside…
Tail feathers added. The Kate is ready for the final assembly and the painting…
… yet not before masking (inside and out) the EXTENSIVE glasshouse which took me a whole evening.
Primer added, ready to be installed for final painting.
That’s it, folks.
Until next time,
Cheers,
Quang