Search the Community
Showing results for tags 'tamiya'.
-
This project started out mainly as an R&D effort to create the perfect shade of ANA 623 Gloss Sea Blue.... However, with the other Corsair done (#3) and with much of the subassembly work done (because i was in temporary housing where i could glue and sand, but not paint), This project started to gain momentum. Presenting El Corsair Grande, Numero Quattro. As many of you know, this time round i am using the Barracuda Studios resin seat. However, i am not using the Barracuda Corsair cockpit placards this time because it seems that they sold out. On one hand, they add a lot to the finished cockpit, but on the other they are time consuming and tedious to install, rapidly sucking joy from the project. But with that aside, the cockpit is installed, the fuselage halves glued together and much of the supporting cast of fuselage parts are installed. Prior to mounting the windscreen, of course i had to paint and mount the armor glass. The -1A incorporated a smaller, rectangle shaped piece of glass towards the top... To attach this, i used a product called Micro Liquitape. Its sort of like 3M post it note adhesive in a bottle. You brush it on, give it a few minutes to dry, and once set it stays perpetually tacky. I was able to attach the little piece onto the bigger piece of glass with no mess. Value Added- DINGG!! I cut the canopy masks using my customary method of sticking them to a piece of .010 sheet styrene, and then carefully trimmed and sanded the tape/plastic composite to final size. The Tamiya masks are quite accurately sized and fit well. Your results may vary, according to age and eyesight. The windscreen was mounted using Mig AMMO acrylic glue and taped in place to dry overnight. It fit well. Many of the components such as wings, flaps, empennage etc. are assembled, sanded, and ready to install. As usual, i will clean up all of the fuselage seams and attend to the wing center section joint first, before the other parts go on. The last "Time-Sucky-Part" of the build is the R-2800 powerplant, but i'll put that off for a little while longer. I'm hoping my model will look *something* like this... That is all for now. Thanks for shopping! -d-
- 21 replies
-
- 22
-

-
- ana 623 sea blue
- tamiya
- (and 2 more)
-
Hey all, I'm back with a new build! This one is very near and dear to my heart, not only because I now work for Boeing, but also because I spent 10 years of my life constantly hearing/seeing these beasts. I'm opting to go with the kit-supplied markings for 91-308 from the 492d FS that is part of the 48FW at RAF Lakenheath. As per my usual, I will be throwing a lot of aftermarket at her, with a majority coming from the beautiful work of Jan Kopecky. The AM list is as follows: Kopecky Scale Models: -F-15E Instrument Panels (I will be referring to these as MIP's, due to habit from work) -F-15E Cockpit Upgrade Set -F-15E Upgrade Set -F-15 Tail Antennas -F-15E Pylons w/ rails (wing pylons) -F-15E Centerline Pylon -F-15 610 Gal Fuel Tanks Eduard -AN/AAQ-33 Sniper ATP -GBU-12 (4 ea) GT Resin -F-15 Seamless Intakes -PW F100-229 Exhaust cans Reskit -GBU-38 (non-thermally coated) -GBU-31 Aires -ACES II Type B (2 ea) As for the obligatory box art photo: Work has just started on this monster, beginning with the cockpit, as per usual. The back wall of the front seat has already been attached to the main tub, and based on what I see from work, is leaps and bounds ahead of whats offered in the kit (though not hard considering its a blank plate!) The detail on the console panels/MIP's is insane, and looks very familiar to me (although with subtle changes, as I work on newer F-15 variants.) Santa (or the General, depending on who you ask) has also been kind to me, and I am now the proud owner of a Paasche Talon airbrush! As always, thanks for stopping by the hangar!
-
This is the the Thunderbirds version of the well-regarded Tamiya kit as it is the closest to the 'Flogger' version of the 64AGRS Aggressor Squadron F-16C that I wanted to emulate. The kit itself is excellent with good fit, detail and design, makes a really nice change from some of the other efforts out there. My aim this time was to generate a more realistic paint and weathering combo as these birds are relatively well kept, and to add some lighting of course! Anyway, on with the photos.. Some close-up detail. The ECM pods are fixed by small magnets and removable. The intake took a while to get right but looks ok now. The wingtip pylons are from Kopecky (lovely detail) and the ALQ-188 is Aires (weirdly a noticeably different size to the Wolfpack version). The weathering was kept fairly subdued using colours that closely matched the originals but provided enough difference for scale effect. The paints are MRP (love these) and the decals by Afterburner. This jet didn't seem to have a black nose but it looks so much cooler with one so artistic license prevailed! The exhaust and Winders are from ResKit and are a really nice substitute for the Tamiya parts. The static dischargers are by Master and the lovely ACMI pods by Bandit Resin. The visor cover is actually a photocopied picture then reduced to size. And yes, the lights still worked - always a nervy moment when you finally connect it all up! I'm still perfecting the afterburner effect but I think this is my best effort yet. Cockpit lighting also came out ok though as its a closed cockpit it only really works from certain angles. Many thanks to everyone who stayed the course and commented on the build - always welcome. Link below if interested. Til next time!
-
Well here we go again, this time I'm indulging in a Tamiya kit. Much as I like the challenge of upgrading the delights of Revell's offerings, sometimes you just want something a little less demanding. Such as the Tamiya F-16C which judging by all the accounts I've read, is a superb kit. Squirrelled away in my stash is the Thunderbirds offering which allows an earlier Blk32 aircraft which differs from the mainstream Blk50 kit by having the P&W engine, normal (small) shock inlet, lightweight gear with the original wheels and flat MLG doors. However, as it is the Thunderbirds kit it also does not come with weapons and some of the pylon details which I will need for my chosen subject. I've always liked aggressor schemes (who doesn't!), in fact anything that gets away from monotone (grey) colour schemes and there is no doubting that the 64AGRS based out of Nellis has some of the most interesting schemes around. I'm pretty much a fan of all the schemes but for this one I've plumbed for the 'Flogger' scheme as pictured on the lead aircraft below. Crucially, the Thunderbirds kit comes with early sidewinder rails which is right for the era I'm looking at i.e. pre-AMRAAM. (USAF) Now I don't want to make it too easy so this will be an in-flight display and I will be adding lights to this one as well but most of the kit will be out of the box. Except for the engine exhaust which comes courtesy of ResKit (love their stuff). Oh and some ResKit winders, will probably need an ALQ-188 and ACMI pod as well. Maybe some cockpit enhancements from Quinta and might treat myself to some goodies from Kopecky who does loads of goodies for the F-16. Yeah, pretty much out of the box. Right, so where do we start. With the intake of course. That's the thing with adding lights, you can't build it in the order Tamiya would like you to. Because you need to add things like wires and batteries you also need to plan the layout of how you will connect it altogether noting that once you close a section up, that's it - no more access. The F-16 has some nav lights on each side of the intake. These can be added by drilling out a small hole and adding a very small LED. To avoid light overspill (a real problem with bright LEDs) a silver foil backing is used. The outside will be first painted black to kill light overspill. Luckily the actual intake has a small enough gap for the wires to go past and feed back into the fuselage. Another tight spot for lighting is the tail where the F-16 has a large anti-col beacon at the top and a smaller light at the base. Again, a small white LED was used with silver foil to limit overspill. The clear part sits on top of the LED and the wires run down the back of the rudder. I had to do this as this was a second hand kit and the tail had already been glued together. In addition, the started kit had also had the base of the fin cut off in anticipation of reworking to an F-16A by the previous owner. I therefore needed to reinstate the original base using a thick piece of card as a strut to provide some strength. In addition to the wire, a thin fibre optic wire was run from the LED light down the base of the rudder and out of the base of the tail. Interestingly, I'm pretty sure Tamiya had plans to add their own lighting kit to this model. The wing tip photo below shows a groove carved into the inside of the wing which leads to the point where the wing nav lights are and the design of that clear part is definitely with lighting in mind. I know because I was going to do the same to fit the lighting I had in mind. Thank you Tamiya for making that part of the kit construction slightly easier! Well its a start. I should point out that progress is inversely proportional to the many demands of family and life in general so please be patient. We will get there in the end.
- 61 replies
-
- 32
-
-
This was one of the most involved conversions I've done: taking the Laminar Flow Design Vc conversion, adding it to the Kotare Models Va fuselage, blending that with the Tamiya IXc wings and landing gear. You might be asking why: the Kotare fuselage has the raised rivets already, and the fit to both the conversion and the Tamiya kit is almost flawless. I just needed to sand the floor of the Kotare cockpit so the wing would fit. Otherwise I painted all markings and scratchbuilt the crowbar for the pilot's door. For more see my Work In Progress here: Cheers, Tom
- 33 replies
-
- 36
-
-
- laminar flow design
- kotare
- (and 1 more)
-
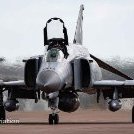
The Subject RF-4EJ Phantom II "433" from the 501 sq. JASDF
- 14 replies
-
- 14
-
-
Have been commissioned to build a 'Grace' type two-seat Spitfire model in 1:32 - based upon the superb Tamiya Mk IX kit and my client has kindly given permission for me to post progress here. Photo by Darren Harbar, via Eastern Daily Press This is a complex project and will have to create a lot of things from scratch, but will have assistance in terms of drawings and details from one of the UK's leading Spitfire engineers. As an example of the changes the front 'pit is moved foward by 13.5 inches on the full-size airframe, and the rear canopy is not the standard Spitfire 'bubble' (it's longer) - so it's not as straightforward as first meets the eye. Aiming to complete the project early in the New Year - but in order to make a start with some of the more straightforward work, I've commenced with that glorious Merlin: Rocker covers have been replaced with the excellent Barracuda items which feature the Rolls-Royce name. Small gaps in assembly now filled and should start getting paint on later today... This project will take priorty over my other builds. Blue Skies! Iain
- 392 replies
-
- 13
-
-
I know, I know! ANOTHER Tamy Corsair build! Forgive me for choosing a kit that is more than well represented on these boards but it is next on my list and I wanted to share my work here. I'm primarily a modeler of Messerschmitts and Focke-Wulfs so this is going to be new territory for me. Hopefully, I'll receive some help along the way and hopefully, the build journey will be of interest to at least some of you. Many of us grew up watching Baa Baa Black Sheep on TV and I was one of those kids. So I'm going to do one of Greg "Pappy" Boyington's many reputed mounts: Bu No. 17740 of VMF-214 based on Vella La Vella in 1943. The kit will be, of course, the magnificent Tamiya 1/32 F4U-1a kit. I've heard so many glowing reports of this masterpiece that I half expect the kit to magically build itself! I'll be adding some customary bits and pieces including the Barracuda cockpit stencils, Barracuda resin wheels to replace the kit's vinyl tires, HGW belts and the Vector resin cowling flaps. Markings will be masked using Montex masks. Fundekals produces a nice set of dekals for some of Boyington's Marine Corsairs and the informative PDF instructions will be used as a painting guide. Does anyone have an interest at looking at the sprues of this kit? I don't want to bore anyone but it is actually beneficial for me to present the sprues as a way to familiarize myself with the kit contents before I start. I'm not as familiar with the Corsair as I am with Luftwaffe fighters and I will be using past builds here as references, of which there should be many. I thought I was being cute when I picked up a True Details parachute to serve as a visual interest prop but there are at least 3 Corsair builds that have had the same bright idea as me. Takeaway?.. there will be nothing new here. Except what I bring to this build. And at this moment... it ain't much.
- 466 replies
-
- 17
-
-
Eventually, I've got around to finishing my South African Air Force Spitfire Mk 9 LF. I built this quite some time ago, but couldn't source the correct propeller decals, so it languished in it's polystyrene box until Peter Castle @airscale produced his prop logo decals! Thanks Peter!! This is the Tamiya Spitfire Mk XVIe kit (I'm sure everyone knows how superb the kit is, so I won't go into that), but there were a few modifications I had to make to it in order to get it to the spec that it was in during it's time at the SAAF Museum at AFB Swartkop in Pretoria. This particular aircraft, manufactured in 1945, was flown by by brother-in-law, Maj. James "Jimmy Jet" Feuilherade (Ret) as it's display pilot during his tenure there (1999-2000). It was unfortunately written off during a display accident (15th April 2000), not long after he resigned and emigrated to Australia to take up a position as a flight instructor for BAE Systems. I know he mourned the loss of HIS "British girlfriend" (as my sister used to call it). This build is in homage to Jimmy Jet! Kit - 1/32 Tamiya Spitfire Mk XVIe AM- Barracuda Studios seat, cockpit upgrade (sidewalls, door, throttles, etc), wheels. Alleycat decals (didn't have my Silhouette when I built it, wished I had. The decals were probably old, had quite a few "moments" with them!) Master Barrels And quite a bit of cockpit modification (see the info from James below - all those mods were carried out)) Below are some excerpts from emails James sent me regarding this particular airframe, which helped tremendously with the build. I'm pretty sure he wouldn't mind me sharing some of it... She was actually a rare low back MkIX, powered by a Rolls Royce built Merlin 70 engine. But I hasten to add, there was no difference at all in the MkIX and the MkXVI airframes. The only reason they had the two different Mk numbers was the fact that the American Packard built Merlins were all built using American Imperial size threads bolts and studs. This basically made the Packard Merlins and the RR Merlins incompatible in terms of spares interchangeability. So to avoid huge logistics spares mix ups, they came up with designating all Packard built engine Spitfires, MkXVI’s. The gunsight was removed but I recall she had the rotatable throttle lever, which was normally used with the later gyro sight, so by twisting the throttle handle you could adjust range on the gunsight. An early version of HOTAS I guess! As I recall the seat only had a padded black leather cover, covering the backrest only. I flew it wearing a Harvard parachute which is the same as the WW 2 parachutes. So you sat on the parachute which was held in the seat bucket. The seat was made from Bakelite so was a reddish brown colour. The flare cartridge rack was removed from the front of the seat. The harness was a modern version with medium blue straps as I recall, I think as used on many Spits flying in the UK today. I think it had an olive green lap strap padding aswell. There was a slight difference to the panel in that the U/C indicator lights were moved to the lower RHS of the panel I think due to the newer radios and comms panel that was fitted in the top RHS of the panel. I have a poster with a small insert of the panel, will have to have a look!? Next to the seat below the pilot door was an electrical panel with battery switch lights etc. Things like the morse key and drop tank selector lever were removed. The canopy had the golf club arrangement, good description actually! When closed the canopy was opened from outside by pressing a small button on the tip of the windscreen canopy arch. It is small and very obvious. The bubble top canopy had an operating mechanism on the RHS of the cockpit, set up of covered chains going to the rear and a small winding handle. Flaps are interesting. They are spring loaded up, and extend open against the spring pressure by compressed air. Most Spitfires will slowly bleed compressed air from their systems. Brakes and rad flaps operated also by comp air. So even if you left the flaps down, after a while the pressure would drop and the springs would then snap them closed. However, you always retracted them on the ground after landing as if left down the restrict airflow through the radiators. That is why you hardly ever see a Spitfire pictured with flaps down. Flap selection is either up or down, to 64 deg. So never used for take- off, more of an air brake in a way. Taking off from the carriers for Malta, someone had the ingenious idea of clamping wedges of wood in the flaps against the return spring to hold them open at about 15 deg so as to get some increase in lift for the short take off run. Once airborne, the flaps were selected down then up, dropping the wedges away. The flap hinges pushed up two small panels near the inboard trailing edge of the wing, when flaps down, as an indicator. But not needed, she pitched noticeably nose down when you lowered the flaps in flight. The flaps are always up. It was my party trick if I still had pressure on the ground, and people were nearby I would lower the flaps (little silver lever up on the instrument panel), they would blow down. Then I would select them up, the air pressure blew off through a small orifice at the flap lever, causing a loud hissing noise, startling most people and the springs would then snap the flaps up. The brake differential valve was on the cockpit floor so to speak (no floor as such in the Spitfire) and as you moved the rudder pedals it would direct more air to the one wheel for differential braking. This also caused hissing noises. Of course only heard on ground engine off. As I recall the rad flaps would drop open. One of the tests after start signaled by ground crew, was to close and open the rad flaps to see they were working. Also to select ram air and filter air they would check to see the flap at the front of the carb intake was opening (ram) and closing (filtered). This whole intake assembly is beautifully modelled with the Tamiya Spitfire. The model itself is very lightly weathered. It was always kept in pristine condition by the museum ground crew, and I know for a fact that James used to "baby" it. James wrote an article for Warbird Alley about flying the Spitfire, the link is here if anyone fancies a read. He also sent me an article he had written regarding the SAAF Spitfire - his text is reproduced below. During my posting to the South African Air Force Museum, I had the extreme good fortune to fly the SAAF Museum Spitfire MkIX. This was a low back bubble top variant, normally referred to as a MkXVI. However the MkXVI was fitted with the Packard built Merlin 66 engine, whereas the SAAF Museum aircraft was fitted with a Merlin 70, technically making it a rare low back MkIX. It also had the clipped wing tips, which gave it a superb roll rate at low altitude and was common on Spitfires towards the end of the Second World War, where the main fighter role had become ground attack. The trade off was, a slight loss of turning performance at high altitude, and a slightly higher landing speed. Arguably it also detracted from the beautiful elliptical shape of the wing,. In his book “Fight for the Sky” Douglas Bader described the clipped wingtips as giving the Spitfire “a more workmanlike appearance”. What can one say about flying the iconic Spitfire? So many clichés exist. Such as “It becomes a part of you”, or “You just think of turning, and it does it”. “It feels so right, it becomes an extension of your arms and legs” is another. Phrases you will almost always hear repeated, when veteran Spitfire pilots are interviewed. Having flown the SAAF Museum MkIX, I can say the clichés are indeed true. It is a viceless and easy aircraft to fly. It does exactly what you want it to, the controls are light and powerful. It is docile in the stall and it does “feel right”, like a willing and faithful partner. In combat, it must have been superb. You can hold a max rate turn on the clearly felt light buffet all day, with just a gentle two fingered rearwards pressure on the stick. The rudder is extremely powerful. I once tried to see if I could hold the rudder against the force of full right rudder trim application, which is used for take off. However such is the rudder power, as the speed built to above 100 Kts after take off, despite holding a straight out locked leg, the left rudder pedal merely started to come back and pushing me up the back of the seat, never mind the 5 point harness! Resulting in me having to rapidly wind the trim off. So, no holding that trim force! Your only option, to pitch nose up, throttle back and try to maintain speed at or below 100, to try sort it out. As mentioned with the clipped tips, the roll rate is impressive. As part of my routine, I flew a 2-300Ft AGL level straight roll. In the Spitfire, this is easy, a ghost of an upwards pitch, check, then stick over unloading slightly as you roll to the inverted position. The aircraft rapidly rolls through 360 deg’, the nose remains beautifully balanced rolling about a point on the horizon, with no yaw divergence. The ailerons at air display speeds, are light and powerful. The only tricky area as such with flying the Spitfire is the after landing roll. With no steering on the tail wheel and no slipstream over the rudder throttled back on landing, a bit of dancing on the rudder is required to keep straight, as any sign of a swing needs to be stopped as with that narrow track landing gear, a ground loop could rapidly develop. The unique hand operated compressed air activated brakes work very well. The landing flaps are also air operated, only have two settings, up or down to 64 deg. A marked nose down pitch occurs, when the flaps deploy, pitching the nose down nicely, on base leg turns. A tight base leg needs to be flown, as turning finals too far out will cause the entire airfield to disappear behind that shapely, but long nose, hence the famous Spitfire curved approaches. Of course a big part of the Spitfire mystique is the brilliant 27 litre two stage supercharged V12 Merlin engine, as fitted to the MkIX. The sound of the Merlin in flight is unique and instantly recognised by any aircraft enthusiast worth his/her salt. At low power settings the engine is remarkably quiet. However, as the throttle is opened and plus boost settings are indicated, a wonderful growling noise starts coming up from the rudder pedal area. War emergency boost was in the +15-18 Ft Pounds area as I recall. For take off and most air display routines, it was rare to need much more than 6-8 Pounds boost. Without ammunition, we were technically light. She did have the 0.5 Browning’s and 20mm Cannon still in the wings, left in for Cof G purposes. There are a lot of moving parts in the Merlin, but for all that it is a remarkably reliable engine. When I first heard a Merlin start up, I remember being surprised by the engine sound. The engine does not have the deep “burble” a lot of the big radial aero engines have, as fitted to the Dakota and Harvard with which I was familiar. Rather the Merlin, has a notable high performance, race car type, crackle. At idle, the propeller reduction gear also makes a slight mechanical clattering. On song, the engine note changes to a harsh bellow, amazingly loud during ground runs. In flight, at low power settings, the engine is remarkably quiet. However as you open the throttle and start to get up to plus boost settings, a wonderful deep growling sound starts coming up from behind the rudder pedals. No doubt a lot of modern aircraft fly as well, if not better, than the Spitfire. However, considering the age of it’s design and the massive historic significance it represents, it is certainly one of the world’s iconic aircraft. Long may the precious few still airborne, fly. James Feuilherade Hope you all enjoy! Iain
- 21 replies
-
- 33
-
-

-
This is my latest project, Tamiya's A6M5 Zero. The model represents an A6M5 of the 210th Fighter Group based at Meiji, Aichi Prefecture at the end of 1944 and into 1945. The model represents about 4 months of work, with the odd sanity recovery break, and is the only LSP WW2 Japanese plane on my shelves. I do hope to add another sometime in the next year, as this one is looking a bit lonely. It was not always the easiest of builds, mostly relating to the undercarriage issues, but you can read all about it if you are so inclined in my WIP, here. That said, it is a model I'm glad I've built and I'm happy with the end result. Whatever the challenges, I think it is a better and more detailed than the even older Hasegawa model, good though that is. No one has yet built a more detailed and better kit yet, in the twenty or so years since this was released. The model was embellished with the cannon barrels from a Master bars set, and a couple of Eduard etch sets covering interior, engine and instrument panel, though not all the parts in these were used. Some were just too small and fiddly for my aged eyes, and others, such as the ignition wires on the engine, I made from various diameter wire as I thought they had a better look than flat etch bits. The fuselage machine guns are the stock kit part, but I did drill out the cooling holes a little more and so a black wash over these for a better than stock look. Once built, the model was finished in Mr Color acrylic paints with a few other types for the details and the final coat were my own mix of Mr Color flat and gloss varnish to produce something of a satin finish, except for the control surfaces which are all fabric so were finished in flat varnish. Cockpit paint was also Mr Color, suitable for a Nakajima built plane as this was, with rattle can AS12 where appropriate, as well as Tamiya Aotake. The model was weathered using a mixture of Tamiya XF16 flat aluminium to represent paint scratches, as well as a good dusting with Tamiya weathering sets to improve the worn look. Here's some photos. Engine shots. One of the things I like about this kit is that it has the whole engine, bot just the part forward of the rear cylinders. It also has removable covers for the rear part so that you can see this. Cockpit shots. Again, nicely done by Tamiya, with detail provided behind the pilot's seat that can be seen once the model is finished. Undersides, here with the drop tank removed. I've touched this up a little more after looking at the picture I posted at the end of my WIP as I thought it looked a bit odd. It;s amazing that no matter how hard you look at something as you're building these models, you see a picture you've posted of that and you think . Cheers, Michael
-
After a few days mulling over my next project, I've decided to tackle Tamiya's A6M5 Zero. Mine will be a Nakjima built aircraft, and probably a carrier based plane too. This will also the only large scale Japanese aircraft I will have to go on the shelf of done. When I get there, that is. Just like Rome, my models are not built in a day. I bought this kit locally in September 2020 and immediately started to acquire some aftermarket bits from Hannants. Once I've bought a kit, I usually start looking for bits to enhance it as soon as possible after purchase, especially in kits like this which were released a while back. Here's what I bought for this one. This lot should slow the progress down nicely . I've also made a printable copy of the tweak list on this site, so between the kit instructions, the Eduard instructions and that tweak list, I'm not anticipating a quick build. Added to which is the fact that this kit is a little toy like in some of it's features, one part of which I've already assembled to satisfy my inner child. So after about three one hour sessions at the workbench, here's what I've got so far. The silver is Tamiya rattle can AS12, the aotake (did I get that right??) is daubed on with a brush and I've added my first etch pieces in the form of the green RDF tray and it's support brackets. I've also been drilling out lightening holes in the cockpit and two of the various bottles that seem to adorn this plane. My next step will be to paint all those parts in Nakajima interior green, then I can start on the cockpit. It seems I can put the fuselage together without the cockpit, which can be slid into place later. That should be interesting. Since this is a Tamiya kit, it should be a fun build. However, what I know about modelling Japanese planes would barely occupy a postage stamp, so please stand by for silly questions. All help/suggestions/criticism gratefully accepted. Cheers, Michael
- 41 replies
-
- 15
-
-
When I joined my first airline many years ago, the old captains loved to say that the reading of Ernest K. Gann's "Fate is the Hunter" should be compulsory for new crew, so they could understand how airlines work. It struck me that maybe the same could be said if you want to build a model of a Zero, that this book should be compulsory... I have only just completed reading it, and it is a real eye opener. I knew about the Saburo Sakai story for many years though, because when I was growing up, Keith Ferris' book was one of my greatest sources of inspiration (I have owned this copy for a very long time). Keith did the cover painting for "Samurai!" and on reading his notes for the painting, I realised how important the underlying structure is in determining the way an aircraft looks. https://keithferrisart.com/product/wounded-samurai-original-painting-by-keith-ferris/ I hope to be able to show some of the unique surface detail of the Zero's aluminium skin on this model. It is interesting to note that Keith painted the aircraft in a very pale grey, as was the norm at the time. I get the impression that an awful lot of research has gone into understanding the grey paint of the early Zero's, and why it has come to be interpreted in so many different ways. There is a wealth of information on the internet and in some new publications that I would like to explore during this build. Here are some lovely books that I found by pure chance at a hobby shop in Johannesburg recently - heaven knows how they ended up in South Africa! This blurry photograph is what I have decided to be first prize for my theme: a grey land based A6M2, Nakajima built, with the white surround to the fuselage Hinomaru, and a Houkoku Gou. Tall order it would seem so far, but maybe? I made a start on the engine since it looked so tempting... only to discover however, that this is going to be a little more complicated than I imagined. Ryan Toews recently completed a tweak list for this kit https://www.largescaleplanes.com/articles/article.php?aid=3339 , and I have printed it out to keep as a handy reference. It is lengthy - so there is clearly quite a lot to learn. Ryan points out the colours on the engine from a captured Sakae 12 metallurgical report. Maybe it was this engine? This should be fun. Sean
-
Hey all- I wasn’t originally planning on posting any of this. It’s already up on LSM.. but over here in LSP land; I’ve pressed pause on the Beaufighter while I wait for Ali to create some new transparencies, and Timmy! is working some incredible magic on my behalf for the big Smurfjet (super excited/you’ll dig it)…so this project was really just a mojo placeholder, but what the hell- here it is. How about a big IAF Eagle in its current config? I started with the Aires early F-15 cockpit. The IAF Eagles are similar to a MSIP II, with a few twists. For starters, the cockpit is black. Bay 5- a lot different. I filed off all of the side console detail from the Aries cockpit and got busy- The Quinta IP is sized to overlay the Tamiya IP; but the Red Fox IP dropped right on top of the Aires blank panel. The Red Fox IP was carefully painted black The ADI and HSI were replaced with Airscale decals. A few parts from the Quinta set were used Side consoles were 100% Quinta..again carefully painting out any grey areas with black P
- 93 replies
-
- 15
-
-
-
Hello all and i hope everyone is well This is the my Tamiya Spitfire which was going to be Johnny Johnson's Triple X beer barrel bomber but it......didnt. The issue arose that i was going to try and have the barrels and pylons removable as i do like the clean lines of the Spit, but the magnets that i had installed werent strong enough to hold the resin barrels and pylons flush to the wing surface, so i ditched the idea in the end. This kit build nice and easily, i add the Red Fox Studio IP set, painted with Tamiya paints plus used my own mask sets for the camo and all the insignia and serials. All comments welcome :-)
- 18 replies
-
- 45
-
-
- tamiya
- red fox studio
- (and 1 more)
-
Hello LSP! This is my recreation of the JASDF 305 Squadron 40th Anniversary F-15J based on the Tamiya kit. The squadron’s tail marking, also prominently displayed as a centerfold across the wings for the anniversary, is of a plum blossom over a Hinamaru. These trees are prolific in the parks around Hyakuri Air Base. My rendition is built primarily out of the box. I detailed the kit air brake since it was to be prominent in the vignette and the wing tanks are modified F-4E tanks. I did my own seamless intakes from the kit parts with sprue-glue, bondo spot putty, and paint. The stencils are from DKM. Cockpit is stock and I modified a Tamiya pilot to wave at the paparazzi - I’ve found the Kanji for Look mom 1-hand lol to make a nameplate for it. Vallejo used for the pilot and cockpit detailing. All other paint work is airbrushed based on a mask set I designed for the silhouette cutter. The white is Citadel spray paint and all the colors are MCW acrylic lacquers. I mixed up custom colors for the orange (sometimes pink) color, as it changes based on the lighting. Using a white primer allowed me to change the hue through layering so it appears to have a pink tone as it fades from red to orange to white. It’s all covered in MCW Gloss Clear. If you’re wondering, Umegumi is in reference to the digital style camo pattern it appears. This was part of the Group Build "Turning Japanese" and there is a Build Thread here F-15J Umegumi And now for your viewing pleasure here are the final glamour shots! The shot that started my infatuation with the JASDF aircraft, this is the one I set up the vignette to represent…
- 16 replies
-
- 35
-
-
-
Hello all, this is my effort to do a Lakenheath F-15C from the Tamiya kit. I choose to do 84-0027 as it had an odd 'camo splat' on the horizontal stabilisers and it had quite a hard edged camouflage, the F-15C's seem to have a mix of soft-edged and hard-edged schemes. So to do this scheme i made my own mask set for it, which made it a lot easier. The add-ons to the basic kit were Red Fox Studios cockpit set, Reskit AMRAAM's and burner cans plus i used PK Productions 'BIG USAFE MOD EAGLES' decals.....all three are excellent products, plus my own masks DM Scale Models Camo and Canopy set. Hope you all like it, it was a nice build and turned out well i think.
- 16 replies
-
- 42
-
-
Hi Guys, A big parcel arrived today. My mate Alan has sent me a Tamiya Mossie kit to build for him. I've known him since the last century when we both sub-contacted to Honeywell on London's Canary Wharf project and he knows I'm a modelling nutcase. Now I've got my own Mossie but haven't really had a good look at it so when this one turned up I though I'd have a quick peek inside. What did I find? Short answer, super duper fantastic plastic. So I'm going to do a dual build for him and me. There's another parcel waiting for me to pick up tomorrow which has contents unknown, Alan won't tell me exactly what I've let myself in for, so it could be seatbelts, etch, resin. Knowing Alan, it's probably all that and the kitchen sink as well. In a week's time I should have the Trumpeter Mustang tamed then straight into the Mosquito build. I know he would prefer to have his model in RAF markings, the kit has RNZAF, RAAF and Polish (RAF) so a bit of research and maybe cut some masks on the Cameo 3. Regards, Bruce Crosby
- 61 replies
-
- 10
-
-
Hello LSP! I've never posted here before, but I have been at Hyperscale, Brit Modeller and ARC over many years. Anyway- here we go! Spitfire Mk XVI SL721 AU-J was a veteran of the RAF and has been kept flying until the present day. Right now she is in Belgium, registered as OO-XVI. Another member here "red Dog" has done a terrific job on this example previously on this forum. More on red Dog later.... This aircraft was previously owned and operated by Vintage Wings of Canada and the Mike Potter Collection in Gatineau Quebec, close to Ottawa here in Canada. This kit was obtained by a fellow named Graham C, a member of the VWoC and he had hoped to build it. He decided, however, that it was beyond his ability to do it justice and decided to donate it to VWoC if someone would volunteer to build it. I said I'd give it a crack and here it is. I won't go into detail on the 1/32 Tamiya kit as it has been covered many times but will try to focus on the modifications and extras I attempted. First off SL721, AU-J reg C-GVZB as she was in Canada. I decided to start with the engine firewall. Using as many photos as I could collect I added piping and lines. Next up the engine was assembled and base coat of X18 semi gloss black. The left side received spark plugs and wires. These are VERY thin wires with most of the insulation stripped, leaving just a little on the end to represent the spark plug boot. The yellow would be painted over later. Some oil lines were added using lead wire and the and the ignition wire tube was made from plastic rod. The right side.. . The supercharger... And underneath... That's it for today. Next I will show the upper (inside) ignition harness, both the first and second versions....
- 63 replies
-
- 30
-
-
Hot off my workbench is this 1/48 Tamiya Viper done as a Block 52 of the Republic of Singapore Air Force's 143 Squadron "Phoenix". I used the Thunderbird boxing as the basis for this build. Mainly built out-of-the-box with Fine Molds seatbelts and ScaleNutz decals as the only aftermarket used. To represent a RSAF bird, some details had to be scratch-built including the plate-mounted AIFF antennae, HMCS sensor on the canopy and GPS receiver on the spine. The model was painted primarily with Mr Color lacquers. Weathering was done with a mix of AK Interactive, Ammo by Mig and oil paints. I also played around with some new techniques to give it a more weathered appearance. Loadout depicted is typical for a peacetime intercept mission consisting of 2 AIM-120C AMRAAMs, 2 AIM-9M Sidewinders, 2 370 gallon wing tanks and a AN/AAQ-33 Sniper XR pod on the right cheek station. Hope you enjoy the photos! Mark
-
 Now that I’ve got the ‘Flanker’ out of the way, and a clear bench that says “get something built”, I suppose I better tackle my next bout of insanity. It’s a really doozy as well. I have 4x F-16s that will have various colourful schemes applied, rather than a bunch of grey jets. All to be built inflight and posed on stands, I’m over gear down builds these days as I just can’t do the gear and bays justice. So here’s what I have….. 2 Tamiya F-16Cs kits. 2 Academy F-16I kits. And what I plan to do with them….. The ‘Zeus’ aircraft is a new build of a model I’d already built before, but the paint suffered some failure and cracked beyond any reasonable attempt at repair. So, I decided to do it from the ground up again. I’m saving the parts unique to the ‘Thunderbirds’ jet, and saving them for a future build when I get my head around creating a custom mask from the decals. This will take my Viper collection to 6 in total, when they’re finished. It goes without saying, that this one will be a slow burner once the plastic has been built. I won’t bore everyone with the building process, most here know all of that, and will know what an F-16 work in progress goes like. I don’t intend to go into any major conversion/backdating work for individual blocks, just using what’s available in the boxes to make them look like the jets they’re being based on. They’re all about the paint schemes for me. I’ll probably stop by with the occasional seat/pilot figure photo, production line progress shot, and go into the nuts and bolts of each individual paint scheme as it’s applied. That’s me sorted ‘til summer ‘22. Catch up with you all soon. Pete.
- 152 replies
-
- 22
-
-
Hey all. First work in progress on this site and first 1/32 aircraft. I've been wanting to build a Corsair for a long while, but 1/48 (my usual for aircraft) just wasn't big enough for the detail I'd like to add, and hopefully not screw up. I've been reading all the builds and RFI's on here that I can find and there are is some beautiful work here to compete against (). Hopefully I won't come off as a complete newb, but this will be my first WW2 aircraft, so hopefully you'll work with me. This won't be quick, since I have a day job ha! Link to some of my work for those of you that might not venture to non aircraft stuff..... So, Tamiya's kit to start, beautiful as usual from them. Vector Resin's intake flaps and engine upgrade parts. Barracuda cockpit stencils (I need better eyes for these!). Dana Bell's Birdcage Corsair book (and I've noticed Dana posts here, that's got to be helpful!. I'm hunting for HGW seatbelt's but so far, no luck on the suppliers I usually turn to. If anyone has a lead on where I can pick those up, I'd appreciate it. I'm also leaning towards using MRP paints for the first time, but I'm not really positive which colors I'll need. I'm going to plan on a two color bird, blue grey upper and light grey lower. Might go with Montex masks, or possible the HGW wet transfers...decisions to be made. Here are my selections for the main colors that I'll need to order. Please let me know if I'm totally wrong! Interior MRP 131 US Interior Green MRP 229 Dark Dull Green For the rest of the interior, I'll be using my existing supplies. Exterior MRP 130 Salmon Pink Primer for the cowling (sorta interior?) MRP 133 Blue Grey MRP 134 Light Grey And of course, mandatory pictures so I'm not boring everyone! The supplies, for now The work shop (everything else in cabinets) The overview And the other kits my wife said I should have built before buying the Corsair last week Hopefully I'll actually get some bench time tomorrow. Today has been "drill a 4 inch hole in your houses foundation day." Super not exciting. Thanks for looking, chime in and tell me where I'm off, nuts, or should go back to scifi lol Brett
- 316 replies
-
- 11
-
-
Hi gents, I would like to share the progres on this great kit, I hope to finish it very soon and do a decent photo session, cheers! Antonio
- 30 replies
-
- 11
-
-
- mustang p-51d
- tamiya
- (and 2 more)
-
My rendition of Major Edward Giller's "The Millie G" is now complete. This was by far my most involved project with extra detailing for the engine, cockpit, landing gear bays and the MG bays. Here's a link to the build thread in the Works in Progress section: https://forum.largescaleplanes.com/index.php?/topic/92956-132-tamiya-p-51d-15-na-mustang-the-millie-g/ Thanks for all the comments and suggestions during the build. In summary, here were the aftermarket additions to the kit: Barracuda cockpit upgrade Barracuda instrument panel Barracuda cockpit sidewalls HGW seatbelts Eduard guy bay kit (late) Barracuda P-51D tires Eduard P-51 exterior detail kit Barracuda decals + placards Eduard canopy masks Eduard engine detail kit The main paints used were Mr. Color lacquers. Now for the final photos. All of the main markings were painted except the stars and bars and tactical lettering, which were decals. The stencils from the Barracuda decals were used instead of the kit stencils. The ailerons and elevators were glued in place. The rudder and flaps are movable and do a pretty good job of staying in place. The Eduard gun bay doors is an excellent upgrade over the kit doors. The ammo belts are from the Tamiya kit. The engine covers are all removable and fit reasonably well with Tamiya's magnet system. The starboard panel just under the exhaust is a little fiddly. The weathering was a combination of oils, airbrushed Tamiya acrylics (heavily thinned) used for local effects and with sponge chipping and spatter templates. Colored pencils and pastels were also used for various effects. Mr. Color GX100 was used for gloss coats and GX114 for flat coats. Great stuff. I used Mr. Color C330 RAF Dark Green for the fuselage. And a slightly darker version for the nose checks and spinner green. The NMF paints are Mr. Color Super Metallics. The checks on the nose were painted. The drop tank fuel and pressure lines were created from 0.5mm wire. I kept the weathering on the drop tanks relatively light since often they were single use items. All of the fastener holes in the engine panel frames were drilled out. Light colored oils were used on the NMF surfaces to depict varying amounts of oxidation on the panels. Eduard's engine upgrade contains PE hose clamps for all of the main hoses and piping in the engine. They are a pain to attach and paint but look pretty snappy when complete. Also, the edges of the gunsight glass were painted Tamiya clear green to simulate the look of the thick glass plate. The aluminum paint on the wings was rendered with a combination of the Mr. Color Silver and light gray. Mr. Surfacer was used to fill the rivets and panel lines on the forward 40% of the wings. Grime and wear was depicted using a combination of Tamiya acrylics, oil paints and colored pencils. Some wear is down to the primer and some is down to the base metal. The primer toward the back of the wing is ZCY and the primer toward the front is dark gray putty colored, based on the construction process. The Eduard gun bay doors really add a lot compared to the kit doors. The Eduard doors come with a hinge at the bottom of the door for gluing it permanently in place. I wanted to be able to remove them, so I made tabs similar to the kit doors and glued them onto the Eduard doors. I also added a support rod made out of 0.3mm wire. I really like the iconic 343 FS, 55th FG markings. Chipping around the panels and doors was done with acrylic paints and colored pencils. The cockpit detail from the Barracuda kit is quite good (details are on the build thread). One note was that I changed the wiring from the radio box behind the pilot seat because the cable harness would interfere with the canopy support bracket. So I converted to a strand of speaker wire and painted it black. Thanks for following along! Comments and critiques are more than welcome. Thanks again.
- 46 replies
-
- 66
-
-
-
Hello all, hope everyone is well. This is my F-15E by Tamiya, its a nice kit to build....well its Tamiya isnt it The Cockpit got the Red Fox Studio upgrade, plus i added the Reskit (RSU32-0030) kit to upgrade the rear burners. Painted mainly with MRP 040 for the gunship and some low-high lights with other various greys. Thought i'd go for a Desert Storm #6 load out of 4xAIM-9L's 4xGBU-10's and fuel tanks. Hope you all like it.... All comments welcome
- 14 replies
-
- 36
-
-
-
Hi guys I now have the replacement canopy sets for the Tamiya kits available This set ended up being a little more tricky than first thought, but I am pleased with the results in the end, you now have three clear resin cast parts, two separate support frames and the canopy supporting cylinders in two alternative lengths for both the front and rear canopies, all supplied as 3D printed parts. Note use the frame part between front and rear canopy from the kit. https://aerocraftmodels.bigcartel.com/product/mcdonnell-douglas-phantom-replacement-canopy-set-for-tamiya-kits
- 33 replies
-
- 19
-


.thumb.png.84c5d3a464f2dd83f0ac37a5aac81ec8.png)


.thumb.png.64af68ce3763f9af8a91e71374ce741e.png)