

JayW
-
Posts
1,953 -
Joined
-
Last visited
-
Days Won
19
Reputation Activity
-

 JayW got a reaction from CODY in 1/18 Scale P-51B 3D Print Build
Getting back onto the subject at hand - the Malcolm Hood drive and emergency release mechanisms, I have finally got Rhino 3D representations of the parts (13 in all) that I will 3D print. It was a bit of an integration nightmare, as alot of stuff gets crammed in between the flanges of the upper longerons. And my longeron flanges are thicker than the real thing by a good bit (scaled of course). Also my longerons are not quite as wide as the real thing, to account for my skin gages, which are also thicker than the real thing (scaled). This all works against me shrinking the space to work with. Neverthless here are some hard won details that I hope will look representative once painted and assembled (assuming they print up OK):
Yup - you are looking at a 3D printed chain (with sprockets). I measure, from the pictures I have, a 1/2 inch pitch and about 1/2 inch wide. Scale to 1/18, and the links are much smaller than I could scratch build (something I managed to do on the Corsair tail wheel door mechanism a while back - but the chain was a bit larger). It is alot to ask of my printer - we shall see. You also see other details that have had a whole lot of artistic license applied to them.
Shortly I hope to show you the actual parts installed into the fuselage side panels. Stay tuned!
-
 JayW got a reaction from Greg W in 1/18 Scale P-51B 3D Print Build
Getting back onto the subject at hand - the Malcolm Hood drive and emergency release mechanisms, I have finally got Rhino 3D representations of the parts (13 in all) that I will 3D print. It was a bit of an integration nightmare, as alot of stuff gets crammed in between the flanges of the upper longerons. And my longeron flanges are thicker than the real thing by a good bit (scaled of course). Also my longerons are not quite as wide as the real thing, to account for my skin gages, which are also thicker than the real thing (scaled). This all works against me shrinking the space to work with. Neverthless here are some hard won details that I hope will look representative once painted and assembled (assuming they print up OK):
Yup - you are looking at a 3D printed chain (with sprockets). I measure, from the pictures I have, a 1/2 inch pitch and about 1/2 inch wide. Scale to 1/18, and the links are much smaller than I could scratch build (something I managed to do on the Corsair tail wheel door mechanism a while back - but the chain was a bit larger). It is alot to ask of my printer - we shall see. You also see other details that have had a whole lot of artistic license applied to them.
Shortly I hope to show you the actual parts installed into the fuselage side panels. Stay tuned!
-
 JayW got a reaction from Azgaron in 1/18 Scale P-51B 3D Print Build
Getting back onto the subject at hand - the Malcolm Hood drive and emergency release mechanisms, I have finally got Rhino 3D representations of the parts (13 in all) that I will 3D print. It was a bit of an integration nightmare, as alot of stuff gets crammed in between the flanges of the upper longerons. And my longeron flanges are thicker than the real thing by a good bit (scaled of course). Also my longerons are not quite as wide as the real thing, to account for my skin gages, which are also thicker than the real thing (scaled). This all works against me shrinking the space to work with. Neverthless here are some hard won details that I hope will look representative once painted and assembled (assuming they print up OK):
Yup - you are looking at a 3D printed chain (with sprockets). I measure, from the pictures I have, a 1/2 inch pitch and about 1/2 inch wide. Scale to 1/18, and the links are much smaller than I could scratch build (something I managed to do on the Corsair tail wheel door mechanism a while back - but the chain was a bit larger). It is alot to ask of my printer - we shall see. You also see other details that have had a whole lot of artistic license applied to them.
Shortly I hope to show you the actual parts installed into the fuselage side panels. Stay tuned!
-
 JayW got a reaction from Shoggz in 1/18 Scale P-51B 3D Print Build
Getting back onto the subject at hand - the Malcolm Hood drive and emergency release mechanisms, I have finally got Rhino 3D representations of the parts (13 in all) that I will 3D print. It was a bit of an integration nightmare, as alot of stuff gets crammed in between the flanges of the upper longerons. And my longeron flanges are thicker than the real thing by a good bit (scaled of course). Also my longerons are not quite as wide as the real thing, to account for my skin gages, which are also thicker than the real thing (scaled). This all works against me shrinking the space to work with. Neverthless here are some hard won details that I hope will look representative once painted and assembled (assuming they print up OK):
Yup - you are looking at a 3D printed chain (with sprockets). I measure, from the pictures I have, a 1/2 inch pitch and about 1/2 inch wide. Scale to 1/18, and the links are much smaller than I could scratch build (something I managed to do on the Corsair tail wheel door mechanism a while back - but the chain was a bit larger). It is alot to ask of my printer - we shall see. You also see other details that have had a whole lot of artistic license applied to them.
Shortly I hope to show you the actual parts installed into the fuselage side panels. Stay tuned!
-
 JayW got a reaction from denders in 1/18 Scale P-51B 3D Print Build
Getting back onto the subject at hand - the Malcolm Hood drive and emergency release mechanisms, I have finally got Rhino 3D representations of the parts (13 in all) that I will 3D print. It was a bit of an integration nightmare, as alot of stuff gets crammed in between the flanges of the upper longerons. And my longeron flanges are thicker than the real thing by a good bit (scaled of course). Also my longerons are not quite as wide as the real thing, to account for my skin gages, which are also thicker than the real thing (scaled). This all works against me shrinking the space to work with. Neverthless here are some hard won details that I hope will look representative once painted and assembled (assuming they print up OK):
Yup - you are looking at a 3D printed chain (with sprockets). I measure, from the pictures I have, a 1/2 inch pitch and about 1/2 inch wide. Scale to 1/18, and the links are much smaller than I could scratch build (something I managed to do on the Corsair tail wheel door mechanism a while back - but the chain was a bit larger). It is alot to ask of my printer - we shall see. You also see other details that have had a whole lot of artistic license applied to them.
Shortly I hope to show you the actual parts installed into the fuselage side panels. Stay tuned!
-
 JayW got a reaction from patricksparks in 1/18 Scale P-51B 3D Print Build
Getting back onto the subject at hand - the Malcolm Hood drive and emergency release mechanisms, I have finally got Rhino 3D representations of the parts (13 in all) that I will 3D print. It was a bit of an integration nightmare, as alot of stuff gets crammed in between the flanges of the upper longerons. And my longeron flanges are thicker than the real thing by a good bit (scaled of course). Also my longerons are not quite as wide as the real thing, to account for my skin gages, which are also thicker than the real thing (scaled). This all works against me shrinking the space to work with. Neverthless here are some hard won details that I hope will look representative once painted and assembled (assuming they print up OK):
Yup - you are looking at a 3D printed chain (with sprockets). I measure, from the pictures I have, a 1/2 inch pitch and about 1/2 inch wide. Scale to 1/18, and the links are much smaller than I could scratch build (something I managed to do on the Corsair tail wheel door mechanism a while back - but the chain was a bit larger). It is alot to ask of my printer - we shall see. You also see other details that have had a whole lot of artistic license applied to them.
Shortly I hope to show you the actual parts installed into the fuselage side panels. Stay tuned!
-
JayW got a reaction from Greg W in 1/18 Scale P-51B 3D Print Build
I have updates. My plan the last few weeks has been to finish up the "blue noser" painting, out of fear that the paint would degrade over time, and it will take a long amount of time to finish the fuselage to a point where the paint would ordinarily be applied. To do that, I wanted to finish up the windshield surround and instrument panel assembly prior to painting, in order to minimize handling the (fragile) painted surface.
Last we visited the IP and windshield surround was Feb 1, where I posted this picture:
Now, I have this:
Added is a bunch of stuff below the IP:
Armament switch panel
Pilot's center switch box
Fuel shutoff bracket and handle
Fuel selector panel and handle
Hydraulic pressure gauge and bracket
Landing gear door emergency release handle
A close-up:
My stuff is never perfect, like some modelers on this site somehow accomplish, but this is the best I have done so far. I'm good with it. All these items should be familiar to the P-51 enthusiast. All parts (with just a couple of minor exceptions) were 3D printed from the drawings, like usual. The switch covers, turn knobs, handles and such were done separately and then bonded onto the panels, brackets, and boxes. And, I will say again because it deserves repeating - Peter Castle is reponsible for the outstanding decals. It must have taken him months to work it all out and have them printed.
Also, there were a couple of items added to the RH windshield frame:
They are:
Type C-5 fluorescent lamp
Recognition light switch box
Also 3D printed. Very difficult and delicate installations with small parts. I might add - this is the first of my 1/18 scale models where I have decent thumb switches. Up til this point I have cut off bits of wire to do them, which is OK until you look closely. Then not so much. These however are 3D printed. And as long as I am careful not to break them, they are fine. MUCH better. I will also add that upon studying for the upcoming Malcolm hood drive mechanism, I found that part of the field mod was to relocate the recognition light switch box further forward - the very same part that I worked so hard installing! Grrr. Wish I had noticed that earlier. The reason - the box interferes with the opening/closing hand crank for the hood. This:
I will have to follow suit and break off and relocate the switch box.
And then, it was time for the blue paint. Assemble the forward fuselage with engine cowl onto the jig, and mask the critical paint boundary:
Here she is:
The masks for the white crosses are from Thunnus - provided to me quite a while back. Thanks John!
Here is what it is all going to look like:
I might add a semigloss coat to the new paint. I think that's what I did with the engine cowl, and it should better the match. BTW - the paint showed zero signs of degradation. I guess I didn't have to go out of sequence, but I also would have fretted about it. Now I don't have to.
Lastly for this update - the Shapeways rear windows came in the mail:
"Diamonds in the rough". And a bit pricey. They will polish up very nicely I guarantee. Recall the ones I printed off myself didn't fit very well; these fit perfectly:
It is going to be a while before you see that crown part of the fuselage in action. First will be the lower radio floor and fuselage tank, and then the upper radio rack and the SCR-522 radio equipment and the battery. All in future installments.
I believe the next step should be the Malcolm hood drive mechanism. It will be all guesswork - whatever I can glean from the photographs I have. I'm excited about it. And hope to have a great update in a couple weeks. Take care all, and thanks for tuning in.
-
JayW reacted to Azgaron in P-47D Thunderbolt - Hasegawa 1/32
Here's what I intend to build for this anniversary.
As silver or 25 is required, I'm building this one instead.
I will start building as soon as possible!
Håkan
-
JayW got a reaction from Greg W in 1/18 Scale P-51B 3D Print Build
The heater outlets are defined on drawings - they are part of the production airplane. The Malcolm hood mod however is just that - a mod. And no drawings are available.
But wait! I think I have it solved, and the solution was in my pictures all along:
LH side, the flex tube is attached to a convenient fuselage frame further forward. RH side, the flex tube is routed under the map case forward to an empty spot on a radio mounting bracket. I can do that!
This is from a modern resto, so I am going to have to hope it fairly well represents what was actually done back when. I am going to declare the mystery solved though.
-
JayW got a reaction from Greg W in 1/18 Scale P-51B 3D Print Build
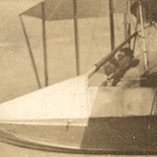
I have for the better part of the day been studying pictures of cockpits with the Malcolm hood modification. As you are probably aware by now, the hood travels on rollers that are attached to a rather prominent rail on either side of the fuselage exterior. To drive the hood back and forth, there are two sets of chains and sprockets in the inside of the cockpit, nested between flanges on the upper longerons. And driven by a hand crank handle. Like so:
What a challenge to properly represent all that clap trap. Already I have learned that the recongition light switch box must be relocated to clear the handle crank on the RH side. Now, I have discovered something else very curious. Take a look at these two pictures.
One -
Those are outlet ducts for the pilots' heating system, right at the pilot's shoulders peaking out from behind teh armor plate (armor plate and seat not in this picture). They are attached to the upper longerons and the sta 146 frame. This is taken from the Lope's Hope P-51C resto - which does NOT have a Malcolm hood.
Two -
This shows the aft end of the Malcolm hood chain drive, with a small sprocket and a connector shaft to the other side and teh other chain. The support fitting is mounted on the upper longeron, and is directly in front of the sta 146 frame. This is taken from a resto with a Malcolm hood, and in process.
Both items are in the same place! What gives? Were these ducts relocated in some fashion? Anybody know? Some of my period pictures suggest maybe they were just removed and the holes plugged. If so - what a penalty. Cold pilots.
-
 JayW got a reaction from Model_Monkey in 1/18 Scale P-51B 3D Print Build
I have updates. My plan the last few weeks has been to finish up the "blue noser" painting, out of fear that the paint would degrade over time, and it will take a long amount of time to finish the fuselage to a point where the paint would ordinarily be applied. To do that, I wanted to finish up the windshield surround and instrument panel assembly prior to painting, in order to minimize handling the (fragile) painted surface.
Last we visited the IP and windshield surround was Feb 1, where I posted this picture:
Now, I have this:
Added is a bunch of stuff below the IP:
Armament switch panel
Pilot's center switch box
Fuel shutoff bracket and handle
Fuel selector panel and handle
Hydraulic pressure gauge and bracket
Landing gear door emergency release handle
A close-up:
My stuff is never perfect, like some modelers on this site somehow accomplish, but this is the best I have done so far. I'm good with it. All these items should be familiar to the P-51 enthusiast. All parts (with just a couple of minor exceptions) were 3D printed from the drawings, like usual. The switch covers, turn knobs, handles and such were done separately and then bonded onto the panels, brackets, and boxes. And, I will say again because it deserves repeating - Peter Castle is reponsible for the outstanding decals. It must have taken him months to work it all out and have them printed.
Also, there were a couple of items added to the RH windshield frame:
They are:
Type C-5 fluorescent lamp
Recognition light switch box
Also 3D printed. Very difficult and delicate installations with small parts. I might add - this is the first of my 1/18 scale models where I have decent thumb switches. Up til this point I have cut off bits of wire to do them, which is OK until you look closely. Then not so much. These however are 3D printed. And as long as I am careful not to break them, they are fine. MUCH better. I will also add that upon studying for the upcoming Malcolm hood drive mechanism, I found that part of the field mod was to relocate the recognition light switch box further forward - the very same part that I worked so hard installing! Grrr. Wish I had noticed that earlier. The reason - the box interferes with the opening/closing hand crank for the hood. This:
I will have to follow suit and break off and relocate the switch box.
And then, it was time for the blue paint. Assemble the forward fuselage with engine cowl onto the jig, and mask the critical paint boundary:
Here she is:
The masks for the white crosses are from Thunnus - provided to me quite a while back. Thanks John!
Here is what it is all going to look like:
I might add a semigloss coat to the new paint. I think that's what I did with the engine cowl, and it should better the match. BTW - the paint showed zero signs of degradation. I guess I didn't have to go out of sequence, but I also would have fretted about it. Now I don't have to.
Lastly for this update - the Shapeways rear windows came in the mail:
"Diamonds in the rough". And a bit pricey. They will polish up very nicely I guarantee. Recall the ones I printed off myself didn't fit very well; these fit perfectly:
It is going to be a while before you see that crown part of the fuselage in action. First will be the lower radio floor and fuselage tank, and then the upper radio rack and the SCR-522 radio equipment and the battery. All in future installments.
I believe the next step should be the Malcolm hood drive mechanism. It will be all guesswork - whatever I can glean from the photographs I have. I'm excited about it. And hope to have a great update in a couple weeks. Take care all, and thanks for tuning in.
-
JayW reacted to Pete Fleischmann in 1/16 scale scratch built AT-38B Talon-The Smurf jet is back!
He is a genius.
but don’t tell him I said that
-
 JayW reacted to Kaeone57 in 1/18 Scale P-51B 3D Print Build
OBG - Ii looks as if her hair is "gone with the wind"! LoL!
Gorgeous work Jay!!
Alfonso
-
JayW got a reaction from Greg W in 1/18 Scale P-51B 3D Print Build
Oh cool pic indeed! Thank you Antonio. Some things to notice:
1. Relocated recognition light electrical box (a few inches forward) seen through the side window windshield glass (with what appears to be a natural metal finish bracket)
2. Some dark colored strip of putty or something along the periphery of the aft enclosure cutout - clearly meant to seal the gap between the hood and the fuselage crown when hood is closed. First I have seen that - I wonder if that was common...
3. There are five sets of rollers exposed with the hood open. All other pictures I have seen either period or modern have six sets. Mine too. Hmmm... Is the hood in this pic not fully open? Or, were more rollers added at some point to address a service issue.....
4. You can see a portion of the round outboard end of the crank handle / forward sprocket support bracket peaking out from behind the roller rail just aft of the windshield. You'll see that on mine too pretty soon.
4. The girl is very hot.
I hear you on modern restos. However I am very confident that the cranking system is accurately represented. All are consistent, and anything that can be gleaned from period photos seem to be in acordance.
As for escape - the Malcolm has an emergency jettison mechanism, including a red pull handle not unlike what we see on all production Mustangs whether greenhouse or bubble top canopy. You will see that on mine soon.
Upon your suggestion, I sent in a querie to the Imperial War Museum in GB, since the British back in the day modified practically every one of their many P-51B's (or Mustang Mk 3's as they called them), to have the Malcolm hood. We'll see if they respond or have anything. Hope they hurry - I am not waiting.
-
 JayW got a reaction from Madmax in 1/18 Scale P-51B 3D Print Build
Oh cool pic indeed! Thank you Antonio. Some things to notice:
1. Relocated recognition light electrical box (a few inches forward) seen through the side window windshield glass (with what appears to be a natural metal finish bracket)
2. Some dark colored strip of putty or something along the periphery of the aft enclosure cutout - clearly meant to seal the gap between the hood and the fuselage crown when hood is closed. First I have seen that - I wonder if that was common...
3. There are five sets of rollers exposed with the hood open. All other pictures I have seen either period or modern have six sets. Mine too. Hmmm... Is the hood in this pic not fully open? Or, were more rollers added at some point to address a service issue.....
4. You can see a portion of the round outboard end of the crank handle / forward sprocket support bracket peaking out from behind the roller rail just aft of the windshield. You'll see that on mine too pretty soon.
4. The girl is very hot.
I hear you on modern restos. However I am very confident that the cranking system is accurately represented. All are consistent, and anything that can be gleaned from period photos seem to be in acordance.
As for escape - the Malcolm has an emergency jettison mechanism, including a red pull handle not unlike what we see on all production Mustangs whether greenhouse or bubble top canopy. You will see that on mine soon.
Upon your suggestion, I sent in a querie to the Imperial War Museum in GB, since the British back in the day modified practically every one of their many P-51B's (or Mustang Mk 3's as they called them), to have the Malcolm hood. We'll see if they respond or have anything. Hope they hurry - I am not waiting.
-
 JayW got a reaction from MikeMaben in 1/18 Scale P-51B 3D Print Build
Oh cool pic indeed! Thank you Antonio. Some things to notice:
1. Relocated recognition light electrical box (a few inches forward) seen through the side window windshield glass (with what appears to be a natural metal finish bracket)
2. Some dark colored strip of putty or something along the periphery of the aft enclosure cutout - clearly meant to seal the gap between the hood and the fuselage crown when hood is closed. First I have seen that - I wonder if that was common...
3. There are five sets of rollers exposed with the hood open. All other pictures I have seen either period or modern have six sets. Mine too. Hmmm... Is the hood in this pic not fully open? Or, were more rollers added at some point to address a service issue.....
4. You can see a portion of the round outboard end of the crank handle / forward sprocket support bracket peaking out from behind the roller rail just aft of the windshield. You'll see that on mine too pretty soon.
4. The girl is very hot.
I hear you on modern restos. However I am very confident that the cranking system is accurately represented. All are consistent, and anything that can be gleaned from period photos seem to be in acordance.
As for escape - the Malcolm has an emergency jettison mechanism, including a red pull handle not unlike what we see on all production Mustangs whether greenhouse or bubble top canopy. You will see that on mine soon.
Upon your suggestion, I sent in a querie to the Imperial War Museum in GB, since the British back in the day modified practically every one of their many P-51B's (or Mustang Mk 3's as they called them), to have the Malcolm hood. We'll see if they respond or have anything. Hope they hurry - I am not waiting.
-
 JayW got a reaction from Paulpk in 1/18 Scale P-51B 3D Print Build
Oh cool pic indeed! Thank you Antonio. Some things to notice:
1. Relocated recognition light electrical box (a few inches forward) seen through the side window windshield glass (with what appears to be a natural metal finish bracket)
2. Some dark colored strip of putty or something along the periphery of the aft enclosure cutout - clearly meant to seal the gap between the hood and the fuselage crown when hood is closed. First I have seen that - I wonder if that was common...
3. There are five sets of rollers exposed with the hood open. All other pictures I have seen either period or modern have six sets. Mine too. Hmmm... Is the hood in this pic not fully open? Or, were more rollers added at some point to address a service issue.....
4. You can see a portion of the round outboard end of the crank handle / forward sprocket support bracket peaking out from behind the roller rail just aft of the windshield. You'll see that on mine too pretty soon.
4. The girl is very hot.
I hear you on modern restos. However I am very confident that the cranking system is accurately represented. All are consistent, and anything that can be gleaned from period photos seem to be in acordance.
As for escape - the Malcolm has an emergency jettison mechanism, including a red pull handle not unlike what we see on all production Mustangs whether greenhouse or bubble top canopy. You will see that on mine soon.
Upon your suggestion, I sent in a querie to the Imperial War Museum in GB, since the British back in the day modified practically every one of their many P-51B's (or Mustang Mk 3's as they called them), to have the Malcolm hood. We'll see if they respond or have anything. Hope they hurry - I am not waiting.
-
 JayW got a reaction from Kaeone57 in 1/18 Scale P-51B 3D Print Build
Oh cool pic indeed! Thank you Antonio. Some things to notice:
1. Relocated recognition light electrical box (a few inches forward) seen through the side window windshield glass (with what appears to be a natural metal finish bracket)
2. Some dark colored strip of putty or something along the periphery of the aft enclosure cutout - clearly meant to seal the gap between the hood and the fuselage crown when hood is closed. First I have seen that - I wonder if that was common...
3. There are five sets of rollers exposed with the hood open. All other pictures I have seen either period or modern have six sets. Mine too. Hmmm... Is the hood in this pic not fully open? Or, were more rollers added at some point to address a service issue.....
4. You can see a portion of the round outboard end of the crank handle / forward sprocket support bracket peaking out from behind the roller rail just aft of the windshield. You'll see that on mine too pretty soon.
4. The girl is very hot.
I hear you on modern restos. However I am very confident that the cranking system is accurately represented. All are consistent, and anything that can be gleaned from period photos seem to be in acordance.
As for escape - the Malcolm has an emergency jettison mechanism, including a red pull handle not unlike what we see on all production Mustangs whether greenhouse or bubble top canopy. You will see that on mine soon.
Upon your suggestion, I sent in a querie to the Imperial War Museum in GB, since the British back in the day modified practically every one of their many P-51B's (or Mustang Mk 3's as they called them), to have the Malcolm hood. We'll see if they respond or have anything. Hope they hurry - I am not waiting.
-
 JayW got a reaction from TAG in 1/18 Scale P-51B 3D Print Build
The heater outlets are defined on drawings - they are part of the production airplane. The Malcolm hood mod however is just that - a mod. And no drawings are available.
But wait! I think I have it solved, and the solution was in my pictures all along:
LH side, the flex tube is attached to a convenient fuselage frame further forward. RH side, the flex tube is routed under the map case forward to an empty spot on a radio mounting bracket. I can do that!
This is from a modern resto, so I am going to have to hope it fairly well represents what was actually done back when. I am going to declare the mystery solved though.
-
 JayW got a reaction from chaos07 in 1/18 Scale P-51B 3D Print Build
I have for the better part of the day been studying pictures of cockpits with the Malcolm hood modification. As you are probably aware by now, the hood travels on rollers that are attached to a rather prominent rail on either side of the fuselage exterior. To drive the hood back and forth, there are two sets of chains and sprockets in the inside of the cockpit, nested between flanges on the upper longerons. And driven by a hand crank handle. Like so:
What a challenge to properly represent all that clap trap. Already I have learned that the recongition light switch box must be relocated to clear the handle crank on the RH side. Now, I have discovered something else very curious. Take a look at these two pictures.
One -
Those are outlet ducts for the pilots' heating system, right at the pilot's shoulders peaking out from behind teh armor plate (armor plate and seat not in this picture). They are attached to the upper longerons and the sta 146 frame. This is taken from the Lope's Hope P-51C resto - which does NOT have a Malcolm hood.
Two -
This shows the aft end of the Malcolm hood chain drive, with a small sprocket and a connector shaft to the other side and teh other chain. The support fitting is mounted on the upper longeron, and is directly in front of the sta 146 frame. This is taken from a resto with a Malcolm hood, and in process.
Both items are in the same place! What gives? Were these ducts relocated in some fashion? Anybody know? Some of my period pictures suggest maybe they were just removed and the holes plugged. If so - what a penalty. Cold pilots.
-
 JayW got a reaction from Pete Fleischmann in 1/16 scale scratch built AT-38B Talon-The Smurf jet is back!
Awesome LG! I must say - one of my most frustrating problems with 3D printing parts that fit together with one another is trying to account for the shrinkage/expansion thing. It is small but it is there, at least with the resin I use. A pin or shaft that fits inside a bore on a fitting, like you have there in several places, needs to be about right on. Not sloppy, and not too tight. I guess Timmy has that down.
-
 JayW got a reaction from Derek B in 1/16 scale scratch built AT-38B Talon-The Smurf jet is back!
Awesome LG! I must say - one of my most frustrating problems with 3D printing parts that fit together with one another is trying to account for the shrinkage/expansion thing. It is small but it is there, at least with the resin I use. A pin or shaft that fits inside a bore on a fitting, like you have there in several places, needs to be about right on. Not sloppy, and not too tight. I guess Timmy has that down.
-
JayW got a reaction from CODY in 1/18 Scale P-51B 3D Print Build
Oh cool pic indeed! Thank you Antonio. Some things to notice:
1. Relocated recognition light electrical box (a few inches forward) seen through the side window windshield glass (with what appears to be a natural metal finish bracket)
2. Some dark colored strip of putty or something along the periphery of the aft enclosure cutout - clearly meant to seal the gap between the hood and the fuselage crown when hood is closed. First I have seen that - I wonder if that was common...
3. There are five sets of rollers exposed with the hood open. All other pictures I have seen either period or modern have six sets. Mine too. Hmmm... Is the hood in this pic not fully open? Or, were more rollers added at some point to address a service issue.....
4. You can see a portion of the round outboard end of the crank handle / forward sprocket support bracket peaking out from behind the roller rail just aft of the windshield. You'll see that on mine too pretty soon.
4. The girl is very hot.
I hear you on modern restos. However I am very confident that the cranking system is accurately represented. All are consistent, and anything that can be gleaned from period photos seem to be in acordance.
As for escape - the Malcolm has an emergency jettison mechanism, including a red pull handle not unlike what we see on all production Mustangs whether greenhouse or bubble top canopy. You will see that on mine soon.
Upon your suggestion, I sent in a querie to the Imperial War Museum in GB, since the British back in the day modified practically every one of their many P-51B's (or Mustang Mk 3's as they called them), to have the Malcolm hood. We'll see if they respond or have anything. Hope they hurry - I am not waiting.
-
JayW reacted to Antonio Argudo in 1/18 Scale P-51B 3D Print Build
superb job Jay, just saw this cool pic and wanted to share, keep the great work, cheers
-
JayW reacted to Paulpk in 1/18 Scale P-51B 3D Print Build
Jay, great work. I am very suspect of restored equipment in private use as being totally accurately restored. So I’d stick to period photos myself. I find this so true with armor vehicle restorations.
I knew of the Malcom hood but not the details of usage or installation. I find the cranking system to close and open questionable. I hope there was an over ride when you needed to escape fast
I searched today for an answer to your question and probably came up with the same answers you have. There must be a set of instructions for installation somewhere in a British museum. Have you contacted any museum?