Search the Community
Showing results for tags 'Tamiya'.
-
Hello everyone, I'm starting a new build and I'm wanting to do the captured paint scheme of Koga's Zero. I'm already messing up though I do think. I've tried two approaches to doing the Aotake blue-green and I don't think either looks good. The lighter one is by Model Master and is Japanese interior Blue. The other one I tried mixing the suggested colors Tamiya has in the manual and to me it looks too Blue in color. I know this subject has been beat to death on colors, but I'm not doing so hot here and remembering why I always stayed away from Japanese subjects. Here is what it looks like so far: Thanks, Brady
-
After the disaster of the Trumpter F4u-1D build and the ridiculous wing arrangement, I've decided to jump straight back on the horse and build another Corsair... this time Tamiya's offering. First impressions were that it's not much different to the Trumpter offering... Right up to the point where I found the decals and instruction manual AND full colour reference photo book. I was sceptical before buying the Tamiya, due to the fairly substantial hike in price, but I think that Tamiya can utterly justify their price. The quality of moldings and lack of flashing and release pin marks is unbelievable. The level of detail of the cockpit alone is the best I've ever seen. I apologise in advance to using John1's build as inspiration, If mine ends up 1/10 as well as his did, I will be a very happy man! I have purchased the cockpit decal set and resin wheels from Baracudu and the cowl kit from Vector to enhance this build, but other than that I will be doing no scratch building, just enjoying the build. I will post pictures of progress to follow. Thanks for looking and I welcome any tips or critism, good or bad.
-
Here is my recently completed Tamiya F4U-1 Birdcage Corsair in the markings of the 2nd Daphne C flown by Capt. James Cupp, BuNo 03829, White 15. Excellent kit, everything just 'clicks' together & the detail is amazing. Aftermarket used; Barracuda cockpit placards, main wheels, early engine upgrade & 'Daphne C' decal. Eduard Cowling & fabric seat belts. HGW wet transfer placard decals. Maketar masks for the national insignia & white 15. Yahu instrument panel. True Details US parachute. Changes/additions made; eliminated the balance tabs on the ailerons, they were not installed on the Birdcage Corsairs. Added extra wiring, ducts, oxygen hose, added detail to the seat mount in the cockpit and added canopy lock handles. Added spark plugs, wiring & oil lines to the engine. Added cowl flaps cable to the Eduard cowling flaps. Added plumbing to the landing gear wells. Added machine gun barrels to the wings, odd that Tamiya doesn't include those. Added antenna, spring & insulators. Painted using MRP for the lower & Xtracolor for the upper color. Preshaded slightly, used panel line wash & pastels for weathering/post shading. I don't own a camera, so just have cell phone photos, some with flash & some without. Flash tends to wash out the colors. Haven't seen the sun here in days, so outside photos are not an option. Thanks for looking & all comments welcome. Larry http:// http:// http:// http:// http:// http:// http:// http:// http:// http:// http:// http:// http:// http:// http:// http://
-
It's Tamiya kit I've built on Nov 2018.
- 12 replies
-
- 20
-

-
With a pair of Spitfires for the Jurassic Plastic and Keep it Civil group builds on the bench, I got carried away and started working on another pair that I've wanted to do for some time. The unique looks of the the HF VII with its extended wingtips and Ocean Grey/PRU Blue paint scheme has had a big appeal to me. Likewise, the VIII with the iconic Grey Nurse shark mouth is hard to resist. The biggest challenge for building a VII was the deeper rear canopy section and the rear pressure bulkhead. Roy Sutherland's build of the VII in the "How to Build Tamiya's Spitfire" book was a great source of inspiration. Unfortunately it didn't cover how to make the rear canopy. I cut and spliced two canopies together to get the correct depth, hoping to use it as a master for a smash moulded replacement. Unfortunately it didn't work out with the sheet plastic melting and deforming my master. Guess I should have expected that but that was my first try at this sort of thing. My second try, I simply bent the plastic sheet to the right shape. This seemed to work out much better. With that out of the way, I turned my attention to the fuselage modifications. I started by cutting away the rear section to match the new canopy. Here is the modified one in front of the VIII fuselage.
-
After weeks of work, here is my finally completed Tamiya A6M2 Zero. It was a fun build. Not too difficult, mostly because of the high quality of the kit, however, attaching the wire they supplied for the antenna was the hardest part of build. Of course, the painting and weathering portion was challenging. Enjoy!
- 20 replies
-
- 27
-
-
I really enjoyed this kit, it goes together extremely well considering it's size, I just wish Tamiya did the later version also! It's pretty much OOB with the exception of some seat belts and all insignia but the tail number was masked and painted. This aircraft was based out of Malaya in December 1941.
-
here my entry for this groupbuild What im going to use the old tamiya F-14A i know lot off work ahaed but im looking forward to do this I love the F-14 and also the camo so what can go wrong A lot off scribbing ahaed The kit and aftermarket Mark
- 40 replies
-
- 11
-
-
Hi, I renewed my old Corsair model. New colors, markings from masks. This plane was originally a "white 13" and it was a Ken Welsh plane, then number was changed to 7 and it was assigned to James Cupp. Unfortunately, on my photos most of scratches to silver/zinc chromate which i done dissapeared. On bottom there is a photo of model before repaint and photo with buddy Hellcat from Pacific with same number
- 11 replies
-
- 18
-
-
Hi guys, do these birds get really filthy? I'm doing a USAF bird and need good ref pics if anybody has got some, particularly the underside. Cheers Bevan
-
Bumped onto this in YouTube: https://youtu.be/HZ6mr8wAW5E This guy did a great job with DN Models' masks. Glad to have videos like that viral. Shows how things can be done the easy way.
-
Hello- These are pics of my Tamiya A6M2 1/32nd scale Type 21. My model depicts the aircraft of NAP1/C Tsuguo Matsuyama during the 2nd strike of the Pearl Harbor attack. The kit took me a long time to build, mainly due to life's interruptions, such as going back to college for a master's degree, and other situations. Anyway, it's an excellent kit, the fit is great unless you add too many details (I found that out during the build and it slowed me down) but, in the end, the kit fits together easily (typical of Tamiya), and it was a lot of fun. I used mostly GSI Mr. Hobby Colors for the build, along with Taiya paints, Alclad II lacquer, Vallejo acrylics, lots of Future, and even some blue food coloring . The tires and drop flaps were aftermarket resin, I added wiring in the cockpit and on the engine, and the seatbelts are the ones included in the kit, which are probably the weakest part of the model. Overall though, I'm very happy with the way it turned out. Thanks for looking! Link to the build log: https://forum.largescaleplanes.com/index.php?/topic/56908-finished-mojo-rei-sen-tamiya-mitsubishi-a6m2/
- 12 replies
-
- 22
-
-
My next build will be the Tamiya Spitfire MkXVIe, which I plane to paint in the markings of SL721 which was the personal hack of Air Marshall Sir James Robb. I have also purchased some Eduard photo etch to help me improve this, but as I've thought about it, I have 2 other Tamiya Spitfires in my stash and if I built them all from kit supplied markings, they would all look the same on the shelf. I had made a tiny start on this plane before I started my Typhoon, but at the time, it really didn't float my boat, so back in the stash it went. I previously decided that this would be my first attempt at one of these Tamiya kits, based purely on the thought that if I mucked it up, at least it would be a learning curve for the other 2, as I much prefer my Spitfires not to have bubble canopies. However, the announcement of this group build gave me some better impetus to get started, and also to think outside the box (yes, I did say that ) and do some research into MkXVI's. Digging through my books on the Spitfire I came across this plane, which still exists. The picture I've shown is as it was in 1999 following restoration by Chris Woods in Canada, being repainted in it's original paint scheme. And this is how I shall be doing it and since I'm presenting it here, I hope I don't make a mess of it. The MkIX and MkVIII will be built later, but I've ordered some new markings for the MkIX and may well do so again for the MKVIII so that they all look different once built. I've also ordered the correct marking for this kit in my desired paint scheme, together with a couple more small bits to further enhance it. I've been at it with the rattle can silver today, them masking up for the interior green. I've also drilled out the lightening holes in the fuselage frames. More later. Cheers, Michael
-
Here is my latest build, a MkXVI Spitfire, by Tamiya, which I built as my contribution to the Colour My World Blue group build. It represent Spitfire SL721 which became the personal plane of Air Chief Marshall Sir James Robb, from 1946 to 1951. As you can read below, this plane has had a very long career, and she still flies. You can find the full build detailed here: https://forum.largescaleplanes.com/index.php?showtopic=72233 Spitfire SL721 never flew in WW2, as it was delivered new to No.6 Maintenance Unit of 27th August 1945. From there, it went to the Fighter Command Communications Squadron in October 1946, then later that month it went on to the Meteoroligical Flight for use by Sir James Robb, who at that time was Commander in Chief of RAF Fighter Command. Soon afterwards, it was sent back to Vickers Supermarine for refitting. All armament was removed, and the gun bays converted to luggage lockers. The gun sight was also removed, as was the rear fuselage fuel tank, and much of the remainder of it's military equipment. It was also painted in RAF Scheme D Light PRU Blue as seen here. In this form, the plane was a dream to fly as it's performance was very much enhanced by the removal of so much weight. The plane was used by Air Marshall Robb to tour the various bases in Great Britain. It also appeared in a few races, including the Kings Cup. In June 1948, it was involved in a landing accident. The pilot on this occasion was AVM Sir John Boothman, who was also the pilot who took the Schnieder Trophy in 1931. SL721 was sent back to it's manufacturer's for repair, this time being repainted in RAF Scheme D PRU dark blue. The plane went back to the 31 Squadron RAF (nominally) for Sir James Robb's continued use, who by now was Commander In Chief, Airforces Europe, until her retired in August 1951. Sir James handed over his plane to the commanding officer of the Central Flying School at Little Rissington until in late 1954, despite many objections from the CFS staff, the plane was ordered to be scrapped. While awaiting it's fate at RAF Lyneham, it was spotted by an automotive garage owner who purchased it for 120 pounds for display on his forecourt at Swandean It was well looked after here, and the engine was stared regularly to keep it in reasonable fettle. Three years later, the plane was moved to Lord Montagu's estate for display, where it appears to have stayed, in the open, until 1966. It seems to have been traded multiple times in a very short time span, without actually being moved, firstly for 2000 pounds, then 3000GBP, then 4000GBP. Finally in 1967, it made it's way to the United States, by now being owned by William "Bill" Ross, a Chicago businessman and aircraft collector. Ross had the plane refurbished in Atlanta, Georgia, and it was now painted in a glossy green/brown camouflage with azure blue undersides, but still wearing JM-R as squadron codes. SL721 spent some years now on the display circuit in the US, often flown by legendary warbird pilot Jerry Billing. Some time in 1972, the plane was sold to Englishman Doug Arnold, and shipped back to the UK. He repainted the squadron codes with his initials D-A. Again, the plane appeared at air displays until it was sold again in 1978 to Woodson K Woods of Chino, California. Here, Woods repainted SL721 in a more accurate green/grey camouflage and again refurbished the plane. It now wore the squadron codes WK-W and again flew on the display circuit. It also appeared at Reno in 1981, in mock combat with a Hispano ME109 "Buchon", where SL721 achieved her first "kill", shooting down the Buchon in mock combat. Woodson loaned SL721 to the San Diego Aerospace Museum for 7 years, starting in 1982. On return, the plane was trucked to Colorado for a complete rebuild. Woodson's son Chris would care for the plane for another 8 years until in late in 1998, he had the plane repainted again, this time in azure blue and in the markings of Sir James Robb. The plane was sold again in 2000 or 2001, soon after appearing again at Reno. This time, it went to Canada and became part of the Vintage Wings of Canada collection. Here, it was repainted in the markings of TB886, AU-J, a Spitfire XVI flown by 421 Squadron RCAF and has flown many displays in honour of fallen Canadian airmen of WW2. It was put up for sale again in August 2017. Earlier this year, SL 721 was purchased by a Belgian consortium, and is now flying again in that country, registered as OO-XVI. https://forum.keypublishing.com/showthread.php?145017-The-Belgians-are-with-flying-Spitfire-once-again-OO-XVI Who knows?? Maybe SL721 will fly again in the skies over Britain. Cheers, Michael
-
I've really been bitten by the "Oh shiny!!!" bug lately. It sort of explains the lack of progress on a couple of my build threads. Between the F-4E, B-25 and Spitfire XIX ive got stated on here, I've pulled out of the stash and worked on a Zoids kit, a Fly Hurricane and now this. This is the original release of the Tamiya Caterham kit from 1994. At the time, it was supposedly the most expensive kit ever produced by Tamiya. I picked up my copy shortly after it came out and made a right mess of it. I tried to polish the aluminum body panels and only made it worse. I tried to cover the seats in leather and made them worse. So it went back into the box and has traveled with me for over 20 years. Earlier this year, Tamiya reissued the kit. I've naturally picked up a new copy to have another go at it. But I first decided to see if I could resurrect this one. To do so, I managed to secure new seats. The one panel that's really tarnished I'll just leave as there's not much else I can do. Here's what the inside of the box looked like after all this time. I had to brush off a nice layer of dust from a bunch of parts and them started in. The first thing I did was clean up the fenders and nose cone and spray them in a custom metallic purple I used a mix of Gunze purple and metallic black. The original paint had etched the plastic badly so it took a bit of sanding to get things smooth.
- 70 replies
-
- 5
-
-
- Caterham
- Super Seven
- (and 2 more)
-
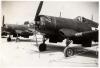
This is the very nice Tamiya kit used along side the Cutting Edge Crossdressing Stormbirds decal sheet. Yellow 17 was flown by Lt Hans Dorn of 1/JG7 and was captured at Fassberg by No 616 Squadron RAF in May 1945. I could find very little information on Dorn, I suspect he was a replacement pilot and fairly new to JG 7, seeing little or no action in his time there. As for yellow 17, she was designated AM-52 and ferried back to England for evaluation before being declared surplus and shipped off to Canada. From there, she was sold along with 300 other surplus aircraft and scrapped. As I said the Tamiya kit is a real pleasure to build. Painted with Gunze RLM 82/83/76 with weathering kept pretty light as this machine looked almost brand new when captured, in all likelihood it was.
-
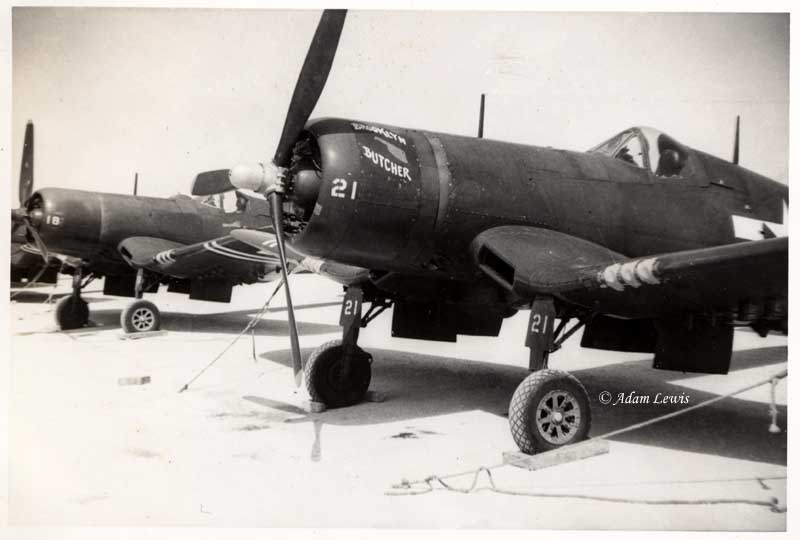
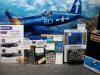
A month ago I started to get the urge to pick up a model airplane and tinker around a bit and see if It was something I wanted to do with my spare time. I ended up picking up and mostly completing a very nice US Navy fighter kit, until I accidently sat on it this morning..Yes, I really sat on it.. dont ask.. I had actually planned to post the warm up build in the RFI before starting this, but this accident with my warm up build just before paint this afternoon kind of put a squash on that.. get it? Oi. It's repairable and parts are ordered so at least I'm able to finish it when the replacements arrive. As I said, it has been a while since aircraft modeling has really sparked an interest, and revisiting the bench after some absence required cleaning my work area, so I took the opportunity to organize my work space a bit better in preparation for this project. There is a fantastic web page with a lot of information on the aircraft and personnel of VMF- 512 and their service in the closing stages of WWII in the Pacific. http://www.adamsplanes.com/vmf-512.htm I will use this fantastic kit and some aftermarket to try to do justice to the prototype. This will be my first Tamiya Corsair! The funny thing is, I've had two pass though my hands since the first release (birdcage), but I've traded them off. This one, I shall build! I've got a ton of great builds from around the net earmarked, and all the reference books and CD's etc. are ready to go. I will also be taking the time to show a comparison between aftermarket parts and the kit parts. Ive already decided a couple of the items are being returned. They just aren't worth the extra money from my point of view. Here is where things start, the Kit and A/M I will be getting started here shortly, one last item I need is still being sourced. More soon, Paul

-
Welcome Everyone, thanks for flying by this build! Tamiya's 1/32 F-16C, this one's been done for over a month now but I didn't have the presentation and the stand the way I wanted it. I think it's ready for display now though(although as soon as I looked at closeups around the cockpit I see I have some touch-up to do LOL). I wanted to represent a picture I found on AirWingSpotter with the plane going vertical and vapor contrails billowing off the wing roots so for that I used medical rayon rope(basically just cotton balls in a rope form). I cut the arm from the Tamiya kit in half and turned it around to go vertical. I chose to do Lt. Col. Mike Chandler's bird from the 2004 show season. I was lucky enough to find a walk-around of his #1 and so i tried to represent it as best I could. This is an out of the box build except for 2 extras that I thought were crucial; the American Flag and the stopwatch in the cockpit. I preshaded with grey and dark grey panel line accent so that the lines would be crisp, without an surrounding shadow, to represent a show bird. I used MCW paints for all the gloss work and Vallejo for the cockpit and the exhaust nozzle. All of the striping is done via airbrush and the rest is with the kit decals. One of the unique things I did for this was to paint the engine internals to represent full afterburner. The way I have the plane oriented I guess I'll need some mirrors to see that now haha! I've included a picture below taken on a horizontal stand so you can see how it turned out. Let me know what you think as I may try this again and would like some feedback on it. You can check out my WIP for more details http://forum.largescaleplanes.com/index.php?showtopic=72439&hl=thunderbird
- 9 replies
-
- 9
-
-
- Tamiya
- Thunderbird
- (and 4 more)
-
Here it is, my first WIP thread on this site. I've been back in the hobby for a little over a year after a couple of decades layoff, and have been working in 1/48 exclusively and posting on FSM mostly. This will be my first 1/32 build, and I will be taking it slow since it's such a huge kit. I will be eventually painting and marking her up as one of the Amiens raiders from 464 Squadron. First picture is just the kit in box in my newly reorganized workspace. Also pictured is my brand new homemade spray booth. I think I'm going to start tonight and will post some pics once I begin. I have no hope to produce something of the same quality as some of the amazing threads I read on here, but I hope to have fun and learn a lot. I welcome any and all comments and criticisms - it's the only way to get better! Thanks for having such an inspiring and welcoming forum.
- 355 replies
-
- 14
-
-
Ok, I really shouldn't be starting this, what with everything else on my bench at the moment but I couldn't resist. Ignore the EJ bit on the box. It's the same inside as the regular USAF boxing but I've been able to get these for much cheaper for whatever reason. I've got a bunch of AM and I'm planning to use Speedhunter decals and various paint masks for the markings. For underwing stores, while not 100% accurate, I'm planning to hang these underneath: Yup, three SUU-23A gun pods. Carl
- 166 replies
-
- 11
-
-
- Hill Grey
- Phantom II
- (and 2 more)
-
Work in progress topic: http://forum.largescaleplanes.com/index.php?showtopic=63538 I used: - Eduard photoetch and masks - HGW seatbelts - Yahu IP (outstanding!) - Kagero Pacific Mustangs decal set - Brassin wheels I added cables in engine, wheel bays and in cockpit. I made "uncle dog" antennas, but these are not entirely correct, maybe someday i will replace it with good ones from Tamiya Pacific P-51 kit. Kit is remarkable but there are some scratches on diamond surface - wheel bays are full of ejector pins and there is a nasty seam line on a canopy. When you manage with these problems overall effect is like somebody used a shrink gun on real Mustang! Finest kit i ever assembled.
- 32 replies
-
- 30
-
-
- The Enchantress
- Tamiya
- (and 1 more)
-
Hi, New to the forum and not sure if this has been talked about before, but I thought I would share what I learnt yesterday with the metal shafts in a lot of the Tamiya 1/32 kits....if you're like me and trying to figure out which size shaft you are looking for, lay the shaft over the instruction sheet. The shaft size matches what is on the instructions Cheers
-

F4U-1A Corsair RNZAF- Finished and off the bench
BloorwestSiR posted a topic in Colour My World Blue
Ok, so I just finished my entry in the last GB and I'm back with this build. The first thing to do was to tidy up the workbench. Shaka, if you're reading this avert your eyes! Yup, a clean bench. So much space to clutter up, er, work in. Now onto my starting point: I'll be using the Montex masks for the larger markings and the Xtradecals for the smaller ones. I'm planning to build 307 in the 3 tone front, GSB rear combo. Carl -
The saga continues this Christmas as we head into 2018 with my 3rd rendition of the USAF demonstration team. I decided on the F-16 because I bought too much paint for the F-35A so this one allows me to use the most of that up. This time I'm doing the Team Leader, Mike Chandler's plane from the 2003-2004 season. I found a full walk around of his plane which will definitely help with details. My plan is to do this OOB except for a few scratch details...originally it was 100% oob but once i saw the flag and stop watch in the cockpit weren't there that thought went by the wayside. I got the Encyclopedia of Aircraft Modeling series by Ammo Mig Jimenez for my birthday. I've moved on to the advanced cockpit section here so let me know how you think it's going - all comments are appreciated. Here's a few teaser picks of what I have done after 2 days of holiday 👨ðŸ¼â€ðŸŽ¨ I think I have to redo the attempt at lettering on the oxy bottle? Looks more like 💠lol I don't have a big enough stash of old decals so I'm trying to make it look oike lettering from a distance.
- 33 replies
-
- 11
-
-
- Tamiya
- Thunderbird
- (and 1 more)


.thumb.jpg.f0920d798d5d8600fb58b1d8a906ddff.jpg)