

Breaker
-
Posts
468 -
Joined
-
Last visited
-
Days Won
1
Content Type
Profiles
Forums
Events
Posts posted by Breaker
-
-
Is that the same intake that comes with the kit just seamless or the differently sized intake for a different block?
-
Jan, could I suggest BOL rails if your going down this route? Plenty of aircraft have them as an upgrade and not many options out there. Latest Italeri Tornado could do with them for certain!
-
On 5/10/2021 at 11:47 AM, Mark P said:
Yes, they do. But what if you dont have the Marine boxing but have the Navy boxing? I'd rather not buy a complete kit just for two pylons.
GT Resins casts them but are out of stock at Sprue Bros and have been for some time. I have looked for that tree on eBay to no avail.
The fact they out of stock tells you the pylons sell.
Mark Proulx
The GT Resin pylons are nothing to shout about, I've got a set and probably won't use them!
-
On 5/8/2021 at 9:20 AM, Mark P said:
Could use a set of o/b US Navy pylons w/o drop tank for the Tamiya F-4J. With a little thought, probably other items too.
Mark Proulx
On 5/8/2021 at 9:03 PM, Anthony in NZ said:oooh that's a good idea!
Tamiya already do them in the 'Marine' boxing with a fully bombed up F-4, as opposed to the normal boxing o the -J with it flying over the sea.
-
Jan, have you thought about doing F-15 launch rails, MSOG vents if your on the Eagle build?
-
Can confirm that Wolfpack will also be too small.
-
Try the QMT exhausts for the Revell kit. Really well cast, not expensive and fit really well. I don't trust the GT Resin stuff, too many bad experiences both myself and what others have received.
- Marcel111 and TankBuster
-
 2
2
-
Drewe I've got the wolfpack set with the fat pylon, want any photos of that at all?
-
I've got reference photos showing all sorts. Going with the underside colour isn't a bad call though, a lot of my photos seem to show that.
-
10 hours ago, Mark M said:
those look great, but a word of warning for anyone thinking of using them with the new Italeri kit, the RAF stopped using ALARMS in 2013 so any builds must be before that period
ill get some for my revell gr1 gulf girl
There's also all the parts in the kit to backdate to GR1 just about.
- wunwinglow and Mark M
-
2
-
-
7 minutes ago, Stokey Pete said:
Very nice! The level of detail overall is lovely, and you’ve picked it out very well during the painting stages. I look forward to seeing the end product.
Yeah, I've intentionally gone 'spanish school' on the undercarriage to really make the detail more obvious. It's not realistic but I think once it's all finished, it'll make the detail more visible than if I'd just mono-toned it all.
- Rockie Yarwood and Kagemusha
-
2
-
So far I've kept it onpoint with each area I've built up so far. I've also built up the tanks, pylons and sensors but I'll post photos when they're a bit more meaningful.
Critique
The weapons included with the kit are rubbish. The profile on the Mk82 bodies that make up the Paveway IV looks well off to my eye and I won't be using them. There's no RAF Litening III targeting pod included which is so far only avaliable from @wunwinglow as a 3DP part. No Brimstone missiles or launcher.
The AIM-9s are acceptable, I'll be replacing with Eduard/Zacto though, as I've got plenty of stock.
There's no TERMA MCP updated pod which came out in 2008 and I feel should have been included as it became the default pod in the majority of my references in the later stages of the Tornados career. I thought I could use the kit part to modify but having looked into the dimensions, it's not that simple and it'll need an aftermarket replacement...(OHH TIIMMMMMMMM).
The kit only comes with the larger RAF tanks, it would have been nice to get the smaller standard tanks as well - I imagine when Italeri release a German/Italian verision, they'll be present.
Most of the parts have micro flash on all the edges and it'll mess up the fit if it's not removed. It's only a couple of swipes of a sharp knife to remove but it's present, some areas worse than others.
- mgbooyv8, Rockie Yarwood, JayBee and 4 others
-
7
-
-
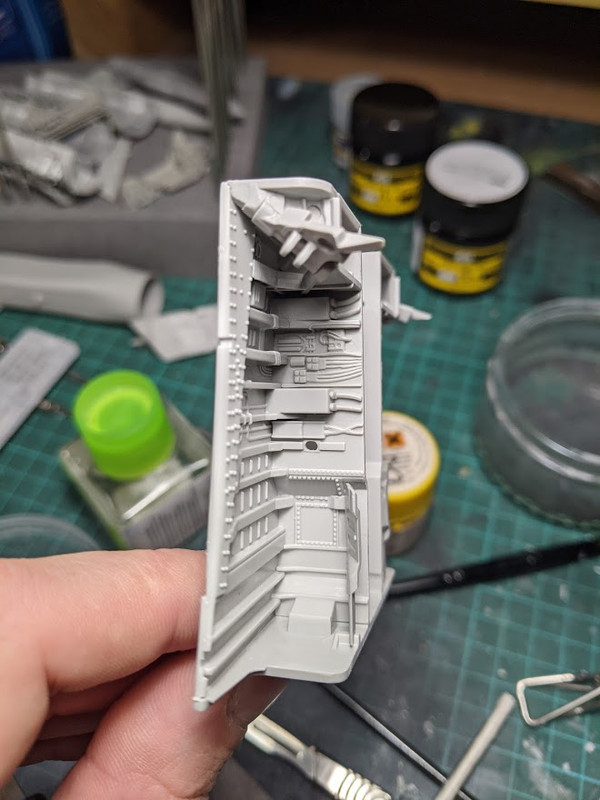
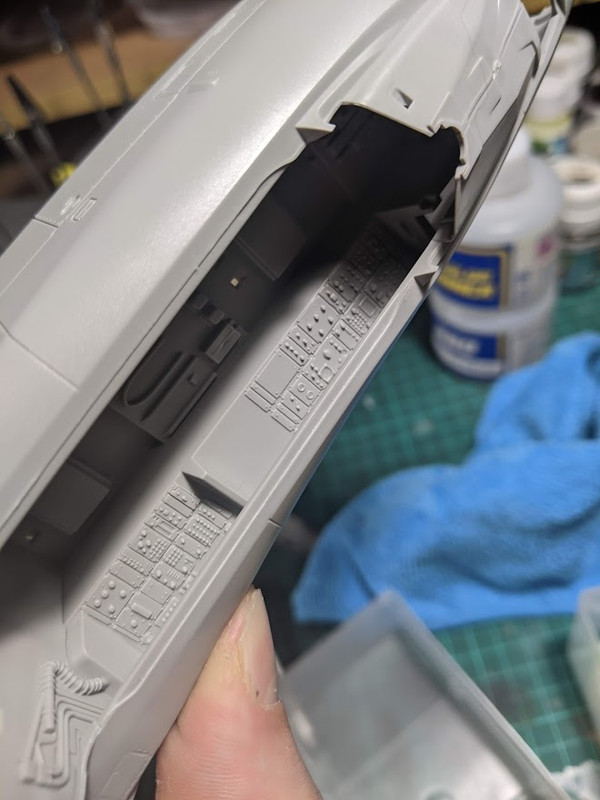
Intakes.

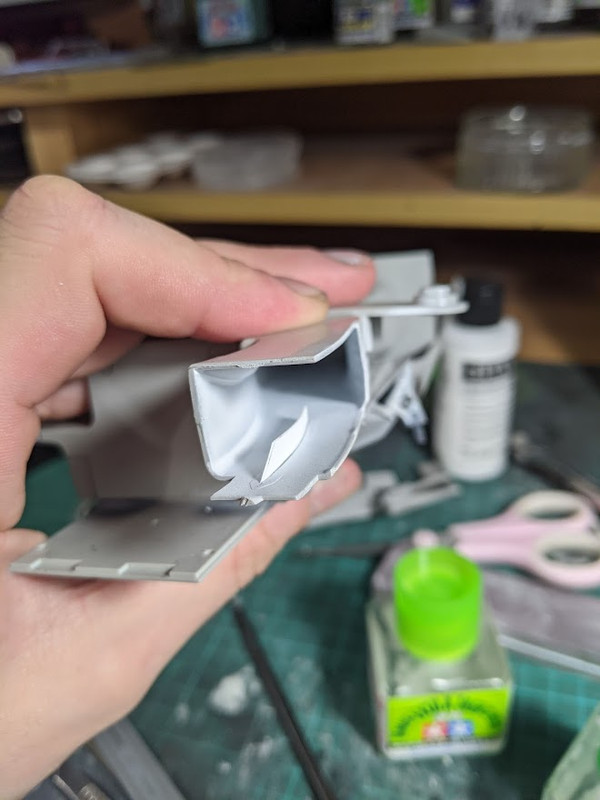


One of my least favourite parts so far. All four parts that make up the main trunking had really deep EJ pin marks and didn't quite fit together nicely. Whilst this was a speed build, I didn't want seam lines present so CA + Pigment was used to get rid of the worst of it, then thick coats of Badger primer to fill in inperfections and sanding marks.
Italeri give you a PE piece for the blade in the port intake but I didn't want to have to fight to bend it and use CA to glue it in place. I used it as a template for a plastic card replacement and used a Tamiya scriber to deepen the slot for it. 5 minute job that saved me getting pissed off with it.
I'm very impressed with the fit of the blow in doors and the intake/fuselage fit. Especially compared to the Revell effort of - Nothing! -
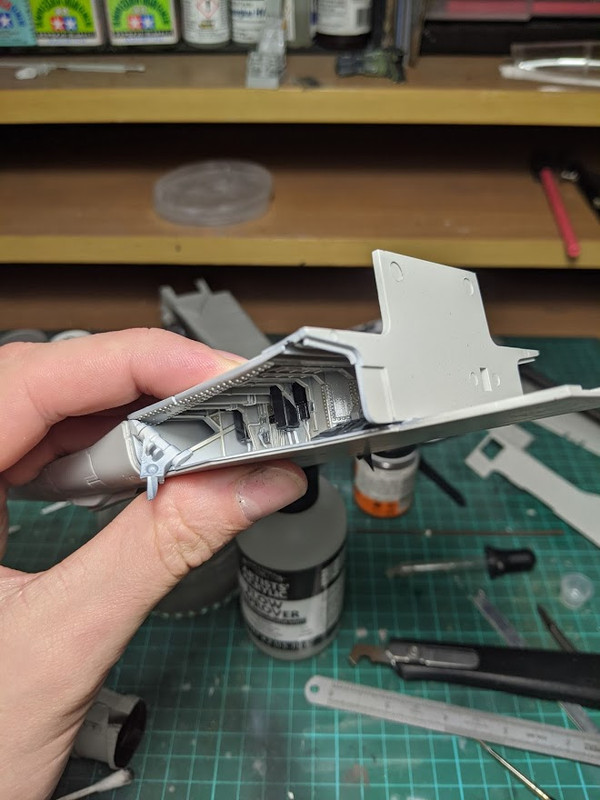
Exhausts.
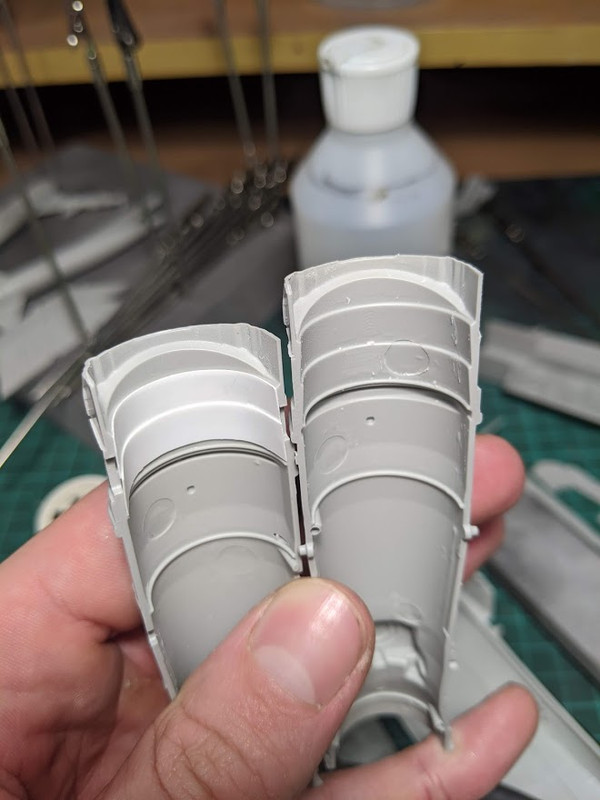
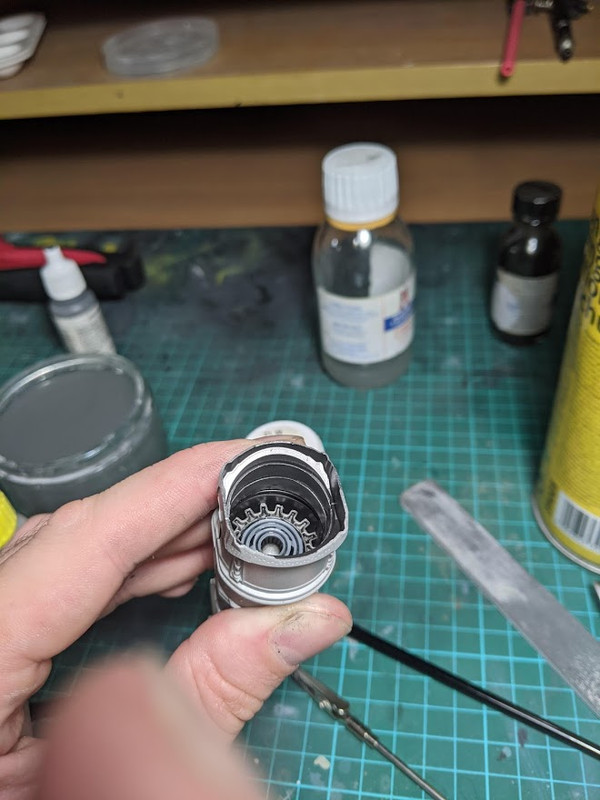
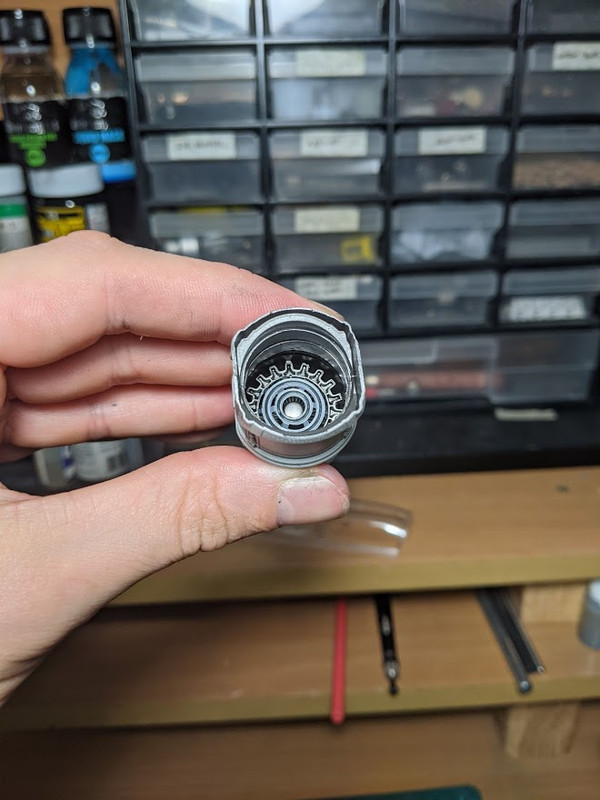
I couldn't be bothered trying to fight some really nasty EJ pin marks inside the exhaust, so I cheated and just boarded over the top. Benefit is stronger/sharper detail inside the exhaust and a smoother finish.
My photos on this section are poor if I'm honest, but I'm happy with the outcome. There's some nasty seam lines on show in a couple of areas but with the nozzle piece in place as well, fair hard to see, especially inside a a dark tube. -
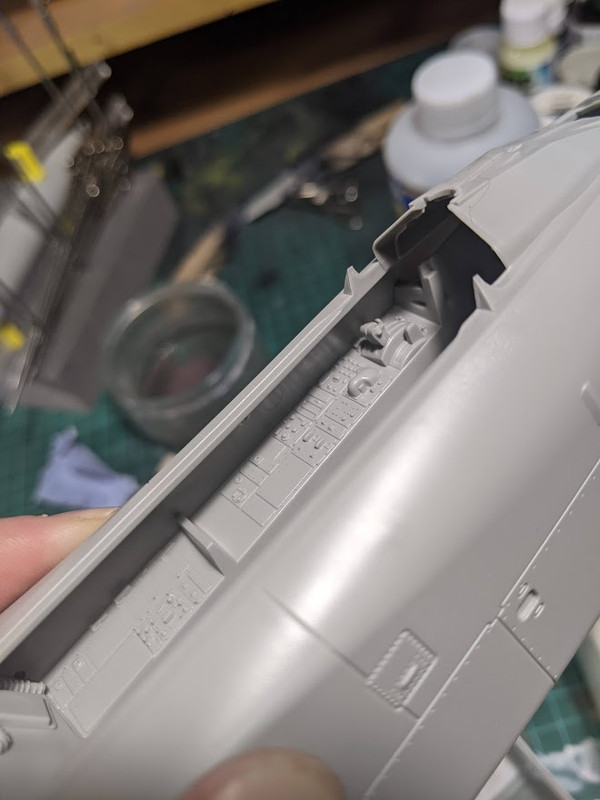
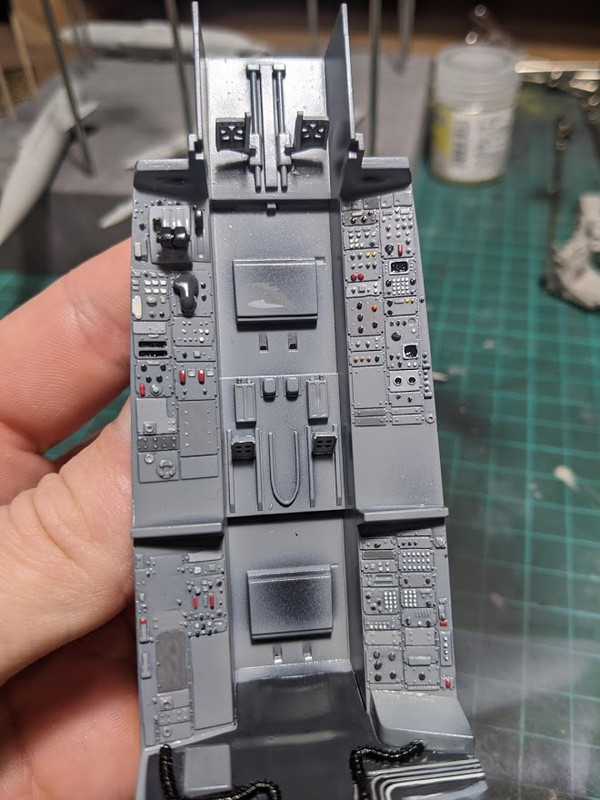
Main Gear well
NOTE - The Pin marks shown on the bottom of the parts here can not be seen on the model, it's just the way I built them so I didn't put any glue on painted parts.


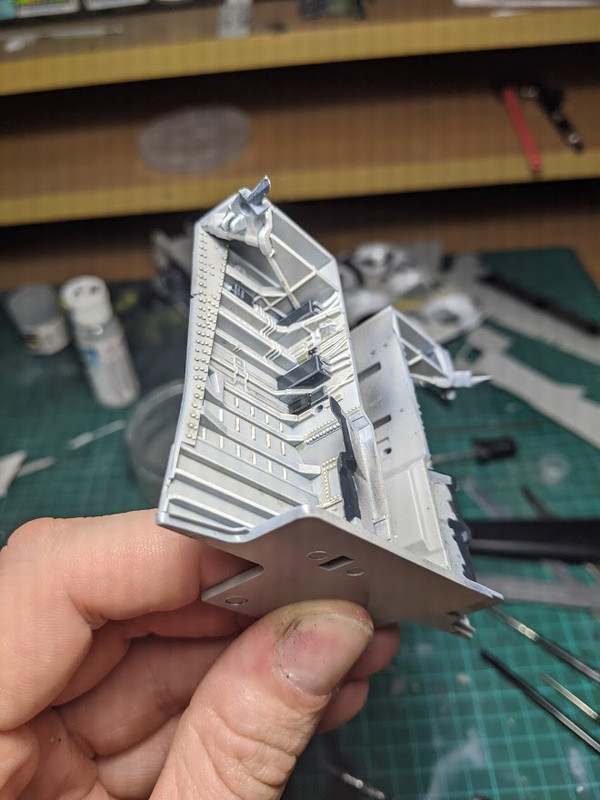

Decals are ANYZ and Airscale placards, just to give some life to the black boxes. The stubs for the main gear legs are super solid. There's a EJ pin mark in the fuselage that I spent ages smoothing out, only to find out it gets hidden - Check before you waste time!!
The fit on this whole section was fantastic.
-
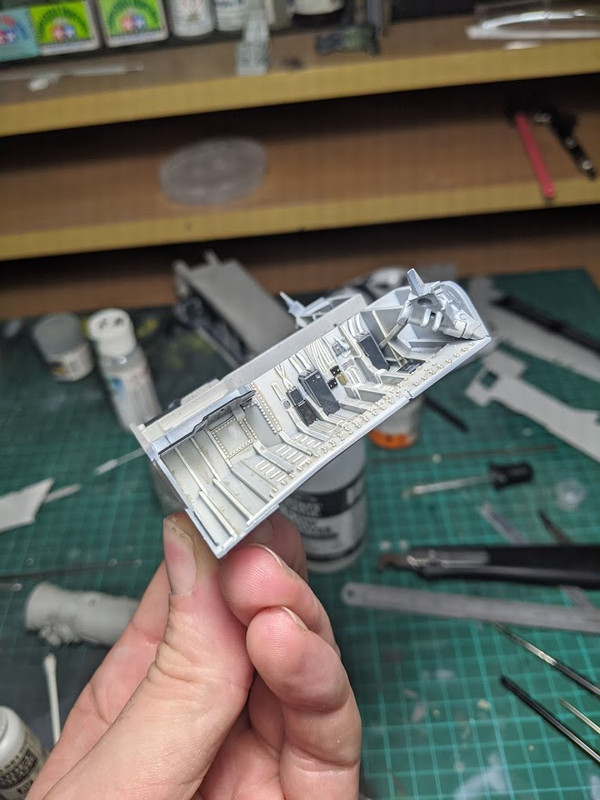
Nose Gear


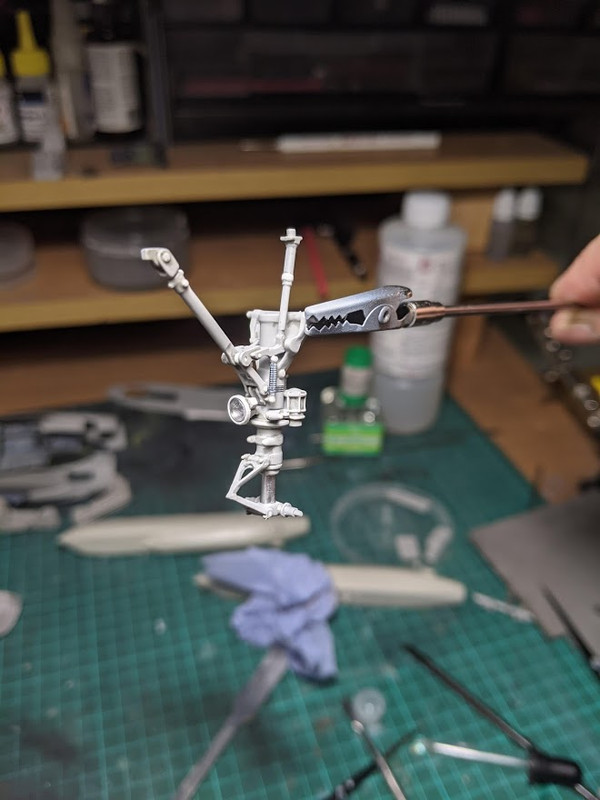
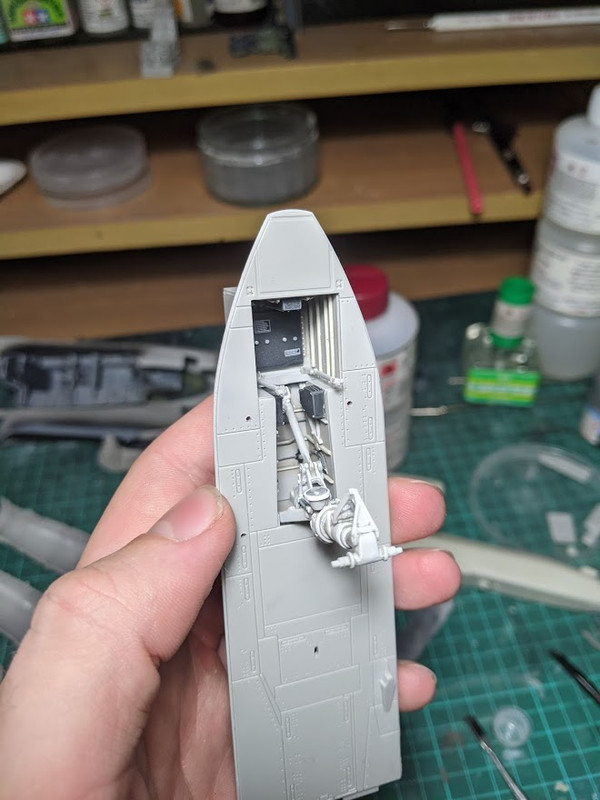
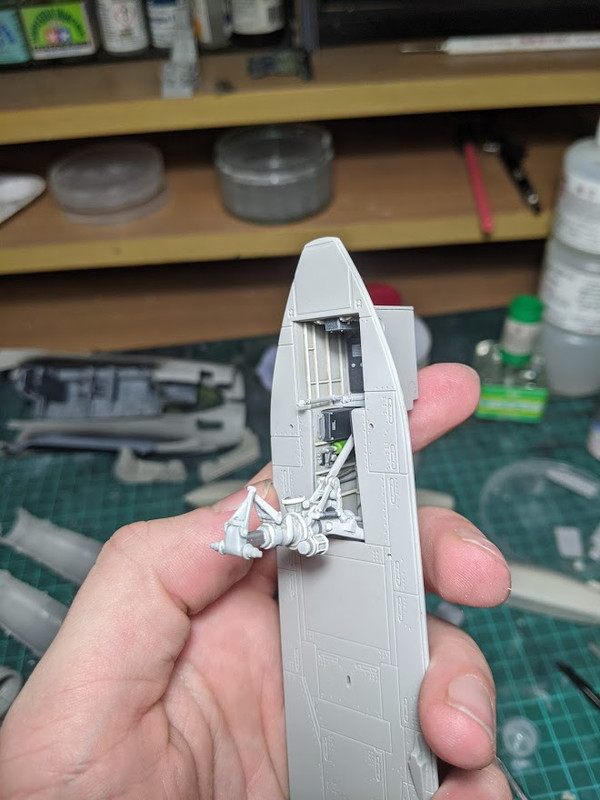
Nose gear has to be built up prior to being installed in the tub then dropped into the lower fuselage half. I couldn't be bothered to try and engineer another way to install it, so I've just gone with the instructions and taken care, so far, so good.
For me, the nose gear is a stunning bit of molding on Italeri's part. I haven't bothered adding wiring in order to get it finished but with some wiring in place, it'll be beautiful. I did think some of the detail was badly molded but it turns out it's correct, check your references before you think that it's a hole that shouldn't be there! -
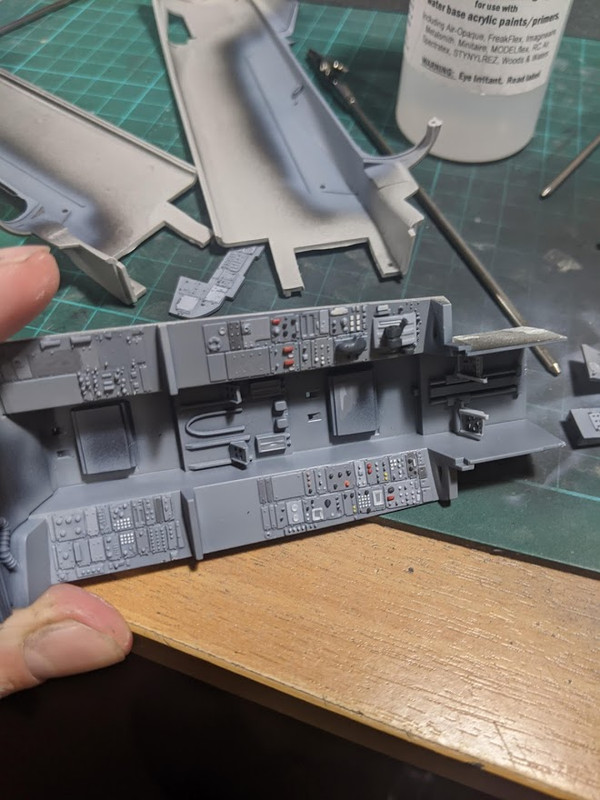

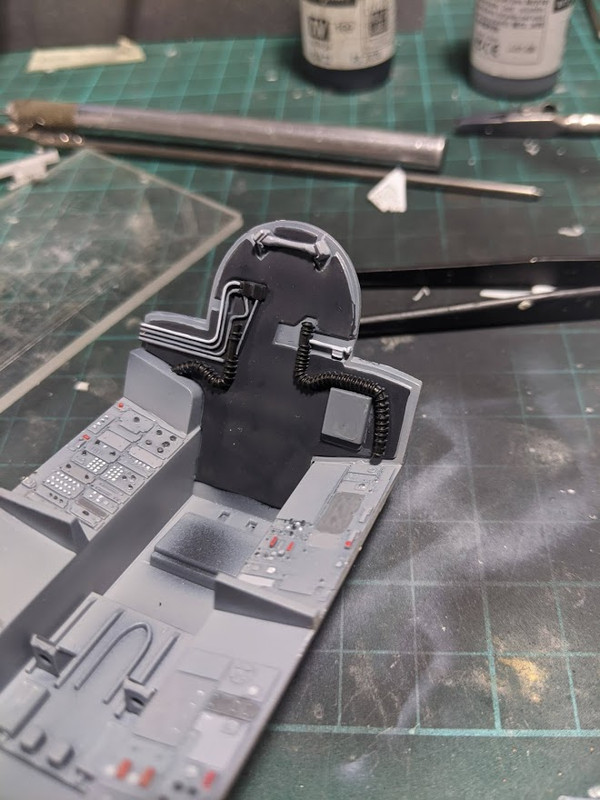
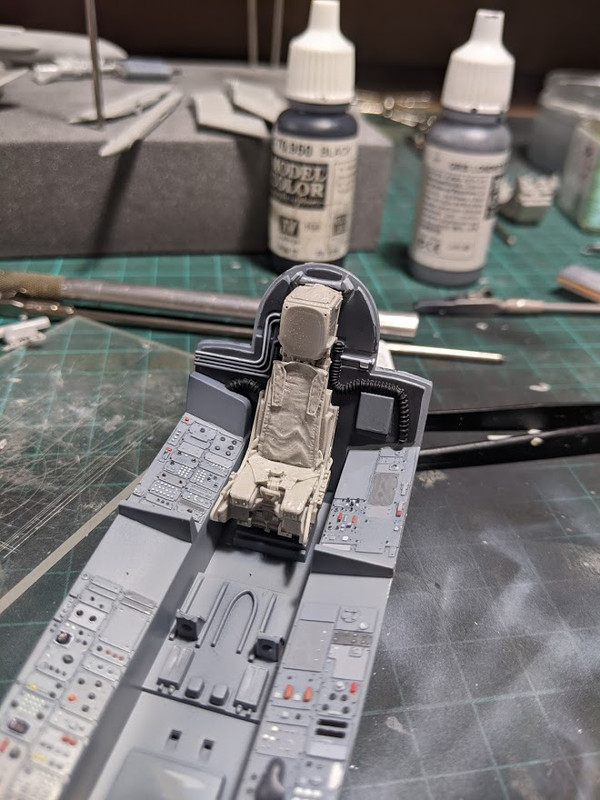
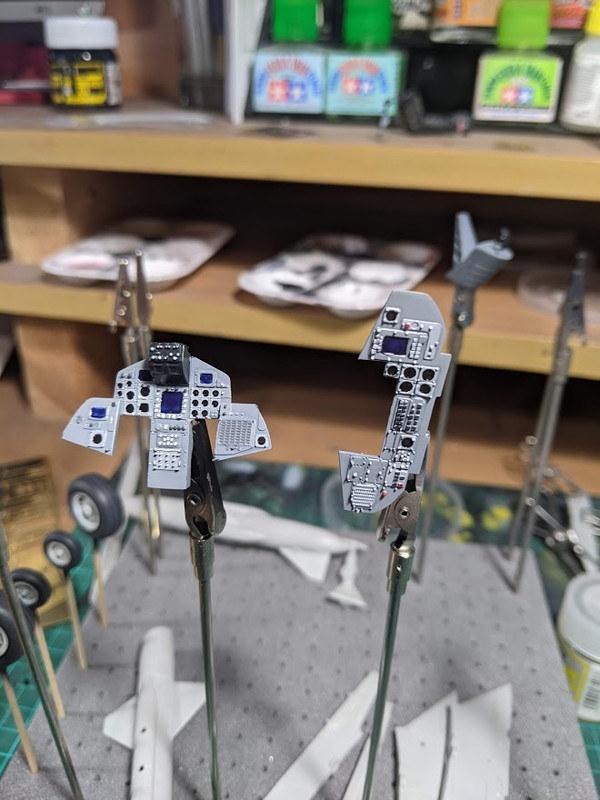
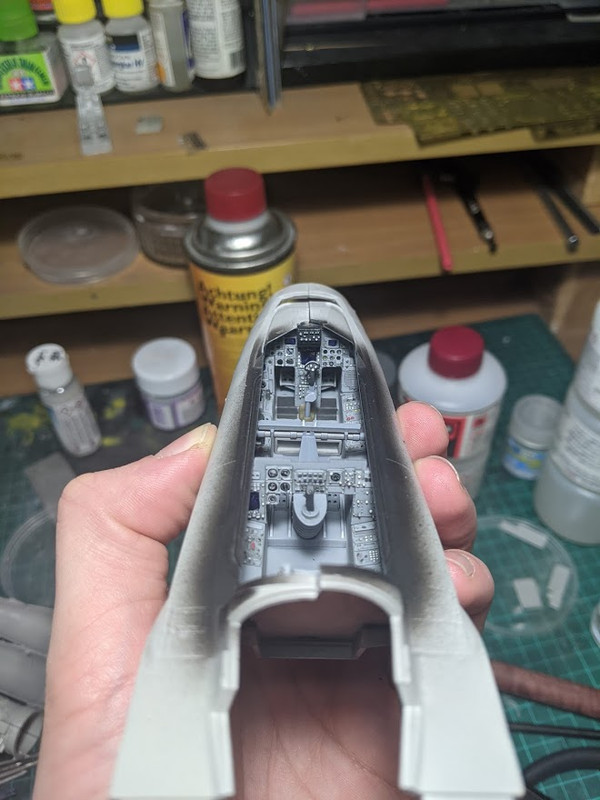
Cockpit. The seat is a Aires resin piece I've got spare. I'll be replacing it with Quickboost at somepoint because the kit seats use a lot of PE which I hate working with. I've used Airscale decals where you can see them and I've also put 6mm Tamiya tape down over the front lip to replicate the antislip rubber matting that's present.
Was a really nice kit cockpit to paint. I would have like some more side wall detail (none in kit) but it's a minor grumble because it's very hard to see, especially with the canopy down, which is how I'll present it. It's also the first Tornado kit that I've seen that doesn't put fake walls in the cockpit, instead the whole tub is hollow with the rear seaters section open underneath. I think it could have also done with a PE piece around the edges to add detail similar to how Italeri dealt with the F-35. The lip that's present is correct but missing a lot of fastner detail.
There's a lot more parts in the kit for different configs on the IP so you can build the various different marks. -
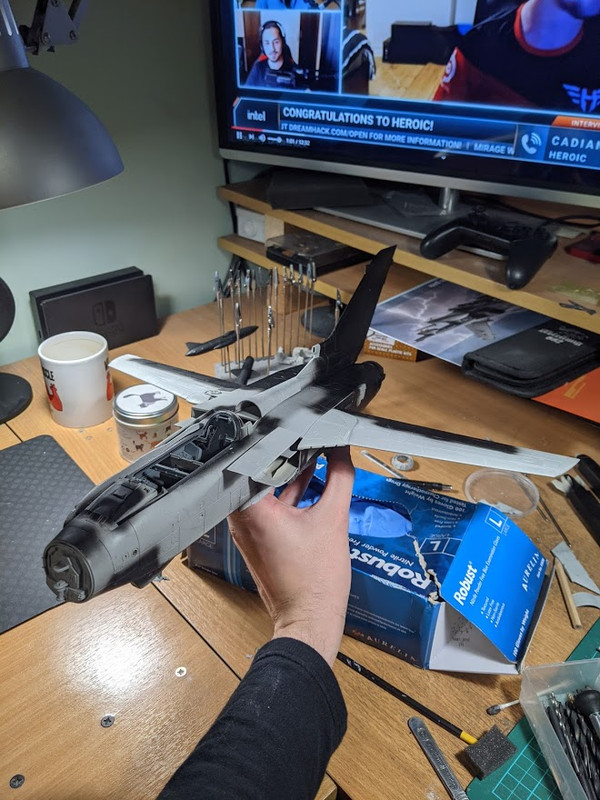
Decided to crack on with a new build in an effort to just get a model finished as I'm crap as finally finishing anything. This was ideal as it's new tool and I couldn't over complicate it with resin and aftermarket which is a bad habit I've got.
I've nearly build the whole model and got it into primer, I'll do a post for each section that I've done so far with images.
More to follow very shortly...- Kagemusha, patricksparks, JayBee and 2 others
-
5
-
For me the USN A-1's had fairly boring loadouts compared to the USAF ones. The Sandy USAF A-1s where very varied on their loadouts.
-
I thought that Phase Hanger brought out a vinyl sticker for the det cord?
I'll have a look now -
On 6/7/2020 at 1:11 PM, Dutch Man said:
Great work. But looking at the pylons comparing to the body work from the kit, I never understood the lack of detail when it comes to riveting those pylons.
They never improved it in later releases.Bit of a disgrace...
Even a 1/48 scale Phantom from, e.g /Academy has better detail on these parts of the plane.
Keep it coming, like your work very much.
Kind regards,
Robert Jan
Yeah but the Academy release is from the late 2010's, as opposed to the Tamiya Phantom which is early 90's from memory. -


ZM Skyraider question
in LSP Discussion
Posted
Harold at AMS does a Aero 1C 150, I used it on my build if you need one.