
mustang1989
-
Posts
1,241 -
Joined
-
Last visited
-
Days Won
1
Content Type
Profiles
Forums
Events
Posts posted by mustang1989
-
-
I'm tuned in! At the rate you're going with the details I can't imagine how good this things gonna look.
-
This all be awesome!!!! Just watchin' and learnin'.................
- Starfighter and LSP_K2
-
 2
2
-
-
Thanks Kevin.

-
-
-
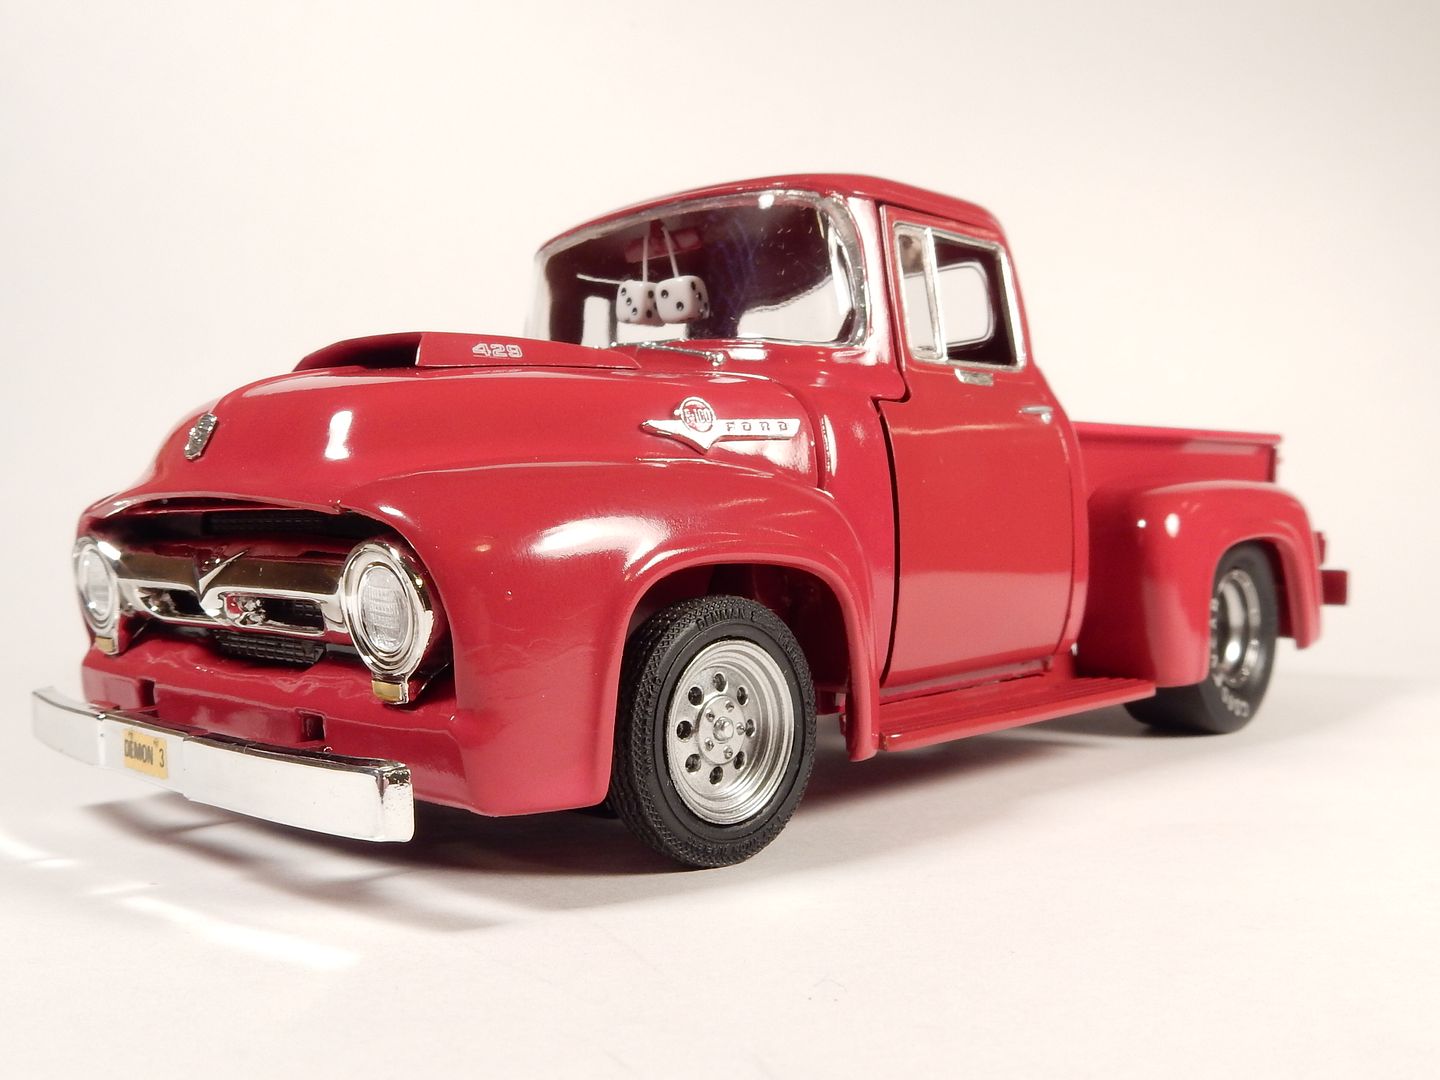
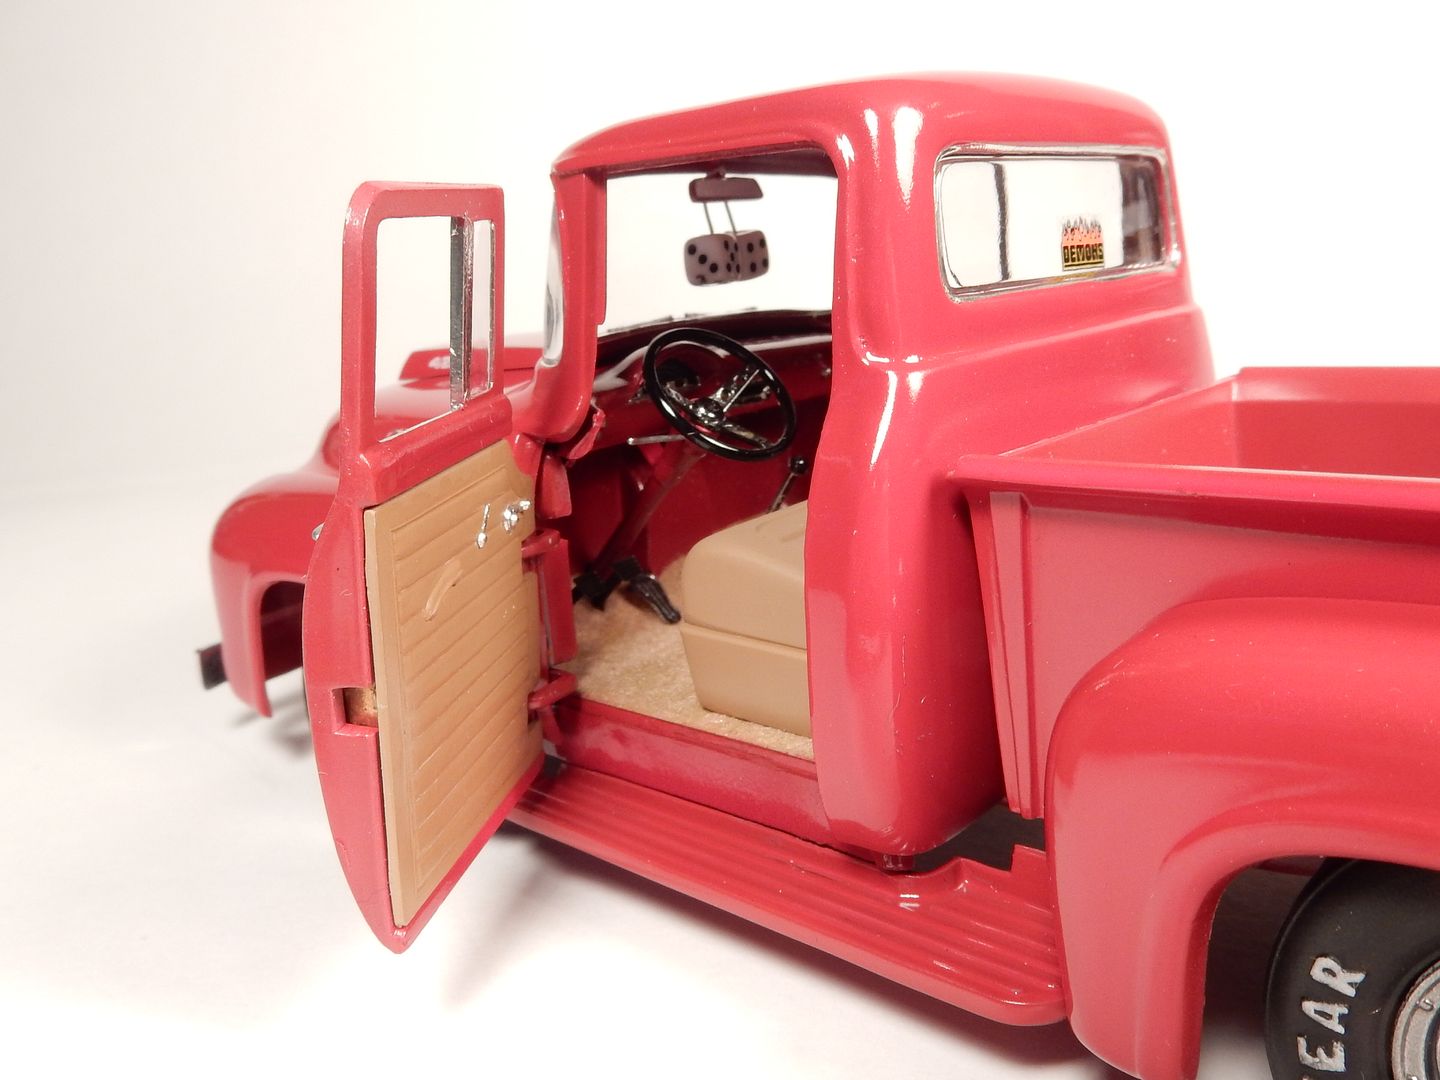
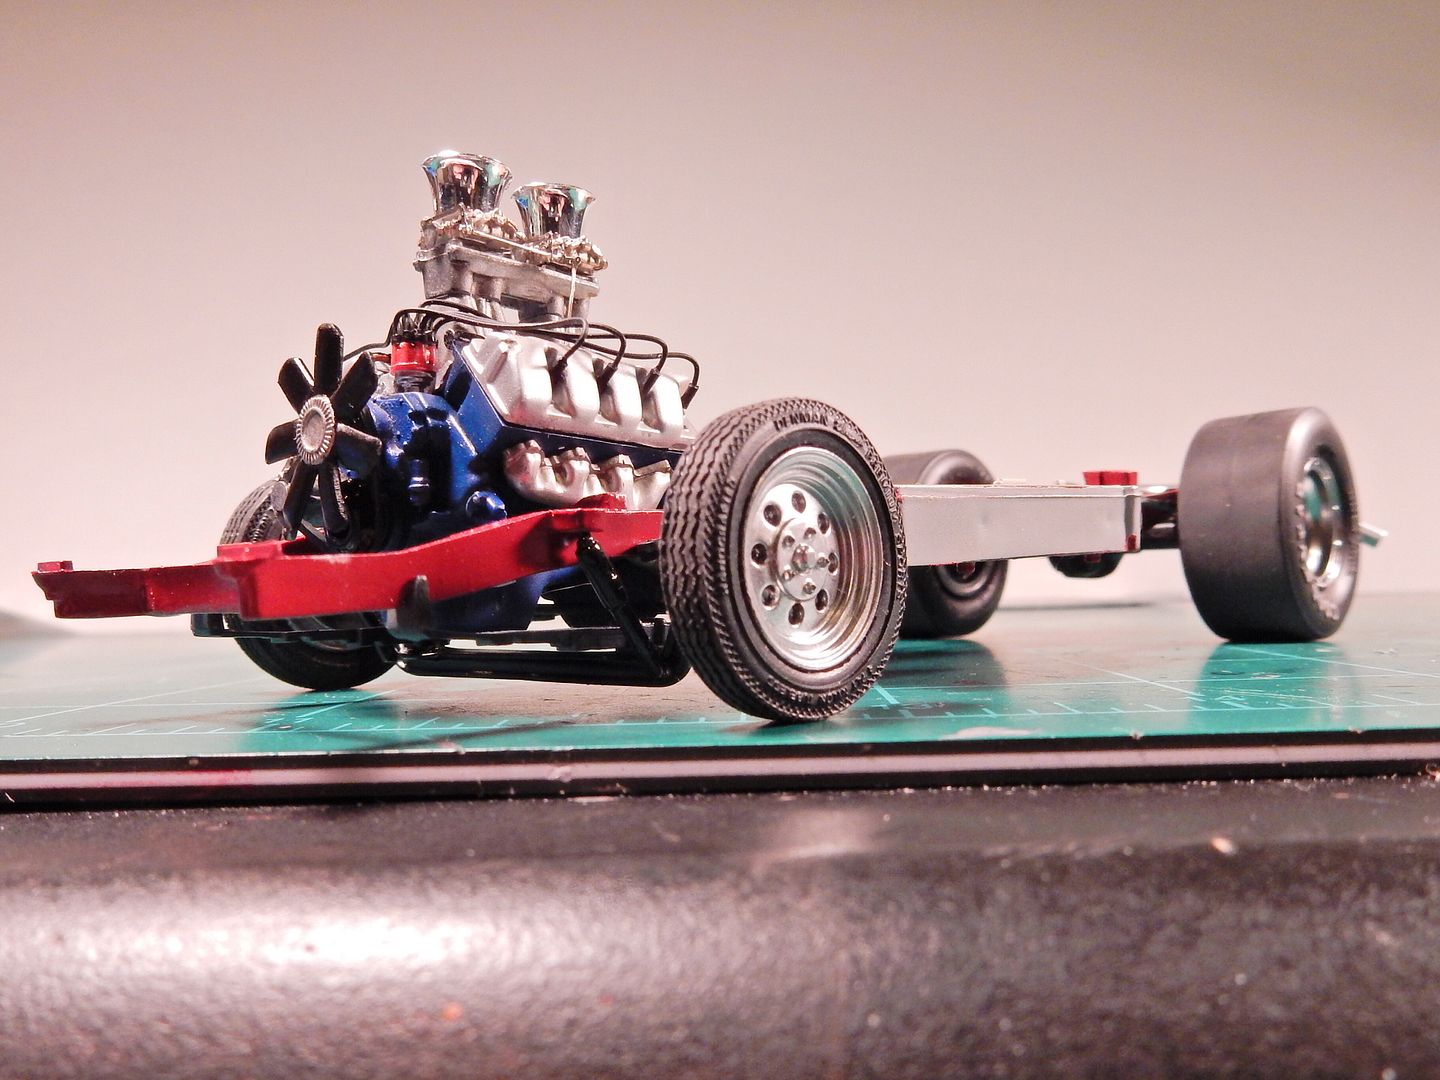
As with my '54 Chevy Panel I built this as well as the rest of the "Street Demons" kits when I was around 14/15 years old. The truck was supposed to be assembled with the ass end way up in the air with some really cool looking slicks out back. I've been working my way through these builds ( and they do suck mind you) and have added my own twist to them in modernizing them and throwing my own quirks in the mix so it adds some fun to the builds. To be totally honest with you I'd like another shot at this one just because the dang steps turned out so rotten bad. I kept thinking to myself that something just didn't look right when I had finished it and then I saw a real '56 F-100 when I was in Dallas and it all came to light. The side step skirts are supposed to line up with the bed and mount flush instead of a huge ass gap being there. It really bugs the crap out of me now with all the efforts that I put into it and I may find the courage to redo that part of the build without destroying the build at some point because I now have a spare set of steps. If it weren't for the fact that it took me 10 dang months to build this I would build another one but that aint gonna happen. lol
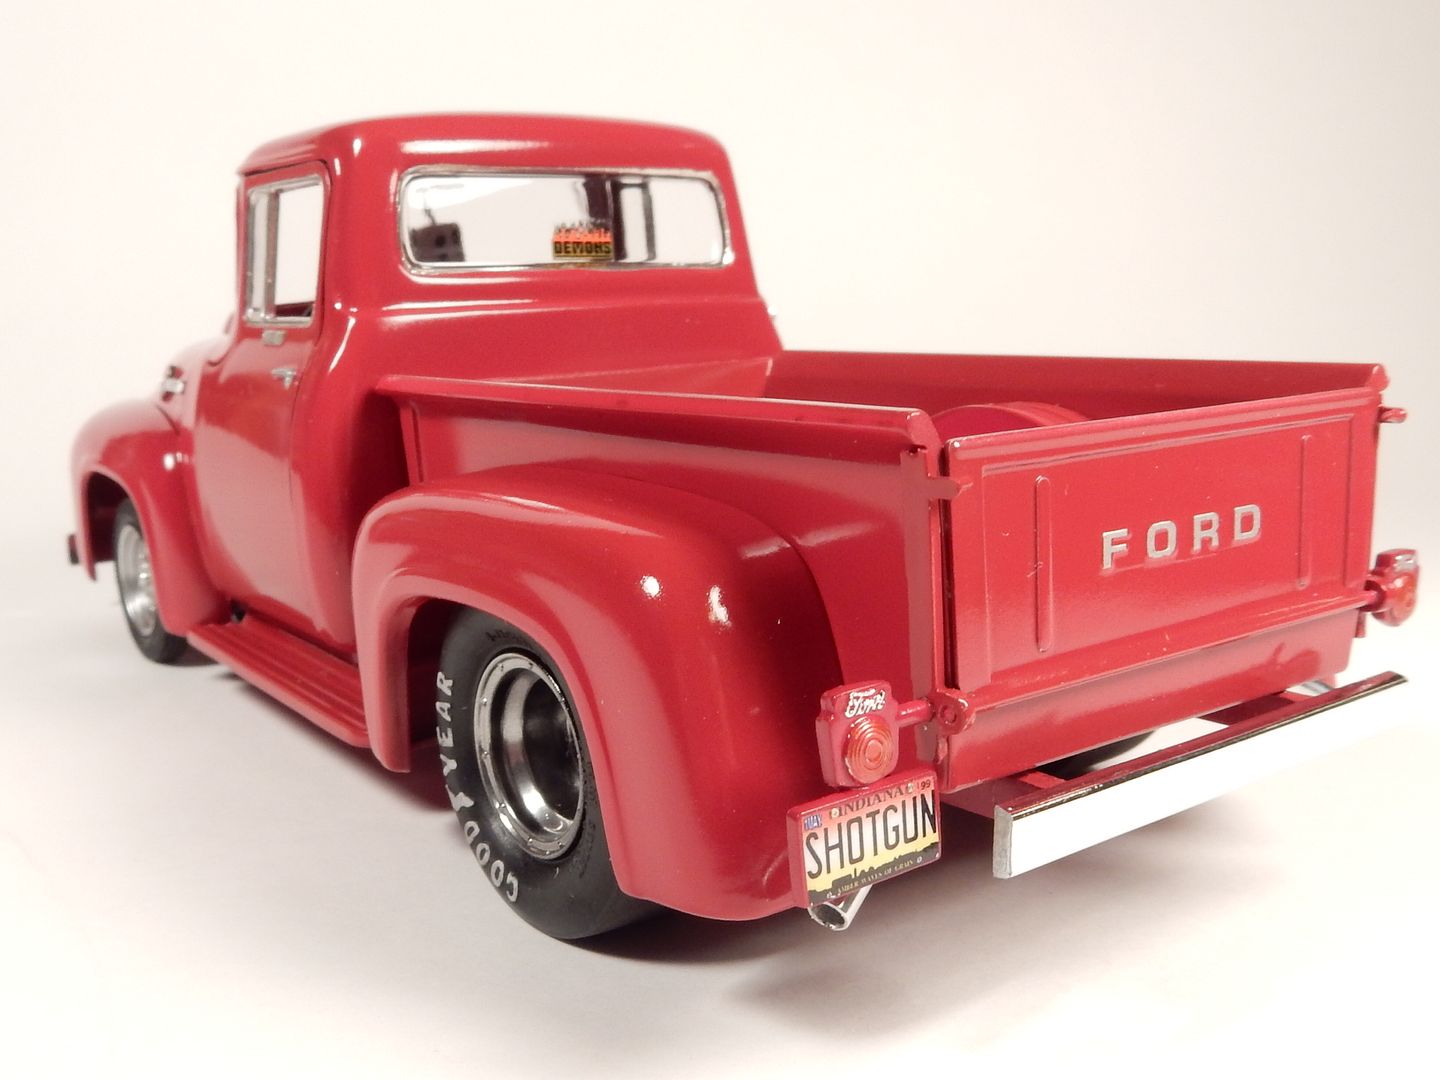
Anyways here she is:
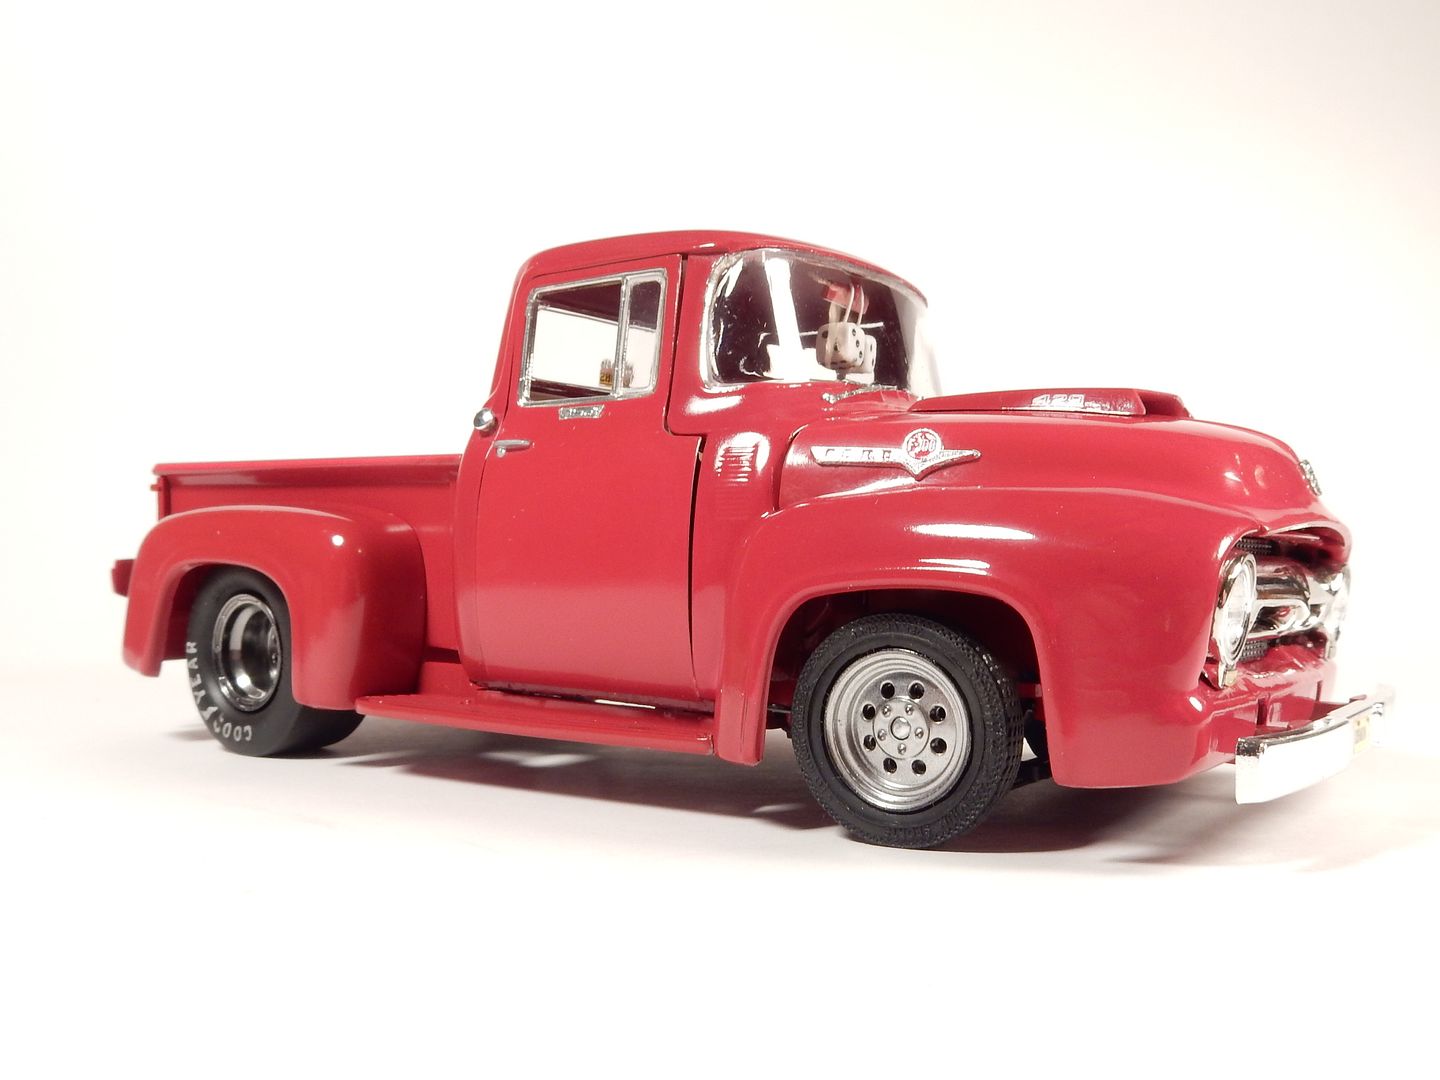
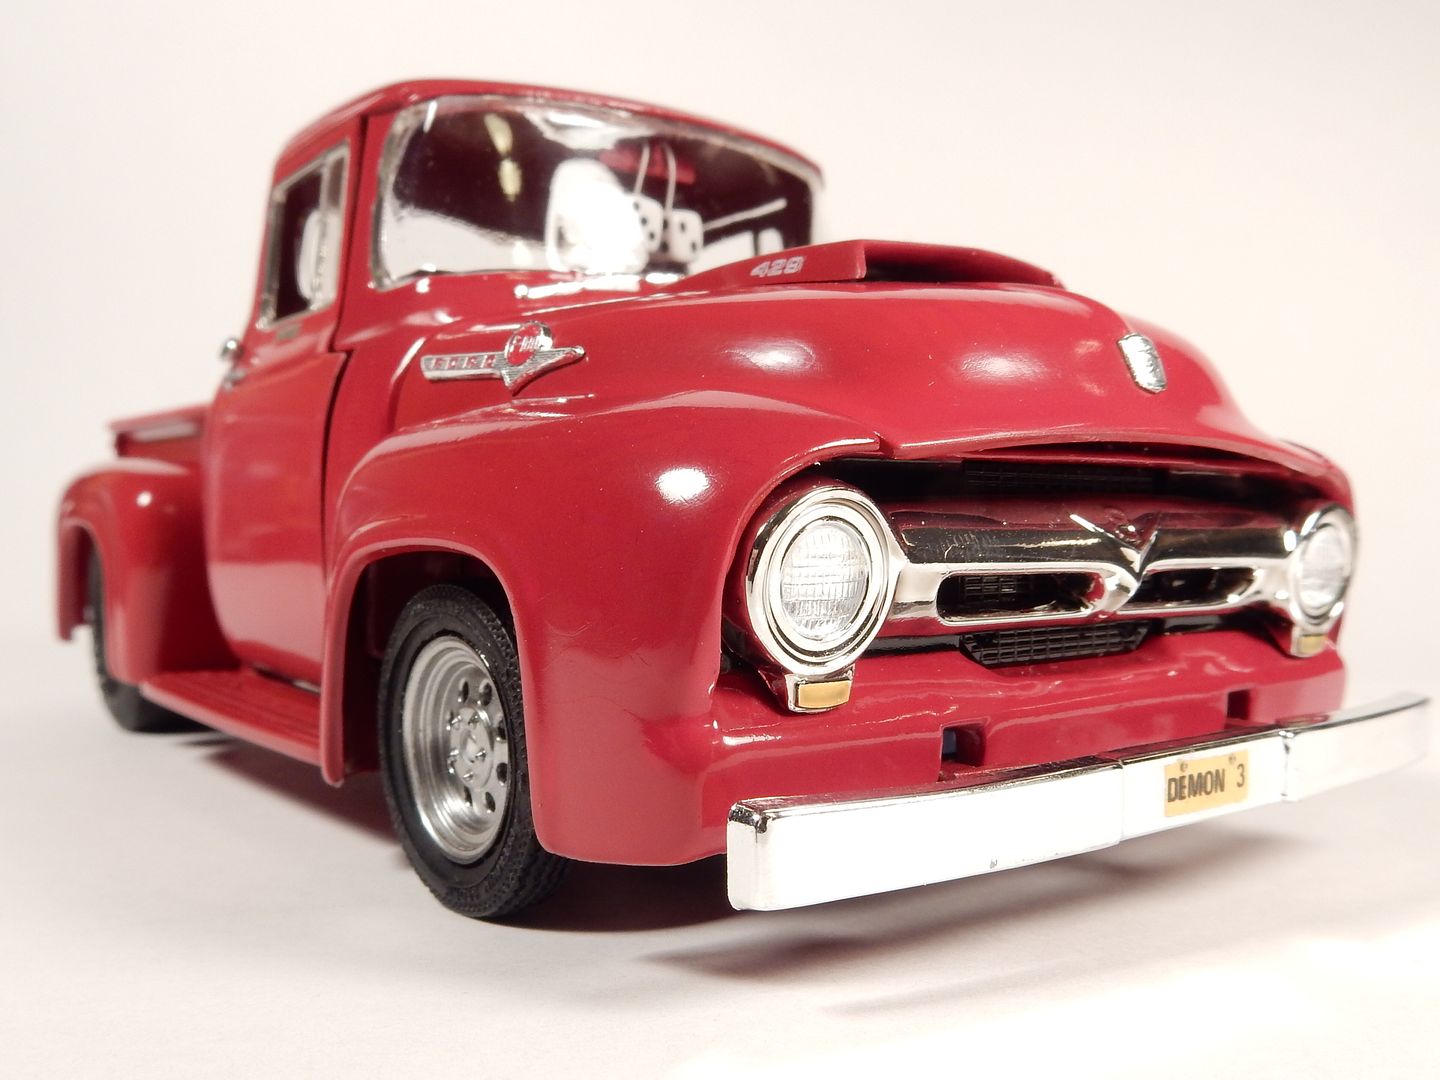
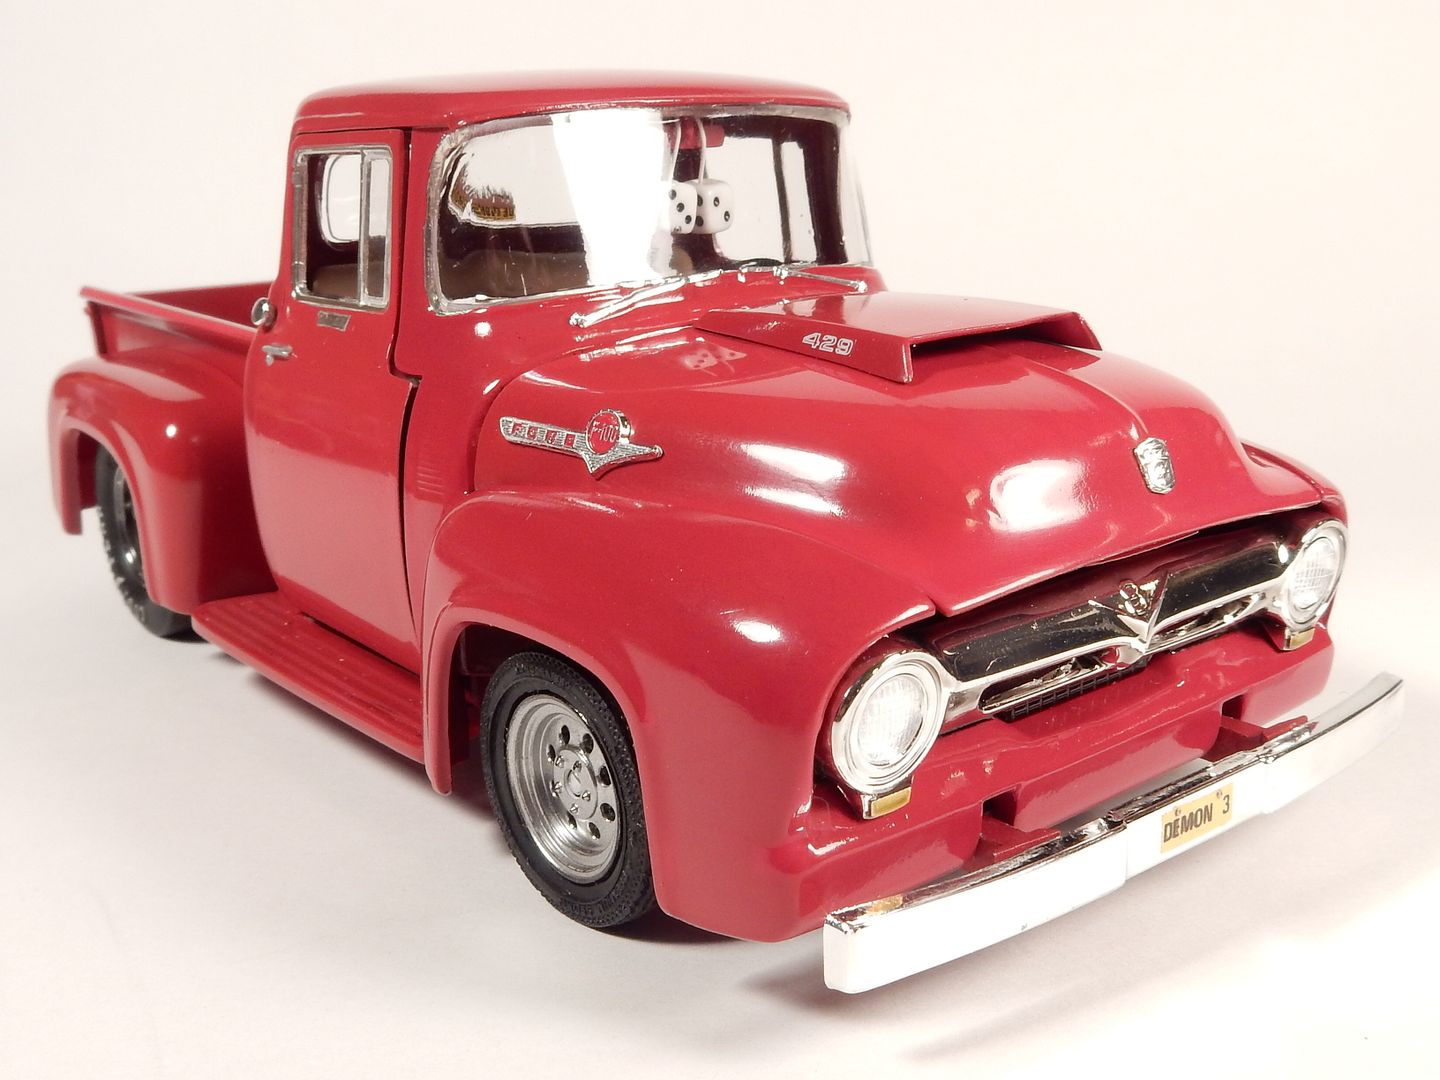

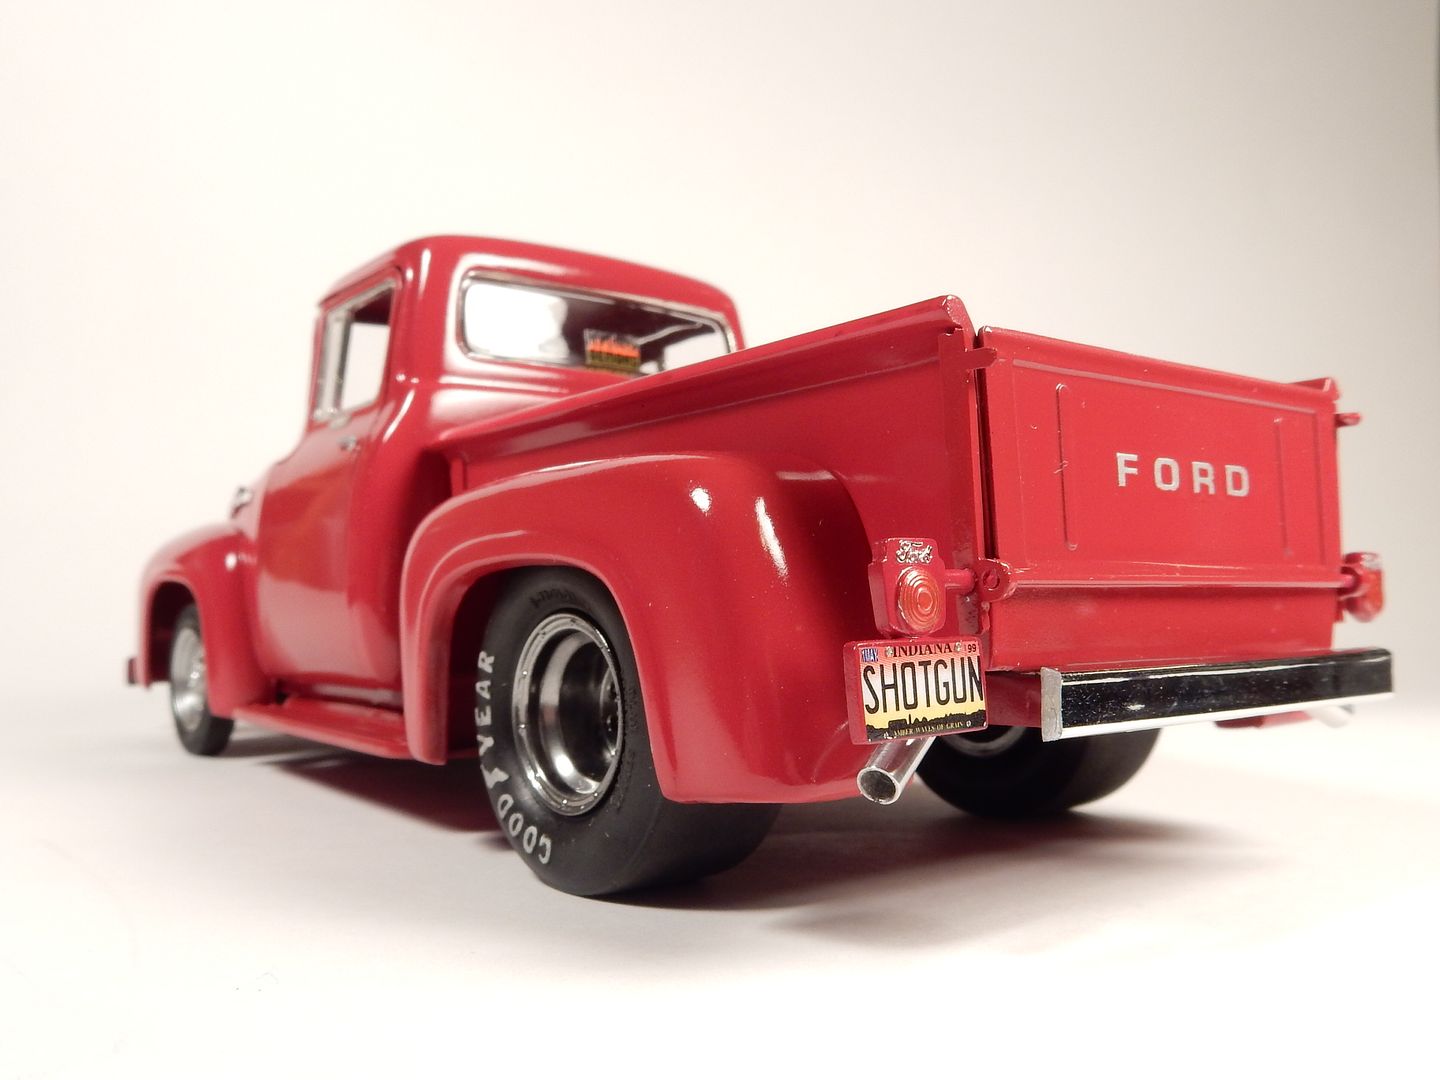
If there's one thing that I learned along the way on this build it was to never do this again. Although I was really happy with the turn out of the braking and exhaust system. The exhaust system was custom built using solder and AM mufflers and the brake lines where all custom formed and made from wire I had laying around. The master cylinder was a spare part and the bracketry and distribution block where scratch built. It was a painstakingly tedious adventure and one I have not repeated since.
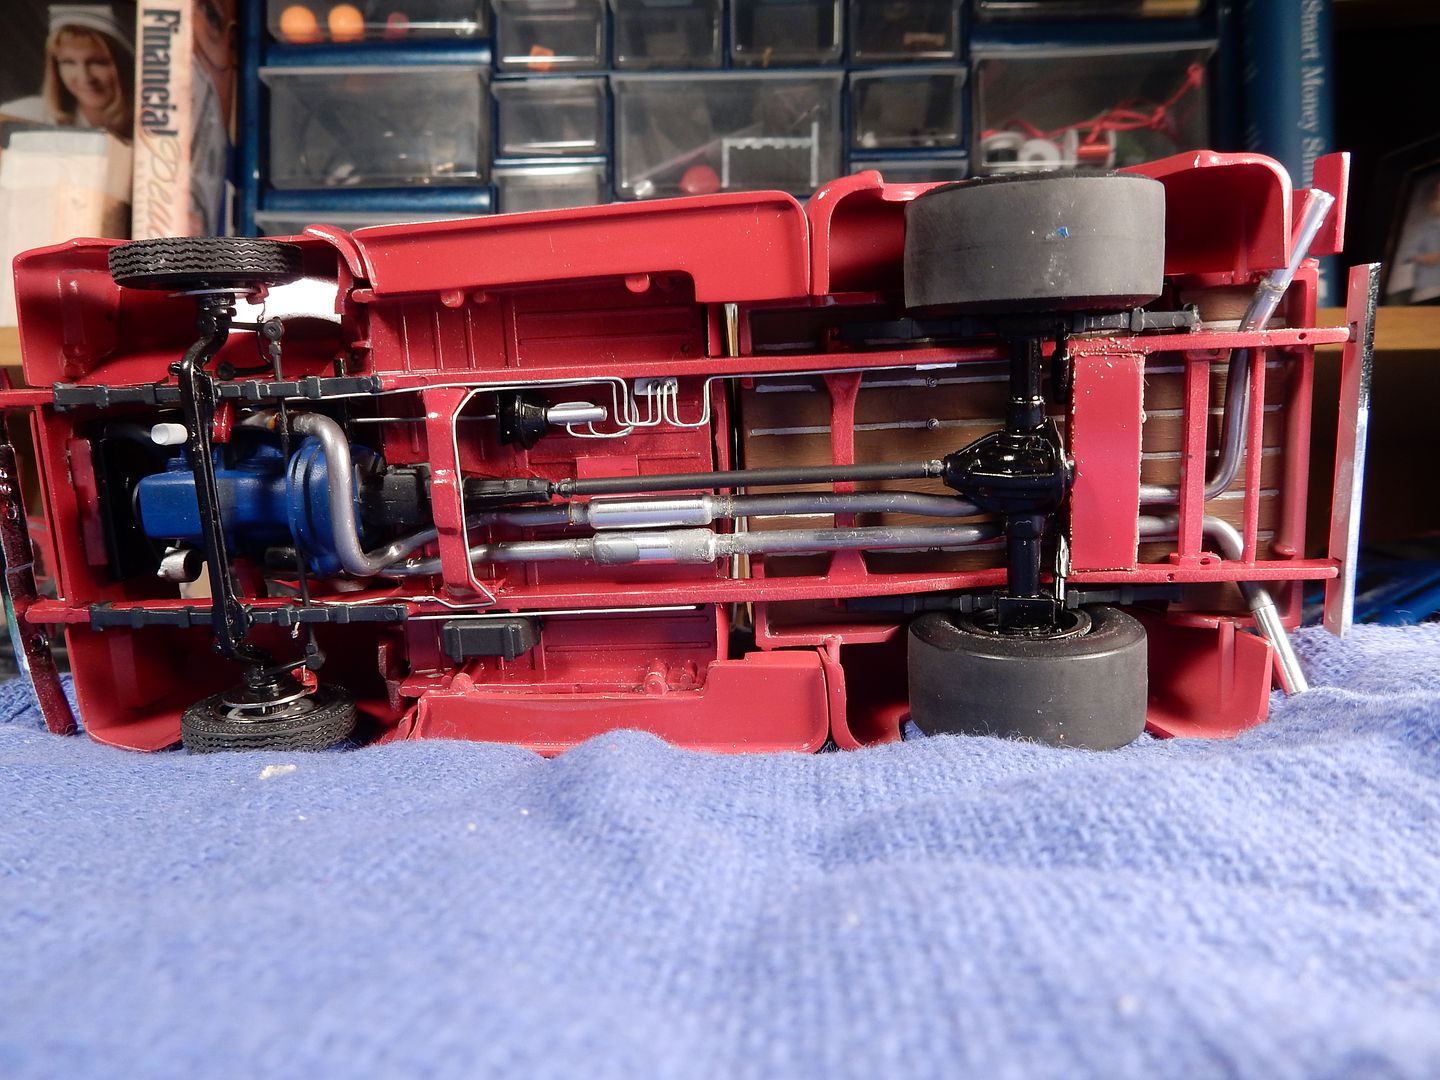
The completed chassis:
-
Say.....................that's a good lookin' bird!
-
Holy Smokes!!!! This is unreal!! Wow man! You really made this one into a winner!
-
-
Sorry for the confusion. The larger one is in fact a 1/24 scale-BUT-the proportions are way off. What I was getting at was that I didn't realize the size difference between the two scales.
-
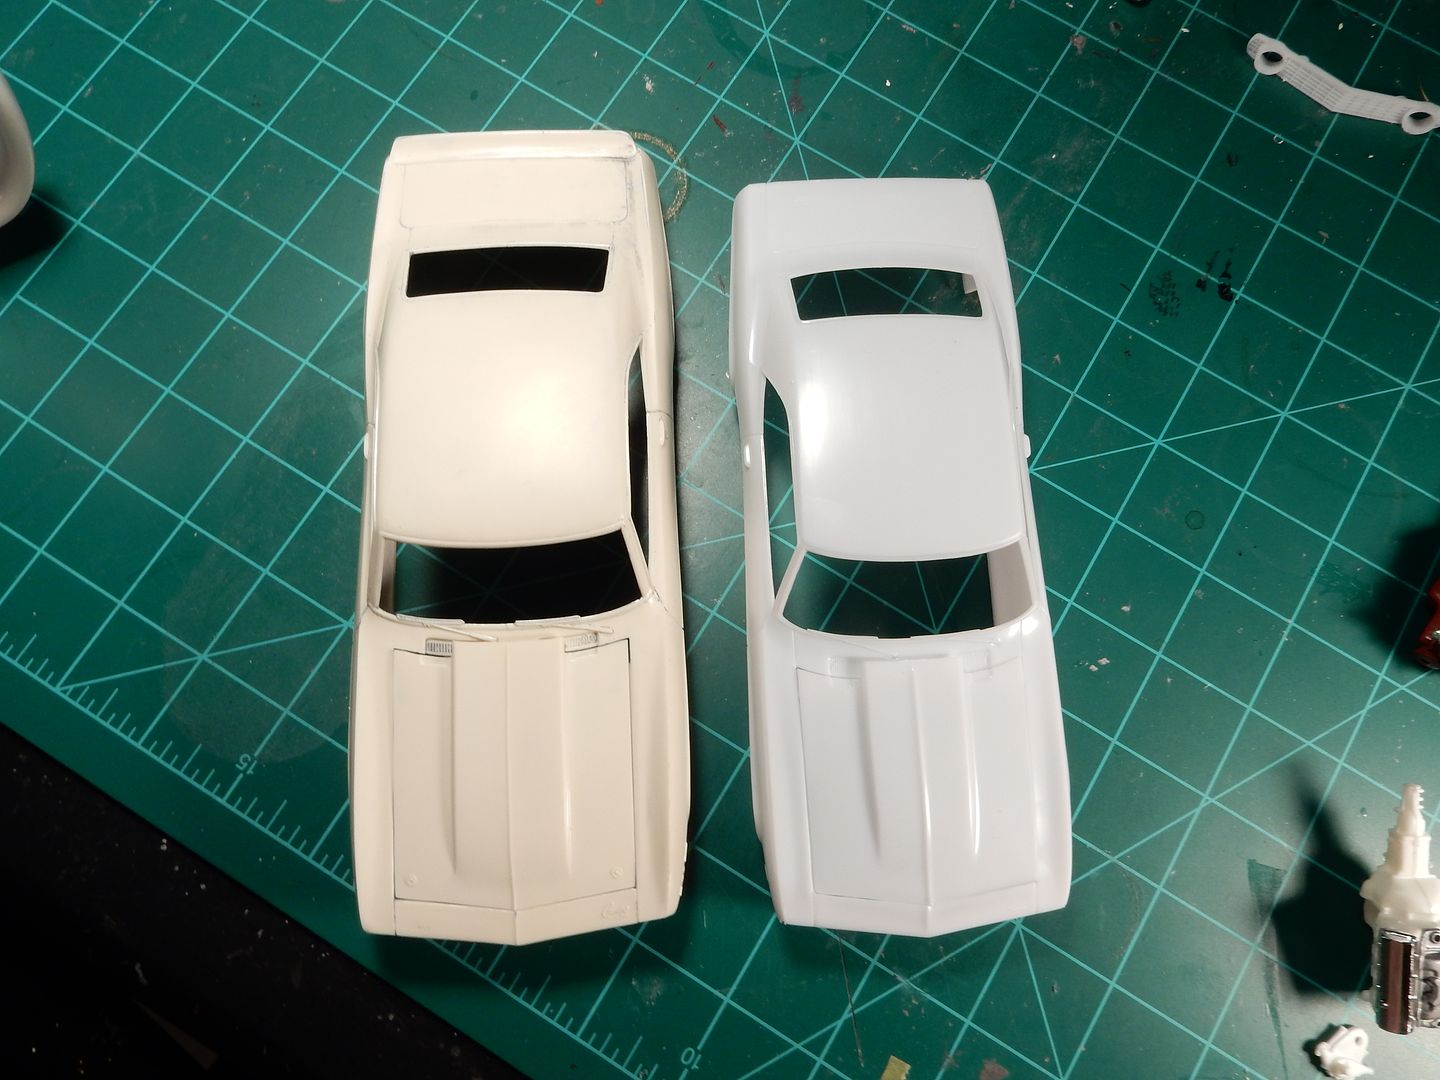
So I picked up this 1/25 scale Revell Camaro for any spare parts I might need along the way, a few of which I have used. I've gotten some commentary on how bad the old Monogram Camaro was in terms of size and overall accuracy in which I can say that those comments are right on in almost every sense of the word. Nevertheless, my original goal was to restore my first auto build and I will be staying true to that course. However there is a temporary set back with the engine.
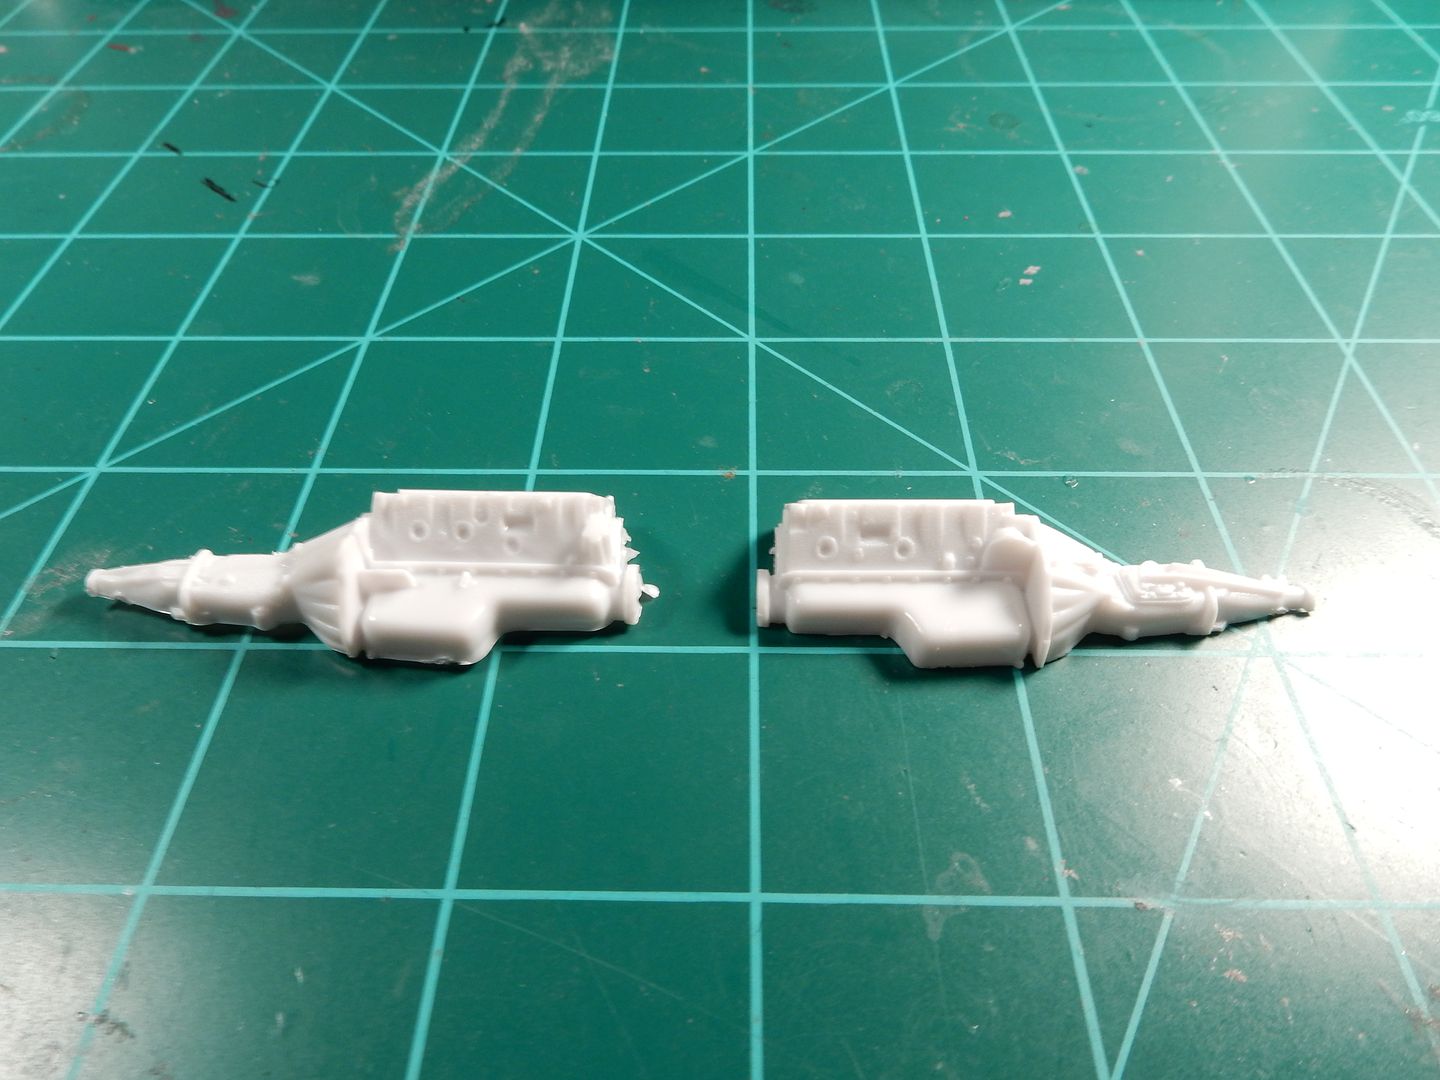
I test fitted the 396 that I've been building up into the mocked up build and I'm glad I did. Talk about what looks like a mouse motor looking 396 in there between the fenders!!!
The more I looked at it , the more I saw a distinct difference in not only scale but from the last BB Chevy I built that went into my '54 Panel. So I turned right back to the AMT BB Chevy for an engine build. Both are the "same scale" at 1/25 but look how much bigger AMT's BB is as opposed to Revell's.
I also grabbed a set of 1/24 scale rocker covers from the Pro Stock Camaro kit that I've got for extra "bulk". They fit perfectly.
Yeah..................a no brainer right?
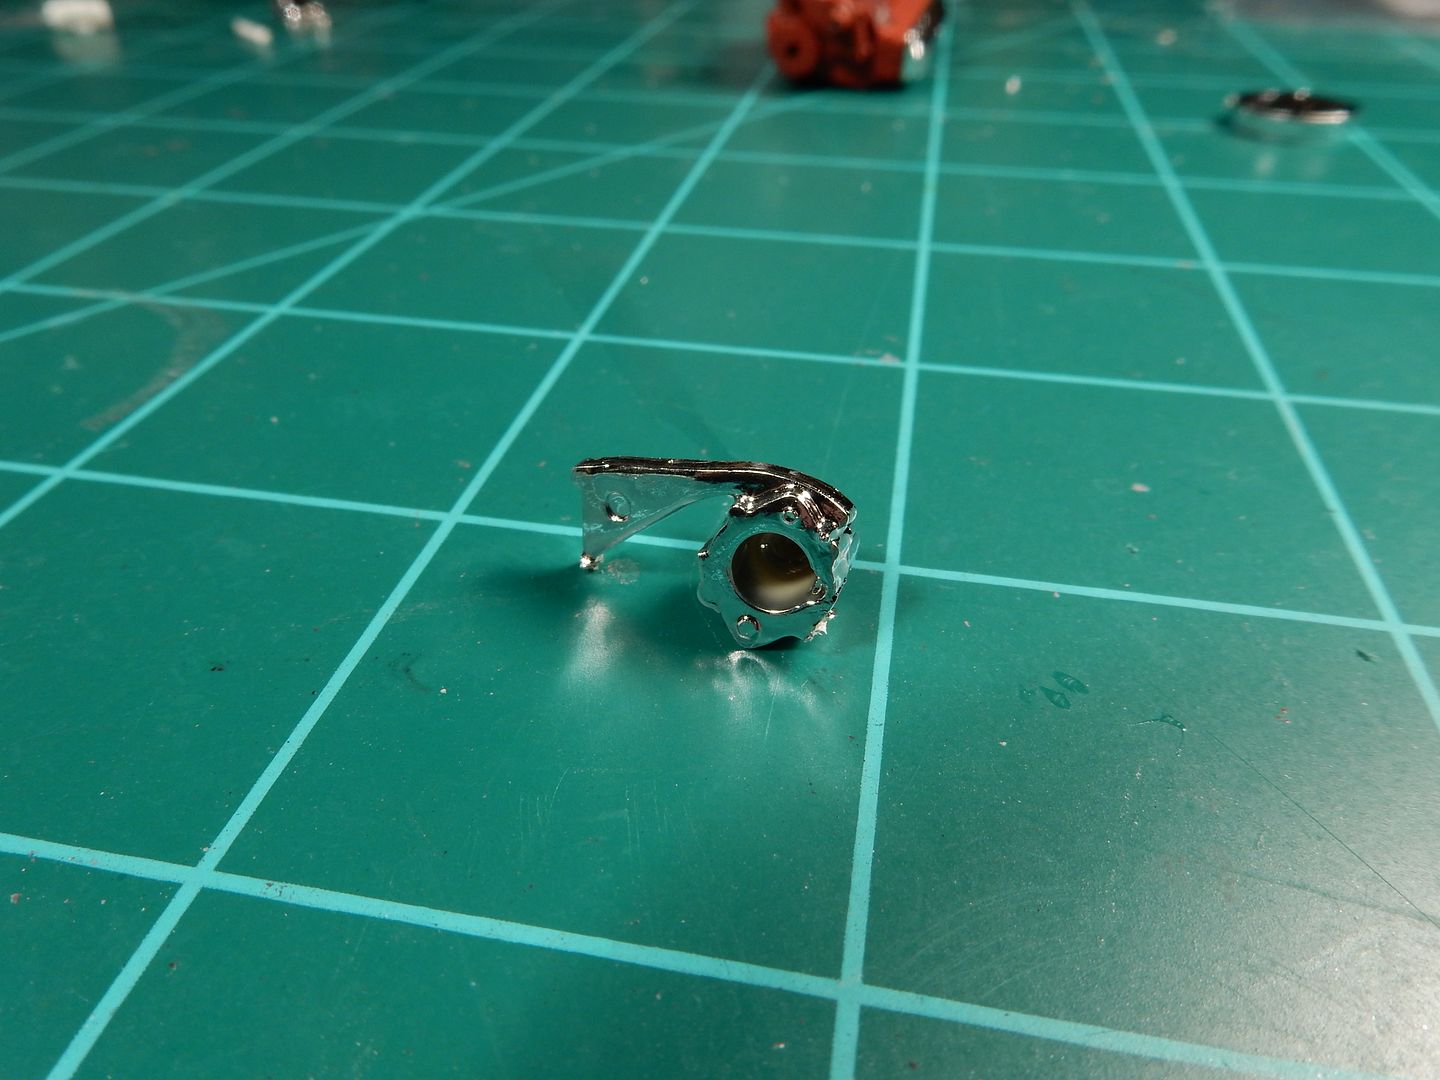
Another thing that I liked about AMT's BB is that it also comes with a bracket for that alternator so I don't have that "mysterious floating alternator" hanging off of the belt out there.
Just as a side note and as a defense to those who are telling me that the Monogram Camaro has some severe dimensional and accuracy issues. Here is the Monogram Camaro body on the left and the Revell one to the right. First off I just don't see how a 1/24th scale model could be this far off in size difference................but that's just me. Secondly there ARE some serious differences in the body lines and curves throughout the body on the Monogram one. Wow! Still................this is all about sentiments so forward with my original intent I go.....

-
I need to take some serious lessons in paint from this build. Wow man. You really know your stuff with that AB and weathering technique!
-
-
-
Always a good show Jay!

-
Any chance you can give the details of how you got the wood to come out that way. That looks pretty dang good.
-
-
-
And yet another great example of figure and diorama skills. Seriously inspiring work.
-
-
It's hard for me NOT to say something yet.....but I'll wait for the finish line for this masterpiece.
-
-
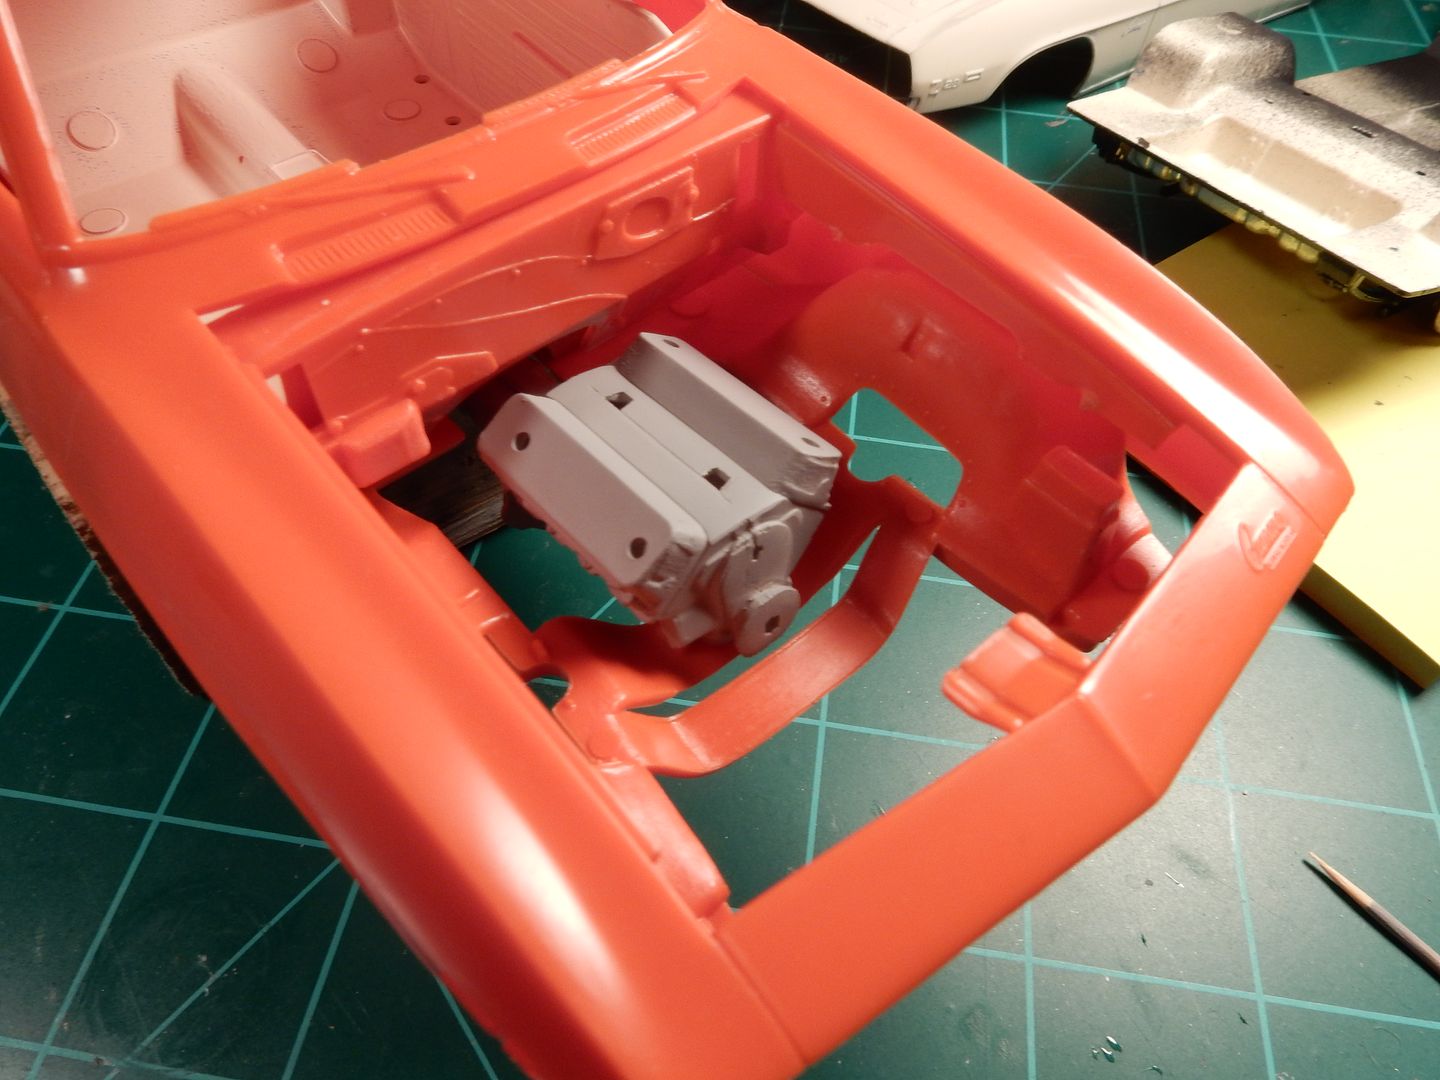
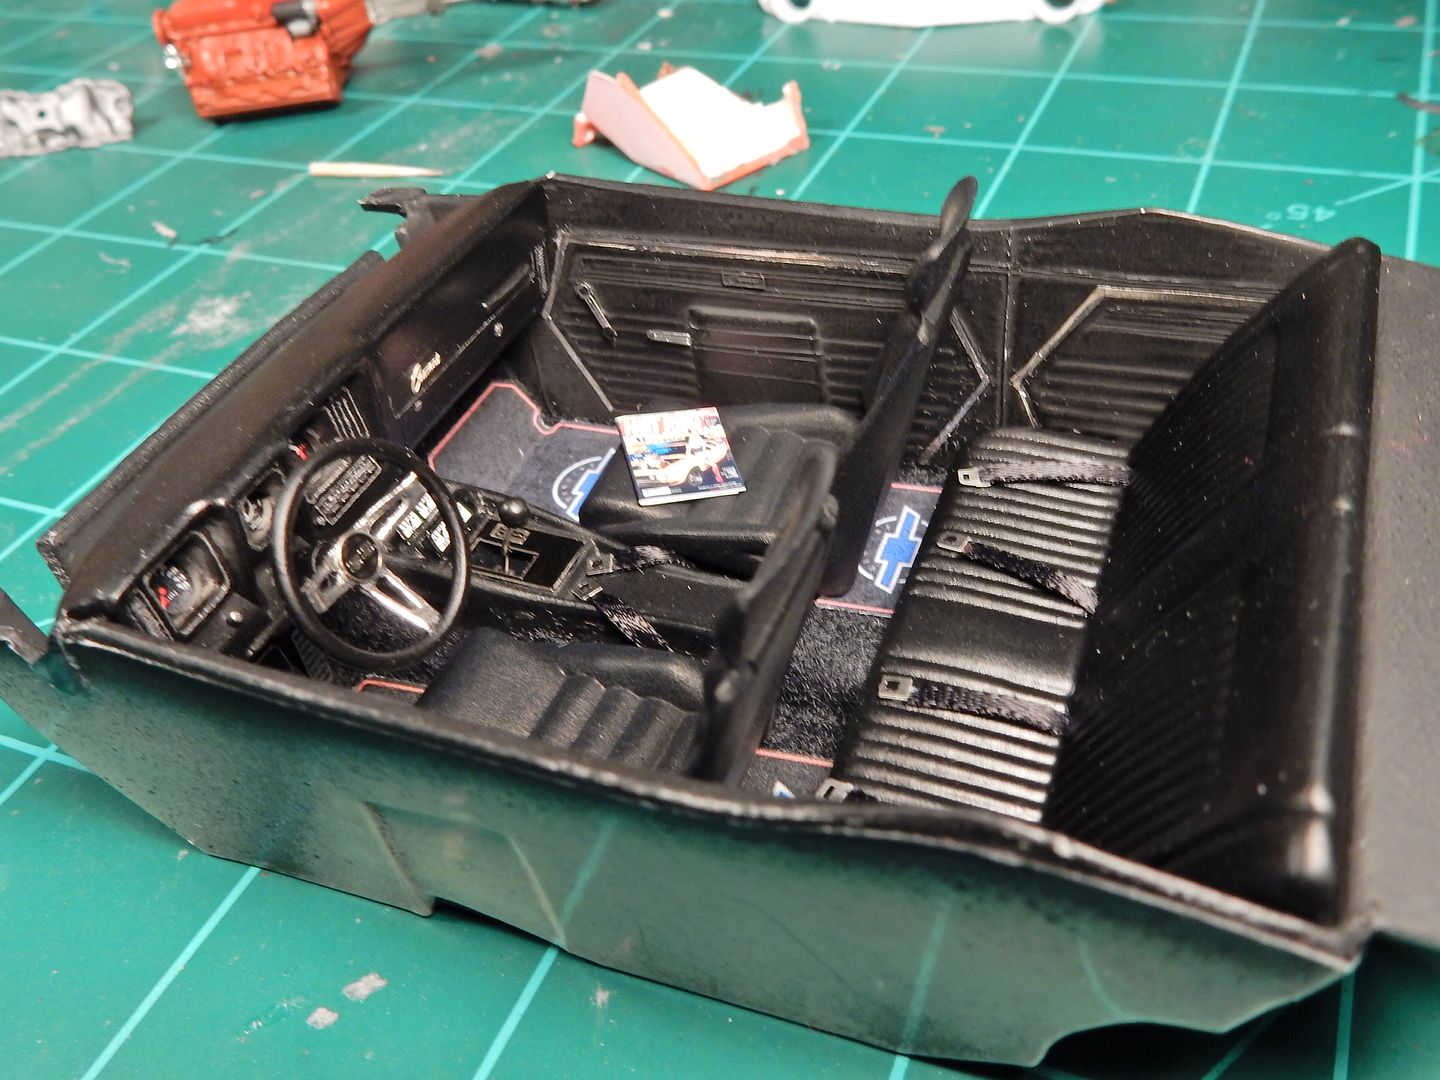
Well guys, the floor mats came in the mail yesterday and I went right to work finishing the interior. All I have left at this point are the door lock rods/ knobs at each door but that'll be one of the last things to take care of with this model. I will, however, go ahead and drill the holes in the door panel. Here it is with floor mats at all four seating positions , the front seat belts installed and a Hot Rod magazine to round it all out.
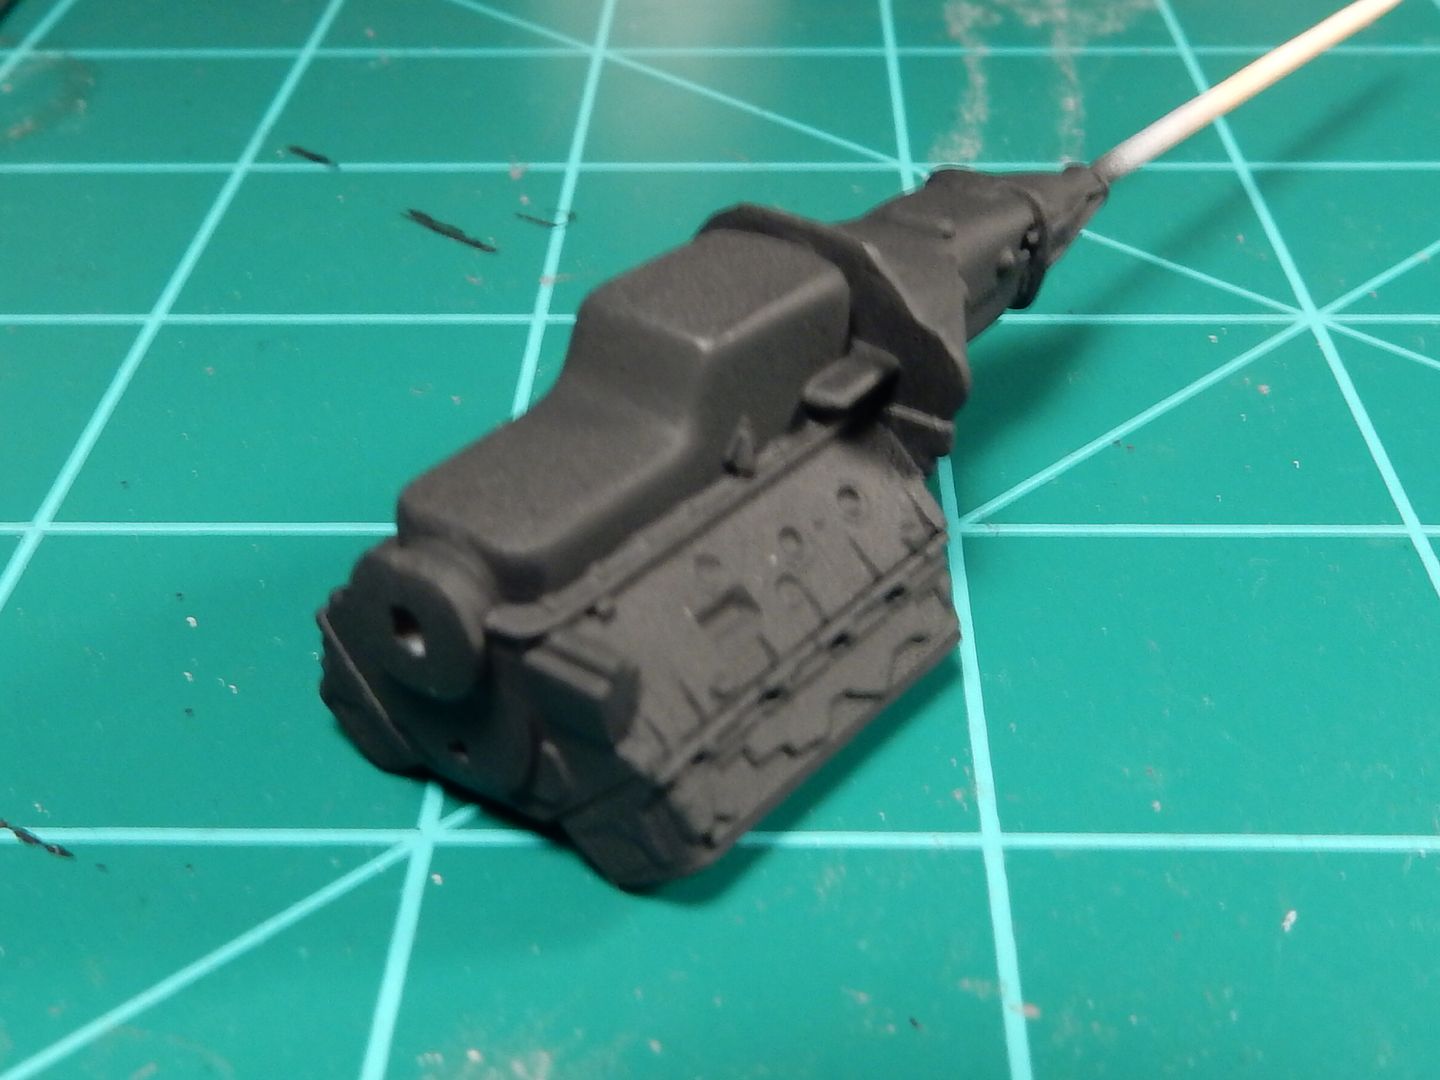
I just hate these engines that are molded in two halves with the oil pan included.

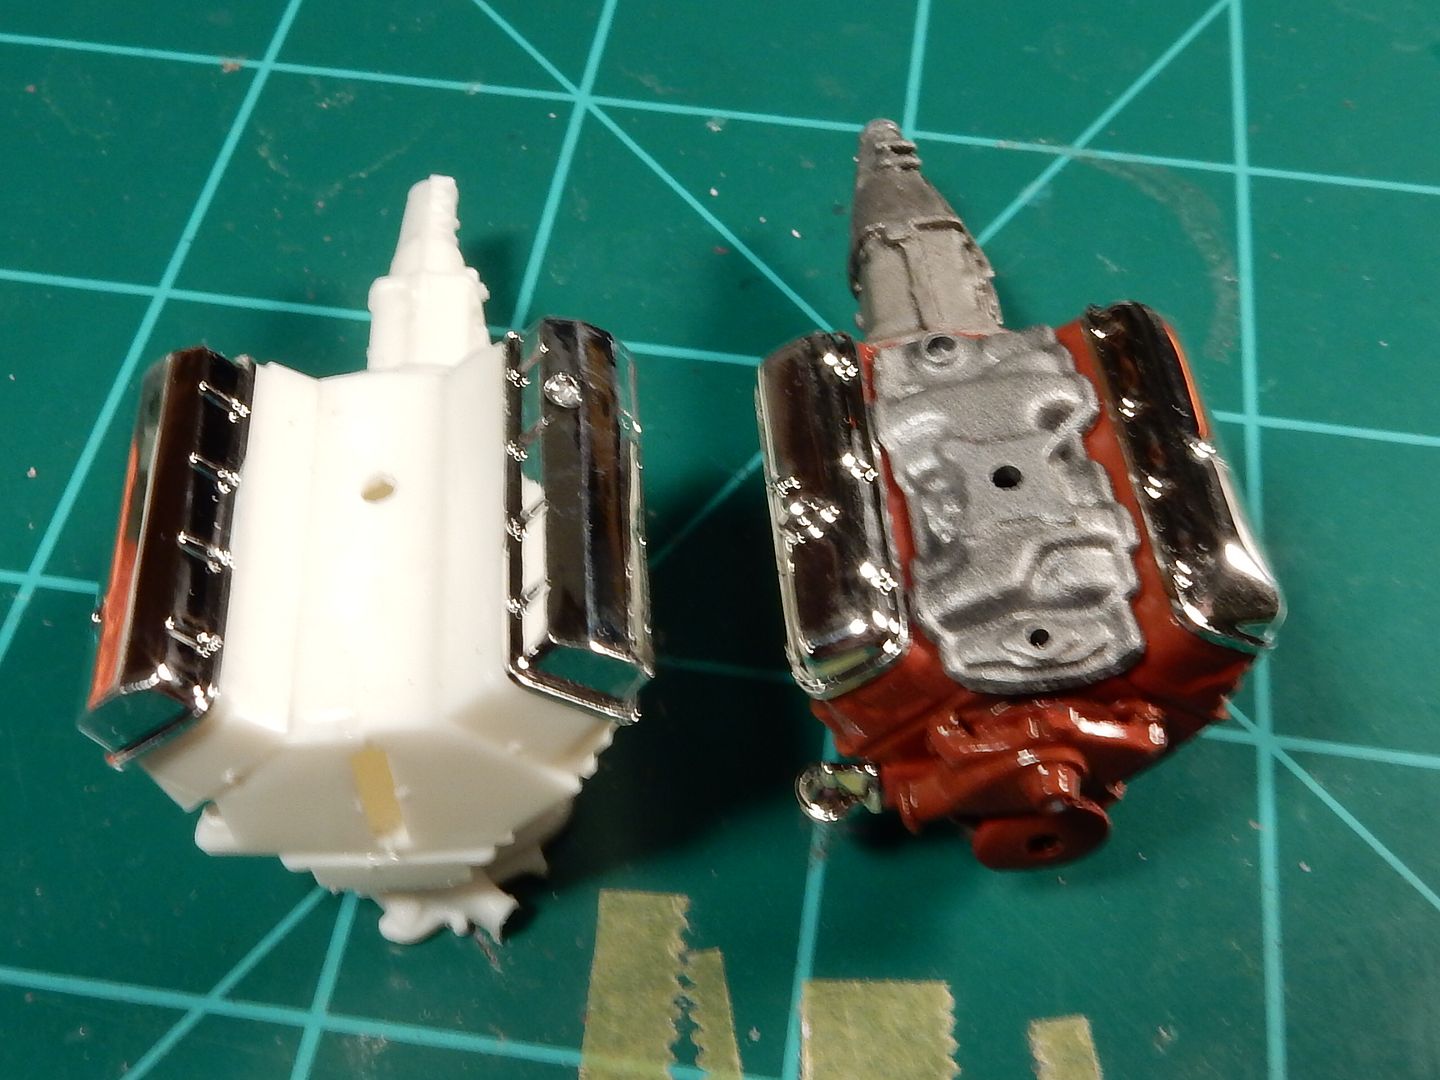
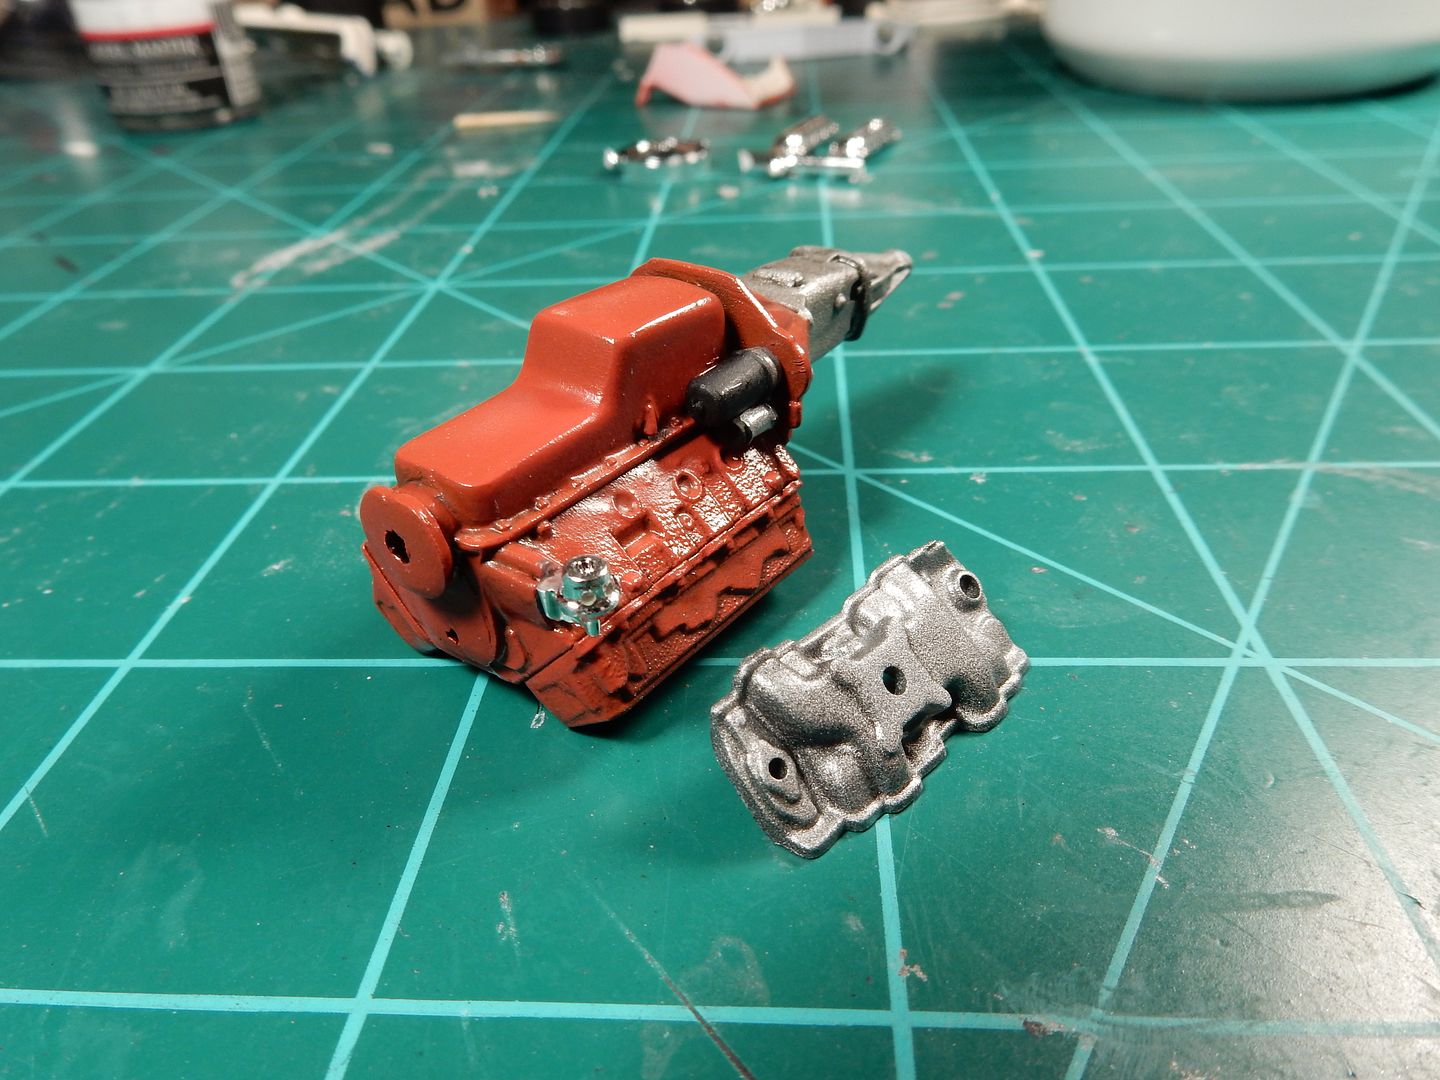
After taking care of the seam lines and priming , I carried the black basing over from the aviation side and applied it here.
I went ahead and black based the intake manifold as well. I shot the block with some home mixed Chevrolet Engine Red and shot the coat on and then shot the intake with some "Aluminum". After that I applied a subtle wash to bring out the detail of both pieces.
35 Yr Old Monogram Z to SS Camaro-PROJECT COMPLETED-07/20
in Non-LSP Works
Posted
Ok fellas, after some serious boo boo's with the initial paint job I stripped everything back off and reprimed/ repainted and now.....I've got COLOR!!! I ended up applying another coat of primer and smoothed all the imperfections out (a couple of freekin' dog hairs and some dust particles) and dispensed the paint into a paint jar and shot it through my airbrush. I had ALOT better results this time around fellas, however this paint does not play well with the air brush. Even after thinning the heck out of it I had difficulty in getting a uniform spray pattern to come out. I can't complaint too much as I'll be able to make this work out good in the end. These pics were taken after the results from my Badger 200. After these I decided to break out the much simpler Badger 350 and had a lot better luck with the pattern and a more consistent coat. I'm really going to be very happy with this color on this car is all I've gotta say:
Engine is still coming along. Resin Holley test fitted onto the motor complete with throttle shaft and throttle lever.