
Cheetah11
-
Posts
1,122 -
Joined
-
Last visited
-
Days Won
2
Content Type
Profiles
Forums
Events
Everything posted by Cheetah11
-
A still from the video just after ejection. About 2/3 of the fin missing and most likely an engine surge due to the yaw.
-
One or two things from the video. After the ejection the aircraft has yawed through almost 90 deg which would be consistent with the remark that part of the vertical stab was lost. Before the ejection the aircraft starts to yaw from side to side and then violently to the right, supporting the above theory. Looks legit from my side.
-
Nicely done Red Baron. Still one of my favourite kits.
-
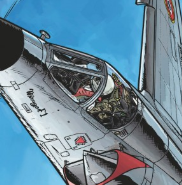
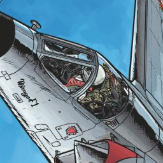 Thanks for posting. Three things from the photos are interesting to me. The seat and rear bulkhead appears to be painted in RLM02 and rivets are only visible in the really close up shots. I do not know if the cockpit has been repainted as the supposed yellow fuel line appears to be cockpit colour and not uniform in thickness. Nick
 -
Some more AM for the build. The F-16A style of wheels still on the F-16C's during 1991. My local hobby shop had a Reskit F-16A set . These are a bit fiddly for old hands but look great when finished. Assembled and painted and with a wash applied. The underside almost finished and a final check for fitment of the cockpit parts before I paint the seat and HUD. Cheers Nick
- 41 replies
-
- 11
-

-
Not LSP but a Cold War icon I have been searching for awhile. My brother picked it up for me at a place selling second hand models. He did not know which boxing to buy so he got both. Now I have two. Maybe one done as a CIA bird in overall black if I can find enough references. Cheers Nick
-
Mirage 2000-5F & Mirage 2000D - 1/32 Kittyhawk
Cheetah11 replied to ROM's topic in Ready for Inspection
Hi Romain WoW these turned out great. Well done with these difficult builds.- 74 replies
-
- 2
-
-
- kittyhawk
- mirage 2000
- (and 1 more)
-
Hi Vic wow, this one turned out really nice. Stunning build.
-
Happy Birthday Cheetah11 & ultmo ! October 9
Cheetah11 replied to GreyGhost's topic in General Discussion
Thanks for the Birthday wishes Alain, Maru and Grey Ghost. Nice day with the family and I got this from the kids for a birthday present, Cheers Nick -
F-86F-30, No. 2 Squadron, SAAF, Korea, 1953
Cheetah11 replied to TimW's topic in Ready for Inspection
Looks great Tim Takes me back to 1975 when I first built this kit in these exact markings. At the time this hype around this release was like the latest Tamiya release! Imagine a fully detailed engine and rubber tyres with Microscale decals. -
Hi Rob Mirages do not have painted intake trunks . The Alu alloy of the intake trunk is anodized in a metallic medium grey. Med grey with a bit of silver may the best way of replication this in scale. The Israeli rebuild and converted versions such as the Nesher and Kfir have gloss white intakes. Cheers Nick
-
Hi Vic Nice to see this one back on the bench. Cheers Nick
-
AV8B II VMA-231 1990/91 Gulf war cammo
Cheetah11 replied to gregair's topic in Aviation Discussion & Research
Hi Greg Here is a site where I found some photos for the F-16 in Desert Storm. The site has a fairly complete list of all aircraft on the Allied side which participated. There are about 10 photos of the aircraft you want to model. As a guess I would venture the aircraft arrived in theatre in the green/grey cammo but were probably repainted before hostilities began, but this is only a guess. Some of the former Marine members here can most likely give more info. https://www.dstorm.eu/pages/en/usa/av-8b.html Cheers Nick -
Great Stuka and welcome to the forum
-
Thanks for all the interest and comments guys. I have started to paint some parts. The tail first and before attaching to the fuselage. Why? A little easier to work on with the painting. I decided to cut masks for the tail. Two reasons. Elite decals have decided way back to do a generic sheet on the decals. This is a plus as almost any aircraft number can be modeled. The neg is the problem of aligning all the individual parts making up the serial no. I just knew one will be skew with my decal skills. I also used the leading edge and bottom as a cut to position the markings. The digitizing was done off a side on photo as the sketch on the decal sheet is a bit small to position the numbers accurately. The USAF badges from the Tamiya kit. Cheers Nick
- 41 replies
-
- 11
-
-
Mitsubishi J2M2 Raiden (雷電) prototype (Hasegawa 1/32)
Cheetah11 replied to sillymodeler's topic in Ready for Inspection
Wow, very nice -
Nicely done Neo. I like the more subtle weathering. Nick
-
Hi John Just a heads up on the Matra RLF-4 Pod. Due to the higher speed and normally 4 pods being carried open ended pods caused more drag. Therefore the pods almost always had the frangible fibre glass covers fitted. You can find the right pod or part in the Mirage 2000 kit from Kittyhawk. Cheers Nick
-
I decided to do the engine with parts from the spares box. Our local hobby shop has the Reskit F-16 exhaust but the one with the closed nozzle, so I had to improvise. Fortunately the Thunderbird kit comes with two jet pipes and the Academy kit has the feathers around the nozzle as an option. I also have a casting of the Tamiya F-15 inner pieces, so let see how this all fits together. All fits together surprisingly well. I made a mask for the feathers on the Silhouette. You have to love the replicate tool. Fifteen clicks on the mouse button and enough for the feathers and a few spare. Here is the result. A wash and a bit of shading to follow but the hard part is done. There is a small step between the Hasegawa and Academy parts. I plan to do a small cut in the fuselage and compress it to minimize the sanding when the tail cone is fitted to the fuselage. Cheers Nick
- 41 replies
-
- 14
-
-
1/32 Tamiya F-15E Israeli Air Force
Cheetah11 replied to miketippingmodels's topic in Ready for Inspection
Hi Mike Great model and photography. Well done. Just a comment. The Reskit F-15 nozzles are not correct for this version. You need the F-16 F-100 nozzles and the fully open ones. The closed ones are only applicable when the engines are at full mil power. Nick -
Thanks Alain. Yes I hope to turn the young apprentice into a good LSP modeler. Cheers Nick Thanks Gerhard. Wonderful news on the soon to be Grandad. Cheers Nick
-
This build is a little slower than anticipated. I am recently retired and we are looking after our 5 moth old grandson. Two things. I cleanly forgot the time a baby consumes and being retired you have little time for modelling!!!! Any way a few corrections and additions before I close the fuselage. The Black Box resin cockpit is nice and some old school painting was required. My hand painting skills suck so do not look too closely. The only addition here are the rudder pedals . The IP was rebuild as well as the combing around the HUD. I suspect the White Metal HUD framing is more representative of a F-16A HUD, so a new HUD support was done. The IP in the Kit is not well defined and does not capture the instruments well. It is not 3-dimentional enough but not having a suitable replacement a compromise had to be made. Hopefully all will fit together. Another piece that needed detailing was the node cone. Strips were added and sanded down to represent the real thing. Cheers Nick
- 41 replies
-
- 11
-
-
I have picked up a discrepancy on the decal sheet. The number of "Hammer Time" on the sheet is listed as 381 whereas most references show the number to be 281. In the mean time some more parts added to Frankenstein. With most of the bottom fuselage done I started on the top fuselage section. The air vent in front of the u/c bay still needs to be fabricated but mostly done on the bottom. I re-enforced the mounting of the stabs with alu tube and brass strips as well. (OCD) Time to do the top fuselage. The cockpit was cut for the Avionix resin (Still marked Black Box ) and dry fitting it shows an almost perfect fit. I am going to midify the front cover below the HUD since the resin and kit part are based on a F-16A. The resin parts glued to the inside and primed. I stumbled by accident on a new way to fit the resin to plastic. The dry fit showed a very small gap between the cockpit tub and side walls and I decided to glue the sidewall to a sheet of .25mm plastic card with Superglue. Once dry the plastic card was trimmed and then glued using Tamiya thin cement. This allowed some positioning of the parts which is not possible with Superglue. Great result. Enjoy Nick
-
Wow what a great offer Pete. Well done. You are right, Frank will never be the same. Cheers Nick
-
Hi John Here is a n accessory for your F1. Cheers Nick
