

brahman104
-
Posts
2,276 -
Joined
-
Last visited
-
Days Won
6
Reputation Activity
-

 brahman104 got a reaction from Archimedes in HK B-17...C 5/4 sweating the metal
Right lads (and ladettes),
Last update was July; pretty disgraceful but I have a good excuse......
After 4 years we are finally back in a place to call our own again (was definitely over apartment living!!!!!!). With that comes the joy of having all our stuff (well mainly my tools and machinery) under one roof instead of being stuck in storage. It looks like for the most part everything has survived pretty well, but there's a huge amount of setting up and organising still to go.
The great news is that the new house is absolutely epic (a gorgeous Queenslander built pre-war) with so much space underneath it has allowed me to have two separate work areas - one for metal working and general shop stuff and the other specifically for modelling and so after 2 international and one local move the B-17 finally has a permanent home! I actually kind of feel like this model has travelled almost as much as the real Swoose!
Anyway here's the "heavy duty" area:
And here's a general picture of the WIP new bench setup. Still long way to go, but it's definitely the best workspace I've ever had!
Look what's on the bench!!!!
Hopefully the 3D printers still work. I've only just found the power leads for them again.......
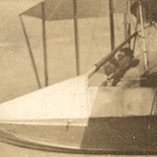
If any of you are following the NMUSAF's restoration of the Swoose, you might find this picture familiar.....
Work is still extremely hectic at the moment but I'm chipping away at the setup and hopefully won't be too long before I can recommence work on the big girl again!
Thanks for continuing to follow along after all these years!
-
 brahman104 got a reaction from Paulpk in HK B-17...C 5/4 sweating the metal
Right lads (and ladettes),
Last update was July; pretty disgraceful but I have a good excuse......
After 4 years we are finally back in a place to call our own again (was definitely over apartment living!!!!!!). With that comes the joy of having all our stuff (well mainly my tools and machinery) under one roof instead of being stuck in storage. It looks like for the most part everything has survived pretty well, but there's a huge amount of setting up and organising still to go.
The great news is that the new house is absolutely epic (a gorgeous Queenslander built pre-war) with so much space underneath it has allowed me to have two separate work areas - one for metal working and general shop stuff and the other specifically for modelling and so after 2 international and one local move the B-17 finally has a permanent home! I actually kind of feel like this model has travelled almost as much as the real Swoose!
Anyway here's the "heavy duty" area:
And here's a general picture of the WIP new bench setup. Still long way to go, but it's definitely the best workspace I've ever had!
Look what's on the bench!!!!
Hopefully the 3D printers still work. I've only just found the power leads for them again.......
If any of you are following the NMUSAF's restoration of the Swoose, you might find this picture familiar.....
Work is still extremely hectic at the moment but I'm chipping away at the setup and hopefully won't be too long before I can recommence work on the big girl again!
Thanks for continuing to follow along after all these years!
-
.thumb.JPG.0f0c0659a1db77808d5fa22f018de2dd.JPG) brahman104 got a reaction from N.H.71 in HK B-17...C 5/4 sweating the metal
brahman104 got a reaction from N.H.71 in HK B-17...C 5/4 sweating the metal
Right lads (and ladettes),
Last update was July; pretty disgraceful but I have a good excuse......
After 4 years we are finally back in a place to call our own again (was definitely over apartment living!!!!!!). With that comes the joy of having all our stuff (well mainly my tools and machinery) under one roof instead of being stuck in storage. It looks like for the most part everything has survived pretty well, but there's a huge amount of setting up and organising still to go.
The great news is that the new house is absolutely epic (a gorgeous Queenslander built pre-war) with so much space underneath it has allowed me to have two separate work areas - one for metal working and general shop stuff and the other specifically for modelling and so after 2 international and one local move the B-17 finally has a permanent home! I actually kind of feel like this model has travelled almost as much as the real Swoose!
Anyway here's the "heavy duty" area:
And here's a general picture of the WIP new bench setup. Still long way to go, but it's definitely the best workspace I've ever had!
Look what's on the bench!!!!
Hopefully the 3D printers still work. I've only just found the power leads for them again.......
If any of you are following the NMUSAF's restoration of the Swoose, you might find this picture familiar.....
Work is still extremely hectic at the moment but I'm chipping away at the setup and hopefully won't be too long before I can recommence work on the big girl again!
Thanks for continuing to follow along after all these years!
-
 brahman104 got a reaction from themongoose in HK B-17...C 5/4 sweating the metal
Right lads (and ladettes),
Last update was July; pretty disgraceful but I have a good excuse......
After 4 years we are finally back in a place to call our own again (was definitely over apartment living!!!!!!). With that comes the joy of having all our stuff (well mainly my tools and machinery) under one roof instead of being stuck in storage. It looks like for the most part everything has survived pretty well, but there's a huge amount of setting up and organising still to go.
The great news is that the new house is absolutely epic (a gorgeous Queenslander built pre-war) with so much space underneath it has allowed me to have two separate work areas - one for metal working and general shop stuff and the other specifically for modelling and so after 2 international and one local move the B-17 finally has a permanent home! I actually kind of feel like this model has travelled almost as much as the real Swoose!
Anyway here's the "heavy duty" area:
And here's a general picture of the WIP new bench setup. Still long way to go, but it's definitely the best workspace I've ever had!
Look what's on the bench!!!!
Hopefully the 3D printers still work. I've only just found the power leads for them again.......
If any of you are following the NMUSAF's restoration of the Swoose, you might find this picture familiar.....
Work is still extremely hectic at the moment but I'm chipping away at the setup and hopefully won't be too long before I can recommence work on the big girl again!
Thanks for continuing to follow along after all these years!
-
 brahman104 got a reaction from blackbetty in HK B-17...C 5/4 sweating the metal
A bit more progress on the outer nacelle. Some of the panels are pretty tricky to discern the shape, but I'd say I'm reasonably close...... The top big access cover is not stuck on yet; still needs details and some adjustment to get it to fit nicely.
Lots and lots of little tricky panels, only another 3 engines to go! At least the RH wing *should* be easier as I'll know the sizes and shapes of the panels......
The wing is starting to look more complete now!
Many, many more hours to get yet on this wing alone, but it is somewhat therapeutic!
Cheers,
Craig
-
 brahman104 got a reaction from scvrobeson in HK B-17...C 5/4 sweating the metal
Right lads (and ladettes),
Last update was July; pretty disgraceful but I have a good excuse......
After 4 years we are finally back in a place to call our own again (was definitely over apartment living!!!!!!). With that comes the joy of having all our stuff (well mainly my tools and machinery) under one roof instead of being stuck in storage. It looks like for the most part everything has survived pretty well, but there's a huge amount of setting up and organising still to go.
The great news is that the new house is absolutely epic (a gorgeous Queenslander built pre-war) with so much space underneath it has allowed me to have two separate work areas - one for metal working and general shop stuff and the other specifically for modelling and so after 2 international and one local move the B-17 finally has a permanent home! I actually kind of feel like this model has travelled almost as much as the real Swoose!
Anyway here's the "heavy duty" area:
And here's a general picture of the WIP new bench setup. Still long way to go, but it's definitely the best workspace I've ever had!
Look what's on the bench!!!!
Hopefully the 3D printers still work. I've only just found the power leads for them again.......
If any of you are following the NMUSAF's restoration of the Swoose, you might find this picture familiar.....
Work is still extremely hectic at the moment but I'm chipping away at the setup and hopefully won't be too long before I can recommence work on the big girl again!
Thanks for continuing to follow along after all these years!
-

 brahman104 got a reaction from fab in HK B-17...C 5/4 sweating the metal
Right lads (and ladettes),
Last update was July; pretty disgraceful but I have a good excuse......
After 4 years we are finally back in a place to call our own again (was definitely over apartment living!!!!!!). With that comes the joy of having all our stuff (well mainly my tools and machinery) under one roof instead of being stuck in storage. It looks like for the most part everything has survived pretty well, but there's a huge amount of setting up and organising still to go.
The great news is that the new house is absolutely epic (a gorgeous Queenslander built pre-war) with so much space underneath it has allowed me to have two separate work areas - one for metal working and general shop stuff and the other specifically for modelling and so after 2 international and one local move the B-17 finally has a permanent home! I actually kind of feel like this model has travelled almost as much as the real Swoose!
Anyway here's the "heavy duty" area:
And here's a general picture of the WIP new bench setup. Still long way to go, but it's definitely the best workspace I've ever had!
Look what's on the bench!!!!
Hopefully the 3D printers still work. I've only just found the power leads for them again.......
If any of you are following the NMUSAF's restoration of the Swoose, you might find this picture familiar.....
Work is still extremely hectic at the moment but I'm chipping away at the setup and hopefully won't be too long before I can recommence work on the big girl again!
Thanks for continuing to follow along after all these years!
-
 brahman104 reacted to tomprobert in HK B-17...C 5/4 sweating the metal
Any updates, Craig? I need my B-17 fix!
-
brahman104 reacted to KiwiZac in HK B-17...C 5/4 sweating the metal
Magic work Craig, I'm so excited to see the next update!
-
brahman104 reacted to scvrobeson in HK B-17...C 5/4 sweating the metal
You're a madman Craig, but it really does look fantastic. Can't wait to see you do it 3 more times
Matt
-
brahman104 reacted to CANicoll in HK B-17...C 5/4 sweating the metal
103 pages!! This needs to be an E-Book. Super work! Chris
-
brahman104 reacted to Gazzas in HK B-17...C 5/4 sweating the metal
Just fantastic, Craig! Eye candy!
-
brahman104 got a reaction from themongoose in B-17G 'A Bit O' Lace'
Glad to see you back on this one Iain!
I began corrective work to fix the nacelle issue. It is quite pronounced once you see it, but to correct it is a whole other kettle of fish. While I'm happy I have achieved the height correction of the outer nacelle, I'm not entirely sure how I will fix the shape as the whole nacelle needs re-profiling.
Probably best to do as you have done in the interest of getting it finished!
Keep up the good work,
Craig
-
brahman104 reacted to tomprobert in B-17G 'A Bit O' Lace'
Hi Iain,
I’d have to agree - whilst it’s good to see someone take the plunge with some 3-pane windows the shape of these, in my humble opinion, is somewhat off:
The outer windows are way too wide and the shape of the curved sections at the top/bottom is way off. There should not be any flat areas along these sections - the whole upper/lower profile is one smooth curve… Monogram, back in the 1970s got this spot on!
As you say, a decent starting point but these will need some mods to be an accurate representation of this version of waist window.
-
 brahman104 got a reaction from Iain in B-17G 'A Bit O' Lace'
Glad to see you back on this one Iain!
I began corrective work to fix the nacelle issue. It is quite pronounced once you see it, but to correct it is a whole other kettle of fish. While I'm happy I have achieved the height correction of the outer nacelle, I'm not entirely sure how I will fix the shape as the whole nacelle needs re-profiling.
Probably best to do as you have done in the interest of getting it finished!
Keep up the good work,
Craig
-
brahman104 reacted to JayW in 1/18 Scale P-51B 3D Print Build
Well the last couple of weeks I have, instead of doing surfacing like I should be doing, indulged myself in the world of 3D printing parts where there is very little guesswork (well - a little here and there) - just digitally defining the parts per drawing data, and turning that into resin parts. You know of course this is main landing gear parts. I made some test parts; now comes the real thing.
First, recall that I was doubting Good Year made the block tread tire. I think I am right, and it matters because I have put manufacturers lettering on the tire sidewalls for the first time ever for me. Before and after:
Uniroyal. May be right; may be wrong. But I found some discussion on the web where someone was sure Uniroyal provided block tread aircraft tires at that time. The style of the lettering is a guess, from a web search. And I also put the tire size on there just for kicks. Also I had asked about tire width - 9.25 inch or 9.50 inch. No definitive response, so I went with 9.5 inch, or in 1/18 scale .527 inch wide.
So with some other tweaks here and there from whatever learning I received from the test parts, I printed off a set of production parts:
Two kinds of tires, two outer wheel halves, two inner wheel halves, two lower struts, two brake housings, and four tow rings (a couple of spares). They came out really nice, except the brake housings where the brake line fittings are too small and fragile. So I will redo the brake housings.
Cleaned up and assembled:
And the lower strut, with a 3/16 inch diameter aluminum tube, and the tow ring dry-fitted:
Again - I have to credit Peter Castle with the outer wheel half at least. It is just excellent, and he gave me the Rhino model.
There was a time when I worried that 3D printed parts were too fragile to be asked to support the weight of a large model. No more. Some will recall that I ran a bench test on a 1/18 scale F4U lower strut for my multi-year F4U project, where I put up to five pounds of weight on it, and it held. This P-51 MLG lower strut is going to be fine; don't you worry.
As you can guess, this P-51 is going to have mismatched tires, like we see so often in wartime pictures.
Alright enough with the MLG for a while! I need to get back on task. Next post is going to be all about surfacing around the radiator intake, maybe more too. Hope you are enjoying this half as much as I am....
-
 brahman104 got a reaction from Model_Monkey in HK B-17...C 5/4 sweating the metal
It's funny how how you can look at things for not "see" things...... For me this week it was the first time my brain had acknowledged the different material that surrounds the turbos on the nacelles. Not sure if it's stainless or something like that, but clearly it's not aluminium.
So what to do? Painting over litho plate didn't really seem like a good option, and actual stainless sheet would be way too hard to shape properly. I went to a local craft store and found some rolls of what they called "foil" which was a bit vinyl-like, but looked pretty close to what I was after and stood up to some embossing work...
It took a while to work out the panel layout but I think I'm getting somewhere with this...
There's two different colours of the "foil" in use. First, is the really dark colour (maybe a bit too dark but it'll be less in the natural shadow) and the second is a little lighter, which you can see where the ducting for the turbo would sit towards the front of the nacelle.
The good thing about the "foil" rolls was that they are sufficiently self-adhesive, so didn't have to worry about contact cement for a couple of panels at least!
I did a bit more on the upper wingtip as well. All of the large wing panels on the upper side are done now, hence it being about time a started with the nacelles.
Little by little, she's getting closer to the end!
Cheers,
Craig
-
brahman104 got a reaction from Model_Monkey in HK B-17...C 5/4 sweating the metal
Hey team!
I'm pleased to say that the dust of our move home has settled enough to resume progress on the big girl
We're in the for the long slog now of covering the wings. After such a long break it took me a while to get back into the groove of doing the rivets, but I'm now starting to make some headway.
Outer wing main panels are done, I'll move onto the wingtip next once I confirm the pattern and panel shapes.
Bit of a colour difference between the new and old panels, but once everything is done they'll all look pretty much the same. I hope .......
Not the most exciting of updates, but there IS progress being made finally! I've still got the underside of this wing, plus the whole other wing to do. Gonna be here a while, but if I can average a panel or so a day, I'll gradually get through it.
Cheers,
Craig
-
brahman104 got a reaction from themongoose in HK B-17...C 5/4 sweating the metal
A bit more progress on the outer nacelle. Some of the panels are pretty tricky to discern the shape, but I'd say I'm reasonably close...... The top big access cover is not stuck on yet; still needs details and some adjustment to get it to fit nicely.
Lots and lots of little tricky panels, only another 3 engines to go! At least the RH wing *should* be easier as I'll know the sizes and shapes of the panels......
The wing is starting to look more complete now!
Many, many more hours to get yet on this wing alone, but it is somewhat therapeutic!
Cheers,
Craig
-
 brahman104 got a reaction from Sasha As in HK B-17...C 5/4 sweating the metal
A bit more progress on the outer nacelle. Some of the panels are pretty tricky to discern the shape, but I'd say I'm reasonably close...... The top big access cover is not stuck on yet; still needs details and some adjustment to get it to fit nicely.
Lots and lots of little tricky panels, only another 3 engines to go! At least the RH wing *should* be easier as I'll know the sizes and shapes of the panels......
The wing is starting to look more complete now!
Many, many more hours to get yet on this wing alone, but it is somewhat therapeutic!
Cheers,
Craig
-
 brahman104 got a reaction from Paulpk in HK B-17...C 5/4 sweating the metal
Thanks Jay!
Townsville does have some nice beaches, but unless you're a tourist you don't swim at them. Too many sharks, stingers and crocodiles...... . Beautiful place though; our winters average around 25 deg C..... little different to the last couple of years in NZ!
Townsville also played a major part in supporting the war effort in New Guinea. Definitely worth a read!
Craig
-
brahman104 got a reaction from Paulpk in HK B-17...C 5/4 sweating the metal
Hey team!
I'm pleased to say that the dust of our move home has settled enough to resume progress on the big girl
We're in the for the long slog now of covering the wings. After such a long break it took me a while to get back into the groove of doing the rivets, but I'm now starting to make some headway.
Outer wing main panels are done, I'll move onto the wingtip next once I confirm the pattern and panel shapes.
Bit of a colour difference between the new and old panels, but once everything is done they'll all look pretty much the same. I hope .......
Not the most exciting of updates, but there IS progress being made finally! I've still got the underside of this wing, plus the whole other wing to do. Gonna be here a while, but if I can average a panel or so a day, I'll gradually get through it.
Cheers,
Craig
-
 brahman104 got a reaction from KiwiZac in HK B-17...C 5/4 sweating the metal
Hey team!
I'm pleased to say that the dust of our move home has settled enough to resume progress on the big girl
We're in the for the long slog now of covering the wings. After such a long break it took me a while to get back into the groove of doing the rivets, but I'm now starting to make some headway.
Outer wing main panels are done, I'll move onto the wingtip next once I confirm the pattern and panel shapes.
Bit of a colour difference between the new and old panels, but once everything is done they'll all look pretty much the same. I hope .......
Not the most exciting of updates, but there IS progress being made finally! I've still got the underside of this wing, plus the whole other wing to do. Gonna be here a while, but if I can average a panel or so a day, I'll gradually get through it.
Cheers,
Craig
-
 brahman104 got a reaction from daHeld in 1/18 Scale P-51B 3D Print Build
Another incredible journey has just begun! I definitely admire the exacting tolerances you set for yourself Jay, which is just one reason why you're on a very tall pillar way above most of us!!!!! Always inspiring.
I know you've had some fit/print issues and given the level of accuracy you're going for there's room for improvement, but when I think back to my first forays with the ABS UpMini and what's inside the my B-17's rear fuselage, it's like Wright Brothers versus walking on the moon!
Very excited to watch this one unfold!
Craig
-
brahman104 reacted to tomprobert in 1/32 Short Stirling
Not the most exciting of updates but important progress nonetheless.
I decided to tackle the distinctive oil coolers that hang under the nacelles on the Stirling MkIII onwards, having moved from the leading edge of the wing on the MkI.
The kit parts were lacking somewhat, so I had a brainwave and decided to see what I could do with some spare 1/48th 500lb bombs, some old felt pen lids and a bit of filler! The bombs are actually an almost exact fit, in terms of the diameter, according to my plans so I threw caution to the wind and had a play to see if I could come up with something viable…
I began by removing the fin section from each bomb and extreme nose, leaving the hollow shell of the bomb body.
Rather than leaving them hollow, I trimmed the pen lids to give them some ‘guts’ and to represent the oil cooler itself. The forward section was then improved by adding some Evergreen tube of the correct diameter and everything was blended in. Finally, I used some thin Evergreen to add some external detail, and fashioned the mounts from plastic strip:
Next, they were given a squirt of black as once installed on the nacelle it would be problematic getting the airbrush into the nooks and crannies:
They were then glued to the correct position on each engine:
Not perfect or totally accurate but they’ll do!
All the best,
Tom