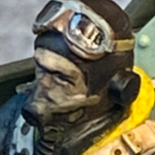
Thunderbolt Posted January 22, 2012 Share Posted January 22, 2012 (edited) Hello all! I am a 23 year old American who has been building model airplanes since the age of about 9. I live on Long Island; very close to the old Republic P-47 plant (now Republic Airport, along with the American Airpower Museum). I am a huge fan of the bubbletop P-47D even though I have never built one. (Don't worry, it's on my list.) Luftwaffe aircraft are my favorite. For years now, I have been admiring all of your work on Hyperscale, the ARC, and here on LSP. I decided it's high time I shared some of my own work with you! In 2008, I began constructing "Blue 12," but was forced to set the project aside until now. I only worked on it a little bit in 2010 since then. This kit represents a massive undertaking for me as a modeller due to the amount of AM, research and extra work I am putting into the kit. Before this project, I completed Dortenmann's colorful D-9 using the old Hasegawa "high grade" kit, which features raised rivets on the wings and incorrect MG 151/20 bulges. Before that, I completed Hartmann's "White 1," which I consider my best work to date. (I will post pictures of this in the appropriate thread soon.) I am seeking to use JaPo's latest book, "Focke-Wulf FW-190D Camouflage & Markings - Part II" to create the most realistic rendition of "Blue 12" as possible. A lot of disagreement exists concerning the correct paint scheme for a such a well-documented aircraft. My understanding is the JaPo book lays any uncertainty to rest. My goal is to make a diorama with American soldiers and the pilot who surrendered. (Will be tough as I can't find 1/32 soldiers anywhere.) I want to simultaneously depict the surrender of Nazi Germany and the American fascination with captured German technology. This, in a way, is the classic AM 190 - any and all AM to create the most opened-up, super-detailed monster possible. In another way, it's a little different. The goal in this build is to use the Eagle Parts replacement gun cowl, along with the rest of the Aires AM engine parts to depict a Dora an open-engined Dora with an accurate gun cowl as the Aires offering offers little correction on what the kit offers. I am also riveting the entire airplane using the MDC rivet tool. I acquired blueprints of the plane that will make this process accurate and easy. This project also represents my first go at the stressed skin effect, which I am modifying by using an MDC rivet tool instead of using a pounce wheel. I believe the MDC tool produces a much more realistic effect that is worth the extra pain involved. I have acquired a Fw 190D manual which shows how most of the Jumo 213 engine is plumbed and wired, but some ambiguity still remains. Parts list: Hasegawa 1/32 Fw 190D-9 kit Eagle Parts Cockpit Aires Fw 190D-9 Superdetail Set EP Cowling EP Drop Tank EP Tail Wheel EP 3-Piece Gun Cowl True details wheels Eduard Instrument Panel Eduard Flaps Master MG131 barrels Posable tail control surfaces (forget company) ...I Think that's it? I may have missed something... pictures to come. I suppose I have to upload them elsewhere on the web before I can attach them here? Edited June 2, 2021 by thunderbolt1988 Link to comment Share on other sites More sharing options...
LSP_Kevin Posted January 22, 2012 Share Posted January 22, 2012 Welcome aboard Christian! I'm building the Hasegawa High Grade kit myself at the moment, though I'm converting it to a D-11. I also built Dortenmann's aircraft using the ancient Revell kit some years ago. Looking forward to seeing your build! pictures to come. I suppose I have to upload them elsewhere on the web before I can attach them here? That's correct; just use Photobucket or similar, and link your photos from there. There's a tutorial about it in General Discussion too. Kev Link to comment Share on other sites More sharing options...
LSP_K2 Posted January 22, 2012 Share Posted January 22, 2012 Link to comment Share on other sites More sharing options...
Loic Posted January 22, 2012 Share Posted January 22, 2012 Link to comment Share on other sites More sharing options...
mattlow Posted January 22, 2012 Share Posted January 22, 2012 Welcome Christian. Airfix made/make a series of 1/32 soldiers, they were called 'multipose' and came as sets of about 8/pack. Seperate arms, legs, torso, head (I think) and then an array of equipment to add. I think they are quite well regarded. They do a set of US Army, Europe, so should be just what you're after. Type 'Airfix Multipose' into Google and you'll get plenty of hits. Matt Link to comment Share on other sites More sharing options...
BradG Posted January 22, 2012 Share Posted January 22, 2012 Should be good mate. Just a note though, if you wish to depict the aircraft as it was when captured, it carried no drop tank. I got some more pics if you want me to scan them for you. Link to comment Share on other sites More sharing options...
A.Wolf Grant Posted January 22, 2012 Share Posted January 22, 2012 Obant. Link to comment Share on other sites More sharing options...
Thunderbolt Posted January 22, 2012 Author Share Posted January 22, 2012 Thanks for the welcomes guys! LSP_Kevin: How are you going about the D-11 conversion? I like the way the D-11 looks. Also, thanks for the tutorial link; here's a test shot: Mattlow: All the 1/32 airfix soldiers I saw in google had very obvious combat poses. I need to be able to do something more relaxed. Am I missing something? May need to break out the old blowtorch if not... BradG: Yes, you are absolutely correct. I bought the drop tank early in the build when I was still uncertain I would finish my D-9 as "Blue 12." Any and all pictures would be very much appreciated, as I still have not purchased the JaPo book yet! Please note that I have seen the pictures that come with the EagleCals. If you have others, then I have never seen them before, and that is very exciting! All in all, thanks for your warm welcomes guys. Look forward to hearing from you all as I finish this daunting project! Link to comment Share on other sites More sharing options...
brewer Posted January 22, 2012 Share Posted January 22, 2012 (edited) Sounds like quite a project, can't wait to see some pics! Also, glad to see another 20-something on the forums Edited January 22, 2012 by brewer Link to comment Share on other sites More sharing options...
LSP_Kevin Posted January 22, 2012 Share Posted January 22, 2012 LSP_Kevin: How are you going about the D-11 conversion? All the gory details are in the build thread I linked to. Which reminds me, I must get back to it soon! Great job on Dortenmann's aircraft by the way. Kev Link to comment Share on other sites More sharing options...
mattlow Posted January 22, 2012 Share Posted January 22, 2012 Christian Yes, I was thinking they'd make a good basis for converting - especially as the arms and legs are seperate. Matt Link to comment Share on other sites More sharing options...
Thunderbolt Posted January 22, 2012 Author Share Posted January 22, 2012 (edited) Ok, test photo worked, here are more! These are all from 2008. I will let you know the approximate age of each batch of photos as I upload them. The Eduard instrument panel: Pre-surgery drilling: cockpit tub: fuselage interior: Edited January 24, 2012 by thunderbolt1988 Link to comment Share on other sites More sharing options...
Thunderbolt Posted January 22, 2012 Author Share Posted January 22, 2012 Here is the fuselage closed up: 2008 photo In addition to this work, I built the Eduard flaps and riveted half of the lower wing. I then let the project sit until October of 2010. -October 2010- While thinning out the inside of the lower wing to accomodate the gun bays, disaster struck. I was dremeling at max rpm when suddenly, the 1.5 cm-wide sanding cylinder I was using got caught on the edge of the port ejector chute. Instantly, a huge hole was torn in the lower wing. The same day, I fixed it as the photos show: 2010 photos: just finished puttying and sanding the hole. I didn't take a picture of the immediate damage. You can see the outline of the dremel attachment where the plastic shows strain. I marked the rectangular portion of the chute using a sharpie: drilled it out and dremeled the rest: thinned it from inside: cut it to size made sure it looked right under paint (I still need to add that lower cutout) phew! not perfect but I'm glad I was able to save the wing from the scrap heap. I have since corrected the rivets shown in these pictures as some are totally fanciful. tomv87 1 Link to comment Share on other sites More sharing options...
Thunderbolt Posted January 22, 2012 Author Share Posted January 22, 2012 October 2010: Stressed Skin Effect. Measure and plot some key landmarks with a sharpie; draw lines: Out with the scalpel - just a few light scrapes: Burnish trenches and polish, check for micro scratches: rivet: Boom! My first time at this. I was pretty satisfied with my work, but I must admit I wasn't able to do this job without there being a few micro scratches here and there. Two remedies for next time: use a more rigid blade. Blade flex while drawing the scalpel across the plastic creates repeating line patterns perpendicular to the motion of the blade. The second remedy: use an extremely sharp, brand-new blade. I want to stress Hasegawa's P-47D in NMF, so I'll need to have mastered this technique to produce a convincing result. The two remedies I've got in mind should be a good start. tomv87 1 Link to comment Share on other sites More sharing options...
Thunderbolt Posted January 23, 2012 Author Share Posted January 23, 2012 Here is where she stands now, January 22, 2012: Kev - Thanks! I threw it together in a little under a week. I actually meant to order the new-tool 190 but ordered this instead by accident. When I opened the box I was a little horrified to discover my mistake, but I just said, "eh, Dortenmann's "Black 1" it is." You're definitely up to some gory work on that D-11...I am really admiring your panel line scribing ability It's a big weakness of mine. Matt - I'll get them. I agree they'll make a great basis. My experience with figures is very limited, but I'll try to heat the joints gently to bend them into more desirable poses. We'll see how it goes. Thanks a lot for telling me about them, as I probably would have just went with 1/35 figures. Link to comment Share on other sites More sharing options...
Recommended Posts
Create an account or sign in to comment
You need to be a member in order to leave a comment
Create an account
Sign up for a new account in our community. It's easy!
Register a new accountSign in
Already have an account? Sign in here.
Sign In Now